


Monty the Rwd R1 engined tarmac eating Minus
Started by
Alburglar
, Aug 31 2004 08:06 PM
654 replies to this topic
#361

ed4ran
-

- Members
-

- 2,849 posts
Cadwell Event organiser
- Location: Stoke On Trent
Posted 28 October 2006 - 09:58 PM
Did you get the fuel sender working on the gauge?
#362
Alburglar
-
- Members
-
- 3,331 posts
Das Pingu's
- Location: Dover Kent
- Local Club: Kentish Mini Club
Posted 30 October 2006 - 04:29 PM
tinkering with the metro at the mo. It won't be long before I can turn back to the mini
#363
Alburglar
-
- Members
-
- 3,331 posts
Das Pingu's
- Location: Dover Kent
- Local Club: Kentish Mini Club
Posted 09 December 2006 - 05:16 PM
Hello again folks,
Don't worry, I haven't fallen off the face of the earth, but I've been very busy. And I've finally got started on the minus again.
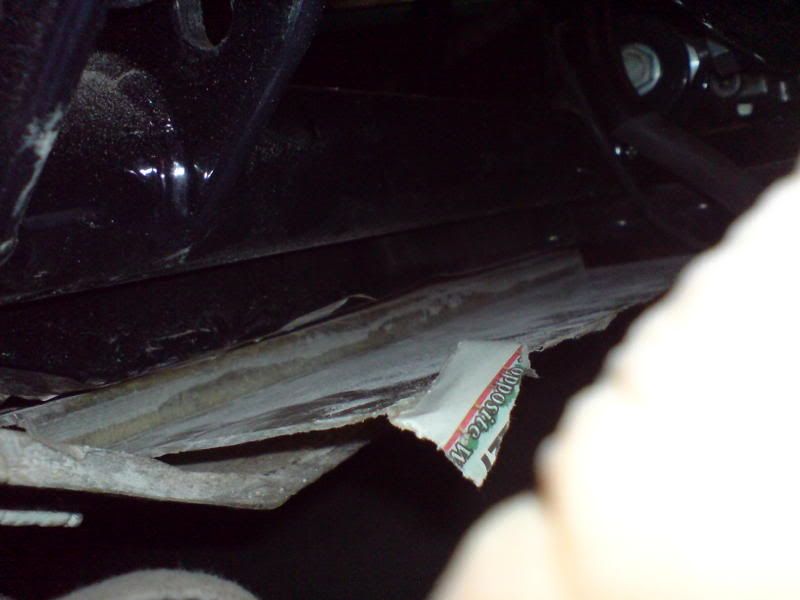
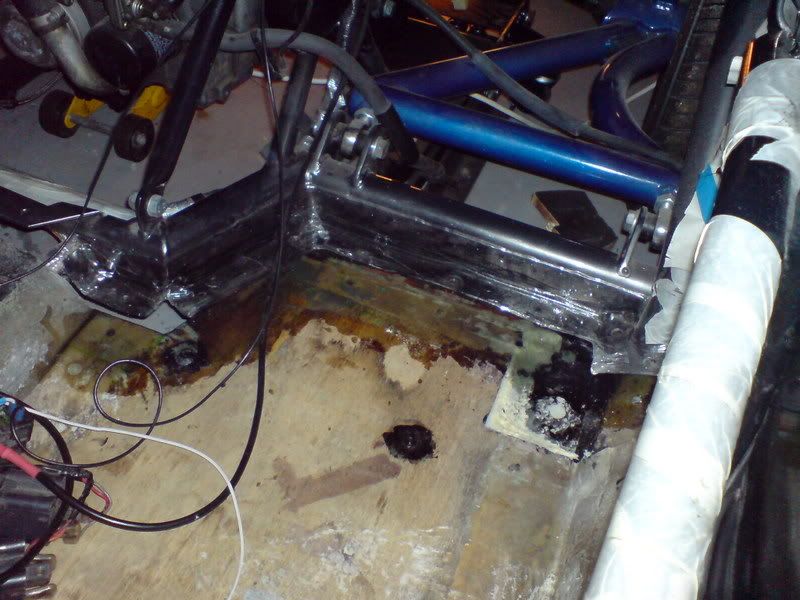
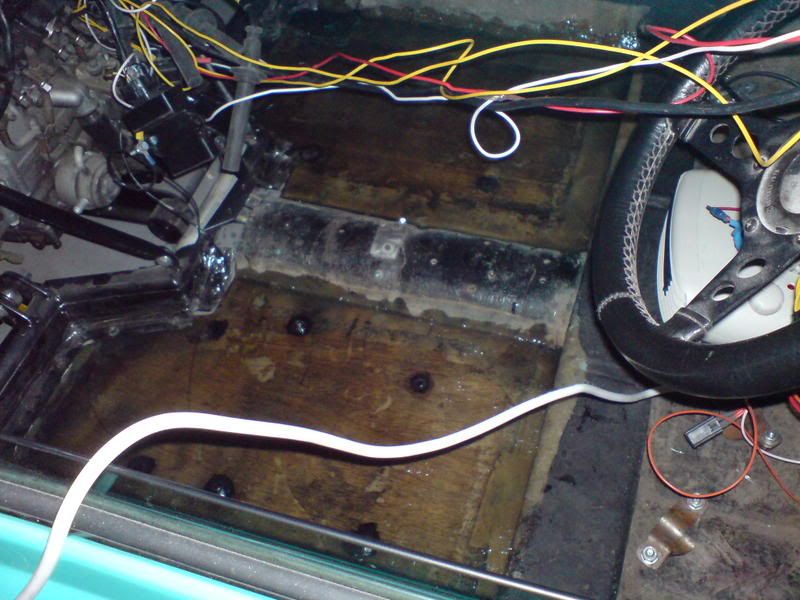
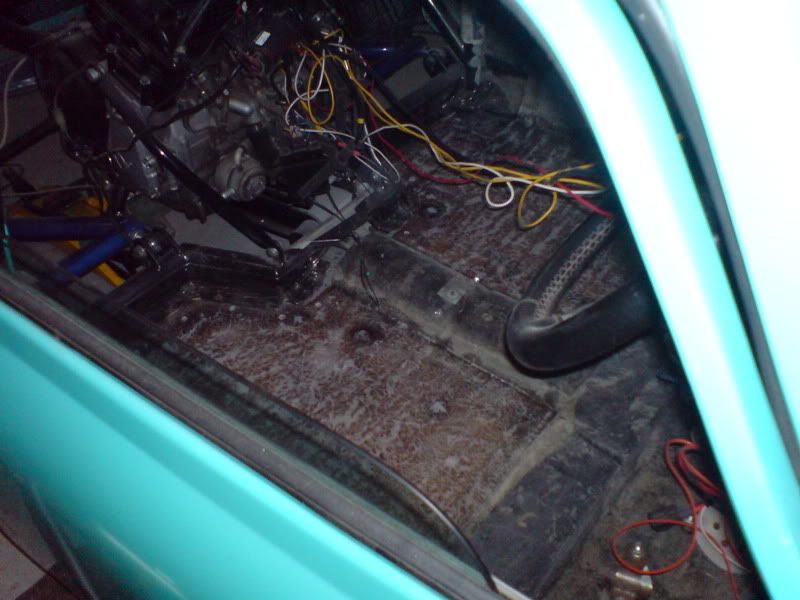
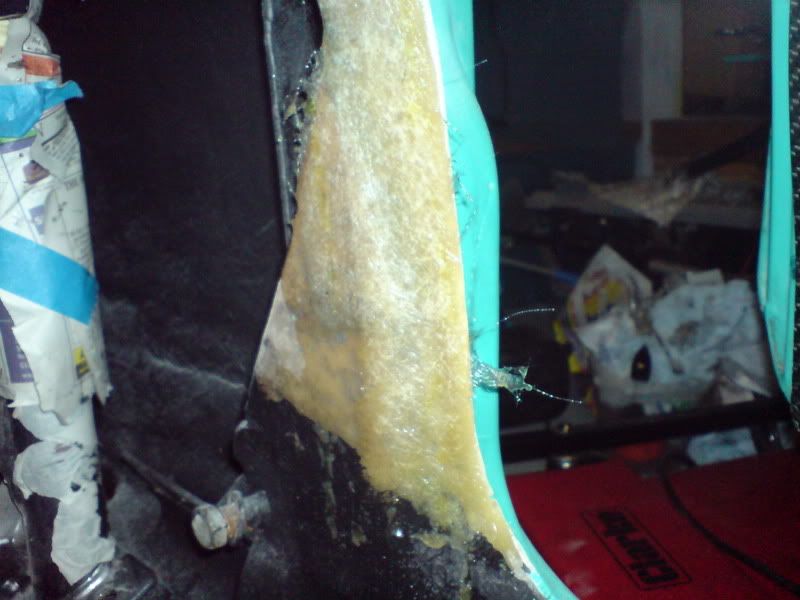
I've not been happy with the floor on the minus, because the ply will now be exposed to the elements:
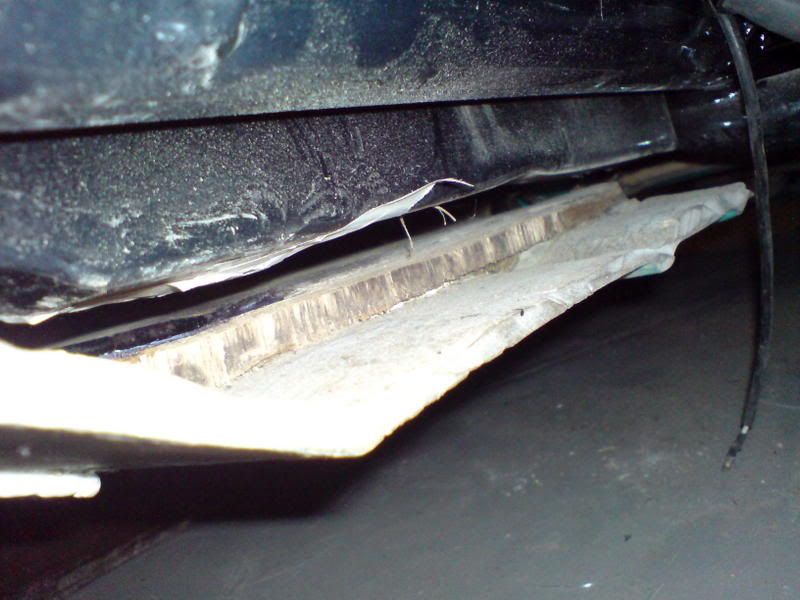
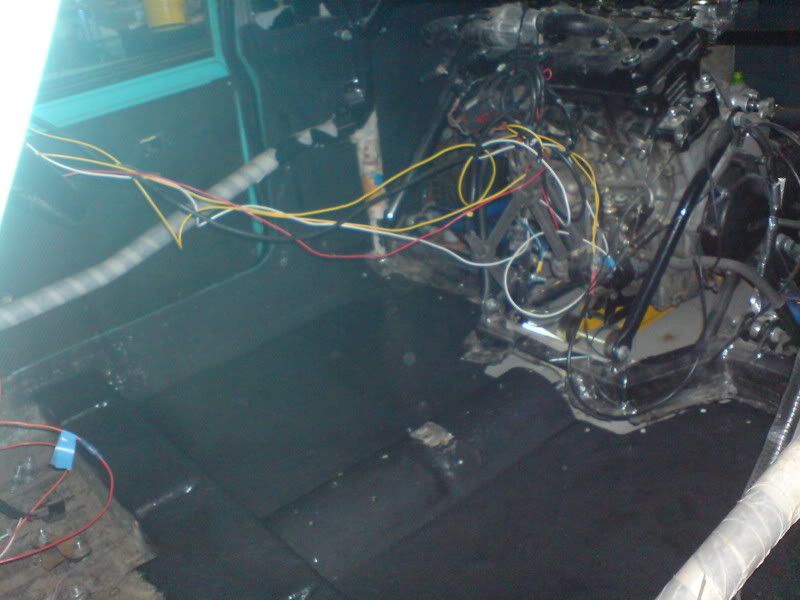
Soo I've unbolted the rear end and jacked it up and rolled it as far back as possible. I tried to remove the whole cage, but I'm on my todd and It was pretty awkward, so didn't bother:
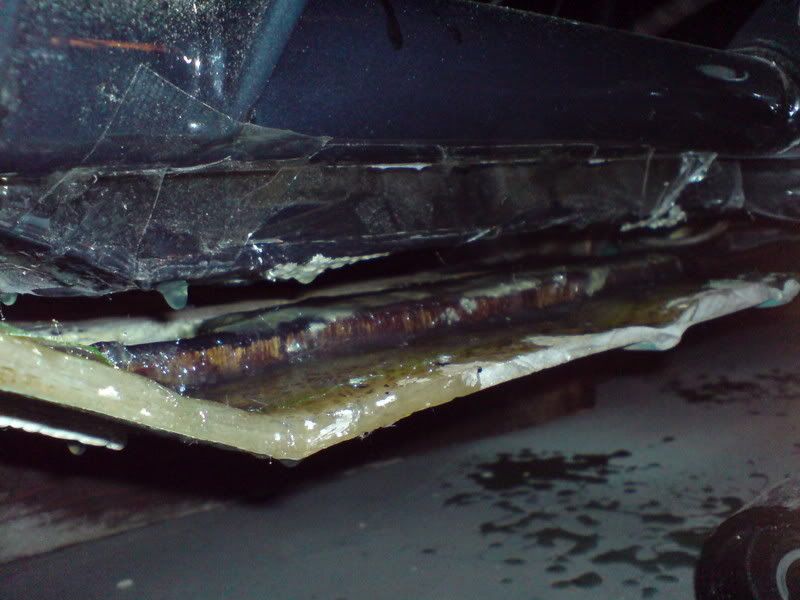
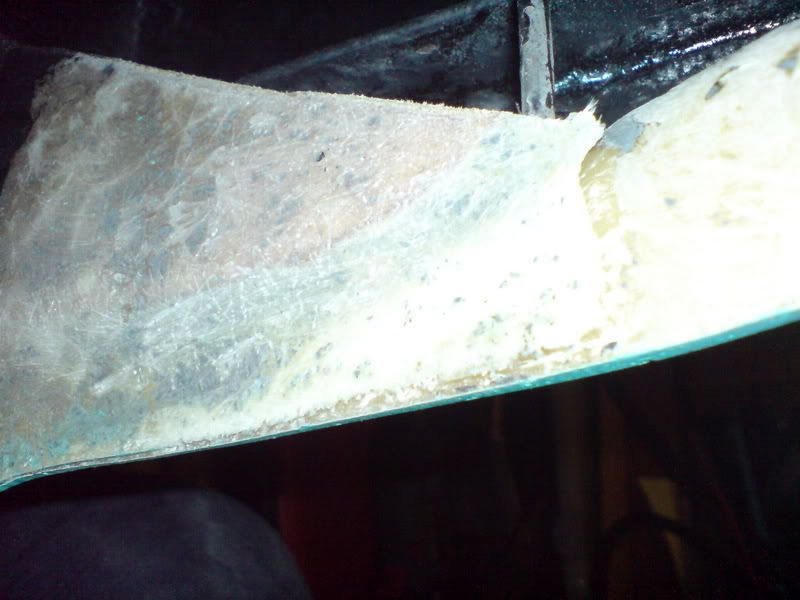
My uncle made me up some very thin stepped pieces of grp which I've started to prepare. I intend to use loads of poly sealant to fix the pieces in place. Then lay mat and resin over the excess inside the floor and on the outside lip, where the floor has been cut:
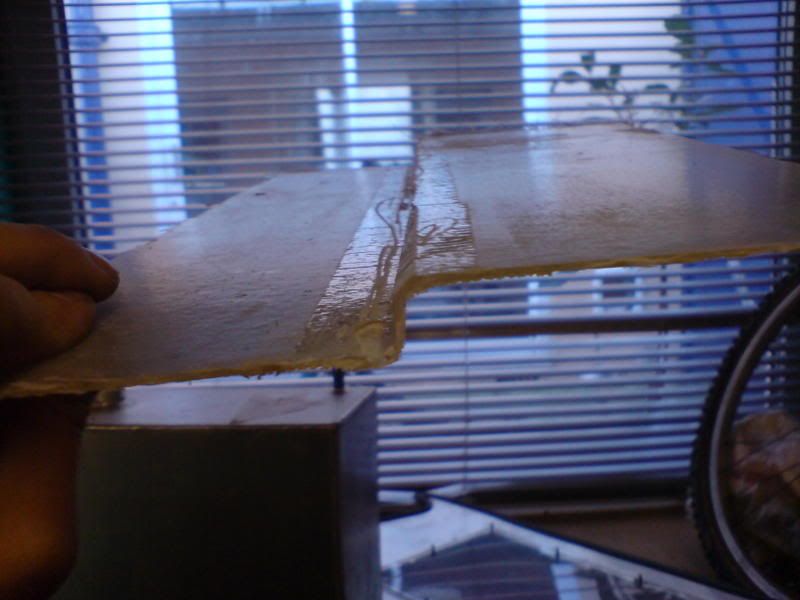
Obviously this bit needs a load of material trimming off it, but it gives you an idea of how it will work:
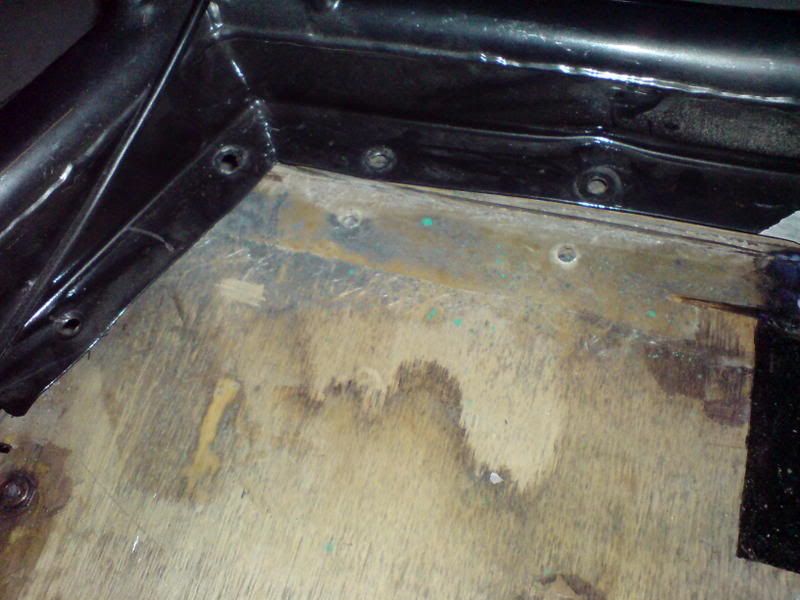
This is it from the inside (i've sanded the floor down to):

Don't worry, I haven't fallen off the face of the earth, but I've been very busy. And I've finally got started on the minus again.
I've not been happy with the floor on the minus, because the ply will now be exposed to the elements:
Soo I've unbolted the rear end and jacked it up and rolled it as far back as possible. I tried to remove the whole cage, but I'm on my todd and It was pretty awkward, so didn't bother:
My uncle made me up some very thin stepped pieces of grp which I've started to prepare. I intend to use loads of poly sealant to fix the pieces in place. Then lay mat and resin over the excess inside the floor and on the outside lip, where the floor has been cut:
Obviously this bit needs a load of material trimming off it, but it gives you an idea of how it will work:
This is it from the inside (i've sanded the floor down to):
#364
Bungle
-

- Members
-
- 28,971 posts
Original Spamster
- Location: Cornwall
- Local Club: cornish mini club
Posted 09 December 2006 - 06:36 PM
so we haven't heard from you as you have been high on fibre glass fumes 
#365
Alburglar
-
- Members
-
- 3,331 posts
Das Pingu's
- Location: Dover Kent
- Local Club: Kentish Mini Club
Posted 08 February 2007 - 05:37 PM
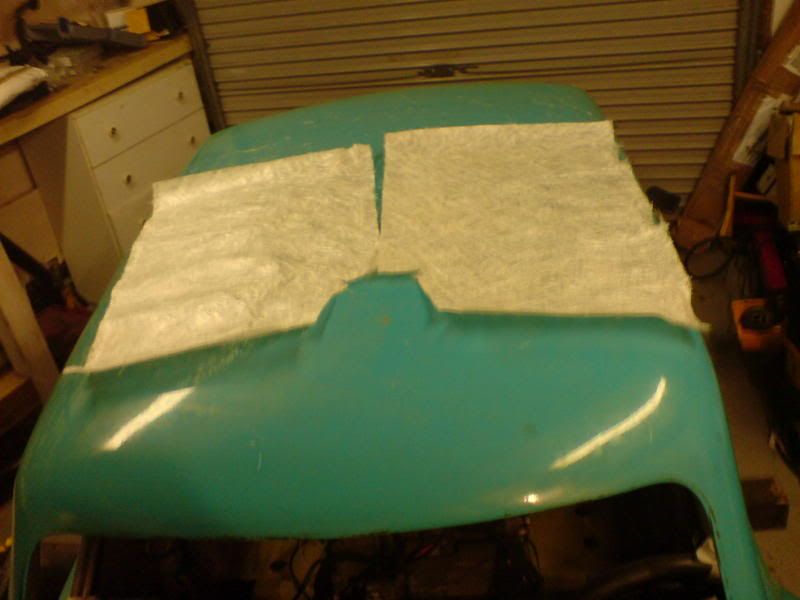
Still moving along in kiddie steps at the moment. I have decided that it may be fiddly but overall it would be better to lay fibreglass mat and resin over the exposed floor in one sheet, rather than seal in the 'step' pieces I made up and then lay mat to meet sealed in pieces.
I have cut the mat to shape, but it is too cold for the resin to set properly at the moment. i reckon it needs to be about 10 or 15 degreres before I can start work again. I'm quite frustrated.
I have cut the mat to shape, but it is too cold for the resin to set properly at the moment. i reckon it needs to be about 10 or 15 degreres before I can start work again. I'm quite frustrated.
Edited by Alburglar, 09 February 2007 - 04:38 AM.
#366
Alburglar
-
- Members
-
- 3,331 posts
Das Pingu's
- Location: Dover Kent
- Local Club: Kentish Mini Club
Posted 09 February 2007 - 04:37 AM
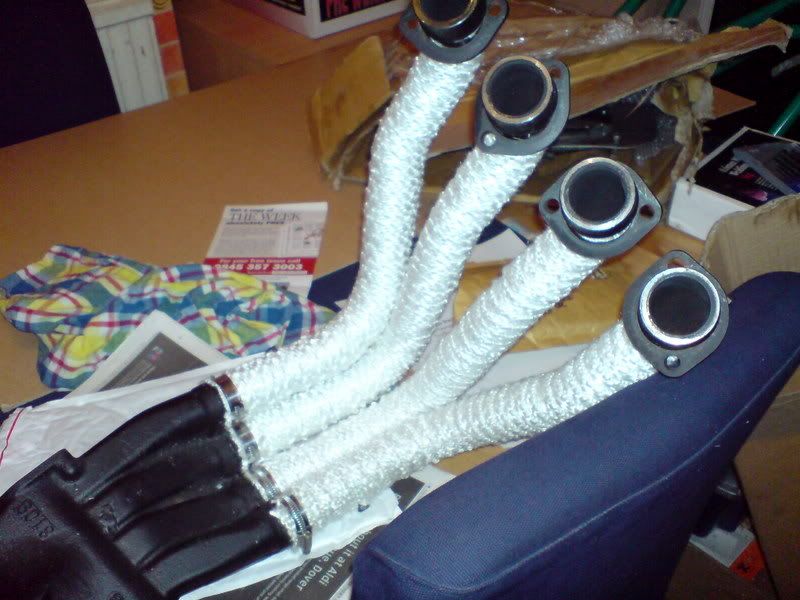
Wrapped the manifold too. Just thinking about sound deadning options for the bulkhead now, preferably self adhesive and heat relfective too. Anyone got any recommendations.
#367
Dev
-

- Banned
-
- 1,549 posts
Fiat 500 'Ringer
- Local Club: NF500
Posted 09 February 2007 - 01:13 PM
Dynamat?? Isn't that reflective?
or Padded tin foil..... any left over can be used for hats
or Padded tin foil..... any left over can be used for hats
#368
Alburglar
-
- Members
-
- 3,331 posts
Das Pingu's
- Location: Dover Kent
- Local Club: Kentish Mini Club
Posted 11 February 2007 - 02:03 AM
I'll have a look for some dynomat
tinfoil - LOL
tinfoil - LOL
#369
Alburglar
-
- Members
-
- 3,331 posts
Das Pingu's
- Location: Dover Kent
- Local Club: Kentish Mini Club
Posted 17 February 2007 - 11:42 PM
Scratched my head for a bit today because under the roll cage the wood had bit been cut open by the grinder when cutting the rear bench out. I hadn't noticed it before because it was obscured by the roll cage. I toyed with filling the gaps with fibre rope and resin but it would have been awkward. I n the end I filled the cuts with poly foam and cut off the excess once it had cured, so the floor is 100% ready to be started now - bought some fibreglass tissue to do the edges nicely.
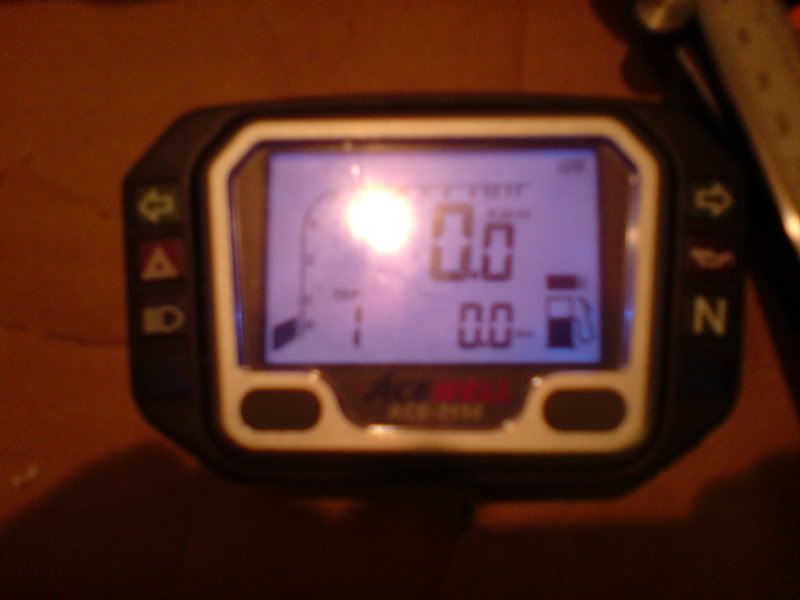
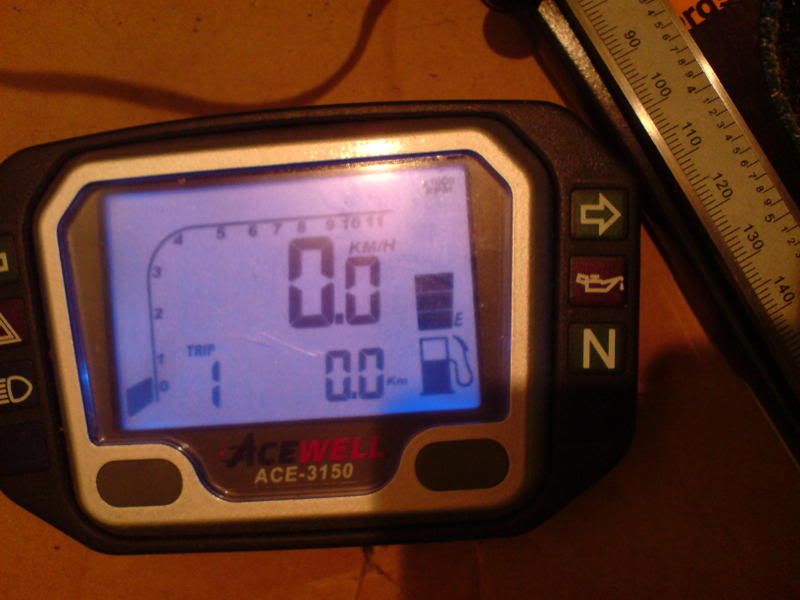
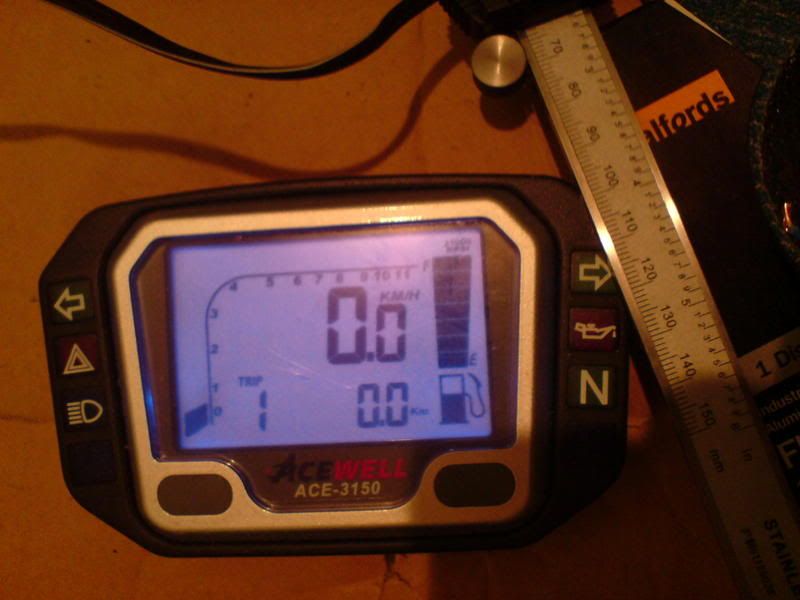
Also made up a nice loom with the required resistors in to get the fuel display on the digi dash working. I've left the two stray ends for when I wire it in properly.
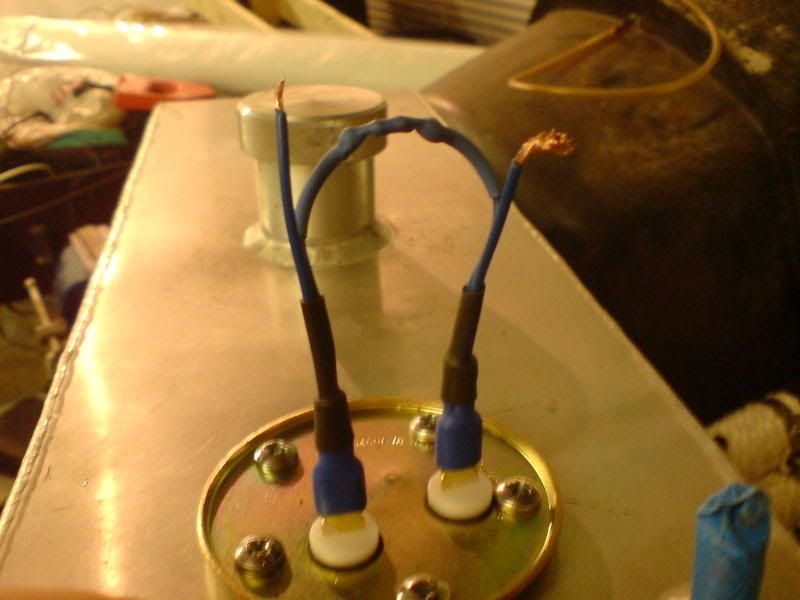
I tested it and it now has a real nice transition from empty to full - hooray at last! Many thanks to those who helped with the resistor ratings.
Also made up a nice loom with the required resistors in to get the fuel display on the digi dash working. I've left the two stray ends for when I wire it in properly.
I tested it and it now has a real nice transition from empty to full - hooray at last! Many thanks to those who helped with the resistor ratings.
#370
Alburglar
-
- Members
-
- 3,331 posts
Das Pingu's
- Location: Dover Kent
- Local Club: Kentish Mini Club
Posted 26 February 2007 - 04:14 PM
High on fumes at the moment, but the floor is done. Because of all the angles I used two layers of fibreglass tissue to cover the exposed wood at the rear.
So that should be a lot less exposed to the elements
I then put a normal layer of chop strand mat down over the top of the floor pan to cover up the wood, plus I can't hurt to add a bit of strength.
It was bloody awkward doing the stepped edges as there was not much room, but I feel like it was worth the effort.
Edited by Alburglar, 26 February 2007 - 04:16 PM.
#371
Alburglar
-
- Members
-
- 3,331 posts
Das Pingu's
- Location: Dover Kent
- Local Club: Kentish Mini Club
Posted 02 March 2007 - 04:05 PM
I have now sanded the whole inside rear end of the car ready for some black emulsion and re-drilled all the bolt holes.
#372
ed4ran
-
- Members
-
- 2,849 posts
Cadwell Event organiser
- Location: Stoke On Trent
Posted 02 March 2007 - 05:07 PM
Will you have alot to do once the frame is bolted back in again? or are most other bits in place?
Good to see you got the digi dials working, did you change the resistance at all or just use the value i said (for the fuel gauge)?
Good to see you got the digi dials working, did you change the resistance at all or just use the value i said (for the fuel gauge)?
#373
Alburglar
-
- Members
-
- 3,331 posts
Das Pingu's
- Location: Dover Kent
- Local Club: Kentish Mini Club
Posted 03 March 2007 - 04:36 PM
To get the Acewell digidash working with the smiths universal fuel sender (from demontweeks), I used a 1k2 and a 200 Ohm resistor in parallel to get 171Ohms, just as you said.
- much appreciated ed by the way.
...And yes still lots of jobs to do. so here's the check list:
-Fill petrol hole, sand rear half of roof interior and paint the lot.
-bolt cage back in.
-make a dash bar that also steadies the steering coloumn.
- strip back grp and restore all metal in front half of interior, then recover in grp (as i did with rear half).
-remove non ltd slip diff and exchange it for semi- race gripper diff and drive shafts.
-fit hoses (waiting for correct 25mm ones from Z's)
- refit tank
- fit dash and console and fix bloody great holes I put in it!
-fit exhaust manifold
-make a steady structure for rear end (body work wobbles a bit) and hang back box off it too.
-fit throttle position sensor.
-modify pedal and fit throttle cable
- fit gear cable.
-finish fitting brake hoses and rear fit clutch cable then bleed em.
- fit (and buy, come to think of it) sump baffle, change filter and fill put new oil in.
-make and fit bottom half side pieces of bulk head and then fit the whole thing.
-fit expansion tank
-make rear number plate bracket and light.
- fit battery cut off and wire instrument panel and rear lights.
-and final note to self...don't look at this list again as it's depressing. LOL.
Edited by Alburglar, 03 March 2007 - 05:07 PM.
#374
Alburglar
-
- Members
-
- 3,331 posts
Das Pingu's
- Location: Dover Kent
- Local Club: Kentish Mini Club
Posted 03 March 2007 - 04:42 PM
today I painted the whole rear interior of the car with black emulsion. I'm very pleased with the results it looks great.
whilst doing it I noticecd another bit of fibreglass repair work that needs doing and I also I realised that I haven't filled in the old petrol tank hole yet. Doh!
whilst doing it I noticecd another bit of fibreglass repair work that needs doing and I also I realised that I haven't filled in the old petrol tank hole yet. Doh!
#375
Alburglar
-
- Members
-
- 3,331 posts
Das Pingu's
- Location: Dover Kent
- Local Club: Kentish Mini Club
Posted 08 March 2007 - 11:42 PM
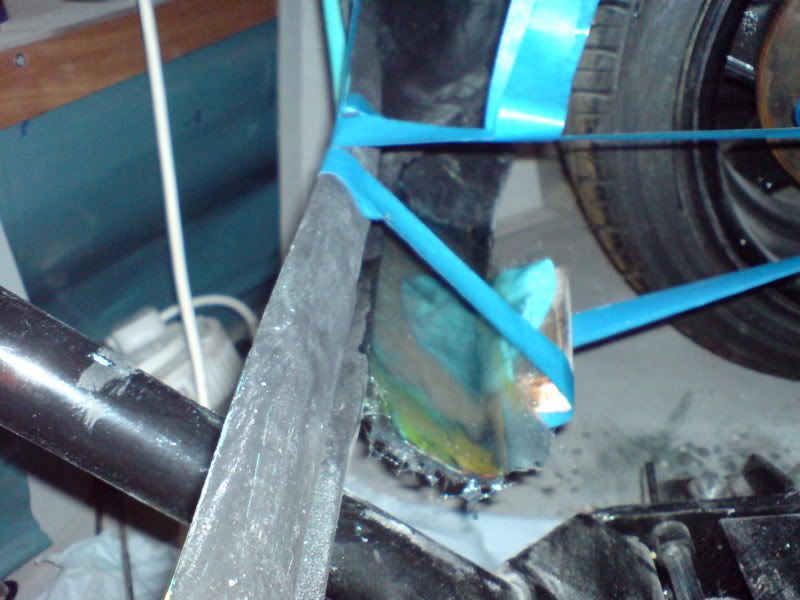
This is the base of the b pillar that needed repairing. It has cracked and was seperating from the body.
I have dremel'd it back and aplied more grp.
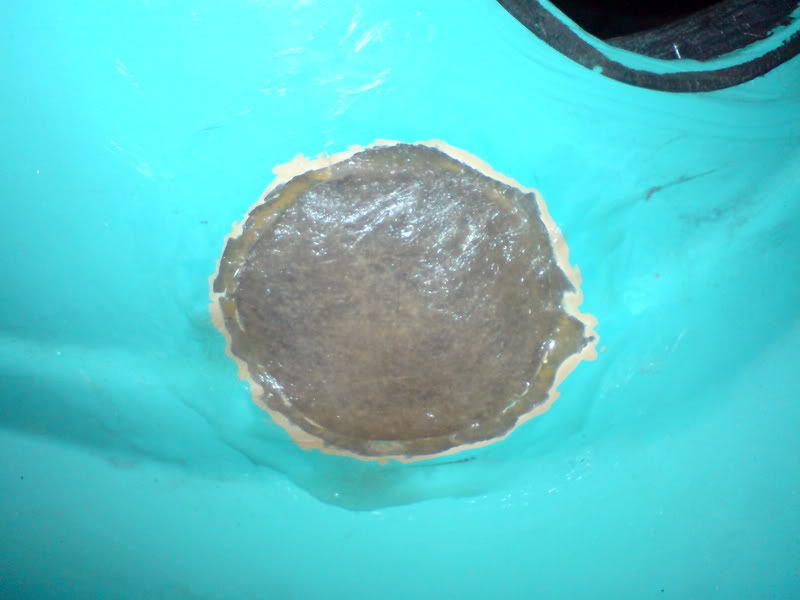
I also filled the old fuel tank hole with grp
Since the photo, I have sanded it to match the swage lines and applied a skim of filler. I'm just waiting for the it to dry before final sanding.
I then filled the old exhaust aperture on the rear valance. I adopted a rather heath robinson aproach but it got the job done.
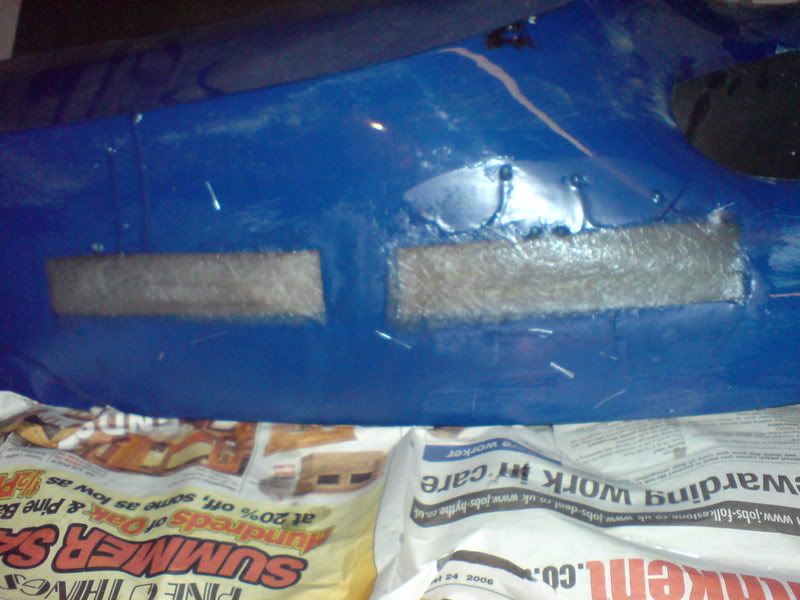
I had previously cut some holes in the dash for two small electric heaters, this was my first attempt to solve the de-mister problem until I came up with the pipe idea, shown on previous pages. So I filled these holes up, the dash will eventually be sprayed matt black.
I have dremel'd it back and aplied more grp.
I also filled the old fuel tank hole with grp
Since the photo, I have sanded it to match the swage lines and applied a skim of filler. I'm just waiting for the it to dry before final sanding.
I then filled the old exhaust aperture on the rear valance. I adopted a rather heath robinson aproach but it got the job done.
I had previously cut some holes in the dash for two small electric heaters, this was my first attempt to solve the de-mister problem until I came up with the pipe idea, shown on previous pages. So I filled these holes up, the dash will eventually be sprayed matt black.
Edited by Alburglar, 08 March 2007 - 11:44 PM.


1 user(s) are reading this topic
0 members, 1 guests, 0 anonymous users


