
Looks great so far! That roll cage is a beast! Have you bolted it in or welded it in? How much did that cost you?

73 fast road mini
Started by
Chris C
, Aug 09 2007 06:03 PM
305 replies to this topic
#32

Chris C
-
- Members
-

- 212 posts
Mini Mad
Posted 09 November 2007 - 11:10 PM
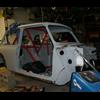
Thanks, the cage is just a Safety Devices front and rear cage with a harness bar and door bars. got it off minisport in a package deal, then bought the harness bar so the total came out to around 550 pounds, not including the ridiculous shipping ordeal I had with customs, but i guess that comes with living in America.
I haven't bolted it in yet as I need to do just a little bit more reconstructive work on the drivers side floor right where the front cage mounts, should get that churned out this weekend so I can get everything all square, the cage bolted in and the door bars cut to fit. Then I just need to pull it back out and paint it .
.
I haven't bolted it in yet as I need to do just a little bit more reconstructive work on the drivers side floor right where the front cage mounts, should get that churned out this weekend so I can get everything all square, the cage bolted in and the door bars cut to fit. Then I just need to pull it back out and paint it
.
#33
Monte Busa
-
- Noobies
-
- 681 posts
Super Mini Mad
- Location: Michigan, USA
Posted 10 November 2007 - 04:05 AM
Chris,
If you ever need anything else shipped from abroad, let me know, my brother is a licensed customs broker and has shipped a bunch of stuff for me from the UK, NZ and others for my various Mini projects.
Cheers,
Aric
If you ever need anything else shipped from abroad, let me know, my brother is a licensed customs broker and has shipped a bunch of stuff for me from the UK, NZ and others for my various Mini projects.
Cheers,
Aric
Thanks, the cage is just a Safety Devices front and rear cage with a harness bar and door bars. got it off minisport in a package deal, then bought the harness bar so the total came out to around 550 pounds, not including the ridiculous shipping ordeal I had with customs, but i guess that comes with living in America.
I haven't bolted it in yet as I need to do just a little bit more reconstructive work on the drivers side floor right where the front cage mounts, should get that churned out this weekend so I can get everything all square, the cage bolted in and the door bars cut to fit. Then I just need to pull it back out and paint it
Edited by Monte Busa, 26 December 2007 - 05:22 AM.
#34
Chris C
-
- Members
-
- 212 posts
Mini Mad
Posted 10 November 2007 - 06:23 AM
now i know! for most of the things i just have them shipped air freight and UPS does a great job of taking care of everything (i got a package from minispares 3 days after they shipped it, with UPS ground one time). However, when the time rolls around to where I am going to buy something else that will be shipped by boat i will DEFINITELY let you know. Thanks for the offer though.
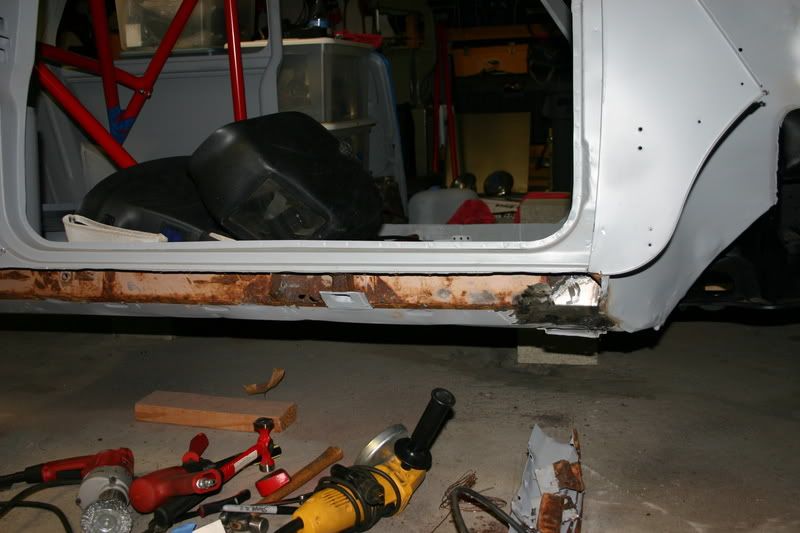
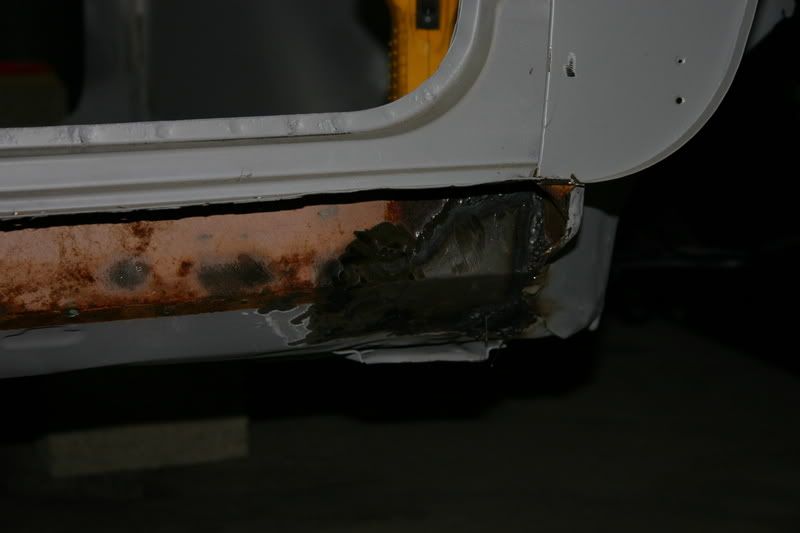
On another note, flipped the car around and pulled of the drivers side sill, which was in decent shape besides the fact that it was an mk1 sill and judging by how the other little bits of repair work were done on the car (braze a small plate over it) i figured it would be in my best interest to take a peek at what was undernieth. Thankfully only I only founda ton of sand from the sandblasting, and no real rust of bodge jobs. I then proceeded to rebuild part of the drivers side floor/inner sill. I should have pictures up in half an hour or so.
It's amazing what you can do when you work for 6 hours non-stop...
On another note, flipped the car around and pulled of the drivers side sill, which was in decent shape besides the fact that it was an mk1 sill
and judging by how the other little bits of repair work were done on the car (braze a small plate over it) i figured it would be in my best interest to take a peek at what was undernieth. Thankfully only I only founda ton of sand from the sandblasting, and no real rust of bodge jobs. I then proceeded to rebuild part of the drivers side floor/inner sill. I should have pictures up in half an hour or so.It's amazing what you can do when you work for 6 hours non-stop...
#35
Chris C
-
- Members
-
- 212 posts
Mini Mad
Posted 10 November 2007 - 06:51 AM
photos:
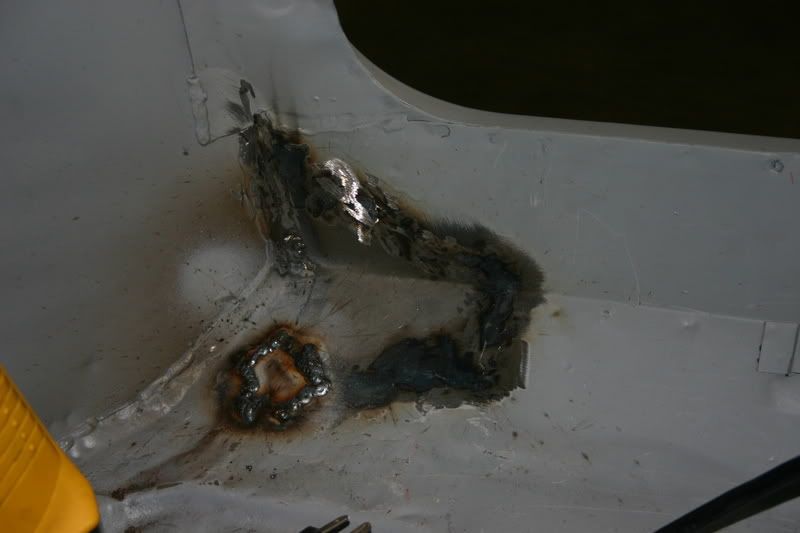
under drivers sill. Pretty good, as far as I am concerned. just a few patches to be done.
hour of work right here. easy.
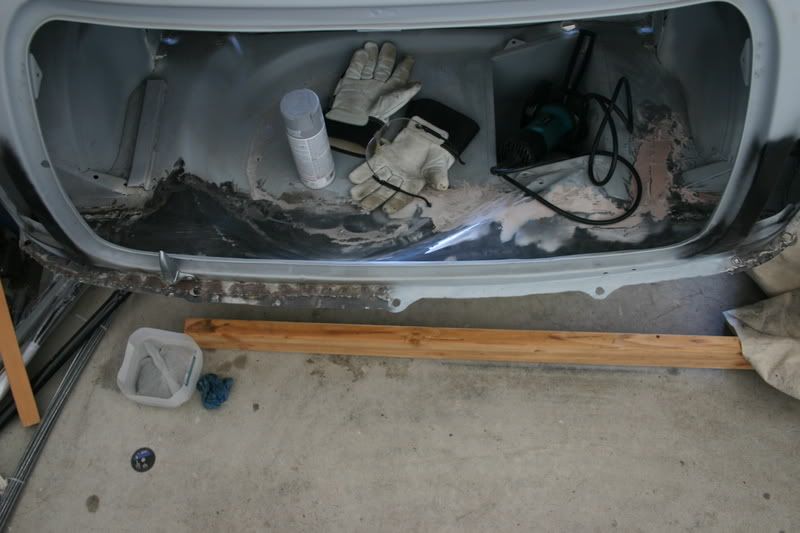
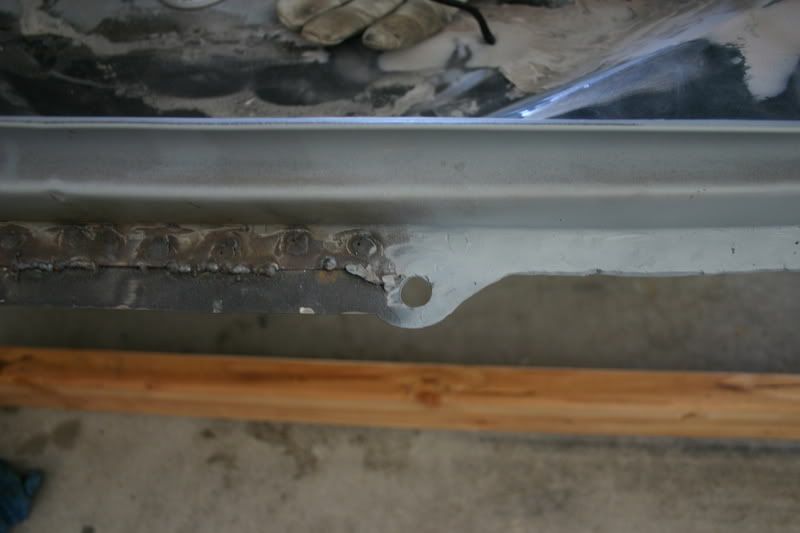
Where i fixed the floor:
hoping to have it done by this weekend, except for the sill which I just ordered.
under drivers sill. Pretty good, as far as I am concerned. just a few patches to be done.
hour of work right here. easy.
Where i fixed the floor:
hoping to have it done by this weekend, except for the sill which I just ordered.
#36
Chris C
-
- Members
-
- 212 posts
Mini Mad
Posted 11 November 2007 - 05:30 AM
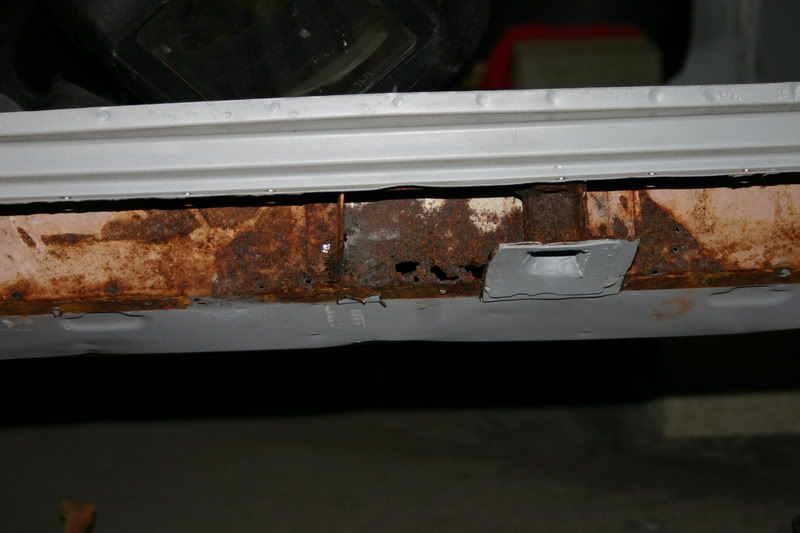
the brackets that the seats bolt to have always puzzled me, as at one point they were welded to the box section that is the crossbeam across the floor. when i just away the floor where there was some rust I decided to take a peek back there, only to find that the metal was twisted and there were huge holes larget then the nuts on the bolts in the crossbeam. after a good 15 minuts of cutting and twisting I pulled off one of the brackets.
I am going to need to cut out the section and weld a new flat piece of sheet in its place. Does anyone know how the brackets actually mounted? (Just the two bolts?) I seem to be at a loss here.
I am going to need to cut out the section and weld a new flat piece of sheet in its place. Does anyone know how the brackets actually mounted? (Just the two bolts?) I seem to be at a loss here.
#37
Chris C
-
- Members
-
- 212 posts
Mini Mad
Posted 13 December 2007 - 08:27 PM
Been making a bunch of decisions rectnly, as I was accepted to a few universities that are a few hundred miles away, and i will have to be making that back and forth trip a few times a year. Also sets a deadline, which is end of may, because i need to spend the summer sorting out any immediate problems before i go off to college.
Maganged to do a bit of work though.
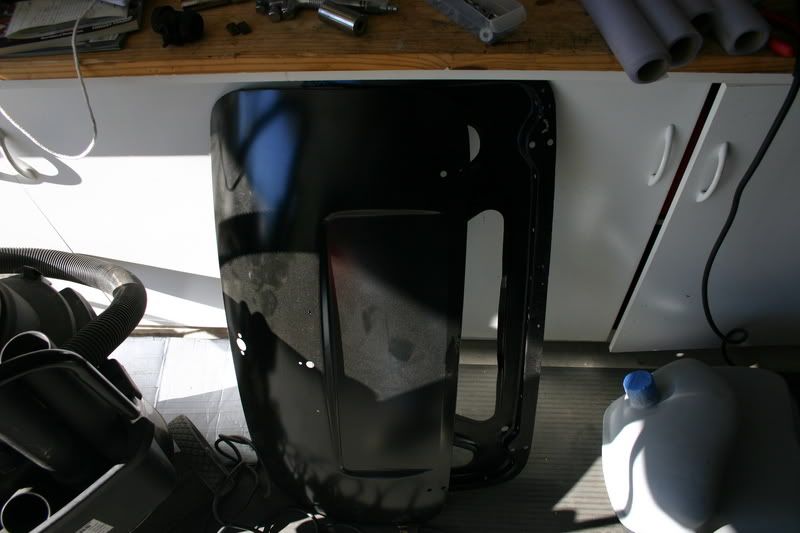
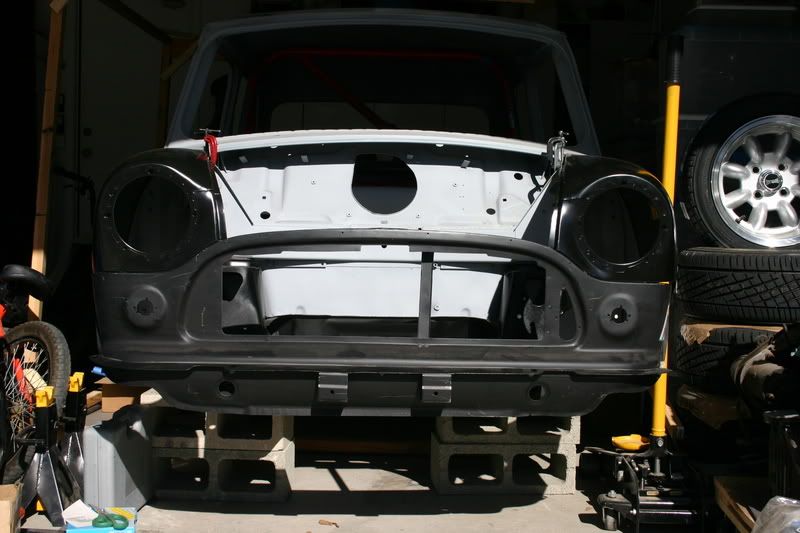
the panels for the rear bumper lip never lined up, and i test fitted it with the bumper and realized that the holes farthest from the body are the ones that fit. so today i begain fixing this little issue. not entirely satisfied, and still needs some filler work but it should look decent when i am done.
also am in the process of mating the innner and outer skins of the bootlid:
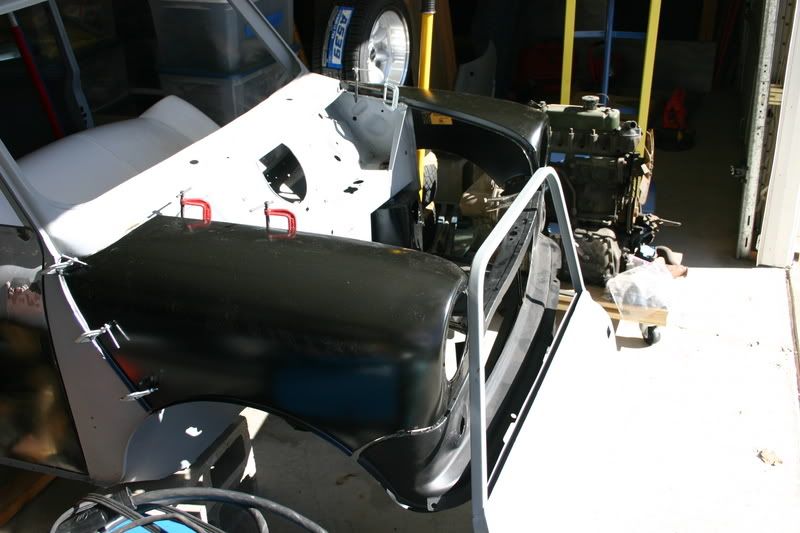
in other news, gave up on trying to fit the fiberglass front end. what a waste of money. where it met the scuttle panel the angle was completely different. anybody want it? shipping from califorinia might be a bit... haha
steel 2 piece flipper anyone?
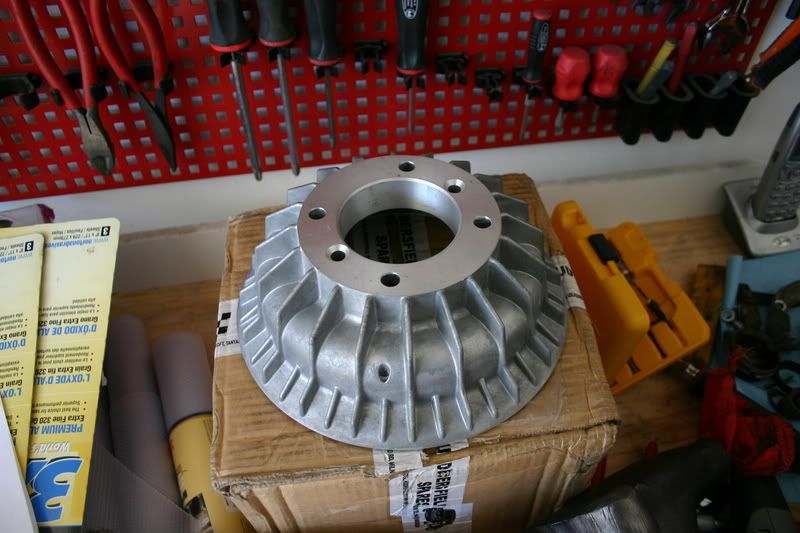
got these guys as well:
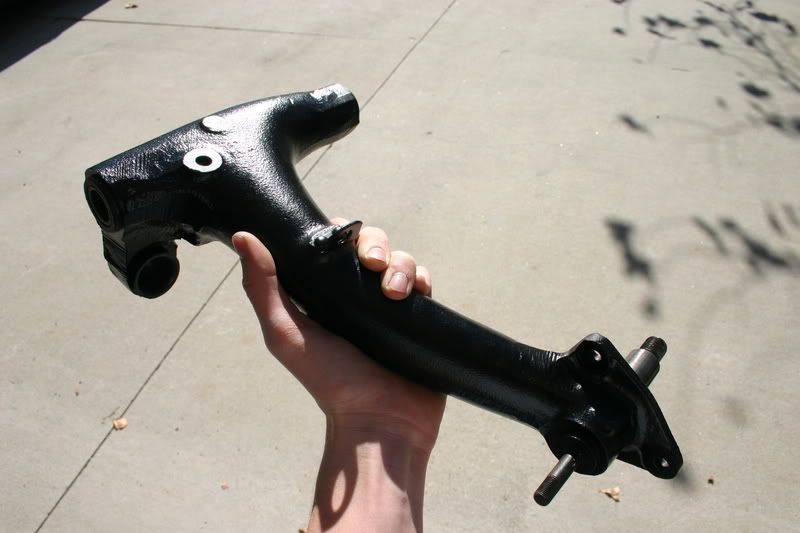
and the chassis black paint i got from eastwood is fantastic. the more i use it, the more i like it. here is a saple of it on a radius arm in the sun:
and this picture just for good measure:
Maganged to do a bit of work though.
the panels for the rear bumper lip never lined up, and i test fitted it with the bumper and realized that the holes farthest from the body are the ones that fit. so today i begain fixing this little issue. not entirely satisfied, and still needs some filler work but it should look decent when i am done.
also am in the process of mating the innner and outer skins of the bootlid:
in other news, gave up on trying to fit the fiberglass front end. what a waste of money. where it met the scuttle panel the angle was completely different. anybody want it? shipping from califorinia might be a bit... haha
steel 2 piece flipper anyone?
got these guys as well:
and the chassis black paint i got from eastwood is fantastic. the more i use it, the more i like it. here is a saple of it on a radius arm in the sun:
and this picture just for good measure:
#38
Chris C
-
- Members
-
- 212 posts
Mini Mad
Posted 25 December 2007 - 02:17 AM
hold on, what the hell is this?
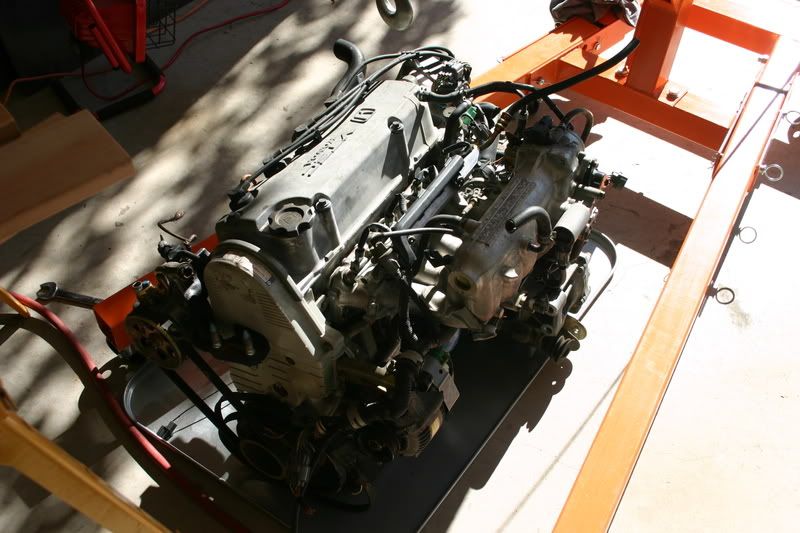
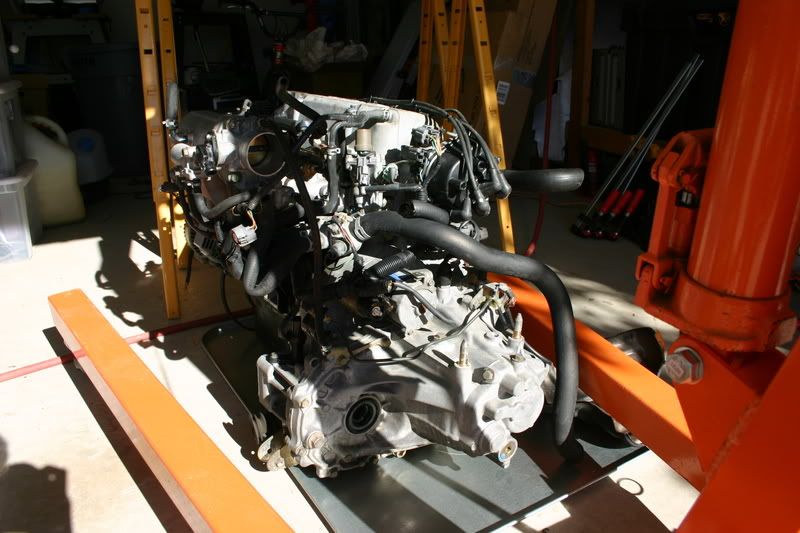
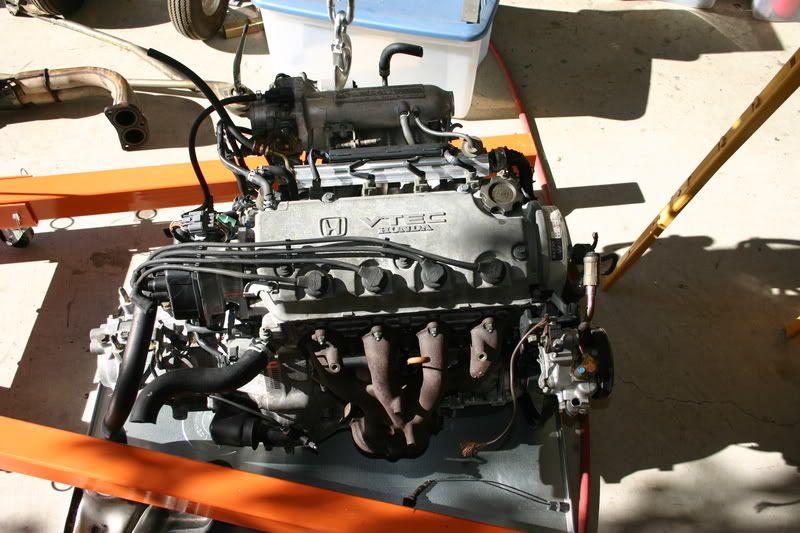
I figured i wasn't angering the purists enough.
130 horsepower and complete reliability sound good to me...
(P.S. request for this to be moved to non mini engined projects)
I figured i wasn't angering the purists enough.
130 horsepower and complete reliability sound good to me...
(P.S. request for this to be moved to non mini engined projects)
#39
miniboo
-

- Members
-
- 9,327 posts
Lord of Original Thinking
Posted 25 December 2007 - 05:08 AM
nice idea what subby are you going to use? minitec or your own variety?
#40
Chris C
-
- Members
-
- 212 posts
Mini Mad
Posted 25 December 2007 - 05:40 AM
yeah going with essentially the entire minitec setup, should be here within the next couple of weeks. been cleaning the engine and labeling everything today, hopefully i get some goddies for christmas...
and thank you for moving the thread
and thank you for moving the thread
#41
miniboo
-
- Members
-
- 9,327 posts
Lord of Original Thinking
Posted 25 December 2007 - 05:50 AM
is the minitec setup not for lefty only? surely your NZ mini is RHD? are you going to adapt the frame?
no probs on moving the thread
no probs on moving the thread
#42
Chris C
-
- Members
-
- 212 posts
Mini Mad
Posted 25 December 2007 - 06:50 AM
From what i have heard it is a problem with the rack hitting a portion of the trans, but i really can't tell how bad it is until i get the engine in for mock up. there have been ways around this that i have heard, like moving the rack (not exactly sure where) but i really need to get it in front of me before i can assess the issue. Worse comes to worse i will buy a left hand rack and switch it over to LHD. I would prefer to keep it RHD though.
#43
wwinstanley
-

- Members
-
- 341 posts
Speeding Along Now
- Local Club: not yet
Posted 25 December 2007 - 07:16 PM
That is looking very nice. Its gonna look good when its finished.
#44
Tom Booth
-

- TMF+ Member
-
- 822 posts
One Carb Or Two?
- Local Club: TurboMinis.co.uk
Posted 25 December 2007 - 10:31 PM
That looks like a bloodey good build mate! The work on it looks really nice too. 1600 vtec?
Should go like stink!
Should go like stink!
#45
Chris C
-
- Members
-
- 212 posts
Mini Mad
Posted 26 December 2007 - 04:28 AM
Thanks for the comments.
It's a 1500 cc japanese-spec D15B, which makes 130 bhp at 5800 rpm. from what I have heard the 160 bhp B16A2's spin the tires up into forth gear, so i think that i will probably be able to get a little excitement out of it
It's a 1500 cc japanese-spec D15B, which makes 130 bhp at 5800 rpm. from what I have heard the 160 bhp B16A2's spin the tires up into forth gear, so i think that i will probably be able to get a little excitement out of it


0 user(s) are reading this topic
0 members, 0 guests, 0 anonymous users


