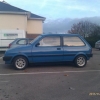
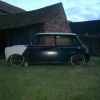
All the good stuff is coming back into fashion

1980 Mini Project
#31

Posted 01 January 2008 - 02:06 PM
All the good stuff is coming back into fashion
#32

Posted 01 January 2008 - 02:31 PM
Hope you sorted out what was left of the roof on the garage didnt look very stable
Cibies looking good
#33

Posted 28 January 2008 - 09:33 AM
I also replaced the fron d/s wheel bearing which had worn quite badly (Vid to follow). My guess is that these items are the originals from when the car was built in 1980 so they havn't done too badly! I'll also be replacing the o/s front bearing when I get round to it but the play wasn't as bad on that side. in any case the handling is loads better and no adjustments are needed on long straight roads!
I now have a temporary interior light as getting ito the car in the carpark at night was a little too dark. It is a most advanced old guage bulb on a few blade terminals popped into the interior light sockets. Will do for now.
I've been commuting to work and back in it too and alas my gearbox is finally giving up. Was making some awful bandsaw like noises so is now confined to the garage before anything too drastic happens to it. This does have an up side though as it means I will finally have to pull my finger out to get my 1293 engine put together with it's low milage gearbox. The gearbox that's in the car now had definately had some abuse as it was already a little difficult to engage 2nd on deceleration and third was beginning to play up slightly before the noises began. TBC
#34

Posted 30 January 2008 - 07:54 PM
I've started sorting out the new engine now and finally installed my duplex timing chain. I needed to fit the 2 countersunk bolts so the chain didn't catch around the crank cog. I initially attempted to countersing with a drill bit but eventually succumbed to popping to my local screwfix and picking up a proper metal countersink along with some easi outs! Withing a minute of getting back with the correct equipment the job was done. Goes to show that having the right tool for the job does mean less sweat in the long run!
 DSC00076.JPG 295.6K
11 downloads
DSC00076.JPG 295.6K
11 downloadsTiming chain on, I fitted the tentioner and oil disc; along with torqueing up and lock tab on the flywheel pulley. I test fitted the timing cover as I had been informed that some grinding may be required to make it fit but it's fine, result!
 DSC00080.JPG 189.36K
7 downloads
DSC00080.JPG 189.36K
7 downloadsTiming cover wise, I cleaned off the old gasket and after a nasty fan/radiator incident I'd experienced I made the required 'modifications' to the breather and gave it a thorough beating
 DSC00079.JPG 211.52K
7 downloads
DSC00079.JPG 211.52K
7 downloadsThe next job before fitting it is painting it black with Hammerite. I decided to do this as when I test fitted it on my shiney brand new engine it looked reet scruffy so might as well tidy up any rough looking bits on the build!
#35

Posted 07 February 2008 - 11:57 AM
 DSC00083.JPG 252.68K
12 downloads
DSC00083.JPG 252.68K
12 downloadsI also thought I'd highlight the Cibe logos as they didn't stand out much so used a permant pen to colour them in and they stand out a lot more now.
 DSC00082.JPG 206.86K
12 downloads
DSC00082.JPG 206.86K
12 downloadsI've also fitted my freshly painted timing cover to the block which is a lot tidier now. So now to look towards the gearbox side of the engine and things will nearly be done!
The straight cut drop gears and lightened flywheel I ordered arrived aswell so I am very excited now! As you can see below they even look meaner!
 DSC00087.JPG 324.54K
7 downloads
DSC00087.JPG 324.54K
7 downloadsI've fitted the new primary gear to the crank. Unfortunately while trying to remove the roller bearing from the 1st motion gear I slipped and mushed it
 DSC00089.JPG 339.02K
9 downloads
DSC00089.JPG 339.02K
9 downloadsTo Be Continued!!!!...
#36

Posted 07 February 2008 - 05:23 PM
#37

Posted 07 February 2008 - 06:04 PM
#38

Posted 16 February 2008 - 10:09 AM
I've been busy sorting my engine over the last week or so and have got the gearbox finished with the new straight cut drop gears and central pick up pipe installed. I've also given it a good cleanup with a wire brush and some Gunk and it's come up really well. I did attempt to dismantle the diff to fit a strenthened diff pin but gave up after being unable to undo the six nuts that tie it together so the standard one will do far now as the engine is going to be only slightly more powerful not superpower. It's all looking good though.
 DSC00094.JPG 267.13K
6 downloads
DSC00094.JPG 267.13K
6 downloadsYesterday I also did my daily work out and got the block onto the geabox and am well chuffed! It looks great. I have to get some new bolts to connect the two though as I've misplaced them! Also the locating stud in the block had been chopped off so I will need a new one of them too. Now that both are together I feel I finally have an engine coming together!
 DSC00104.JPG 302.08K
10 downloads
DSC00104.JPG 302.08K
10 downloadsLast of all I've fitted some smoked lenses from a friend so the rear now looks a little tidier and with the coloured lamps look cool when they're lit. I love little jobs like this as they take such little effort for an instant result (Not like engine builds)!
 DSC00112.JPG 308.61K
8 downloads
DSC00112.JPG 308.61K
8 downloadsI can feel the engine is really getting near completion now. I'm just wondering whether I should try to run it outside the car before installing it as I really want to make sure its ok before installing it after all the time and money I've spent on it! TBC!...
#39

Posted 16 February 2008 - 11:17 AM
They shouldn't be that difficult to remove and for the peace of mind I would def fit the new diff pin especially if you are going to continue doing your sprint races
#40

Posted 16 February 2008 - 03:50 PM
Suppose it'll be a new set of driveshaft plate gaskets then. If I can be arsed!
#41

Posted 16 February 2008 - 07:47 PM
#42

Posted 21 February 2008 - 08:14 PM
#43

Posted 23 February 2008 - 10:39 AM
Good that I found the source of the problem and it's nothing major but a PITA as I've put the case and block on now and will have to get another set of gaskets. This does have another upside though as if I have another set of gaskets (& sealant) I'll have some so I can take the diff out (Again) and take up UDO's offer of a decent vice so I can get my hardened diff pin in. Plus I'll have an even bigger pile of spare gaskets in reserve!
Still, nice to get the engine together, justa pity about the hiccup. TBC...
#44

Posted 23 February 2008 - 11:05 AM
You haven't got a spare water pump gasket in the pile have you?
#45

Posted 23 February 2008 - 11:19 AM
1 user(s) are reading this topic
0 members, 1 guests, 0 anonymous users


