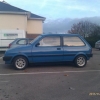
1980 Mini Project
#16

Posted 12 September 2007 - 09:53 AM
http://minispares.co....aspx?pid=34324
Did your engine have a tensioner on the timing chain? If so you may also need to give it a little bit of therapy to the cover with a hammer! I would also advise buying a new pad for the tensioner and refitting, even though it doesn't seem to fit the wider chain properly. Some people say don't bother but for a road car it doesn't do any harm. If you choose not to refit it, at least put the bolts back in as they are used to locate and secure the backplate.
#17

Posted 12 September 2007 - 11:25 AM
#18

Posted 13 September 2007 - 12:34 PM
Timmy, d'ya recon it's fine like that or should I outline the slots in the slotmags?
#19

Posted 13 September 2007 - 01:06 PM
It also covers the info on the tensioner
cheers
#20

Posted 13 September 2007 - 02:49 PM
#21

Posted 13 September 2007 - 08:46 PM
Whaddaya reckon? I am now wondering whether to highlight the inside edge of the slots with another thin line of yellow but again, this is a gamble. I just feel it's a shame you can't really see the alloys in such a dark colour and want to show them off a bit!
Would look something like this?
Looking good
Attached Files
#22

Posted 14 September 2007 - 09:01 AM
Nice one Cactus
#23

Posted 28 September 2007 - 05:49 PM
#24

Posted 28 September 2007 - 06:19 PM
And best wishes from me and Vern
I pushed Buttercup's button
#25

Posted 28 September 2007 - 06:19 PM
Edited by Joshmini, 28 September 2007 - 06:20 PM.
#26

Posted 28 September 2007 - 07:40 PM
#27

Posted 29 December 2007 - 12:20 PM
Also fitted some new brake pads to the rear drums including stripping and cleaning the master cylinders and I now have a handbrake once again! While doing this I've discovered the the radius arms are wobbly so the pins require replacing, also the front d/s wheel bearing (I need to confirm the others).
I'm now commuting in it and have had to fit a new thermostat as the poor little bugger was freezing, and it's occupant due to the heater being C**p with no hot engine water flowing through it! So much to do!
Edited by zomerzet, 29 December 2007 - 12:26 PM.
#28

Posted 01 January 2008 - 12:49 AM
Next was to fit my new voltmeter as my old one was unreliable and would only measure up to 11V. While the dash was out I also finally got round to fitting bulbs to light my auxillary gauges as I only had the speedo and rev counter during night driving previously. It'll be very handy to now be able to see my fuel and temp gauges!
I also removed my grille mounted numberplate and stuck on my bonnet one to make way for my Cibie spot lamps. I think I did quite a good job. I had to peel back a few times and re apply to eliminate any bubbles but it's now perfectly bubble free!
 DSC00009.JPG 226.35K
8 downloads
DSC00009.JPG 226.35K
8 downloadsNext job was to sort out my in car entertainment. I have been using my mp3 player connected to my amp for some time but have just been sticking on the passenger seat. I wanted to make something more accessable and permanent so bought a universal mobile phone holder wide enough to hold my mp3 player and tie wrapped it to an ideal position on my roll cage. I had also bought a longer audio lead to reach the amp if it was mounted in this position. I also had a switch dangling in my passenger footwell which turned theamp on/off which needed to be tidied so it has been moved just above the phone holder with the wiring to the amp being routed with the audio cable. It is all alot easier to see and operate now (Rather than fumbling around on the passenger seat.
 DSC00004.JPG 283.74K
22 downloads
DSC00004.JPG 283.74K
22 downloadsWhilst on a tidying mission I decided that the amp wiring in the boot needed attention too. Whilst there I also installed an inteferance supressor in the boot which I had bought some time ago to the amp remote/switch line. This is due to getting a crackling through the speakers only when the engine was running. I knew it couldn't be the permanent live as that was directly from the battery, but the remote line comes from the wiring behind the dash so encounters a lot of electrical noise. Finally I have solved that annoyance. Additionally, when I took the battery out I found my 13mm Draper wratchet spanner which I thought I'd lost which was a real bonus!
 DSC00001.JPG 232.51K
9 downloads
DSC00001.JPG 232.51K
9 downloadsNext, the spotlights!
#29

Posted 01 January 2008 - 07:40 AM
#30

Posted 01 January 2008 - 12:23 PM
I also fitted my huge spotlights which look great. I drilled the bumper but had to modify the ball sockets on the lamp mounts as they wouldn't point up far enough even at the highest setting were pointing at about 45 degrees! I have tie wrapped them for now to secure them better, but I have a strip of auminium I am planning to fabricate some brackets out of. I'll do that when I wire them in. I'm planning to run them from a relay via a 3 position switch mounted on my rollcage. The switch positions will be a spring loaded flash, off, and on where they will run with the high beam.
 DSC00014.JPG 272.26K
11 downloads
1 user(s) are reading this topic
0 members, 1 guests, 0 anonymous users


