 This topic is locked
No probs, glad to be of help(at least I did something right this week!!!)
See you at Cannon?


Is This The Rustiest Mini Ever?!
Started by
Shifty
, Oct 21 2007 02:20 PM
209 replies to this topic
#151

Shifty
-
- Admin
-

- 13,146 posts
Sponsored by Fosters (tm)
- Name: Sean
- Location: Shropshire(sunny)
- Local Club: TMF
Posted 17 June 2009 - 10:28 PM
#152
cookie4343
-

- Traders
-
- 2,257 posts
**Caution: Do Not Feed Alcohol**
- Local Club: CV1 Mini's
Posted 17 June 2009 - 10:49 PM
Not sure if im comeing, its farthers day and all that.No probs, glad to be of help(at least I did something right this week!!!)
See you at Cannon?
#153
Shifty
-
- Admin
-
- 13,146 posts
Sponsored by Fosters (tm)
- Name: Sean
- Location: Shropshire(sunny)
- Local Club: TMF
Posted 19 June 2009 - 02:36 PM
Ok then, got some batteries for the camera and its not a pretty picture!!


OUCH!!
Sommerford list repair sections for this area so its not all bad.
Fecking thing!!
OUCH!!
Sommerford list repair sections for this area so its not all bad.
Fecking thing!!
Edited by shiftyseamus, 19 June 2009 - 02:38 PM.
#154
arnie
-

- Members
-
- 514 posts
Super Mini Mad
- Local Club: sutton coldfield
Posted 19 June 2009 - 03:37 PM
feck mate im well gutted for ya. so close aswell. see you sunday mate.Well no pics because the camera was flat!!
Project Spudnik has hit a problem!!
All was going well, he was on track to go to COVICSs to be painted when I discovered more rot and serious rot at that.
I'd primed and prepped the shell and had loads of time spare so decided to make a start on stripping the engine bay out, ripped out the carb,rad, master cylinders, old LCB etc.
Still had some time left so started to clean up the bay with the wire brush when all of a sudden the metal turned white!! CRAP!!
Mr I M A Bodger had been here as well!!
Serious rot on the bulkhead by the master cylinders, the stiffening plate had rotted out and taken part of the bulkhead with it.............FECK!!!
Only course of action was to remove the front subby and engine to see just how bad the damage was.
The rot isn't that bad(well thats what I keep telling myself!!) but its gonna need some serious repairs and I've just got to decide how I'm gonna do it.
The other problem is that now the engines out I want to take it apart and stick a cam and flywheel in it and check it over!!!
Then the front subby can be stripped, painted and rebushed.
MORE WORK!!
Pics to follow!!
#155
Shifty
-
- Admin
-
- 13,146 posts
Sponsored by Fosters (tm)
- Name: Sean
- Location: Shropshire(sunny)
- Local Club: TMF
Posted 27 June 2009 - 06:11 PM
Right, well I've finished stropping about the setback and have got on with the repair!!!
Initatially I was struggling to get the repair panels, heritage were out of stock and no onr else had them.
Full credit to MINI_MACHINE here, they didn't have them in stock so they made some up for me and had them out to me within a week.
Great service and I'll use them again, helpfull, and knowledgeable as well.
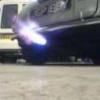
Anyway, heres what it looked like when I broke out the plasma cutter.

Ooops!!
Shock mount was ropey so repaired that.

Repair panel fitted

And finally the stiffener tacked in place

I hope you'll agree that it looks a shedload better now.
Got some tidying up and welding to do but its looking good!!!
Should be able to do a bit more tomorrow.
Initatially I was struggling to get the repair panels, heritage were out of stock and no onr else had them.
Full credit to MINI_MACHINE here, they didn't have them in stock so they made some up for me and had them out to me within a week.
Great service and I'll use them again, helpfull, and knowledgeable as well.
Anyway, heres what it looked like when I broke out the plasma cutter.
Ooops!!
Shock mount was ropey so repaired that.
Repair panel fitted
And finally the stiffener tacked in place
I hope you'll agree that it looks a shedload better now.
Got some tidying up and welding to do but its looking good!!!
Should be able to do a bit more tomorrow.
#156
dezshearer
-

- Members
-
- 441 posts
Speeding Along Now
- Location: Belfast
- Local Club: mini-chat.co.uk
Posted 27 June 2009 - 06:23 PM
Never seen a mini go there, shock mount yes, but that corner, wow.
Nice work!
Nice work!
#157
Shifty
-
- Admin
-
- 13,146 posts
Sponsored by Fosters (tm)
- Name: Sean
- Location: Shropshire(sunny)
- Local Club: TMF
Posted 27 June 2009 - 07:16 PM
Never seen a mini go there, shock mount yes, but that corner, wow.
Nice work!
You're not the first person to say that!!
I had that response from most of the panel suppliers, still done now.
Back on track.......................I hope!!
#158
Racer_Pete
-

- TMF+ Member
-
- 2,492 posts
Up Into Fourth
Posted 27 June 2009 - 07:45 PM
Hey Sean, havent spoke to you for a while! hows things?
Looking like its really coming together, will be worth it in the end, good job!
Pete.
Looking like its really coming together, will be worth it in the end, good job!
Pete.
#159
Shifty
-
- Admin
-
- 13,146 posts
Sponsored by Fosters (tm)
- Name: Sean
- Location: Shropshire(sunny)
- Local Club: TMF
Posted 27 June 2009 - 07:48 PM
Hey there Petey!!
Have you passed your test yet?
I sincerely hope it will be worth it!!
Have you passed your test yet?
I sincerely hope it will be worth it!!
#160
Pauly
-

- Members
-
- 4,213 posts
Up Into Fourth
- Location: Wolverhampton
- Local Club: Just 4 Fun Minis!
Posted 27 June 2009 - 08:14 PM
Chhrist mate, some work gone into that...... I would seriously think about the weight of all that weld, IT WONT BE LIGHT!  and they say rust is weight saving material .
...... Good work mate .
.
Paul.
and they say rust is weight saving material ....... Good work mate
.Paul.
#161
Shifty
-
- Admin
-
- 13,146 posts
Sponsored by Fosters (tm)
- Name: Sean
- Location: Shropshire(sunny)
- Local Club: TMF
Posted 27 June 2009 - 08:17 PM
Chhrist mate, some work gone into that...... I would seriously think about the weight of all that weld, IT WONT BE LIGHT!
...... Good work mate
Paul.
Well its lucky I'm a shortarse who weighs next to nothing!!
(with a bit of luck it should cancel out the welding wire!!!)
#162
Pauly
-
- Members
-
- 4,213 posts
Up Into Fourth
- Location: Wolverhampton
- Local Club: Just 4 Fun Minis!
Posted 27 June 2009 - 08:25 PM
Also the rust beaters helped

Paul.
#163
Shifty
-
- Admin
-
- 13,146 posts
Sponsored by Fosters (tm)
- Name: Sean
- Location: Shropshire(sunny)
- Local Club: TMF
Posted 27 June 2009 - 08:28 PM
If only the previous owner had used it!!!
#164
Jack Jones
-
- Members
-
- 617 posts
Super Mini Mad
Posted 28 June 2009 - 09:51 PM
quite good when it comes to welding aint you, some right pretty welds there,
that support is the home fabricated or a somerfield part, if you hand made that, well your pretty good at that aswell.
very impressed by your work mister, when are you hoping it'll be done?
jack
that support is the home fabricated or a somerfield part, if you hand made that, well your pretty good at that aswell.
very impressed by your work mister, when are you hoping it'll be done?
jack
#165
miniman retford
-

- Members
-
- 3,553 posts
Most Definitely Not Beer Powered....
- Location: Retford Notts
- Local Club: Lincs ford group
Posted 29 June 2009 - 07:03 AM
You will be coming to Gaydon in it on friday then !


1 user(s) are reading this topic
0 members, 1 guests, 0 anonymous users


