
Unicycling FTW
I have a uni and love it!!!!!!
woop, mini is lookin great!!


Ed's Mk1 Morris Cooper
Started by
edi57
, Apr 21 2008 09:37 PM
188 replies to this topic
#152

Shifty
-

- Admin
-

- 13,154 posts
Sponsored by Fosters (tm)
- Name: Sean
- Location: Shropshire(sunny)
- Local Club: TMF
Posted 19 March 2009 - 10:01 PM
Well Ed, thats twice tonight you've helped me!!
There was some doubt cast on the way my MK1 conversion plates were fitted, looking at yours(which are the same as mine) has put my mind at rest!!
Top work fellah.
There was some doubt cast on the way my MK1 conversion plates were fitted, looking at yours(which are the same as mine) has put my mind at rest!!
Top work fellah.
#153
Saxo-Fiesta-Mini
-

- Members
-
- 2,889 posts
Up Into Fourth
- Local Club: LCMOC
Posted 19 March 2009 - 11:47 PM
great work love it gonna be nice to have it back in one piece
#154
luke6040
-
- Members
-
- 449 posts
Speeding Along Now
- Local Club: na
Posted 22 March 2009 - 02:43 PM
Looks like your putting some serious work into that! Will be an amazing beast when its done!
#155
jack_marshall
-

- Members
-
- 2,540 posts
Up Into Fourth
Posted 24 March 2009 - 07:33 PM
Ed, this is going to sound crazy but... your spot welder problem, you say it heats up too much and you have to wait for it to cool.
Get yourself a shallow bucket of cold water and ever couple spots, dunk the electrodes in (DONT PULL THE TRIGGER OBVIOUSLY!!)
This cools it down rapidly and lets you carry on.
I was taught this on a body restoration course at a place they make XK bodys from scratch and have done for many years!
Get yourself a shallow bucket of cold water and ever couple spots, dunk the electrodes in (DONT PULL THE TRIGGER OBVIOUSLY!!)
This cools it down rapidly and lets you carry on.
I was taught this on a body restoration course at a place they make XK bodys from scratch and have done for many years!
#156
Sleeping Park Lane
-

- Noobies
-
- 132 posts
Mini Mad
- Location: Reading
Posted 26 March 2009 - 11:18 AM
What a superb job! Every credit to you fella for a first rate restoration - and they say all the youth of today are only interested in hanging around just drinking White Lightning! 
Out of interest, two questions for you:
1) What gauge steel do you use for your repair panels?
2) Do you have the part numbers handy for the side panel repair panels for behind the rear arches?
Edited to add: Aha - found them I think: 11.14.00.57 - £3.95 - Wheel Arch Corner, left hand, Mk1-5; and 11.14.00.58 for the right.
M-Machine do some good stuff, but their website is bl00dy awful! Links don't work, info isn't easily searchable, etc. - ok, sorry, rant over!
Keep up the fantastic work.
Steve
Edited by Sleeping Park Lane, 26 March 2009 - 11:33 AM.
#157
Pauly
-

- Members
-
- 4,213 posts
Up Into Fourth
- Location: Wolverhampton
- Local Club: Just 4 Fun Minis!
Posted 26 March 2009 - 08:20 PM
Love this project, top work mate  .
.
Paul.
.Paul.
#158
beaubrad
-

- Members
-
- 736 posts
One Carb Or Two?
Posted 08 May 2009 - 10:00 PM
any progress yet mate??
#159
mad mk1
-

- Members
-
- 746 posts
One Carb Or Two?
- Location: woking
- Local Club: TurboMinis.co.uk
Posted 17 May 2009 - 07:40 PM
i wood just like to say tip top work bud
#160
emalee
-

- Members
-
- 813 posts
One Carb Or Two?
- Local Club: west of england
Posted 06 June 2009 - 08:03 AM
Any updates yet?
i LOVE you project!!!
i LOVE you project!!!
#161
edi57
-
- Members
-
- 821 posts
One Carb Or Two?
Posted 11 October 2009 - 09:00 PM
Hi All,
Thanks for your comments as always.. but my biggest apologies about the lack of updates! I can hardly believe it... I've actually not touched my project since March.. and I wonder why my project is moving slowly??!
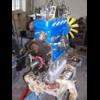
Anyway.. going back to March. I had finished the rear panel.. and I had started removing one of the arches. Before I removed the arch I took a few measurements and I have marked the distance between the tops of the two arches with a couple of large washers welded onto a bit of steel. Simple, but hopefully effective.
The below pictures were taken in March... I can't actually remember what they're all about. Probably just some for my reference.


So... the present day! I finished drilling out the last few spot welds and the arch dropped out after a couple of whacks with the old hammer. And here it is!

Which left me with a nice big hole to play with...

I had to re-make an edge here as it had rusted away. Back to some of the old favourite delicate welding!

Remade...!

A few thin areas and holes to repair...


Now, all the flanges that I'm going to keep have been cleaned-up, repaired and sprayed with some weld through primer. Ready for the new arch.

The new arch really fits like a glove. This is as far as I got today (breaking myself back into this mini resto stuff slowly!). Next I'll be taking the e-coat off the arch in the appropriate places and then plug welding/spot welding it in.

Thanks for your comments as always.. but my biggest apologies about the lack of updates! I can hardly believe it... I've actually not touched my project since March.. and I wonder why my project is moving slowly??!
Anyway.. going back to March. I had finished the rear panel.. and I had started removing one of the arches. Before I removed the arch I took a few measurements and I have marked the distance between the tops of the two arches with a couple of large washers welded onto a bit of steel. Simple, but hopefully effective.
The below pictures were taken in March... I can't actually remember what they're all about. Probably just some for my reference.
So... the present day! I finished drilling out the last few spot welds and the arch dropped out after a couple of whacks with the old hammer. And here it is!
Which left me with a nice big hole to play with...
I had to re-make an edge here as it had rusted away. Back to some of the old favourite delicate welding!
Remade...!
A few thin areas and holes to repair...
Now, all the flanges that I'm going to keep have been cleaned-up, repaired and sprayed with some weld through primer. Ready for the new arch.
The new arch really fits like a glove. This is as far as I got today (breaking myself back into this mini resto stuff slowly!). Next I'll be taking the e-coat off the arch in the appropriate places and then plug welding/spot welding it in.
#162
Shifty
-
- Admin
-
- 13,154 posts
Sponsored by Fosters (tm)
- Name: Sean
- Location: Shropshire(sunny)
- Local Club: TMF
Posted 11 October 2009 - 09:03 PM
Hey Ed!! Top work as always, nice to see at least one of us is making progress!!
#163
edi57
-
- Members
-
- 821 posts
One Carb Or Two?
Posted 11 October 2009 - 09:05 PM
Hey Ed!! Top work as always, nice to see at least one of us is making progress!!
Thanks Shifty!
I'm going to try and make some regular progress now
#164
Mini Basher
-

- TMF+ Member
-
- 424 posts
Speeding Along Now
- Location: Forest of Dean
- Local Club: Mini Foresters
Posted 11 October 2009 - 09:13 PM
Hi Ed
Nice to see you back again, excellent job on removing the wheel arch, I had to remove both of mine and they are a pain, you think you've drilled all the spots but theres always one that you miss, glad to see your using heritage arches. First ones I bought were patent ones and they didn't fit well at all, took them back in the end and got heritage ones , look forward to more updates soon
Andy
#165
mighty mini jack
-

- Members
-
- 5,095 posts
Mighty Before a Pint
Posted 11 October 2009 - 09:17 PM
Nice work as usual Ed, wondered where this project went!


3 user(s) are reading this topic
0 members, 3 guests, 0 anonymous users


