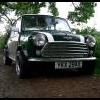
Ed's Mk1 Morris Cooper
#91

Posted 27 January 2009 - 07:06 PM
#92

Posted 27 January 2009 - 07:21 PM
Ed
#93

Posted 01 February 2009 - 08:35 PM
All of the panels arrived in good order with exception of the complete boot floor/rear seat panel. It looks like the rear seat has got bent to an angle greater than it should be during delivery. I'll just have to straighten it out a bit. All of the panels I ordered were Heritage pressings. This is the first time I've bought genuine panels and overall I'm reasonably happy with them... but there are imperfections in the panels that I wasn't expecting to see. I hope I find that the fit of the panels justifies the cost.
I didn't get any work done on Saturday as I had a friend visiting. But I've spent a good few hours getting some chopping done today.

My big box!

Trying the new panel for size

Rough markings of what I'm going to be cutting out. You can see why I needed the complete rear panel with the rust having gone up as high as it did.

This pic shows a large area of heavy pitting. If I had a light behind it would have shown just how bad it was. This isn't something I would have been able to repair with sheet!

More dodgy areas. The darker area is where lead had previously been used. Underneath it it's just heavily pitted and full of holes.

It looks like a boot hinge panel had gone on in the past.

Other side

More heavy pitting

More holes

After a bit of cutting and drilling I ended up with this. I've now got a bottomless Mini!

The old panel. I'm going to keep it as it could come in handy for a Mk1 Rear Light conversion for future projects. I'll get some cheap paint on it soon to stop it deteriorating.

My next job is to repair this little panel on each side while access is good. I got a couple of little repair panels from M-Machine to sort out the area. These are the first panels that I've ordered from M-Machine and I'm very impressed with them. The fit is first class and the steel is nice and thick.
Today I also marked, measured and cut the new rear panel roughly to size, ready for fitting.
Edited by edi57, 01 February 2009 - 09:02 PM.
#94

Posted 01 February 2009 - 08:42 PM
#95

Posted 01 February 2009 - 08:46 PM
I remember this sight too well..
#96

Posted 01 February 2009 - 09:45 PM
Great effort so far, look forward to updates
#97

Posted 01 February 2009 - 09:51 PM
#98

Posted 02 February 2009 - 09:43 AM
have you any more pic? brad
#99

Posted 02 February 2009 - 02:43 PM
#100

Posted 02 February 2009 - 05:29 PM
have you any more pic? brad
Brad I haven't got any more pics yet. I'm probably going to be busy most evenings this week so I won't have much of a chance to work on the Mini until the weekend. I do wish I had more free time... especially when I get to stages like this!
Ed
#101

Posted 02 February 2009 - 11:21 PM
can't wait to see more progress!!
Ed
#102

Posted 04 February 2009 - 10:17 PM
Somehow this work took me two hours (yes, I do know I'm slow!). It was a matter of cutting out the holey area and tidying up the wheel arch seam so that the new panel can sit neatly. Then some accurate marking for final cutting... followed by some trimming to get the repair panel lined up perfectly. Following that, clamping the panel in place and tacking in. I didn't get time to weld it in properly. I hope to get the time to finish it off properly tomorrow evening.


#103

Posted 04 February 2009 - 10:22 PM
What steel you using?
#104

Posted 04 February 2009 - 10:37 PM
Lovely stuff as usual fella.
What steel you using?
Cheers Jack. That panel was made by M-Machine and the thickness looks to be about 1.5mm-ish. It's certainly thick stuff. I'll measure it next time I'm in the garage.
#105

Posted 05 February 2009 - 06:06 PM
Well done to you.
0 user(s) are reading this topic
0 members, 0 guests, 0 anonymous users


