Jump to content


Photo

My Speaker Pod Build Diary


  • Please log in to reply
46 replies to this topic

#1 jwb_moto

jwb_moto

    One Carb Or Two?

  • TMF+ Member
  • PipPipPipPipPipPipPip
  • 1,387 posts
  • Local Club: PMOC

Posted 23 August 2008 - 11:21 AM

This is my attempt at making my speaker pods.

firstly heres the car they are going in (excuse the filthieness its (or Marlon as my Girlfriend calls it) needs a wash LOL
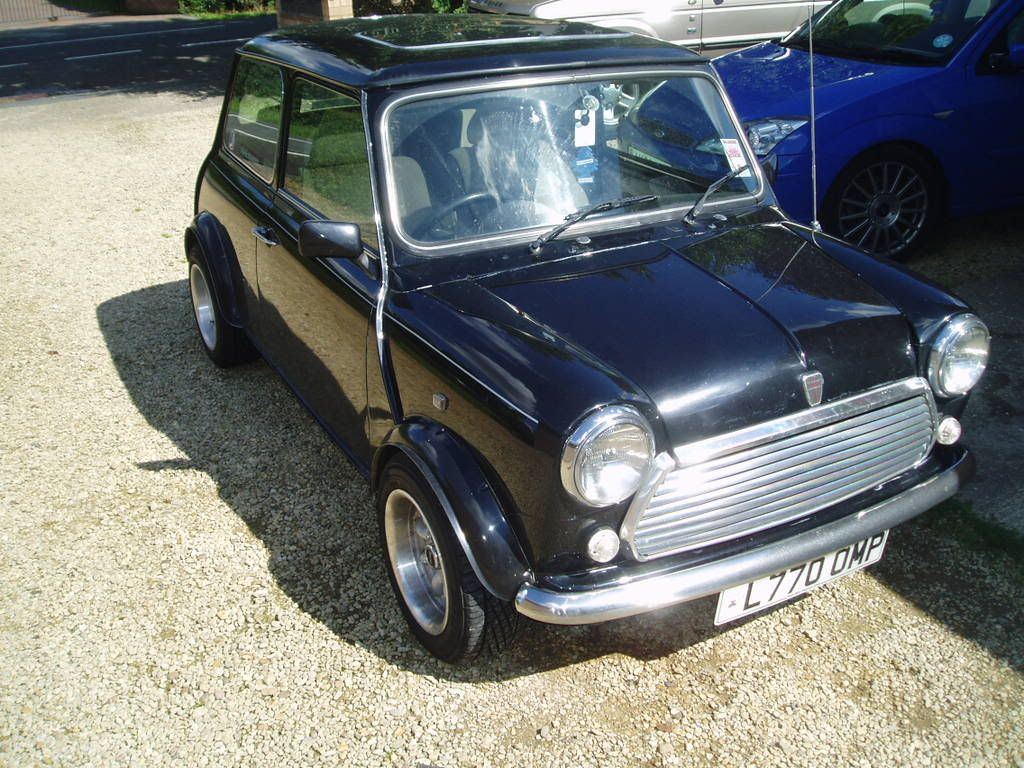
Posted Image

Heres a Picture of the speakers which im fitting curtousy of our very own TMF audio supplier Mark@lcs

Posted Image

Heres a picture of the speaker rings, mdf and dowel which im using to make the bare bones of the speaker pod im using 12mm mdf throughout and 12mm diameter dowel

Posted Image

Heres a picture of all the tools, materials that im using, i might have missed a couple out lol.

Posted Image

First Step: Making the base

I layed one of the speaker rings on some A4 paper (tight up in the corner) and drew round it

Posted Image

Posted Image

I knew i wanted the base to be roughly square along the top and side so once i hd drawn round the ring i used a square to mark the side, i then used a decent size socket to round off the corners. finally i layed the speaker ring over the top to see if i looked the look of it

Posted Image

Posted Image

Posted Image

I now test fitted the templates in my mini so see if the would look ok. I need to move the bonnet release catch across a bit but this is easy peasy

Posted Image

Posted Image

They looked alright so i marked them on to my mdf and cut them out

Posted Image

Posted Image

thats all for now just waiting on my spare of hands to hold everything while i measure up for the dowel rods. more updates in a while.

Edited by jwb_moto, 23 August 2008 - 11:22 AM.


#2 Ouster

Ouster

    Up Into Fourth

  • TMF+ Member
  • PipPipPipPipPipPipPipPipPip
  • 2,986 posts
  • Local Club: Looking

Posted 23 August 2008 - 11:36 AM

The game is oooooooooon!
*goes off to fibreglass*

#3 jwb_moto

jwb_moto

    One Carb Or Two?

  • TMF+ Member
  • PipPipPipPipPipPipPip
  • 1,387 posts
  • Local Club: PMOC

Posted 23 August 2008 - 12:35 PM

Im making good progress today should hopefully have at least one or maybe 2 coats of resign done.

Step 2: postioning the rings using my highly calbirated tool aka as squinty eye with my guestimation tape measure LOL

I gaffa tapped the mounting base to the carpet in my mini where i wanted it and then held the the speaker and ring into position whilst some measurements and guess work was made. for reference the top dowel was 32mm long with a 2mm cut angle to 30mm. the bottom dowel was 100mm long with a 3mm angle cut to 97mm. any slight discrepencies (spelling??) where taken up with the glue.

Posted Image

I only measured the top and bottom to get the angle i wanted and i then drew this on a pices of paper so i could work out what angles the dowels should be cut at

Posted Image

I then cut my first two pieces of dowel and glued them to the base using a hot glue gun

Posted Image

after this had set i double checked my angle where correct by laying the ring on top (which it was) and glued this into postion

Posted Image

After this had set i measured up for the other two dowel supports, cut them to length and glued them position. hey presto one finshed speaker pod skeleton

Posted Image

I offered this up in the car to see if it still looked ok

Posted Image

I mirrored the other side so that it was the same

Posted Image

Posted Image

more to come later just hoping the weather holds up :)

#4 jwb_moto

jwb_moto

    One Carb Or Two?

  • TMF+ Member
  • PipPipPipPipPipPipPip
  • 1,387 posts
  • Local Club: PMOC

Posted 23 August 2008 - 01:28 PM

Step 3: covering the skeletons in fleece

after chopping one of me "Ol" mans old fleeces up i ended up with a nice size piece of dark blue fleece material to play with.

When i was covering the first pod i made the mistake of going all the way round in one go and ended up with a flap of excess material i ended up stapling this back as best as i could and this will now need a little bit of filler just to smooth it out. I made sure i didnt make the same mistake twice and stapled a bit on each side on my other pod. (first pod is on the right in the next few pics.

Posted Image

Posted Image

Posted Image

#5 Ouster

Ouster

    Up Into Fourth

  • TMF+ Member
  • PipPipPipPipPipPipPipPipPip
  • 2,986 posts
  • Local Club: Looking

Posted 23 August 2008 - 01:32 PM

Looking good, you work a lot faster than me!
Are you bolting these to the inner wing?

#6 jwb_moto

jwb_moto

    One Carb Or Two?

  • TMF+ Member
  • PipPipPipPipPipPipPip
  • 1,387 posts
  • Local Club: PMOC

Posted 23 August 2008 - 02:16 PM

Yeah i will be bolting them in, im going to make a little box for my crossovers aswell

Step 4 - Part 1: the resin!

Very very messy but very very rewarding. I mixed a little too much resin up and had to tip some away so for my next pod il only mix say 350ml instead of 500ml

Posted Image

Posted Image

Posted Image

#7 benb12

benb12

    One Carb Or Two?

  • Members
  • PipPipPipPipPipPipPip
  • 1,483 posts
  • Local Club: Medway Mini Club

Posted 23 August 2008 - 02:24 PM

What does the resin do?

#8 Ouster

Ouster

    Up Into Fourth

  • TMF+ Member
  • PipPipPipPipPipPipPipPipPip
  • 2,986 posts
  • Local Club: Looking

Posted 23 August 2008 - 02:30 PM

Makes it 'ard!

#9 benb12

benb12

    One Carb Or Two?

  • Members
  • PipPipPipPipPipPipPip
  • 1,483 posts
  • Local Club: Medway Mini Club

Posted 23 August 2008 - 02:41 PM

Riiiight, so the speakers go behind your dad's 'ard fleece?

#10 frankiebateman

frankiebateman

    Up Into Fourth

  • Members
  • PipPipPipPipPipPipPipPipPip
  • 3,288 posts
  • Local Club: NWMC

Posted 23 August 2008 - 02:54 PM

Riiiight, so the speakers go behind your dad's 'ard fleece?


ontop of the 'ard' flece :D the resin makes it hard so its alot easier to stick the fiberglass on :D :)

Edited by frankiebateman, 23 August 2008 - 03:02 PM.


#11 Ouster

Ouster

    Up Into Fourth

  • TMF+ Member
  • PipPipPipPipPipPipPipPipPip
  • 2,986 posts
  • Local Club: Looking

Posted 23 August 2008 - 03:16 PM

You cut the middle out - that's why he hasn't put any resin in the middle.

#12 jwb_moto

jwb_moto

    One Carb Or Two?

  • TMF+ Member
  • PipPipPipPipPipPipPip
  • 1,387 posts
  • Local Club: PMOC

Posted 23 August 2008 - 03:18 PM

Once all the resin has gone off properly i will cut the middle of the hole out. I think i will get away with a couple of good coats of resin without the need to lay ome matting on top.

Step 4 - part 2: resin

I mixed up a batch of 350ml of resin with7-8ml of catlyst, this still left me with plenty after covering the second pod. I even had enough left over to give the first one another good coat and another splodge on my second pod.

Im going to give them another coat just to be sure.

heres some pics of the second pod and me in action (oo er missus LOL) excuse the scruffiness tis a saturday after all! busy week at work un all that.

Posted Image

Posted Image

Posted Image

Posted Image

Posted Image

Posted Image

#13 jwb_moto

jwb_moto

    One Carb Or Two?

  • TMF+ Member
  • PipPipPipPipPipPipPip
  • 1,387 posts
  • Local Club: PMOC

Posted 23 August 2008 - 05:15 PM

Now the resin has gone off completely on the first one i have cut the hole back out again and primed it so that when i rub it down il see the hi spot alot easier.

heres some pics

Posted Image

Posted Image

#14 jwb_moto

jwb_moto

    One Carb Or Two?

  • TMF+ Member
  • PipPipPipPipPipPipPip
  • 1,387 posts
  • Local Club: PMOC

Posted 23 August 2008 - 07:12 PM

Step6: resining the inside of the pod and strengthening

Ive now cut both holes out and given them a quick sand. Ive also painted some more resin on the inside of the pod and along the join between the now "Ard" fleece and MDF. Ive also gone along the ede of the MDF and drilled some holes ive started to fill these with resin, this so make sure there is a good bite between the "Ard"fleece and MDF when i remove the overhanging material and staples.

heres some pics

Posted Image

Posted Image

Posted Image

#15 jwb_moto

jwb_moto

    One Carb Or Two?

  • TMF+ Member
  • PipPipPipPipPipPipPip
  • 1,387 posts
  • Local Club: PMOC

Posted 25 August 2008 - 11:13 AM

Step7: cutting the over hang off

I did this with an angle grinder as the resin has set proper hard now its very dusty & noisy so i made sure i wore some goggles, face mast and ear plugs. note the heap of excess material thats been removed

heres some pics

Posted Image

Posted Image

Posted Image

Step8: applying the filler

I used some P38 which i bought from halfrauds on the first pod, this is just bog standard easy sand filler. For the second pod i used some P40 bridging filler (this stuff that contains fibreglass strands. this was used to take out some of the bigger lumps un bumps and once this has gone off i will be putting some P38 over the top

Heres some pics

Posted Image

Posted Image

Posted Image

Posted Image

Posted Image


1 user(s) are reading this topic

0 members, 1 guests, 0 anonymous users