
where did you get a boot floor for £130!? 

128 replies to this topic
#31

Ben_O
-

- Paint Doctor
-

- 9,794 posts
Mill Road Garage
- Location: Isle of Wight
Posted 23 May 2014 - 10:57 PM
#32
MrElliott
-
- Members
-
- 419 posts
Speeding Along Now
- Location: Surrey
- Local Club: Box Hill Mini Club
Posted 24 May 2014 - 08:03 AM
a member on here :) really nice bloke too but he only had one 
#33
Ben_O
-
- Paint Doctor
-
- 9,794 posts
Mill Road Garage
- Location: Isle of Wight
Posted 24 May 2014 - 08:20 AM
damn
#34
MrElliott
-
- Members
-
- 419 posts
Speeding Along Now
- Location: Surrey
- Local Club: Box Hill Mini Club
Posted 08 June 2014 - 09:39 PM
not much of an update as its slow progress trying to sort my life out with uni work. but i started to tidy up my second hand rear subframe
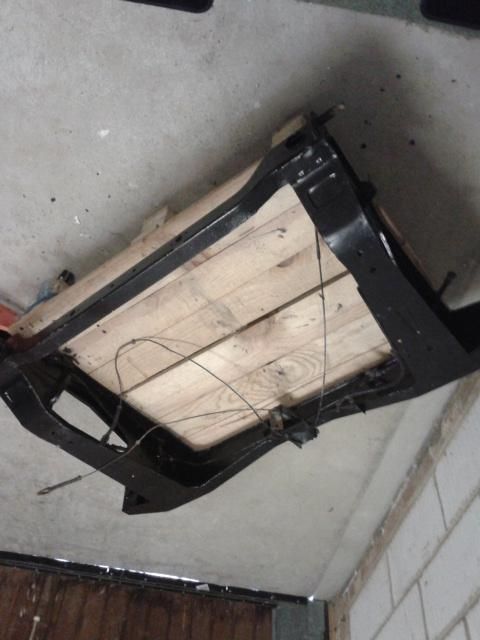
just pulling old bits of pipe and cable off so i can grind it back and re paint. Notice my new dolly made with some random caster wheels and a shipping pallet that i shall be putting the back half of the car on.
then i decided that it would be wise to give the new brake connector some rust protection
bit of Zinc 182
and some oyster gold to give that factory look. i know this part will hardly ever be seen but i dont want to put anything on this car that looks less than 100%
so tomorrow i shall polish up the copper brake lines, paint the joints and coat the subframe in a nice layer of hammerite
cheers
Elliott
#35
MrElliott
-
- Members
-
- 419 posts
Speeding Along Now
- Location: Surrey
- Local Club: Box Hill Mini Club
Posted 10 June 2014 - 09:58 PM
painted my rear subframe gloss black after sanding it back. it looks much better now even though no one will see it
then i took the skin off my drivers door which i discovered was full of filler.
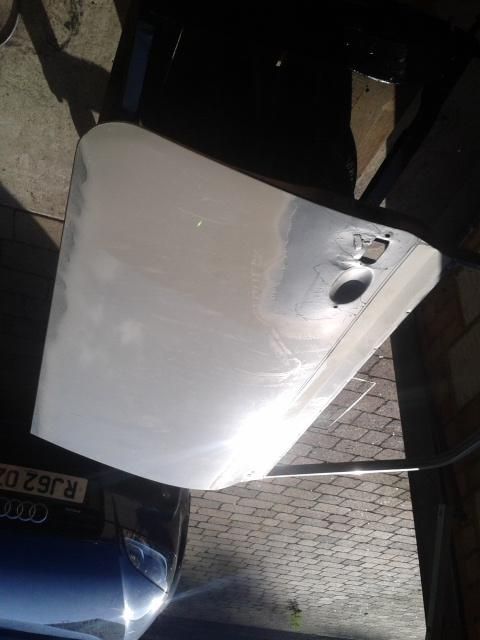
so glad i did as theres so much rust that i couldnt see from the outside!!
so i ground it all back and zinc primered it
i shall wait for that to dry for now before grinding back and finishing the other side before putting the new skin on
cheers
Elliott
#36
MrElliott
-
- Members
-
- 419 posts
Speeding Along Now
- Location: Surrey
- Local Club: Box Hill Mini Club
Posted 12 June 2014 - 07:50 PM
absolutely knackerd after todays fun and games :)
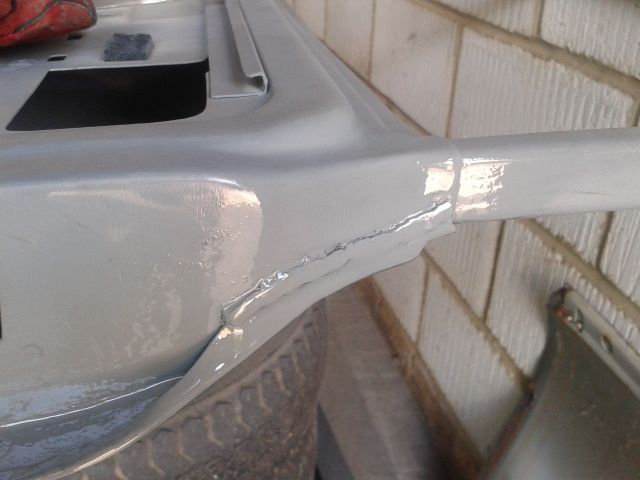
firstly i put the skin on the drivers side door and hammered over the edges which i got better at as i worked my way around the door. then i decided to put the door on the car to line up the skin better on the door frame.
so being my mini its wasnt so simple that i could just remove the current door... no way the hinge bolts were seized so i ended up sheering two and carried on with many gallons of WD40 to get the other two off
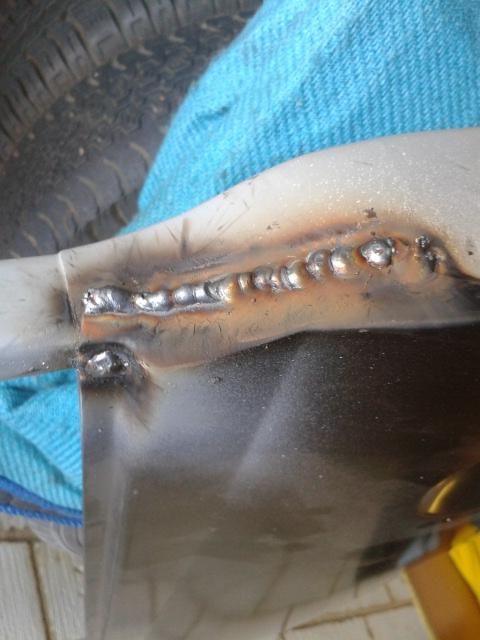
so after that it was plain sailing. i lined up the door on the car and plug welded the top corners. then removed the door and weled up the seams using the origional door for refference
not the prettiest weld in the world but it holds and i ground it back and dressed it nicely so it looks fairly okay now :)
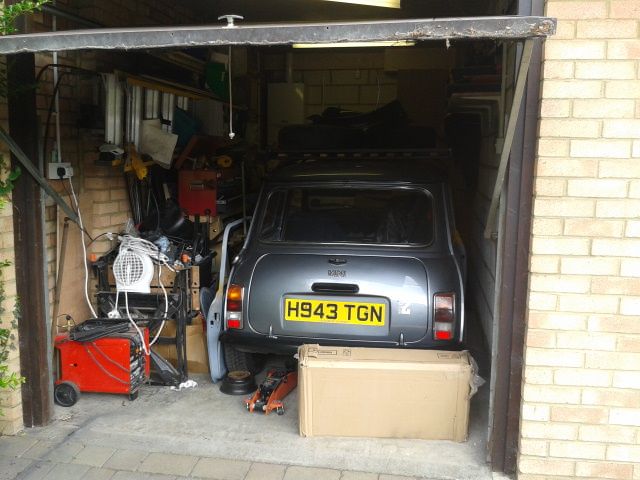
just the other side to weld now so happy days and i also managed to squeeze the car into the garage
cheers for reading
Elliott
#37
MrElliott
-
- Members
-
- 419 posts
Speeding Along Now
- Location: Surrey
- Local Club: Box Hill Mini Club
Posted 13 June 2014 - 08:23 PM
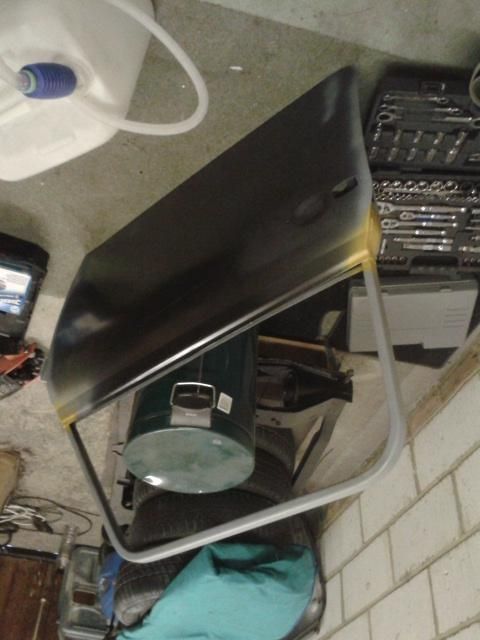
more work today which started with me finishing off seam welding the new door skin onto the door
quite happy with how that one turned out. then i plug welded a few points around the seam to stop it flexing on the car.
whipped out the seam sealer...
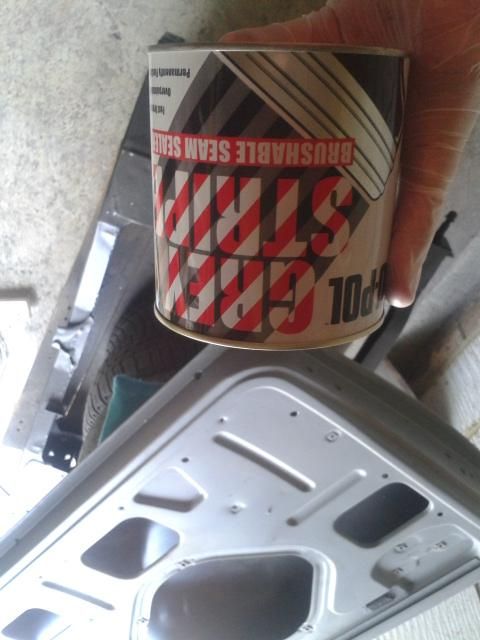
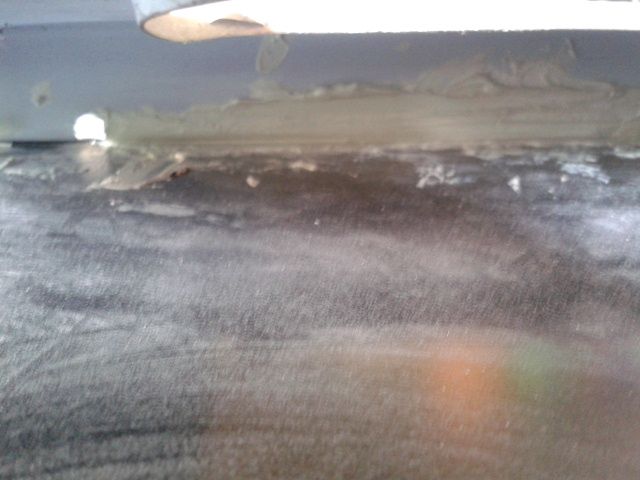
made a compete mess of the bottom of the door but at least it wont rust any more
Done!
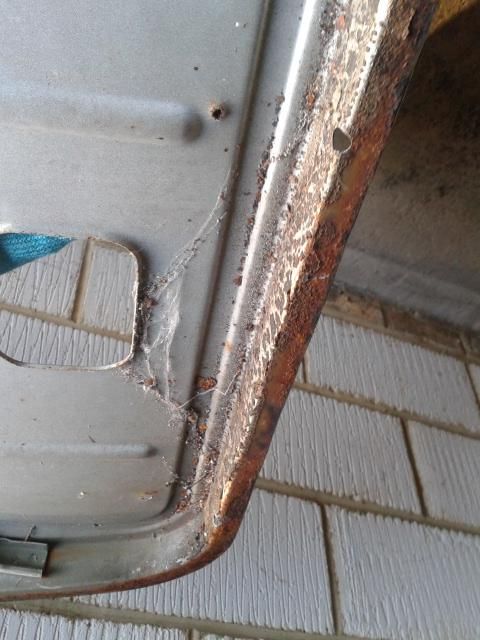
The next next step was to repeat the process for the passenger door which i discovered had a lot more rust 

its a mess and might need to be patched so i gave up for the day.
cheers
Elliott
#38
Jordie
-

- TMF+ Member
-
- 13,567 posts
Traders Area Specialist Mod, North and Scotland Area Manager
- Name: Jordan
- Location: North East
Posted 13 June 2014 - 09:02 PM
make sure you have drain holes in those doors, as that seam sealer will hold water in if not and rust 10x as fast.
#39
MrElliott
-
- Members
-
- 419 posts
Speeding Along Now
- Location: Surrey
- Local Club: Box Hill Mini Club
Posted 13 June 2014 - 10:03 PM
oh no i made sure to keep the holes in place!!
#40
MrElliott
-
- Members
-
- 419 posts
Speeding Along Now
- Location: Surrey
- Local Club: Box Hill Mini Club
Posted 23 June 2014 - 09:12 PM
more progress today
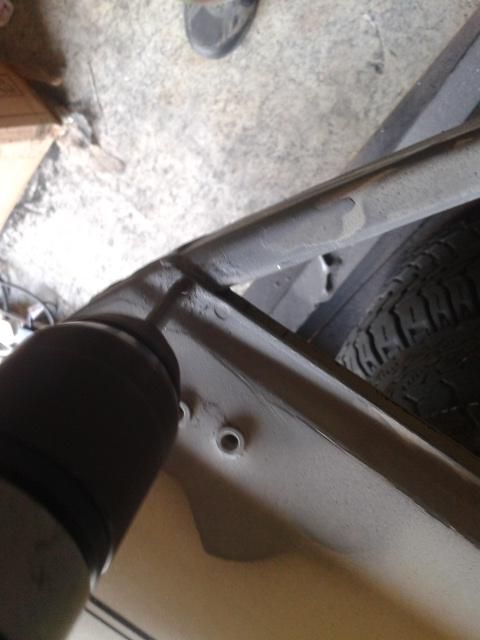
small frame repair to the passenger door
fitted to adjust the skin
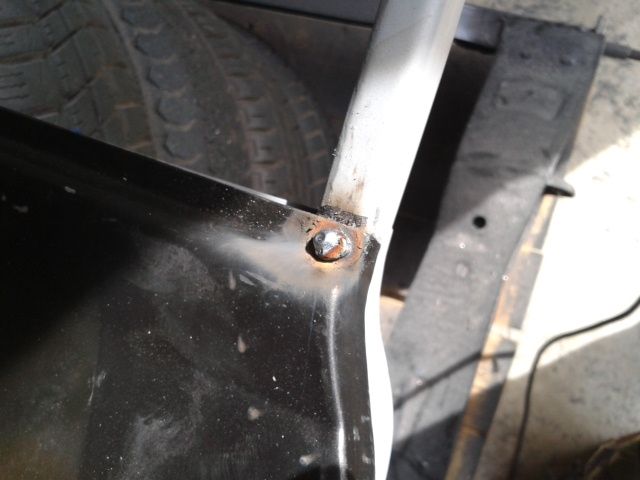
plug welded the top corners
and seam welded the edges
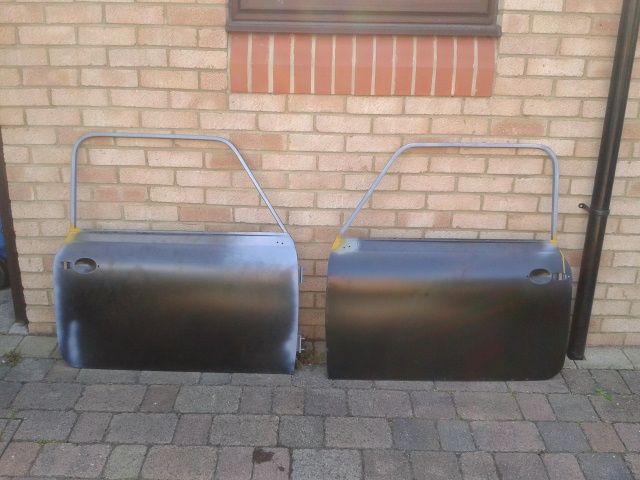
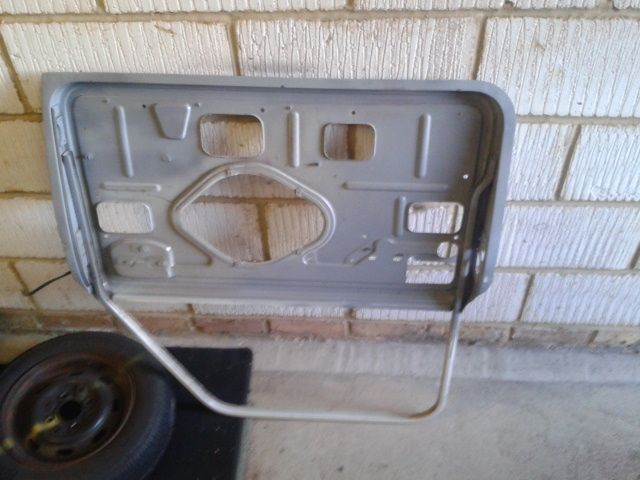
two finished doors :)
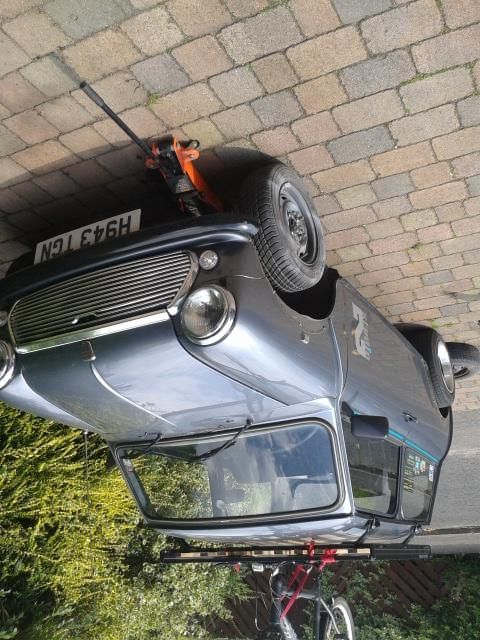
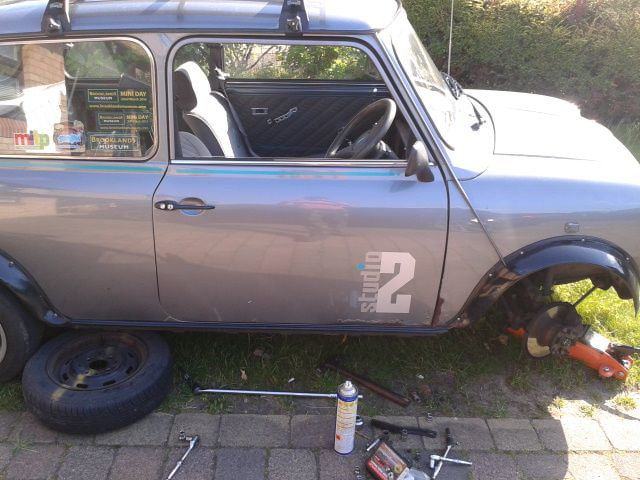
starting to strip it back to move it into the garage
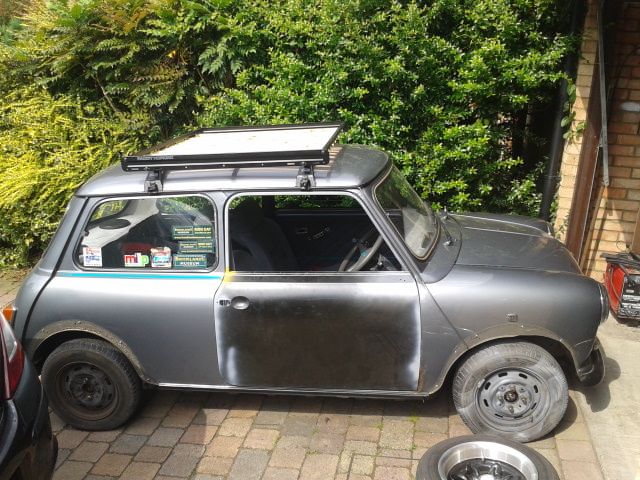
my poor little mini all tucked up then i started to remove a few parts
and the outer skin will become a wall display
cheers for reading. tomorrow i hope to remove the subframe and start cutting the boot floor out
#41
MrElliott
-
- Members
-
- 419 posts
Speeding Along Now
- Location: Surrey
- Local Club: Box Hill Mini Club
Posted 24 June 2014 - 09:33 PM
major step forward today :)
first off i had to take the exhaust off then get the tank out so i started by draining the fuel into a jerry can after pulling the exhaust off

the sender unit said the tank was empty yet i managed to pull out12 litres of fuel after that.. which i had to put in my parents car
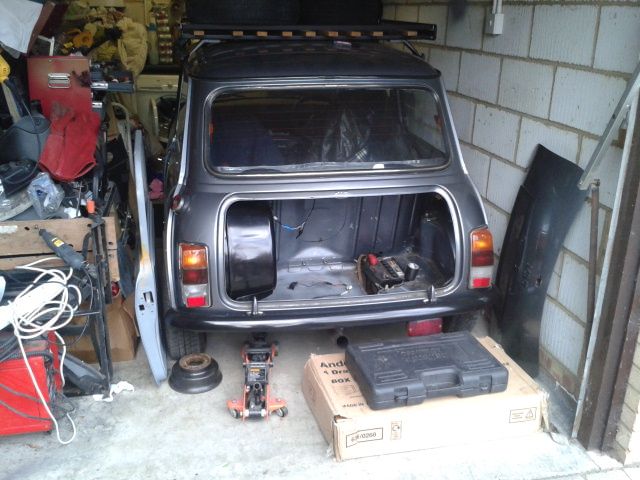
then removed the hoses and battery leads from the boot floor.
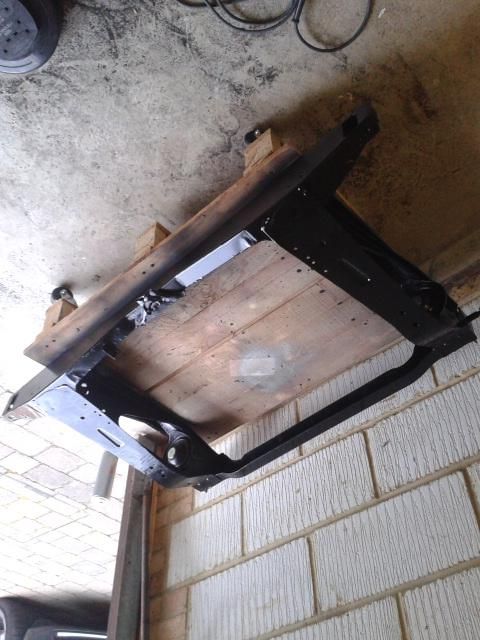
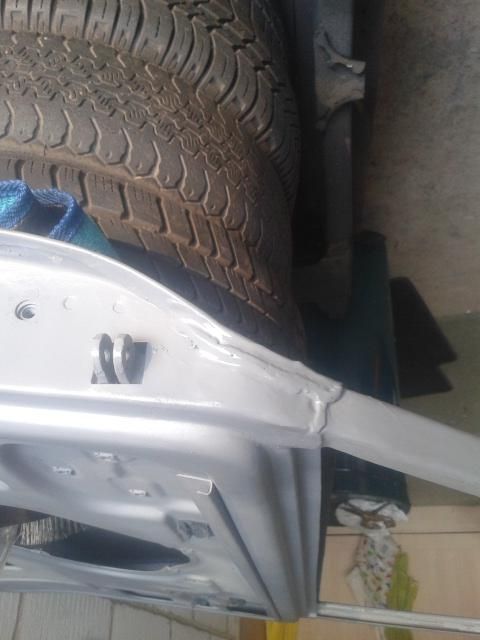
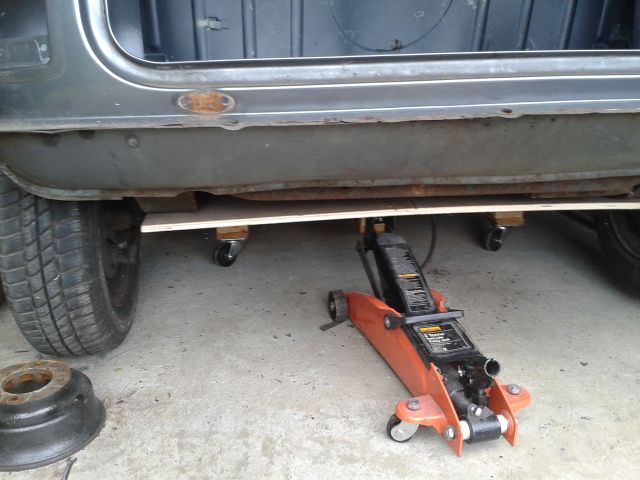
now the fun began as i had to put a dolly under the belly of the mini so i could get the subframe off but i didnt want to jack the car up on the boot floor so i jacked one side of the subframe up in the air
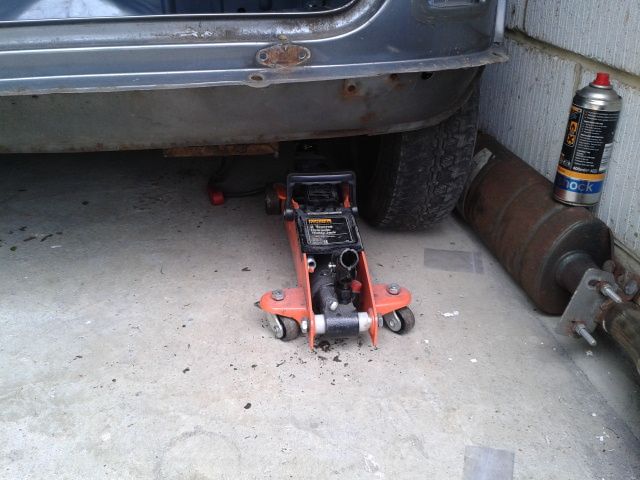
the slid and wedged the doly under the car with some planks on top to protect the fuel, brake pipes and the positive battery lead that run the length of the floor
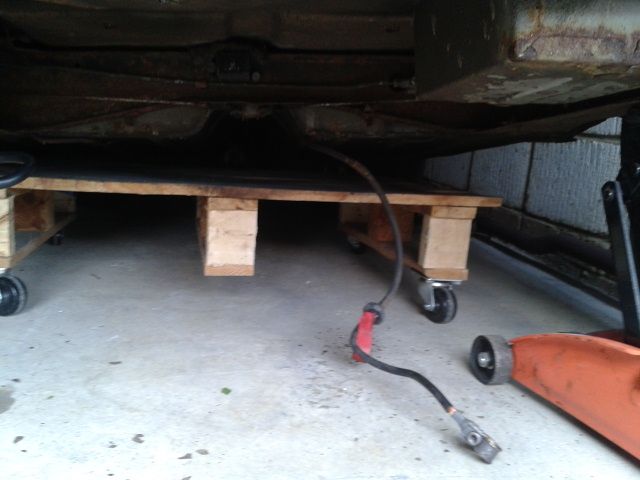
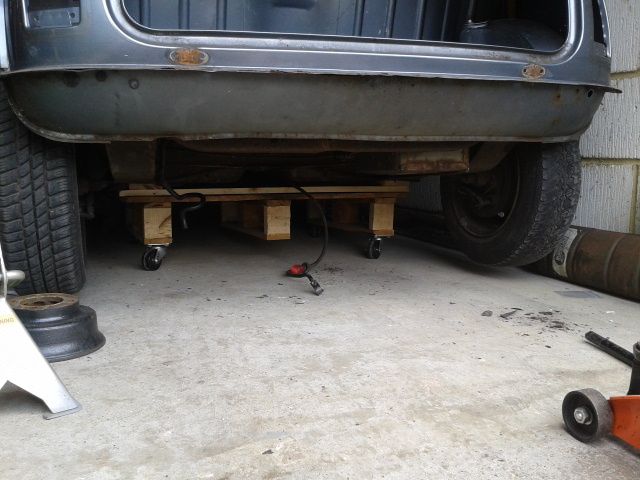
amazingly the dolly didnt snap in two which is a promising sight for the rest of the build
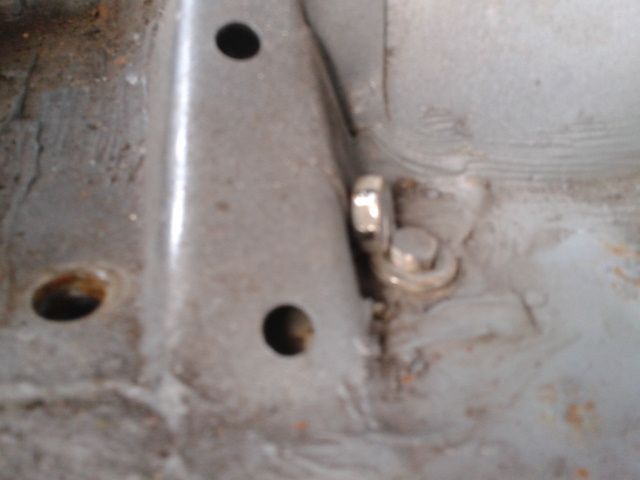
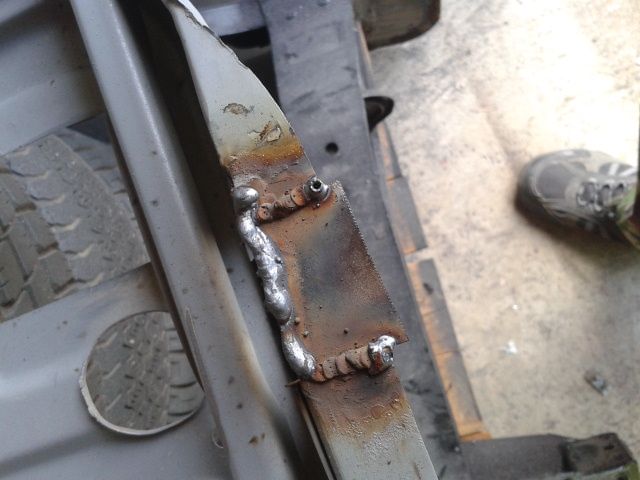
7/8 is a high score for the number of subframe bolt that i didn't have to grind off! but you know there's always one... luckily its not a heel board one!
got a bit keen to remove the subframe and remembered i needed to cut the handbrake cable and unto the brake lines. fluid then got everywhere :/
the gently lowered the subframe to the correct level. it was like watching the door step on the millennium falcon lowering :) only more rust
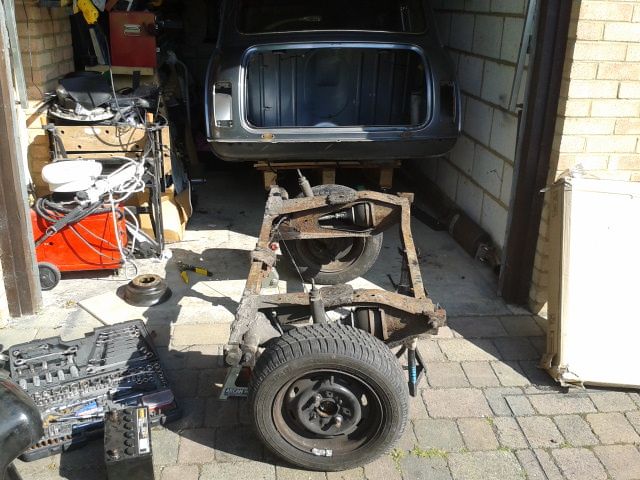
its free after many wiggles and scraped knuckles then started to strip it down
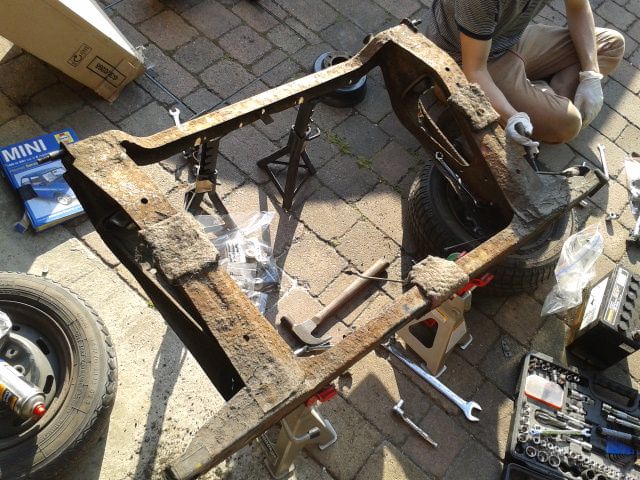
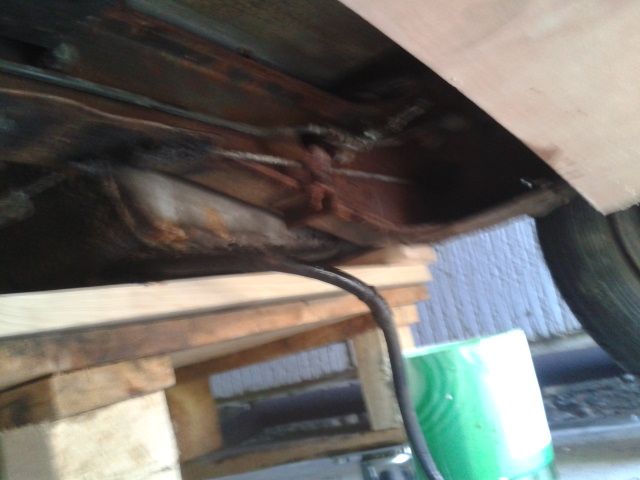
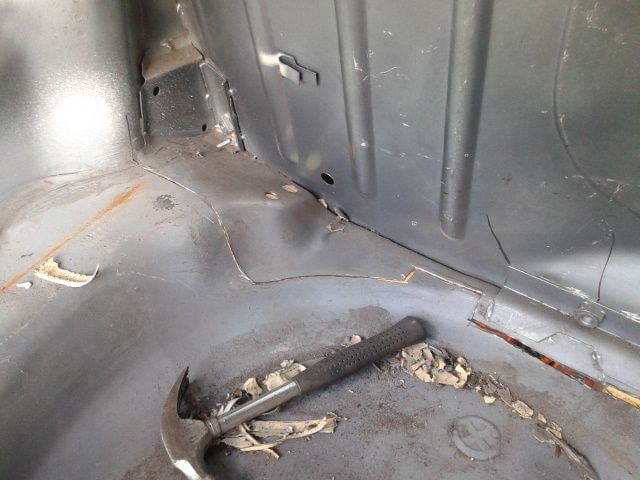
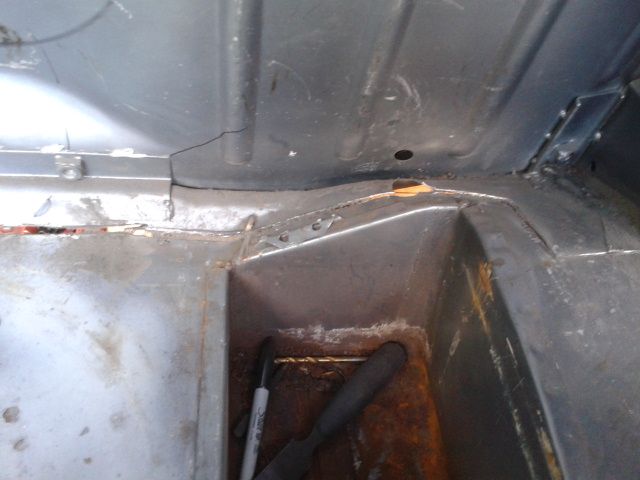
had a poke at the subframe and its actually very solid! just a lot of surface rust. i think i will try sell this on. any ideas how much its worth?
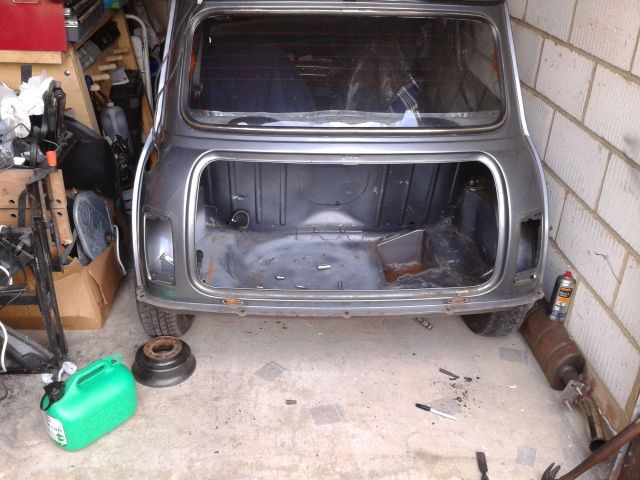
now for the rust update!
heelboard- good i am really happy with not cutting that out.

boot floor, closing plates and valance- s**t they are being cut out tomorrow and heritage ones ready to go back in :)

just these to clean up and assemble with new bearings and i can start bolting bits to my new rear suby
cheers
Elliott
#42
Ben_O
-
- Paint Doctor
-
- 9,794 posts
Mill Road Garage
- Location: Isle of Wight
Posted 24 June 2014 - 10:11 PM
Nice going mate.
Good luck with the floor, i've got all that to come with mine.
Did you use heritage door skins?
Ben
Edited by Ben_O, 24 June 2014 - 10:12 PM.
#43
MrElliott
-
- Members
-
- 419 posts
Speeding Along Now
- Location: Surrey
- Local Club: Box Hill Mini Club
Posted 25 June 2014 - 07:15 PM
Nice going mate.
Good luck with the floor, i've got all that to come with mine.
Did you use heritage door skins?
Ben
yes all heritage or genuine parts being used in this one from now on. the boot floor is a nightmare at the moment as its fixed in there so securely and can get the grinder in to cut it
will upload some picks to show todays apauling progress
#44
MrElliott
-
- Members
-
- 419 posts
Speeding Along Now
- Location: Surrey
- Local Club: Box Hill Mini Club
Posted 25 June 2014 - 07:20 PM
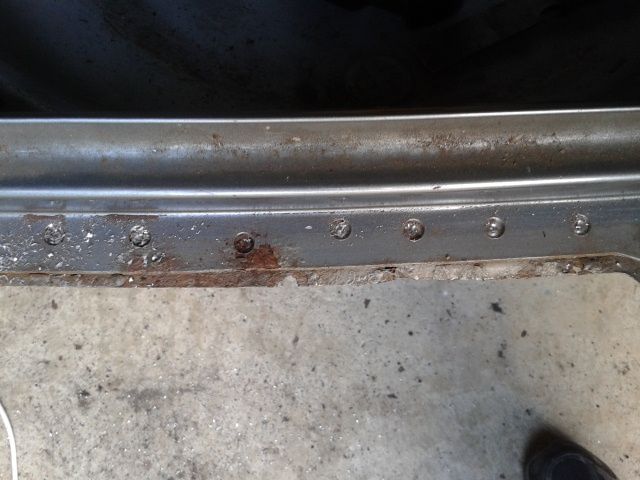
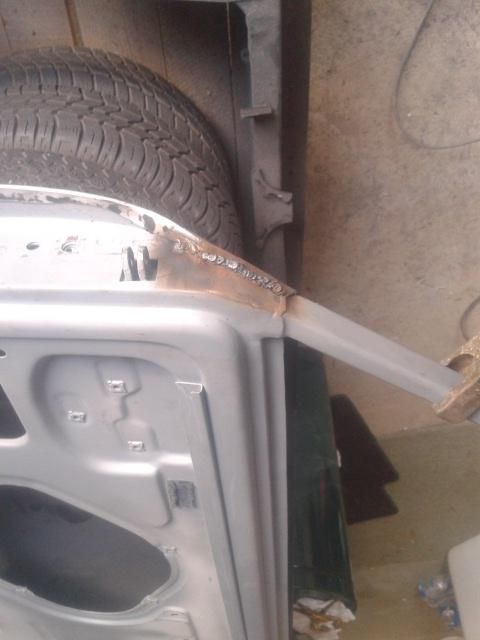
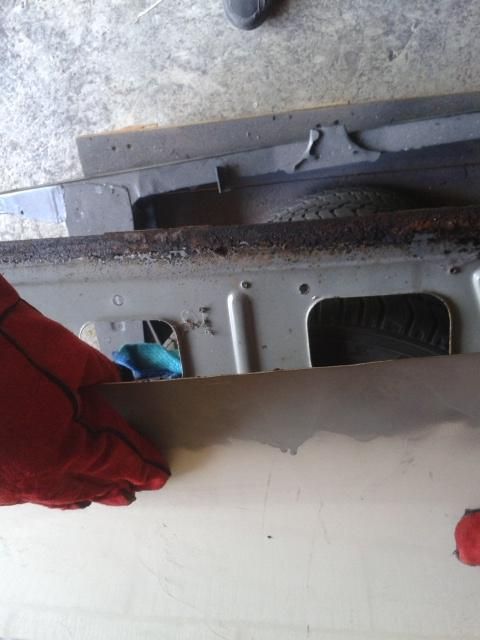
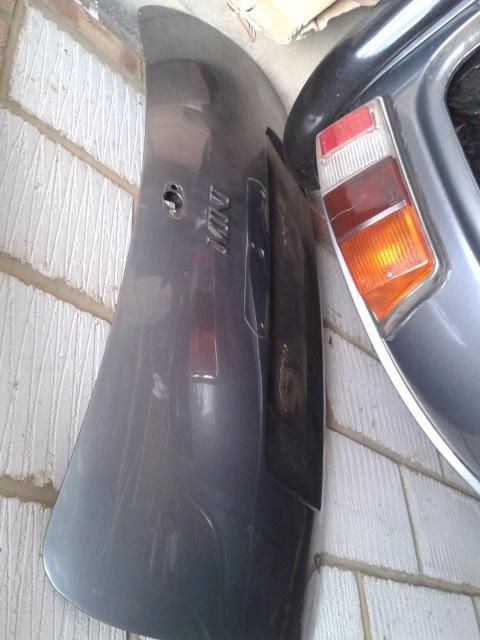
drilled out the spotwelds on the bumper lip
cut across the back with the grinder. I hate working in a tight space with that thing!
cheers
Elliott
#45
Ben_O
-
- Paint Doctor
-
- 9,794 posts
Mill Road Garage
- Location: Isle of Wight
Posted 25 June 2014 - 07:24 PM
shame you can't get it on it's side. That way you could cut it from underneath.
You need a spit mate!


Also tagged with one or more of these keywords: roundnose
Projects →
Mini Saloons →
1976 Mini 1000 Le "stripey"Started by cafeclassic , 03 Sep 2025 |
|

|
||
Projects →
Mini Saloons →
Mini Cooper Project - Finally StartsStarted by piphatch , 08 Jan 2025 |
|

|
||
Projects →
Mini Saloons →
1965 Austin Mini Restoration - Canadian Mk1Started by DoubleEh , 14 Nov 2022 |
|

|
||
Projects →
Mini Saloons →
Project Joe - 1991 Mini Mayfair 998Started by Eggers , 02 Jun 2022 |
|

|
||
Projects →
Mini Saloons →
Mpi Dashboad ProblemStarted by mikeprez , 22 Dec 2021 |
|

|
0 user(s) are reading this topic
0 members, 0 guests, 0 anonymous users


