Jump to content


Photo
- - - - -

92 City, My First Rebuild.

roundnose

  • Please log in to reply
670 replies to this topic

#646 big-jay

big-jay

    Super Mini Mad

  • Members
  • PipPipPipPipPipPip
  • 518 posts
  • Location: Birmingham
  • Local Club: British Mini Club

Posted 27 September 2015 - 07:54 PM

I've got an update to do, just haven't got round to uploading the pictures yet. Will try and get one up tonight or if not it'll be tomorrow for sure.


Well...That went to pot !

I'll be honest, I've been really rather lazy of late but this weekend I decided to pull my finger out and get some more progress made on the Mini.

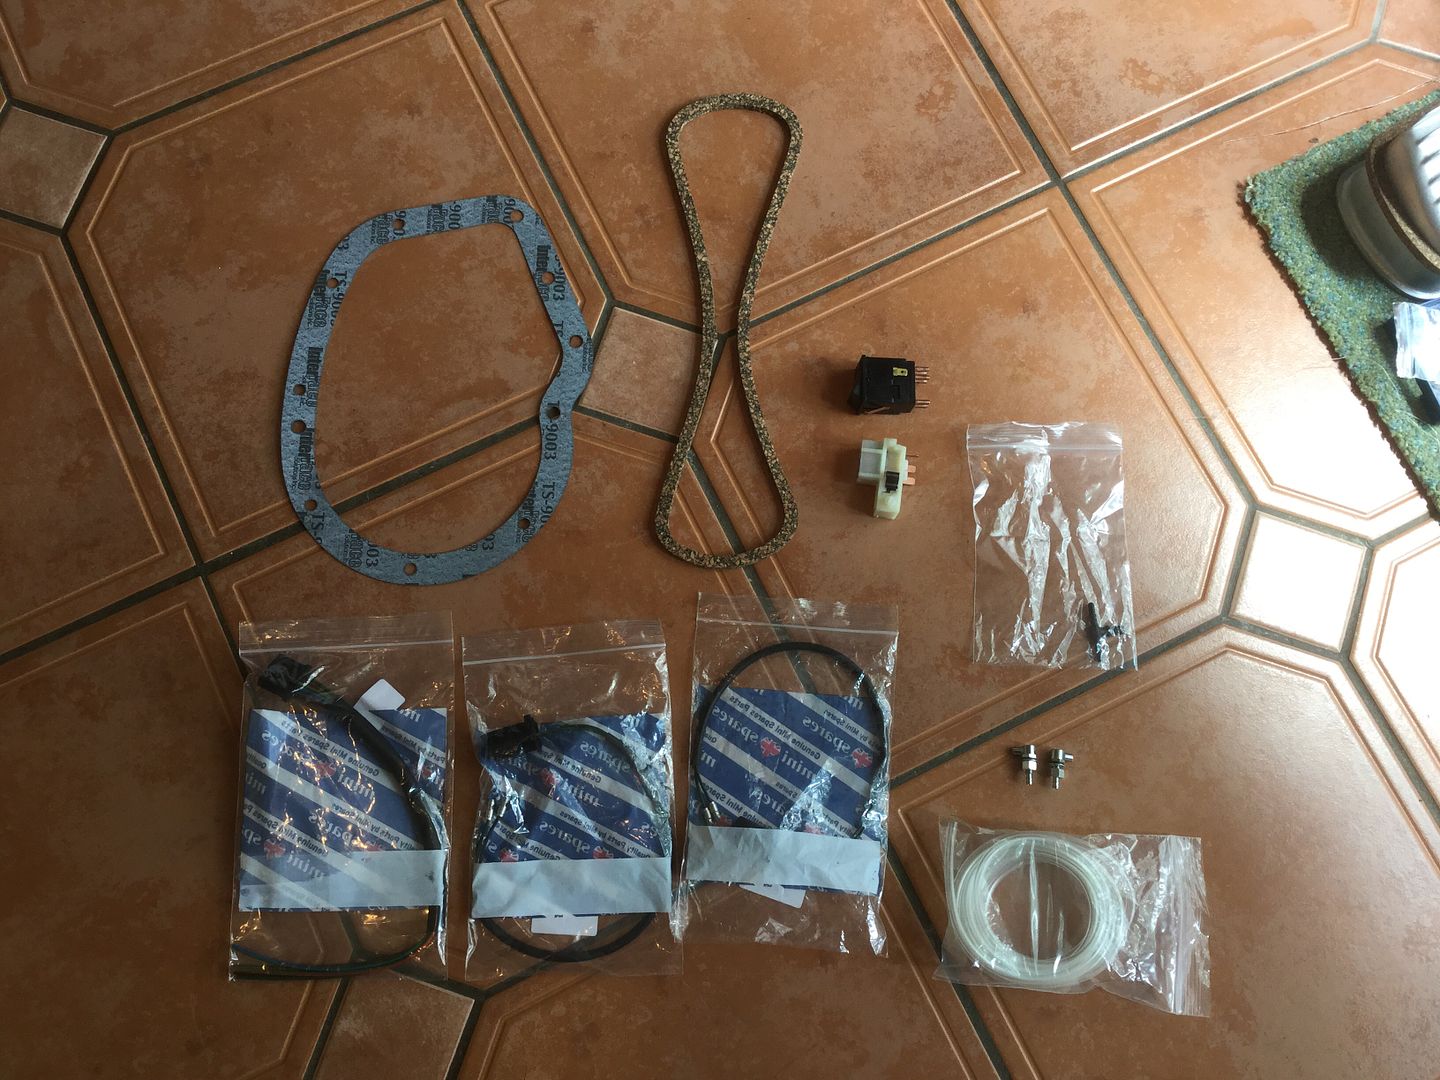
I'll start with the bits I purchased.

Few bits from Minispares -

626875c808987b73a533b7b214a09ee8_zpsnpi1

b8a79264247075e4a5ad360801680e1a_zpsw6al

3bf2b24816fda7105c6381be563ab599_zpsfzdx

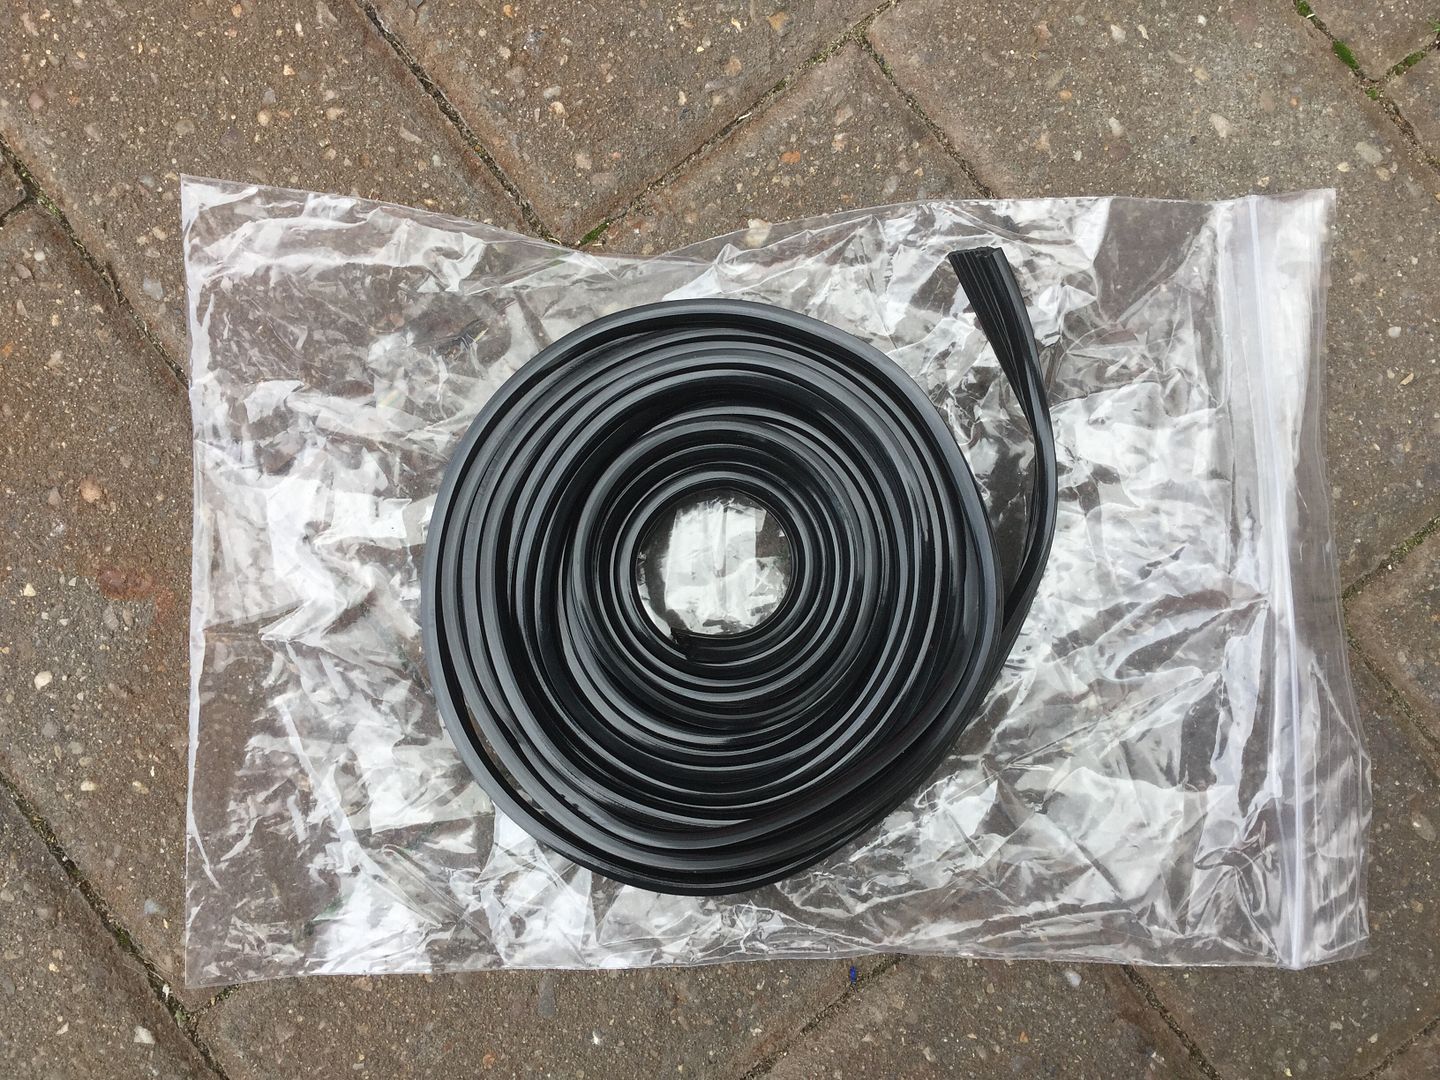
And some rubber wheel arch moulding trim -

f91a56a845fcc9ba9d0b90904131d419_zpsoj9p

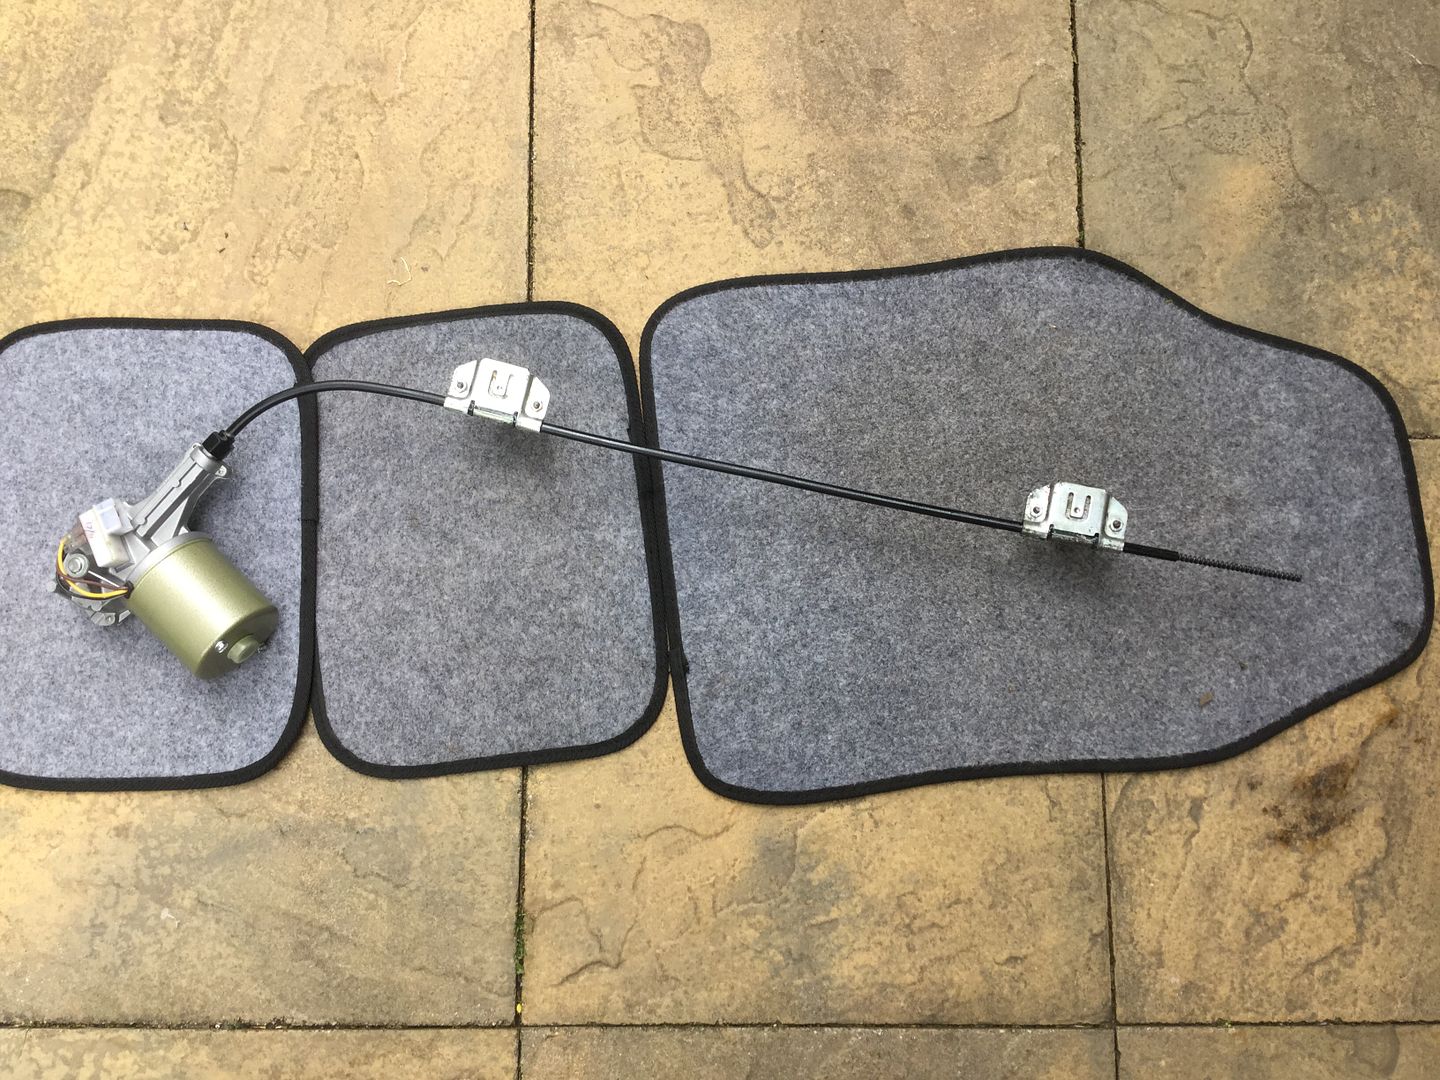
So, first job of the day was to get my wiper mechanism built up, I've replaced the 'worm' and also painted up the tubing that it sits in -

c50e696acb9edf4b20d4bae45cc3cdec_zpslydm

Then I plumbed in the washer tubes using the t-piece I bought -

3e50afd9a1f79673f1752604aa6ce054_zpsisxk

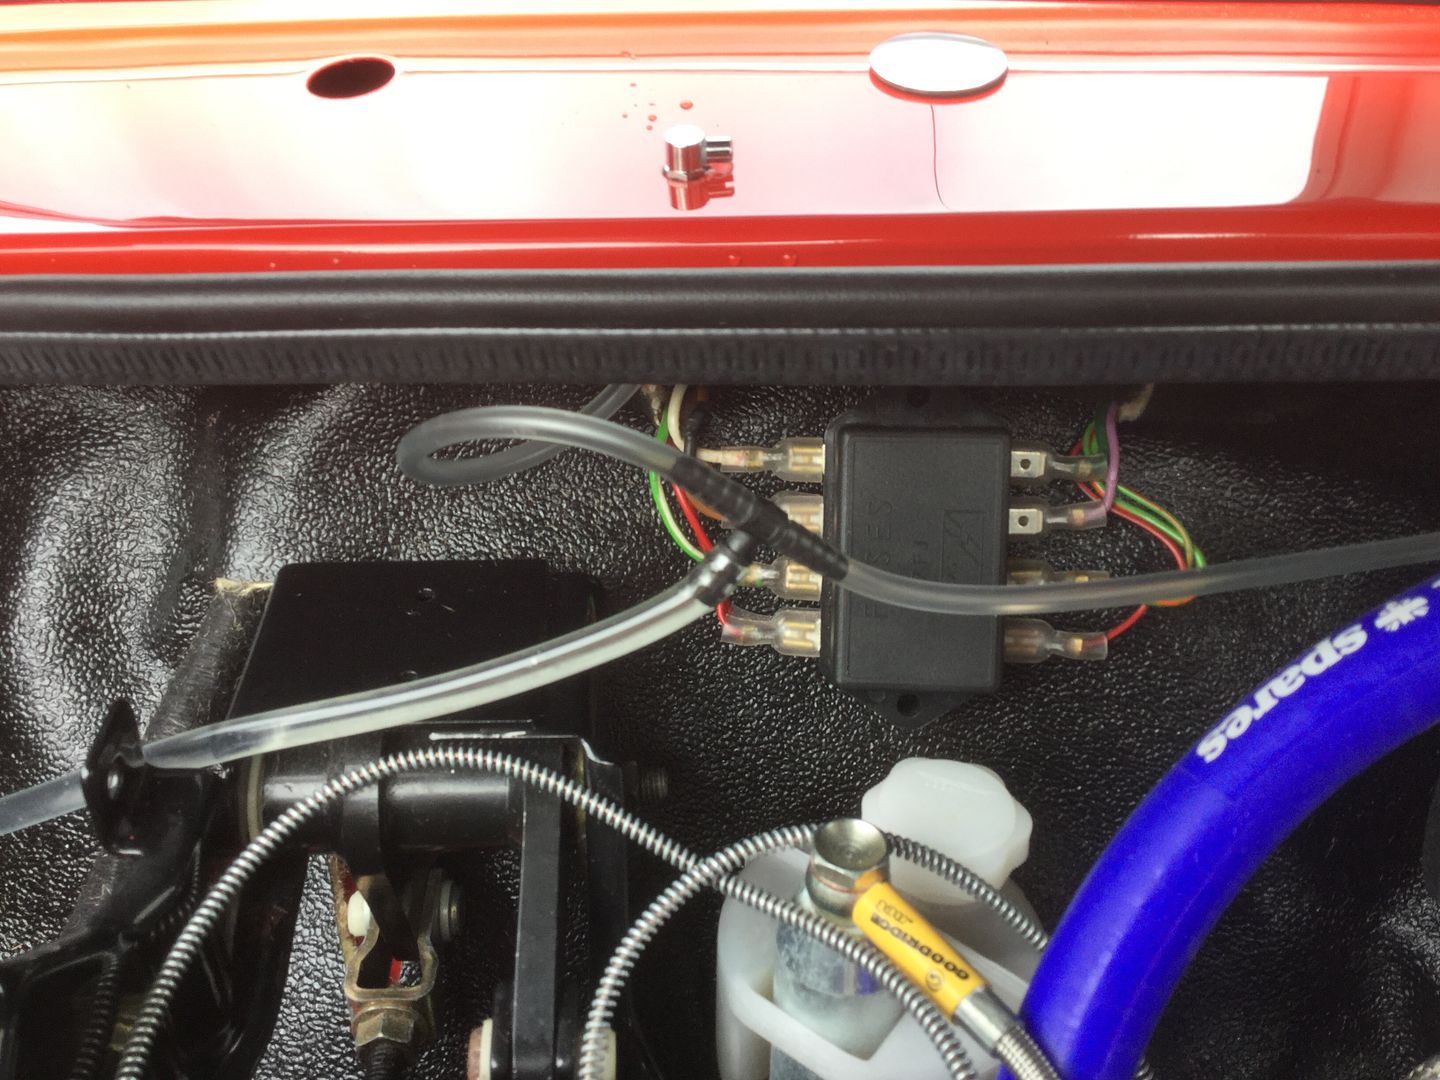
And fitted the washer jets and stainless wiper hole blanker's -

bebe1dfb55786981fb59f75687116fb9_zpsfklf

I also fitted the wiper mechanism but forgot to take a picture of that in place. Next on the to do list was fitting the door mirrors so I got the rivet gun out and fitted some aluminium M5 rivnuts -

89a64307130fa510bce7db1be0365db0_zps2u6a

I used some stainless button head Allen bolts to secure the mirror to the door -

ec42cc23783f70cff47694593d02a60a_zpsmoio

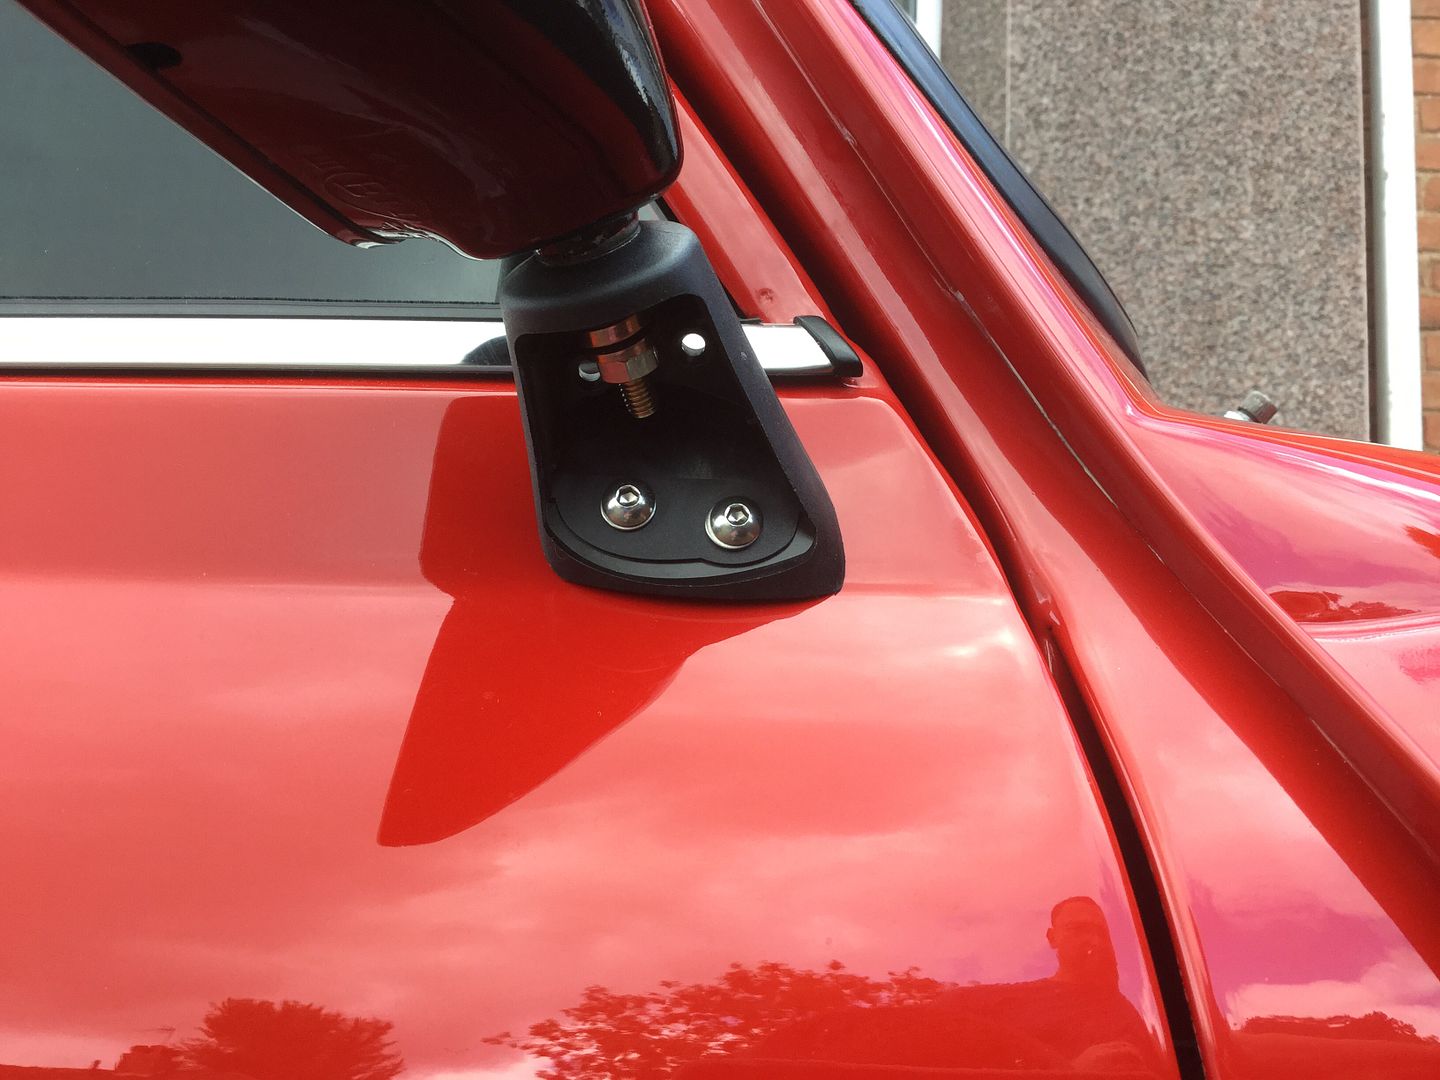
A couple of shots of the mirror fitted -

1458a6aad64a10eb5a0f039649f119b3_zpstcxa

b62a76b142880d821ecf69e3330f19f2_zps56zy

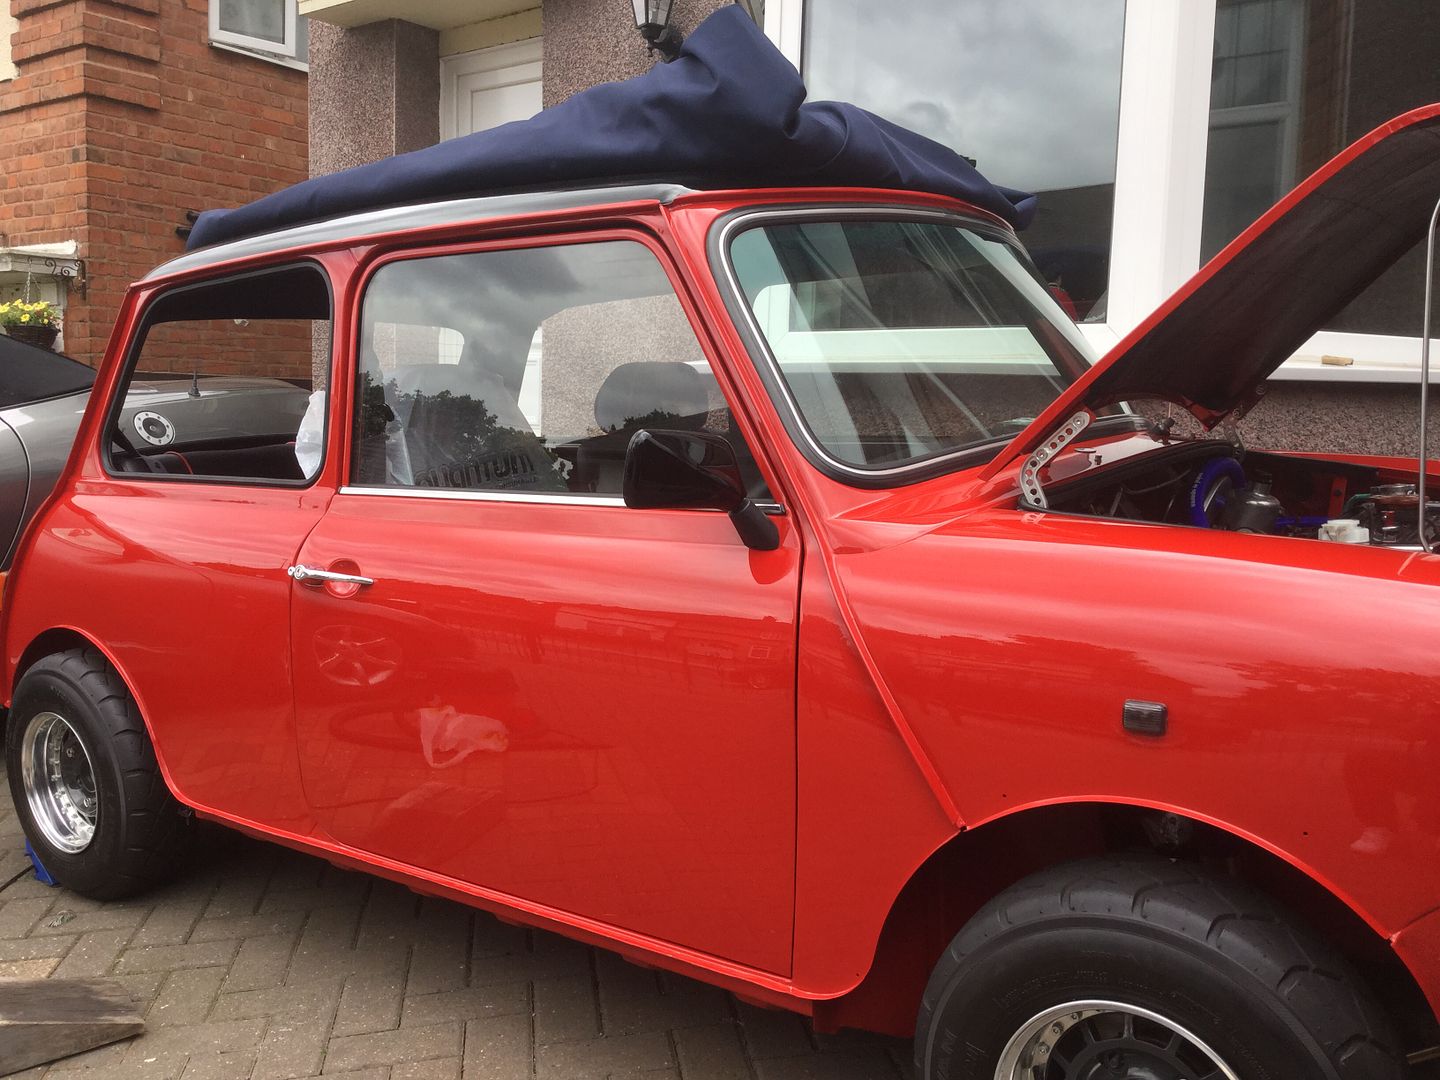
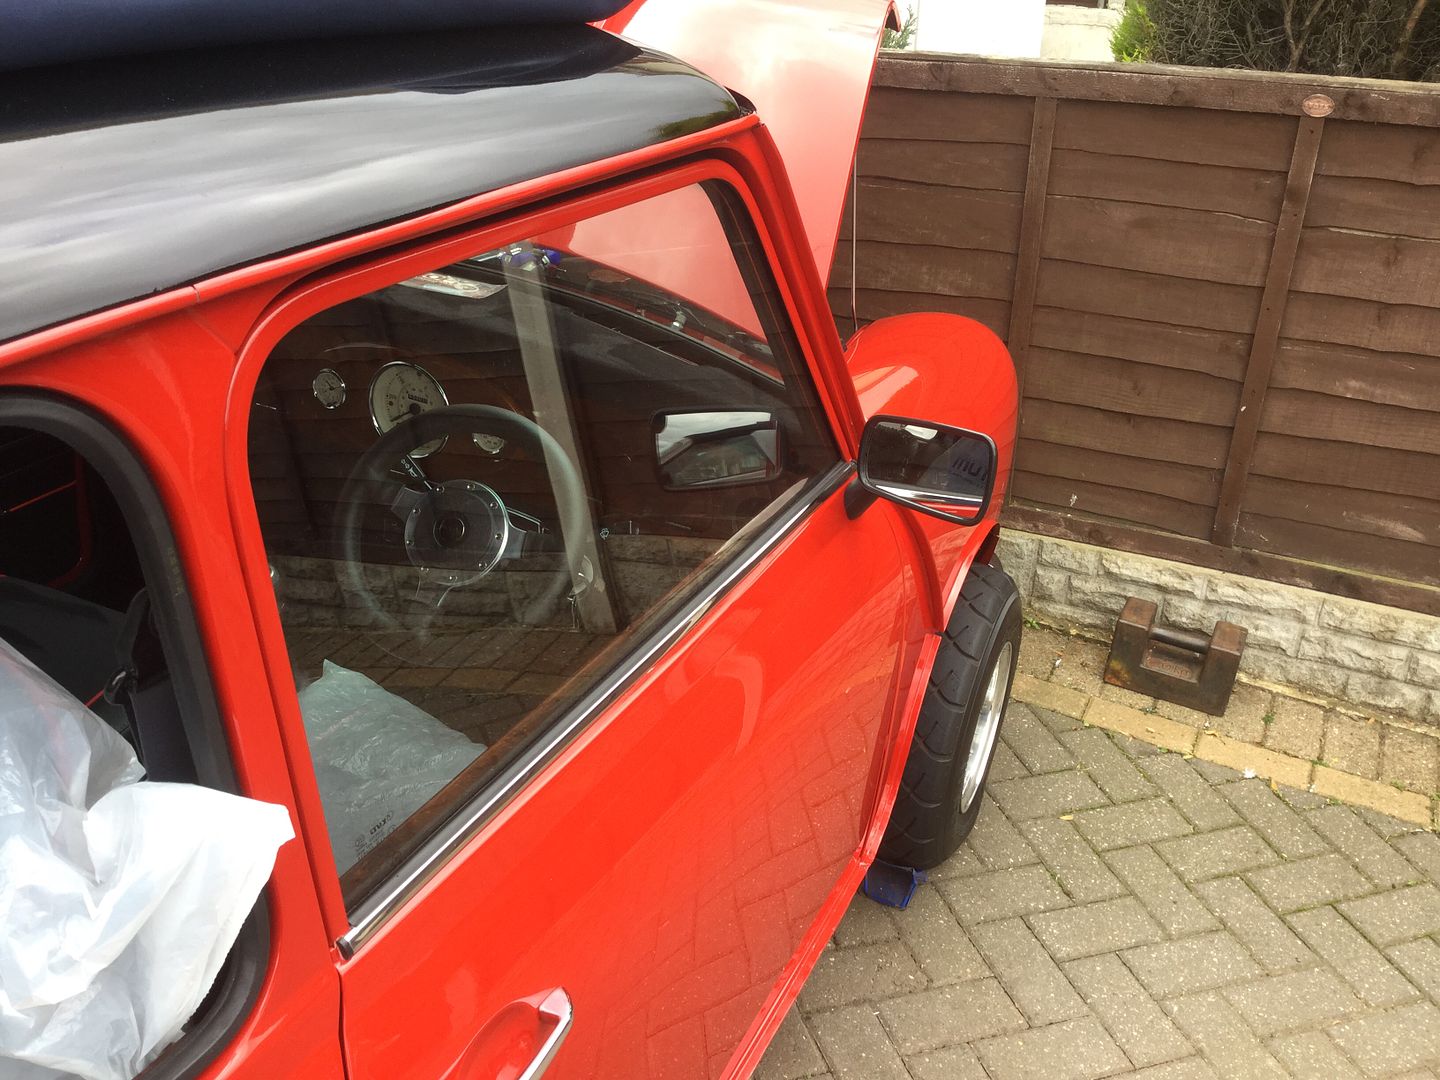
Rinse and repeat for the passenger side.

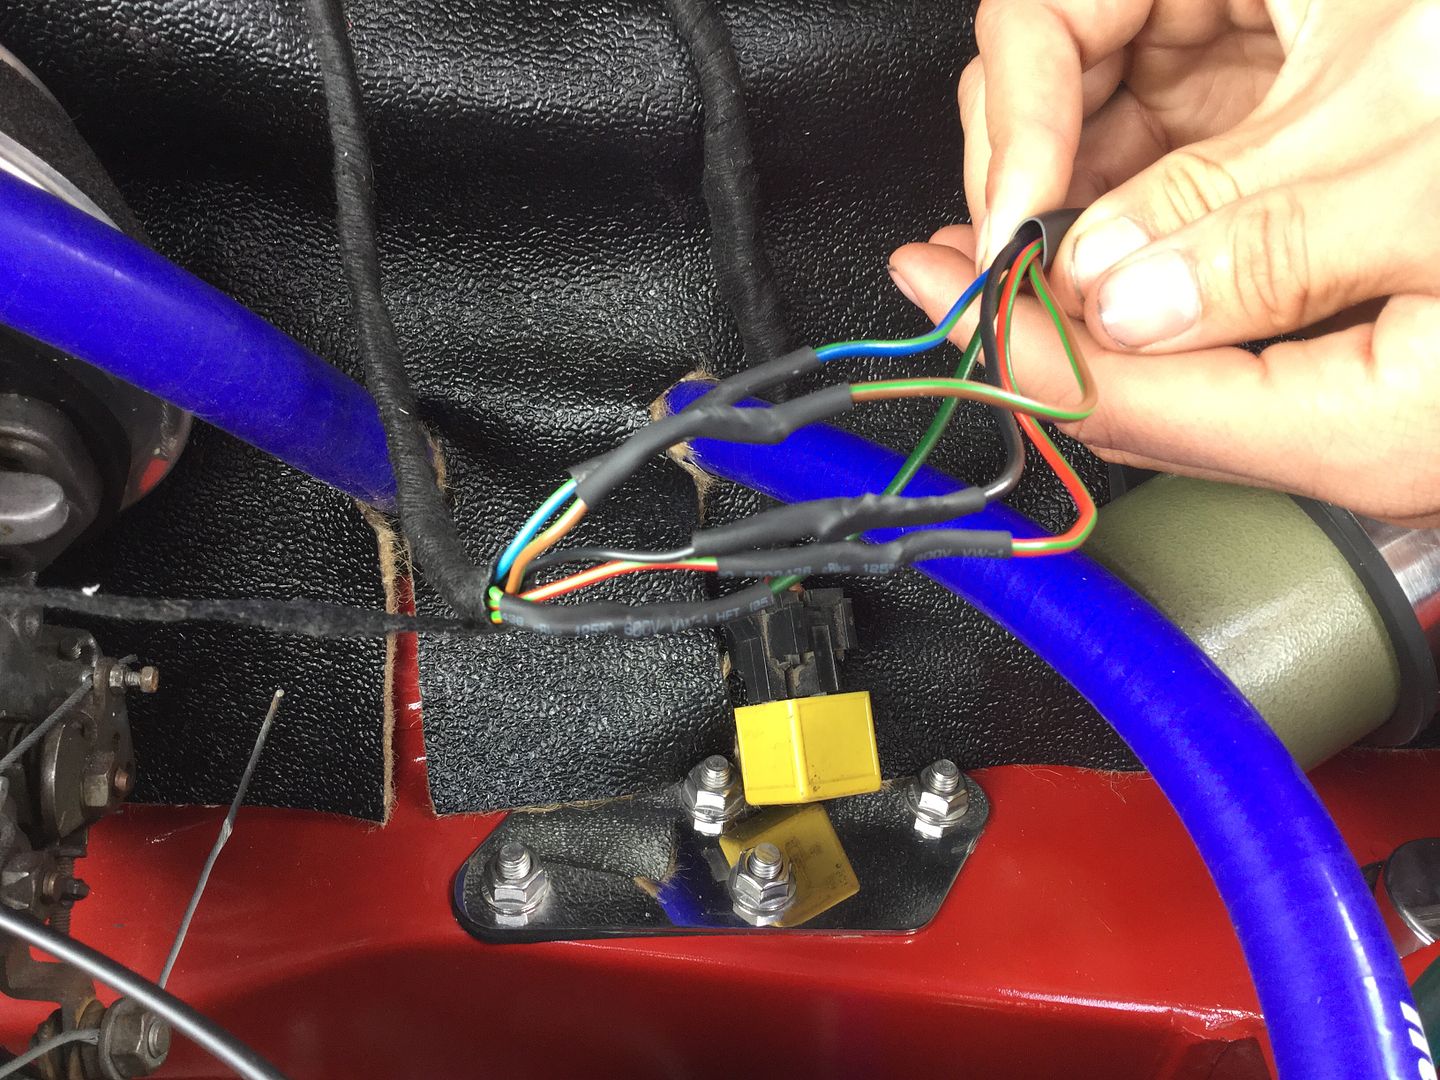
That took me until midday-ish so I decided to crack on and finish getting my headlights and front indicators in. First off a bit of wiring was required, I swapped the bullet connectors for some spade connectors on the main loom so I had to modify the headlight looms to fit those.

Here's the wires all connected up -

6204d50d1d947d07c5e0d8814bf48f74_zps5nxc

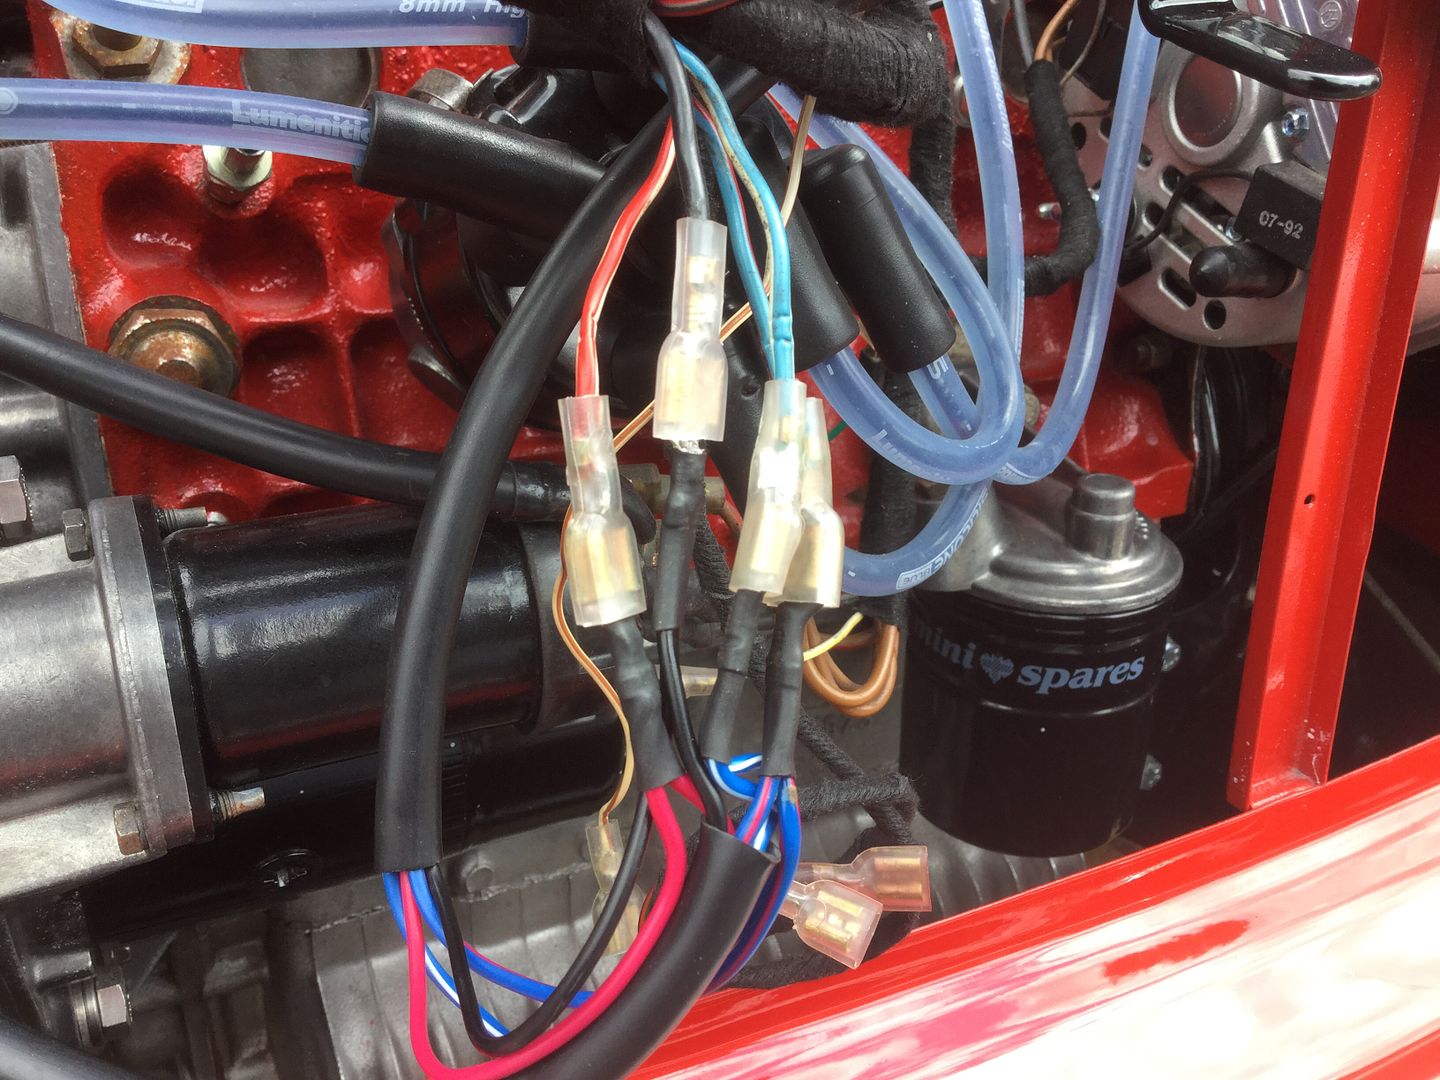
And then shrink wrapped -

f3bc2aabd4e7037707f93de8d83f90ba_zpsakmn

I bought some ready made indicator looms for an MPI Mini from Minispares so I had to modify those to fit my indicators. Here it is out of the packet -

53d7a405d6408c02635d805379e2116a_zps3j0f

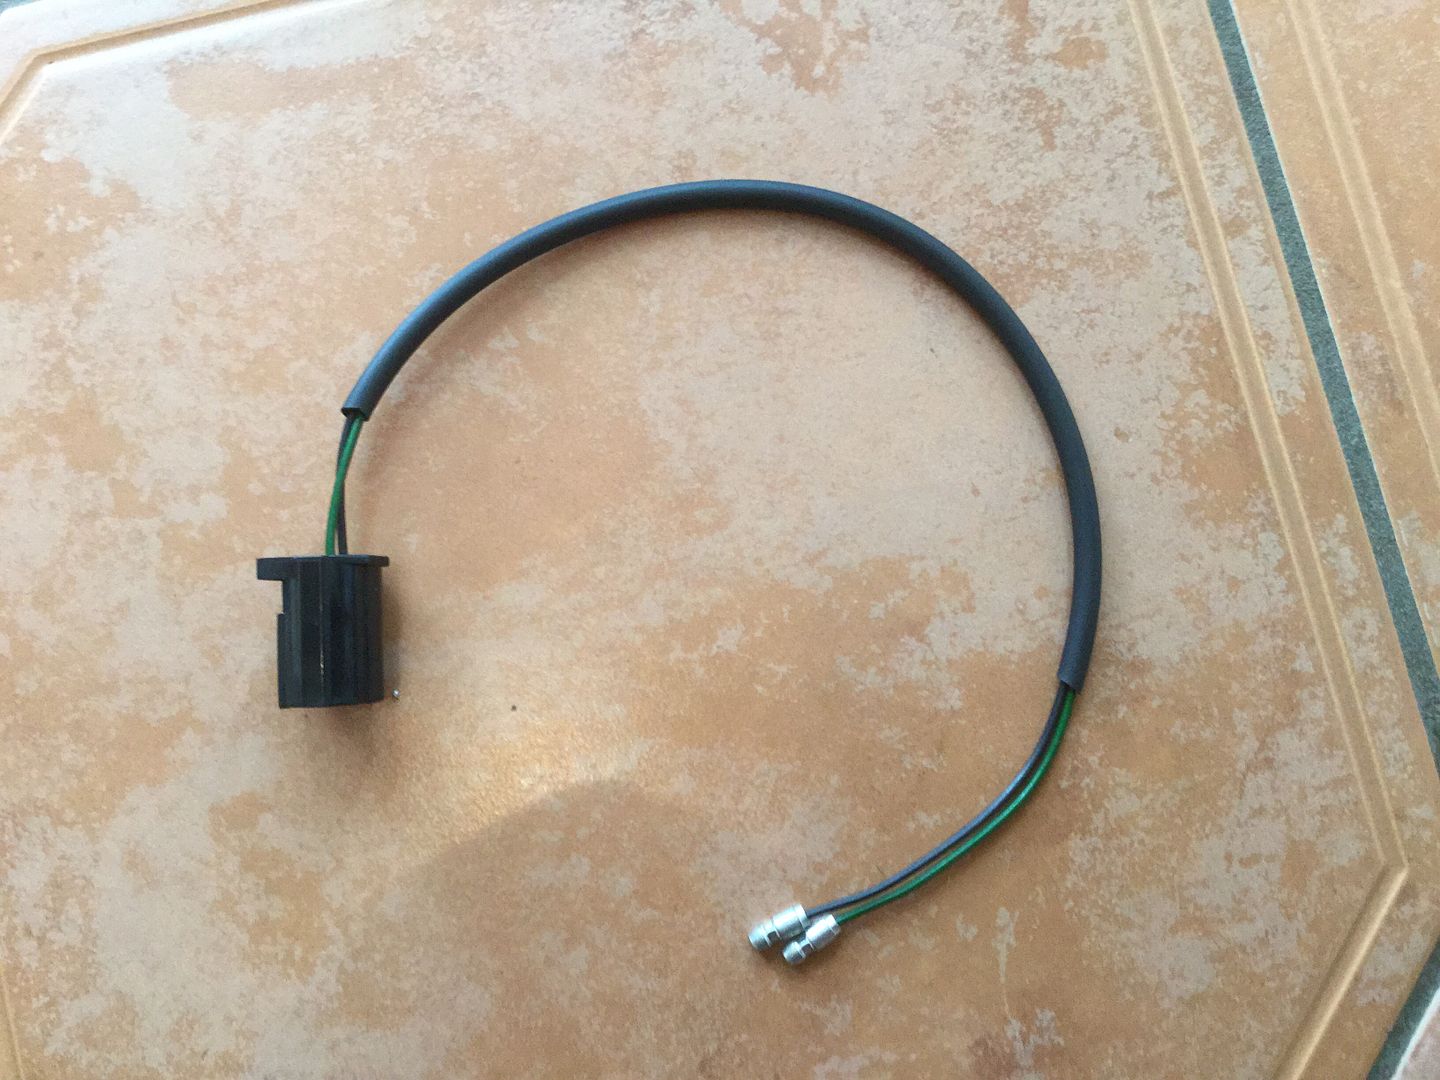
Snipped the plug end off -

4b68df5f5cdbe494103b6a4959de363c_zpsj7fg

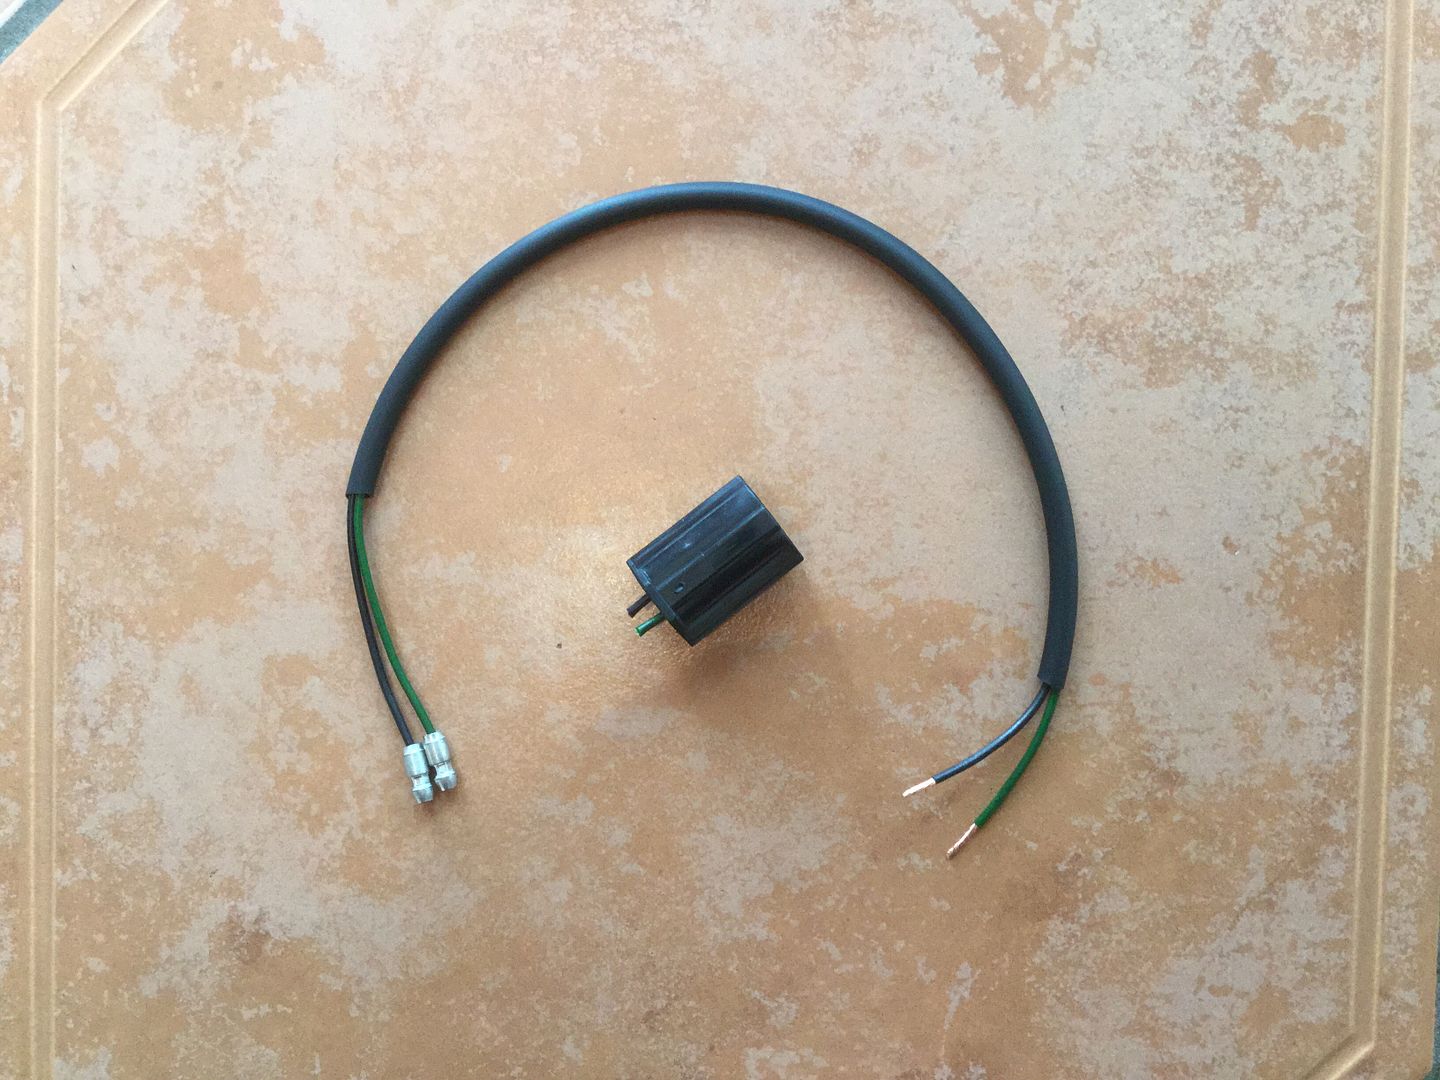
And soldered on some male spade terminals -

bf2cf721d23ed2ba63ad5912bff0b384_zpsvmec

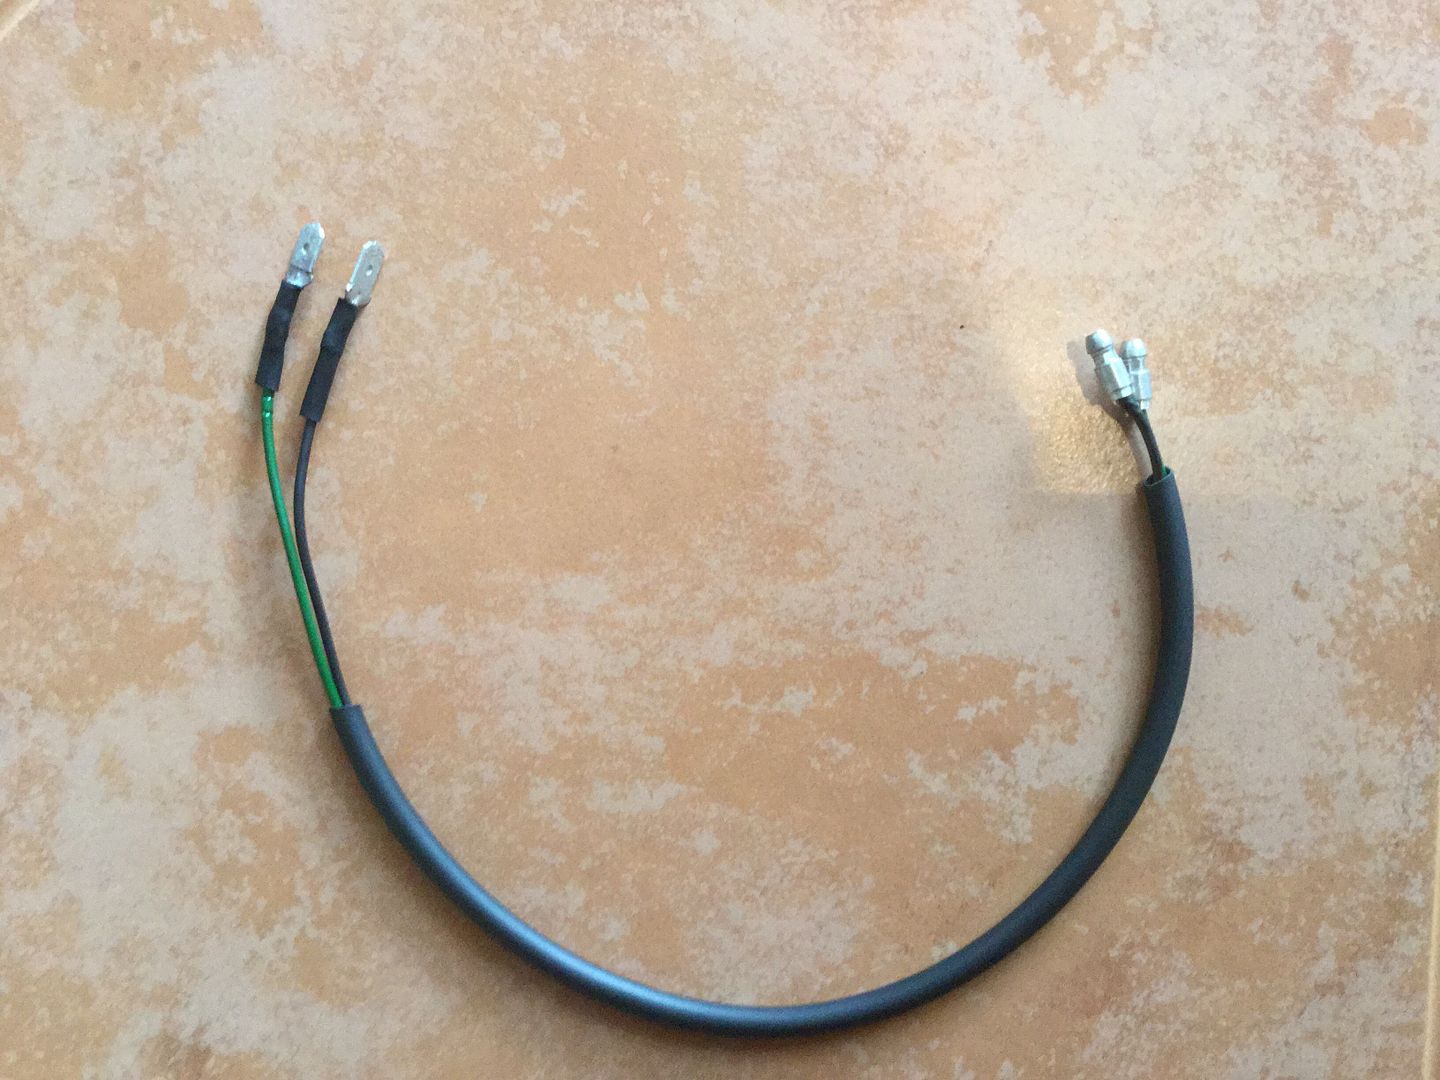
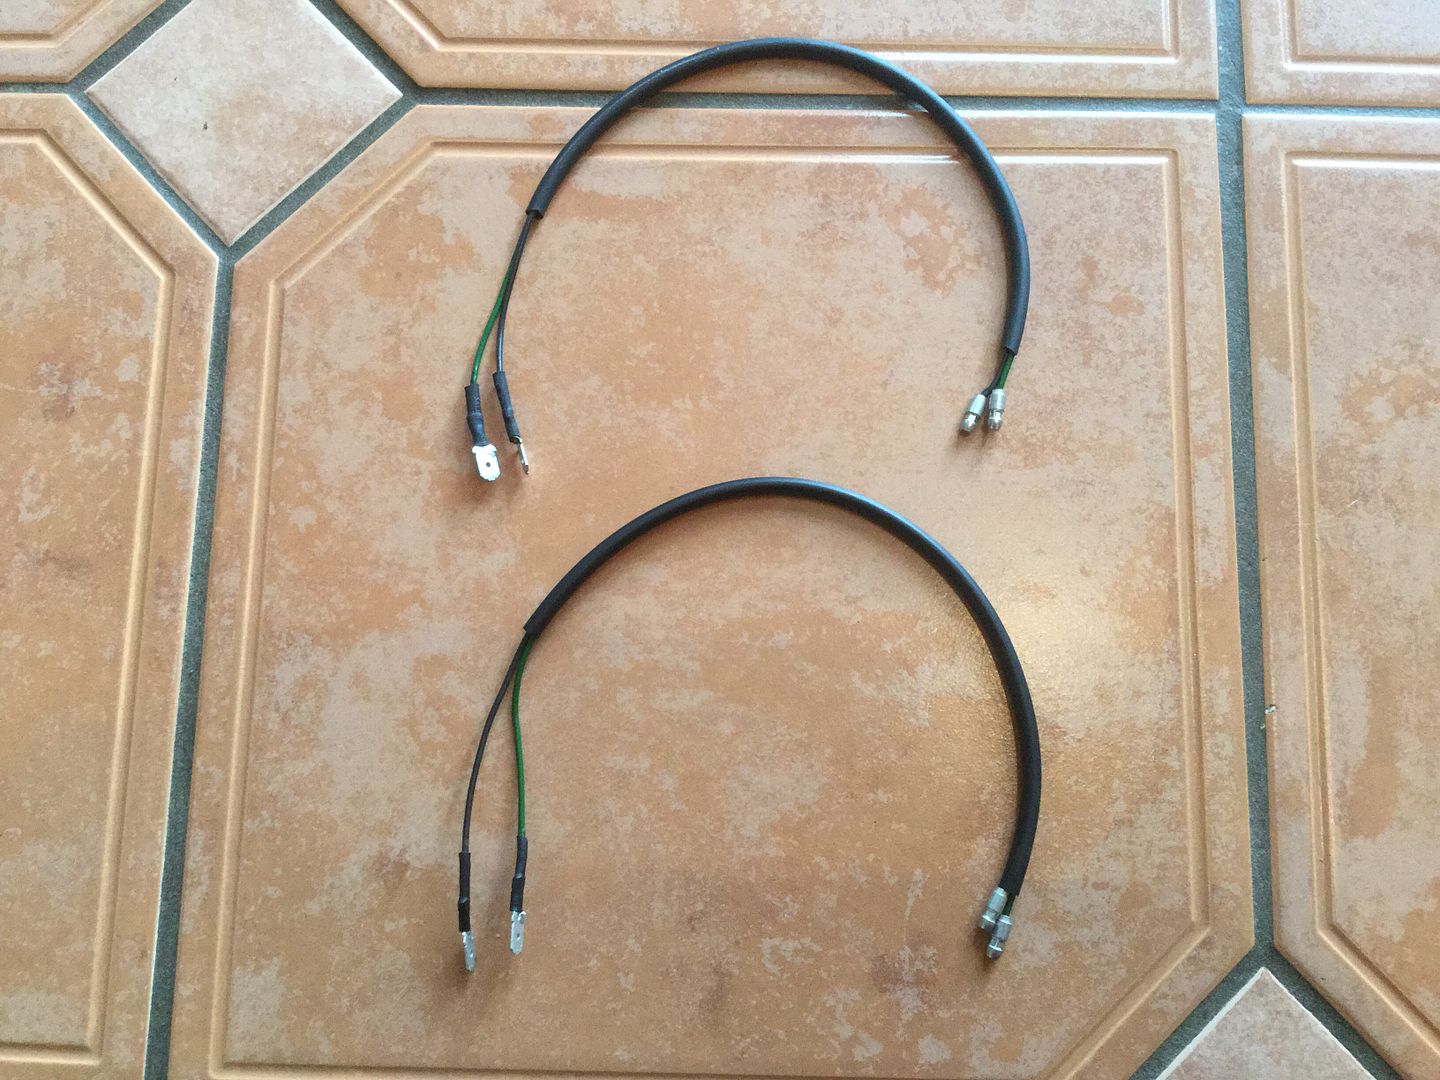
Here's both the looms ready to be fitted -

366d302f70b21d7880541e19fb99d128_zpsfrrt

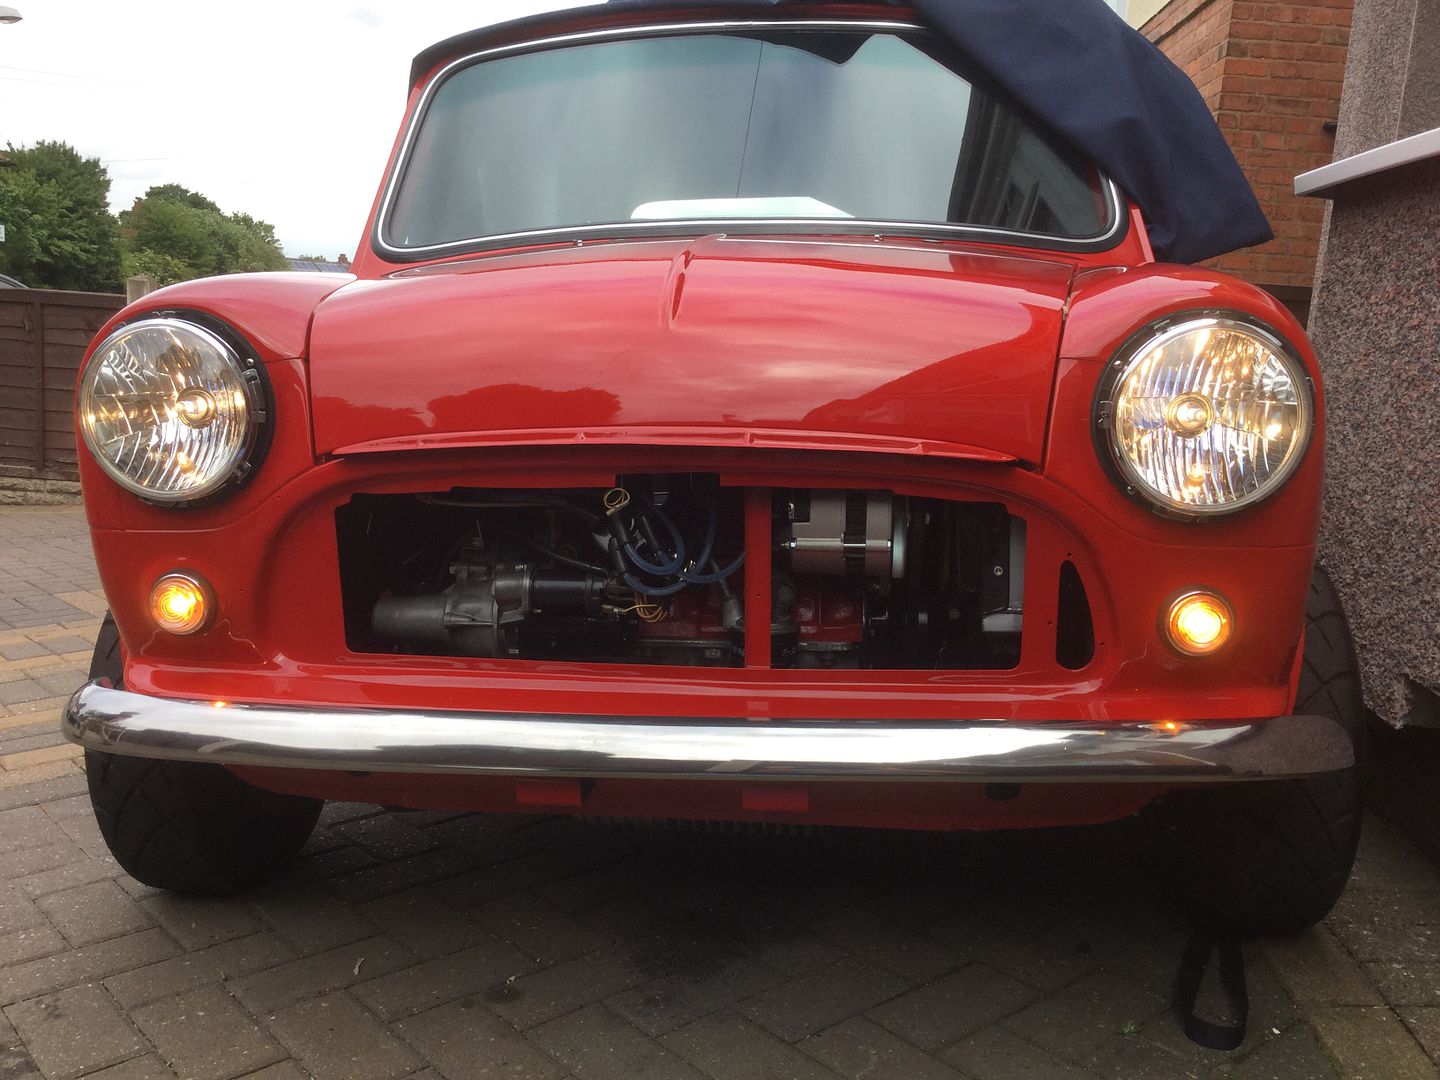
With all that wired up and some Osram Night Breakers fitted into my headlights, this was the result -

fb23fc320a2fbd56bce77052ec5c4704_zpszkyi

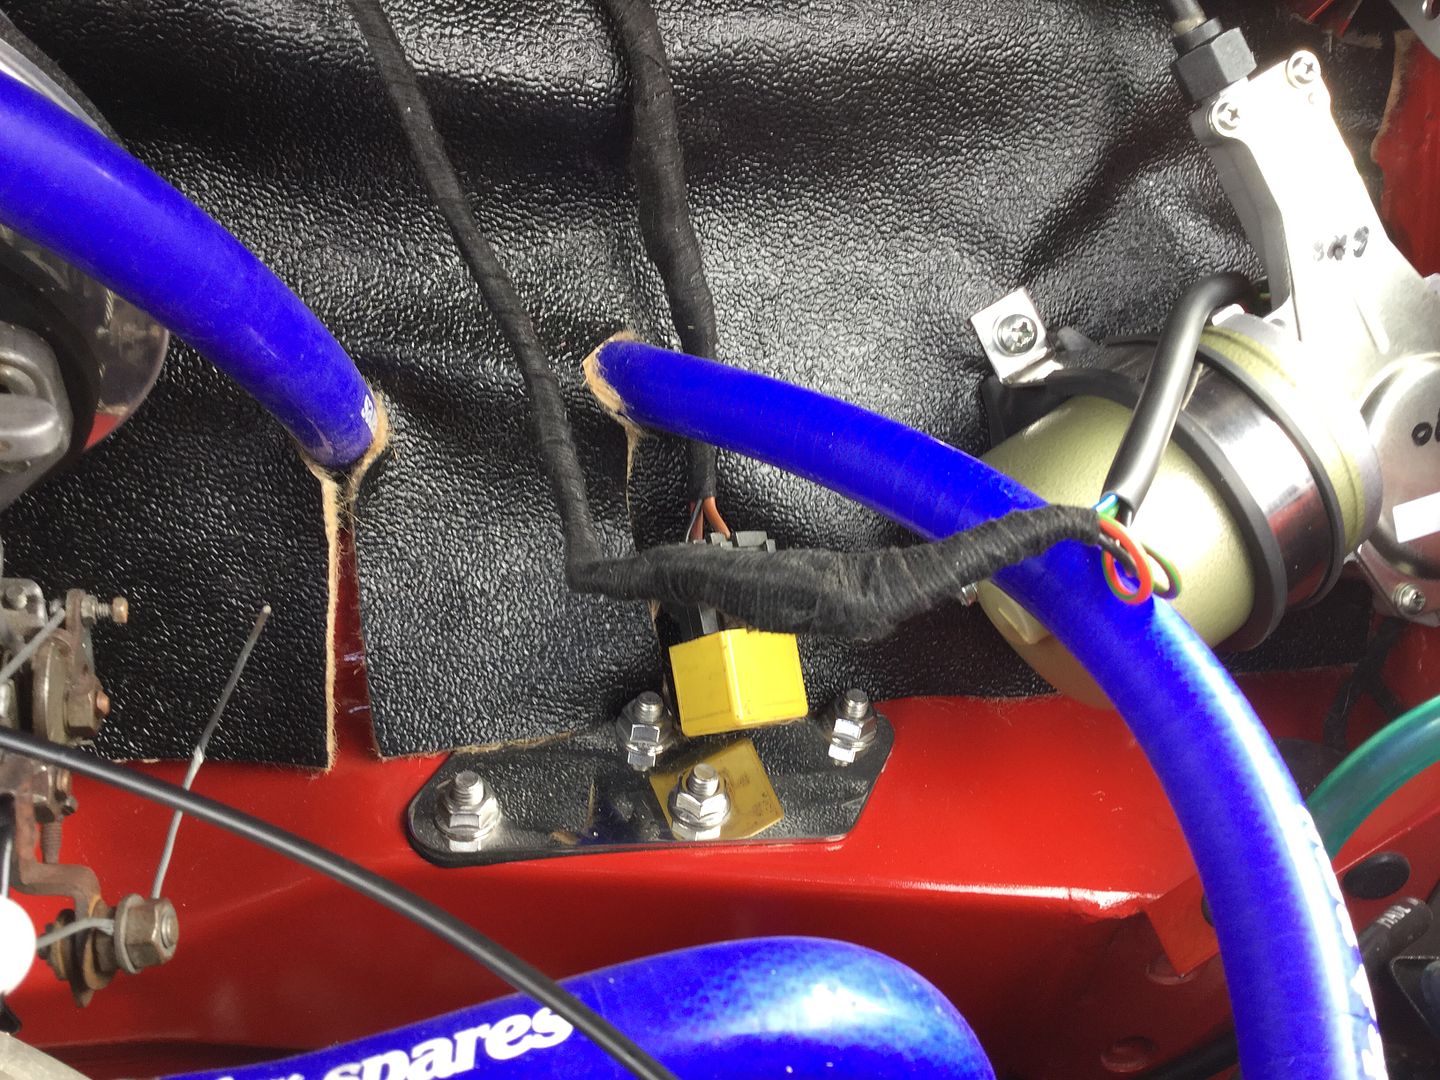
Whilst I had the soldering equipment out I also changed the wiper motor plug as I didn't spot that it was quite corroded when I refurbed the loom.

Here it is soldered up and shrink wrapped -

0bd58edaf13c5f97ee4d7a6cc1723b54_zpstxvt

And then wrapped in loom tape -

c795e94a329b9e67e8c9c9a1de21e4a4_zpsdzgd

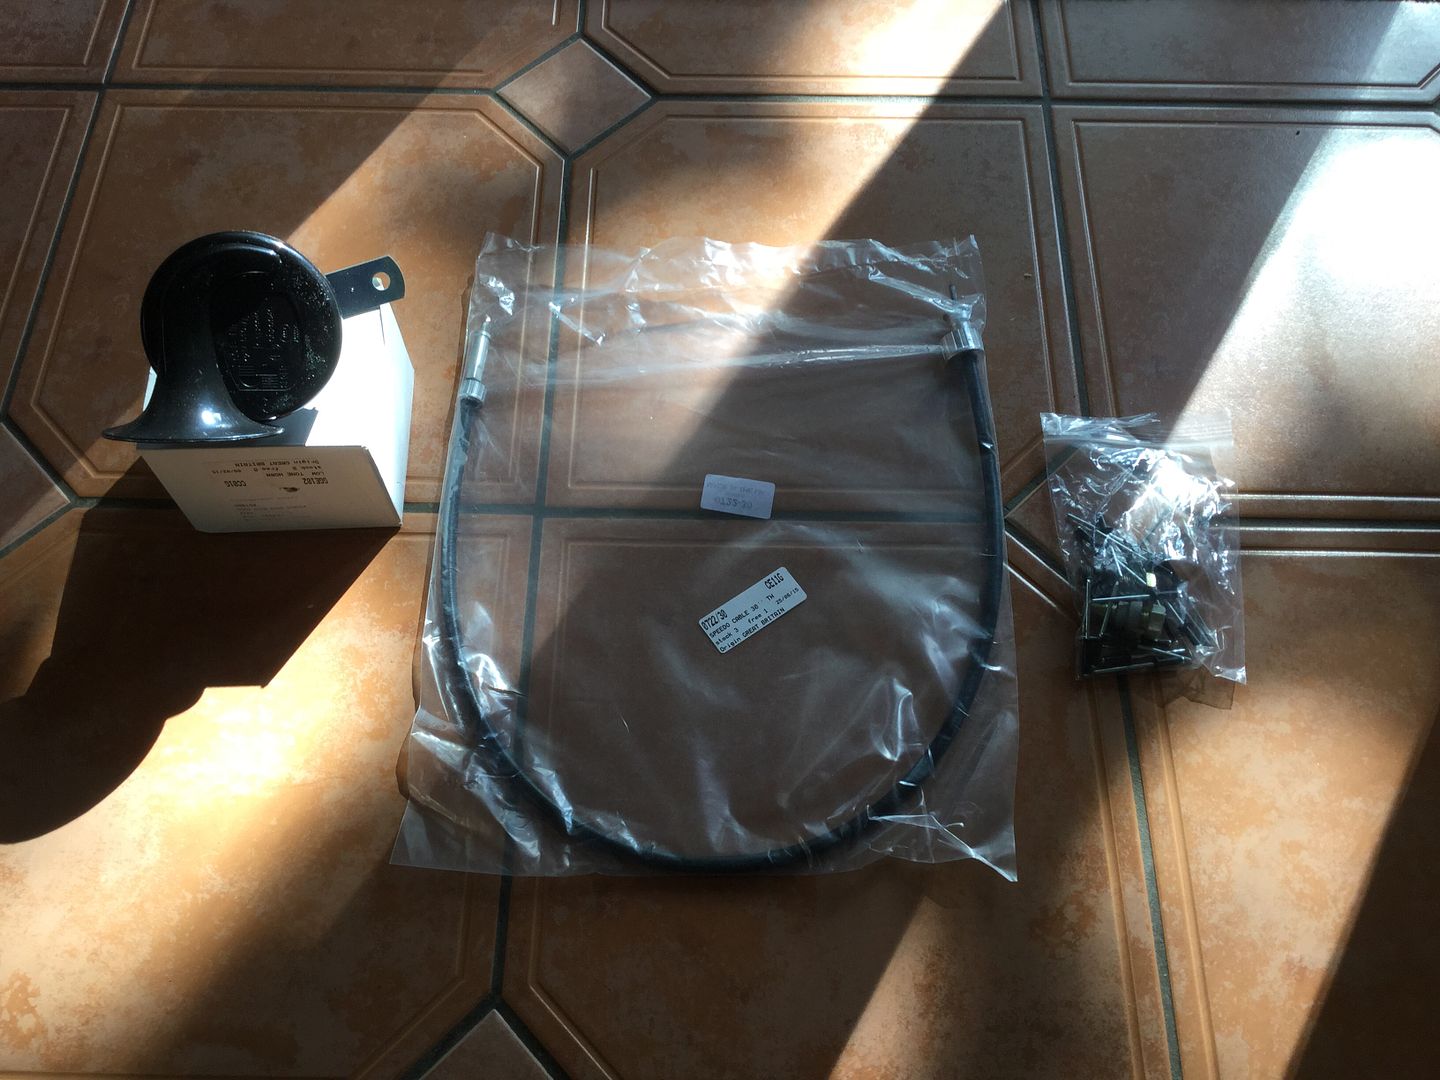
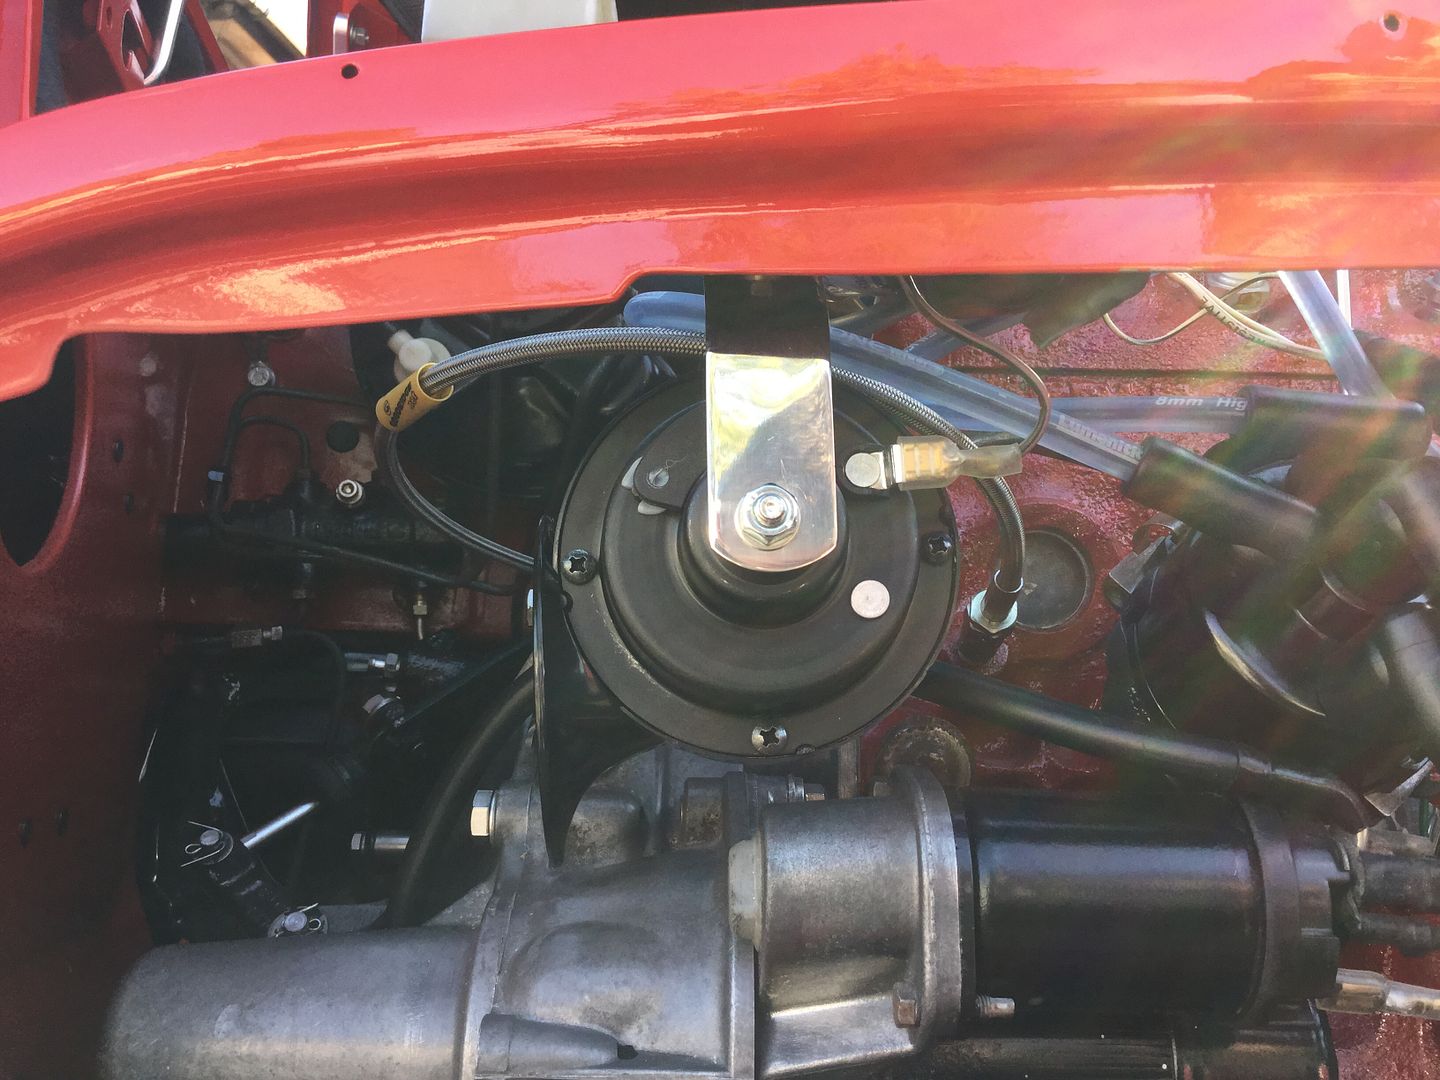
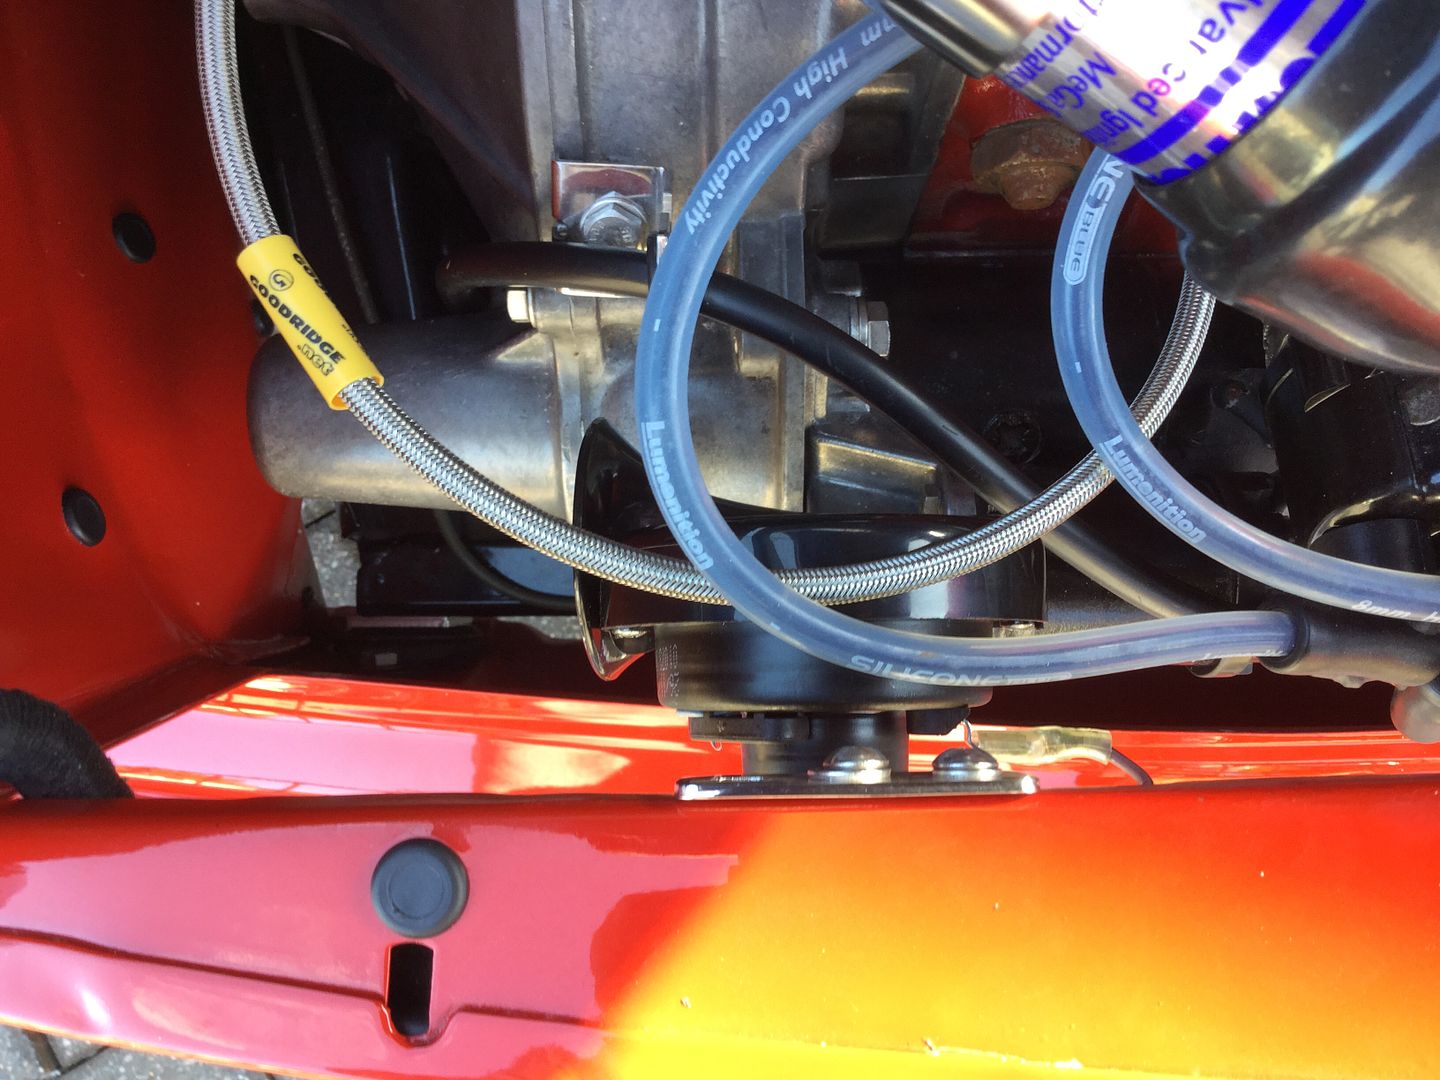
Fitted the horn along with a Smiffys stainless bracket -

da784cd241e05f5964f86ac47ff420bd_zpssiut

bf606863ea9b3c0f2f6e24c4d153abf4_zps4s64

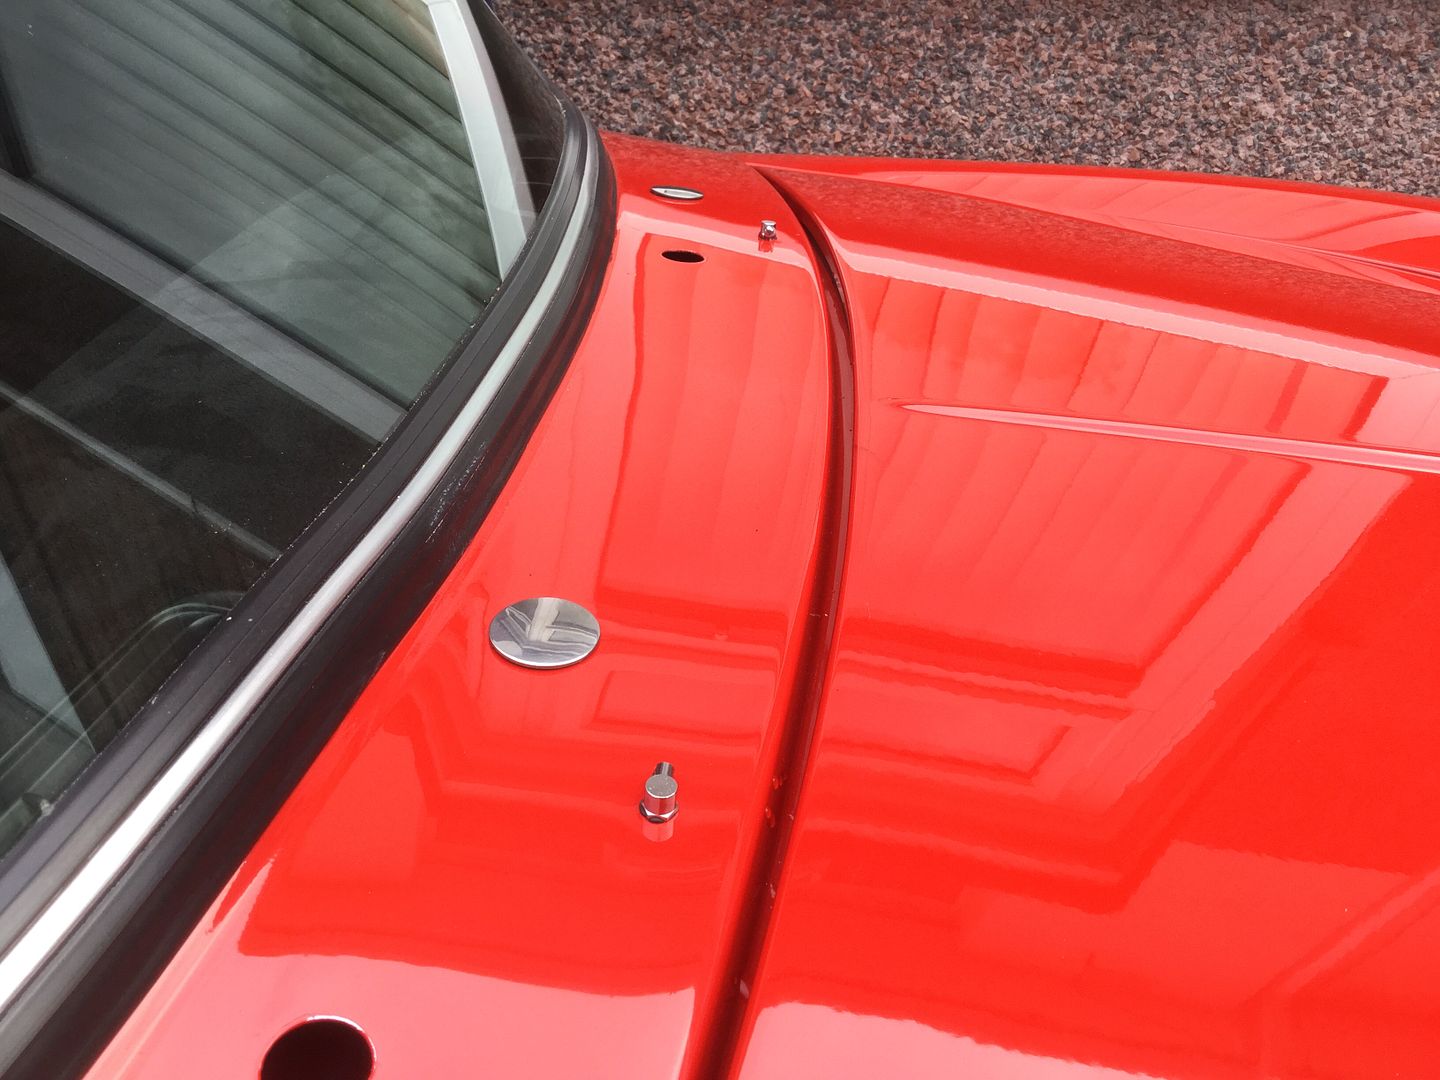
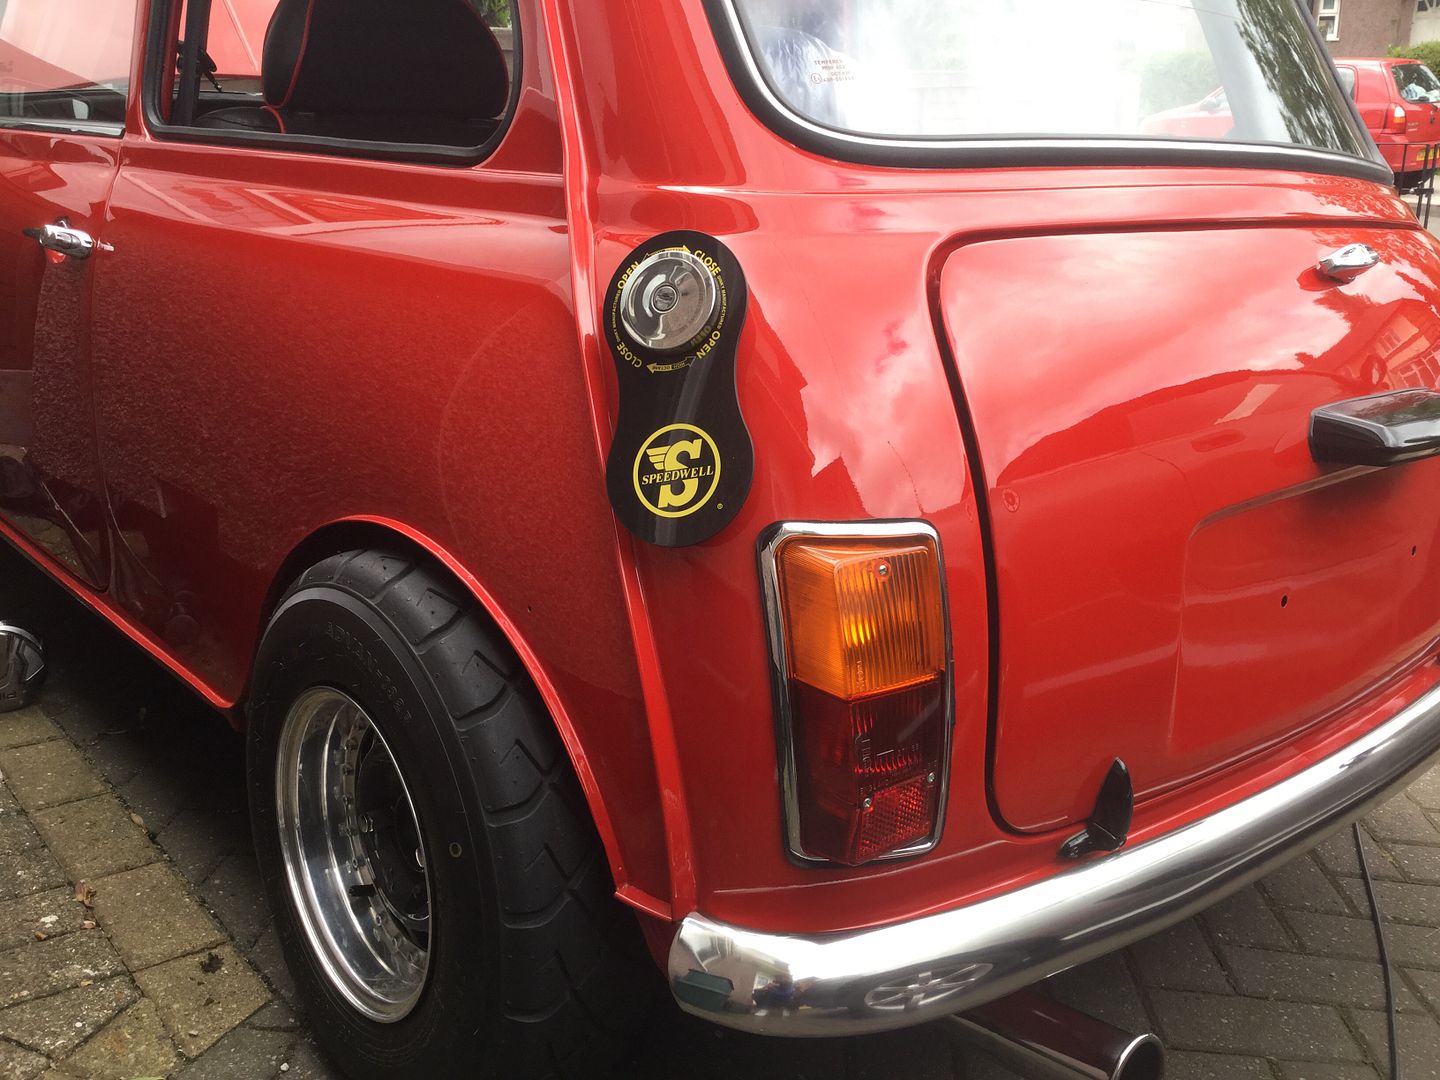
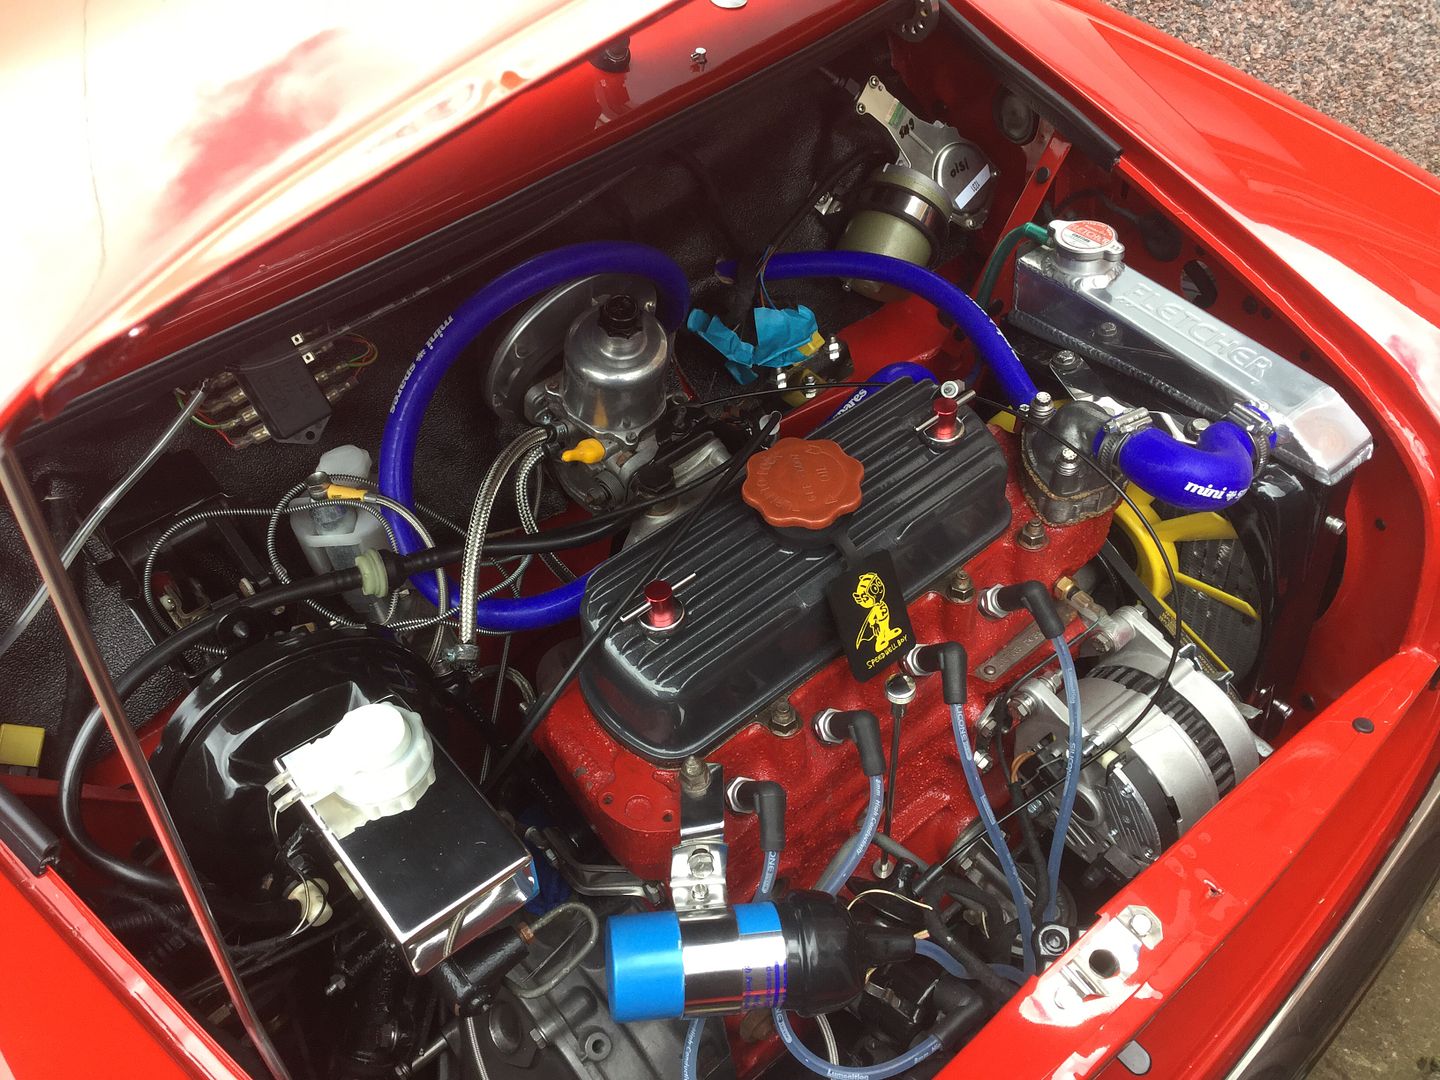
And finally I thought I'd fit my speedwell petrol bib and oil tag -

8d3dedd82ddecc986b6c939e04f289e0_zps5mid

cf5916db43b0a98ffc2fc3724abfe40c_zpslcdu

I've also started to fit my wheel arches so I'll have a few pictures of that tomorrow.

Jay.

#647 big-jay

big-jay

    Super Mini Mad

  • Members
  • PipPipPipPipPipPip
  • 518 posts
  • Location: Birmingham
  • Local Club: British Mini Club

Posted 27 September 2015 - 07:56 PM

Is this all finished now then Jay?


Sorry for the slow reply Ben, It's not too far off bud.

Jay.

#648 Jared Mk3

Jared Mk3

    Has a small thing but it does make a difference

  • Members
  • PipPipPipPipPipPipPipPip
  • 1,974 posts
  • Location: Kokstad, South Africa
  • Local Club: MOCKZN

Posted 28 September 2015 - 07:44 AM

Finally, an update! Lovely as always Jay. The petrol bibs aren't to everyone's taste, but I like it. Can't wait to see it with the arches fitted.


#649 alex-95

alex-95

    I am THE CLAMP MAKER

  • TMF+ Member
  • PipPipPipPipPipPipPipPipPipPip
  • 6,017 posts
  • Location: l

Posted 01 January 2016 - 11:40 PM

Any updates Jay?


#650 big-jay

big-jay

    Super Mini Mad

  • Members
  • PipPipPipPipPipPip
  • 518 posts
  • Location: Birmingham
  • Local Club: British Mini Club

Posted 09 January 2016 - 04:02 PM

Any updates Jay?


Hi Alex,

I've actually done a fair bit since my last update. All four arches are now on and I've also fitted the grille and bonnet catches etc...

I've also had to have the whole rear subframe off to replace the rubber mountings as they had all split/perished, really annoying as the car hasnt even seen the road yet ! Swapped them out for poly replacements anyway so should be ok for the foreseeable future I hope.

I've also had to replace all four rubber suspension cones, non genuine may I add, for some Minispares genuine ones. Should of bought genuine in the first place really but lesson learnt ! Seems to me like a lot of the rubber components available for Minis aren't up to the job !

I'll get the pictures uploaded to photo bucket at some point and get this thread updated !

Jay.

#651 alex-95

alex-95

    I am THE CLAMP MAKER

  • TMF+ Member
  • PipPipPipPipPipPipPipPipPipPip
  • 6,017 posts
  • Location: l

Posted 11 January 2016 - 08:15 PM


Any updates Jay?


Hi Alex,

I've actually done a fair bit since my last update. All four arches are now on and I've also fitted the grille and bonnet catches etc...

I've also had to have the whole rear subframe off to replace the rubber mountings as they had all split/perished, really annoying as the car hasnt even seen the road yet ! Swapped them out for poly replacements anyway so should be ok for the foreseeable future I hope.

I've also had to replace all four rubber suspension cones, non genuine may I add, for some Minispares genuine ones. Should of bought genuine in the first place really but lesson learnt ! Seems to me like a lot of the rubber components available for Minis aren't up to the job !

I'll get the pictures uploaded to photo bucket at some point and get this thread updated !

Jay.


Sounds good, shame about the rubbers, I'm hoping mine doesn't do the same when I get round to fitting them, might get them them out and see what they are like. What was wrong with the cones?


#652 big-jay

big-jay

    Super Mini Mad

  • Members
  • PipPipPipPipPipPip
  • 518 posts
  • Location: Birmingham
  • Local Club: British Mini Club

Posted 12 January 2016 - 08:22 PM

Any updates Jay?


Hi Alex,
I've actually done a fair bit since my last update. All four arches are now on and I've also fitted the grille and bonnet catches etc...
I've also had to have the whole rear subframe off to replace the rubber mountings as they had all split/perished, really annoying as the car hasnt even seen the road yet ! Swapped them out for poly replacements anyway so should be ok for the foreseeable future I hope.
I've also had to replace all four rubber suspension cones, non genuine may I add, for some Minispares genuine ones. Should of bought genuine in the first place really but lesson learnt ! Seems to me like a lot of the rubber components available for Minis aren't up to the job !
I'll get the pictures uploaded to photo bucket at some point and get this thread updated !
Jay.
Sounds good, shame about the rubbers, I'm hoping mine doesn't do the same when I get round to fitting them, might get them them out and see what they are like. What was wrong with the cones?

Save yourself the headache and go straight for poly, this is the state of mine after a few months -

image.jpg2_zps6jqzhgfl.jpg

The trunion rubber has completely split in half if you look closely. I know the rubber is back to front but it wouldn't have made any difference anyway as the other side was the correct way round and was just as bad. The dust shield on the radius arm had gone brittle and cracked so I've had to replace those aswell.

All four cones had perished and collapsed mate.

#653 alex-95

alex-95

    I am THE CLAMP MAKER

  • TMF+ Member
  • PipPipPipPipPipPipPipPipPipPip
  • 6,017 posts
  • Location: l

Posted 12 January 2016 - 08:43 PM


Any updates Jay?


Hi Alex,
I've actually done a fair bit since my last update. All four arches are now on and I've also fitted the grille and bonnet catches etc...
I've also had to have the whole rear subframe off to replace the rubber mountings as they had all split/perished, really annoying as the car hasnt even seen the road yet ! Swapped them out for poly replacements anyway so should be ok for the foreseeable future I hope.
I've also had to replace all four rubber suspension cones, non genuine may I add, for some Minispares genuine ones. Should of bought genuine in the first place really but lesson learnt ! Seems to me like a lot of the rubber components available for Minis aren't up to the job !
I'll get the pictures uploaded to photo bucket at some point and get this thread updated !
Jay.
Sounds good, shame about the rubbers, I'm hoping mine doesn't do the same when I get round to fitting them, might get them them out and see what they are like. What was wrong with the cones?

Save yourself the headache and go straight for poly, this is the state of mine after a few months -

image.jpg2_zps6jqzhgfl.jpg

The trunion rubber has completely split in half if you look closely. I know the rubber is back to front but it wouldn't have made any difference anyway as the other side was the correct way round and was just as bad. The dust shield on the radius arm had gone brittle and cracked so I've had to replace those aswell.

All four cones had perished and collapsed mate.


Christ, Hopefully my genuine rubber that I got a few years back are ok, Can you get poly for the radius arm seals? May have to get poly then >_<. Luckily I'm putting solid mounts on the front.


#654 Gillybobs

Gillybobs

    Mini Mad

  • Members
  • PipPipPipPip
  • 243 posts
  • Location: Sheffield
  • Local Club: Sheffield Mini Club

Posted 17 January 2016 - 08:41 PM

Absolutely Love this build! What a stunning car!


#655 minimissions

minimissions

    Up Into Fourth

  • Members
  • PipPipPipPipPipPipPipPipPip
  • 3,427 posts
  • Location: North West
  • Local Club: M.M.O.C

Posted 18 January 2016 - 06:26 AM

This is a stunning car just had a quick flick through. Nice work. Loving the overall look and those wheels are something else ;D


#656 FAZ

FAZ

    Mini Mad

  • Members
  • PipPipPipPip
  • 284 posts

Posted 01 April 2016 - 05:20 AM

updates?


#657 big-jay

big-jay

    Super Mini Mad

  • Members
  • PipPipPipPipPipPip
  • 518 posts
  • Location: Birmingham
  • Local Club: British Mini Club

Posted 06 April 2016 - 05:59 PM

Absolutely Love this build! What a stunning car!


Cheers bud !

This is a stunning car just had a quick flick through. Nice work. Loving the overall look and those wheels are something else ;D


Thanks mate, the wheels really set the car off !

updates?


Soon FAZ, been really busy of late sorting out my new daily.

I've got a good few pics that I haven't uploaded yet of my arches fitted and what not, should have the daily finished Friday so that'll free me up to work on the Mini again. Itching to get it finished ready for the summer shows !

#658 big-jay

big-jay

    Super Mini Mad

  • Members
  • PipPipPipPipPipPip
  • 518 posts
  • Location: Birmingham
  • Local Club: British Mini Club

Posted 10 May 2016 - 05:48 PM

Update,

Long overdue I must admit !

Well I've finally finished sorting out my daily so now I can fully focus on getting my Mini finished and back on that road where she belongs.

I went to the Himley Hall Mini show the weekend and picked up a few bits and pieces that I needed. Here they are -

image.jpg2_zpsldtvhnvw.jpg

And a few bits I purchased prior to the show -

image.jpg1_zpsux1uqmdp.jpg

So with those items in hand we left the show early as I was itching to get back and work on the Mini.

Before I get started though here's a couple of pictures of when I changed out the rubber bushes on the rear subframe for the poly replacements -

image.jpg2_zpsiweee9jw.jpg

image.jpg1_zpsnprctqkl.jpg

Ok, with that out the way I started by fitting the fresh air blanking plates, these are stainless steel items I purchased from a seller off eBay -

image.jpg4_zpsfijf2q1m.jpg

image.jpg6_zpsctvyosdh.jpg

Got my new fog light fitted, just got to drill a hole in the boot floor to pass the wiring through and connect it up -

image.jpg2_zpsyxy8ga5v.jpg

image.jpg5_zpsx8xt6vxj.jpg

And I finally fitted my walnut door pull handles after I bought an assorted pack of stainless self tappers -

image.jpg3_zpsumw0lrsx.jpg

Then it was onto fitting my inner arch liners.

Now they do supply a fitting kit with the liners but I didn't fancy using self tappers and rivets, plus there mild steel so it would only be a matter of time before the fitting's started rusting, so I decided to use aluminium rivnuts and stainless button head fitting's. That way it'll make for a much tidier job and will be easier to remove in future.

So we drilled holes in three places and fitted the rivnuts into the inner wing -

image.jpg3_zpsdlnchkig.jpg

image.jpg4_zps6fvs8nmb.jpg

And then fitted the arch liner into place and bolted it up -

image.jpg5_zpsrobyqs2t.jpg

image.jpg6_zps9cg7x19f.jpg

image.jpg1_zpsrvzxgddb.jpg

Rinse and repeat for the drivers side -

image.jpg3_zpscy8ecplo.jpg

image.jpg4_zps3ytvoeuz.jpg

Fantastic idea these arch liners, makes you wonder why they were never fitted from factory !

We also got the grille fitted along with the bonnet catch mechanism. I've again used aluminium rivnuts to secure the grille to the front panel and we also fitted the grille buttons I got from Smiffy's Bits -

image.jpg1_zpsidhq5qxc.jpg

image.jpg2_zpsmcmqzya9.jpg

image.jpg3_zpswe4wu9jv.jpg

Still got a bit of adjusting to do with the bonnet to get it spot on but all in all I'm quite pleased with that.

That's about it for now guys. I did have all four arches fitted but I had to remove the front two to fit the arch liners so I'll get those refitted, take a few pictures and post them up on here for you to have a look at.

I've also fitted some wheel spacers on the front and rear so the wheels pop out the arches a touch now, looks mean !

Jay.

#659 Jared Mk3

Jared Mk3

    Has a small thing but it does make a difference

  • Members
  • PipPipPipPipPipPipPipPip
  • 1,974 posts
  • Location: Kokstad, South Africa
  • Local Club: MOCKZN

Posted 10 May 2016 - 05:56 PM

That sneak shot with the arch on the rear looks really good!

#660 grahama

grahama

    Up Into Fourth

  • Members
  • PipPipPipPipPipPipPipPipPip
  • 2,442 posts
  • Location: Warrington
  • Local Club: None in my area !!

Posted 10 May 2016 - 05:57 PM

Looking great.

Why did you use aluminium rivinuts instead of stainless steel?? I am just thinking of thread softness on aluminium. Did you use a proper tool or just a screw arrangement?

Graham


Also tagged with one or more of these keywords: roundnose

0 user(s) are reading this topic

0 members, 0 guests, 0 anonymous users