Jump to content


Photo
- - - - -

1990 Rover Mini Studio 2

roundnose

  • Please log in to reply
24 replies to this topic

#1 WoodlandsMini

WoodlandsMini

    Mini Mad

  • Members
  • PipPipPipPip
  • 208 posts
  • Location: North Petherton
  • Local Club: AutoJungle

Posted 26 April 2014 - 11:00 AM

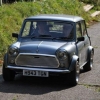
Went to pick this up yesterday, 2 hours on the train to Barnstaple.
 
Arrived at the train station to find the previous owner, I was told to look for the Army green hippy van/ambulance... and that it was... a renault traffic I think, to be honest I wasnt paying too much attention.
 
Paid for the car and speed walked to the post office. Back to the car onto the road... now how do I put the tax disc in without a holder... I borrowed some tape from a local shop and added it to the window, went to the petrol station as I wasnt sure if the petrol gauge would work... it doesnt! Only £13 later I left the petrol station getting the looks you get in a rusty old mini, grinding the gears as you go.
 
DSCF4738_zps7dc79a95.jpg
 
Got it back home and took a closer look over it, engine wise its great runs well, could probably do with a service and a slight adjustment, but nothing major, most of the electrics work too, just an issue with a relay on the front lights, and of course that dodgy fuel gauge, oh and the horn, that doesnt work either... but I was happy.
 
DSCF4741_zps638f1987.jpg
 
On closer inspection its relatively solid it has its patches of rust in the usual places. The boot looked a mess, stickers had to go... and the colour is definitely not what I would have chosen, so it seemed the boot would be the best place to start, not the worst part of the car but something that would be quick and easy and make a big difference.
 
So off came the boot:
DSCF4747_zps3fc745b1.jpg
 
Pulled all the bits off:
DSCF4748_zps336fceb5.jpg
 
First layer of primer:
DSCF4750_zps816d9b1c.jpg
 
I think this is the first layer of paint:
DSCF4753_zpsa76a0f74.jpg
 
Then fitted back to the car:
DSCF4759_zpsbbce001d.jpg


#2 the_samkingdon15

the_samkingdon15

    formally known as samkingd0n

  • Noobies
  • PipPipPipPipPipPip
  • 644 posts
  • Location: Devon
  • Local Club: I ride alone

Posted 26 April 2014 - 11:04 AM

WOOO BARNSTAPLEEEE


#3 MrElliott

MrElliott

    Speeding Along Now

  • Members
  • PipPipPipPipPip
  • 419 posts
  • Location: Surrey
  • Local Club: Box Hill Mini Club

Posted 14 May 2014 - 02:59 PM

yay studio 2! and its a nice colour if its not faded :D good luck fixing it up!


#4 WoodlandsMini

WoodlandsMini

    Mini Mad

  • Members
  • PipPipPipPip
  • 208 posts
  • Location: North Petherton
  • Local Club: AutoJungle

Posted 14 May 2014 - 06:38 PM

Changed the front bumper yesterday, and had the bonnet taken off to be worked on, I took the back bumper off the car and had a poke to see how bad it was, and although its not that bad, I think fixing it on a driveway would not be ideal.
 
DSCF4762_zpsa3c9849f.jpg
 
DSCF4763_zps8bb9ea80.jpg
 
DSCF4765_zps39084bd5.jpg
 
So I've got a garage again, its nothing special but has electric and a roof, and no one will complain about the noise :)
 
WP_000261_zps617c5727.jpg
 
WP_000260_zps2da9c087.jpg
 
... so it needs a little work, but its cheap :)


#5 WoodlandsMini

WoodlandsMini

    Mini Mad

  • Members
  • PipPipPipPip
  • 208 posts
  • Location: North Petherton
  • Local Club: AutoJungle

Posted 14 May 2014 - 06:39 PM

A little bit more work today, removed the rear valance as it was rather crusty... and removed the bonnet for some work, more on the bonnet another time... let the pictures do the talking...
 
DSCF4780_zps8679b210.jpg
 
DSCF4777_zps48cebb2b.jpg
 
DSCF4781_zpsba5c5bbb.jpg
 
DSCF4785_zps26f1fbaf.jpg
 
DSCF4786_zps2813a74d.jpg
 
DSCF4798_zpsb39ac283.jpg
 
Its only been held into place at the moment, as there is still a bit more to remove first and some tidying to do :)


#6 WoodlandsMini

WoodlandsMini

    Mini Mad

  • Members
  • PipPipPipPip
  • 208 posts
  • Location: North Petherton
  • Local Club: AutoJungle

Posted 14 May 2014 - 06:41 PM

Bonnet has not been completed sanded on the outside :) ready for some paint soon-ish...
 
DSCF4819_zps9010762e.jpg
 
Also started to make the repair panel for the boot
DSCF4817_zps6f1e8316.jpg
 
Bonnet has not been completed sanded on the outside :) ready for some paint soon-ish...
 
DSCF4819_zps9010762e.jpg
 
Also started to make the repair panel for the boot
DSCF4817_zps6f1e8316.jpg


#7 WoodlandsMini

WoodlandsMini

    Mini Mad

  • Members
  • PipPipPipPip
  • 208 posts
  • Location: North Petherton
  • Local Club: AutoJungle

Posted 14 May 2014 - 06:42 PM

yay studio 2! and its a nice colour if its not faded :D good luck fixing it up!


Thanks :)


Its a nice colour, but will be changing soonish :)


#8 WoodlandsMini

WoodlandsMini

    Mini Mad

  • Members
  • PipPipPipPip
  • 208 posts
  • Location: North Petherton
  • Local Club: AutoJungle

Posted 24 May 2014 - 08:37 AM

A bit more work to the bonnet today
 
DSCF4819_zpsb135f243.jpg
 
DSCF4820_zps42b344c0.jpg
 
DSCF4821_zps4da4c99b.jpg
 
DSCF4822_zpsfcff07f1.jpg
 
DSCF4823_zps6e2bb095.jpg
 
Its not quite finished yet, needs another sand and small amount of filler to sort a small dent, then more primer, more sanding and some paint :D


#9 WoodlandsMini

WoodlandsMini

    Mini Mad

  • Members
  • PipPipPipPip
  • 208 posts
  • Location: North Petherton
  • Local Club: AutoJungle

Posted 24 May 2014 - 05:01 PM

A bit more today, more filler on the bonnet...

DSCF4824_zps3e80a490.jpg


Roof is being prepped for etch primer

DSCF4826_zps528d2665.jpg


And fixed a few holes where the boot meets the rear wheel arch, looked at the top of the boot and seen this.... oh dear, looks like another days work, but will of course be worth it in the end

DSCF4827_zpsb98e0dae.jpg


Matt


#10 WoodlandsMini

WoodlandsMini

    Mini Mad

  • Members
  • PipPipPipPip
  • 208 posts
  • Location: North Petherton
  • Local Club: AutoJungle

Posted 26 May 2014 - 03:21 PM

Bought some Genuine rover minilites for this, it was difficult deciding whether to go back to 10s but with conversion kits costing £300 it was a no brainer, should be picking them up tonight :)
 
Just deciding on a colour to paint them, I think it will probably be silver, so as not to add too many colours to the car, white could work too, but with no intentions of painting the roof its likely to be a grey/silver.


#11 WoodlandsMini

WoodlandsMini

    Mini Mad

  • Members
  • PipPipPipPip
  • 208 posts
  • Location: North Petherton
  • Local Club: AutoJungle

Posted 27 May 2014 - 10:06 PM

New wheels, which of course need a refurb, but will look good when done :)
 
DSCF4866_zpsf36fae65.jpg
 
DSCF4867_zpsff7f8062.jpg


#12 WoodlandsMini

WoodlandsMini

    Mini Mad

  • Members
  • PipPipPipPip
  • 208 posts
  • Location: North Petherton
  • Local Club: AutoJungle

Posted 28 May 2014 - 01:15 PM

Little photoshop of the colour change, its not the full finished item, as it will have a chrome grill, different wheels, mirrors, handles, wipers ect.
 
mini12_zps89d2685e.jpg


#13 Ben_O

Ben_O

    Mill Road Garage

  • Paint Doctor
  • PipPipPipPipPipPipPipPipPipPip
  • 9,781 posts
  • Location: Isle of Wight

Posted 28 May 2014 - 01:53 PM

wow you don't often see that much rust under the rear parcel shelf!

Hopefully it will be sound once the flakey bits have been removed.


Good start though mate.

What you using to strip the paint?


Ben


#14 WoodlandsMini

WoodlandsMini

    Mini Mad

  • Members
  • PipPipPipPip
  • 208 posts
  • Location: North Petherton
  • Local Club: AutoJungle

Posted 28 May 2014 - 05:14 PM

Uh oh, thats not a good thing, oh well...

We're using a DA sander on the car, and unsure on the wheels, may have to hand sand them, not a massive fan of nitromors, but may have to try the stuff...

More tonight :)


#15 WoodlandsMini

WoodlandsMini

    Mini Mad

  • Members
  • PipPipPipPip
  • 208 posts
  • Location: North Petherton
  • Local Club: AutoJungle

Posted 28 May 2014 - 09:20 PM

Quite a bit more progress this evening, the roof is nearly ready for a final sand (by hand of course) I attempted to sandblast the wheels, but the media I have is way to fine, so no progress with that really, but the roofs coming along nicely, hopefully have that in etch this weekend... have a roof picture, its just the front drivers side (further away in image) which needs doing :)
 
DSCF4875_zps376928be.jpg


Also tagged with one or more of these keywords: roundnose

0 user(s) are reading this topic

0 members, 0 guests, 0 anonymous users