It will all be worth it in the end! It will be another Pup saved.
Project Penny - Complete Restauration Including Timelapse
#16

Posted 10 January 2018 - 06:38 AM
#17

Posted 15 January 2018 - 09:49 PM
Time to replace the doorsteps and outer A panels
4 layers of floor :)
The rear of the doorstep / B post will be fixed with the quarter panels later on.
#18

Posted 16 January 2018 - 09:38 PM
With some solid doorsteps in place the floorpans could be put in after some minor repairs to the tunnel.


#19

Posted 18 January 2018 - 12:56 PM
Great progess there!
#20

Posted 18 January 2018 - 09:26 PM
Next in queue is the front. I was careful when the heelboard was replaced to make sure i could use this as a reference for where the floorpan meets the inner wings. With some nice and fresh metal from doorstep to doorstep the rest of the front and A posts could be cut away.


Making sure to prime and paint everything before mounting panels on top
Trial fitting of inner wings.

Wings fits nicely with the outer A posts
After a lot of measurements the panels are welded in place with only a few spot welds for now. Need to make sure the rest of the front fits the inner wings and A posts, but for now the measurements seems to be good
Also changed the shock absorber upper mounting bracket sti with 8 mm metric bolts while the inner wings were out.
#21

Posted 18 January 2018 - 09:29 PM
#22

Posted 18 January 2018 - 09:43 PM
Making quick progress!
Well.. The work started some time ago :) It's just me being slow on updating the progress, it would be a bit much to upload 500 pics in one post :)
#23

Posted 24 February 2018 - 10:20 PM
Getting the inner A panels in place:
Time to get the front fitted..
Trial fitting of the wings and bonnet


Making sure to remove the folds in the panel where the wings meets the front. Never liked them, I don't think they are there intentionally:
#24

Posted 02 March 2018 - 03:01 PM
det ser godt ud !
flot arbejde med døren ![]()
#25

Posted 25 April 2018 - 06:52 PM
After making sure everything was ligning up the front was welded together
Doing it this way is a lot easier with the Heritage panels.
Closing up the inner wing voids
Putting the front onto the car :)
Using the front subframe to make sure the front is aligned
Trying to get all panel gaps lign up with an equal gap in all of them
Done. All welded up
Edited by Rasmus Holst, 25 April 2018 - 06:53 PM.
#26

Posted 25 April 2018 - 07:00 PM
Fitting the doors
A bit of a gap at the front-bottom. Will have to fix that later on
Making the inner A post
Making new ends to the lower dash rail and fitting the inner posts:
#27

Posted 25 April 2018 - 07:10 PM
I was trying to look for a fresh roof for this one. No succes though..
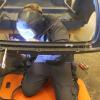
While trying to see if something showed up, I took a shot at repairing the roof and gutters from sheet metal. This is the result of 2-3 weeks of heating and bending metal.
Gutter profile


Still a bit of straightening to do, but the rust has gone and some fresh metal is in
#28

Posted 25 April 2018 - 07:23 PM
First part of the timelapse ready:
https://www.youtube.com/UqLPM0Fzj5A
Edited by Rasmus Holst, 25 April 2018 - 07:49 PM.
#29

Posted 04 May 2018 - 04:49 PM
Do you have any more photos of inner wing install. Going by the photos, the outer A panel was installed before putting the inner wings on. Just wondering on how you welded in the inner wing without access to to as the outer is already attached.
#30

Posted 10 May 2018 - 05:56 PM
Do you have any more photos of inner wing install. Going by the photos, the outer A panel was installed before putting the inner wings on. Just wondering on how you welded in the inner wing without access to to as the outer is already attached.
As you (most likely) know the A-post on cars with external hinges is made of an inner- and outer panel.
The outer panel is attached to the doorframe. The inner panel is attached to the inner wing.
I put the outer A post panel in first, then the inner wing and lastly using the inner A post to connect the inner wing to the outer A post. There is no direct welding between the inner wing and the outer A post panel.
Best pic of the inner wing meeting the outer A post is this:
Connecting the inner wing with the outer A post:
Edited by Rasmus Holst, 10 May 2018 - 05:57 PM.
Also tagged with one or more of these keywords: pickup
Projects →
Mini Variants →
Mini Pickup Body PartStarted by MikesMiniPickup , 19 Aug 2022 |
|
|
||
Projects →
Mini Variants →
South African Mini 'bakkie'Started by Jared Mk3 , 04 Jan 2020 |
|

|
||
Projects →
Mini Variants →
'81 PickupStarted by KTS , 15 Apr 2019 |
|

|
||
Projects →
Mini Variants →
Mini Pick-Up @ Mill Road Garage, Isle Of WightStarted by Ben_O , 30 Jul 2018 |
|
|
||
Projects →
Mini Variants →
Scot In SwitzerlandStarted by ings , 15 May 2018 |
|
|
2 user(s) are reading this topic
0 members, 2 guests, 0 anonymous users


