Jump to content


Photo
- - - - -

Getting The Rose Family Mini Back On The Road! (After 5 Years)

roundnose

  • Please log in to reply
297 replies to this topic

#166 Gilles1000

Gilles1000

    Speeding Along Now

  • TMF+ Member
  • PipPipPipPipPip
  • 438 posts
  • Location: Karlsruhe

Posted 28 November 2019 - 07:56 PM

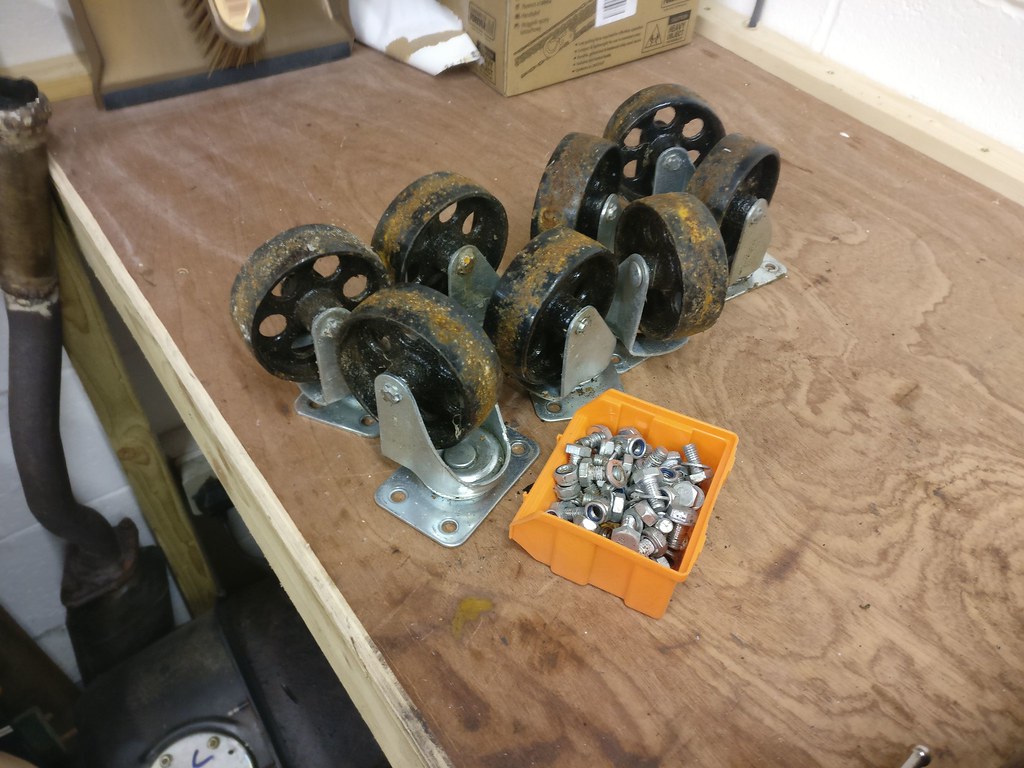
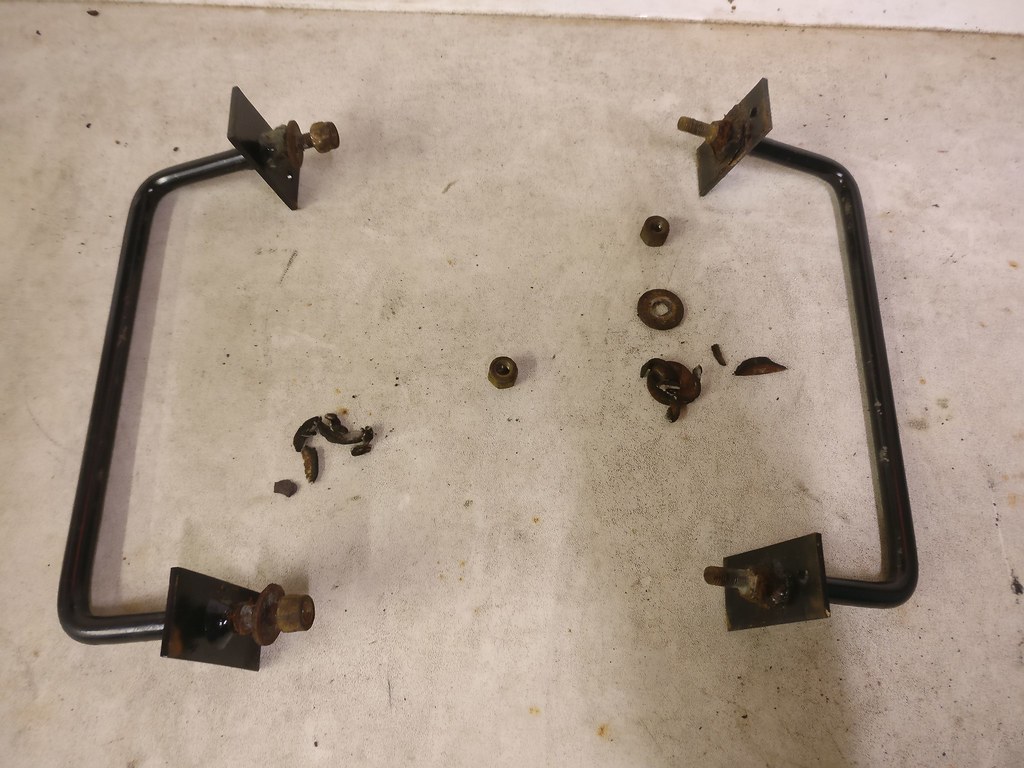
Congrats on labelling and picturing each part you took away from the car... 

I tried to do this, it ended up in a right mess, having some pictures, but then dirty hands, and no picture... and so on...


I will make use of your thread once I will start the rebuild.

But first jobs at first, I just started the metal repairs and this is going to be very interesting as Ihave holes on nearly every panel...


Good luck with your project, and see you at L2B in some time ;)

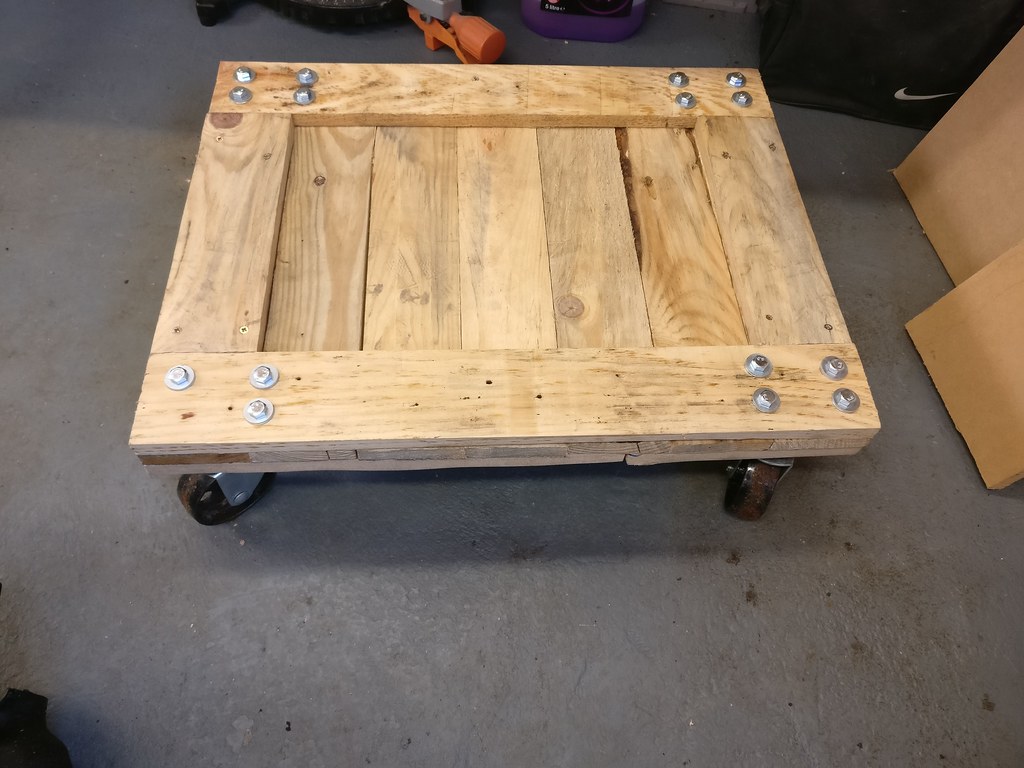
I wanted to take part to the 60th anniversary (and 40th of my car). Could have been possible on the trolley haha.


#167 Ben Rose

Ben Rose

    Mini Mad

  • Members
  • PipPipPipPip
  • 210 posts
  • Location: Preston, Lancashire

Posted 03 December 2019 - 04:32 PM

So my plan to remove the engine is to use a bolt through a roof joist and chain and block to lift out engine. This means I need to be able to easily move the shell around the garage.
First I need to make the dolly the shell and engine will sit on allowing me to move it around. This will hopefully help when I get to body work.

I already had some wheel dolly's so I intend on re-using the castors from this.
49157087422_78c5193fec_b.jpg

49157087357_4eed226059_b.jpg

Got myself a sturdy pallet and used another to create some extra lift so I can remove brake lines etc in the process.
49156866451_2c83907b52_b.jpg

Castors installed.
49156377833_f71371e712_b.jpg

49156377283_7f79b4b8af_b.jpg

Remove some final parts from the underside of the shell.
Heat shield.
49156868831_24ebc411aa_b.jpg

49156379543_7d48777593_b.jpg

49157086232_ccb572e1b8_b.jpg

Floor looking good?!
49157085522_c302f10463_b.jpg

Fuel line clips.
49156379783_25d688fbc2_b.jpg

49156379348_78b5c5900c_b.jpg

49156378608_2f05f6eb64_b.jpg

49156377903_42561832f5_b.jpg

Battery cable.
49156379268_7ea4001341_b.jpg

Chair restraint brackets.
49157086327_175531bf85_b.jpg

Car on dolly! I have a moveable shell. Next post will be engine out, I promise.
49163563493_5e44f24962_b.jpg

49164279847_6409d83161_b.jpg

49164045396_9f4a27a4a9_b.jpg

#168 cooperd70

cooperd70

    Super Mini Mad

  • TMF+ Member
  • PipPipPipPipPipPip
  • 653 posts
  • Location: London

Posted 03 December 2019 - 09:40 PM

???

#169 Ben Rose

Ben Rose

    Mini Mad

  • Members
  • PipPipPipPip
  • 210 posts
  • Location: Preston, Lancashire

Posted 10 December 2019 - 11:46 AM

:D 
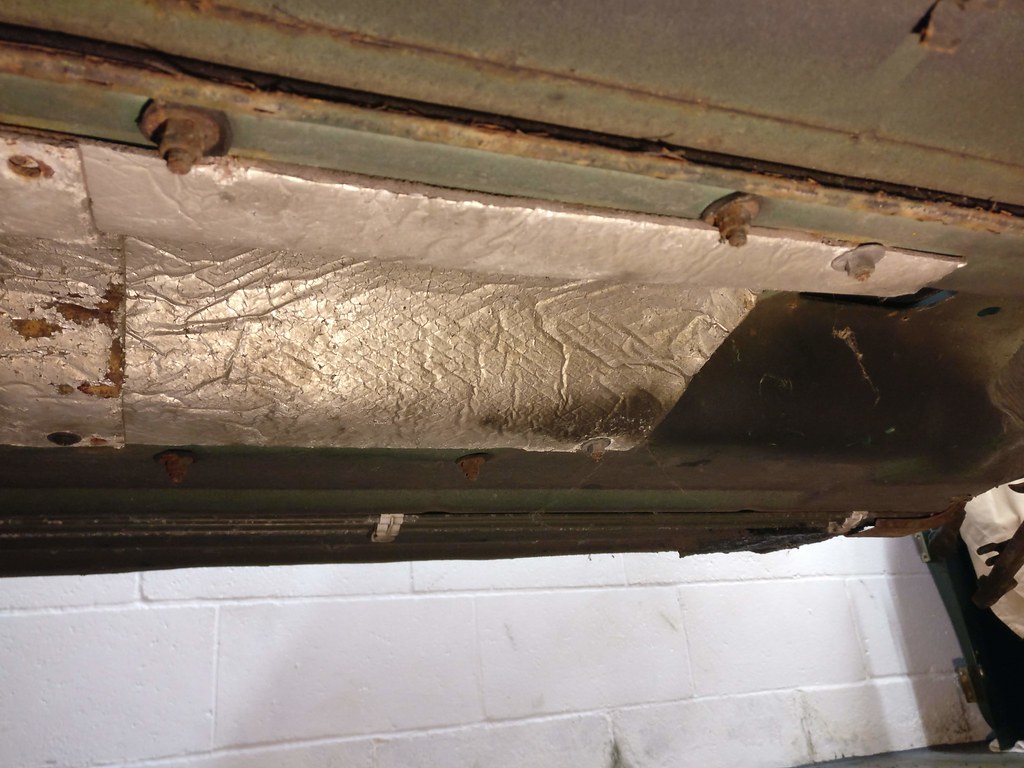
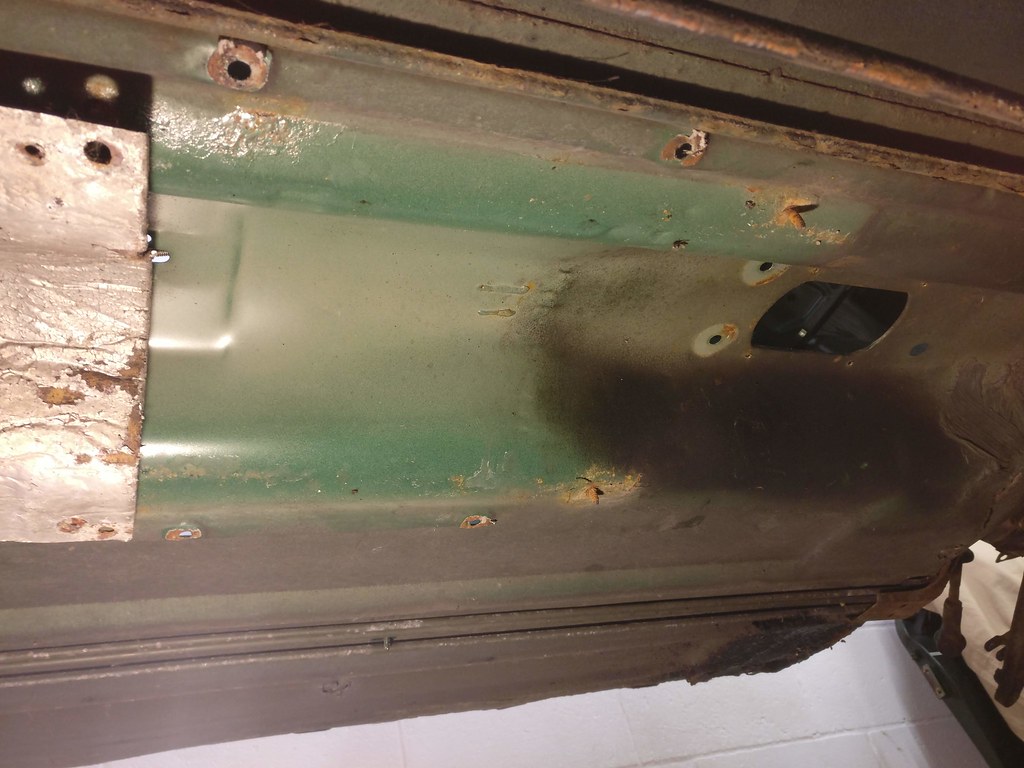
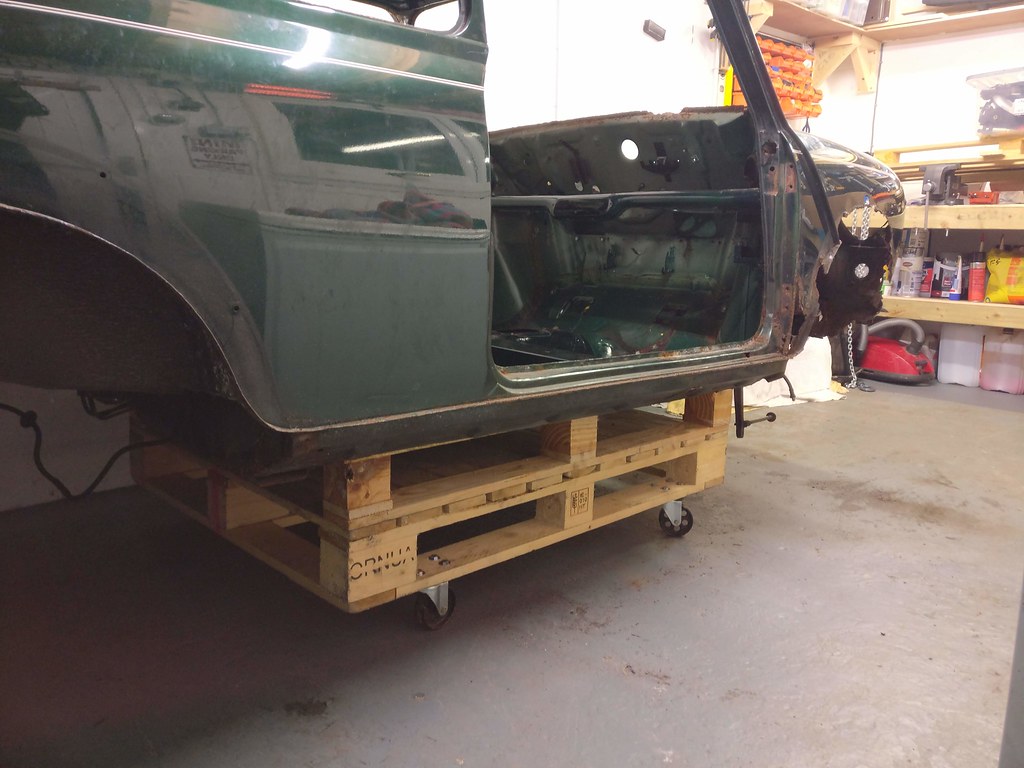
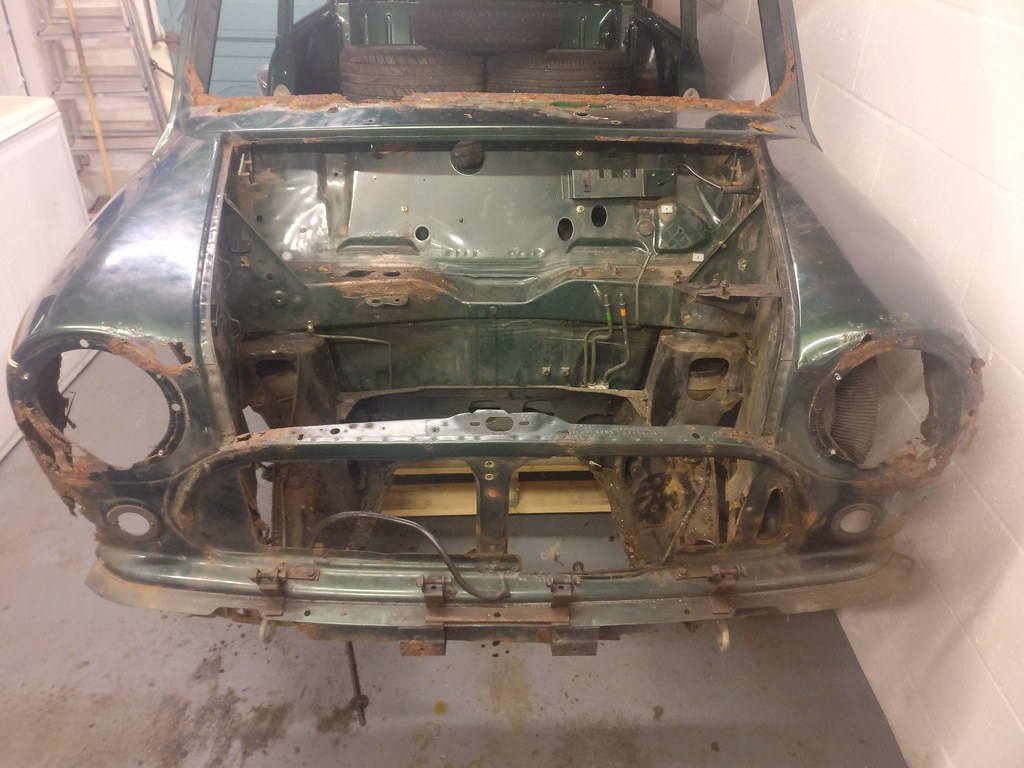
So just a quick update. The engine is out which for me is quiet an achievement. It means I'm at the point where I can no longer put off the bodywork stage!  :D
 
I am currently writing a list of panels I think I need which will give me a final cost that I will have to budget for.  Depending on the cost may slow down my progress a bit.
 
I lifted the engine out using a bolt through a beam in my garage and a Chain/Block lift.  I chose this method as I didn't want a big engine crane taking up valuable space in my garage.  Also it cost a significant amount less than buying OR hiring an engine crane.
 
Engine lifting brackets from mini spares bolted to the two outer most head bolts.  I then used 1 Tonne straps to lift with.

49197817518_0da72a6f08_b.jpg

49198512237_e4f0db3fa7_b.jpg

All seemed really secure and sturdy so I can definitely do this again in the future.

49198512447_908de4f1cb_b.jpg

49197817443_c00d9a5ce2_b.jpg

And its out! I will build a small dolly to push the engine around on out of some timber and another set of castors.

49198313151_677e72e857_b.jpg

49197817373_5ba99d5dc9_b.jpg

Bare shell, just the front subframe to remove before I start to remove panels. Any tips on removing / replacing a complete front end?!

49198512342_916820067f_b.jpg

49198512302_673a38ae66_b.jpg

49198512282_0b1699b58d_b.jpg

49198312976_66a6267157_b.jpg

  :highfive:  Big shout out and thanks to my good friend Gary for helping me on this.  :highfive:


Edited by Ben Rose, 10 December 2019 - 11:51 AM.


#170 Ben_O

Ben_O

    Mill Road Garage

  • Paint Doctor
  • PipPipPipPipPipPipPipPipPipPip
  • 9,781 posts
  • Location: Isle of Wight

Posted 10 December 2019 - 12:31 PM

Excellent!


My tip regarding the front end for now would be to leave it until last. Work from the back forwards.


When the time comes, decide how far you want to go with panels before cutting anything. For instance, do you intend to replace the inner wings? maybe even a new bulkhead if its bad enough?


Then decide. If you are replacing the lot, you can brace up and cut the whole lot off in one bulkhead and all


#171 Ben Rose

Ben Rose

    Mini Mad

  • Members
  • PipPipPipPip
  • 210 posts
  • Location: Preston, Lancashire

Posted 10 December 2019 - 12:38 PM

Excellent!


My tip regarding the front end for now would be to leave it until last. Work from the back forwards.


When the time comes, decide how far you want to go with panels before cutting anything. For instance, do you intend to replace the inner wings? maybe even a new bulkhead if its bad enough?


Then decide. If you are replacing the lot, you can brace up and cut the whole lot off in one bulkhead and all

Thanks for the input and advice Ben.  Really appreciate it.  The back of the car does look far better but there are definitely small repairs needed here and there so I will start on those.  The bulk head is solid but the inner wings need to be replaced in my opinion.  I'll put a post up showing the rust in all the panels more clearly.  Its looking like a complete window surround will be easier than just the scuttle too.


Hopefully it repairing the smaller patches of rust will give me good practice and time to save up for the panels I need at the front.


May seem a daft question but do you have any advice for buying sheet metal for repairs?  I'm in Lancashire.


#172 Gilles1000

Gilles1000

    Speeding Along Now

  • TMF+ Member
  • PipPipPipPipPip
  • 438 posts
  • Location: Karlsruhe

Posted 10 December 2019 - 12:59 PM

Nice progress!! 

Lifting the engine out is always a big milestone!

Then you will see that there are still loads of parts left in the car. Screws, clips, brake pipes...

I checked many times before sending the body to acid dip but I still found screws on the car after getting it back.


Now comes the real part of the restoration. bodywork!!


@ Ben_O:

why would you start at the back? Easier repairs to start with? Easier construction at the back?


#173 cooperd70

cooperd70

    Super Mini Mad

  • TMF+ Member
  • PipPipPipPipPipPip
  • 653 posts
  • Location: London

Posted 10 December 2019 - 12:59 PM

Great progress Ben. Know you've seen some of Ben_O's threads...if you haven't seen this one already....

http://www.theminifo...f-wight/page-27

Clubman shell, but he's currently starting work on the front end ???

#174 Ben Rose

Ben Rose

    Mini Mad

  • Members
  • PipPipPipPip
  • 210 posts
  • Location: Preston, Lancashire

Posted 10 December 2019 - 01:17 PM

Great progress Ben. Know you've seen some of Ben_O's threads...if you haven't seen this one already....

http://www.theminifo...f-wight/page-27

Clubman shell, but he's currently starting work on the front end

I hadnt seen this one!  I'm follwing it now and will read it all later.  Certainly helps to see how Ben approaches the repairs.


#175 Ben_O

Ben_O

    Mill Road Garage

  • Paint Doctor
  • PipPipPipPipPipPipPipPipPipPip
  • 9,781 posts
  • Location: Isle of Wight

Posted 10 December 2019 - 01:19 PM

If you have the entire shell to restore, I find it easier to start at the back as you are less likely to run Into issues with panel orders.
For instance you might fit a pair of inner wings and weld them all nicely to the floor and then find that the floor wasn't as good as you hoped when you start prodding further back meaning it's now better to replace a half floor or the entire floor. Suddenly you are undoing work you have done.
It might be more personal preference but it seems logical to me.
With regards to the scuttle, replacing the whole frame may not be necessary or easier as replacing the whole thing requires unpicking the gutter from the roof skin which is roller welded and quite tricky to split cleanly. Of course you might still like to get the whole panel to enable you to make your joins higher up the screen frame.
As for buying sheet steel, just have a Google and see if any steel and fabrication firms are nearby and give them a shout.
All my sheet steel and welding gas comes from a small local one man band and the service and price are really good

Cheers
Ben

#176 Ben Rose

Ben Rose

    Mini Mad

  • Members
  • PipPipPipPip
  • 210 posts
  • Location: Preston, Lancashire

Posted 10 January 2020 - 04:00 PM

So its amazing how busy Christmas can be with two children under 5. Anyway enough of the excuses.

I finally made the dolly for the engine so I could push it around my garage.

49362337991_018b19d537_b.jpg

49361874478_f3690f162c_b.jpg

With that completed I had no excuse to start the bodywork. I'm not embarrassed to admit I'm scared about this part.

So as per Ben_O's advise I'm going to work from the rear up to the worst part, the front!

Rear Valance is the first Job I'm going to tackle. Its very bad in certain places but good in others. The panel still needs to be replaced.

49362337566_24c6a2a307_b.jpg

I started off removing all the finishing strips which came off quiet well and I hope with a bit of a clean can be re-used.

49362542527_79638810d8_b.jpg

49362336996_f830b47334_b.jpg

49361873353_f30d43ca4e_b.jpg

This is the point at which I need you guys to tell me if I am doing any of this wrong!!

I started by gently grinding back the paint to find the spot welds.

49361872248_14df28b376_b.jpg

49361872093_9be8f9d92b_b.jpg

I then drilled them out and started to pry the two sides apart.

49362540162_bb3502b898_b.jpg

49361871828_d2969f8fb6_b.jpg

49362539862_865beb82c0_b.jpg

49362539752_3ea9b9f7de_b.jpg

Does that look right? Sorry if I am asking an obvious question.
I'll complete the panel removal over the weekend, I just hoped someone could stop me if I was doing something obviously wrong!

#177 Ben_O

Ben_O

    Mill Road Garage

  • Paint Doctor
  • PipPipPipPipPipPipPipPipPipPip
  • 9,781 posts
  • Location: Isle of Wight

Posted 10 January 2020 - 04:22 PM

What you are actually doing there is splitting the bootfloor from the rear panel by the looks of it.

There are 3 skins there, Valance - boot floor - back panel


No worries though, you can just continue on but drill all the way through the spot welds until your drill pops out the other side, that way you will split all 3 panels


Cheers

Ben


#178 Ben Rose

Ben Rose

    Mini Mad

  • Members
  • PipPipPipPip
  • 210 posts
  • Location: Preston, Lancashire

Posted 10 January 2020 - 04:49 PM

What you are actually doing there is splitting the bootfloor from the rear panel by the looks of it.
There are 3 skins there, Valance - boot floor - back panel

No worries though, you can just continue on but drill all the way through the spot welds until your drill pops out the other side, that way you will split all 3 panels

Cheers
Ben


Wow, glad I asked. Thanks for the advise. I'll do that over the weekend and post results.
Would you have removed it differently?

Thanks

Ben

#179 Harryrothers93

Harryrothers93

    Mini Mad

  • Members
  • PipPipPipPip
  • 229 posts
  • Location: cumbria

Posted 10 January 2020 - 04:59 PM

ahh the fun starts!! wishing you the best of luck with the body work!


I did the same by just drilling all the spot welds and just ran down the seam with a big flat blade unpicking the panel sandwich one part at a time. Just take your time and you will be fine.


ask as many questions as you want. No judgement will be passed no matter what you ask! we all had to start somewhere!


harry


#180 Bdshim

Bdshim

    Mini Mad

  • Just Joined
  • PipPipPipPip
  • 196 posts
  • Location: Suffolk

Posted 10 January 2020 - 05:05 PM

I got a spot weld chisel the other day for when I get going might be worth getting one looks like it would be useful for the job


Also tagged with one or more of these keywords: roundnose

0 user(s) are reading this topic

0 members, 0 guests, 0 anonymous users