Jump to content


Photo
- - - - -

That Old Black Magic '2'


  • Please log in to reply
68 replies to this topic

#31 Gazza211

Gazza211

    Stage One Kit Fitted

  • Noobies
  • PipPipPip
  • 77 posts

Posted 11 February 2009 - 12:05 PM

Hi

Well haven't managed to do a lot in the last month or so but was able to get into the garage over the weekend, so i repaired the end of the passenger sill, sorted out what was left of the old replacement quarter panel on the pillars and as i don't have a spot welder i have drilled all the panels ready to plug weld, the wheel arch flange and quarter panel are now clamped into position ready for welding at the weekend, While i had an hour or so to kill i have started to remove the front panel which was rotten around the wheel arch fixings and was bent in the centre of the valance, the N/S flitch is in reasonably good condition at the front edge and just needs a small repair before the new front panel is fitted.
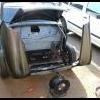
I have attached a couple of photos to show the progress

Posted Image

Posted Image

Edited by Gazza211, 14 October 2009 - 06:19 AM.


#32 dfraser

dfraser

    Mini Mad

  • Noobies
  • PipPipPipPip
  • 121 posts
  • Local Club: Minis in Inverness

Posted 11 February 2009 - 03:06 PM

Liking the standard of work your'e doing there - good to see so many people doing thoroughly good jobs on their Mini's like this!

#33 Gazza211

Gazza211

    Stage One Kit Fitted

  • Noobies
  • PipPipPip
  • 77 posts

Posted 11 February 2009 - 03:56 PM

Liking the standard of work your'e doing there - good to see so many people doing thoroughly good jobs on their Mini's like this!


There really is no point doing a bodge job, it only lasts half as long and costs as much and theres no real satisfaction in the finished job

Gaz.

#34 Bean

Bean

    Queen of 'shoppin, Voted Miss TMF 2011

  • Members
  • PipPipPipPipPipPipPipPipPipPip
  • 8,054 posts
  • Name: Jean
  • Location: Malvern

Posted 11 February 2009 - 03:58 PM

How did I miss this?

Excellent work :D

#35 edi57

edi57

    One Carb Or Two?

  • Members
  • PipPipPipPipPipPipPip
  • 821 posts

Posted 11 February 2009 - 06:12 PM

Hi,

I've only just seen your project and I think it looks great. I think making this mini look as near to your original mini would be nice.

Keep up the top quality work.

Ed

#36 Gazza211

Gazza211

    Stage One Kit Fitted

  • Noobies
  • PipPipPip
  • 77 posts

Posted 12 February 2009 - 10:39 AM

Hi,

I've only just seen your project and I think it looks great. I think making this mini look as near to your original mini would be nice.

Keep up the top quality work.

Ed


Hi

Because this is supposed to be a "budget" build i cannot run to the cost of 7.5" discs so i will have to use 8.4" discs, 12" wheels, with arches, but apart from that and a contrasting roof colour it should look pretty similar on the outside, obviously due to technical advances since my first Mini the running gear will be far better, ie servo, adjustable suspension etc.

Gaz

#37 Gazza211

Gazza211

    Stage One Kit Fitted

  • Noobies
  • PipPipPip
  • 77 posts

Posted 12 February 2009 - 12:32 PM

How did I miss this?

Excellent work :P


Thanks for the comments it all helps to keep my enthusiasm going :wub:
Just had a quick read through your thread, the van looks great, wish my funds would stretch to buying one :thumbsup: , as for the engine it has to be 'A' Series. personally i would go for an SPI unit

Thanks again Gaz

#38 Gazza211

Gazza211

    Stage One Kit Fitted

  • Noobies
  • PipPipPip
  • 77 posts

Posted 13 February 2009 - 10:16 AM

Hi

Two posts in two days, must be a record! dragged myself into a cold garage last night and managed to plug weld the new quarter panel and seam weld the replacement panel into the wheelarch, so thats all the welding done from the 'A' posts backwards, just need to rip off the A panels and the rest of the front panel and replace them, luckily the wings, flitches and wheelarches are all ok so hopefully shouldn't take too long :thumbsup:
I have attached a couple of pictures of the finished quarter panel and a bit of welding that i am quite proud of (this is my first project using a MIG welder)

Posted Image

Posted Image

Gaz

Edited by Gazza211, 14 October 2009 - 06:22 AM.


#39 Gazza211

Gazza211

    Stage One Kit Fitted

  • Noobies
  • PipPipPip
  • 77 posts

Posted 23 February 2009 - 09:50 AM

Hi

With Mini50 and the IMM fast approaching i am now trying to get a bit of a move on with the body work on the Mini, as i said on my last post i had just got the front to repair, so i removed the remains of the front panel and fitted a slave subframe to line up the new front panel, before i could fit it i had to repair the front edge of both flitch panels as they were quite heavily corroded :D
The front panel is not genuine so caused a few headaches trying to get the seams to look ok, but it turned out ok in the end.
I then stripped down both the doors to make them more manageable, the top hinge on the drivers door needed to be repaired as one of the studs had sheared off, this was redrilled, tapped and a new stud fitted, both doors were then hung and gapped so that i would be able to replace both A panels in the correct position.
Both doors were then removed and the A panels cut off, the inner flitch on the passenger side is in excellent condition with only surface rust but the drivers side will need two plates around the upper and lower hinge fixings, the plates are now cut ready for welding, the A panels are ready for welding and the flanges are all drilled for plug welding, hopefully i will have a chance to get out in the garage for a couple of evenings to get it all welded up.
I have attached a couple of pictures to show progress to date.
Flitch repair

Posted Image

Front panel fitted

Posted Image

O/S flitch rot removed

Posted Image

Trial fit of O/S A panel

Posted Image

Edited by Gazza211, 14 October 2009 - 06:28 AM.


#40 Bean

Bean

    Queen of 'shoppin, Voted Miss TMF 2011

  • Members
  • PipPipPipPipPipPipPipPipPipPip
  • 8,054 posts
  • Name: Jean
  • Location: Malvern

Posted 23 February 2009 - 10:01 AM

Looking great, Gaz! :D Work looks very tidy! :w00t:

( I wish I had your garage :P ! )

#41 Gazza211

Gazza211

    Stage One Kit Fitted

  • Noobies
  • PipPipPip
  • 77 posts

Posted 26 February 2009 - 09:45 AM

Hi

Feel like i've turned a corner now, :) Both 'A' panels are now fitted and the doors are hung and gapped. Its now a complete shell! with doors boot and bonnet for the first time in many years. there is still the odd plug weld to finish and the bottom of the passenger door frame to repair but then i can get on with some painting,
The next job is to put a pair of slave subframes on to check the clearance of the wheels, modify the wheelarches at the front and decide on which arches to go for. Not sure whether to go for GP5 or wide GP2 (wheels will be deep dish 6 x 12)
Anyway picture attached to show progress

Cheers Gaz

Shell with doors fitted

Posted Image

Quick question does anyone know if you can put rack stops in a standard steering rack to reduce the turning circle like a sports pack so the tyes dont rub on the inner arch. Thanks Gaz

Edited by Gazza211, 14 October 2009 - 06:29 AM.


#42 Junior Mini

Junior Mini

    Speeding Along Now

  • Members
  • PipPipPipPipPip
  • 313 posts

Posted 26 February 2009 - 08:26 PM

http://www.kad-uk.com/accessories.htm

1012230 Steering rack limiter kit

Where a restriction in steering lock is desired, these simple nylon collars slip over the end of the rack limiting movement.
Simple to fit, uses would include preventing 13” wheels fouling wheel arches,
saving CV ’s in rally or grass track cars or with 6 pot calipers.


Hope it help's :D

Paul.

#43 Gazza211

Gazza211

    Stage One Kit Fitted

  • Noobies
  • PipPipPip
  • 77 posts

Posted 26 February 2009 - 08:29 PM

http://www.kad-uk.com/accessories.htm

1012230 Steering rack limiter kit

Where a restriction in steering lock is desired, these simple nylon collars slip over the end of the rack limiting movement.
Simple to fit, uses would include preventing 13” wheels fouling wheel arches,
saving CV ’s in rally or grass track cars or with 6 pot calipers.


Hope it help's :D

Paul.


Cheers Paul, just what i need, i will get straight on their website.

Thanks Gaz

#44 Gazza211

Gazza211

    Stage One Kit Fitted

  • Noobies
  • PipPipPip
  • 77 posts

Posted 17 March 2009 - 08:11 AM

Hi Everyone

Been a couple of weeks since i updated, i thought all the welding was complete until i spotted a penny sized hole in the battery box :cry: (will get this done in the next couple of weeks) i spent a really exciting evening grinding down all the plug welds and tidying up all the flanges. The front panel, A panels, quarter panel, engine bay and rear panel have all had a couple of coats of filler primer so i actually feel like i am getting somewhere.
I now need to trim the front wings and front panel to accept the new wheels so my next job is to strip the subframes from the donor car as these have disc's instead of the drums that came with the project!, fit them into the shell ready to do some accurate marking up.
Once that is done i will put the remains of the donor car on ebay.

Mini outside again! hopefully in a couple of weeks it might have some wheels on :ermm:

Posted Image

Edited by Gazza211, 14 October 2009 - 06:31 AM.


#45 Retro_10s

Retro_10s

    Moderator

  • Members
  • PipPipPipPipPipPipPipPipPipPipPip
  • 10,138 posts
  • Location: Bromsgrove

Posted 17 March 2009 - 08:48 AM

looking good gaz - i've got the brown paint when you're ready.


0 user(s) are reading this topic

0 members, 0 guests, 0 anonymous users