Mini Sky Rebuild
#241

Posted 13 March 2009 - 11:18 AM
well done keep it up emma.
#242

Posted 13 March 2009 - 10:31 PM
hi , lovin ur work,just read this project over the week and im amazed how u keep going. i look forward to reading this everyday now,
well done keep it up emma.
cheers, i had better update it everyday then!!! LOL
#243

Posted 13 March 2009 - 10:41 PM

so i had no option to strip the affected areas off and repaint


excuse the red and black, the red paint also decided to react to the white!!! grrrr i hate that white paint!!!!
so then cleaned up the rear valance where the closing panels are welded on


and stone chipped

and the shell masked up ready for the stonechip (i really should of done this yesterday as well, but hey!!

then the underneath stonechipped


and inside the boot which i did yesterday


so today has been a completely backwards day, because i just spent the whole day - 11-6 then 7.30-9 putting right GRRRR, well not happy
so tomorrow, i have a interview first thing in the morning, at 9am!!!, which is good because i'll probably be able to get to the garage by at least 11 (the interview is 30mins away from me - i love the drive there!!! done it for the past 4 years!!)
anyway, so give a quick recoat of some areas in stone chip, as it kinda started sliding off some of the black areas, so i gave the rest a light coat, then unmask and try and rub down as much as i can of the body and another coat of primer where needed, which will be the same for sunday, monday, etc etc etc!!! LOL
#244

Posted 15 March 2009 - 10:34 PM


then trail fitted the bumpers, which are non-gen and a really bad fit!!!, i can just about get one on the back with a few mods!!!, and for the front i'll get a gen one!!!
then trail fit of the wheel arches!!!!
even worse fit, but with the help of the heat gun and a file....


the fit!!!!
then i rubbed down both sides of the shell


and primed


i really need to practice mixing the paint a bit more!!!, i decided because there wasn't that much primer left, i would use it all, which left me with not enough room in the gun for the thinners needed to apply it propery, so i ended up with one dry coat, so i could it the thinners in and about 2-3 normal coats!!!! lesson learnt, don't try to use up paint!!!
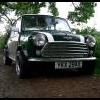
and final pics, my mini and my dads morris


#245

Posted 16 March 2009 - 12:25 AM
Edited by BMC Paul, 16 March 2009 - 12:28 AM.
#246

Posted 16 March 2009 - 12:34 AM
#247

Posted 16 March 2009 - 09:45 AM
wow! my internets been down last two days and you been busy, great updates and photos and not forgeting great progress!! the stonechiped underside looks great and the last few pics of the mini in second primer coat looks like a new shell!!!! really coming on mate


also top job with trial fitting the wheelarches and bu,pers, somthing that can be a major problem once its all painted the shell and mint etc.... and i agree... pattern bumpers although a dman lot cheaper are a terrible fit sometimes, genuine lal the way mate
yeah i looked at the gen ones last night and they are aroun 70 each!!!
we do have one old one, which has a bit of surface rust, so thats a possibity, or some fibreglass bumpers be arc angels, which are £40 a pair + postage....
#248

Posted 16 March 2009 - 10:11 AM
I had similar paint reactions between my redoxide and top coat-ended up applying a coat of standard primer then ok.
#249

Posted 16 March 2009 - 11:13 AM
Great work as always.
I had similar paint reactions between my redoxide and top coat-ended up applying a coat of standard primer then ok.
i hate paint reactions!!!, its so annoying having to strip it off and start again!!!, its good that you solved yours with primer tho!!!
#250

Posted 17 March 2009 - 01:36 AM
#251

Posted 17 March 2009 - 11:15 AM
#252

Posted 17 March 2009 - 10:21 PM
#253

Posted 18 March 2009 - 10:43 PM
Arh!!! i no the feeling! had a few reactions today, going to HAVE to invest in a water trap! It would be so easy to get it recovered and took to a garage and have it painted .... but we love it really dont we!!! ???
i keep telling myself it will be worth it and its character building to have to strip everything off and start again..... but i'm not convinced, then its soooo much cheaper diy!!!! and rewarding, yeah we love it!!!
#254

Posted 18 March 2009 - 10:54 PM
the bottom of the pass door looked like this

and the driver wing

after most of the part peeled off

well not happy!!!!,
but i've added a few more bits to the engine

took the doors off and made room for them on top of my sisters mini

re fillered the bottom of the pass door

and rubbed down the drivers door, bonnet, front panel and rear panel


so the plan for tomorrow is to rub down the boot, rear quarters, and passenger wing then try again with the primer to get a better mix (more hardner) and no reactions, the its mainly gonna be touch ups and the wheels trims,
#255

Posted 18 March 2009 - 11:06 PM
Here is the stuff...
http://www.paints4u....ainselection=13
Keep at it - you are keeping many of us going!!
Edited by dfraser, 18 March 2009 - 11:07 PM.
0 user(s) are reading this topic
0 members, 0 guests, 0 anonymous users


