Jump to content


Photo
- - - - -

Mike's X18xe1 Powered Mini


  • Please log in to reply
79 replies to this topic

#46 M J W J

M J W J

    One Carb Or Two?

  • Members
  • PipPipPipPipPipPipPip
  • 976 posts
  • Location: Midlands
  • Local Club: not yet

Posted 19 April 2012 - 11:28 PM

Its been far too long since I last updated this.

Not really much done but have been back from university for a week and have done a little to the mini. I have been re building a c20xe which is in the way so until that is done not much more will be done to the mini. The c20xe isn't destined for the mini folks.

Machined some new pins for where the hand brake cable connects to the brake mechanism and have machined two new pins for where the two arms in the rear brake set up join together. Just need to drill a hole in them to fit a small split pin.

Posted Image

I also cleaned up and repainted the brackets that hold the steering column in place. Today I put the steering column back in place.

Posted Image

I have also cleaned up and repainted the rear hubs. I have also been cleaning up the back plates. I can't for the life of me get the brake adjusters to move. I have had them soaking in parrafin for 3 months, have tried penetrating oil and even had heat on them and they still won't budge :angry: . Any suggestions folks? If I can't get them moving by the end of the week I am just going to machine them out, re-tap the holes and machine new brake adjusters. I am not going to pay 20 something quid for new back plates.

Edited by M J W J, 19 April 2012 - 11:29 PM.


#47 M J W J

M J W J

    One Carb Or Two?

  • Members
  • PipPipPipPipPipPipPip
  • 976 posts
  • Location: Midlands
  • Local Club: not yet

Posted 05 August 2012 - 09:27 PM

Not a major update but I have finally done something to the mini in 4 months.

I never did get round to machining the adjusters out in my back plates but I have finally managed to get them to move.

I found this trick somewhere (can't remember where) and who ever it was that came up with it I love you right now.

I welded an M8 nut to the adjusters and then used my socket set to get them to turn. I have no more problems with rounding off the corners or trying to find a spanner that will fit them anymore.

Posted Image


When I finally get round to fixing the broken stud on my rear sub frame and painting the back plates, I can finally put the wheels back on.

#48 M J W J

M J W J

    One Carb Or Two?

  • Members
  • PipPipPipPipPipPipPip
  • 976 posts
  • Location: Midlands
  • Local Club: not yet

Posted 25 October 2012 - 11:04 PM

Its been way too long since I updated this.

It hasn't been forgotten just an MSc and a Locost got in the way.

Since my last update I have repaired my rear sub frame's broken stud. I did it the same way as last time except made the stud the same diameter all the way along and with the same thread. I noticed on my previous attempt it was where the change in diameter was, was where the repair sheered. Unfortunately I forgot to take a picture of it.

I have also painted up my back plates, fitted rear wheel bearings, built up the hand brake mechanism on the back plates, painted the springs for my coil overs, welded in reinforcements for my rear coil overs, fitted my rear sub frame and assembled the N/s rear suspension.

Posted Image

Posted Image
As you may notice I made the mistake and put my back plate on upside down. Doh! >_< Ah well. I will have to spin it round when I get back to it.

I have been struggling to get my adjustable rear toe and camber brackets to fit. Has anybody else had this problem and if so what did you do to solve it? They are minispares ones so am a bit surprised as minispares stuff is usually pretty good.

#49 charie t

charie t

    Up Into Fourth

  • Members
  • PipPipPipPipPipPipPipPipPip
  • 3,153 posts
  • Location: South Leicestershire sticks
  • Local Club: wreake mini wanderers

Posted 04 November 2012 - 02:14 PM

I have been struggling to get my adjustable rear toe and camber brackets to fit. Has anybody else had this problem and if so what did you do to solve it? They are minispares ones so am a bit surprised as minispares stuff is usually pretty good.

Years ago mine fitted fine, but more recent sets i have tried to fit as you say don't fit right. I've spoken to simon (minispares) via pm, but may well be worth it if you inform him too.
P.S back plate is on right in that pic?

#50 M J W J

M J W J

    One Carb Or Two?

  • Members
  • PipPipPipPipPipPipPip
  • 976 posts
  • Location: Midlands
  • Local Club: not yet

Posted 04 November 2012 - 05:24 PM

Yep realised that is was on correct when I disconnected it. I just assumed (wrongly) that the slave cylinder would be at the top for bleeding purposes.

I've got one side to line up just not the other. I will have a better look at it this week.

#51 charie t

charie t

    Up Into Fourth

  • Members
  • PipPipPipPipPipPipPipPipPip
  • 3,153 posts
  • Location: South Leicestershire sticks
  • Local Club: wreake mini wanderers

Posted 04 November 2012 - 06:42 PM

I've got one side to line up just not the other. I will have a better look at it this week.

Is it the n/s (passenger) you're struggling with by any chance?

#52 M J W J

M J W J

    One Carb Or Two?

  • Members
  • PipPipPipPipPipPipPip
  • 976 posts
  • Location: Midlands
  • Local Club: not yet

Posted 05 November 2012 - 10:25 AM

No. O/s

#53 M J W J

M J W J

    One Carb Or Two?

  • Members
  • PipPipPipPipPipPipPip
  • 976 posts
  • Location: Midlands
  • Local Club: not yet

Posted 05 November 2012 - 07:45 PM

Well after much wriggling and fiddling I have managed to get my trailing arm brackets to fit without having to drill out the holes. I did manage to break a weld though but was easily fixed.

Posted Image

I have also put in the brake shoes and drum on the other side. As someone pointed out to me I didn't have the back plate on up-side-down which I quickly realised.

Posted Image

I just need to find one of my brake adjuster tappets. I have a couple of spare trailing arm assemblies I can nick one from if I am desperate.

#54 M J W J

M J W J

    One Carb Or Two?

  • Members
  • PipPipPipPipPipPipPip
  • 976 posts
  • Location: Midlands
  • Local Club: not yet

Posted 03 February 2013 - 11:35 PM

Finally got round to updating my build diary. Everytime I work on the mini it goes dark before I remember to take pictures.

Since my last update I have finished fitting the rear suspension

Posted Image

Machined off the lugs on my metro drive flanges. My method may be a bit overkill but it means I didn't have to remove the wheel studs to do it.

Posted Image

I have finally got round to rebuilding my other hub. I did the first one months ago but this one sat on the bench for ages. I have had all the front suspension built but I disassembled it ready to fit the drive shafts in (once they are built).

Posted Image (always nice to have a load of shiny parts ready to fit :proud: )

I fitted my brake and clutch master cylinders.

Posted Image

I have also got back to my drive shafts. I have machined one sleeve and cut two shafts down to length. I just need to cut the notch into the Vauxhall shaft and they will be ready for welding.

Posted Image
Posted Image
Posted Image

I have also started machining the sleeve for the other shaft. My dad's lathe spins a bit too quick even when the belts are on the smallest pulleys so I have to do quite shallow cuts meaning it takes longer to machine them. I would start with a smaller diameter piece of steel but I am using what I can find in either my dad's workshop or my granddad's garage. Never mind. Free material.

Posted Image

While at Bingley I bought a few bits and pieces. Once the mini is back on its wheels it will be coming home so I can start sorting out fitting the front end and having something that looks like a mini.

I have also managed to pick up a set of CBR 929 throttle bodies so I need to start designing a manifold to fit them and that also clears my master cylinders.

#55 M J W J

M J W J

    One Carb Or Two?

  • Members
  • PipPipPipPipPipPipPip
  • 976 posts
  • Location: Midlands
  • Local Club: not yet

Posted 31 March 2013 - 07:47 PM

Had chance today to do a little bit more to the mini. My mate Whit returned one of my shafts to me during the week (the other he hasn't yet welded).

I spent today reassembling it and fitting it to the mini.

Posted Image
Posted Image
Sorry its not a very clear picture but as soon as he returned them to me he immediately apologised that his welding wasn't neater. Nowt wrong with it in my eyes. He said if I had done a better job of cleaning them before hand the mini side would have been better. He said that the Vauxhall side was fine.

Posted Image
One drive shaft assembled. I managed to get the OEM style bands back on it and tight.

Posted Image
The disc and drive flange show here is only temporary to pull the shaft through the bearing. I will be fitting my machined metro drive flanges and vented discs.

Posted Image
Just need to tighten everything up and fit the coil over and I can put the wheel back on.

Just the other side to sort out and I will have one upped a robin reliant

#56 M J W J

M J W J

    One Carb Or Two?

  • Members
  • PipPipPipPipPipPipPip
  • 976 posts
  • Location: Midlands
  • Local Club: not yet

Posted 07 April 2013 - 08:48 PM

Just a small update.

I am currently stripping my astra apart and selling it off bit by bit for spares. As I need to get rid of the shell I had to get it out the garage except this was a little difficult without suspension and wheels.

Before I removed the suspension from the mini I built a dolly to put the shell on. To move the astra shell out the way I needed the dolly so I first had to get the mini off it. To help support the car I finished assembling the suspension so at least one side of the car could support its self. This meant I could jack the other side up on the trolley jack and slide the dolly out from underneath.

Posted Image
Posted Image
Here is one side suspension built. This does not have my vented brakes fitted just the spare solid one I have for the time being. The wheels was just a steel one I had lying around. My alloys will be fitted once I have refurbished them.

Hopefully my mate Whit finishes welding my other shaft during the week. Apparently last week the apprentice they have at work managed to break the welder so he hasn't been able to do it for me. Thanks apprentice! If I get it back during the week I can get it fitted next weekend.

#57 M J W J

M J W J

    One Carb Or Two?

  • Members
  • PipPipPipPipPipPipPip
  • 976 posts
  • Location: Midlands
  • Local Club: not yet

Posted 15 April 2013 - 07:58 PM

Small update.

My mate whit returned my second shaft to me last week and as I had some free time Sunday decided to spend the day fitting it. I was looking forward to rolling the mini out the garage for the first time in about 4 years on its own wheels.

I assembled the shaft and all was going well.

Posted Image

Once I fitted it into the car and assembled the suspension I cycled the suspension to check everything was OK. Unfortunately one of the gators popped off. Annoying but hey ho. Nothing was torqued up so I stripped the suspension apart again to remove the shaft. With the hub out the way I tugged the driveshaft to remove it from the box and the inner CV joint fell to pieces. >:(

I found that the gaiter had come off as the band had snapped. I then snapped the spare I had afterwards trying to fit it.

I now need to replace a CV, a gaiter band and figure out how the hell to remove half a CV joint from my gearbox. unfortunately I'd put the circlips back in place so it won't come out easily.

I did start to sort out my sub frame front bar but I don't have any pictures of it.

#58 M J W J

M J W J

    One Carb Or Two?

  • Members
  • PipPipPipPipPipPipPip
  • 976 posts
  • Location: Midlands
  • Local Club: not yet

Posted 19 April 2013 - 07:02 PM

Managed to get a little done on the mini last night. I am now kind of back to where I was last week

It may seam a little extreme but I took the engine and gearbox out to removed the offending broken CV. Its simple enough with no front end on the car and only 3 nuts that hold the engine and gearbox to the frame. With the engine out I could split the engine and gearbox which allowed me to get a crow bar in a prise the broken CV joint out.

Posted Image
Proof that my home made engine crane works.

Posted Image
The offending CV joint out

Posted Image
Engine and box back together and mounted back into the sub frame

Posted Image
N/S suspension back together. Steering arm isn't connected yet as I didn't have my trolley jack with me to lift the suspension up and put pressure on the ball joint taper to stop it spinning. I also did not have my dad's socket set which has the socket for the drive shaft retaining nut so this is only loosely done up.

Posted Image
This shows the (lack of) space I had to get something in to prise the broken CV joint out, hence why I removed the engine and gearbox.

#59 M J W J

M J W J

    One Carb Or Two?

  • Members
  • PipPipPipPipPipPipPip
  • 976 posts
  • Location: Midlands
  • Local Club: not yet

Posted 11 May 2013 - 01:13 PM

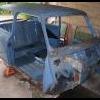
Its been a while but I managed to get a bit done yesterday before the UK MCM meet.
 
After being messed around twice while trying to find a replacement CV joint, I found in car in a scrap yard near me that had the same drive shafts that I have cut up to make my custom ones. An hour later and £20 lighter I had myself a replacement shaft. Shame as all I really wanted was the CV on the end.
 
A word of warning for anybody who has an F17 gearbox fitted. If you need a replacement shaft make sure you get the right one. The drive shafts that fit the F10, F13 and F15 gearboxes have the same number of splines on the outside of the inner CV so will fit into the gearbox however the shafts are different. The F17's are larger in diameter (about 26mm as opposed to 22.5mm) and have 25 splines not 22 on the end. This means that the CV joint is larger and the shafts are stronger. This is where I have been messed around by people selling me F15 ones instead.
 
I tightened up the track rod end nut that connects it to the steering arm on the N/s hub, refitted my spare drive flange and old brake disc and fitted a spare steel wheel.
 
DSC00878_zps535a8fcf.jpg
(the wheel in on full lock in this picture)
 
I'd already refitted the new CV joint to the other shaft so once I had greased the splines I fitted it into the gearbox and slid the hub in place. I spun the wheel on the other side to make sure everything moved ok but once again the outer CV gator popped off. I discovered due to the design of the mini hub it was catching the bit where you tighten up an OEM style metal gator band and this was what was knocking the gator off. After removing the shaft again (CV didn't fall apart this time), accidently stabbing myself in the hand with a screw driver and some swearing, I managed to fit the original metal band that the mini uses.
 
The shaft was refitted and the suspension assembled.
 
26c5044d-6222-46c9-b66e-37feb67b66e6_zps
 
I also fitted one of my brand new, slotted, grooved and vented discs to the drive flanges that I had machined.
DSC00877_zps510574aa.jpg
 
Once the bolts are torqued up I will remove the temporary disc and drive flange I have on the other side and fit the new disc and machined drive flange I have for that side.
 
These discs will go with a set of minitex brake pads and a set of 4 pot callipers that I am currently rebuilding. I found I have the rarer ATE callipers instead of the more normal Lockheed ones so parts are a little harder to find but I shall persevere. I need three new pistons for them so I am currently machining them out of some stainless steel. I'll also need to machine some spacers as these callipers are designed for non vented discs. The replacement seals are the same as some old Volvo rear brakes so aren't too difficult to get.
 
Hopefully I should be able to finish off the last few bits tomorrow before I drop it back down on its wheels for the first time in about 5 years (I keep saying this but it never seams to happen).


#60 M J W J

M J W J

    One Carb Or Two?

  • Members
  • PipPipPipPipPipPipPip
  • 976 posts
  • Location: Midlands
  • Local Club: not yet

Posted 12 May 2013 - 08:28 PM

Grrr! So Close. I didn't quite get in onto its wheels today as I hoped.
 
Managed to finish assembling the O/S suspension. Unfortunately I stripped three of the four bolts that connect the drive flange to the brake disc so wasted about an hour today to remove them and fit replacement bolts. Luckily I had some spare.
 
DSC00879_zps9e341854.jpg
(the car looks bent in the picture but I assure you it is the picture and not the car)
 
I think my tracking is a little out :rolleyes:. I adjusted the lower arms a bit as I realise that the wheel would hit the inner flitch panel when the suspension was compressed. I didn't adjust the track rod though. My suspension isn't together for good. The engine and gearbox has to come out at some point as I need to weld the gear change mount to the back of the frame and also paint the frame.
 
I swapped the temporary brake disc and drive flange I had on the one side for my new vented discs.
 
DSC00880_zps93bf07ff.jpg
 
I just need to sort the front bar out before I can put it down on its wheels. I managed to get the one side tacked together but when I tacked the other side I didn't get it quite right so need to grind it apart and do it again (beauty of tack welds I suppose).
 
I have realised that I will need to make an exhaust manifold for it as well as the standard cast one puts the down pipe right through the middle of the front bar. The engine is as far back as it can go and the front bar can't come forward otherwise the front end won't fit. Oh well. One of many little problems to solve which come with fitting a big engine into a very small car.
 
DSC00881_zpsb51b0680.jpg


0 user(s) are reading this topic

0 members, 0 guests, 0 anonymous users