Jump to content


Photo
- - - - -

What Did You Do To Your Mini Today


  • Please log in to reply
9734 replies to this topic

#5731 benm

benm

    Mini Mad

  • Noobies
  • PipPipPipPip
  • 111 posts
  • Location: S.Wales

Posted 23 April 2016 - 08:21 AM

Made a tool to ream the new bushes on the rear radius arms 😊
20160423_090549_zpsfncgfs9k.jpg

Edited by benm, 23 April 2016 - 08:23 AM.


#5732 Chris.Williams

Chris.Williams

    Super Mini Mad

  • Members
  • PipPipPipPipPipPip
  • 679 posts
  • Location: Matamata

Posted 23 April 2016 - 11:26 AM

Carpeted my boot/rear of the seat and mounted my amp
Attached File  image.jpeg   33.8K   10 downloads

Then made a boot board, which I will carpet tomorrow all going well
Attached File  image.jpeg   65.89K   17 downloads

Edited by Chris.Williams, 23 April 2016 - 11:29 AM.


#5733 Batmini

Batmini

    Speeding Along Now

  • Members
  • PipPipPipPipPip
  • 378 posts
  • Location: Stourport

Posted 23 April 2016 - 01:50 PM

Carpeted my boot/rear of the seat and mounted my amp
attachicon.gifimage.jpeg
Then made a boot board, which I will carpet tomorrow all going well
attachicon.gifimage.jpeg


I'll be the first to ask, got any drawings for the boot board? Looks good

#5734 Batmini

Batmini

    Speeding Along Now

  • Members
  • PipPipPipPipPip
  • 378 posts
  • Location: Stourport

Posted 23 April 2016 - 01:56 PM

Today i fitted the new pulley and hot climate fan, but still had issues with clearance with my rad. Ended up making a new top support plate in the end.

Attached Files


Edited by Batmini, 23 April 2016 - 01:57 PM.


#5735 Chris.Williams

Chris.Williams

    Super Mini Mad

  • Members
  • PipPipPipPipPipPip
  • 679 posts
  • Location: Matamata

Posted 23 April 2016 - 06:31 PM

Carpeted my boot/rear of the seat and mounted my ampattachicon.gifimage.jpeg
Then made a boot board, which I will carpet tomorrow all going wellattachicon.gifimage.jpeg


I'll be the first to ask, got any drawings for the boot board? Looks good

No drawing as I made it up as I went along, but I can take some measurements and post them with a little picture maybe.
I should get the time to carpet it today and will post that pic too

#5736 old original

old original

    Speeding Along Now

  • Members
  • PipPipPipPipPip
  • 353 posts
  • Location: Cornwall

Posted 23 April 2016 - 07:28 PM

A picture paints a thousand words.....


Attached File  DSCN1633.JPG   64.38K   39 downloads


now..BEER


#5737 davej

davej

    Kelly Jones

  • Members
  • PipPipPipPipPipPipPip
  • 985 posts
  • Location: North Wales

Posted 23 April 2016 - 07:28 PM

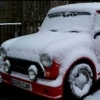
I gave her a hoover and a wash to get the dust off


DSC05505_zpsia1axxfq.jpg


#5738 1968andyf

1968andyf

    Mini Mad

  • TMF+ Member
  • PipPipPipPip
  • 144 posts
  • Location: Derbyshire

Posted 23 April 2016 - 07:39 PM

Spent all afternoon setting ride height camber caster and tracking. Wow what a difference

#5739 leepol83

leepol83

    Camshaft & Stage Two Head

  • Members
  • PipPipPipPipPipPipPipPip
  • 1,744 posts

Posted 24 April 2016 - 09:00 AM

managed to find and eliminate 4 rattles


Only a few thousand more to find and eliminate the ha ha!!!!!

#5740 robocx

robocx

    Passed Test

  • Noobies
  • PipPip
  • 34 posts
  • Location: manchester

Posted 24 April 2016 - 02:49 PM

Took it out for drive it day

Attached Files


#5741 sh4ne

sh4ne

    Learner Driver

  • Noobies
  • PipPip
  • 17 posts
  • Location: Lincolnshire

Posted 24 April 2016 - 03:37 PM

8 months on from my Mini purchase, she is MOT ready!

Arches rivet'd back on (that was a pain) and sunvisors 'repaired' and back in place :)

Still loads I want to do but main objective now (after MOT) is to enjoy the ride!


#5742 New game mini

New game mini

    Mini Mad

  • Members
  • PipPipPipPip
  • 294 posts
  • Location: Burton upon Trent

Posted 24 April 2016 - 07:17 PM

[quote name="THE ANORAK" post="3378110" timestamp="1460909715"]

removed the standard mini city stickers. the electric blue was clashing with the cranberry red !!! the start of a process to de-90's the car.
 
Looks great! Any handy tips for getting off the remaining glue left behind by the stickers? Took my Mayfair stripes off and they've left marks.

EDIT: OOOPS my quote didn't work :/

Edited by New game mini, 24 April 2016 - 07:18 PM.


#5743 THE ANORAK

THE ANORAK

    Up Into Fourth

  • Members
  • PipPipPipPipPipPipPipPipPip
  • 3,946 posts
  • Location: rugby

Posted 24 April 2016 - 09:51 PM

i did a you tube search and the best i could come up with was WD40. the idea is to wet the glue with it and give it chance to soak in and soften it. i also used the edge of a credit card as a scraper.


cleaned the paint off and gave it a good polish.


best to keep everything warm apparently and i used a hairdryer to soften the vinyl before removal.


there is a slight difference in paint colour but you should be able to get all the glue off with a bit of elbow grease.


actually be good to know if anyone has a better method.


#5744 FAZ

FAZ

    Mini Mad

  • Members
  • PipPipPipPip
  • 284 posts

Posted 25 April 2016 - 08:17 AM

Heat gun
Petrol
Polish

#5745 Chris.Williams

Chris.Williams

    Super Mini Mad

  • Members
  • PipPipPipPipPipPip
  • 679 posts
  • Location: Matamata

Posted 25 April 2016 - 08:41 AM

Today I carpeted my boot board and I constructed my sub box, mounted my sub and installed the box into my boot.
Completed the wiring too.

Attached File  image.jpeg   47.09K   3 downloads

Attached File  image.jpeg   29.58K   0 downloads

Attached File  image.jpeg   35.5K   0 downloads

Attached File  image.jpeg   28.35K   0 downloads

Attached File  image.jpeg   41.53K   6 downloads

Attached File  image.jpeg   47.01K   7 downloads


152 user(s) are reading this topic

0 members, 152 guests, 0 anonymous users