 )
)


Mini Virgin Rebuild Of 83 Mayfair.
Started by
grahama
, May 22 2010 05:09 PM
1006 replies to this topic
#91

nrwilliams
-

- Noobies
-

- 133 posts
Mini Mad
- Location: Uckfield, East Sussex
Posted 19 January 2011 - 04:26 PM
Excellent progress! )
)
#92
grahama
-
- Members
-
- 2,442 posts
Up Into Fourth
- Location: Warrington
- Local Club: None in my area !!
Posted 26 January 2011 - 06:48 PM
Hi all,
more slow progress, but going slowly so I don't, hopefully, bugger it all up and have to give it to the scrap man, also weather crappy and cold lol.
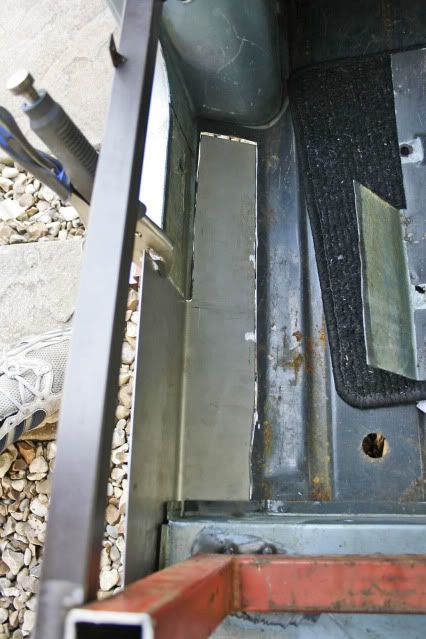
Anyway got the flitch kurusted up and red oxided to stop the rot on my shiny new panel.
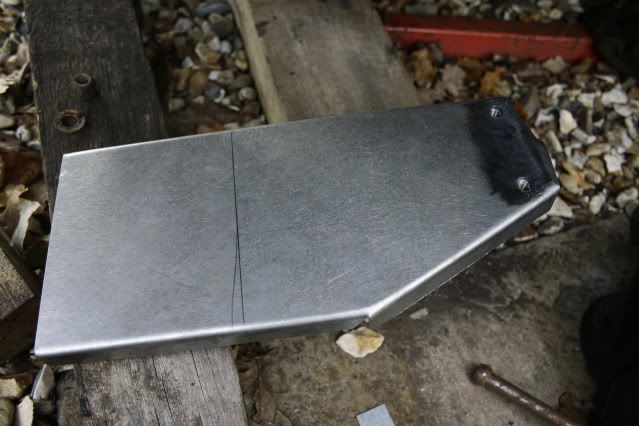
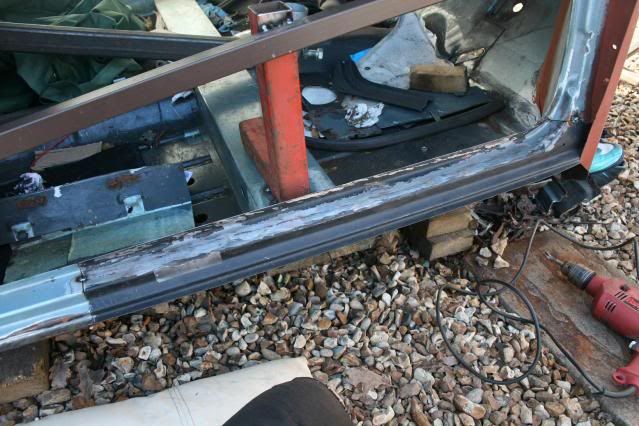
The doorstep was cut in half as it didn't fit so welded it up along the less than straight cut !! Getting good penetration on the rear too which I am pleased about.
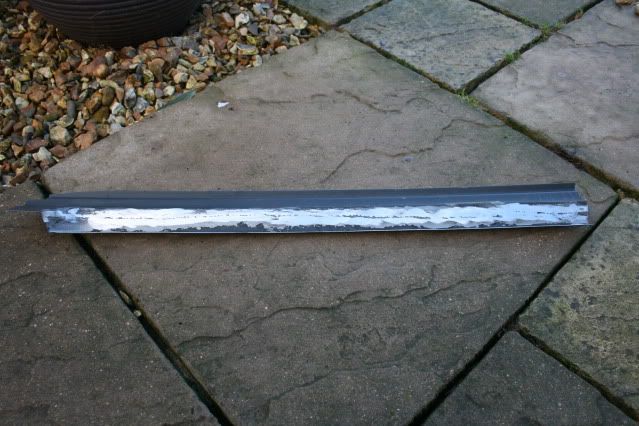
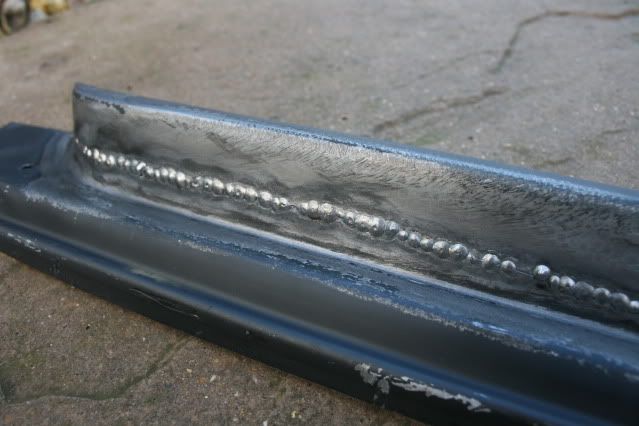
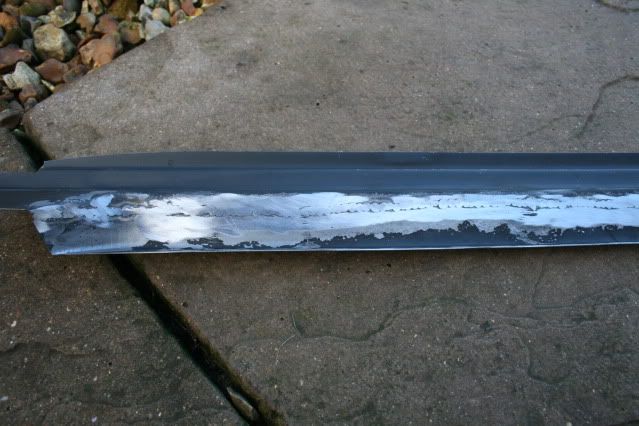
I did a trial fit and found that there is a slight curve in the step following the cut and weld process, not from the welding I feel as I took it very slowly to avoid heat, but the cut was grinded in one go and that may heve done it. Not too bad as a few well placed welds will hold it in place and I may yet put a relief cut in to straighten it up.
The pattern step is not the same shape as the original as the join shows but I will add filler later to smoothe the join and hopefully the door will fit.
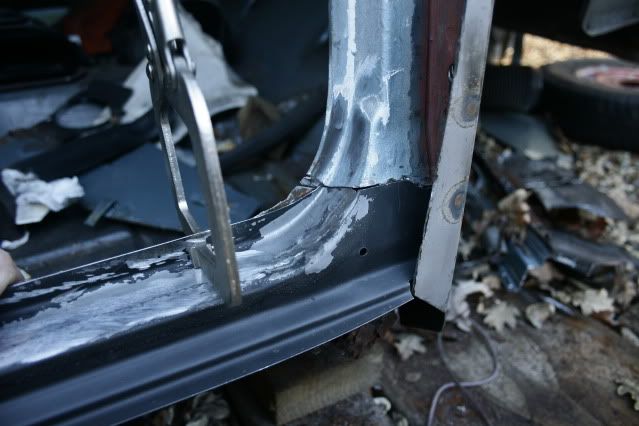
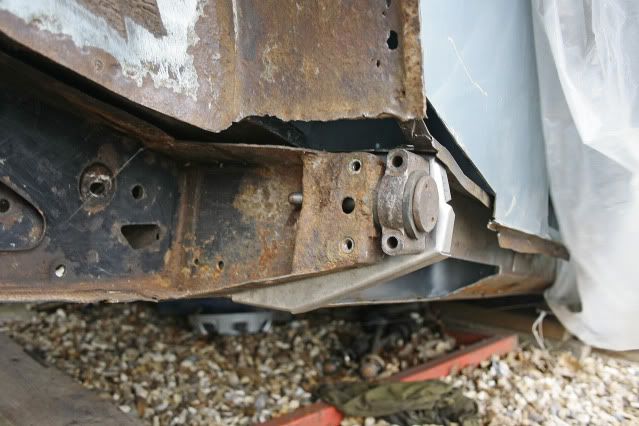
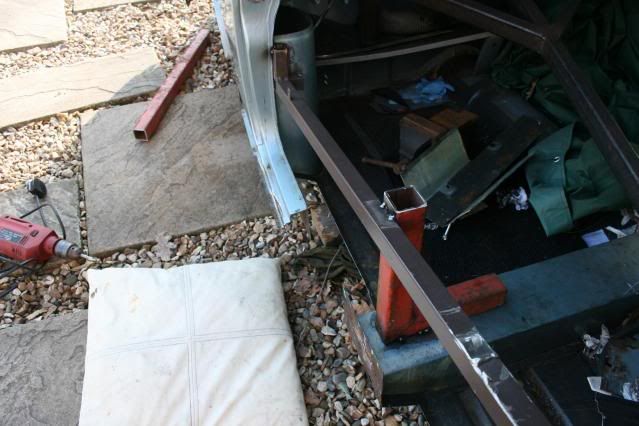
Next bit was the os heelboard repair and these brackets had to go as that section of inner sill had had it, not sure what they are for though??
Not a huge repair required across the back but the subframe mounts are past it so a headache coming up getting this bit right.
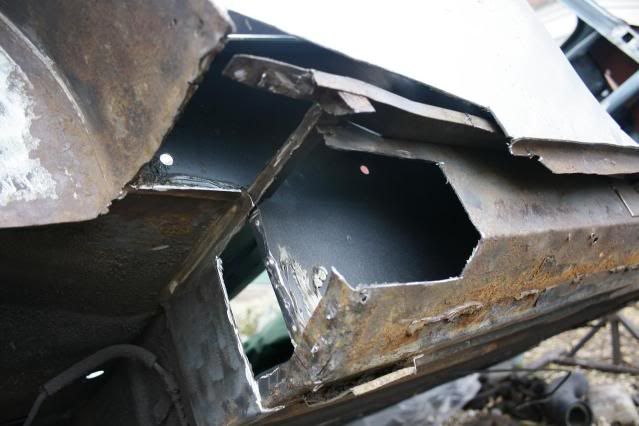
I chopped happily away till the sill started to look patchy and I realised I hadn't made any measurements for the new mounts to go so the subframe will have to go back on for that.
The ends of the inner sills are not too bad but when I make the new inner sill I will probably replace the flanges to get a better join to the heelboard repair section.
All tidied up, the inner sill section cut out to good metal and given a good wire brushing to see how it all looked. Quite pleased all in all, and now I have to find the subframe mount bolts etc !!! Thats all till next week though as work and cold fingers stop play lol
Hope you enjoyed,
Graham
more slow progress, but going slowly so I don't, hopefully, bugger it all up and have to give it to the scrap man, also weather crappy and cold lol.
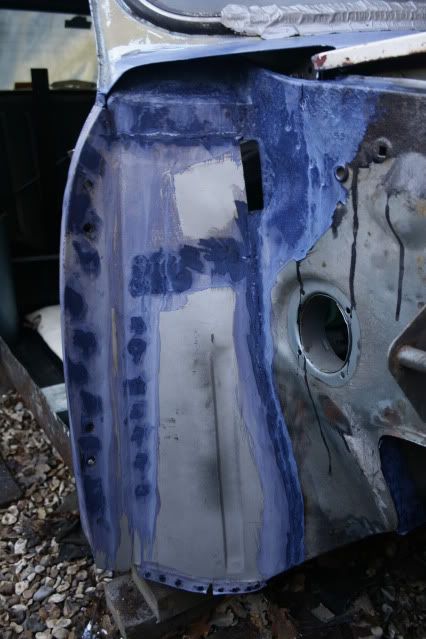
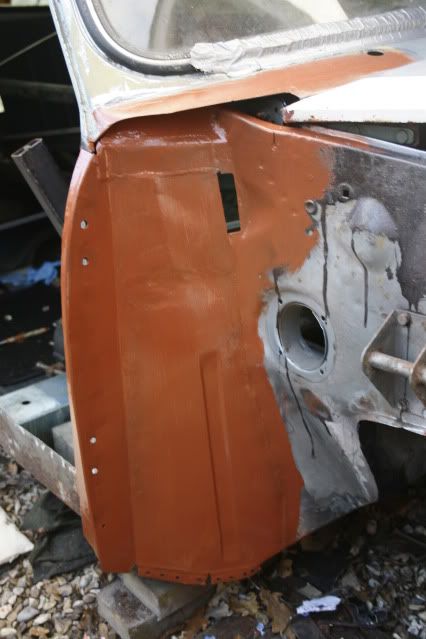
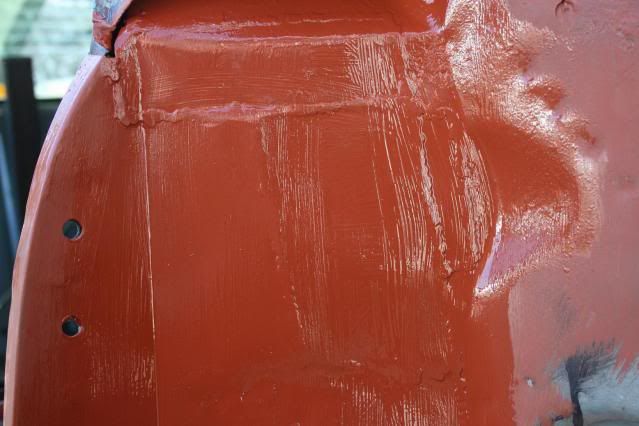
Anyway got the flitch kurusted up and red oxided to stop the rot on my shiny new panel.
The doorstep was cut in half as it didn't fit so welded it up along the less than straight cut !! Getting good penetration on the rear too which I am pleased about.
I did a trial fit and found that there is a slight curve in the step following the cut and weld process, not from the welding I feel as I took it very slowly to avoid heat, but the cut was grinded in one go and that may heve done it. Not too bad as a few well placed welds will hold it in place and I may yet put a relief cut in to straighten it up.
The pattern step is not the same shape as the original as the join shows but I will add filler later to smoothe the join and hopefully the door will fit.
Next bit was the os heelboard repair and these brackets had to go as that section of inner sill had had it, not sure what they are for though??
Not a huge repair required across the back but the subframe mounts are past it so a headache coming up getting this bit right.
I chopped happily away till the sill started to look patchy and I realised I hadn't made any measurements for the new mounts to go so the subframe will have to go back on for that.
The ends of the inner sills are not too bad but when I make the new inner sill I will probably replace the flanges to get a better join to the heelboard repair section.
All tidied up, the inner sill section cut out to good metal and given a good wire brushing to see how it all looked. Quite pleased all in all, and now I have to find the subframe mount bolts etc !!! Thats all till next week though as work and cold fingers stop play lol
Hope you enjoyed,
Graham
Edited by grahama, 26 January 2011 - 07:59 PM.
#93
hughJ
-

- Members
-
- 727 posts
Soldiering Along
- Location: Highlands, Scotland
Posted 26 January 2011 - 06:59 PM
I am enjoying Graham - coming on great. Keep going at it
Hugh
Hugh
#94
grahama
-
- Members
-
- 2,442 posts
Up Into Fourth
- Location: Warrington
- Local Club: None in my area !!
Posted 11 February 2011 - 04:34 PM
Hi all,
a very frustrating update !!!
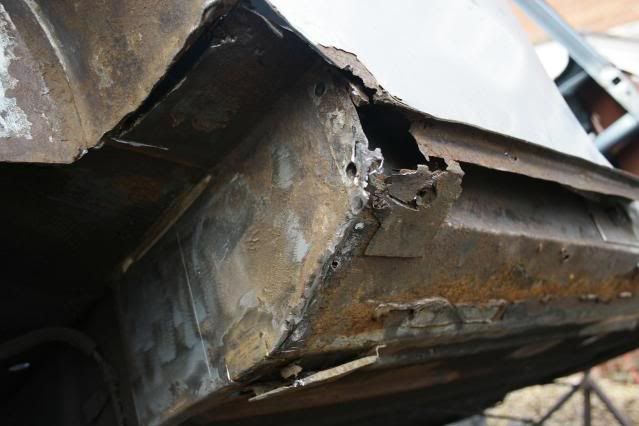
OS heelboard repair to do and have done it but not without problems and not sure all is ok.
placed the subby on to try and get the holes aligned as I didn 't make any templates or measurements as I intended to do, muppet!! So fitting the repair piece was going to be tricky.
Measured and cut up I test fitted the repair panel and quite pleased, gap too large at the top but I can put a piece in to make welding in easier when I am up to that.
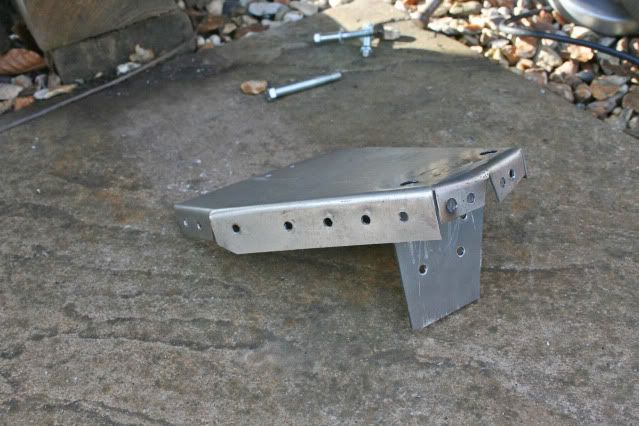
I preped the panel for the inner wing before final test fits and made a locating thing to keep it aligned ok while I weld. Measured and then re measured from side to side, and when happy I tried the subby on and fitted fine, well all the screws went into the holes anyway !!!
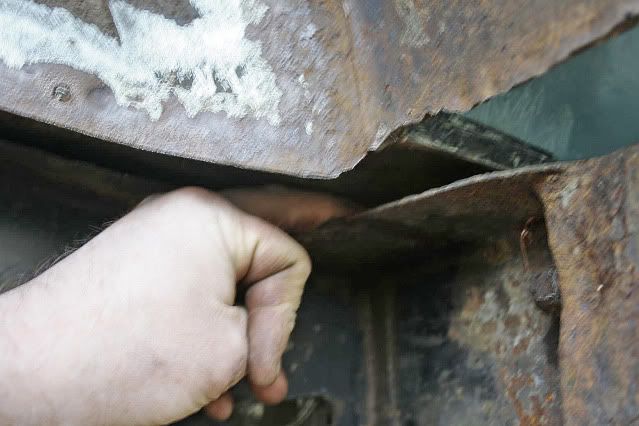
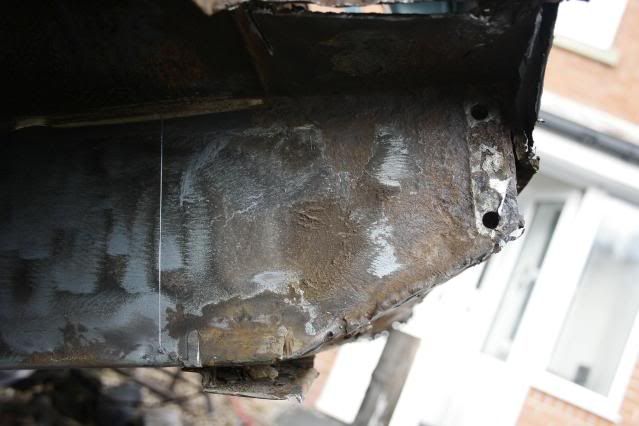
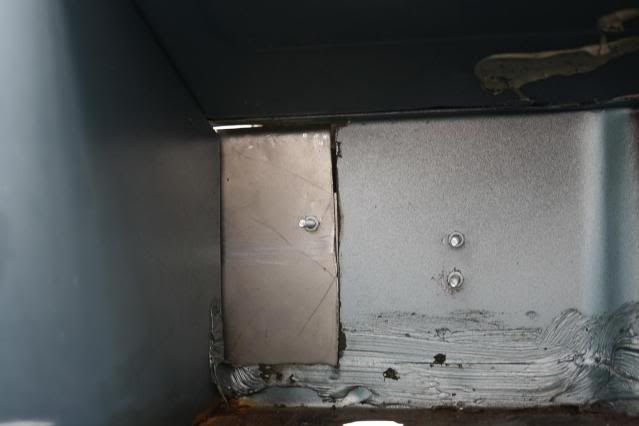
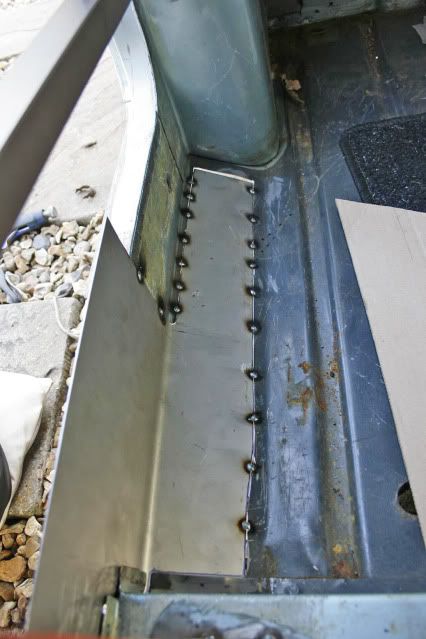
The finger test seemed to confirm that by feel the gaps from subby to heelboard were same along the length and to the boot floor on left and right so welding took place.
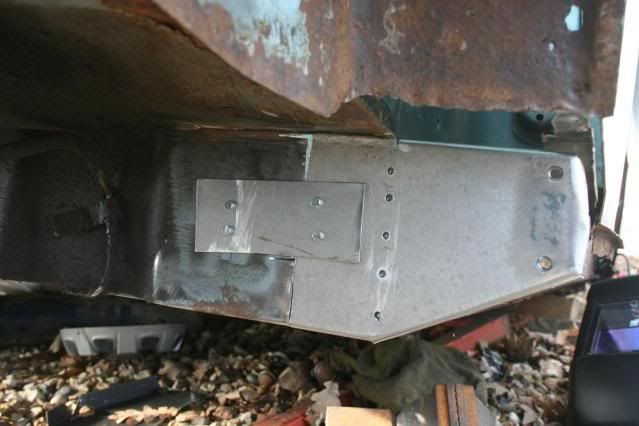
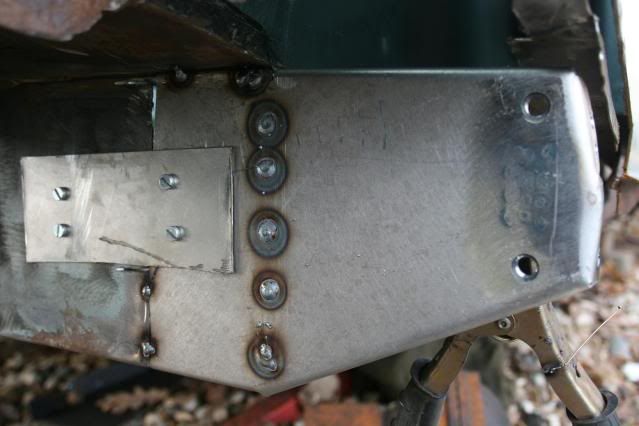
Very pleased with the tacking in and especially the plug welds, best so far. Thanks to all for advice about holding power on and filling in the hole for that !!
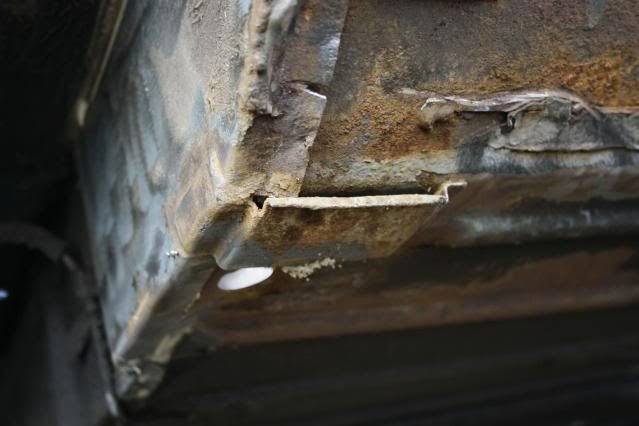
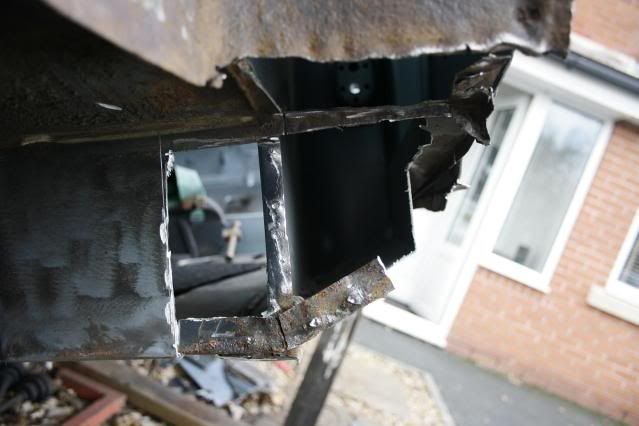
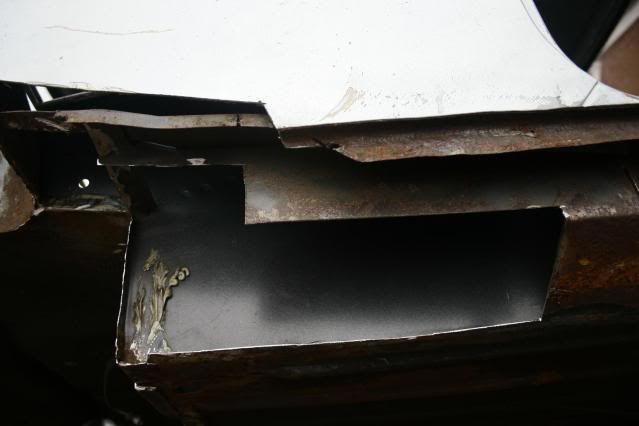
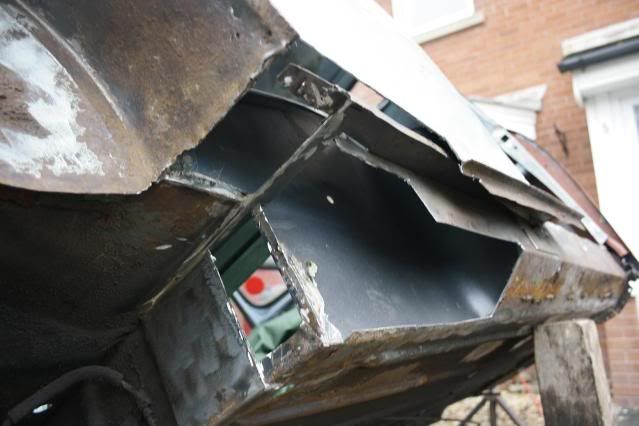
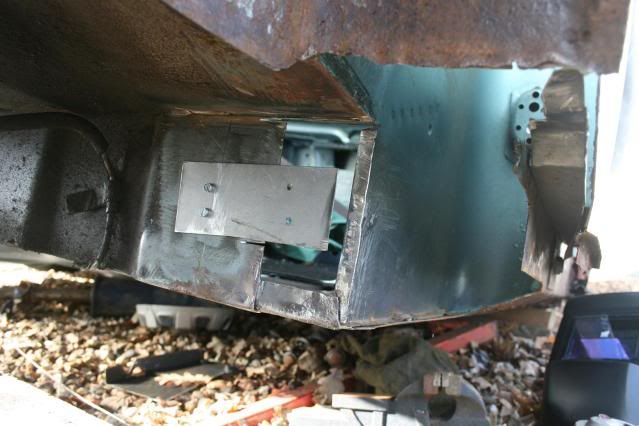
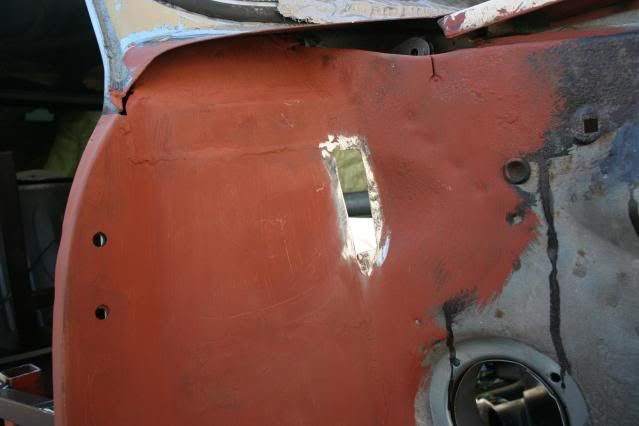
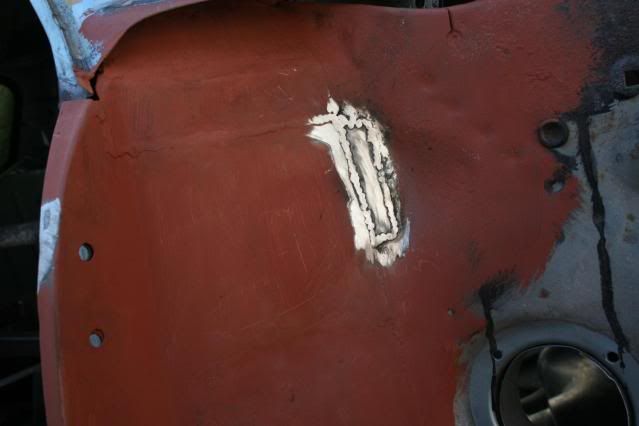
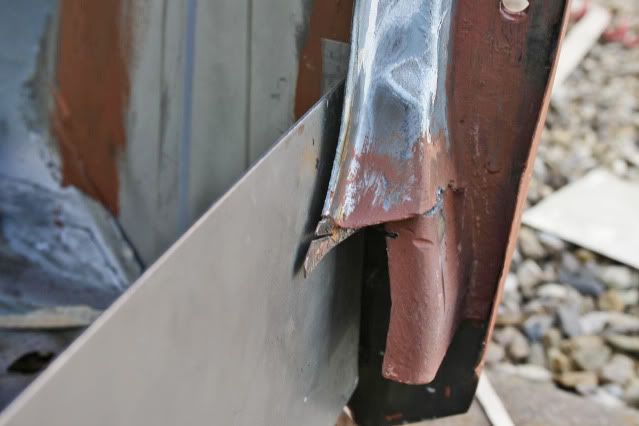
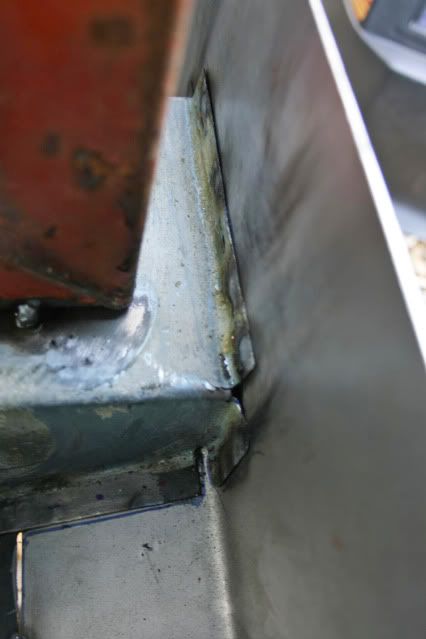
Than as I checked all the frustration started. The end of the heelboard should be level all the way along but mine didn't end up like that...
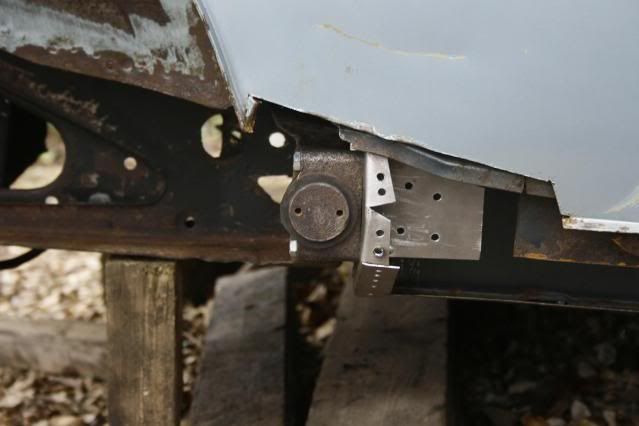
Looks fine but to get the gap behing the subby the same left and right I have to move the end of the heelboard repair back by about 1mm
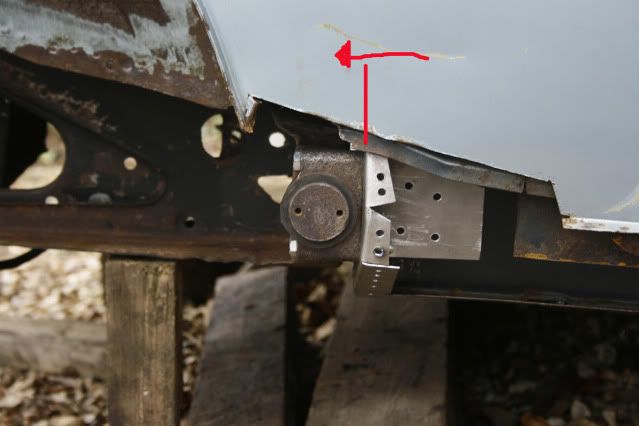
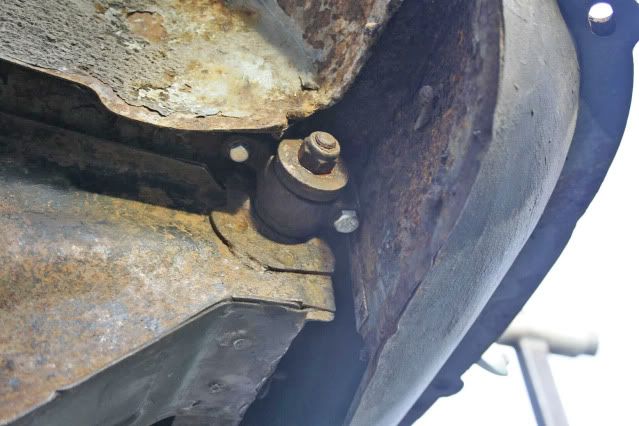
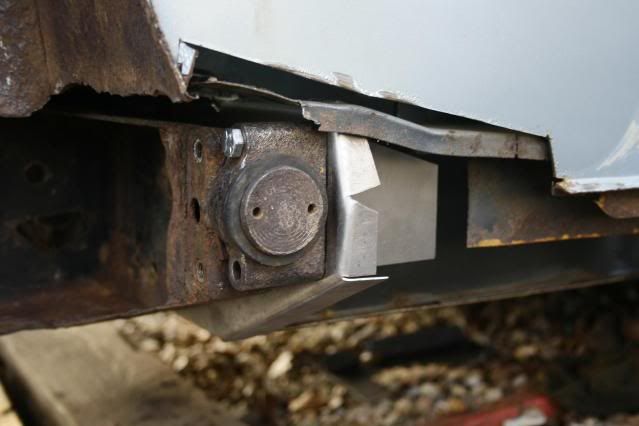
Like above. Now, with it all moved the gaps are fine and the screws go into the holes all round but there is still a small deflection on the repair piece from flush. As I said very very frustrting.
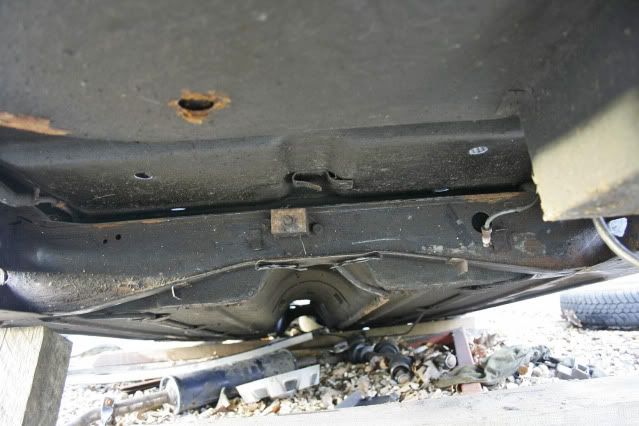
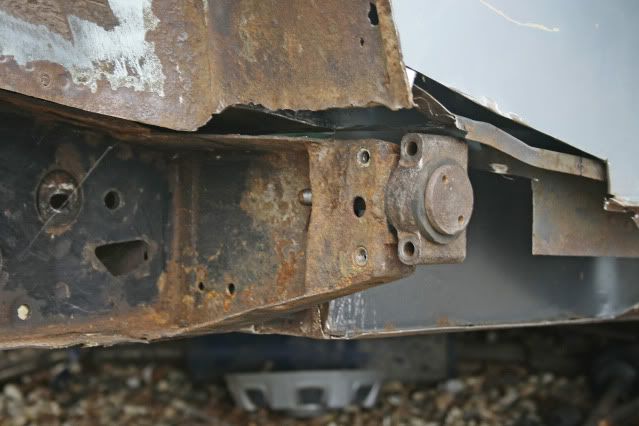
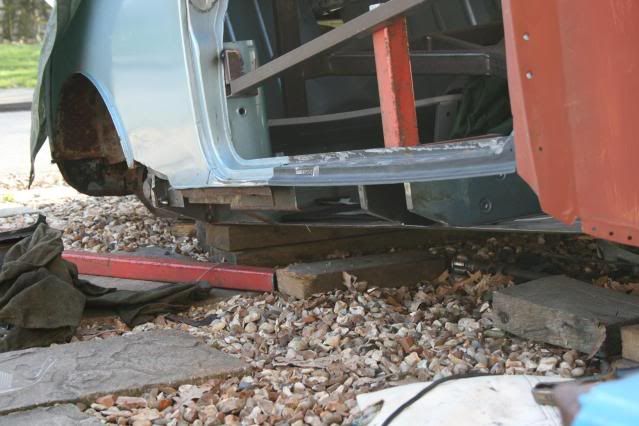
Gaps seem fine, underneath shown but I am worried about crabbing, your thoughts please as I can't figure it out !!!
Hope you enjoyed, and will ask in bodywork section too.
Graham
a very frustrating update !!!
OS heelboard repair to do and have done it but not without problems and not sure all is ok.
placed the subby on to try and get the holes aligned as I didn 't make any templates or measurements as I intended to do, muppet!! So fitting the repair piece was going to be tricky.
Measured and cut up I test fitted the repair panel and quite pleased, gap too large at the top but I can put a piece in to make welding in easier when I am up to that.
I preped the panel for the inner wing before final test fits and made a locating thing to keep it aligned ok while I weld. Measured and then re measured from side to side, and when happy I tried the subby on and fitted fine, well all the screws went into the holes anyway !!!
The finger test seemed to confirm that by feel the gaps from subby to heelboard were same along the length and to the boot floor on left and right so welding took place.
Very pleased with the tacking in and especially the plug welds, best so far. Thanks to all for advice about holding power on and filling in the hole for that !!
Than as I checked all the frustration started. The end of the heelboard should be level all the way along but mine didn't end up like that...
Looks fine but to get the gap behing the subby the same left and right I have to move the end of the heelboard repair back by about 1mm
Like above. Now, with it all moved the gaps are fine and the screws go into the holes all round but there is still a small deflection on the repair piece from flush. As I said very very frustrting.
Gaps seem fine, underneath shown but I am worried about crabbing, your thoughts please as I can't figure it out !!!
Hope you enjoyed, and will ask in bodywork section too.
Graham
#95
grahama
-
- Members
-
- 2,442 posts
Up Into Fourth
- Location: Warrington
- Local Club: None in my area !!
Posted 08 March 2011 - 03:59 PM
Hi all,
I am having a crisis of sorts as I do think I have taken on more than I think I can manage. It may well be that I am doing it on the drive and I am trying to restore too much, i.e. have I cut out too much from the sill ??, but I always have doubt in my mind till I get on and actually do it. This is my hardest bit yet to put back but onwards and hopefully upwards, as downwards is to the scrappers’ !!! Do first timers always have these doubts ??
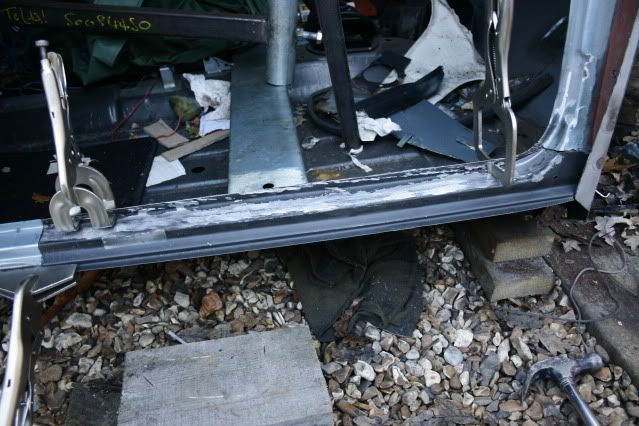
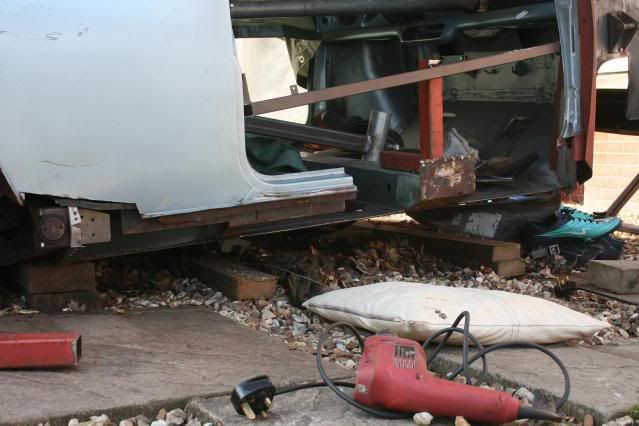
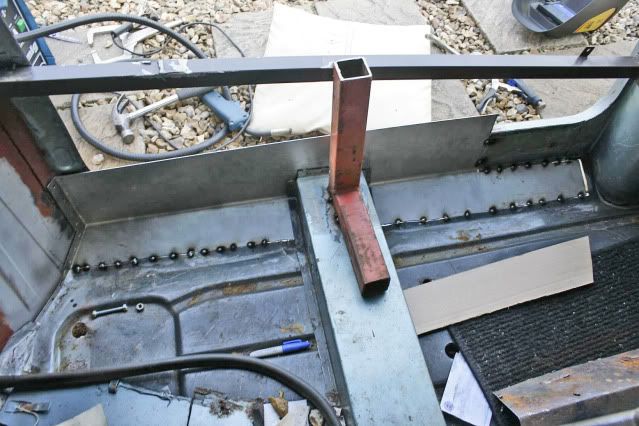
However a bit of an update, inner sill replacement in nearly it’s entirety !! Quite pleased with it really as I have learnt quite alot from this section of the restoration, fabrication and long seam welding, (when I get to it). Started by putting some bracing into the door aperture to hold things in place and seeing as though the sill needed replacing infront of the cross member then I also braced down to that.
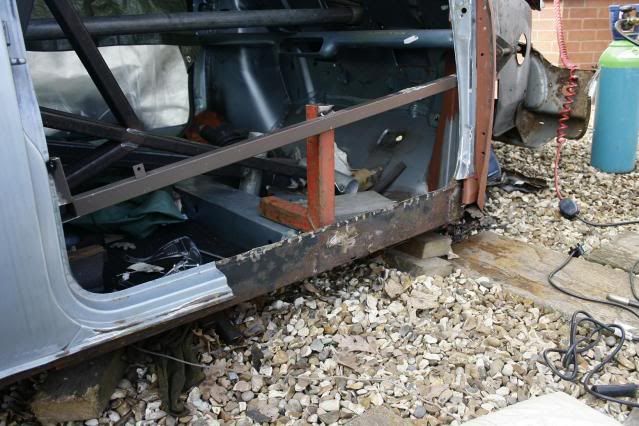
That done I ONCE again forgot to take measurements of the door aperture, ahhhhhhhhhhh, but I can measure the other side fortunately and I have the doorstep as a rough guide. Then the grinder came out to play weh hey !!
I only took the inner sill out back to near the rear bin as the metal was ok under it and I really didn’t want the hastle of re welding it back in !! The sill forming the cross member closing plate was also shot so I ground the spot welds off so I didn’t have holes in it. However the grinder did try to self destruct on the way !!

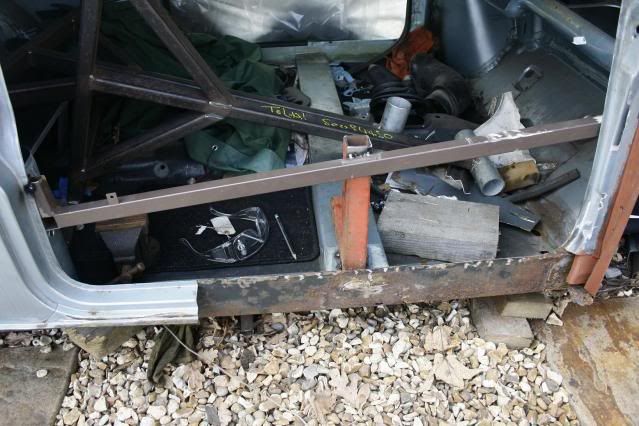
Cleaned it up so I can plug weld from the rear of the inner sill panel, hope this is ok !!
As I mentioned the doorstep would provide a rough reference for me to cut the new panel in so I tacked it in for a guide.
Not too happy with the pattern door step as after tinkering it has a bow so may make another one from scratch, ahhhhhhhhhhhh again !!!
Then finished off with a quick repair of an earlier mistake, quick clean weld and red oxide.
Still amazed with how a lick of paint improves my welding !!!
In two sections because of pics.........
I am having a crisis of sorts as I do think I have taken on more than I think I can manage. It may well be that I am doing it on the drive and I am trying to restore too much, i.e. have I cut out too much from the sill ??, but I always have doubt in my mind till I get on and actually do it. This is my hardest bit yet to put back but onwards and hopefully upwards, as downwards is to the scrappers’ !!! Do first timers always have these doubts ??
However a bit of an update, inner sill replacement in nearly it’s entirety !! Quite pleased with it really as I have learnt quite alot from this section of the restoration, fabrication and long seam welding, (when I get to it). Started by putting some bracing into the door aperture to hold things in place and seeing as though the sill needed replacing infront of the cross member then I also braced down to that.
That done I ONCE again forgot to take measurements of the door aperture, ahhhhhhhhhhh, but I can measure the other side fortunately and I have the doorstep as a rough guide. Then the grinder came out to play weh hey !!
I only took the inner sill out back to near the rear bin as the metal was ok under it and I really didn’t want the hastle of re welding it back in !! The sill forming the cross member closing plate was also shot so I ground the spot welds off so I didn’t have holes in it. However the grinder did try to self destruct on the way !!
Cleaned it up so I can plug weld from the rear of the inner sill panel, hope this is ok !!
As I mentioned the doorstep would provide a rough reference for me to cut the new panel in so I tacked it in for a guide.
Not too happy with the pattern door step as after tinkering it has a bow so may make another one from scratch, ahhhhhhhhhhhh again !!!
Then finished off with a quick repair of an earlier mistake, quick clean weld and red oxide.
Still amazed with how a lick of paint improves my welding !!!
In two sections because of pics.........
#96
grahama
-
- Members
-
- 2,442 posts
Up Into Fourth
- Location: Warrington
- Local Club: None in my area !!
Posted 08 March 2011 - 03:59 PM
Part two....
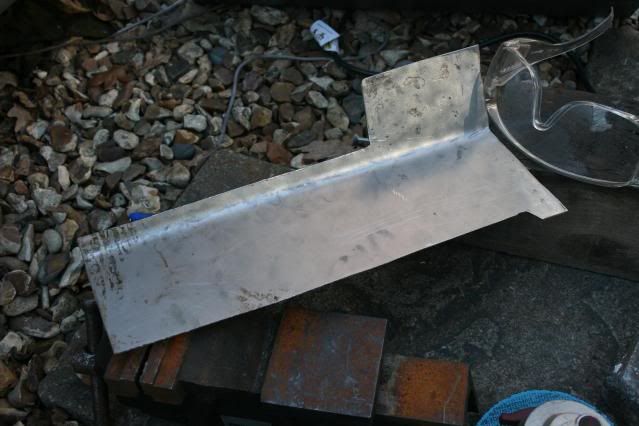
Anyway got some sheet metal the other day and took it down to a fabrication place who cut it and bent it for me into an inner sill shape !!! Cut it out over a few frustrating hours to get the basic shape I needed for the front part.
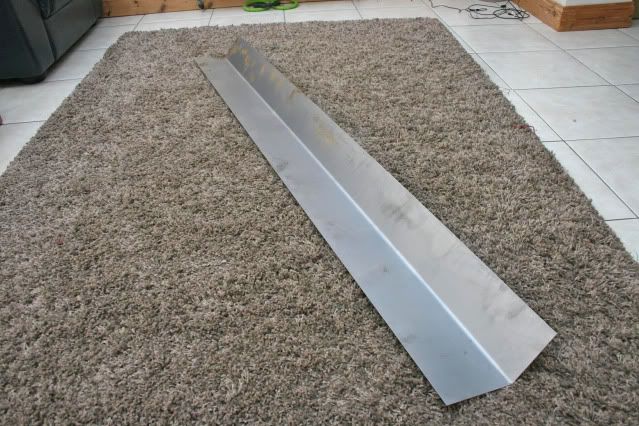
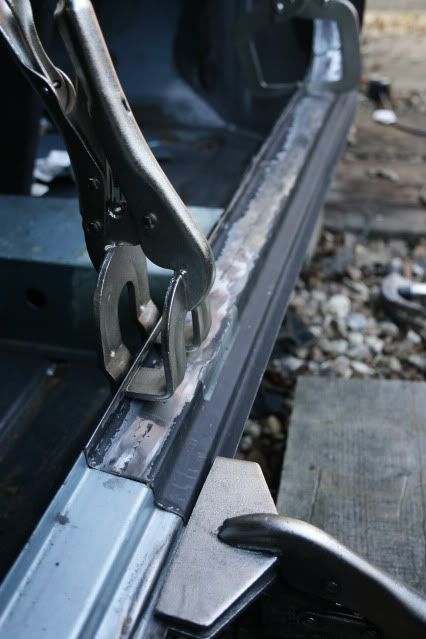
Even with the doubts I have I was pleased with the fit both sides of the cross member apart from where the sill joins the door post.
The puzzling gap...
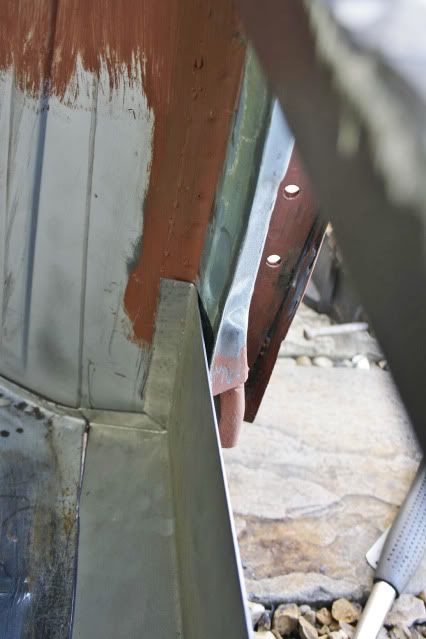
This has to be cut down a little to come into line with the doorstep so the top section may be exaggerated because it shouldn’t be there.
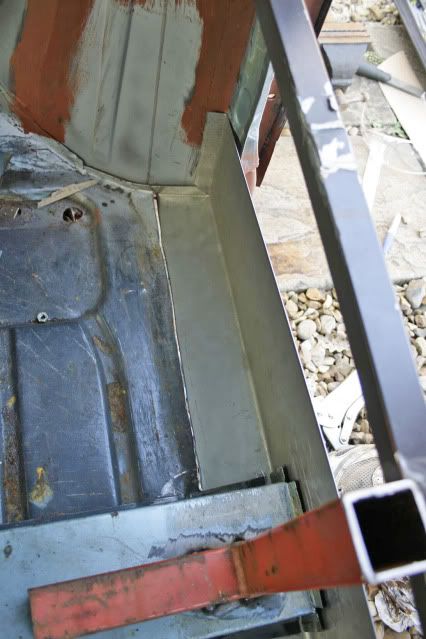
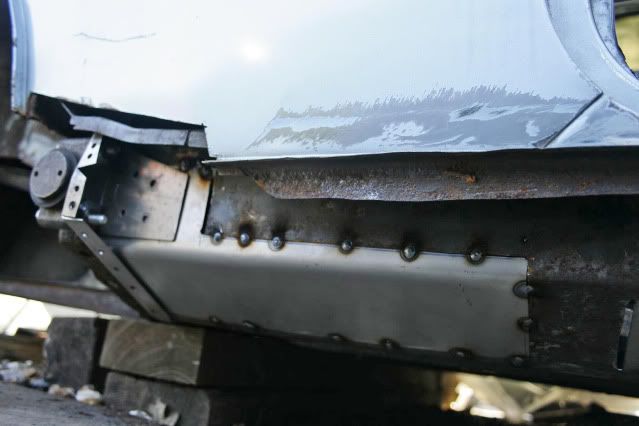
Got it tacked in today too so nice and stable again but will leave the bracing in for now. I think the 1.2mm steel I have used is thicker that the mini as the tacks have not penetrated as well as usual so when I seam it up I will have to apply the power for longer to get through, not a big problem though.
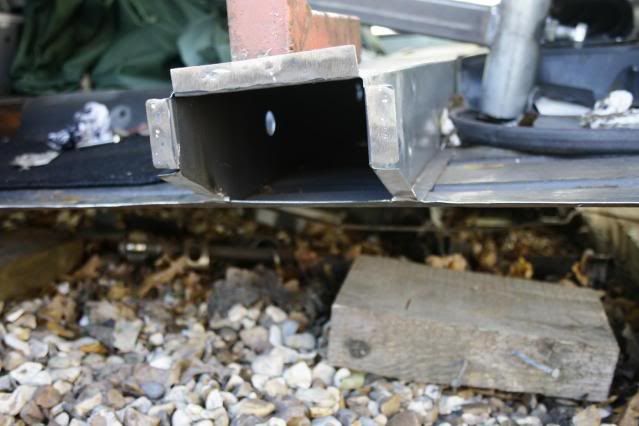
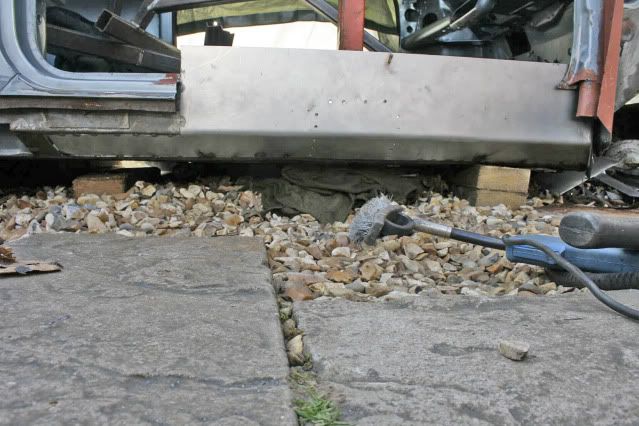
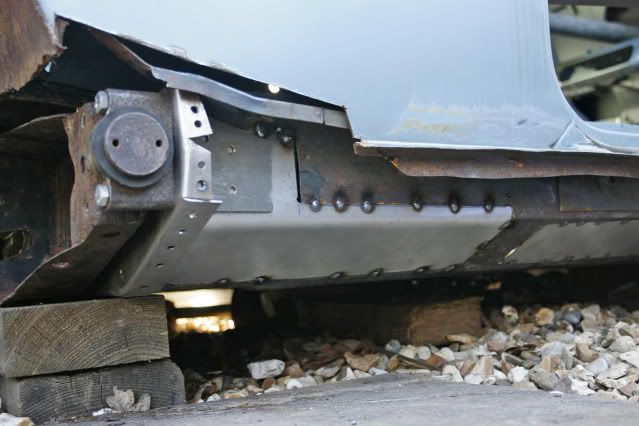
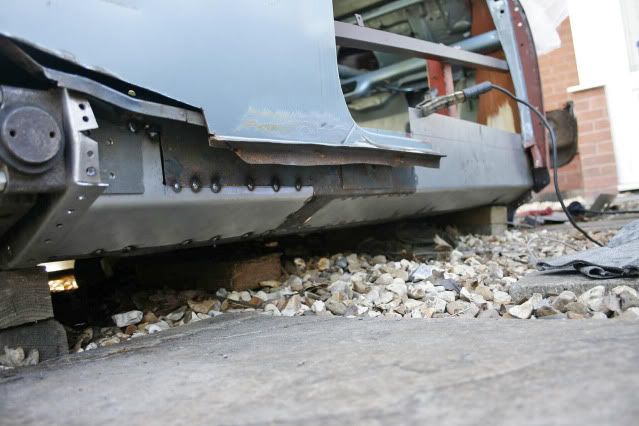
One last one from the outside, the cross member is not plug welded up yet so holes and I am glad I did it in one piece as not I do not need to do a separate cross member end patch.
Hope you enjoyed ,
Graham
Anyway got some sheet metal the other day and took it down to a fabrication place who cut it and bent it for me into an inner sill shape !!! Cut it out over a few frustrating hours to get the basic shape I needed for the front part.
Even with the doubts I have I was pleased with the fit both sides of the cross member apart from where the sill joins the door post.
The puzzling gap...
This has to be cut down a little to come into line with the doorstep so the top section may be exaggerated because it shouldn’t be there.
Got it tacked in today too so nice and stable again but will leave the bracing in for now. I think the 1.2mm steel I have used is thicker that the mini as the tacks have not penetrated as well as usual so when I seam it up I will have to apply the power for longer to get through, not a big problem though.
One last one from the outside, the cross member is not plug welded up yet so holes and I am glad I did it in one piece as not I do not need to do a separate cross member end patch.
Hope you enjoyed ,
Graham
#97
BusheyTrader
-

- TMF+ Member
-
- 484 posts
Speeding Along Now
- Location: Bushey
- Local Club: Nope
Posted 08 March 2011 - 04:20 PM
"Do first timers always have these doubts ??" Well I do.
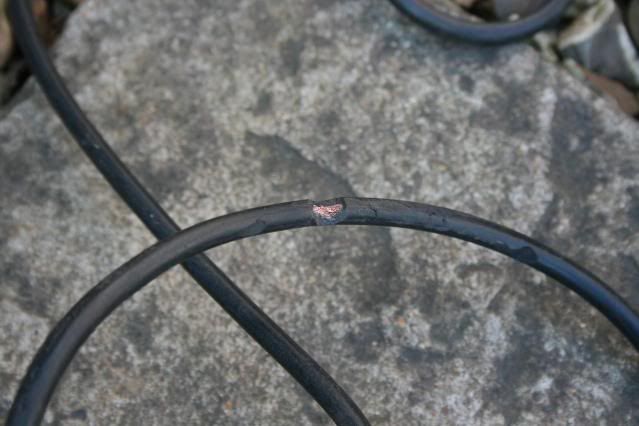
My inner wings rotted behind the front shock absorber mounts from the inside. The inner wing is double skinned there, forms the end of a box section and you can't see inside it. I hope yours are rust free.
Adam
My inner wings rotted behind the front shock absorber mounts from the inside. The inner wing is double skinned there, forms the end of a box section and you can't see inside it. I hope yours are rust free.
Adam
#98
grahama
-
- Members
-
- 2,442 posts
Up Into Fourth
- Location: Warrington
- Local Club: None in my area !!
Posted 08 March 2011 - 06:44 PM
Hi Adam,
Seem to have got away with that bit, not looked in detail tho !! Glad it's not just me in doubting mode lol. Hope that came out right !
This project may turn into a 2 year not 1 year ordeal but the more I do the more relaxed I get ! I wouldn't advise anyone taking a project on to do it on the front drive, becomes very tiresome moving equipment in and out every time a bit is to be done !
Graham
#99
hughJ
-
- Members
-
- 727 posts
Soldiering Along
- Location: Highlands, Scotland
Posted 08 March 2011 - 08:43 PM
Hello again Graham
I'm absolutely full of doubts!!! When you look at a job you've a fortnight later it doesn't seem so bad. You forget the damage done! I am most impressed by your panel making and I'd say very tidy welding. My own feelings about Minis now is that they don't fit together at all. You have to bend and force every bit to fit. I had once thought it might be - this panel slides in here, then this one fits neatly on top and so on. NO WAY. So keep going Graham. Us doubters just have to.
Grind on
Hugh
#100
darky32
-
- TMF+ Member
-
- 272 posts
Mini Mad
- Location: Bournemouth
- Local Club: Not yet !!
Posted 09 March 2011 - 09:25 AM
Hi Graham
Firstly you are doing a great job, and continued where many would have just given up and walked away. I have recently just replaced the n/s healboard section on my car and even after working around bodyshops and being in the motortrade for 20years I still had doubts with every grind and cut I was doing, I must have measured the exact point for the repair panel about 10-15 times prior to cutting it out and the same again when re welding it in.
Keep at it Graham, just think of each repair as a job well done
Regards
Mark
#101
Scholes2012
-

- Members
-
- 239 posts
Mini Mad
- Local Club: NONE
Posted 09 March 2011 - 10:51 AM
Great work, I would think that when the sill is cut to the right height it would be a closer fit, as it does look like the corner of the foot well is keeping the sill from matching up, looks good, keep at it.
#102
grahama
-
- Members
-
- 2,442 posts
Up Into Fourth
- Location: Warrington
- Local Club: None in my area !!
Posted 13 March 2011 - 06:24 PM
Hi all,
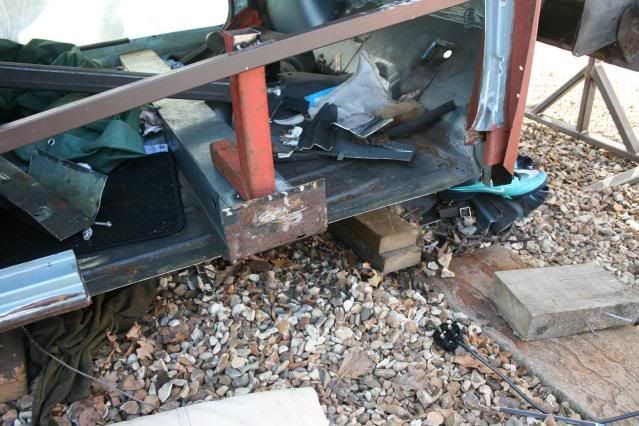
Good weather today so outside with all the gear once again. The rear piece of the inner sill was the last thing I wanted to get done before going back to work after a week or so off. I started with a lot of cardboard and a pen as fitting this piece inside the rear bin was going to be a little tricky.
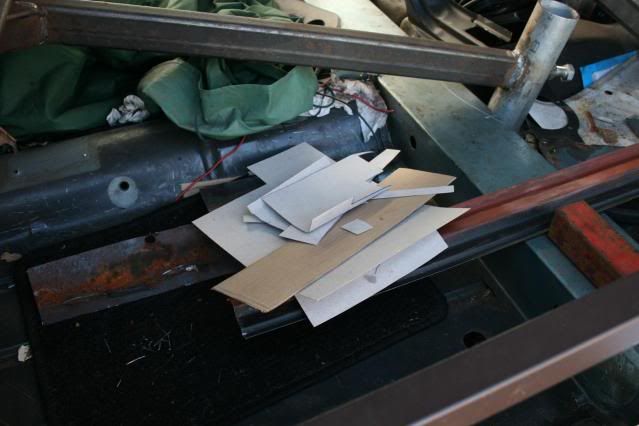
Transferred all the templates I did to my bent steel leftovers and came up witha nice looking piece, not that welding it in was going to be an easy afair even though the fit was quite tight.
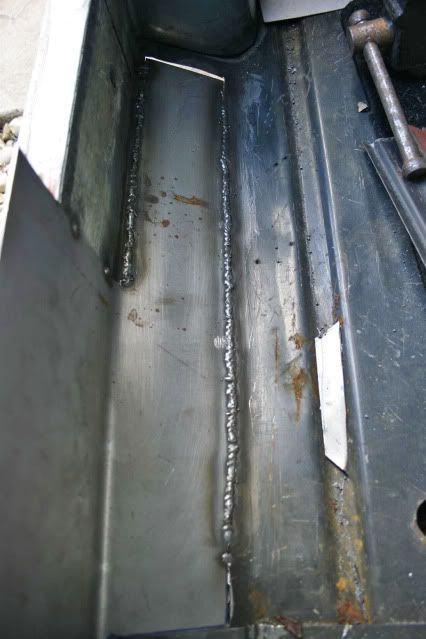
Not looking too shabby in my opinion seeing as though I have been having big doubts about my abilities. I drew on the cut line for the front section of the inner sill piece I put in using the doorstep, not too clear on the pics though.
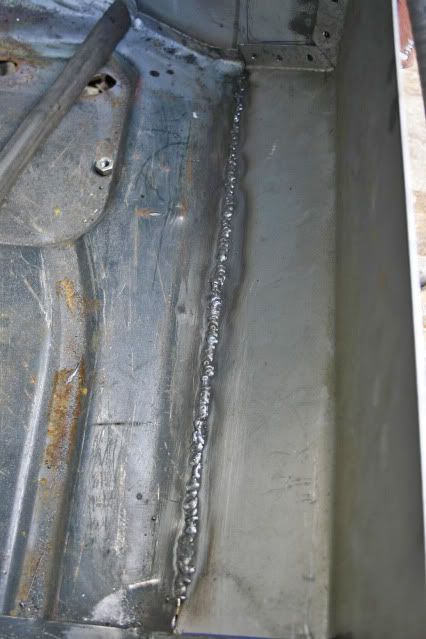
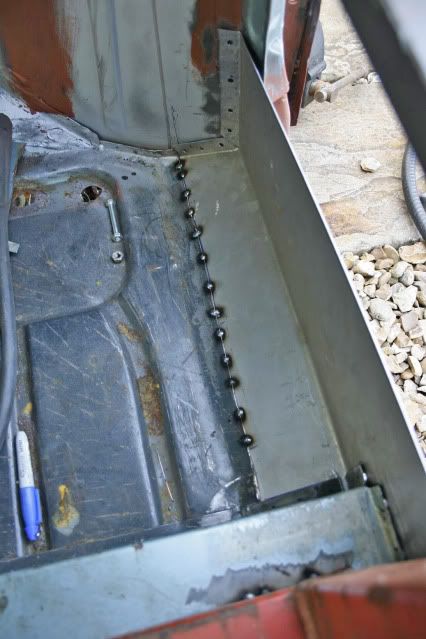
I had some time after the few hours spent getting to here today so decided to start seaming in the front section. Penetration is ok so I am definately going to re weld from the other side when the mini is back on the spit this next week. I can't seam the rear piece till then also. I plug welded the cross member aswell.
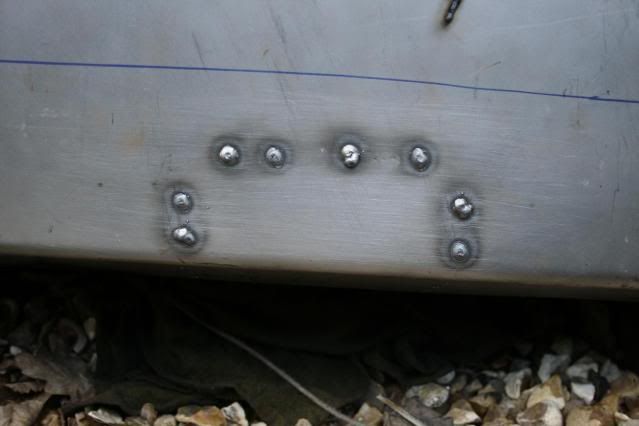
Not doing too badly on the plugs either, a couple had a hole by the side so I blobbed some weld in to close up so they turned out not too pretty. I must be starting to believe if I am thinking about the beauty of my welding in what will be a closed section, lol !!
There were gaps however on the inside of the sill on the corners of the cross member and I don't know if they need closing too.

I intend to put some weld on the edges of the cross member tabs anyway so could close these up pretty easilly.
Thats all folks, for a few days anyway,
Graham
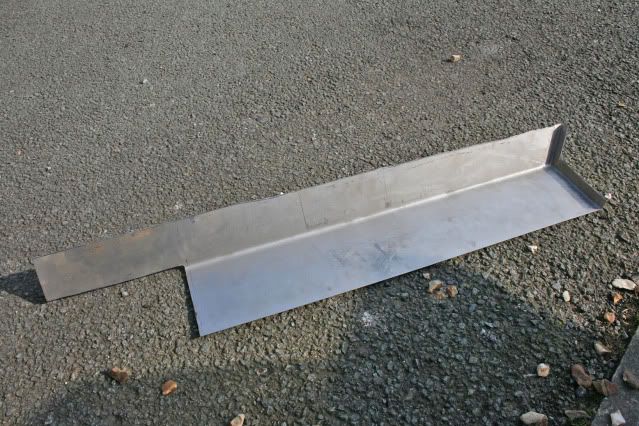
Good weather today so outside with all the gear once again. The rear piece of the inner sill was the last thing I wanted to get done before going back to work after a week or so off. I started with a lot of cardboard and a pen as fitting this piece inside the rear bin was going to be a little tricky.
Transferred all the templates I did to my bent steel leftovers and came up witha nice looking piece, not that welding it in was going to be an easy afair even though the fit was quite tight.
Not looking too shabby in my opinion seeing as though I have been having big doubts about my abilities. I drew on the cut line for the front section of the inner sill piece I put in using the doorstep, not too clear on the pics though.
I had some time after the few hours spent getting to here today so decided to start seaming in the front section. Penetration is ok so I am definately going to re weld from the other side when the mini is back on the spit this next week. I can't seam the rear piece till then also. I plug welded the cross member aswell.
Not doing too badly on the plugs either, a couple had a hole by the side so I blobbed some weld in to close up so they turned out not too pretty. I must be starting to believe if I am thinking about the beauty of my welding in what will be a closed section, lol !!
There were gaps however on the inside of the sill on the corners of the cross member and I don't know if they need closing too.
I intend to put some weld on the edges of the cross member tabs anyway so could close these up pretty easilly.
Thats all folks, for a few days anyway,
Graham
#103
analogue_radio
-

- TMF+ Member
-
- 4,897 posts
Up Into Fourth
- Location: Melton Mowbray, UK.
Posted 13 March 2011 - 06:32 PM
Brilliant build, I've scanned really quickly through the last page but I'll have a proper read of the whole lot when I've got time.
#104
nrwilliams
-
- Noobies
-
- 133 posts
Mini Mad
- Location: Uckfield, East Sussex
Posted 14 March 2011 - 09:44 AM
Please slow down! I cant keep up! Not been in the garage for a few weeks now and you are steaming ahead! 
Great work looks fantastic!!!!!
Neil
Great work looks fantastic!!!!!
Neil
#105
Nick Warwick
-
- TMF+ Member
-
- 1,588 posts
Camshaft & Stage Two Head
- Local Club: Sheffield mini club
Posted 14 March 2011 - 10:21 AM
coming along nice graham, you have a lot more on your plate than i do with my 83 mayfair project


1 user(s) are reading this topic
0 members, 1 guests, 0 anonymous users


