As most things we learn about mini's I only know this from a mistake I made when I wanted the pots from one engine for another. I didn't even think the oil would run out, you can imagine the panic lol. Glad I can help you out for once


Mini Virgin Rebuild Of 83 Mayfair.
Started by
grahama
, May 22 2010 05:09 PM
1006 replies to this topic
#751

Minidarren83
-

- Members
-

- 1,207 posts
One Carb Or Two?
- Location: Stanford Le hope
Posted 06 January 2013 - 05:20 PM
#752
alex-95
-

- Members
-
- 6,078 posts
I am THE CLAMP MAKER
- Location: l
Posted 06 January 2013 - 05:22 PM
Looks great Graham
#753
Carlos W
-

- TMF+ Member
-
- 10,115 posts
Mine is purple, but I have been told that's normal
- Location: Sittingbourne, Kent
Posted 06 January 2013 - 05:42 PM
Is the gasket sealant definitely fuel safe Graham?
#754
grahama
-
- Members
-
- 2,442 posts
Up Into Fourth
- Location: Warrington
- Local Club: None in my area !!
Posted 06 January 2013 - 08:02 PM
Ahhh Carlos, haven't thought of that either, turning out to be a 'one step forward, three back' sort of update !! Will check but if it isn't then not a big job. It is Loctite 5922 non hardening gasket sealant. We will see in time if it has to come off !
Graham
Graham
#755
Carlos W
-
- TMF+ Member
-
- 10,115 posts
Mine is purple, but I have been told that's normal
- Location: Sittingbourne, Kent
Posted 06 January 2013 - 08:04 PM
I've seen the blue stuff go all horrible in petrol anyway, being used for Carb float bowl sealing!
#756
mini danny
-

- Members
-
- 5,229 posts
I am a mini daddy.
- Local Club: british mini club
Posted 06 January 2013 - 08:29 PM
this is coming together nicely, the engine looks absolutely amazing better than new can't wait to see it finished :)
#757
Abimini
-

- Noobies
-
- 31 posts
Passed Test
- Location: Wigan
Posted 06 January 2013 - 09:39 PM
If I drop my engine off with u, could you make mine look like that :)
#758
rich2
-

- TMF+ Member
-
- 353 posts
Speeding Along Now
Posted 07 January 2013 - 07:12 PM
Wow this has come on in leaps and bounds since I last looked! I need to go back and have a good read. Good progress!
#759
hughJ
-

- Members
-
- 727 posts
Soldiering Along
- Location: Highlands, Scotland
Posted 07 January 2013 - 08:31 PM
Graham, Graham, Graham why have you to keep making me look so useless. That is just so good. Even all the bolts are new looking. Don't know how you do it. There are people in life who have it - you are one of those. The engine is stunning from every angle. Great Graham.
Hugh
Hugh
#760
grahama
-
- Members
-
- 2,442 posts
Up Into Fourth
- Location: Warrington
- Local Club: None in my area !!
Posted 07 January 2013 - 10:34 PM
Hugh,
you do make me laugh, shiny bolts but all still in bits overall, unpainted lol. As for shint bolts, hours spent with a wire brush grinder attachment, being very boring. Just cant bring myself to putting rusty bolts on. Maybe if I wasn't so fussy I would have done it all by now !! Still haven't timed it, hate learning new jobs, always nervous of messing it up but I suppose I have to take the plunge.
Graham
#761
Carlos W
-
- TMF+ Member
-
- 10,115 posts
Mine is purple, but I have been told that's normal
- Location: Sittingbourne, Kent
Posted 08 January 2013 - 08:54 AM
Are you going to get it running out of the car?
#762
grahama
-
- Members
-
- 2,442 posts
Up Into Fourth
- Location: Warrington
- Local Club: None in my area !!
Posted 15 January 2013 - 08:02 PM
Hi all,
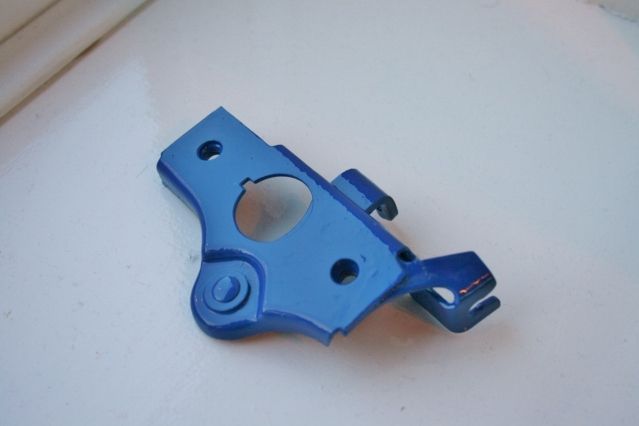
another small update, firstly the crud turned good stuff. Got an internal bonnet release off fleabay, rusty, stiff but complete.
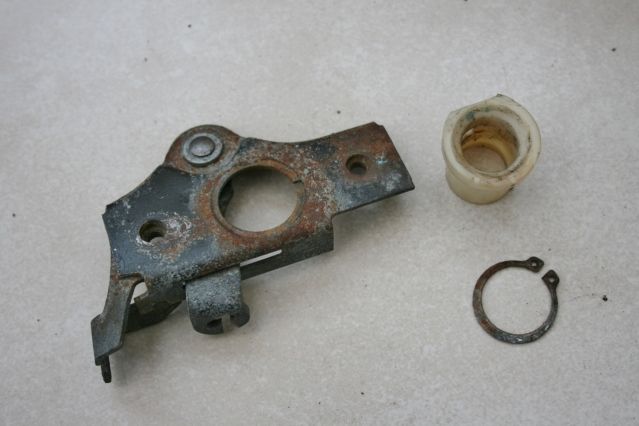
wire wheel as usual and kurust sorted it and added a little paint. I soaked the ends of the cable in wd40 which freed it up nicely so all ready to go.
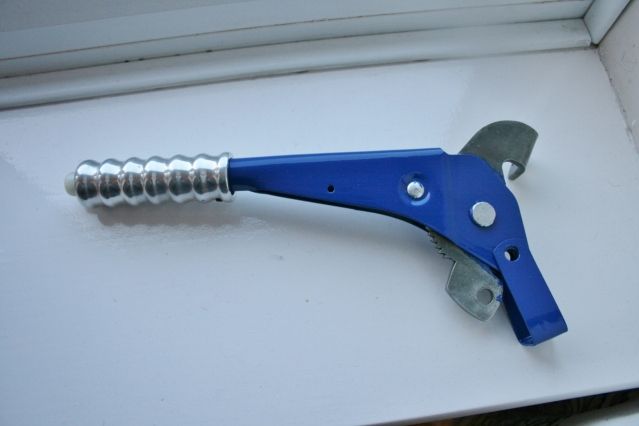
Also did the handbrake lever and surprised Matthew with an allot handle, he was well chuffed.
I wanted to test fire the engine with the cooling system in place but on the fleabay set I won the heater matrix hose diameter was too big so I will be reselling those and buying a new set, probably a good idea to be honest, this was the state of the connecting tube from bottom hose to heater.
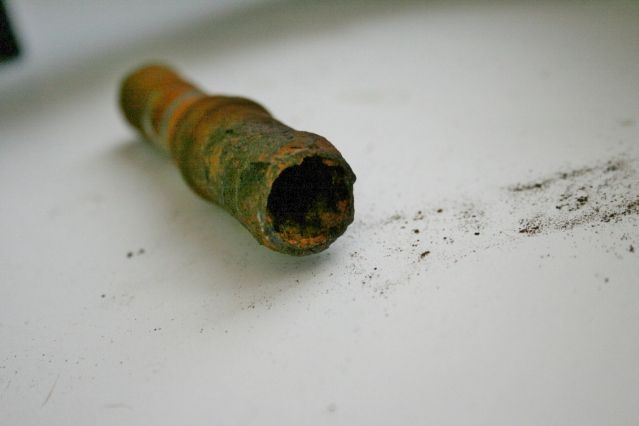
Will be putting in a plastic connector in the new set.
So back to the engine, rapidly turning into a right pain and following Hugh's great pictorial PM on statically timing an engine I timed it to 6deg btdc.
Used a multimeter to check when the points opened and moved the dizzy round till the had just opened and clamped the retaining bolt tight.
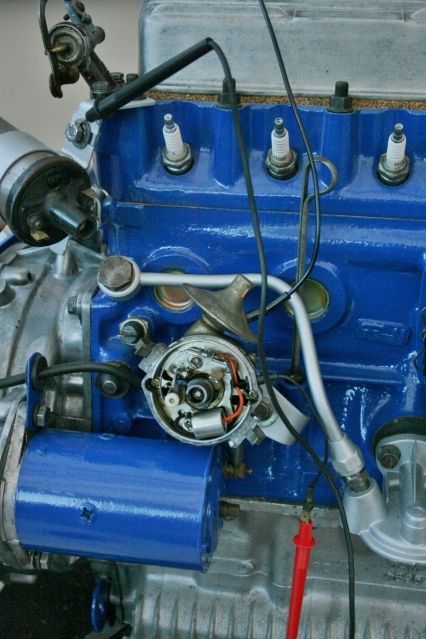
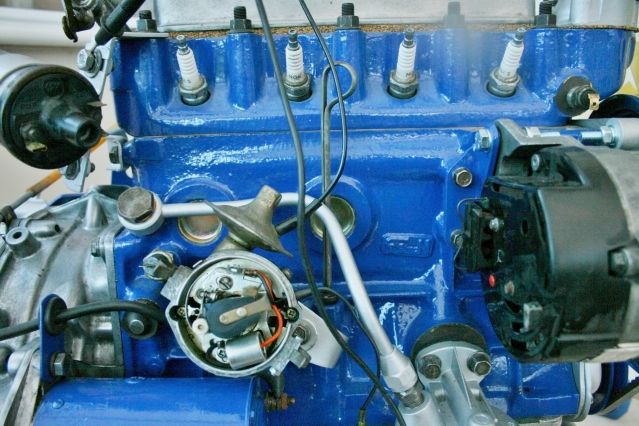
Rotor arm pointing to No.1 piston as is correct I think, but it doesn't really matter if you put the plugs in the right place I think.
Then the fun started, Jan went shopping so I moved my Focus to the porch door and dragged the engine through the house to the front door, there it was attached to the jump leads.
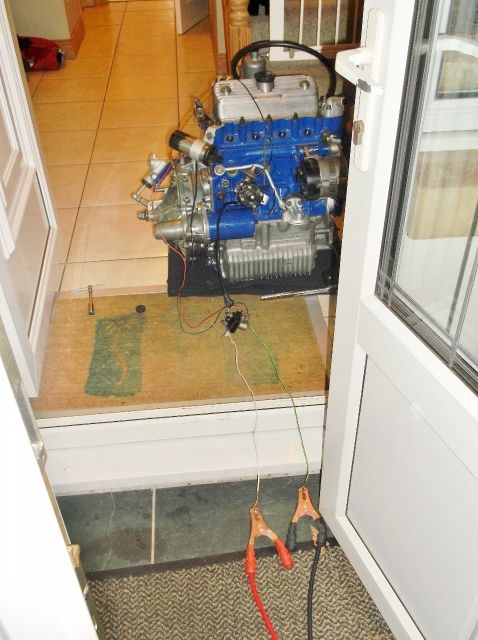
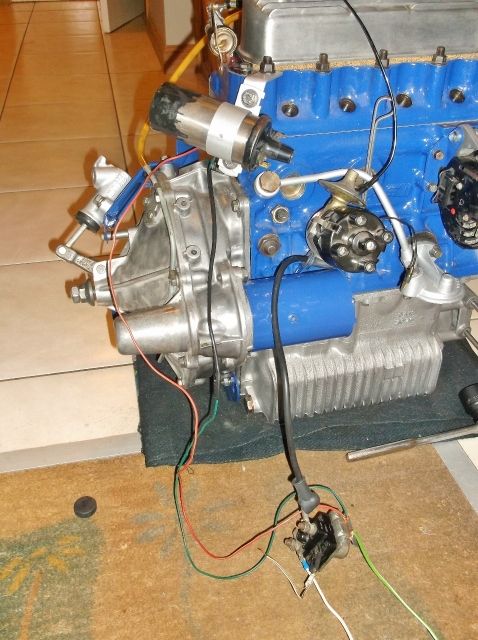
I have used the solenoid to switch the power from the focus to the engine to learn how it worked and stop sparking. It turned over nicely, no clunking or scraping so I think I have put it back together ok. This was a dry test to check the starter would spin the engine, no plugs etc and no oil, just the build lube and wd40 for extra protection. It was a very quick test as I didn't want to run it dry for long until I can get oil in it and get the pressure up.
The problem I have found though is that the starter teeth didn't disengage fron the ring gear until I turned it using a socket. Maybe it needs the engine fired up to throw off the teeth, I'm not sure, I have asked in the tech section and will report back. All going fine though, last few bits being picked up Saturday.
And if anyone tells Jan I was testing the engine in the hall, I will not be your friend anymore, lol, I have to break her into the test firing phase slowly as it may well have to be done there due to battery power needed. All tidied away before she returned so got away with it!!!
Not very exciting but getting there,
Graham
another small update, firstly the crud turned good stuff. Got an internal bonnet release off fleabay, rusty, stiff but complete.
wire wheel as usual and kurust sorted it and added a little paint. I soaked the ends of the cable in wd40 which freed it up nicely so all ready to go.
Also did the handbrake lever and surprised Matthew with an allot handle, he was well chuffed.
I wanted to test fire the engine with the cooling system in place but on the fleabay set I won the heater matrix hose diameter was too big so I will be reselling those and buying a new set, probably a good idea to be honest, this was the state of the connecting tube from bottom hose to heater.
Will be putting in a plastic connector in the new set.
So back to the engine, rapidly turning into a right pain and following Hugh's great pictorial PM on statically timing an engine I timed it to 6deg btdc.
Used a multimeter to check when the points opened and moved the dizzy round till the had just opened and clamped the retaining bolt tight.
Rotor arm pointing to No.1 piston as is correct I think, but it doesn't really matter if you put the plugs in the right place I think.
Then the fun started, Jan went shopping so I moved my Focus to the porch door and dragged the engine through the house to the front door, there it was attached to the jump leads.
I have used the solenoid to switch the power from the focus to the engine to learn how it worked and stop sparking. It turned over nicely, no clunking or scraping so I think I have put it back together ok. This was a dry test to check the starter would spin the engine, no plugs etc and no oil, just the build lube and wd40 for extra protection. It was a very quick test as I didn't want to run it dry for long until I can get oil in it and get the pressure up.
The problem I have found though is that the starter teeth didn't disengage fron the ring gear until I turned it using a socket. Maybe it needs the engine fired up to throw off the teeth, I'm not sure, I have asked in the tech section and will report back. All going fine though, last few bits being picked up Saturday.
And if anyone tells Jan I was testing the engine in the hall, I will not be your friend anymore, lol, I have to break her into the test firing phase slowly as it may well have to be done there due to battery power needed. All tidied away before she returned so got away with it!!!
Not very exciting but getting there,
Graham
#763
Carlos W
-
- TMF+ Member
-
- 10,115 posts
Mine is purple, but I have been told that's normal
- Location: Sittingbourne, Kent
Posted 15 January 2013 - 08:15 PM
The wires to the solenoid are very small!
Are they not getting red hot?
Are they not getting red hot?
#764
grahama
-
- Members
-
- 2,442 posts
Up Into Fourth
- Location: Warrington
- Local Club: None in my area !!
Posted 15 January 2013 - 08:18 PM
The feed wires no, but the engine earth yes, very quickly, so put another in parallel, but could do with some thicker wire as you suggest !! Did for the test though but point taken.
#765
Carlos W
-
- TMF+ Member
-
- 10,115 posts
Mine is purple, but I have been told that's normal
- Location: Sittingbourne, Kent
Posted 15 January 2013 - 08:21 PM
The feed wires no, but the engine earth yes, very quickly, so put another in parallel, but could do with some thicker wire as you suggest !! Did for the test though but point taken.
Longer jump leads?


4 user(s) are reading this topic
0 members, 4 guests, 0 anonymous users


