Jump to content


Photo
- - - - -

Mini Virgin Rebuild Of 83 Mayfair.


  • Please log in to reply
1006 replies to this topic

#916 grahama

grahama

    Up Into Fourth

  • Members
  • PipPipPipPipPipPipPipPipPip
  • 2,442 posts
  • Location: Warrington
  • Local Club: None in my area !!

Posted 26 July 2014 - 08:13 AM

Hi,


Ben,  I would like it done this year as I am desperate to drive it now lol,  but motivation issues and other jobs keep getting in the way !!  Next big job is bleeding the brakes and clutch.  Then I can hopefully move it under it's own power if the clutch works !!


69k, I have gone back to cones as I didn't like the springs so they are going to settle I suppose.  The mini is on gravel at the moment so probably quite un level which may be why it is sitting funny.  Will panic about that as and when I see it on level ground,  but thanks for the shocker lesson,  you live and learn !!


Graham


#917 sixtyeight

sixtyeight

    Super Mini Mad

  • Members
  • PipPipPipPipPipPip
  • 630 posts
  • Location: Newcastle, Australia
  • Local Club: forums.minidriver.com.au

Posted 26 July 2014 - 08:29 AM

I'm sure I've read before not to set the hilos the same. set them as required for each corner. 


1:5 ratio at the back.. 5mm adjustment = 25mm in ride height.


Only set when the car is on level ground.


#918 grahama

grahama

    Up Into Fourth

  • Members
  • PipPipPipPipPipPipPipPipPip
  • 2,442 posts
  • Location: Warrington
  • Local Club: None in my area !!

Posted 04 September 2014 - 06:16 PM

Hi all,


slipped down to page 10 again !!  So way overdue an update...


2014-08-28111347_zps14a8fcb8.jpg


2014-08-28111433_zps15b145c2.jpg


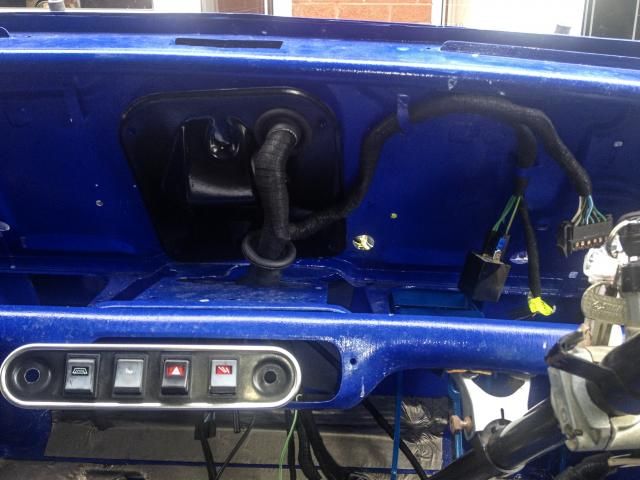
a week or so ago I pulled the front loom through the bulkhead and loosely threaded it round the bay.  All was well except for the re wrapped loom on the inside which was too thick for the lower dash tinware so I had to modify it.


2014-08-28112328_zps9ee84b50.jpg


2014-08-28112348_zps3ae1730b.jpg


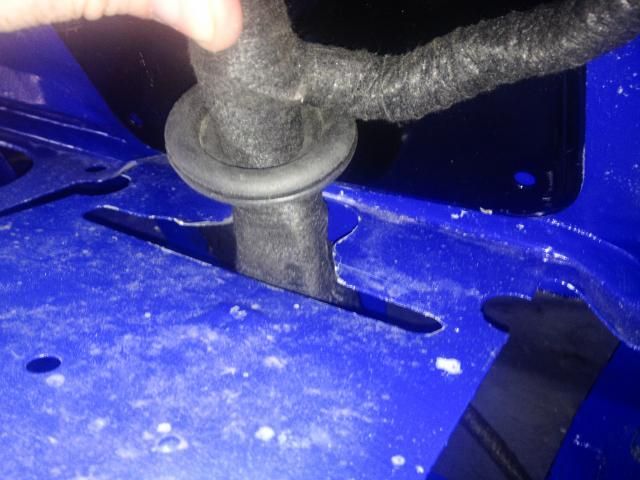
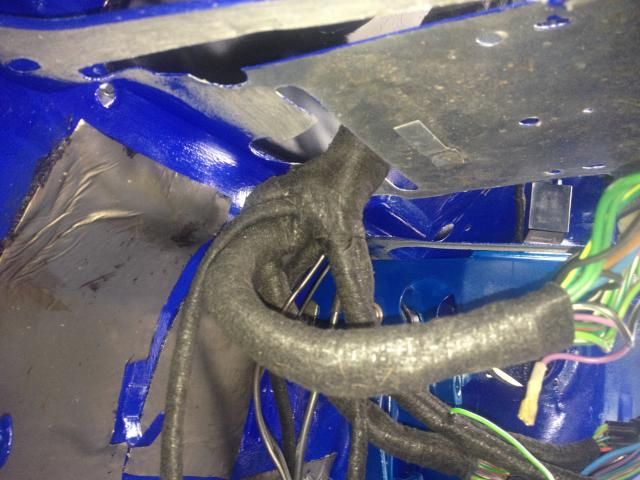
Will pad round the loom there as the grommet is useless now.  Put some things in place to see if the loom reached everything.


2014-08-28112137_zps6cd870f4.jpg


2014-08-28111818_zps16329d13.jpg


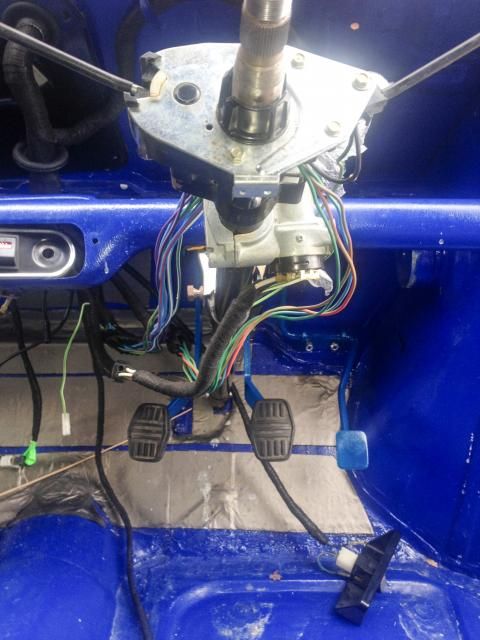
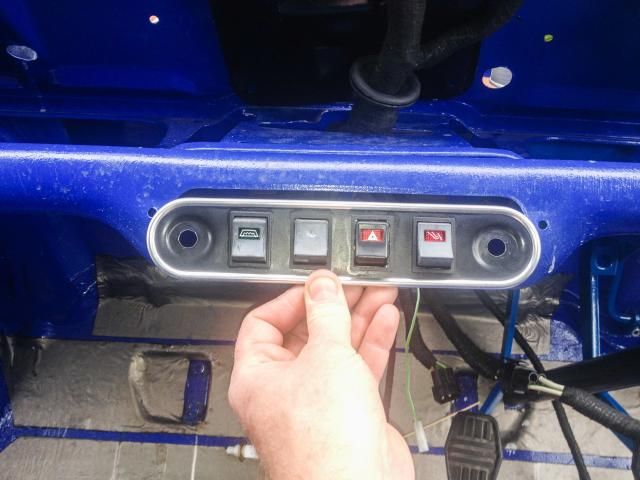
All was well thankfully but two layers of wrapping certainly made things harder to manipulate.  The switch plate I bought seems too small though so will have to refurb my old one


2014-08-28111554-1_zpsc0707930.jpg


And so to today..  Waterworks.


2014-09-04144416_zps86ff4f30.jpg


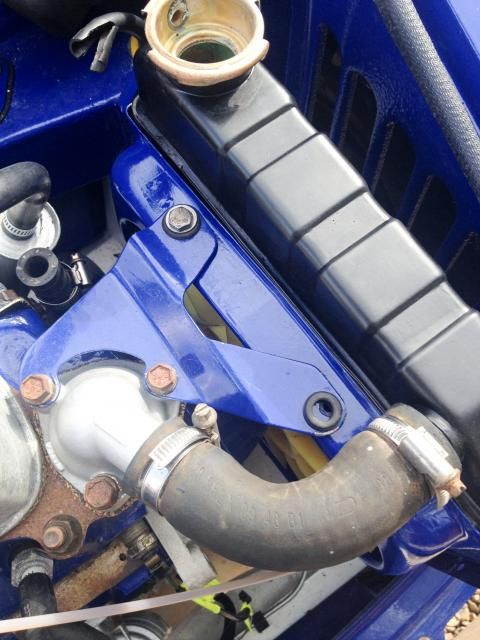
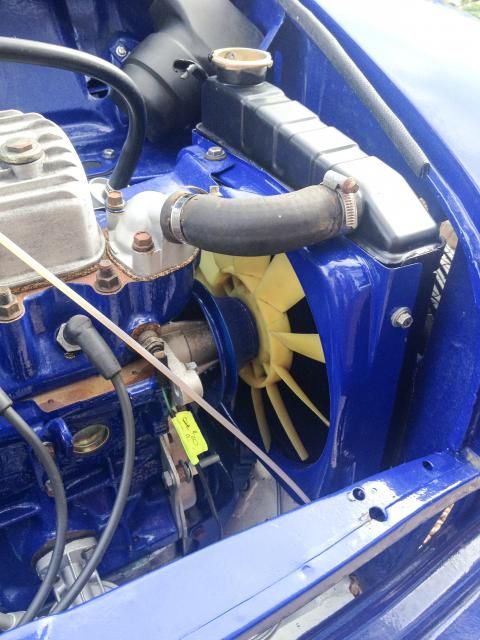
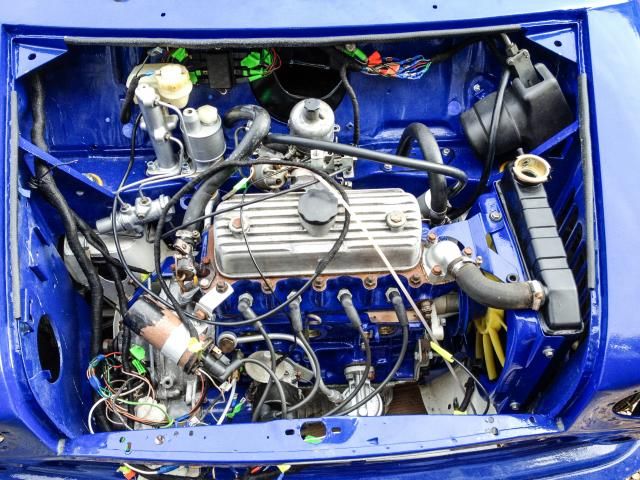
I got a nice new 3 core radiator from minisport and slid it in.  Not sure which bolts were used for the top bracket so will sort this out later. 


2014-09-04151653_zps9c1e5c49.jpg


2014-09-04151708_zps4f006511.jpg


2014-09-04151724_zps954893fb.jpg


Now to the awkward bit,  the hoses.  Mine were past it to be honest and a good while ago I got a set off Ebay and set to.  Not an exact fit but they seemed to go on ok.


2014-09-04151801_zps7191097a.jpg


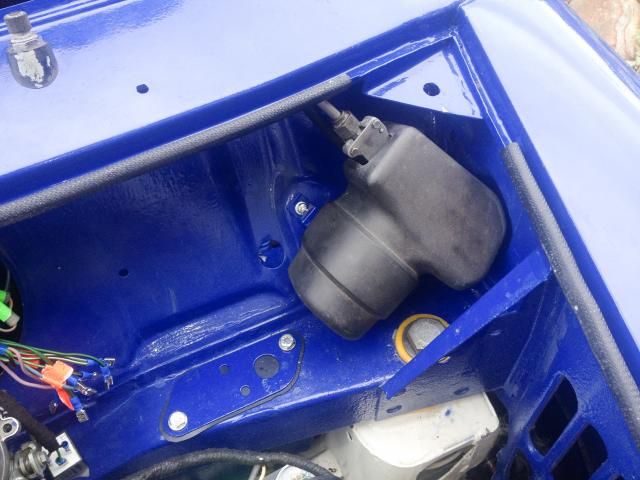
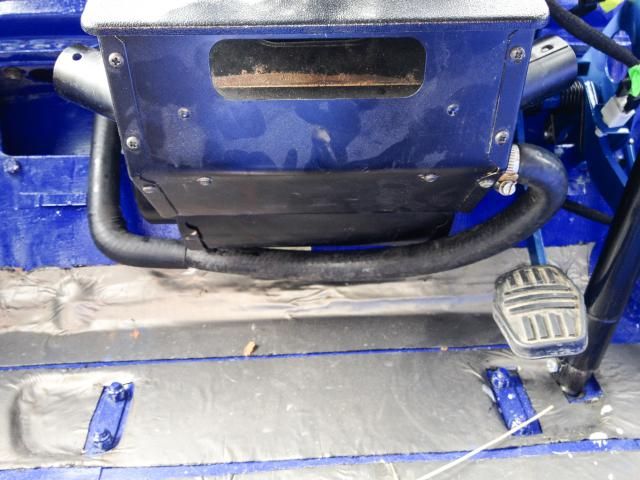
Heater in and threaded the hoses inside through the bulkhead holes and clipped them up.


2014-09-04161806_zps867d6d06.jpg


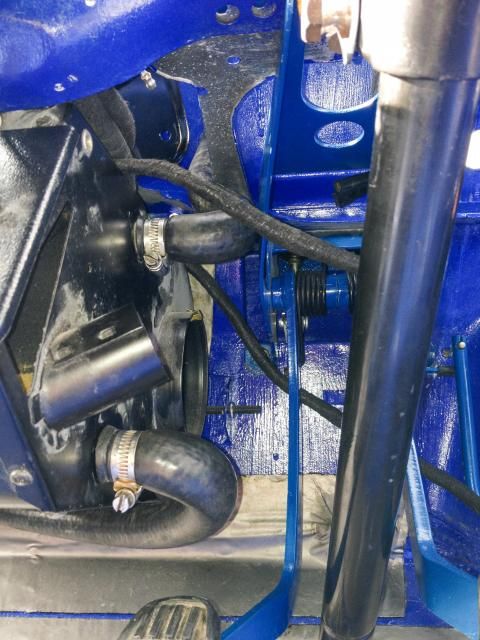
The lower hose was routed as best I could and I hope it's ok.


2014-09-04161750_zps029f558b.jpg


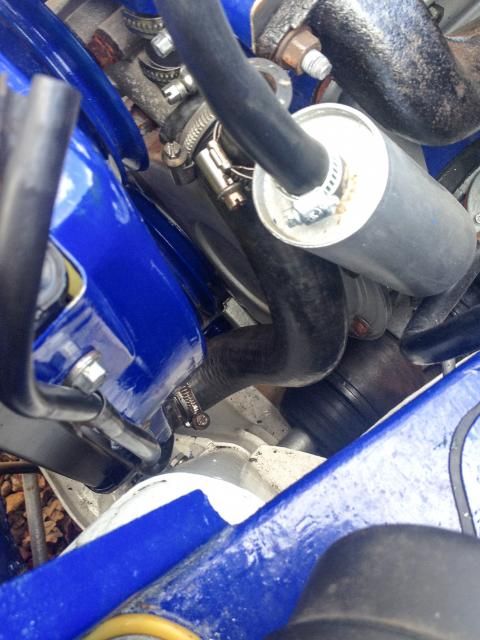
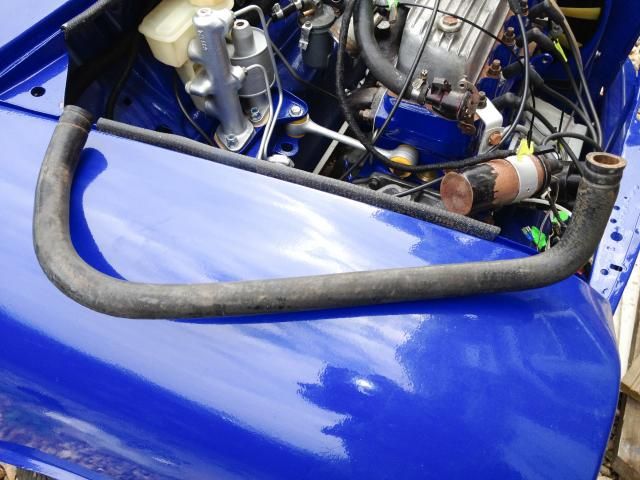
Also the top hose sees a little kinked but flow should be ok


2014-09-04161834_zps15bc7a0e.jpg


2014-09-04162103_zps25740c5c.jpg


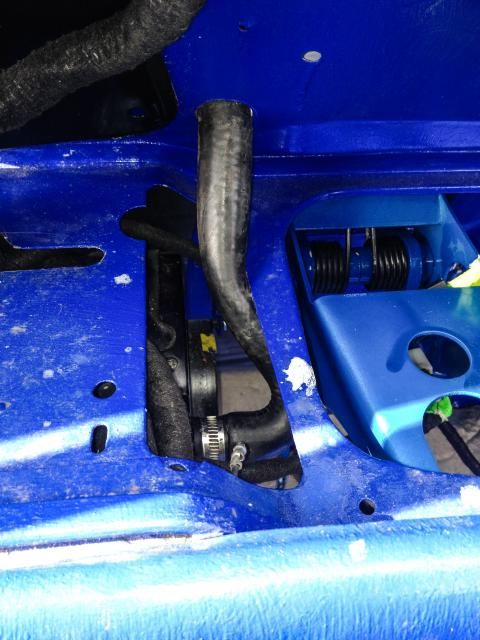
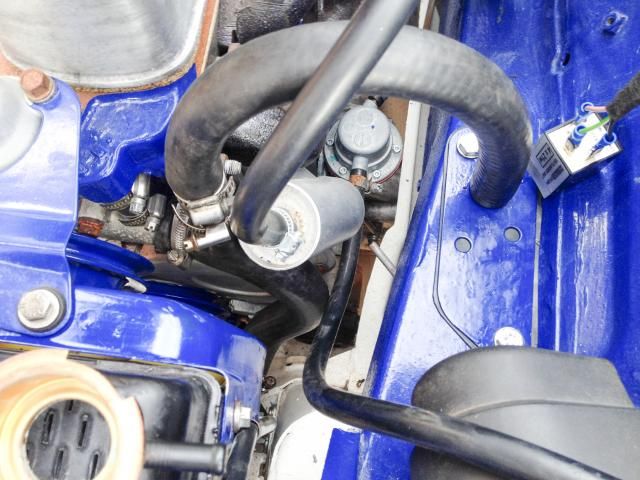
Old hoses were too long for the top lug on matrix to the heater valve so cut it down and re did.  Might re do a little shorter though as that kink in the engine bay is not the best on the eye.


2014-09-04163001_zps9a62a700.jpg


2014-09-04163036_zps96e300ae.jpg


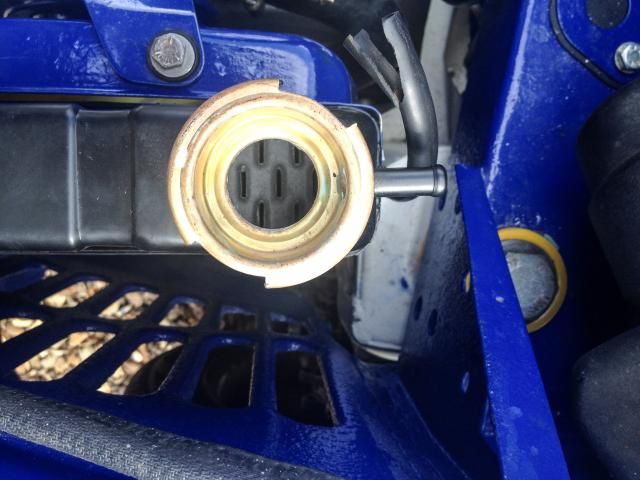
The hose bore is larger than the heater valve and the heater matrix lugs as can be seen here


2014-09-04162804_zpsd3198ba5.jpg


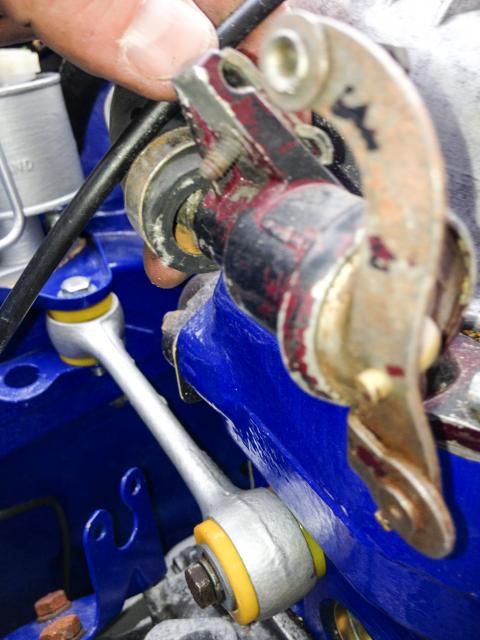
I have jubilee clipped them up tight but only time will tell if they are up to the pressure of the pump.


Had one hose left over so I suppose the hoses weren't from my mini spec !


2014-09-04163114_zps9a8ae970.jpg


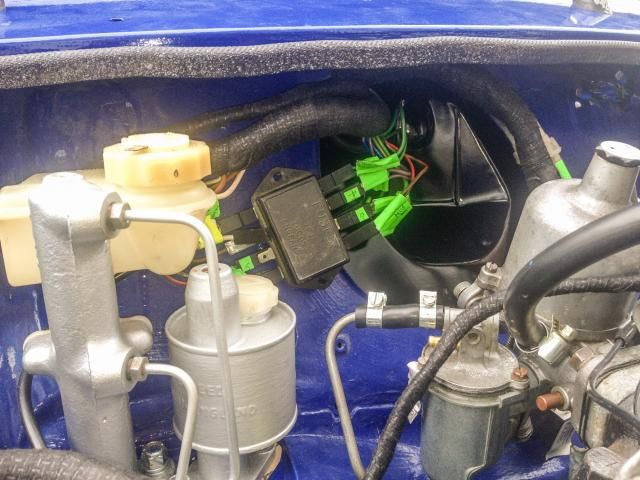
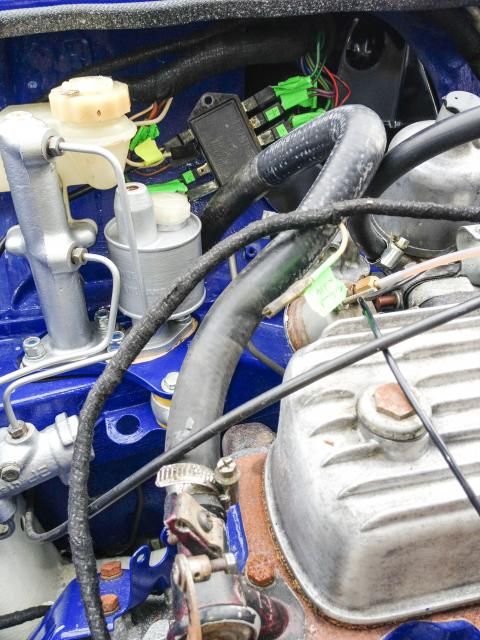
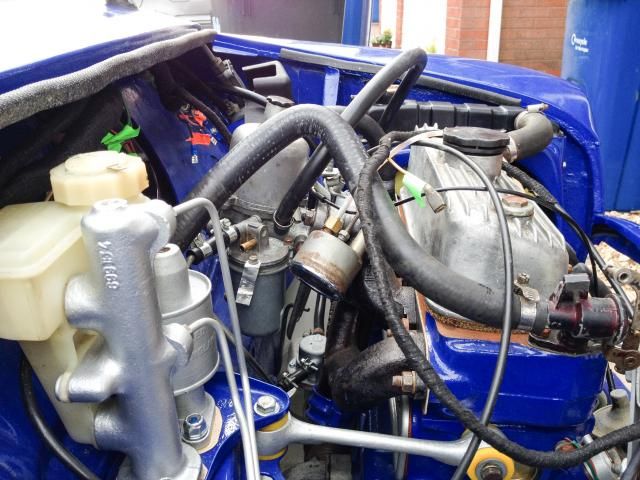
And lastly the engine bay looking busier now,  not clean and simple as I wanted. Will have to work hard hiding the loom and some other bits If I can.


2014-09-04170024_zpsca08eb0c.jpg


Regards,


Graham


#919 Minidarren83

Minidarren83

    One Carb Or Two?

  • Members
  • PipPipPipPipPipPipPip
  • 1,207 posts
  • Location: Stanford Le hope

Posted 04 September 2014 - 06:26 PM

Good to see your still plugging away graham

#920 minimuk

minimuk

    Camshaft & Stage Two Head

  • Members
  • PipPipPipPipPipPipPipPip
  • 1,946 posts
  • Location: Midlands

Posted 04 September 2014 - 08:01 PM

getting there Graham, you still work on yr first one?


#921 grahama

grahama

    Up Into Fourth

  • Members
  • PipPipPipPipPipPipPipPipPip
  • 2,442 posts
  • Location: Warrington
  • Local Club: None in my area !!

Posted 04 September 2014 - 08:22 PM

Thanks fellas, yes first one lol. Going to try bleeding brakes next to see if all is ok there.

#922 jamesquintin

jamesquintin

    One Carb Or Two?

  • TMF+ Member
  • PipPipPipPipPipPipPip
  • 1,017 posts
  • Location: Harlow

Posted 05 September 2014 - 09:05 AM

That switch panel is for the normal padded lower dash rail, not straight onto the dash...


#923 grahama

grahama

    Up Into Fourth

  • Members
  • PipPipPipPipPipPipPipPipPip
  • 2,442 posts
  • Location: Warrington
  • Local Club: None in my area !!

Posted 05 September 2014 - 05:40 PM

Hi all,


working two days on the run,  what am I thinking of !!!


Just a few things done but it does seem that I am sorting one thing then remembering I have to do something else first.  Undoing work because I forgot something is so frustrating but must be done.


First thing was fitting the fan belt.


2014-09-05150814-2_zps0680de20.jpg


Radiator out,  trying desperately not to crush the veins and split the hoses,  but on now.  Also decided to change the matrix hoses as the jubilee clips looked like they were squashing the hoses far too much.


2014-09-05154534_zpsff18a884.jpg


2014-09-05170113_zpsd0ff2cd5.jpg


Didn't have time to cut the new hose to length but I have also put the right hose onto the right matrix lug.  The only problem is the new hose is way too big for the old hole through the bulkhead and I need to find a solution to take up the slack !!


Next re do was the lower dashrail fittings,  heater and steering column to put the cover in first.  Now the switch panel fits too,  thanks, James for the tip.


2014-09-05154427_zps5ef13e48.jpg


2014-09-05170129_zpsbebc741c.jpg


The switch wires are a little short after the cover went on but just long enough to sort,  if I can remember which switches have the side wires on.


Last thing was to put the air ducts in


2014-09-05162926_zps79626faa.jpg


2014-09-05163335_zps1b3c8e32.jpg


Working tomorrow but hopefully a full day on Sunday.


Graham


#924 HarrysMini

HarrysMini

    I do not have short legs!!!

  • Members
  • PipPipPipPipPipPipPipPipPip
  • 3,352 posts
  • Location: .

Posted 05 September 2014 - 06:54 PM

Looking really good Graham! Need to crack on with mine, but motivation is lacking.


#925 Ben_O

Ben_O

    Mill Road Garage

  • Paint Doctor
  • PipPipPipPipPipPipPipPipPipPip
  • 9,794 posts
  • Location: Isle of Wight

Posted 05 September 2014 - 07:06 PM

It is looking marvellous Graham. 


#926 grahama

grahama

    Up Into Fourth

  • Members
  • PipPipPipPipPipPipPipPipPip
  • 2,442 posts
  • Location: Warrington
  • Local Club: None in my area !!

Posted 05 September 2014 - 08:28 PM

Thanks fellas,

Motivation is the killer of projects for sure. I have it a lot lol but I am so close to driving it I have to keep going.

#927 alex-95

alex-95

    I am THE CLAMP MAKER

  • Members
  • PipPipPipPipPipPipPipPipPipPip
  • 6,025 posts
  • Location: l

Posted 05 September 2014 - 08:36 PM

Good work Graham, Totally agree with motivation being a killer, I've just started doing some work on my project, it doesn't help having the ritz to do aswell.


#928 jpw1275

jpw1275

    Up Into Fourth

  • Noobies
  • PipPipPipPipPipPipPipPipPip
  • 2,803 posts
  • Location: Warrington
  • Local Club: I'm a carb addict!!!!!!!

Posted 05 September 2014 - 08:52 PM

Looks like a top job and I'm looking forward to seeing it around Warrington....:0).... Maybe we should meet up once mine is finished in about 10 years lol

Cheers james

#929 deepee71

deepee71

    Mini Mad

  • Noobies
  • PipPipPipPip
  • 101 posts
  • Location: Ruskington Lincolnshire

Posted 06 September 2014 - 07:34 PM

Nice work Graham!..


Andy


#930 grahama

grahama

    Up Into Fourth

  • Members
  • PipPipPipPipPipPipPipPipPip
  • 2,442 posts
  • Location: Warrington
  • Local Club: None in my area !!

Posted 07 September 2014 - 06:56 PM

Hi all,


A little more progress today.


Decided to get rid of the temporary starting loom and wire up the proper loom a little.  Couldn't find the mounting holes for the solenoid so I had to drill mounting holes for it,  not what I wanted to do through the paint but hey ho !!


2014-09-07130549_zps214d416d.jpg


2014-09-07131333_zps44e502f1.jpg


2014-09-07131359_zps0b36bc98.jpg


I intend to paint the inside of the holes and that might lead to an earth problem for the solenoid  so I put one onto the mounting bolt which I will put into the loom earths.


Think I bought too long a positive lead from the battery and I have had to cable tie it out of the way to stop it dragging down.  Connected the loom to the solenoid and with  a little quick start spray it fired up on the key.


2014-09-07133638_zpsfde7d9c3.jpg


2014-09-07132810_zps3f54df7a.jpg


Bit of tidying up of the water hoses,  correct bore this time and cut to length they made things neater,  glad I changed them.


2014-09-07160046_zps04428c81.jpg


2014-09-07160116_zps53d27af0.jpg


2014-09-07140522_zpsa1e5dc66.jpg


2014-09-07160312_zpsf7d53219.jpg


2014-09-07160417_zpsfaa71777.jpg


Put the callipers on to finish the brake circuits off but I realised I had no copper sealing washers so that will have to wait.  New ignition barrel on too so the cowl fits correctly too now,  even enlarged the tinware a touch so the panel switches came out a tad further to fit into the switch backs.  Not sure that the side wires on the switches are all on the right ones.


2014-09-07163013_zpscd1b254b.jpg


2014-09-07163018_zps65ecc564.jpg


All was going well till I put the steering wheel on to try the rack out.  Bit notchy and clunky to be honest so am a little concerned that I will need to replace it.  However the ball joints are not firmly in place yet so hopefully that is the problem as I stripped it prior to refitting and re greased and all looked fine.


Time will tell but the gravel drive it is on wont help either, ahhhhhhhhhhh,  minis !!!


Regards,


Graham


1 user(s) are reading this topic

0 members, 1 guests, 0 anonymous users