Jump to content


Photo
- - - - -

Project 850 X


  • Please log in to reply
277 replies to this topic

#16 minimuk

minimuk

    Camshaft & Stage Two Head

  • Members
  • PipPipPipPipPipPipPipPip
  • 1,946 posts
  • Location: Midlands

Posted 03 March 2011 - 09:11 PM

and on we go, front offside floor panel area,

Floor cut out, toe board cutting and ready for new panel


new panel in and ready for doostep
Attached File  DSC01054_editeda.jpg   18.59K   27 downloads

First rear quarter repair, then tack on the step

step and floor in


I will flip car on his side after, to fit the outer sills.

I am getting nearer with all the body work to where I started, so progress was good, till I found the next treasure!!

innerwing was ok appart from that just a bit of cleaning


Leftover door panel came in handy
Attached File  DSC01125_editeda.jpg   18.27K   17 downloads

innerwing and scuttle repaired


otherside next.

#17 sonikk4

sonikk4

    Twisted Paint Polisher!!!

  • Admin
  • PipPipPipPipPipPipPipPipPipPipPip
  • 16,080 posts
  • Name: Neil
  • Location: Oxfordshire

Posted 03 March 2011 - 10:24 PM

Nice little project you have got there. It never ceases to amaze me why people go to such lengths to bodge. Like you Project Erm was just one huge bodge job, 1" thick floors, stuck on patches and so on. If people thought they were safe driving these cars in the conditions that we found them in they must be stark raving bloody mad.

I would like to think now i have restored and increased the strength of the car as before that one little punt and major damage would have been the outcome. Good luck with the rest of the resto.

#18 minimuk

minimuk

    Camshaft & Stage Two Head

  • Members
  • PipPipPipPipPipPipPipPip
  • 1,946 posts
  • Location: Midlands

Posted 04 March 2011 - 12:20 AM

Nice little project you have got there. It never ceases to amaze me why people go to such lengths to bodge. Like you Project Erm was just one huge bodge job, 1" thick floors, stuck on patches and so on. If people thought they were safe driving these cars in the conditions that we found them in they must be stark raving bloody mad.

I would like to think now i have restored and increased the strength of the car as before that one little punt and major damage would have been the outcome. Good luck with the rest of the resto.


Thank you You are right with those dodgy bodging people, there is patching-up and patching-on! if they just think how much money they would safe on new tyres and it would safe us having to cut it all out!! great job you are doing too with Erm. I am glad I started the first cut in the door step in Feb last year,taking the decision then to do the whole mini, might even save my son's life in the end. Trouble with doing up a mini, you get better at it and want to do another one, hence I started my next one already "Total Rebuild Of '71 Evy" , a 998cc Leyland mini , she does look worse in a way, but at least you can see what you are up against, that makes it easyer with forward planning.

"Total Rebuild Of '71 Evy"
http://www.theminifo...amp;pid=2048389

Edited by minimuk, 04 March 2011 - 12:28 AM.


#19 STREET TWEAKS

STREET TWEAKS

    Super Mini Mad

  • Traders
  • PipPipPipPipPipPip
  • 662 posts

Posted 04 March 2011 - 07:32 PM

Hi mate i have got the same boot floor replacemant to do on my car nice to see sum pics was it easy to do mate ? as i have never do one before

#20 minimuk

minimuk

    Camshaft & Stage Two Head

  • Members
  • PipPipPipPipPipPipPipPip
  • 1,946 posts
  • Location: Midlands

Posted 04 March 2011 - 10:10 PM

Hi mate i have got the same boot floor replacemant to do on my car nice to see sum pics was it easy to do mate ? as i have never do one before


hi, there are more pictures of the transformation, but a few pointers here,

1) make sure you make measurements of the bootlid opening, horizontal, diagonal etc and write it down,nd make a piccie from all the cables(easyer for later when re-assembling.
2)the hight of the top of the wheelarches, distance between arches.
3) If your rear seats are fine, carry on with boot, if not do those first and use thicker panels ie. 1.2-1.5mm, this will last longer as it will be hidden above the subby after.
4)have a few cuppas
5)make sure you re-measure when tacking panels in, I also tend to use new valence as a guide to make sure, and even the bootlid.
6) when seam welding after all is tacked in right position and have 10mm overlap on panels, weld inside first and when mini on its side do the belly too.
7) grind back and zinc prime the lot, next day seam-seal and prime again,
8) ready for stone chip spray or filling etc.

If you keep to that, you'll get there, This was my first boot aswell, and made sure whatever I did, I measured the lot again. Don't want to end up having a out of line car, and lets face it, the back-end and front end need to look 100%.

Hope this helps, good luck.

Edited by minimuk, 08 March 2011 - 10:33 AM.


#21 minimuk

minimuk

    Camshaft & Stage Two Head

  • Members
  • PipPipPipPipPipPipPipPip
  • 1,946 posts
  • Location: Midlands

Posted 05 March 2011 - 12:26 AM

finishing OS inner-wing before going to NS Flitch


OMG, Cleaned and cut out rusty scuttle,last bit of mess


cleaned top with petrol and cut out rusty bits


new piece welded in place


innerwing extension and flitch, ...done


tacked scuttle repair and seam welded and grind down


Scuttles done,...trial fit Apex and wings!!!!!!


trial fit bonnet too, see if all sits good and nout is out!!!!


getting there,................never thought I could do a mini!! Well good feeling that was.
Attached File  DSC01344_editeda.jpg   13.01K   3 downloads

tacked both apex panels and wings, welded the inside and grinded out/off tacks


Seam-sealed joints under wings


Tomorrow, doors and Belly on a roll that day in August 2010

#22 minimuk

minimuk

    Camshaft & Stage Two Head

  • Members
  • PipPipPipPipPipPipPipPip
  • 1,946 posts
  • Location: Midlands

Posted 05 March 2011 - 11:48 PM

the belly exersize,......................

Attached File  DSC01161a.jpg   20.11K   17 downloads[attachment=10
8933:DSC01164a.jpg]

welding begins and tidy flitch area

bit of primer

NS rear arch area

seamseal the welds
Attached File  DSC01200a.jpg   13.8K   12 downloads
NS outer sill on

bit more primering,......

oops nearly forgot the valance and floor panel stiffener

bell nearly done and then flipped on the other side

crossmember tidy and wheelarch
Attached File  DSC01271_editeda.jpg   10.72K   3 downloads
OS outer sill on

4 weeks 1 hour a day belly service comes to an end,...but not yet finished

stone chippin outside and inside, that does look good already!

Valence on and finally car body (belly) painting starts with a brush may I add.
[attachment=10
8952:DSC01400a.jpg]
not to forget the front wing area


6 days drying time and gave the rear subby area 2 more coats

doors tomorrow

#23 minimuk

minimuk

    Camshaft & Stage Two Head

  • Members
  • PipPipPipPipPipPipPipPip
  • 1,946 posts
  • Location: Midlands

Posted 06 March 2011 - 12:31 PM

The doors weren't that bad, needed new skins and small bottum repairs, patience required though

OS door, old skin and repair
Attached File  DSC01374a.jpg   17.07K   6 downloadsAttached File  DSC01375a.jpg   14.51K   2 downloads
Attached File  DSC01376a.jpg   14.8K   2 downloads
Attached File  DSC01377_editeda.jpg   14.22K   2 downloadsAttached File  DSC01378_editeda.jpg   14.92K   3 downloads
Attached File  DSC01379a.jpg   19.22K   2 downloads
Attached File  DSC01380_editeda.jpg   14.67K   2 downloadsAttached File  DSC01384a.jpg   15.7K   2 downloads

NS easy repair, just new skin and one corner repair, then weld, primed,seamsealed and primed again
Attached File  DSC01389a.jpg   21.29K   3 downloadsAttached File  DSC01391a.jpg   22.25K   3 downloads

850X getting some fresh air for the fist time in nearly 12 month, Full rebuild and strong again, happy chappy, trial fit his doors next
Attached File  DSC01405_editeda.jpg   21.89K   12 downloadsAttached File  DSC01408_editeda.jpg   23.29K   9 downloads

OS trial fit, needs tweeking a bit, few shims and should be good
Attached File  DSC01418_editeda.jpg   18.96K   7 downloadsAttached File  DSC01419a.jpg   14.27K   7 downloads
Attached File  DSC01424_editeda.jpg   13.74K   7 downloadsAttached File  DSC01425_editeda.jpg   13.45K   6 downloads

NS trial fit, tweeking and a bit welding a seam
Attached File  DSC01426a.jpg   13.35K   8 downloadsAttached File  DSC01427_editeda.jpg   13.47K   6 downloads
Attached File  DSC01438_editeda.jpg   20.67K   6 downloads

New owner giving a hand on bonnet
Attached File  DSC01460_editeda.jpg   25.67K   27 downloadsAttached File  DSC01464_editeda.jpg   15.33K   9 downloads

Decided to get rid of messy rear quarter panel, should have done that ages ago!!!
Attached File  DSC01485_editeda.jpg   14.75K   15 downloadsAttached File  DSC01486_editeda.jpg   16.98K   14 downloads
Attached File  DSC01490_editeda.jpg   18.46K   12 downloadsAttached File  DSC01491_editeda.jpg   18.68K   12 downloads

New panel tacked and welded in looking 100% better, well happy with the decision.
Attached File  DSC01492_editeda.jpg   17.3K   8 downloadsAttached File  DSC01497_editeda.jpg   23.57K   9 downloads

Getting ready for painter tomorrow after a few more tweeks

Attached Files


Edited by minimuk, 06 March 2011 - 03:46 PM.


#24 STREET TWEAKS

STREET TWEAKS

    Super Mini Mad

  • Traders
  • PipPipPipPipPipPip
  • 662 posts

Posted 06 March 2011 - 08:26 PM

Thanks for the info mate great help it will be a few weeks yet before i get there with work and so on

#25 minimuk

minimuk

    Camshaft & Stage Two Head

  • Members
  • PipPipPipPipPipPipPipPip
  • 1,946 posts
  • Location: Midlands

Posted 06 March 2011 - 09:17 PM

Thanks for the info mate great help it will be a few weeks yet before i get there with work and so on


know the feeling, but I made it a habit to do 1 hour a day to keep the momentum going.
Good luck

#26 minimuk

minimuk

    Camshaft & Stage Two Head

  • Members
  • PipPipPipPipPipPipPipPip
  • 1,946 posts
  • Location: Midlands

Posted 07 March 2011 - 09:00 PM

after a long play and making the mini solid once again, he is nearly ready for the paint-shop


put his old 10" on, alloys getting shotblasted and repainted alloy gloss with a pearl in it
Attached File  DSC01504a.jpg   21.04K   5 downloadsAttached File  DSC00351a.jpg   37.21K   4 downloads

in the snow for the first time and eager waiting for the traylor
Attached File  DSC00357a.jpg   33.09K   5 downloadsAttached File  DSC00361a.jpg   31.94K   3 downloads[attachment=10
9064:DSC00362_editeda.jpg]

and engine ready for it's return
Attached File  DSC00368a.jpg   39.71K   20 downloads

At the painters,...........bit of filler here and there, then flatning
Attached File  DSC01508a.jpg   22.7K   8 downloadsAttached File  DSC01510a.jpg   24.42K   7 downloads
Attached File  DSC01527a.jpg   19.28K   6 downloads

first primer on,..... see if there are more few bits to fill
Attached File  DSC01607a.jpg   17.36K   7 downloadsAttached File  DSC01608a.jpg   16.72K   6 downloads

blue undercoat/primer on,.. getting exciting now
Attached File  DSC01650a.jpg   19.09K   6 downloadsAttached File  DSC01651a.jpg   23.3K   6 downloads
Attached File  DSC01652a.jpg   21.38K   7 downloadsAttached File  DSC01653a.jpg   22.47K   4 downloads

I made one picture of the car when ready at painter but a few more at home
Attached File  102_0106a.jpg   71.02K   12 downloads
Attached File  102_0112a.jpg   73.96K   6 downloads
Attached File  102_0113a.jpg   76.25K   7 downloadsAttached File  102_0114a.jpg   74.87K   8 downloads

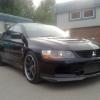
WELL HAPPY WITH Result!!!!!!!!

Feb 2011 reassembling, but brakes first,...........pain in the backside to be honest, tandem master cylinder was nackered, played 3 days bleeding all, but in the end the cylinder needed a new kit, 10 days after I started the reassembling it finally worked properly, and formost no leaks. This excersize certainly tested my patience.
Attached File  DSC01663a.jpg   27.63K   5 downloads

windscreen whiper motor assembly in and water works


Floor sound proofing,.......... and doors 2
Attached File  DSC01671a.jpg   18.88K   8 downloads

Give him some eyes,..... however i did notice that the "origional bulbs" where 2 different brands, Lucas and Unipart I need to change those to a 1brand pair.
Attached File  DSC01667_Muk_got_eyes_againa.jpg   28.02K   5 downloads
rear lights,....and the same here, two different brands, Ducellier and something Italian like, so again need to change that. piece of mind.


Well that is it for a few days, showing you my first project to date, has given me a lot of fun looking back what I have done in the last 12ish month, I am sure you all agree it was worth it.
I am waiting for the new headlining to be delivered from Retro Retrims, and after I put that one in, I can start on the seals, windows and engine, not to forget the "Exhaust" and the rest of the interior.

Edited by minimuk, 07 March 2011 - 11:13 PM.


#27 minimuk

minimuk

    Camshaft & Stage Two Head

  • Members
  • PipPipPipPipPipPipPipPip
  • 1,946 posts
  • Location: Midlands

Posted 14 March 2011 - 06:03 PM

hi, very slow progress, then again,
my mondeo had a problem, idle pulley's bolt snapped/broke,...result.... 8 exhaust valves bend, so that needed doing first and then getting that one on the road again, defenately not the same as a mini engine.

After that I managed only putting in place the power-cable, and the petrol tank.
I have trial-fitted the double exhaust, check it out;


I am not sure,... does the exhaust be the same depth as the bumper so needs to come out more, or further in, or leave it where it is and put Bootlid on to see the difference
tell me what you are thinking

Cheers

#28 B1LLY87

B1LLY87

    Just On Tickover

  • Noobies
  • Pip
  • 6 posts

Posted 14 March 2011 - 06:22 PM

Good job, very impressed.

#29 minimuk

minimuk

    Camshaft & Stage Two Head

  • Members
  • PipPipPipPipPipPipPipPip
  • 1,946 posts
  • Location: Midlands

Posted 18 March 2011 - 05:50 PM

Good day today, managed to work on 850X and Evy, I did trial fit the exhaust a few days ago and managed to make a bracket to hang the heavy box on, in the rear subframe, It is difficult to work under the car upside down. but at the end a good result.

Yes the bracket is there, just difficult to see after priming and black spray paint


taken after attaching the long 2" pipe to the engine bay


result,.. need to adjust lefthand pipe end a bit, but definately looking good


that's better,......

Attached File  DSC01717a.jpg   44.71K   7 downloadsAttached File  DSC01718a.jpg   54.28K   5 downloads


Finally the headling came in today from "bert998", cheers, and already looked up how to put headlining in,.... yes easy to get the old one out,.... I kept all the rods and marked them when they came out to make sure,...why else would they have different color end bits!! A great help was "Southy" wisdom on here, although written in Jan 2008 a very helpfull step by step method. I did not get far with it today but made a start. probably finish it over the weekend or monday.


see you next time

Edited by minimuk, 18 March 2011 - 07:32 PM.


#30 minimuk

minimuk

    Camshaft & Stage Two Head

  • Members
  • PipPipPipPipPipPipPipPip
  • 1,946 posts
  • Location: Midlands

Posted 24 March 2011 - 03:17 PM

HEADLINING................FRUSTRATING..................NOT A JOB FOR THE IMPATIENT ONE!!!!

Glue spray or stick????? anyone?

I had to stop for today, 2 hours and pulling my hair out, started 2 days ago with the driverside, then the rear quarter, although it looks "OK" I am not 100% happy with results, wrinckles here and there, need to put heat gun on that bit I suppose.
I defenately need a weeks holiday before I do the next one. here are a few piccies of the lining. Still got to do the front and rear window bits and then the rear corners etc.
Attached File  DSC01725a.jpg   49.04K   6 downloads
Attached File  DSC01727a.jpg   37.12K   5 downloads


0 user(s) are reading this topic

0 members, 0 guests, 0 anonymous users