Jump to content


Photo
- - - - -

Aussie Clubby


  • Please log in to reply
73 replies to this topic

#16 buddylove

buddylove

    Camshaft & Stage Two Head

  • TMF+ Member
  • PipPipPipPipPipPipPipPip
  • 1,640 posts
  • Location: North America
  • Local Club: SAMOA

Posted 14 December 2011 - 11:45 PM

I have been told that the original color of mine is Bitter Apricot. I found a few places, where there was an orangish / brownish paint that seemed more original then the red. Though the red is pretty well sprayed all over the car, you can find hints of overspray on items that the factory wouldn't have done. When I pulled off the door cards, I found some of this bitter apricot color lurking underneath. I have also found it in the boot area, and also on the roof gutter.
I am pretty sure bitter apricot resembles the 3rd Mini in on the 1st row.
Posted Image
That one looks more like a fresh respray.
This Mini is bitter apricot as well, but it seems to have weathered the years poorly. It is also more along the lines of the color that I have found hidden. Well, I guess I found a combo of the 2 colors.
Posted Image

#17 buddylove

buddylove

    Camshaft & Stage Two Head

  • TMF+ Member
  • PipPipPipPipPipPipPipPip
  • 1,640 posts
  • Location: North America
  • Local Club: SAMOA

Posted 18 December 2011 - 02:29 AM

This morning, I went over to Don's shop to buy back my old 7.5 Cooper S Disc setup (Thank you, Don).
At Chuck's shop today, I removed the flag off the roof. It probably looks worse now, as they painted only parts of the roof white, and some of the red paint lifted off with the sticker. It took about an hour with a heat gun.
Before, with the flag roof:
Posted Image
After, with the flag gone:
Posted Image
Posted Image

While I was removing the flag, Chuck started inspecting the rear brakes. Just like the fronts, the cylinders were leaking. The adjusters checked out ok, and were rather interesting as they were slotted so that you could use a flat head on the interior side. Also, the drum has a built in spacer like the old Cooper setup, but Australian made. The spacered drum, wasn't 1" wide, so they will be getting switched out for my 1" spacered setup. Chuck found the spring on the left side installed incorrectly as always. We finished out the night by putting new studs in the rear hubs, and re-installing the adjusters after a clean up.

#18 buddylove

buddylove

    Camshaft & Stage Two Head

  • TMF+ Member
  • PipPipPipPipPipPipPipPip
  • 1,640 posts
  • Location: North America
  • Local Club: SAMOA

Posted 20 December 2011 - 12:46 AM

Chuck had the brake cylinders installed in the rear before I got there. We installed both of the rear hubs on the stub axles, and re-installed the brake shoes and springs. We also, put my old 1" spacered drum setup.
Posted Image
Posted Image
We then started disassembling the 7.5" Cooper S disc setup, so that we could use the axles from my mini, as well as the steering arms.
Posted Image

#19 buddylove

buddylove

    Camshaft & Stage Two Head

  • TMF+ Member
  • PipPipPipPipPipPipPipPip
  • 1,640 posts
  • Location: North America
  • Local Club: SAMOA

Posted 22 December 2011 - 06:33 PM

Chuck received word that the carb might be back by Friday. I am hoping that the holidays don't conflict with the shipping. If we get it back Friday, the Mini might be running and driving again by Monday/Tuesday.

#20 buddylove

buddylove

    Camshaft & Stage Two Head

  • TMF+ Member
  • PipPipPipPipPipPipPipPip
  • 1,640 posts
  • Location: North America
  • Local Club: SAMOA

Posted 25 December 2011 - 07:48 PM

I got to Chuck's earlier then normall yesterday, but in regular fashion Chuck had already removed both hubs and drum setups. On the right side, Chuck had to remove the tie rod and lower arm as well because of an issue with things not coming apart. We were hoping that we would get the Mini back on its wheels, but it was fighting us a lot.
When I initially took the 7.5" Cooper S disc setup off of the 1960 Mini, it took a lot of work. I didn't check the threads when I took them off. Chuck found 3 out of the 4 ball joint threads, cross threaded. Whoever put them on them on the first time around didn't pay attention and destroyed the threads. Chuck was on fire with all of the bodge fixing yesterday. He was able to restore all 3 thread setups, as well as finding another purpose for a knuckle joint dust cover (I think that's what it is called) and used it as a steering tie rod end boot.
By the end of the day, we had both disc setups installed. Chuck had also installed a new steering rack boot and cv boot, before I had shown up. We are going to need to run a new front hardline, as the current hardline isn't screwing into the new front left stainless brake line.
Posted Image
Posted Image
Posted Image
Posted Image
Posted Image
A more clear shot of the heater core used as a 2nd radiator setup. It will be going away soon. Once I get the Mini back to my place, I really want to give the wheel wells a good scrub.

#21 buddylove

buddylove

    Camshaft & Stage Two Head

  • TMF+ Member
  • PipPipPipPipPipPipPipPip
  • 1,640 posts
  • Location: North America
  • Local Club: SAMOA

Posted 27 December 2011 - 05:06 AM

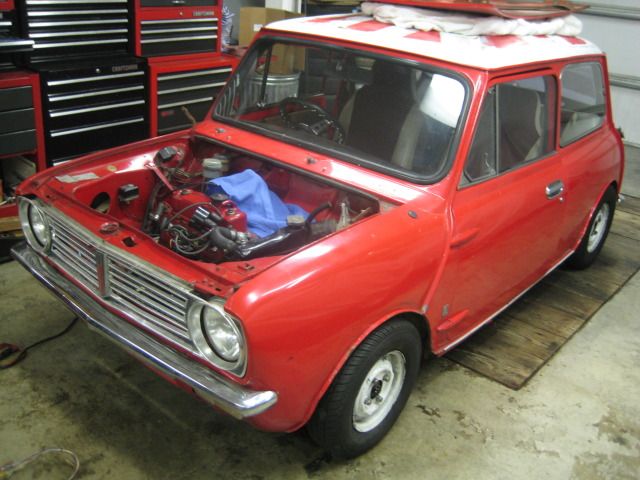
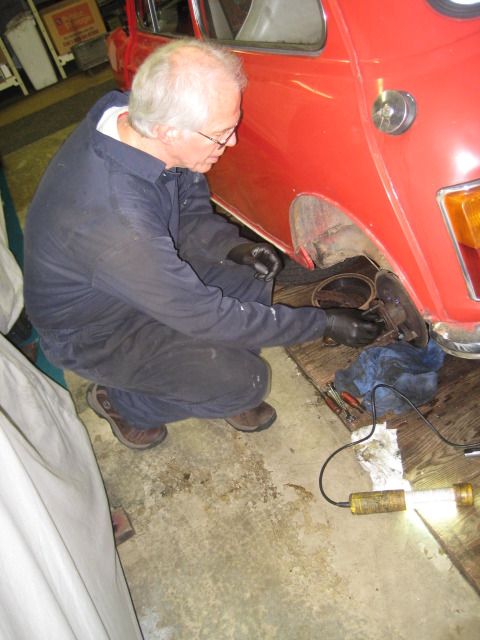
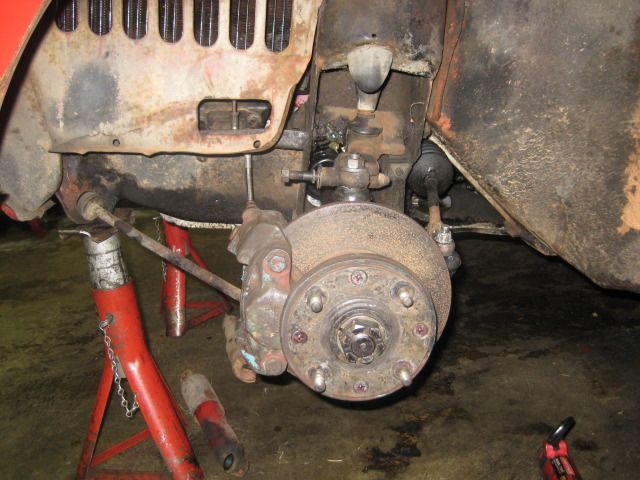
Today we installed the front hardline. There was a kink in the hard line that goes from the front hardline to the T, so Chuck had to straighten it out to get the connection to work properly. After that, we bled the whole brake system and then bled the clutch. The fluid for the clutch didn't look that great, and I am glad that we bled it because there ended up being bubbles in the system.
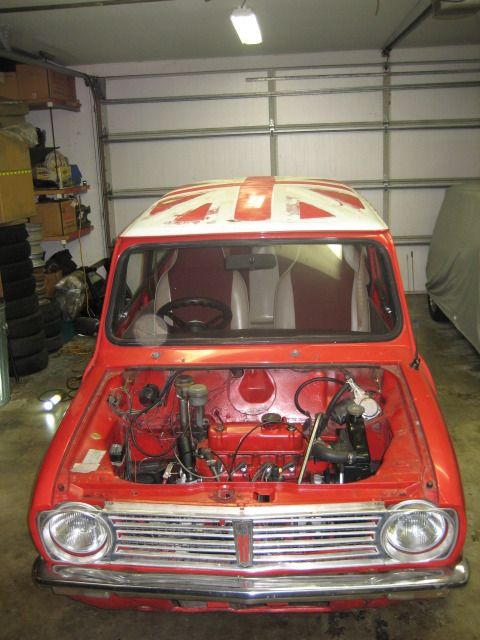
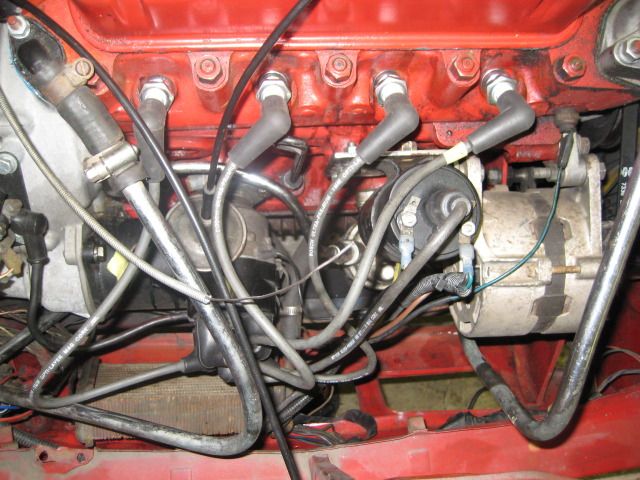
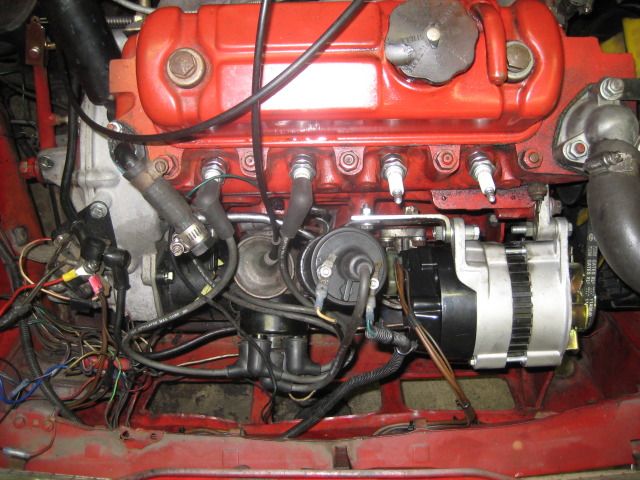
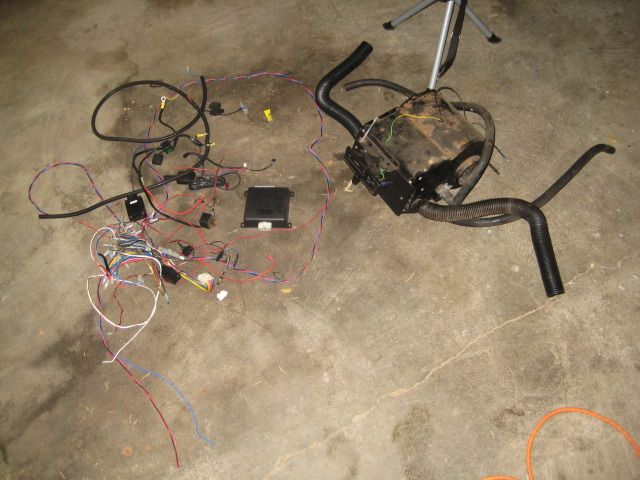
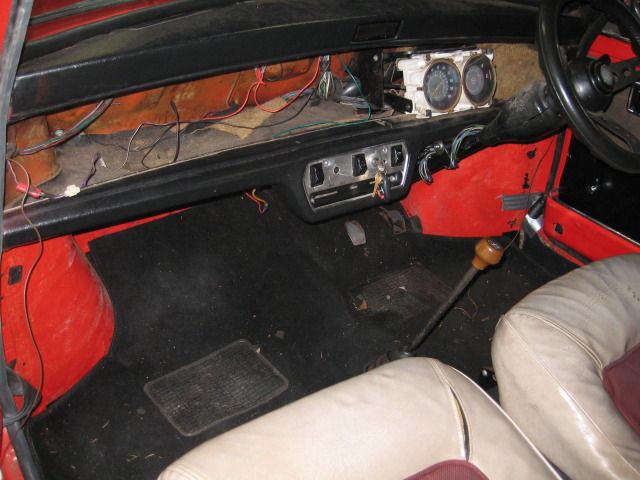
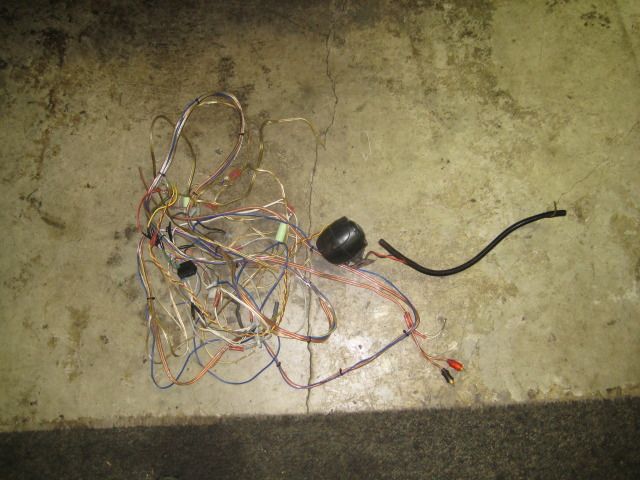
Next, we adjusted the clutch, checked the timing, and then pulled the distributor. Upon taking apart the distributor, Chuck found out that the vacuum advance wasn't working due to a bent arm. He straightened it out and also found out that a screw on the plate in the distributor wasn't allowing the plate to rotate freely. We had to sort out a few more issues, but it ended up coming out nicely. While Chuck was sorting out the distributor, I was working on getting rid of more of the "extra" wiring the previous owners had installed.
Posted Image
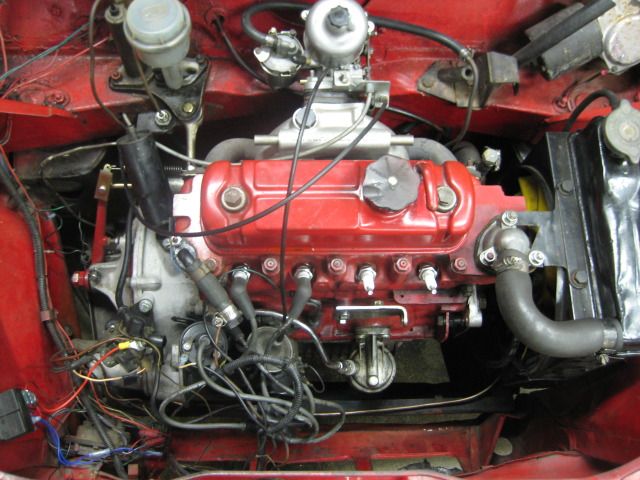
We then checked on a few things and fired up the Mini after a few cranks. It ran nicely and Chuck adjusted the fast idle, as well as the jet. It is still running a little lean, and the clutch needs to be adjusted again.
We did a warm compression test, and the numbers came out to 155 140 145 150. If I remember correctly. I am hoping that a valve adjustment improves it slightly and that a test drive doesn't show blue smoke on acceleration.
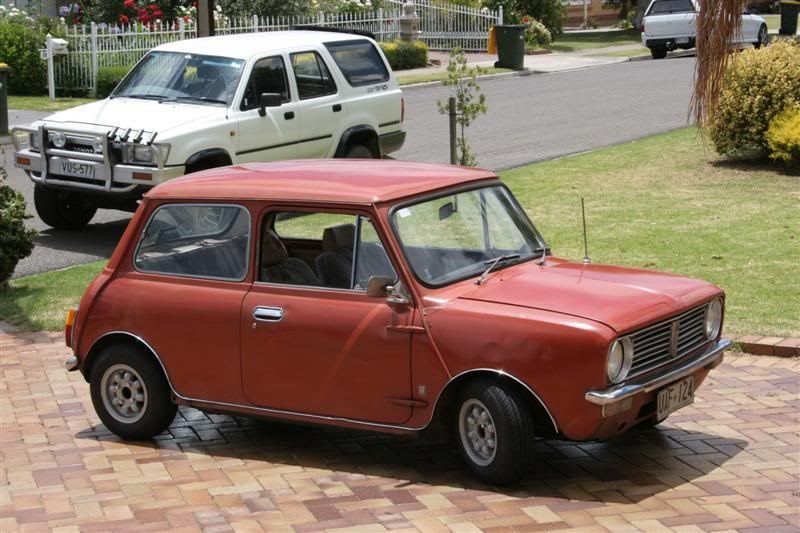
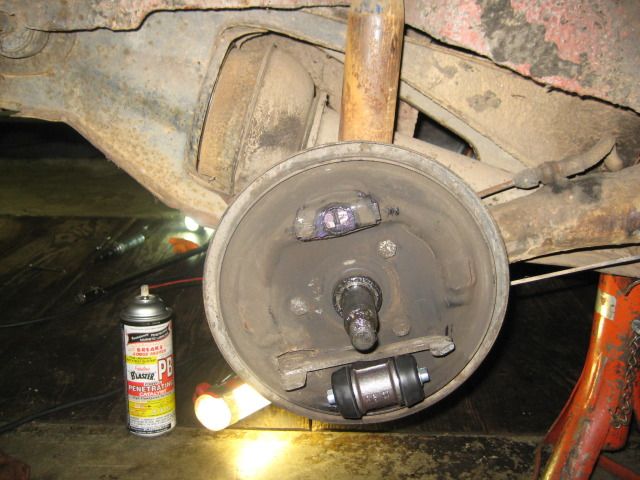
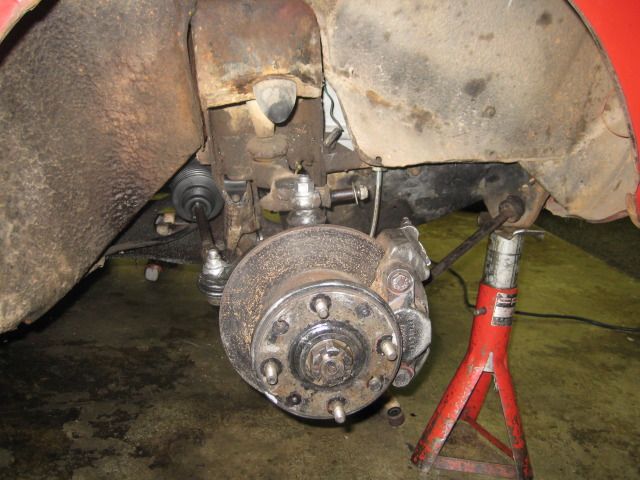
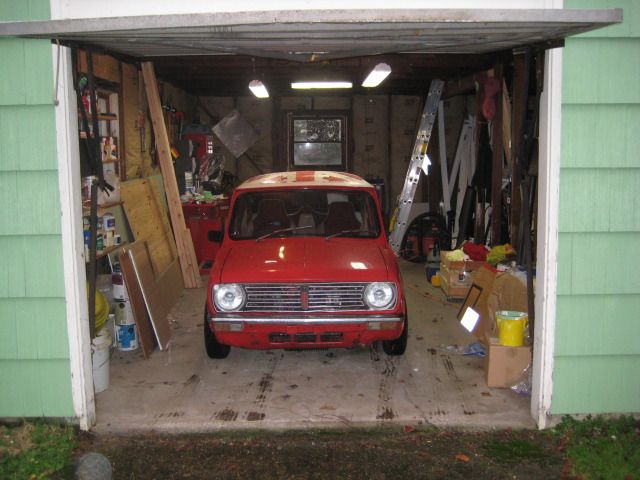
How it sits with the Cooper S disc setup and rear 1" spacered drums. I personally like its "stance".
Posted Image

#22 buddylove

buddylove

    Camshaft & Stage Two Head

  • TMF+ Member
  • PipPipPipPipPipPipPipPip
  • 1,640 posts
  • Location: North America
  • Local Club: SAMOA

Posted 28 December 2011 - 04:51 AM

We tackled the charging issue and clutch activating today. The alternator in the Mini was one that Chuck didn't recognize and it had some sort of separate voltage regulator. In true fashion to this Mini, the alternator was spliced into the wiring harness, and it took a bit to figure out what exactly was going on with it. After drawing out our own diagram as to what was going on and a phone call, we did some testing and figured out that the alternator was dead.
The engine bay minus the alternator and a few more deleted wires.
Posted Image
Chuck adjusted the clutch some more, and it now activates just how I would like it to. We will see if it needs anymore fine tuning once we get it on the road. Still left to do: Radiator flush, install new alternator (on order), delete a ton more wires, get the dash lights to work, and duct tape the floor. I am sure more stuff will keep popping up.

#23 buddylove

buddylove

    Camshaft & Stage Two Head

  • TMF+ Member
  • PipPipPipPipPipPipPipPip
  • 1,640 posts
  • Location: North America
  • Local Club: SAMOA

Posted 06 January 2012 - 03:30 AM

From earlier today:
We test fitted the new alternator up and it seemed to line right up without us having to mess with the brackets at all. After I did a full mock up of it, we figured out that the belt was sitting to the left too much, and we needed to space out the alternator by a washer. After we did that, it lined up pretty nicely. Chuck scrounged around for awhile and was able to come up with a wiring harness that fit the new alternator without us having to use spades. It looks more factory and the only wire we needed to splice in was the brown and yellow wire that goes back to the light on the dash.
After start up the Mini was putting out 14.17 volts at the battery, so we were pretty happy with that. There was a pretty loud rattle coming from the radiator shroud, and at first we thought that the fan was hitting the shroud. It ended up being a missing screw from the back side of the shroud. Once we replaced it, the rattle was gone.
The Mini wasn't done with us though, even though we had fixed two issues. It decided that it wanted the jet to keep sticking partially open, causing running issues. It could have something to do with the arm / bracket that comes off of it. We will be looking into that tomorrow. I am hoping to be able to finally take it for a spin tomorrow.
A pic of the new alternator setup, and the factory looking alternator harness that you can't really see.
Posted Image

#24 buddylove

buddylove

    Camshaft & Stage Two Head

  • TMF+ Member
  • PipPipPipPipPipPipPipPip
  • 1,640 posts
  • Location: North America
  • Local Club: SAMOA

Posted 08 January 2012 - 06:03 AM

Yesterday, Chuck had already pulled off the carb to see what was going on with the jet. He adjusted the arm, and it kept binding. He kept moving it up and down to see if it would bed in. Eventually it stopped binding, and I hope it doesn't bind again while driving it. We put it back together and put the air cleaner on it. I took it for a test spin, and experienced some sputtering on acceleration. When I got back, we put in another carb spring and on the next test drive it sputtered a bit less on acceleration. Overall, it drove nice and I drove it home. I am going to have to get use to the braking system, so I am so used to not having to add so much pressure.
A pic of it at home:
Posted Image
Today, I decided to drive it over to my friend's house in Woodinville (about 20 miles from me one way). It made the trip fine, but was sputtering on acceleration and died coming up to a stop light about 5 or 6 times the whole trip. It fired right up after it died, but it would be nice to figure out why it was doing it. The doors need to be bent slightly back into shape and new door seals installed to help cut down on noise and cold air into the cabin. It was also popping a bit out of the exhaust, I am guessing that means its running a bit rich?

#25 timmins

timmins

    Mini Mad

  • Noobies
  • PipPipPipPip
  • 109 posts
  • Location: Chapel Hill NC, USA
  • Local Club: Mid Atlantic Minis

Posted 02 February 2012 - 07:09 PM

Good to see you've got another Clubman!

#26 buddylove

buddylove

    Camshaft & Stage Two Head

  • TMF+ Member
  • PipPipPipPipPipPipPipPip
  • 1,640 posts
  • Location: North America
  • Local Club: SAMOA

Posted 02 February 2012 - 11:48 PM

Thanks! I still miss the one you have though! :D

#27 buddylove

buddylove

    Camshaft & Stage Two Head

  • TMF+ Member
  • PipPipPipPipPipPipPipPip
  • 1,640 posts
  • Location: North America
  • Local Club: SAMOA

Posted 02 February 2012 - 11:50 PM

Not sure if this thread is getting any reads... but, here are some more updates that have happened over the month.

#28 buddylove

buddylove

    Camshaft & Stage Two Head

  • TMF+ Member
  • PipPipPipPipPipPipPipPip
  • 1,640 posts
  • Location: North America
  • Local Club: SAMOA

Posted 02 February 2012 - 11:52 PM

01/09/12

Yesterday, I disconnected the alarm ecu and hoped for the best. The Mini still fired up just fine and all the lighting still worked after I had disconnected it. After that, I fought with the passenger side door seal for a good hour. I didn't realize how much of a pain in the butt it was going to be. I had the door seals still from my MK1 project and the passenger side worked fine after fighting with it. I just had to cut off about 4 inches when I was done. I am not looking forward to doing the drive side door seal, but at least I know more about how to get it to go on. A future project will be to bend the top of the door in the rear top as it is not fitting flush against the body / seal.
Today I removed a ton more wires out of the interior, the alarm wires ended up being interconnected with the ignition wires. It took me a bit, but I figured it out, and I was able to get the Mini to fire up again. Thankfully all of the lighting still works, the alternator is still charging, but the wipers are only operating on a single speed. They were dual speed before I started all of this... Another thing to figure out later and I want to open up that area again as I need to do a bit better job with the wires.
I also removed the UK heater that was installed into it at one point. I don't know if it works, but I kept kicking it when I went to use the clutch.
Everything removed from today:
Posted Image
How the dash area looks now:
Posted Image

#29 buddylove

buddylove

    Camshaft & Stage Two Head

  • TMF+ Member
  • PipPipPipPipPipPipPipPip
  • 1,640 posts
  • Location: North America
  • Local Club: SAMOA

Posted 02 February 2012 - 11:52 PM

01/11/12

Swung by Chuck's today to pick up a AAM needle so that I could replace my AAU needle. On the way over, the Mini really started acting up and died everytime I came to a stop as well as sputtered on any sort of acceleration. After I got to Chuck's, he wanted to take a ride in it so that we could figure out what was going on. It acted the same as when I was driving over and when he took his turn with it, it didn't do much better.

When we got back to his garage, I swapped out the needles and Chuck adjusted the idle as well as the fast idle. Chuck took it through its paces after filling it up, it drove smoother, and didn't making any popping noises.

We also figured out that the Mini has a 3.44 final drive. We finished up with greasing the shifter assembly to try to take the slop out of it a bit.

#30 buddylove

buddylove

    Camshaft & Stage Two Head

  • TMF+ Member
  • PipPipPipPipPipPipPipPip
  • 1,640 posts
  • Location: North America
  • Local Club: SAMOA

Posted 02 February 2012 - 11:52 PM

01/12/12


This morning my plan was to take the Mini to work for the first time. I went out to the garage and smelled fuel. I pushed the Mini back a bit to see if there was a fuel spot under the car, and surprise surprise... I had a nice little puddle under there. The soft line that comes off of the hard line from the back to the mechanical fuel pump was leaking at the fuel pump. I ran out of time before having to go to work and had to use my other car. I left the Mini outside the garage as it was still leaking fuel and planned to work on it when I got home.

Once I got home, I shortened the soft line, and tried to get it to stop leaking again. Using the old clamp, it still kept leaking. I replced it with another clamp and got it to stop leaking. I am hoping that it stays this way. Next, I flushed the rust water from the engine and radiator, it was a nice rusty brown, and replaced it with Prestone 50/50 antifreeze. Finally, I tightened up the front bumper to keep it from rattling, one side fits closer to the body then the other, so I am pretty sure it has been in some sort of front end accident.


0 user(s) are reading this topic

0 members, 0 guests, 0 anonymous users