looking good!!!


'92 City E - Mk1 Fraudster - Attempt To Shine (16/05/16)
Started by
The Otter
, Mar 08 2012 05:38 PM
297 replies to this topic
#31
: post #31")
coopdog
-
- TMF+ Member
-

- 4,506 posts
Up Into Fourth
- Location: South Wales
Posted 13 May 2012 - 08:57 AM
#32
rob963
-
- Just Joined
-
- 350 posts
Speeding Along Now
- Location: Bristol
Posted 13 May 2012 - 11:57 AM
You're welcome, I think mine looks better with the clear lenses on it anyway 
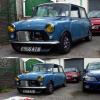
looks good after a wash and a tidy up
don't forget to sort that melted paint
pity about the silly person who took out much more than the needed to from the arch/a-panel
but i'm sure it can be sorted eventually
looks good after a wash and a tidy up
don't forget to sort that melted paint
pity about the silly person who took out much more than the needed to from the arch/a-panel
but i'm sure it can be sorted eventually
#33
The Otter
-
- Members
-
- 620 posts
The artist formally known as j322overthetop
- Location: Midlands
Posted 13 May 2012 - 08:25 PM
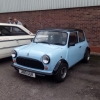
A quick snap from todays TMF meet at Midlands Mini Clinic, near Merry Hill. Not exactly a massive turn out again, but was still a very fun day! Many drag races were performed, and plenty of messing around with mini motos 

#34
The Otter
-
- Members
-
- 620 posts
The artist formally known as j322overthetop
- Location: Midlands
Posted 14 May 2012 - 07:58 PM
Another small update, today I touched up a couple of bits of paintwork and tidied up the speaker grilles on the rear speakers, not much but every little helps!
Re-spraying a patch of bad paint on the wing. I can't be bothered to do a perfect job at the moment, as the wings really need replacing and have a lot of rust on them, so I don't want to waste all my paint on a panel that's had it anyway!

This door step repair was done before my ownership, the welding looks to be quite good but it wasn't done very neatly and as you can see, was just covered over with underseal.

So a quick rub down and blow over with red will do for now, again both door steps have gone through in the front corners, so I'll replace them and do a proper job someday.

Next up, I wanted to make the rear speakers look a bit neater, seeing as they're so prominent through the rear window. The paint on the Kenwood logos had cracked and looked pretty manky, so I rubbed off the old paint to start with a blank canvas.

I then painted the letters white and did a couple of bits in red, and quickly rubbed off the excess to leave the writing looking pretty nice.


A quick spray over with black on the grilles made them look like new again.

I got distracted a bit when this thing was flying around the area!

I don't know anything about helicopters, but I think it's a Chinook? Sounded fantastic whatever it was
Still got a few more things planned for the next few days, including more paintwork and an oil change
Re-spraying a patch of bad paint on the wing. I can't be bothered to do a perfect job at the moment, as the wings really need replacing and have a lot of rust on them, so I don't want to waste all my paint on a panel that's had it anyway!
This door step repair was done before my ownership, the welding looks to be quite good but it wasn't done very neatly and as you can see, was just covered over with underseal.
So a quick rub down and blow over with red will do for now, again both door steps have gone through in the front corners, so I'll replace them and do a proper job someday.
Next up, I wanted to make the rear speakers look a bit neater, seeing as they're so prominent through the rear window. The paint on the Kenwood logos had cracked and looked pretty manky, so I rubbed off the old paint to start with a blank canvas.
I then painted the letters white and did a couple of bits in red, and quickly rubbed off the excess to leave the writing looking pretty nice.
A quick spray over with black on the grilles made them look like new again.
I got distracted a bit when this thing was flying around the area!
I don't know anything about helicopters, but I think it's a Chinook? Sounded fantastic whatever it was
Still got a few more things planned for the next few days, including more paintwork and an oil change
#35
rob963
-
- Just Joined
-
- 350 posts
Speeding Along Now
- Location: Bristol
Posted 15 May 2012 - 07:13 AM
Looks like you are making some good progress! 
should look pretty good on London to Brighton, looking forward to seeing it
it'll certainly be better than with the melted paint...
Yeah I believe you're right about the helicopter, it is a Chinook to the best of my knowledge...
And I wont forget your Hilo spanners either
should look pretty good on London to Brighton, looking forward to seeing it
it'll certainly be better than with the melted paint...
Yeah I believe you're right about the helicopter, it is a Chinook to the best of my knowledge...
And I wont forget your Hilo spanners either
#36
The Otter
-
- Members
-
- 620 posts
The artist formally known as j322overthetop
- Location: Midlands
Posted 16 May 2012 - 07:45 PM
I only did a little bit yesterday, just making a couple of adjustments to my centre console. I had to cut down the top left side panel to make it fit a bit better, as it was a bit too tall and had pulled the threads out of the main panel, so it just fell off one day... So I peeled back the vinyl, cut the top off and stapled the vinyl back in place, along with tidying up the vinyl in a few other places.
Went from this:

to this:

Today, I did an oil change and painted the front valance, beneath the bumper, red, as someone in the past had painted it in underseal.
I know I don't need to go through an oil change with you guys, but I took some pictures anyway
The new oil, filter, and copper washer.

After letting the oil drain out as much as I can whilst the car is up on ramps, I let it back down to the ground and allow the last bits to trickle out, whilst jacking up the rear passenger corner to get as much old oil to run out as possible.

Yes, yes, I know, I haven't chocked the front wheels, how naughty of me

The new filter primed and the rubber seal oiled up, ready to go on. I love the colour and smell of 20W50 mineral oil!

Nice clean sump plug with new washer.

Whilst I was at it, I thought I'd check the valve clearances, and they were all perfect except one inlet valve that had no clearance at all for some reason Thought I'd take a couple of pics of the head whilst the rocker cover was off.

Double valve springs

Next job was to freshen up the front panel underneath the bumper, this is what it started out like


We shall ignore the fact that this part of the bumper lip is made from fibreglass and duct tape

One thoroughly clogged up flapwheel later...

It looked like this

Once again, the front panel has rotted through in various places, and half of the steel is wafer thin and bends like paper, so I wasn't going to do a perfect job on a ruined panel
Primered

Mmm, red

The finished article

These also arrived in the post this morning, yummety yum yum

That's all for now! Thanks for reading
Sven.
Went from this:
to this:
Today, I did an oil change and painted the front valance, beneath the bumper, red, as someone in the past had painted it in underseal.
I know I don't need to go through an oil change with you guys, but I took some pictures anyway
The new oil, filter, and copper washer.
After letting the oil drain out as much as I can whilst the car is up on ramps, I let it back down to the ground and allow the last bits to trickle out, whilst jacking up the rear passenger corner to get as much old oil to run out as possible.
Yes, yes, I know, I haven't chocked the front wheels, how naughty of me
The new filter primed and the rubber seal oiled up, ready to go on. I love the colour and smell of 20W50 mineral oil!
Nice clean sump plug with new washer.
Whilst I was at it, I thought I'd check the valve clearances, and they were all perfect except one inlet valve that had no clearance at all for some reason
Thought I'd take a couple of pics of the head whilst the rocker cover was off.Double valve springs
Next job was to freshen up the front panel underneath the bumper, this is what it started out like
We shall ignore the fact that this part of the bumper lip is made from fibreglass and duct tape
One thoroughly clogged up flapwheel later...
It looked like this
Once again, the front panel has rotted through in various places, and half of the steel is wafer thin and bends like paper, so I wasn't going to do a perfect job on a ruined panel
Primered
Mmm, red
The finished article
These also arrived in the post this morning, yummety yum yum
That's all for now! Thanks for reading
Sven.
#37
rob963
-
- Just Joined
-
- 350 posts
Speeding Along Now
- Location: Bristol
Posted 04 June 2012 - 09:45 AM
Looking good sven!
Pity about the fiberglass on the bumper lip, but I think the sheer amount of lights on there covers that up
along with the bumper that is...
Still a good job with the paint
and me likey the cones! I must replace mine at some point...
Pity about the fiberglass on the bumper lip, but I think the sheer amount of lights on there covers that up
along with the bumper that is...
Still a good job with the paint
and me likey the cones! I must replace mine at some point...
#38
MiniElliott
-
- Members
-
- 378 posts
Speeding Along Now
- Location: England
Posted 09 June 2012 - 09:24 AM
Hi, im soon to have a similar spec engine to you with the 12G295 and twin HS2's. Which of Vizzards mods did you do the the carbs and did you mod the manifold aswell ? Sorry for all the questions
#39
The Otter
-
- Members
-
- 620 posts
The artist formally known as j322overthetop
- Location: Midlands
Posted 09 June 2012 - 11:12 AM
Hi, im soon to have a similar spec engine to you with the 12G295 and twin HS2's. Which of Vizzards mods did you do the the carbs and did you mod the manifold aswell ? Sorry for all the questions
The only modification I did was to file down the butterfly spindles and knife edge the butterfly valves as explained in the book. I did it to my old single HS4 and noticed a difference, so I thought I might as well do it to the twins before I put them on and got them set up. I didn't do anything to the manifold, from my research it came from a late 60's 1275 Cooper S originally (if the casting numbers are to be believed) so it's probably good enough in standard form for my wheezy old 998.
Edited by J322OverTheTop, 09 June 2012 - 01:03 PM.
#40
MiniElliott
-
- Members
-
- 378 posts
Speeding Along Now
- Location: England
Posted 09 June 2012 - 03:22 PM
What's your casting number? Mines 12A661. From the fixed needles AH2 I believe mine are from a 997 cooper or a 1275 S according to vizards chart. It's nice to think that at one point in time they where top end performance items :)
#41
The Otter
-
- Members
-
- 620 posts
The artist formally known as j322overthetop
- Location: Midlands
Posted 18 June 2012 - 07:56 PM
I had a fantastic weekend down in Bristol, with the Help for Heroes cruise on Saturday and the Bristol Mini Day on Sunday, with camping Friday and Saturday night. I posted up all of the best pics I took in this thread here --> http://www.theminifo...i-weekend-pics/ , and I ended up buying a few things on Sunday, none of which I'd actually planned to get (as usual!).
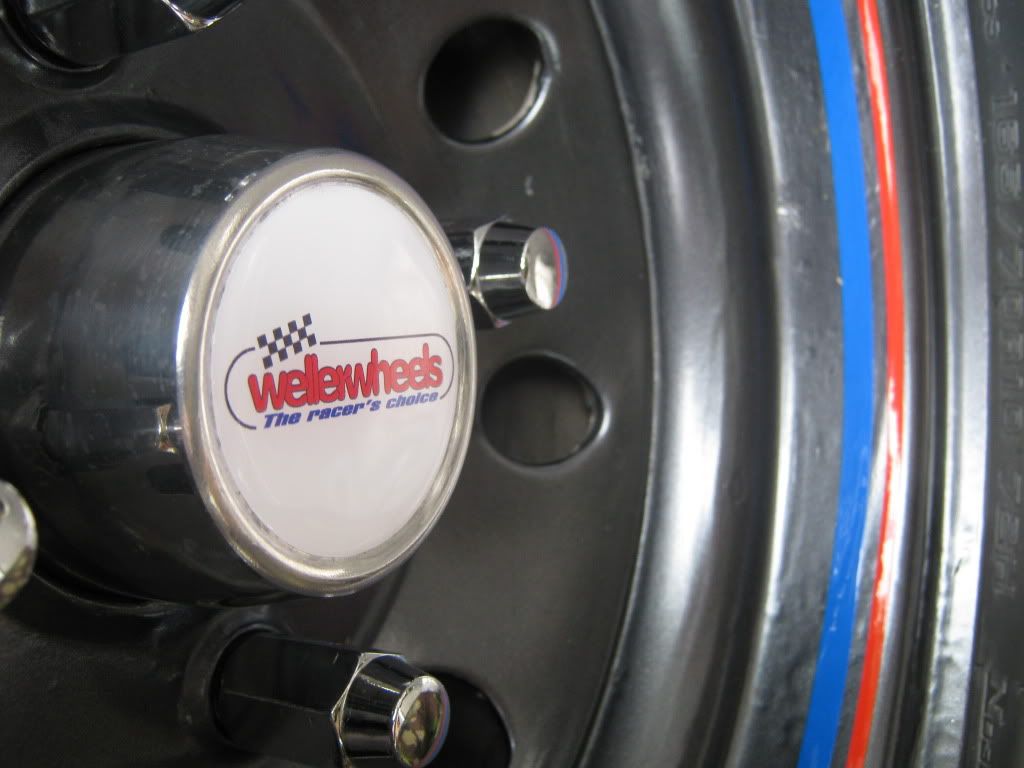
I picked up some Weller centre cap stickers and some Weller pin striping from stickyfingers/roofless at a very reasonable price.

I also bought a new steering column pinch bolt, a missing bracket for the weather shield, and some new orange front indicator lenses.
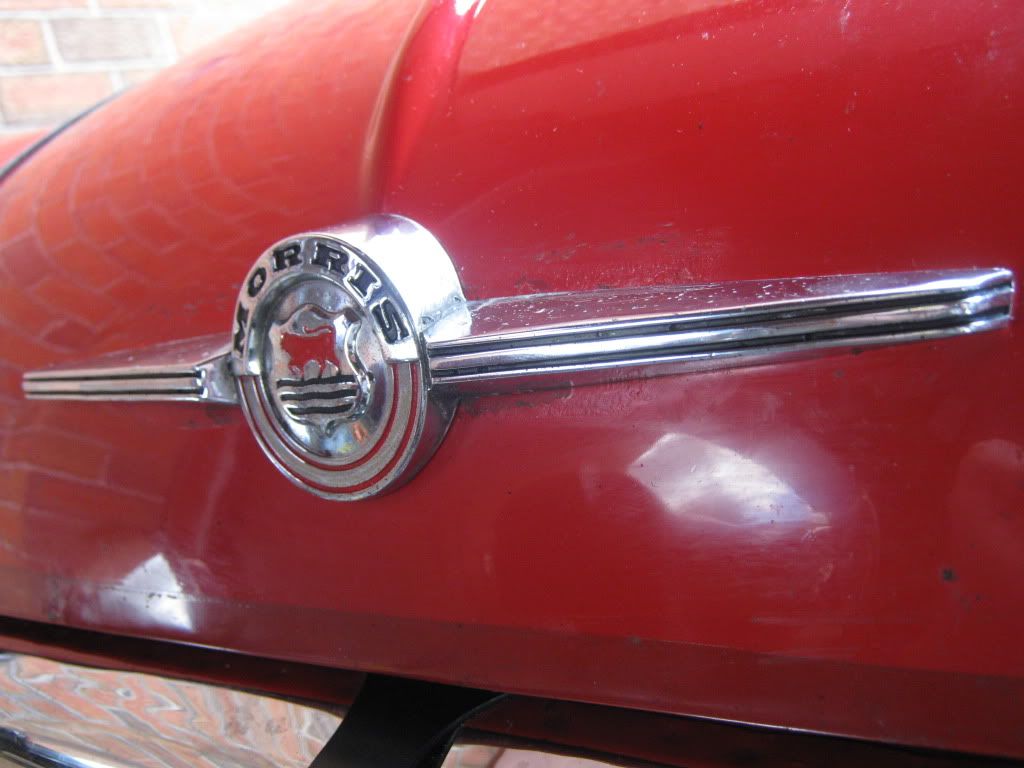
I then got entranced by all the second hand goodies at the main autojumble stand and ended up buying a morris bonnet badge, an old AA badge, and what I was told were a full set of Mk1 door hinges. I'll make a thread later to see if that's true...
AA badge and indicator lenses that I put on straight away at the show:

Morris badge:

Mk1 hinges, one of which came with some free car still attached! They need some work, there are a couple of missing studs and a couple sheared off that will probably need drilling out and maybe retapping, and one of the hinges is very wobbly so I'll have to refurb them sometime. One of them is even a proper brass hinge so has no rust! Only paid £25 for the set, which is obviously a lot cheaper than getting them new.


Unbelievably, I actually managed to get that mess off without much hassle, the nuts and studs are still perfectly usable too!

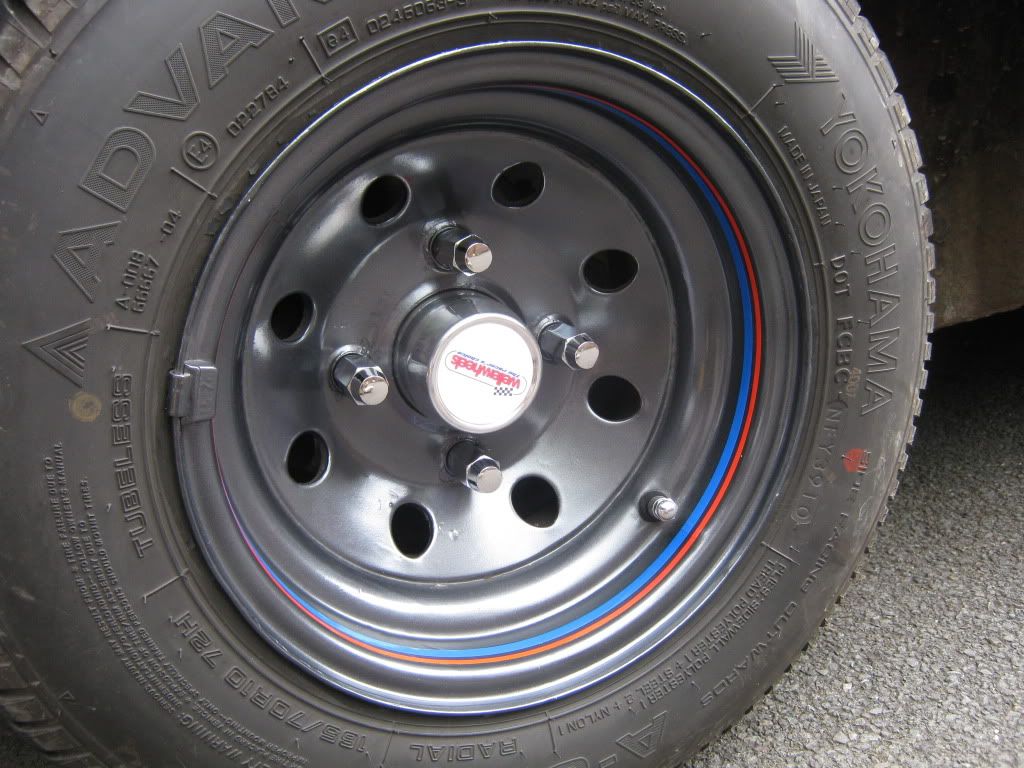
Today I got on with putting some of the bits I bought on to the car, so first up I decided to put the stickers on to the wheels and centre caps. I know not many people bother putting the Weller stripes back on after refurbing their wheels, and I've never seen a set of non-white Wellers with the stripes. I think it looks a bit odd, but hopefully it'll grow on me and it certainly jazzes up the wheels a bit.

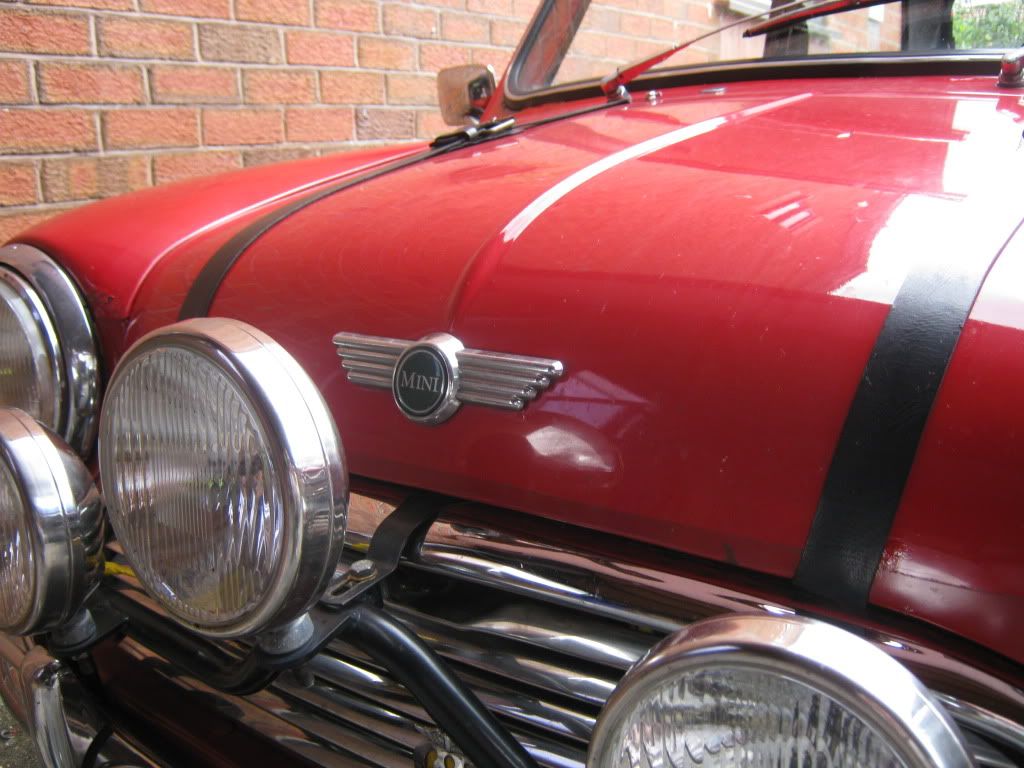
Then I decided to tackle the bonnet badge, I repainted it black and red rather than blue and red, as I thought it would fit in nicer with the rest of the car.
Old Rover wing badge:
I had to make up some simple brackets and drill a couple of new holes to hold the badge in place. I'm not sure how it originally would have been held on, but the one I bought had a couple of holes in the back with enough depth for some self tapping screws to bite in to.

That's all for now, next thing I need to do is find a better way of securing in the third brake light, sticky pads on the window are useless!
Let me know what you think, positive and negative opinions always welcomed
Sven.
I picked up some Weller centre cap stickers and some Weller pin striping from stickyfingers/roofless at a very reasonable price.
I also bought a new steering column pinch bolt, a missing bracket for the weather shield, and some new orange front indicator lenses.
I then got entranced by all the second hand goodies at the main autojumble stand and ended up buying a morris bonnet badge, an old AA badge, and what I was told were a full set of Mk1 door hinges. I'll make a thread later to see if that's true...
AA badge and indicator lenses that I put on straight away at the show:
Morris badge:
Mk1 hinges, one of which came with some free car still attached! They need some work, there are a couple of missing studs and a couple sheared off that will probably need drilling out and maybe retapping, and one of the hinges is very wobbly so I'll have to refurb them sometime. One of them is even a proper brass hinge so has no rust! Only paid £25 for the set, which is obviously a lot cheaper than getting them new.
Unbelievably, I actually managed to get that mess off without much hassle, the nuts and studs are still perfectly usable too!
Today I got on with putting some of the bits I bought on to the car, so first up I decided to put the stickers on to the wheels and centre caps. I know not many people bother putting the Weller stripes back on after refurbing their wheels, and I've never seen a set of non-white Wellers with the stripes. I think it looks a bit odd, but hopefully it'll grow on me and it certainly jazzes up the wheels a bit.
Then I decided to tackle the bonnet badge, I repainted it black and red rather than blue and red, as I thought it would fit in nicer with the rest of the car.
Old Rover wing badge:
I had to make up some simple brackets and drill a couple of new holes to hold the badge in place. I'm not sure how it originally would have been held on, but the one I bought had a couple of holes in the back with enough depth for some self tapping screws to bite in to.
That's all for now, next thing I need to do is find a better way of securing in the third brake light, sticky pads on the window are useless!
Let me know what you think, positive and negative opinions always welcomed
Sven.
#42
rob963
-
- Just Joined
-
- 350 posts
Speeding Along Now
- Location: Bristol
Posted 18 June 2012 - 08:48 PM
Wow! Looks awesome so far! excellent work!
For the 3rd brake light, I found the industrial strength Velcro with outdoors adhesive works very well
AND it's only about 3 quid for 2 big patches from everyone's favourite halfrauds...
excellent work! For the 3rd brake light, I found the industrial strength Velcro with outdoors adhesive works very well
AND it's only about 3 quid for 2 big patches from everyone's favourite halfrauds...
#43
Down&Out
-

- Traders
-
- 4,853 posts
The King Of Retro Cool
- Location: -
Posted 23 June 2012 - 10:20 PM
Where did you get those spotlamps? Ive got an IJ bar and those are the perfect size!
#44
The Otter
-
- Members
-
- 620 posts
The artist formally known as j322overthetop
- Location: Midlands
Posted 23 June 2012 - 10:53 PM
Where did you get those spotlamps? Ive got an IJ bar and those are the perfect size!
They came as part of the kit I bought from Huddersfield Spares about a year and a half ago, but I am pretty much 100% sure they are these 6" driving lamps (with the grilles removed obviously): http://www.ebay.co.u...#ht_2148wt_1163 - which unfortunately means you'd need to buy £100's worth of lamps and have a spare, but I didn't look around for any cheaper prices so it might not be quite that bad.
Hope that was helpful!
Sven.
Edited by J322OverTheTop, 24 June 2012 - 03:12 PM.
#45
Steely
-
- Members
-
- 1,764 posts
Camshaft & Stage Two Head
Posted 06 July 2012 - 04:30 PM
Its looking good mate :). A lot better than in the flesh! Joking ;)


2 user(s) are reading this topic
0 members, 2 guests, 0 anonymous users


