Jump to content


Photo
- - - - -

'92 City E - Mk1 Fraudster - Attempt To Shine (16/05/16)


  • Please log in to reply
297 replies to this topic

#46 The Otter

The Otter

    The artist formally known as j322overthetop

  • Members
  • PipPipPipPipPipPip
  • 620 posts
  • Location: Midlands

Posted 28 July 2012 - 03:28 PM

So, I haven't done much to the car in a while, but now that I've got a ridiculously good saving on my insurance I had some spare money lying around in my account for mini parts! So I ordered a few things from Minispares which I'll get round to fitting over the next couple of months hopefully, including a scuttle and A-panels to go towards the front end replacement (which I'll be doing end of August if all goes to plan). I got the first bits on the car over the past couple of days.

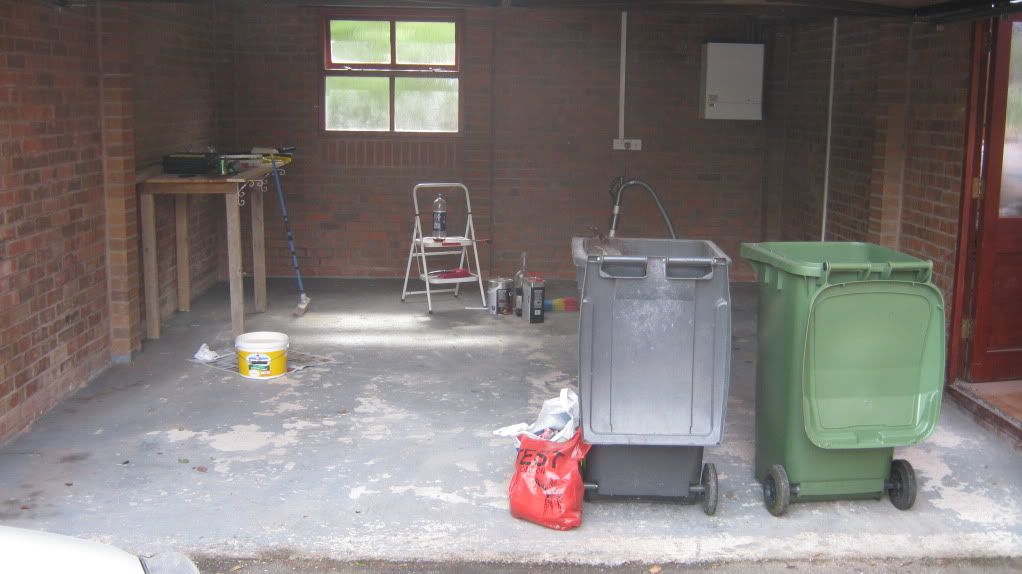
The first thing I want to show you though was what I spent 8 days doing from a couple of weeks ago to a few days ago, and that was the refurbishment of the garage. Me and my Dad spent about 2 days stripping everything out, throwing away half the stuff we went through, and cleaning the walls and floor ready for the new paint job. A long time ago, my Mum painted the floor with ordinary floor paint (as opposed to garage floor paint) which can't cope with the heat from car tires, so half the old paint had peeled away and it looked utterly terrible. I did all the re-painting myself, two coats on the walls, two coats of concrete sealer and two coats of paint on the floor.

Posted Image

Posted Image

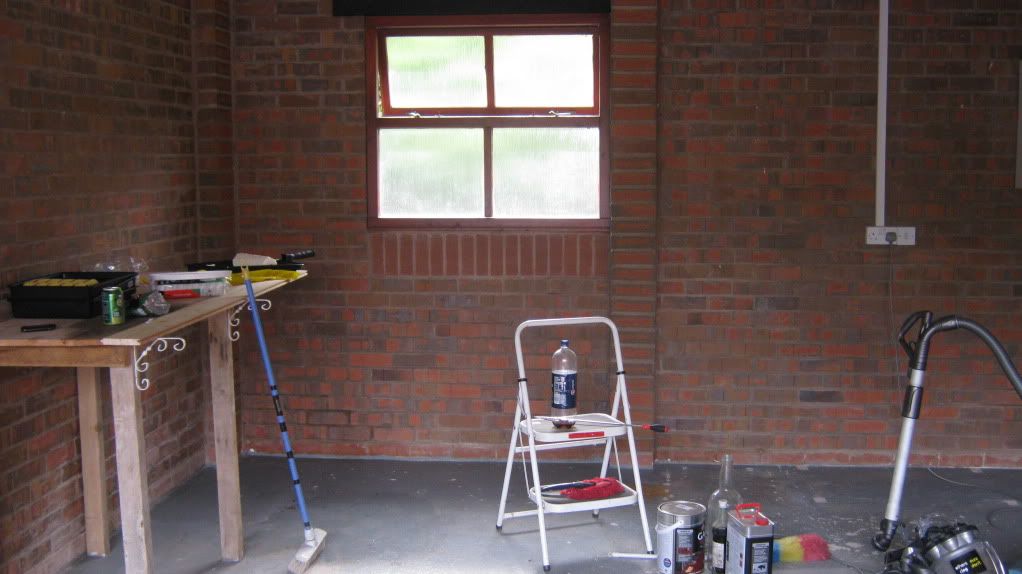
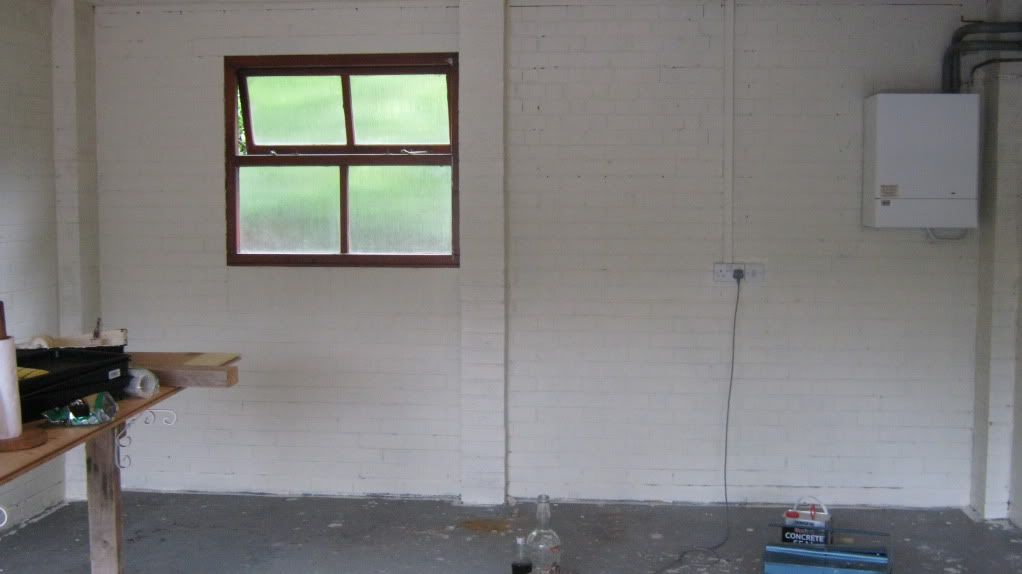
The walls were unpainted brick and looked a bit drab and depressing, so they were painted in ivory white, an off-white creamy colour.

Posted Image

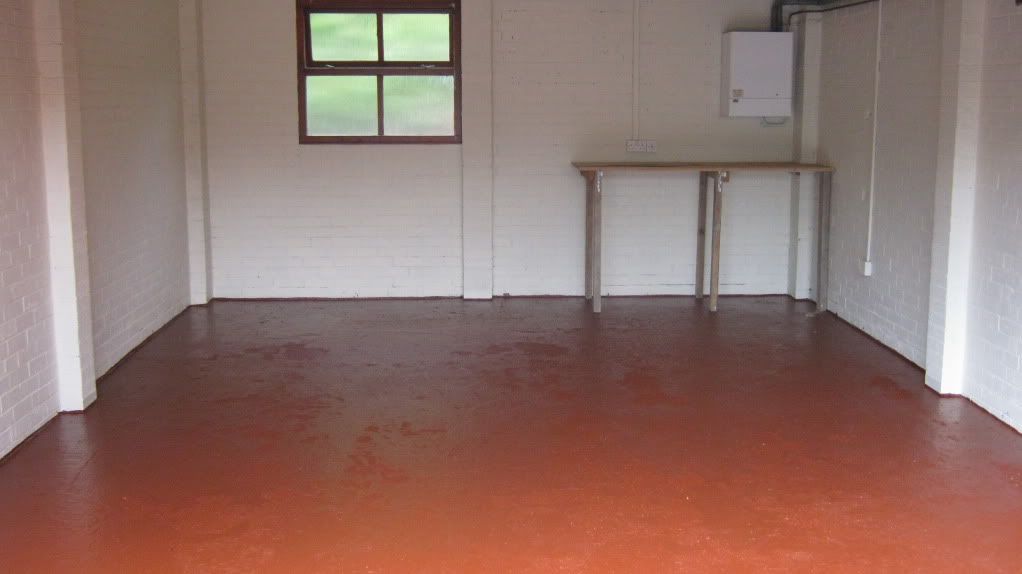
The floor was re done with concrete sealer on the bare concrete, and then tile red on top.

Posted Image

After all the paint was dry it was time to put everything back in, and again we threw away half of what we were going to put back in and I spent a whole day organising all the loose boxes of screws and nails and bolts and brackets and old tools - it was a damn boring job but it's so much easier to find what you want now. I also decided to go crazy with the organisation and decided to hang as much as I could from the walls, so the car ramps, garden tools, etc. are all hanging next a shelving unit, and all my tools are organised much nicer on the work bench.

Posted Image

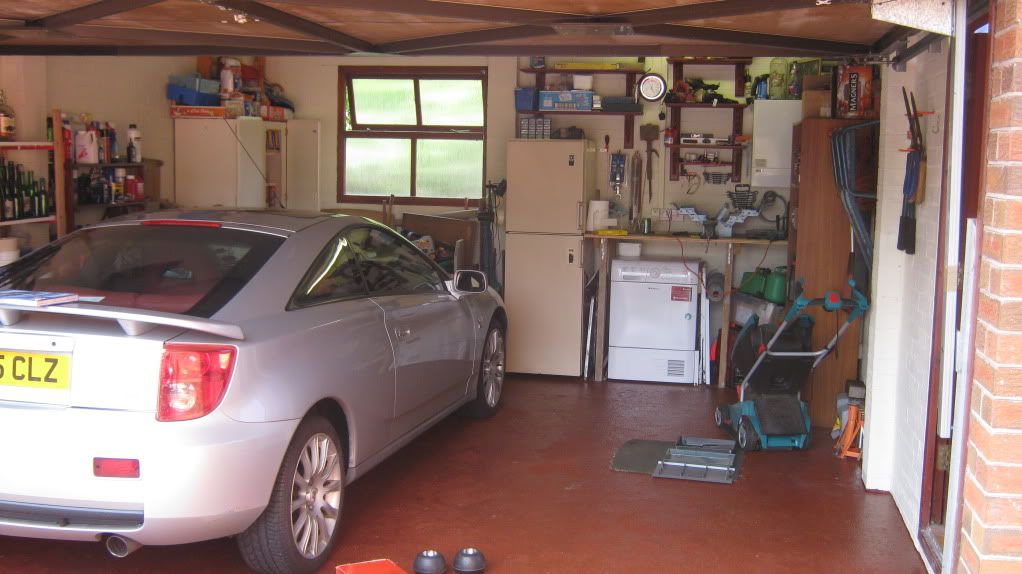
So, that's enough about the garage, but it took a hell of a lot of time and effort to get it looking like it does now!

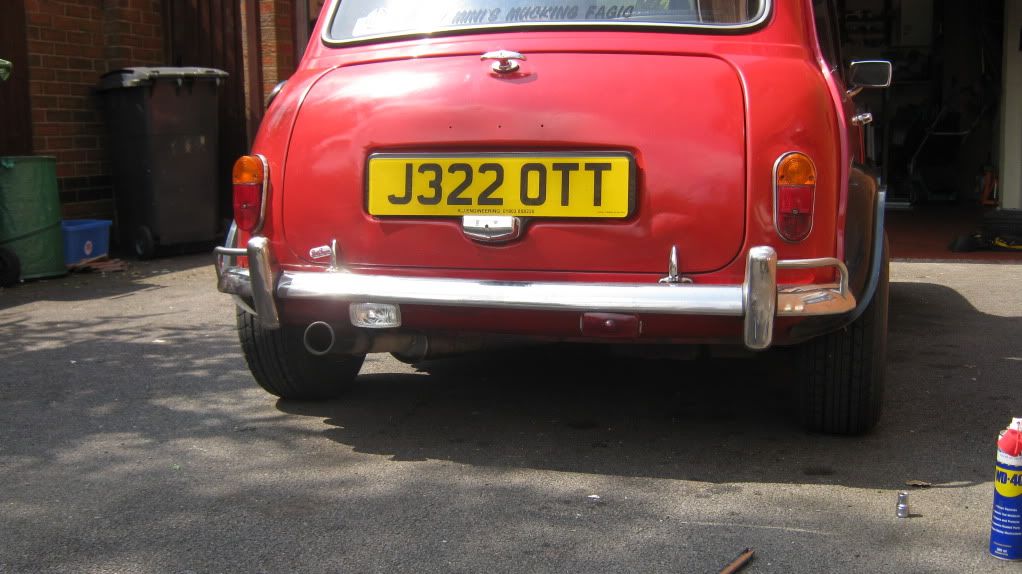
First job on the car was to sort out the fog light and reversing light that I'd taken off a while back. I had them on the very corners of the valance, which I preferred lookswise but it meant that when driving in rain it sprayed dirty water and muck up on to the lights, which led to an amusing discovery at BMD that my reverse light was full of water! So I just repositioned them somewhere sensible and neat, and I'm happy with them for now.

Posted Image

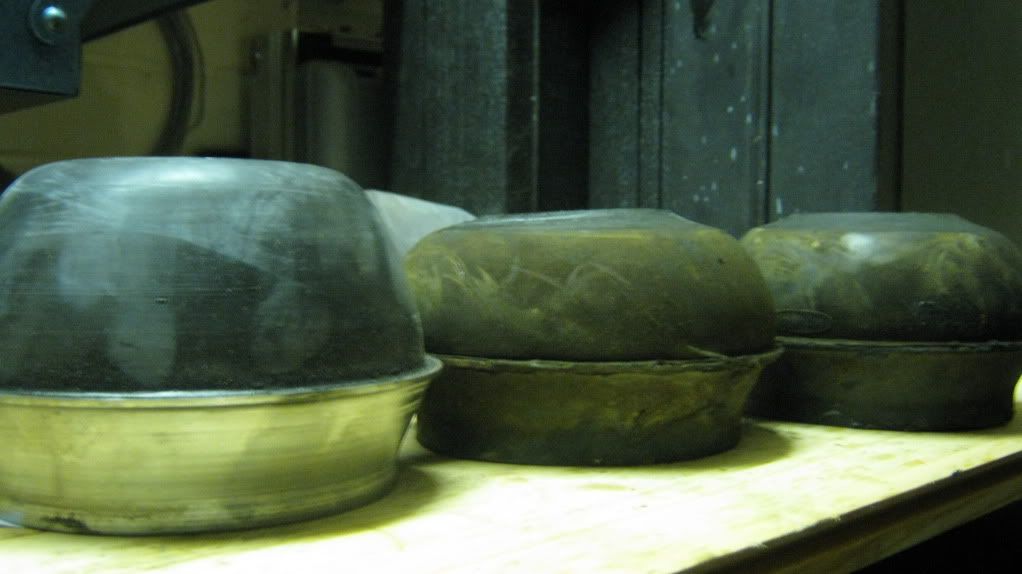
Then I decided to replace the rear brake shoes, not a big job but one that needed doing as the old shoes were getting a little on the thin side:

Posted Image

This was one of the better shoes, the others were worn thinner than this:

Posted Image

All new shoes and springs:

Posted Image

Then on to the bigger job, it was time to replace the old rubber suspension cone springs all round with Minispares Red Dot cones. I'd fitted HiLos last year sometime, which made the job a little easier for me, and the rears were no trouble at all. New cone against old rear cone:

Posted Image

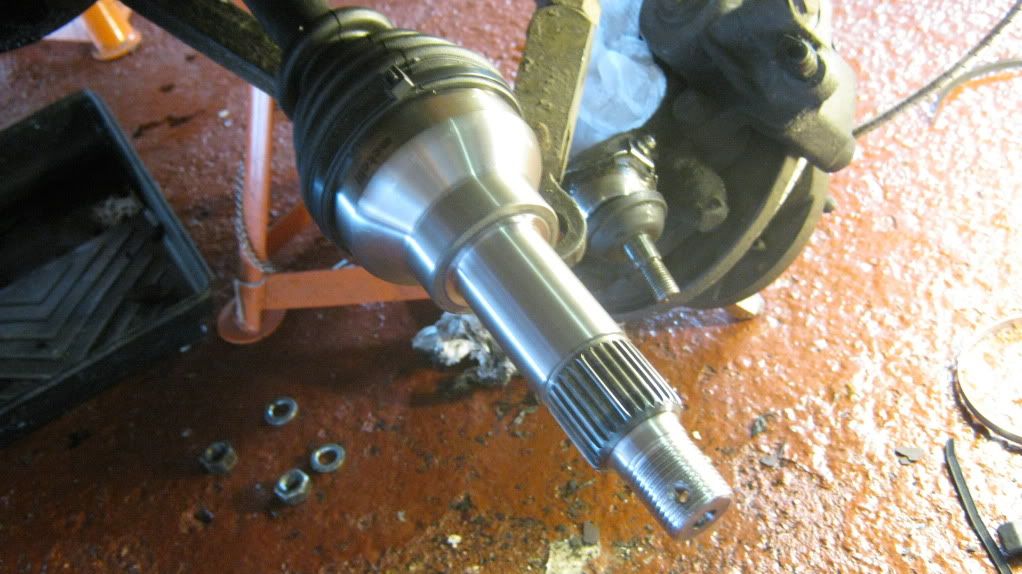
The fronts however were a little trickier, the top arm pin on the passenger had a seized bearing that had rusted solid, so it took some ingenuity to work out how to remove a rusted solid pin that should have slid out no problem - like the drivers side did. This picture shows the pin after I got it loose, by using a bracket I'd found whilst clearing through the garage (and a couple of old nuts) I'd managed to make a tool that pulled the pin out when tightening the nut on the pin, if that makes sense... I'm sure you'll work it out from the picture, but basically I just tightened the nut on the pin and it pulled the pin out of the arm.

Posted Image

I then spent about an hour with a lot of WD40 and a blow torch and carb cleaner and WD40 and a wire brush and WD40 to get the rust out and get the seized bearing moving again. For some reason one of the needle rollers seemed to be missing, so the other fells out about three times, but I got them back in fine, cleaned thoroughly and then greased up again. I know I should have replaced it but I didn't have the time to order a new bearing and do it properly. Cleaning up the top arm components:

Posted Image

By this time it was about 1 in the morning, so I thought I should let my neighbours get some sleep and put my tools down and go to bed. Unfortunately however, I'd parked the car a little too close the garage door to be able to close it! >_< So the car spent the night looking like this:

Posted Image

So that there was enough clearance for the door:

Posted Image

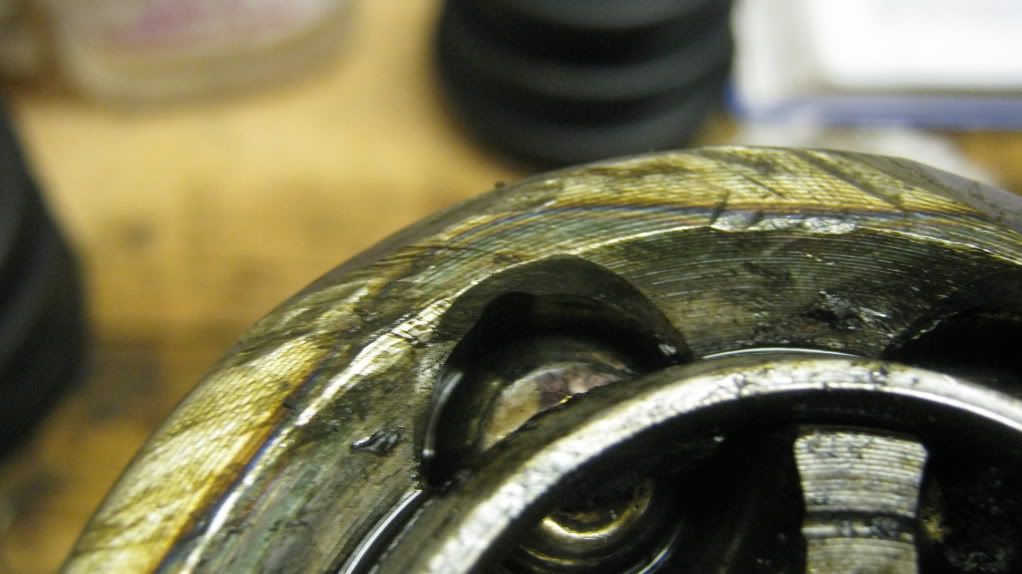
So the next morning, I fitted everything back together and it all went back in fine. New cone against old front cones - no idea how one of the old ones got so mangled :crazy::

Posted Image

Posted Image

Oh yeah, I got a bit annoyed with the lack of access on the drivers side, so I got a bit brutal with the inner wing :angel::

Posted Image

All back together and sitting a little high at the moment before the cones settle, even on the lowest HiLo settings all round:

Posted Image

And that's everything up to date now, I'll be doing the CV joints in the next few days, and there's a few other little jobs to get done before MITP, so there's probably going to be a few more updates in the next two weeks.

Thanks very much for reading, hope you enjoyed it!

Sven.

#47 eden7842

eden7842

    One Carb Or Two?

  • Members
  • PipPipPipPipPipPipPip
  • 907 posts

Posted 28 July 2012 - 09:10 PM

Loving this :-)

And go for a good drive to let the sus settle.

#48 The Otter

The Otter

    The artist formally known as j322overthetop

  • Members
  • PipPipPipPipPipPip
  • 620 posts
  • Location: Midlands

Posted 03 August 2012 - 06:38 PM

I got the CV joints changed today, it turned out that the passenger side was fine and it certainly looked newer than the drivers side (which was well past it, as you'll see), but I thought I might as well do them both at the same time. It took me rather a long time to get the knack of how to remove a CV joint, and it turned out that I just needed a bigger hammer and a harder swing ;D The first one I did took me about an hour and a half to get off, the second took me about 30 seconds >_<

This is the knackered drivers side joint, which obviously was giving me the characteristic clicking noise on full lock. You can see the extra little grooves at the back of the big ball bearing grooves, which shouldn't be there and is what causes the clicking. From new that is a perfectly smooth curved face:

Posted Image

The clips supplied with the kit (bought from Minispares) to secure the boot to the CV and the driveshaft were too big for some reason and wouldn't close up enough to even grip the boot, let alone grip it tightly. Unless I was doing something wrong I just couldn't see how they'd hold the boot on, so I used some big cable ties instead. This was as I tight as I could get the metal clamp:

(However I now know that a special pair of pliers is needed for this clamp to close it up, thanks charlie t)

Posted Image

New, shiny, clean CV joint fitted:

Posted Image

Another issue with this kit was the new hub nut they provided, which for some reason was 34mm instead of the correct 1 5/16" that it should be, so my socket wouldn't fit over it. No problem though, my old hub nuts were fine so I just re-used them, just seems strange to supply the wrong size nut...

(I have since been informed that this nut is not the wrong size and Rover switched to using the 34mm nut during production)

Posted Image

This is my method for locking the hub whilst tightening the hub nut, in this picture you can see the big washer that should be used to seat the bearings and the CV joint, before the assembly is tightened up with the tapered split washer. Note also that I put two of the wheel nuts back on to protect the threads on the studs in contact with the locking device:

Posted Image

This is my locking device. Might as well put the pickaxe to some use...

(I got a lot wrong with this post... anyway, this method will apparently bend your wheel studs, so please use some other method to avoid damaging them)

Posted Image

Might have a go at fitting my Austin Mini rear script badging in the next few days, which will involve welding up three old badge holes and drilling four new ones! Along with some grinding and painting of course.

Thanks for reading.

Sven

Edited by J322OverTheTop, 05 August 2012 - 03:55 PM.


#49 rob963

rob963

    Speeding Along Now

  • Just Joined
  • PipPipPipPipPip
  • 350 posts
  • Location: Bristol

Posted 04 August 2012 - 08:45 AM

Yay!! no more clicking! ;D

looks good :proud:

how are the new cones doing?
are they more comfy?

yeah CV's need a good whack to get them off :shifty:

was the thread the same for the new hub nuts, as they may have just changed the size of the nut so that it would be easier for people to get hold of metric sockets? >_<

#50 The Otter

The Otter

    The artist formally known as j322overthetop

  • Members
  • PipPipPipPipPipPip
  • 620 posts
  • Location: Midlands

Posted 04 August 2012 - 05:25 PM

Yay!! no more clicking! ;D

looks good :proud:

how are the new cones doing?
are they more comfy?

yeah CV's need a good whack to get them off :shifty:

was the thread the same for the new hub nuts, as they may have just changed the size of the nut so that it would be easier for people to get hold of metric sockets? >_<


The cones are doing well, the ride has been softened on harsh bumps like manhole covers and rough surfaces, but it's still hard in the corners and under acceleration/braking. The only issue is with my shocks, which are still very old and probably not working as they should, so the car still wallows about and is rather unsettled over bigger bumps and potholes. A set of brand new Protech shocks are on the parts list ;D

The thread on the nut was the same yeah, just the outer size was different. Must have done it because so many people use a 34mm socket on the old hub nuts instead of a 1 5/16" so they wouldn't notice the difference. Seems a shame to penalise the people like me that do it properly though, a 34mm socket works fine on a 1 5/16" (33.3mm) but obviously not the other way round! Oh well, it doesn't really matter anyway, just one of those things :geek:

#51 mini danny

mini danny

    I am a mini daddy.

  • Members
  • PipPipPipPipPipPipPipPipPipPip
  • 5,229 posts
  • Local Club: british mini club

Posted 04 August 2012 - 06:57 PM

looks very nice now i want mk1 rear lights on mine because of yours hahha loving your mini one of the best I've seen nicely modified not to much and not to little

Danny

Edited by mini danny, 04 August 2012 - 06:57 PM.


#52 rob963

rob963

    Speeding Along Now

  • Just Joined
  • PipPipPipPipPip
  • 350 posts
  • Location: Bristol

Posted 04 August 2012 - 08:30 PM


Yay!! no more clicking! ;D

looks good :proud:

how are the new cones doing?
are they more comfy?

yeah CV's need a good whack to get them off :shifty:

was the thread the same for the new hub nuts, as they may have just changed the size of the nut so that it would be easier for people to get hold of metric sockets? >_<


The cones are doing well, the ride has been softened on harsh bumps like manhole covers and rough surfaces, but it's still hard in the corners and under acceleration/braking. The only issue is with my shocks, which are still very old and probably not working as they should, so the car still wallows about and is rather unsettled over bigger bumps and potholes. A set of brand new Protech shocks are on the parts list ;D

The thread on the nut was the same yeah, just the outer size was different. Must have done it because so many people use a 34mm socket on the old hub nuts instead of a 1 5/16" so they wouldn't notice the difference. Seems a shame to penalise the people like me that do it properly though, a 34mm socket works fine on a 1 5/16" (33.3mm) but obviously not the other way round! Oh well, it doesn't really matter anyway, just one of those things :geek:


I'm glad they have made a difference to the comfort and your mini will be at a sensible height ;D
ah right, well I'm sure soon the new shocks will be on relatively soon and then it'll be better :proud:

hmm that is odd, but I guess that that would make sense that it would be because so many use the 34mm socket for it >_<
but it is a shame that they have to make it so awkward for everyone else :ohno:

#53 charie t

charie t

    Up Into Fourth

  • Members
  • PipPipPipPipPipPipPipPipPip
  • 3,153 posts
  • Location: South Leicestershire sticks
  • Local Club: wreake mini wanderers

Posted 05 August 2012 - 08:53 AM

The clips supplied with the kit (bought from Minispares) to secure the boot to the CV and the driveshaft were too big for some reason and wouldn't close up enough to even grip the boot, let alone grip it tightly. Unless I was doing something wrong I just couldn't see how they'd hold the boot on, so I used some big cable ties instead. This was as I tight as I could get the metal clamp:

Posted Image

The clips go on loose and that square loop is crimped with a special tool to tighten

Another issue with this kit was the new hub nut they provided, which for some reason was 34mm instead of the correct 1 5/16" that it should be, so my socket wouldn't fit over it. No problem though, my old hub nuts were fine so I just re-used them, just seems strange to supply the wrong size nut...

Its not the wrong sized nut, both were fitted to later cars

#54 jaydee

jaydee

    Crazy About Mini's

  • Members
  • PipPipPipPipPipPipPipPipPipPip
  • 8,565 posts

Posted 05 August 2012 - 09:53 AM

This is my locking device. Might as well put the pickaxe to some use...

Posted Image


No please dont do that, you're damaging the studs that way..
I'm used to work alone on the mini, so having no assistant to push the brakes, i just put chocks at the wheels, 1st gear on, handbrake on, it works.
Your is a very good looking mini though, well done.

#55 The Otter

The Otter

    The artist formally known as j322overthetop

  • Members
  • PipPipPipPipPipPip
  • 620 posts
  • Location: Midlands

Posted 05 August 2012 - 03:05 PM


The clips supplied with the kit (bought from Minispares) to secure the boot to the CV and the driveshaft were too big for some reason and wouldn't close up enough to even grip the boot, let alone grip it tightly. Unless I was doing something wrong I just couldn't see how they'd hold the boot on, so I used some big cable ties instead. This was as I tight as I could get the metal clamp:

Posted Image

The clips go on loose and that square loop is crimped with a special tool to tighten

Another issue with this kit was the new hub nut they provided, which for some reason was 34mm instead of the correct 1 5/16" that it should be, so my socket wouldn't fit over it. No problem though, my old hub nuts were fine so I just re-used them, just seems strange to supply the wrong size nut...

Its not the wrong sized nut, both were fitted to later cars


Guess I didn't bother reading the instructions properly enough for the CV clip >_< How awkward, making you buy another special tool for one specific job, haven't I got enough of those already?!

Fair enough, I didn't know that about the nut, thanks for the info :-) Just me being stubbornly ignorant again. :proud:


This is my locking device. Might as well put the pickaxe to some use...

Posted Image


No please dont do that, you're damaging the studs that way..
I'm used to work alone on the mini, so having no assistant to push the brakes, i just put chocks at the wheels, 1st gear on, handbrake on, it works.
Your is a very good looking mini though, well done.


Dang, didn't know I was damaging anything doing it that way :ermm: Out of interest, what sort of damage am I doing to the wheel studs? Twisting or bending them? I've been doing it this way for two years now, although I have gone through four sets of disks for other reasons, hope I haven't done anything too catastrophic. >_<

#56 charie t

charie t

    Up Into Fourth

  • Members
  • PipPipPipPipPipPipPipPipPip
  • 3,153 posts
  • Location: South Leicestershire sticks
  • Local Club: wreake mini wanderers

Posted 05 August 2012 - 03:26 PM

this is the type of pliers needed
http://www.machinema...?da=1&TC=SRC-cv boot
wheel studs/bolts are designed for clamping loads, not side loads, so you will be bending them

Edited by charie t, 05 August 2012 - 03:31 PM.


#57 The Otter

The Otter

    The artist formally known as j322overthetop

  • Members
  • PipPipPipPipPipPip
  • 620 posts
  • Location: Midlands

Posted 05 August 2012 - 03:36 PM

this is the type of pliers needed
http://www.machinema...?da=1&TC=SRC-cv boot
wheel studs/bolts are designed for clamping loads, not side loads, so you will be bending them


If only I'd have known about those pliers beforehand! Thanks for the link.

Right then, that pickaxe can be relegated back to garage ornament for now then. Thanks for letting me know jaydee and charlie t. I hate finding out I haven't been doing a job properly for two years... oh well, live and learn, etc.

#58 Roach

Roach

    Stage One Kit Fitted

  • TMF+ Member
  • PipPipPip
  • 58 posts
  • Location: BC

Posted 06 August 2012 - 01:50 AM

If you don't have those pliers, you can use a set of side cutters to squeeze it and then whack the rest down with a hammer. This method will work but I do recommend using the proper tool, then again most of use really don't do many of these boot changes.

#59 The Otter

The Otter

    The artist formally known as j322overthetop

  • Members
  • PipPipPipPipPipPip
  • 620 posts
  • Location: Midlands

Posted 08 August 2012 - 06:19 PM

Fitted my boot badges today.

This bootlid came from an 850, I could tell that because when I bought it there was a faded outline of an 850 badge where the three original holes were, and I couldn't find anything to fit in the original holes so I just left them for almost a year, like this:

Posted Image

I bought an Austin and a Mini script badge from Gaydon not long ago, here's the markings on the back of the badges:

Posted Image

Trial fit and marking up where to drill the holes:

Posted Image

Holes drilled:

Posted Image

Test fit in holes with nipples (lol):

Posted Image

Three original holes welded up:

Posted Image

Ground down:

Posted Image

This thing has so many layers of paint, it creates such a deep crater taking it back to bare metal in patches like this:

Posted Image

Painting:

Posted Image

Posted Image

Finished article back on the car:

Posted Image

Not a big job, but one that needed doing, as those holes were bugging me and were obviously letting a trickle of weather in to the boot every now and then.

So, the bonnet says it's a Morris, the boot says it an Austin, and the V5 says it's a Rover. Win for consistency! :D

Thanks for reading

Sven

#60 MiniElliott

MiniElliott

    Speeding Along Now

  • Members
  • PipPipPipPipPip
  • 378 posts
  • Location: England

Posted 08 August 2012 - 09:44 PM

So, the bonnet says it's a Morris, the boot says it an Austin, and the V5 says it's a Rover. Win for consistency! :D


Ha, mines the same. Bonnet says Morris, gearknob says Austin and Boot badge says Leyland.

What are you plans for the external hinges ? Are you doing the full hinge conversion or using them as 'Fake' hinges ?

Elliott

Edited by MiniElliott, 08 August 2012 - 09:44 PM.


2 user(s) are reading this topic

0 members, 2 guests, 0 anonymous users