He didnt let go of this box all the way home
Edited by Mini-Mad-Craig, 24 November 2016 - 06:17 PM.


Crazy About Metro's


Posted 26 March 2013 - 10:25 PM
He didnt let go of this box all the way home
Edited by Mini-Mad-Craig, 24 November 2016 - 06:17 PM.
Camshaft & Stage Two Head
Posted 27 March 2013 - 12:28 AM
 I've been driving around in the cooper sport a bit & I have to admit I have been enjoying the mpi luxuriousness!
Up Into Fourth

Posted 27 March 2013 - 12:32 AM
One Carb Or Two?

Posted 27 March 2013 - 12:34 AM
that engine cleaned up well dude...
The amount of time and effort put hes putting into meticulously cleaning brackets and bits that won't even be seen I think you can eat your dinner off this engine bay once Simon is finished with itthanks for the comments
Good work as always Simon
Simon in 4 months when this car is finished 'Who do you love most? Craig or your car?' (Marco ;))
Edited by scotty_1987, 27 March 2013 - 12:37 AM.
Camshaft & Stage Two Head

Posted 27 March 2013 - 08:29 AM
Formally known as Dog
Posted 27 March 2013 - 01:50 PM
Great to see progress
I thought it was you two at work, I was doing an order for Gavin whilst you were in.

Great progress dude, my engine block on my MPi looks about the same as yours did! I'm sure all the MPi blocks I've seen (unless been restored) look rusty as hell lol. What colour you doing the engine bay? When I whip mine out, I'm thinking BMC green on the block n head, Paddy Hopkirk polished alloy rocker cover (and various other Paddy Hopkirk stuff) and lots of shiny DSN stuff, should look better than the Brown turd it is now
Yours sounds good! I'm still not decided on engine colour yet, I'm an indecisive loser. 
Formally known as Dog
Posted 03 June 2013 - 08:44 PM
So, it's been a while.
I've been busy making progress with bits on this car, and I've exceeded my original deadline (L2B 2013), but the car isn't even back from Altered Image yet, so that's my excuse at the moment 
I'll get on with the pictures and stuff 
First up, the engine pictures:

Cleaning up the top of the block:

Ensuring the side faces were clean:

The head once painted:

Taking it apart to clean it up:

I had a friend of Craig's and mine (Erik) come to stay for the weekend, all the way from Holland! He came over to assist with putting the engine bits back together, because he had the correct tools and also the experience to ensure that nothing went drastically wrong! Thanks ERIK


Separating the block from the gearbox to replace the gasket and check for damage:


New clutch plate to go in:

Then, we started to put lots of the other bits back on the engine. We replaced every gasket and seal we could (what the box from minispares contained). Here's a picture of how it currently stands. I'll get some better quality photos in good light when it's fully ready to go in the car!

Edited by Dog., 03 June 2013 - 08:59 PM.
Formally known as Dog
Posted 03 June 2013 - 08:45 PM
Whilst all this was going on, I was tidying up other parts from the engine bay:
The brake limiter valve:

Brush painted in Bilt Hamber Hydrate 80 paint:

In primer:

I've been using Halfords enamel paint mostly on the engine parts:

The brake master cylinder:


In paint:

I bought a repair kit so I could replace some of the seals, here they are fitted:

How the brake servo originally looked:

Wire brushed and painted in Hydrate 80:

Masking up for spray:


In primer:

In black:

Part of the alternator mount:

In primer:

In black:

The crankshaft position sensor:

In paint:

Cleaning up the wiper motor parts:


Spraying the cylindrical cover part:


Cleaning up the intake manifold and other parts associated:


Starter motor:

I've also got quite a few bits sent off for shot blasting, and some for powder coating - not all of these parts have returned yet!

Edited by Dog., 03 June 2013 - 08:48 PM.
Formally known as Dog
Posted 03 June 2013 - 08:46 PM
Now, for the screws.
I've been using another product from Bilt Hamber - their Deox C stuff, which comes as a powder which you mix with water. I made two buckets worth - one at a 1/12 ratio and one at a 1/8 ratio.
Just to show you what it can do, I did a test on the coil bracket. Here's the before:

And the after (notice how it doesn't remove paint):

So first things first, I put all my screws into labelled pots:

Then I started putting them into the de-rusting tanks. Once removed, I wire brushed them to polish them up a little, and then sprayed them in high temperature enamel clear lacquer:

I also did the nuts too:

They came out really well, and the paint has so far been strong enough to not chip as I do them up!
I've also stripped the wiring loom of any tape and plastic; I will be taping it in cloth tape specially made for engine looms to make it look tidier than the ugly plastic encasing that MPi's come with!

Also bought some new headlamps, and a pair of new headlamp bowls:

The side lights (built into the P700's) had to be soldered into the plug. I used bullet connectors so that the headlamps could be removed from the bowls without having to cut any wires:

I cleaned up the level adjusters, and put everything together:

That's all the photos of the completed bits that Craig and I have done so far - there's still a lot that we've done but haven't quite finished yet.
I've also bought a ridiculous amount of bits from minispares that I haven't photographed yet, and there's a lot of surprises and more interesting things to come, that I'll put up on this thread as it's done. That'll be happening lots more once the shell is back at mine and it all starts going back together!
I have got a photo of one of my rooms in the house, how it is at the moment. It reveals a bit more about what's coming, but I'll do more detailed stuff when it comes to it:

Edited by Dog., 03 June 2013 - 08:52 PM.
Formally known as Dog
Posted 03 June 2013 - 08:46 PM
And of course, I have to share photos of the journey so far!
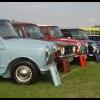
Craig and I have still been to many shows this year, but instead of going in my mini, we went in another friend's mini. Me, Craig, Erik, and Hugo have been going around as a quad mob since Brooklands in this little machine:

Here are some more photos of us having a LAUGH!


And lastly, just a final photo to show what the view has been like on my driveway for every weekend over the past few months:

I'll do proper credits when the car is back on the road, but for now, THANKS FOR THE HELP CRAIG
Stay keen for the moment boys and girls, and drive tastefully.™
Until next time,
Simaig. 
Edited by Dog., 04 June 2013 - 11:32 AM.
One Carb Or Two?
Posted 03 June 2013 - 09:02 PM
keep it up dudes :)Snuggle-Buddy
Posted 03 June 2013 - 09:15 PM
Top work - well done! Amusingly written thread with lots of lovely photos which is just what I like 
I look forward to the next installment.
Formally known as Dog
Posted 04 June 2013 - 05:15 PM
Thanks for the nice comments Scott and Tanya
I am THE CLAMP MAKER

Posted 04 June 2013 - 05:28 PM
Look's good simon, The Engine is looking very smart, Do you know when the shell will be ready?
Formally known as Dog
Posted 04 June 2013 - 06:48 PM
The shell should be ready in about 2 weeks time Alex, but it's not definite - I've had about 3 deadlines so far for the shell and they've all been hampered by problems!


0 members, 1 guests, 0 anonymous users