Jump to content


Photo
- - - - -

Elliskwleisk - Mk3 Full Nut & Bolt Restoration With Slight Modifications"


  • Please log in to reply
155 replies to this topic

#61 Elliskwleisk

Elliskwleisk

    Mini Mad

  • Members
  • PipPipPipPip
  • 250 posts
  • Location: Scottish Borders

Posted 16 May 2014 - 09:11 PM


Looking good so far, keep up the good work.  :D


Can I ask about how you cut the rear seat down and remove the bins. The reason I ask is because I shall be doing this shortly and have read numerous builds to see exactly how it's done. Unfortunately for some reason they all seem to suddenly appear cut down and finished without any explanation on execution  :(


How is the joint between the seat and the bulkhead finished off ?  Have you seam welded right across the car then ground back or just filled the joint with filler and smoothed to close the joint, does the joint even need to be filled ? Hopefully I've explained that properly 


Some close up pics would be great and very appreciated if that's possible, thanks  :thumbsup:


Hopefully I've got enough info here to answer your questions.


Firstly, too remove the bins, you need to drill out all the spot welds that attach it to the bottom of the "B" pillar. Then you need to drill out the spot welds that hold it to the floor (usually done easiest from the underside of the car if you can see where the welds are) Then drill out the spot welds that hold it to the rear wheel arch and the rear seat. 


I cut my bins down because I originally planned on reusing them some how. Obviously I changed my mind on this so cutting them down the middle is not necessary but does get rid of the bulk if you like to work that way. 


IMG_1582_zps46ca3058.jpg


In this photo you can see all the spot welds on the forward half.


IMG_1583_zpse107d54a.jpg


Once you have drilled out all of the spot welds, you may have some small holes in the "B" pillar and floor. These will need welded up and ground flush. I also added a small panel between the "B" pillar and the inner sill at the rear bottom of the pillar. I did this because it just looked untidy with the companion bin removed as there was a gap. I also did it to add a bit of strength. They cant really be seen in this photo unless you compare it to a car that has had the bins cut out and no panel welded in. You will see though that now, at the bottom of the pillar, it looks like it joins straight to the sill. Tidier and Stronger!  ;D


IMG_2230_zpsd6161612.jpg


Unfortunately, I don't have any step by step photos of how I removed the over hang of the seat. As I mentioned earlier, I got frustrated and just cut it out.  :shy: So I will try and describe it!


Once you have removed all traces of the companion bins, you should just have the seat left hanging. Alternatively, you can cut the companion bin around the ends of the seat and just remove it with bit of the bins stuck on either end. The choice it yours. I did it the latter way, then cut, just by eye (probably best if you measure and mark a straight line), as straight as I could, along the seat over hang, about 10mm in front of the line of spot welds. I did not fill or seam weld it as I felt that the line of spot welds with the cage were strong enough to hold the rear of the car together. I hope...  :shy: I will however, squirt some waxoyl in to the seam if I can. The only bits that I did seam weld were the ends of the inner sills to the heel board and the companion bin closing panel (the panel that covers the gap behind the "B" pillar between the inner and outer sill) to the front of the rear wheel arch. 


Here's some close ups. I'm a bit disappointed because I left the small gap between the panels. :mmkay:  I should have tidied this up. It will be covered with carpet at least. 


IMG_2560_zps57b89205.jpg


IMG_2557_zps93c5e821.jpg


And then once you're done, add one roll cage and it'll look like this!  :gimme:


IMG_2522_zps7969a510.jpg


Apologies for the poor quality! If you need anymore info or photos just let me know!  =]


#62 Elliskwleisk

Elliskwleisk

    Mini Mad

  • Members
  • PipPipPipPip
  • 250 posts
  • Location: Scottish Borders

Posted 16 May 2014 - 09:35 PM

Lovely work !


Thanks for that mate

Following your progress.

Mark.


Very nice work, and a neat outcome, that internal cover looks great!


You could easily add some Fibreglass matting and resin to the edges and sand back to get perect gaps, time consuming but worth doing for peace of mind after paint, might bug you if you don't :P


Great work


Thanks for all the support chaps! 


Your idea of the fibreglass matting and resin to build up the edges is spot on! I should have done it but I just didn't feel up to the task. But you're probably right, I bet I'll regret it once I fit the lid... 


#63 Elliskwleisk

Elliskwleisk

    Mini Mad

  • Members
  • PipPipPipPip
  • 250 posts
  • Location: Scottish Borders

Posted 16 May 2014 - 09:44 PM

Oh my. Looks sweet haha


No worries, looking good and learning quite a lot from the thread as I have just started to learn to weld this weekend. Last time I touched a welder was around 20 years ago lol.  :D


Not sure if it's be said before, where did the cage come from ? 


Looks like a lovely paint job. You must be pleased.


What is the purpose of the stonechip on the inside of the floors?


Ben


Looks awesome, top work pal!


Glad to see other people think it looks good too! I am over the moon with it, just hope it lasts!  :D


The roll cage is manufactured by Safety Devices. You can buy this mini specific cage from several suppliers such as Mini Sport or Mini Spares. They call it an "18 point multi point bolt in cage" but actually it's a 19 point cage. I believe that it comes FIA approved but I requested for my top door bar to be removed as I felt it would be a pain for an everyday car. Downside is that my cage is not FIA approved...  :ermm:


As for the stone chip on the inside, I have no idea why he did it. I'm not sure If there was a minor misunderstanding and that he thought I wanted it stone chipped on the inside or what. However, it's no biggy, it'll all be covered with soundproofing and carpet anyway so I wont lose sleep over it. Down side is that it's difficult to differentiate between the stone chip and bubbling due to rust under it... 


#64 Banksy Boy

Banksy Boy

    Learner Driver

  • Noobies
  • PipPip
  • 15 posts
  • Location: Kent

Posted 17 May 2014 - 09:46 PM

The pics and explanation is great, thank you for your time.  :thumbsup:


Will hopefully be having a crack at it tomorrow if I get the time.


Have looked at that cage before and will probably be going for the same one as I really like the cross at the rear, looks the dogs bo....... :D


#65 Elliskwleisk

Elliskwleisk

    Mini Mad

  • Members
  • PipPipPipPip
  • 250 posts
  • Location: Scottish Borders

Posted 18 May 2014 - 08:21 AM

The pics and explanation is great, thank you for your time.  :thumbsup:


Will hopefully be having a crack at it tomorrow if I get the time.


Have looked at that cage before and will probably be going for the same one as I really like the cross at the rear, looks the dogs bo....... :D


Glad I could help. Let me know if you have anymore problems or questions.


It is expensive but once you get it and see the craftsmanship involved you'll think its actually really good value. But then again, you can't put a price on safety equipment! it does look cool! Looks sweet with the seats and harnesses too. I don't think I'll bother tinting the rear windows...  ;D Obviously there is a lot more advantages to having it than just looks  :lol:


#66 Elliskwleisk

Elliskwleisk

    Mini Mad

  • Members
  • PipPipPipPip
  • 250 posts
  • Location: Scottish Borders

Posted 31 May 2014 - 11:51 AM

Finally got the Carbon Fibre front end up for sale. Take a look here if you're interested.  =]


http://www.theminifo...anels-fittings/


#67 Niko-mini1275

Niko-mini1275

    Mini Mad

  • Members
  • PipPipPipPip
  • 175 posts
  • Location: dubrovnik,croatia

Posted 31 May 2014 - 12:23 PM

mini looks awesome man,but i absolutely adore the seats,keep up the good work!


#68 Elliskwleisk

Elliskwleisk

    Mini Mad

  • Members
  • PipPipPipPip
  • 250 posts
  • Location: Scottish Borders

Posted 31 May 2014 - 06:14 PM

mini looks awesome man,but i absolutely adore the seats,keep up the good work!

Cheers bud! Me too, something a little bit different and lotssssssssss more comfortable in comparison to the cobra's. I'm sure someone else has them but I am yet to see them in another mini.  =] I've got plenty of stuff to update with, hopefully get round to updating it this weekend.  :techsupport:


#69 Elliskwleisk

Elliskwleisk

    Mini Mad

  • Members
  • PipPipPipPip
  • 250 posts
  • Location: Scottish Borders

Posted 31 May 2014 - 10:14 PM

Sooo, a wee update.  =]


I started off by putting the car back on the spit. This would usually take me about half an hour but with the fresh paint it took me about a day because I had to put some of this sponge strip in all the places that the spit came in to contact with the car!  >_<


IMG_2580_zps082084a0.jpg


On the plus side, with all the paint and the cage in the car, it is perfectly balanced.  :proud:


IMG_2582_zps0ede62ce.jpg


IMG_2581_zps1eedb519.jpg


Then I got to open some of my goodies that I have been buying over time. 


IMG_2578_zpsde92f06d.jpg


So I started by touching up some transport scuffs and scratches that were on the underside. 


IMG_2653_zps12565537.jpg


And then I got on with the waxoyling. But, I made a total mess... :shy:  For some reason I went total OTT and sprayed waxoyl in to every nook and cranny. Well protected now, however I made such a mess that I am literally spending days cleaning it up.  >_<  :xxx:


IMG_2589_zpsfba4551a.jpg


IMG_2588_zpsf467f6be.jpg


Downside of using the spit when waxoyling is that when you think it's finally all dried and settled and okay to rotate...  :crazy:


IMG_2595_zps2d993ce1.jpg


One mess I am happy to see on the workshop floor.


IMG_2594_zpsa0346e20.jpg


So while I was waiting for that to dry, I decided to give my rear subframe a good key and then a coat of Hammerite. Although these have been painted professionally with 2pac, I just wanted to ensure they were going to last so I gave them another 2 coats. Admittedly it was with a paintbrush, but I'm okay with the finish. 


IMG_2643_zps94f49147.jpg


IMG_2654_zpsf08856eb.jpg


Then I received my sound proofing. 88 square feet should be suffice.  :D


IMG_2585_zpsf6e495ca.jpg


So I started with the bonnet. Cutting the pieces to the shape, sticking them down and then going over the seams with aluminium tape.


IMG_2590_zps440bc9df.jpg


And the finished result! 


IMG_2592_zps1f14dea5.jpg


Then I began with the roof. It sticks better if its heated up slightly.


IMG_2626_zpseaa58103.jpg


IMG_2599_zps227c9dcd.jpg


All pieced in, ready for tape.


IMG_2627_zpsc9f6e9e9.jpg


And the finished result. 


IMG_2628_zpse3e9bc70.jpg


Next step was the headlining. I had bought a newton headlining kit, which looked great. However, with how tight the roll cage is against the roof, it wouldn't work. Fortunately Brad at Minisport was happy enough to take it back and credit me for it. So as a solution, I purchased a nice big roll of carpet.  :proud:


IMG_2629_zps67f0ac5d.jpg


Fortunately the step mum, Daphne, was around to lend a hand and with her expertise in these sort of things, we managed to get a nice headlining cut! But, because the roll cage is about 1mm from the roof in two places, we had to make the headlining in two pieces. I was pretty gutted about this at first but once it was finished, you cant even tell that there is a join! Good job Daphne!  :thumbsup:


So with some pretty cool and amazing contact adhesive, the back piece went on first, followed by the front. I was amazed that it managed to bond to the foil membrane of the sound deadening but it was incredibly hard to peel up once applied, even with light pressure!


IMG_2632_zps4049472e.jpg


IMG_2630_zpscc671123.jpg


Ta-da!  :teehee:


IMG_2631_zpscfc487d9.jpg


And then all finished!  :D


IMG_2634_zpsa1553e50.jpg


Really pleased with how it turned out in the end. That's all for now. I finished off by getting some lovely big boxes of parts!  :D


IMG_2639_zps9fe982d1.jpg


Hopefully have another update soon as Daphne has been helping speed along the process with the fitment of the rear subby! Stay tuned!  :techsupport:


#70 Nino

Nino

    Mini Mad

  • Members
  • PipPipPipPip
  • 178 posts
  • Location: Jutland

Posted 01 June 2014 - 09:16 AM

Looking great !! :)


that last pic is epic :D


#71 alex-95

alex-95

    I am THE CLAMP MAKER

  • Members
  • PipPipPipPipPipPipPipPipPipPip
  • 6,026 posts
  • Location: l

Posted 01 June 2014 - 09:35 AM

excellent work, The headlining looks great, what glue did you use to stick it on?


#72 rooney123

rooney123

    Mini Mad

  • Noobies
  • PipPipPipPip
  • 114 posts
  • Location: lancaster

Posted 01 June 2014 - 10:05 AM

like the  idea of the head liner nice job.......................andy :proud:


#73 Ben_O

Ben_O

    Mill Road Garage

  • Paint Doctor
  • PipPipPipPipPipPipPipPipPipPip
  • 9,794 posts
  • Location: Isle of Wight

Posted 01 June 2014 - 11:06 PM

that headlining is the dog's danglies!


And the sound proofing on the underside of the bonnet is genius. It has a really OEM look to it. I think i may use that idea on mine


Ben


#74 Elliskwleisk

Elliskwleisk

    Mini Mad

  • Members
  • PipPipPipPip
  • 250 posts
  • Location: Scottish Borders

Posted 11 June 2014 - 06:57 PM


Looking great !! :)


that last pic is epic :D


excellent work, The headlining looks great, what glue did you use to stick it on?


like the  idea of the head liner nice job.......................andy :proud:


that headlining is the dog's danglies!


And the sound proofing on the underside of the bonnet is genius. It has a really OEM look to it. I think i may use that idea on mine


Ben


Cheers folks! Nothing more exciting than opening boxes of new parts!  :D


The contact adhesive that I used is just some stuff I found on the interweb that I thought I would give a shot. Turned out to be a pretty good gamble.


IMG_2706_zpsbc2853e2.jpg


Pleased you all like the headlining. I wasn't sure how it was going to turn out but I'm over the moon with it! 


The sound proofing on the bonnet looks good, but is an absolute pain to get the shape right with all the curves  :mmkay:


Hopefully get around to an update tonight or this weekend. 


Edited by Elliskwleisk, 11 June 2014 - 06:58 PM.


#75 Elliskwleisk

Elliskwleisk

    Mini Mad

  • Members
  • PipPipPipPip
  • 250 posts
  • Location: Scottish Borders

Posted 11 June 2014 - 08:20 PM

Okay, so I'm finally starting to bolt some things on... I've had enough of cleaning waxoyl, sound proofing and carpeting. I still have practically the whole interior to do, but it can wait because I need to see some visual progress in order to boost my motivation! 


So I began by re mortgaging my soul to buy this beastly tap and die set so I could clean paint and crap out of threads for ease of assembly. :proud:  I was fed up of buying individual taps and not having the ones I needed so I just bit the bullet and went for it. 


IMG_2657_zps9229a6d9.jpg


Then I got on with fitting the rear subframe and brake pipes. Daphne gave me a hand to lift it on as I decided to fit it while the car was still on the spit. Quite glad I did now because it was a total pain! But, it's done now. I painted the trunnion's black last minute but they don't look the best as I got impatient waiting for them to dry and just fitted them with soft paint.  :shy: I also decided to fit uprated bushes while I was at it because any money spent improving handling is money well spent!  ;D So I purchased some of the minispares C-STR638 bushes. Fitted easily with a light coating of polyurethane friendly grease. But, they are purple... Don't know why they are pictured black when they are actually purple :mmkay: but I'm sure I'll live.  :lol: I also fitted the stainless braided pipes while I was at it.


IMG_2697_zps4a7fc904.jpg


Anyways, so then I ripped open the pre made brake pipe set, cheating, I know, but much more convenient! Or so I thought... I also cleaned up the 3 way union with some gunk, a wire brush, and then cleaned up the threads with a tap. 


IMG_2656_zpscee3c447.jpg


If you're a fruit like me, then you'll be able to appreciate how beautifully made these brake pipes are. If you're not a fruit, then this build thread probably isn't for you. :lol:  The flares are absolutely perfect! I know they will be made on a machine but even so! However! The type of flare isn't one that I am familiar with. I have only every seen what I call, "Operation 1" and "Operation 2" flares, or operation 1 and operation 1, 2, or function 1 and fucntion 1 & 2 or whatever you want to call it. But these appear to be like, in between? Almost like a universal flare that could be used for either purpose. But what do I know!  :lol:  So I borrowed a flaring kit from Mark who was kind enough to lend it to me for a few weekends and just cut and reflared to what I felt was the appropriate operation. 


IMG_2692_zps4eba2613.jpg


And here is an example of what I mean. The flare on the right, is the what I think is a universal flare (if there is such a thing) that came on all the ends of the kit. Whereas the flare on the left is one that I did and is known as an operation 1. 


IMG_2690_zpsd3daabf5.jpg


Then I came across the next problem. The "convenient" pre made brake pipe set, was actually more hassle than it was worth!  :mmkay: All of the pipes were wayyyy to long. Admittedly you could have just wiggled and waggled them about the place to take up the excess but that's unprofessional and looks a mess. A straight brake pipe is true workmanship!  ;D


So you can see here that both of these pipes are far too long. 


IMG_2687_zps8e6c7304.jpg


IMG_2691_zpsa7716369.jpg


So I trimmed them down, put the correct flare on the end, and got it all looking sexy. 


IMG_2688_zps7e1c442b.jpg


IMG_2695_zpsbe703967.jpg


Then lots more goodies arrived!  :D


IMG_2727_zps39af780f.jpg


I also decided to splash out on a selection of fastners because I was fed up of not having the right stuff. Couple hundred squids later and I've got a nice selection of metric, UNF, UNC, high tensile and stainless A2 and A4 grade!


IMG_2730_zps38f5f26d.jpg


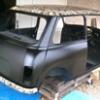
Next, I decided to bite a bit more of the waxoyl cleaning, sound proofing and carpeting malarkey and tackled the C Pillars. 


IMG_2708_zpsf46e3962.jpg


IMG_2707_zpsc9b0cc07.jpg


IMG_2709_zpsbaed9938.jpg


Then, to mix things up a bit, my absolute plonker of a brother decided to break the 200 year old front door knob. Guess who was expected to pick it up off the floor and fix it...  :mmkay:


So a quick mod later for a wee grub screw and we were back in action!  ;D


IMG_2712_zps26043681.jpg


So the next job was all the bits that go along the floor like the front to rear brake pipe etc. I wanted to get all of these done before I took it off the spit, for obvious reasons. 


So this was my first attempt.  :shy:


IMG_2713_zpsdc020543.jpg


But I wasn't happy with this so I took it off and started again. I cut off the bit that I had bent because I was concerned that it may have damaged the inside diameter if I was to keep on bending it. Then I spent several hours trying to weave it in correctly. Why I didn't just lift the subframe and be finished in half an hour, I don't know.  >_< So the second attempt! Required some on the car flaring. It isn't perfect, but looks better... 


IMG_2715_zps26da2fda.jpg


IMG_2717_zps0eedc20d.jpg


I'm not sure if this is totally the correct routing, but It's how the old one was that I removed. 


Next job was the battery lead, this went on a breeeeeze - with stainless fasteners and " P Clips" of course  ;D - other than chipping some more paint  :mmkay: I also bought too long of a cable, but that's always better than too short!  :shy:


IMG_2720_zps6ecd0a08.jpg


Followed by the stainless braided fuel line.  :wub:  Two clips, for extra security.  :proud:


IMG_2753_zpse62a1fa7.jpg


IMG_2752_zpsf95b41ca.jpg


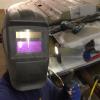
Then I managed to persuade my grandparents to donate their garden waste bin to me - that the council no longer collect - to use as a curing booth! So first I gave it a good clean and then I plopped a heater in the bottom, followed by some wire to hang stuff off. I'll need to get a photo of it all kitted out.  =]


IMG_2714_zps726cedc7.jpg


After touching up all the chipped paint, I removed the car from the spit. It was  :xxx: heavy with all the stuff on it, and set about fitting the steering rack. I had bought a new one because the old one was no where near serviceable condition. But, I was disappointed because the rubber boots were held on with cable ties. Now I appreciate that these boots see no where near the stresses that the likes of the CV boots do, but I had the kit and clips, so I thought I may as well.  =]


IMG_2755_zpsfbfbea32.jpg


IMG_2756_zpsc287a4b9.jpg


IMG_2758_zps24c59c37.jpg


I've just noticed that in the photo where it is fitted, it still looks like cable ties.  :lol:  But I can assure you that the boots are held in place by the real deal! You can also see in that photo, because I made a hash of the first attempt with the front to rear brake pipe, it is now too short to reach the limiter valve. So I have bought some more pipe from minispares along with a joining piece. Not totally pleased with this as a solution but I will try and hide the joining piece and at least it'll look like one pipe if I do because it's the same material. 


Next step was to prepare the front subframe. So I keyed it, painted it, badly... and then started kitting it out. 


IMG_2686_zpsf931a48e.jpg


First step was to get the minitastic coil spring conversion kit ready. They only come in black unfortunately but I wanted to paint them red because I think they look fab in the black subframe. So I painted the front two first to see how they'd come out. 


IMG_2759_zpsd0c844ac.jpg


Happy with this result, I got my new upper arms and gave them a couple of coats of black also because the factory paint was pretty crap. I then fitted new bearing kits too them and took a wee picture of the set up on the bench.  :wub:


IMG_2761_zpsaa61c764.jpg


While I was at it, I decided to take apart the new knuckles because I wanted to check how well greased they were. Fortunately I did because they come with practically nothing. Or at least I think so... It may be a right  :xxx: to get the boot back on the cup but well worth it if it lengthens the life of them!


IMG_2760_zpsdfde26d4.jpg


And this is as far as I got. 


IMG_2762_zps562554ff.jpg


IMG_2763_zpsede9d69b.jpg


Obviously still loads to be done and bolts to be tightened but I think it looks great! I also managed to get a small nut on the back of the lower buffer screw. I know these are just supposed to be a self tapper but a nut and bolt is always better!  ;D I also fitted the C-AJJ3361 shocker pins because I plan to have the car lowish... 


In the mean time, #VSC has been busy taking on the difficult jobs this past week. Had the whole team on this big job.  ;D Then we left Mark to it because he was boring us with his mini patter, again...  :mmkay:


IMG_2722_zps1ddf6dd6.jpg


On another note, it was a sad day at #VSC yesterday. We had acquired the most curious and friendly pet mouse. The VSC mouse.


IMG_2765_zps2e3b9183.jpg


But after a whole 10 minutes in our company, or should I say, Mark's company, It had had enough and kicked the bucket.  :cry:


IMG_2766_zps08dd2c4c.jpg


So hopefully I'll get on with the rest of the suspension this weekend. That's if my minisport order that I placed almost 3 weeks ago arrives...  :mmkay:


Edited by Elliskwleisk, 11 June 2014 - 08:30 PM.


1 user(s) are reading this topic

0 members, 1 guests, 0 anonymous users