Jump to content


Photo
- - - - -

My Mini 1000 1975 Mk3 Restoration Project

roundnose

  • Please log in to reply
199 replies to this topic

#166 Nino

Nino

    Mini Mad

  • Members
  • PipPipPipPip
  • 178 posts
  • Location: Jutland

Posted 12 February 2017 - 06:39 PM

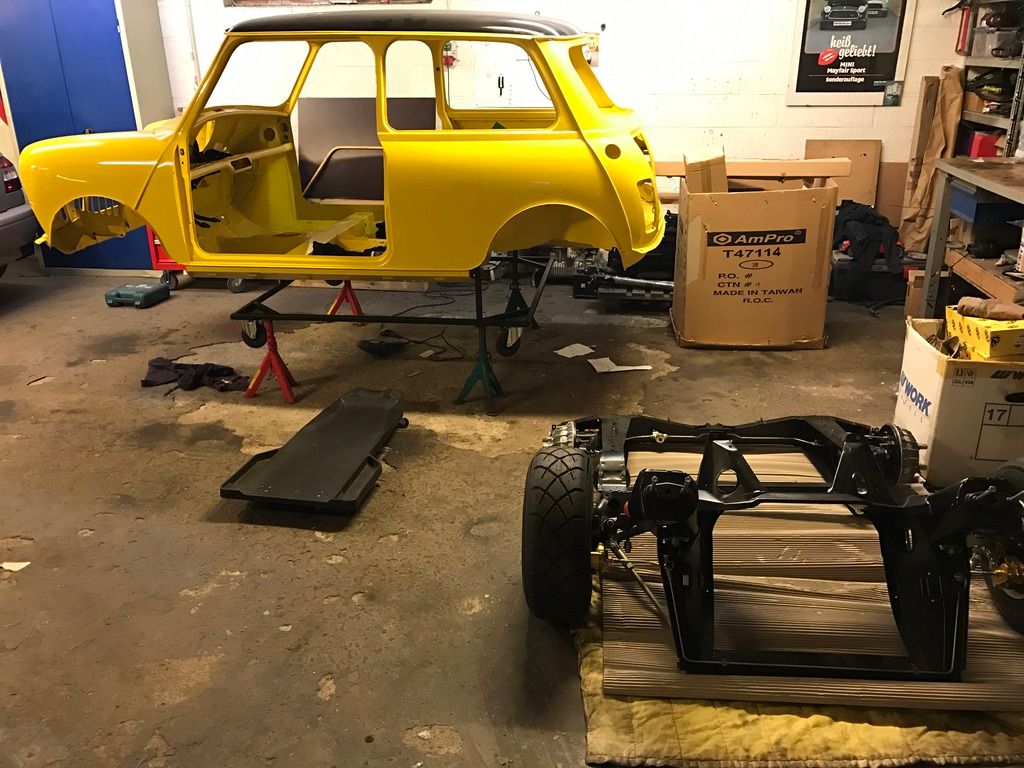
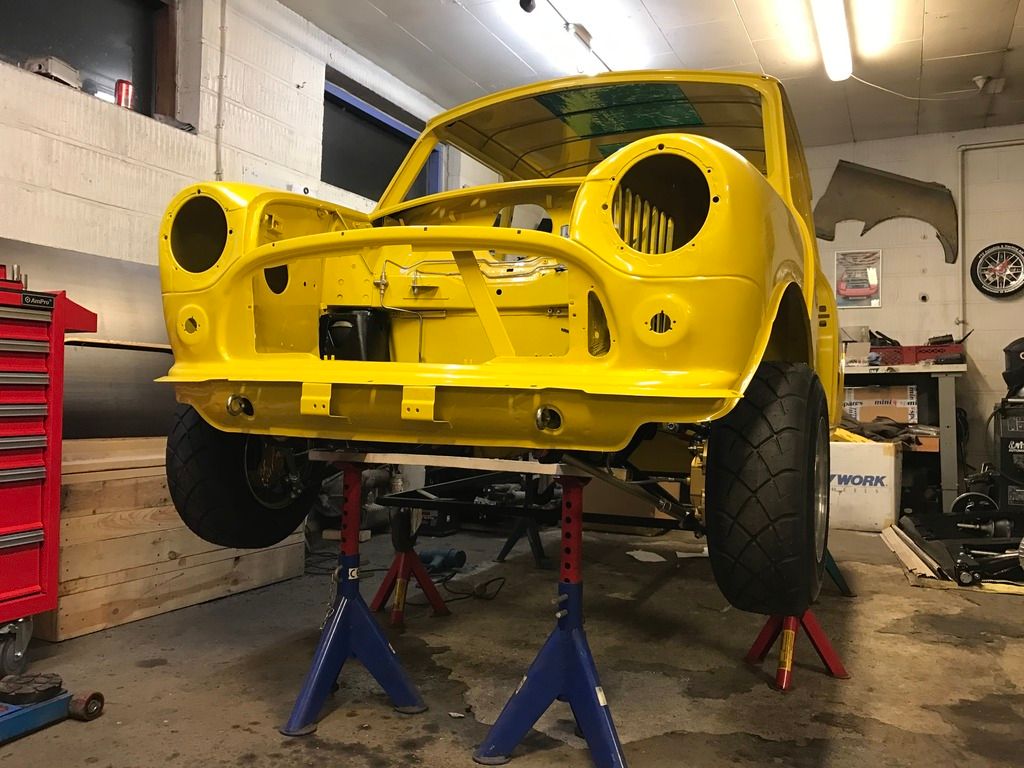
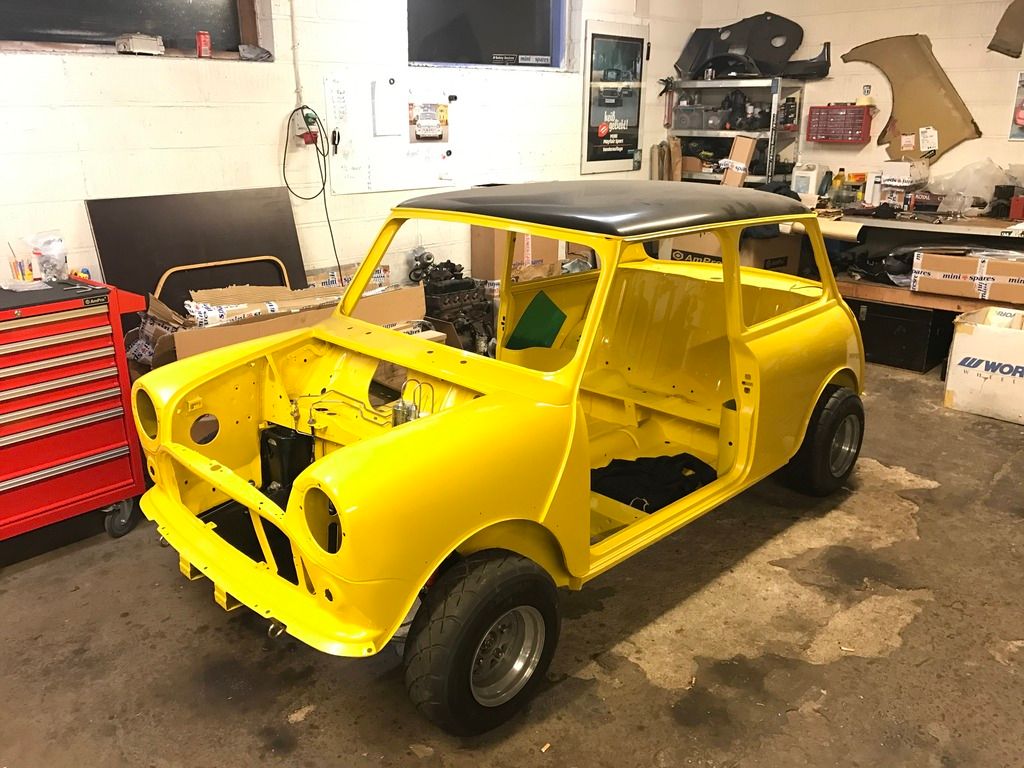
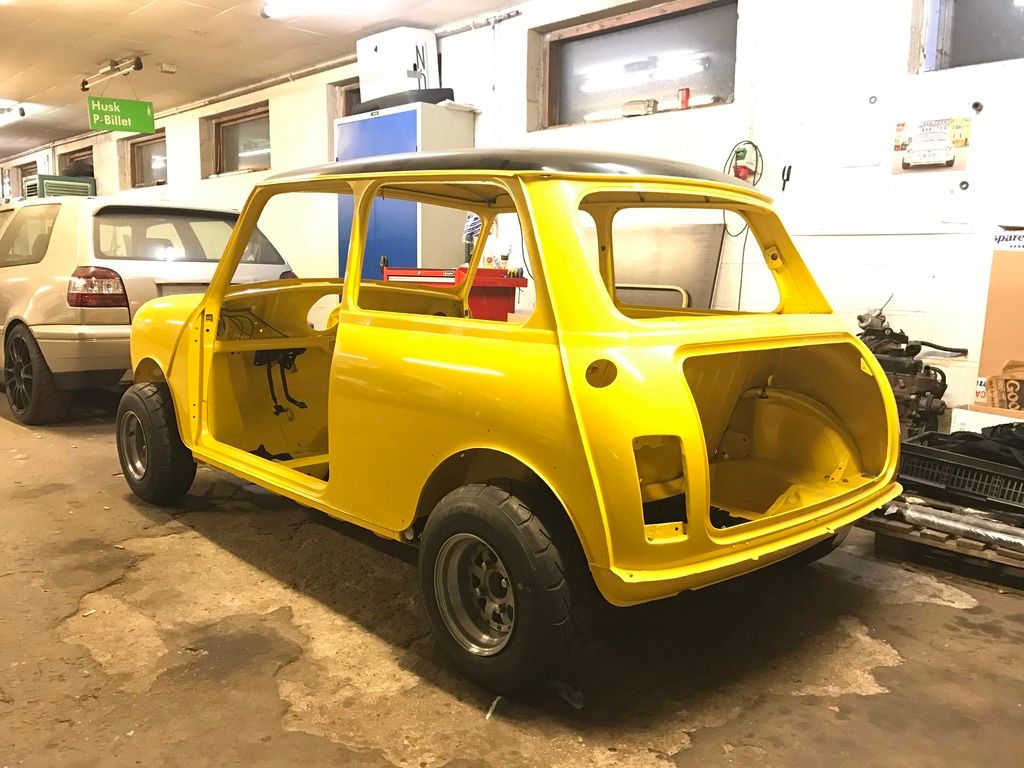
I only have a small update today, as i am preparing all the last small bit so i can install the subframes and headlining.


so you guys will have to live with it for yet a weeks time. :)


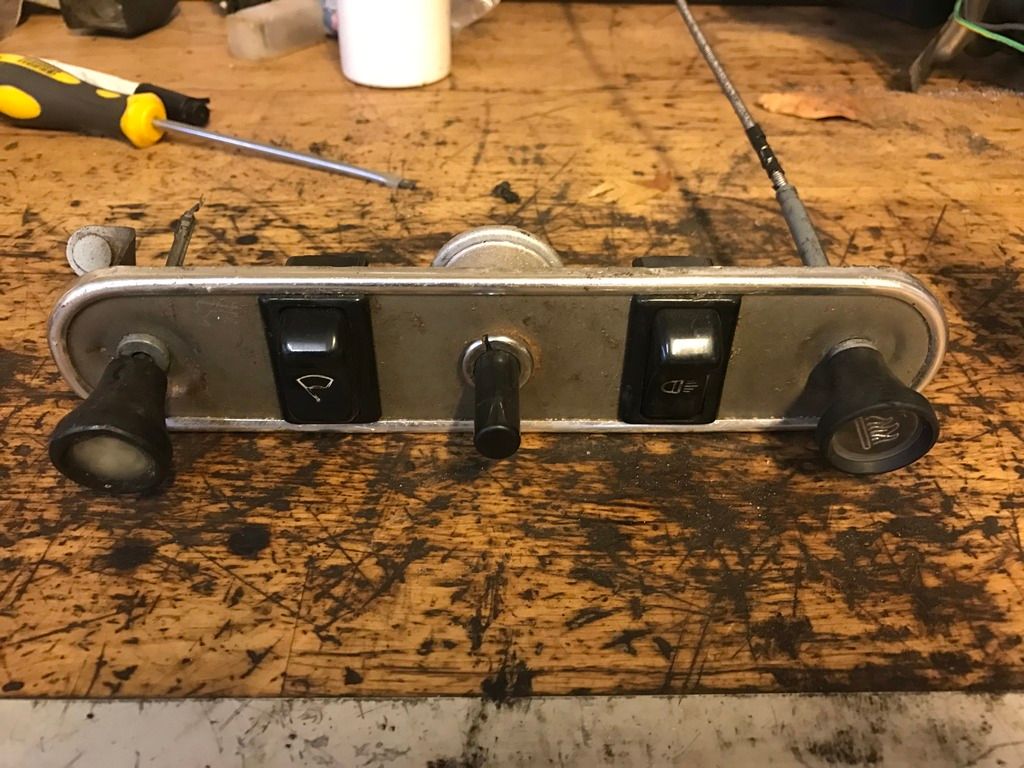
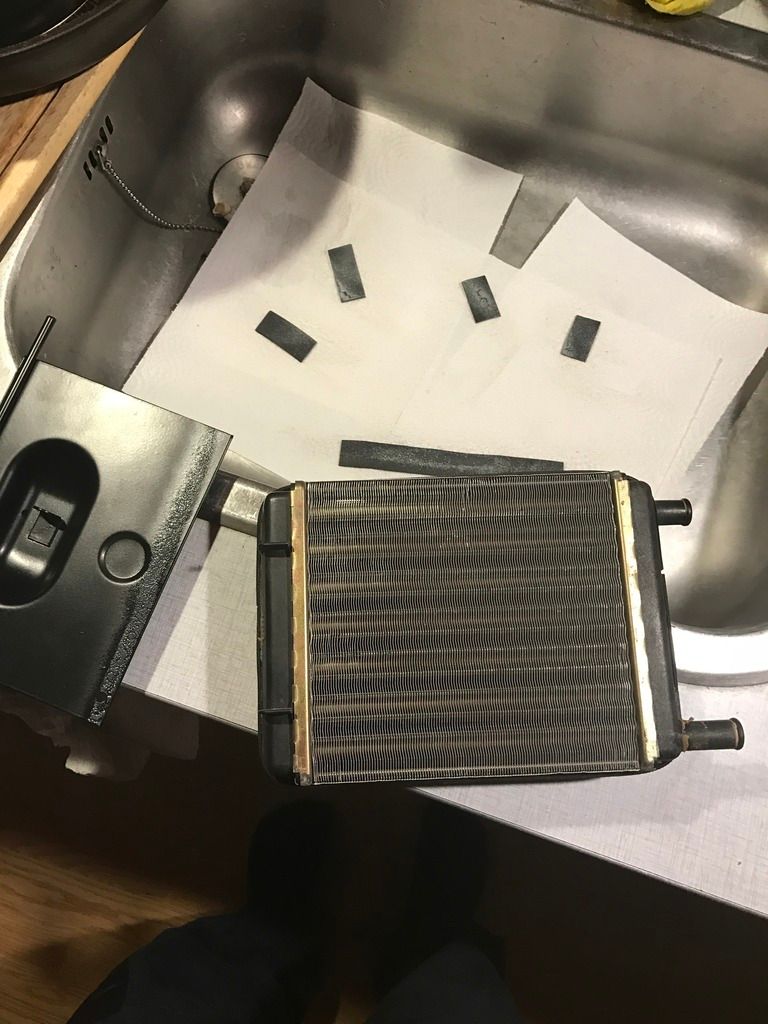
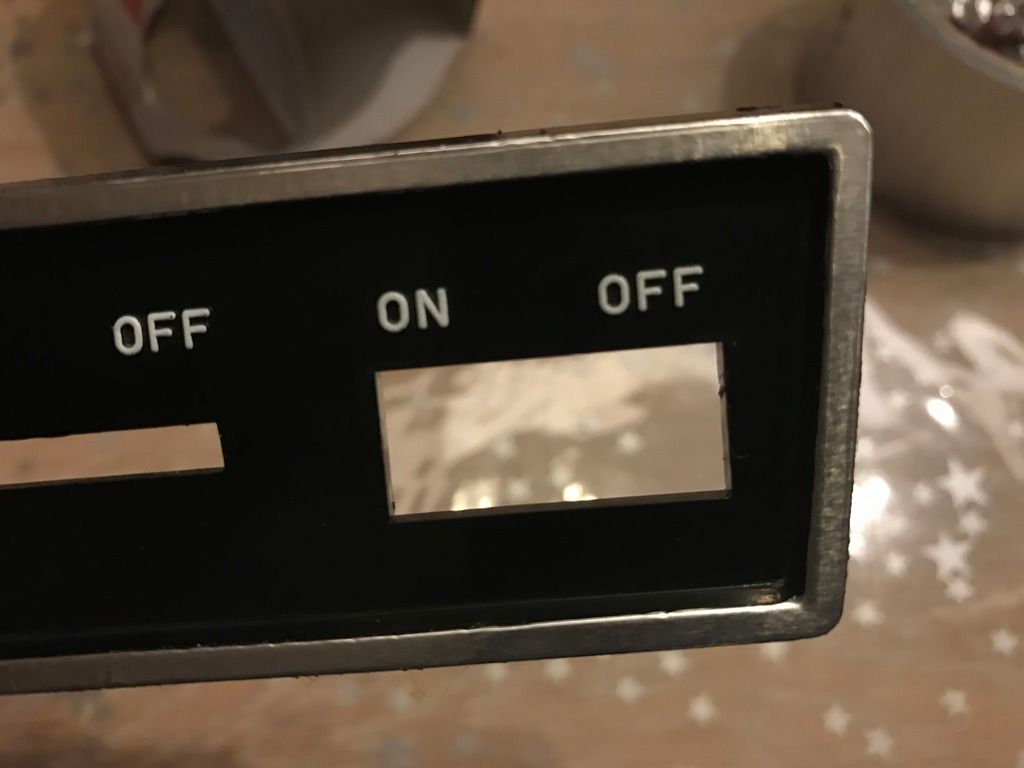
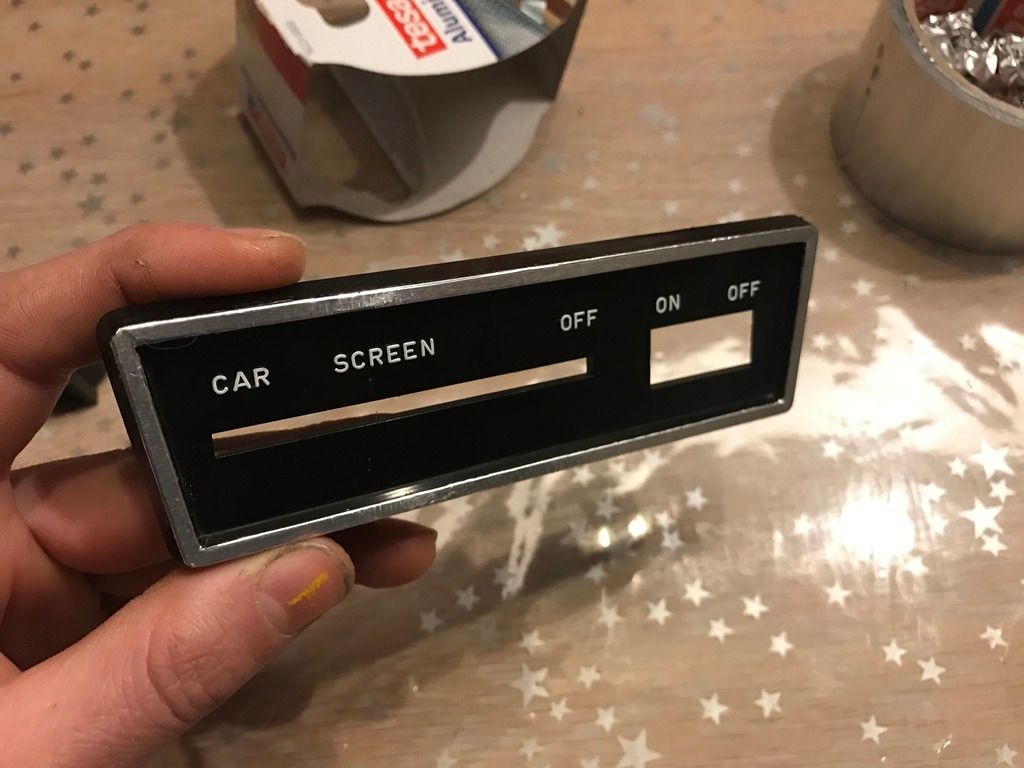
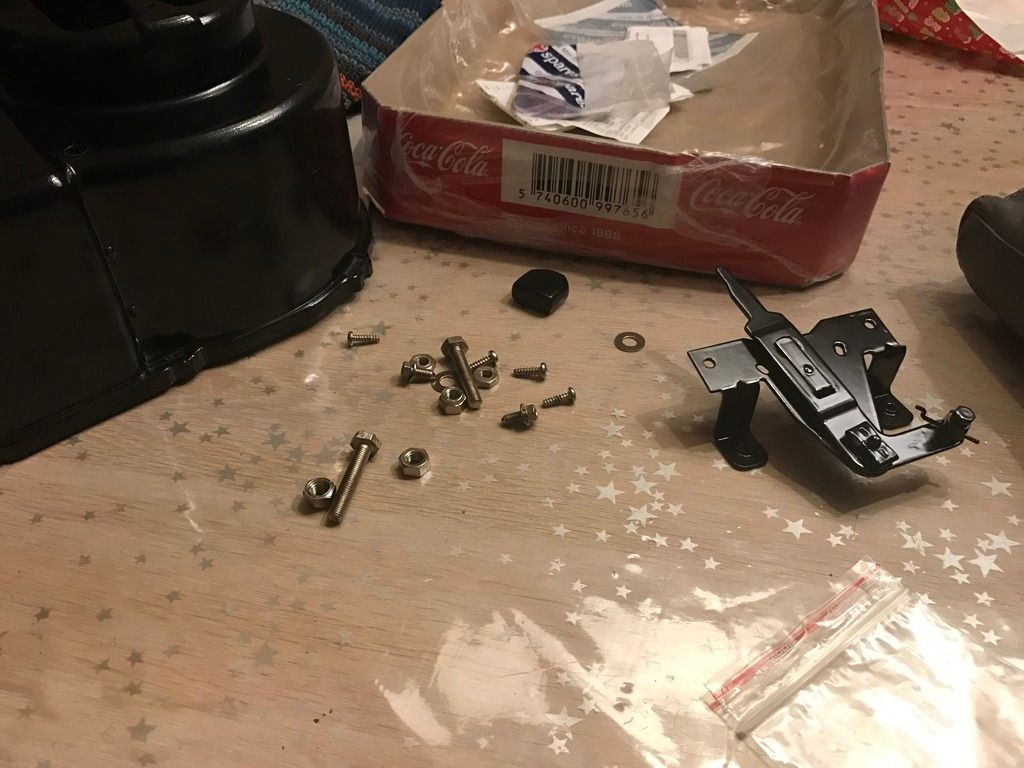
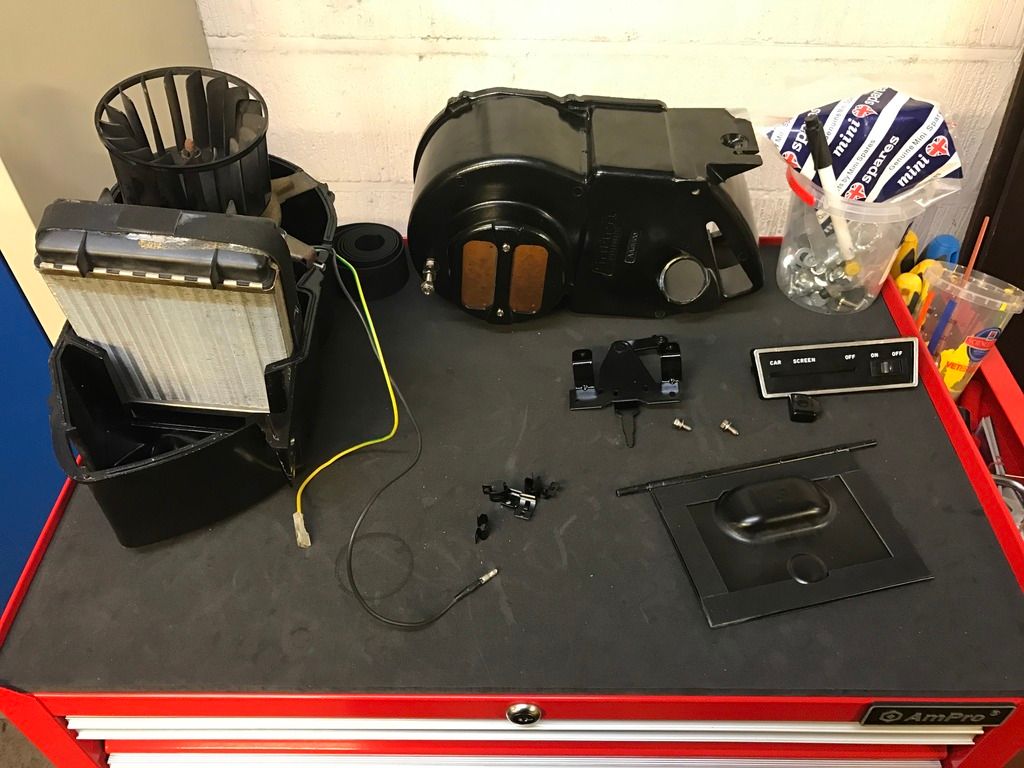
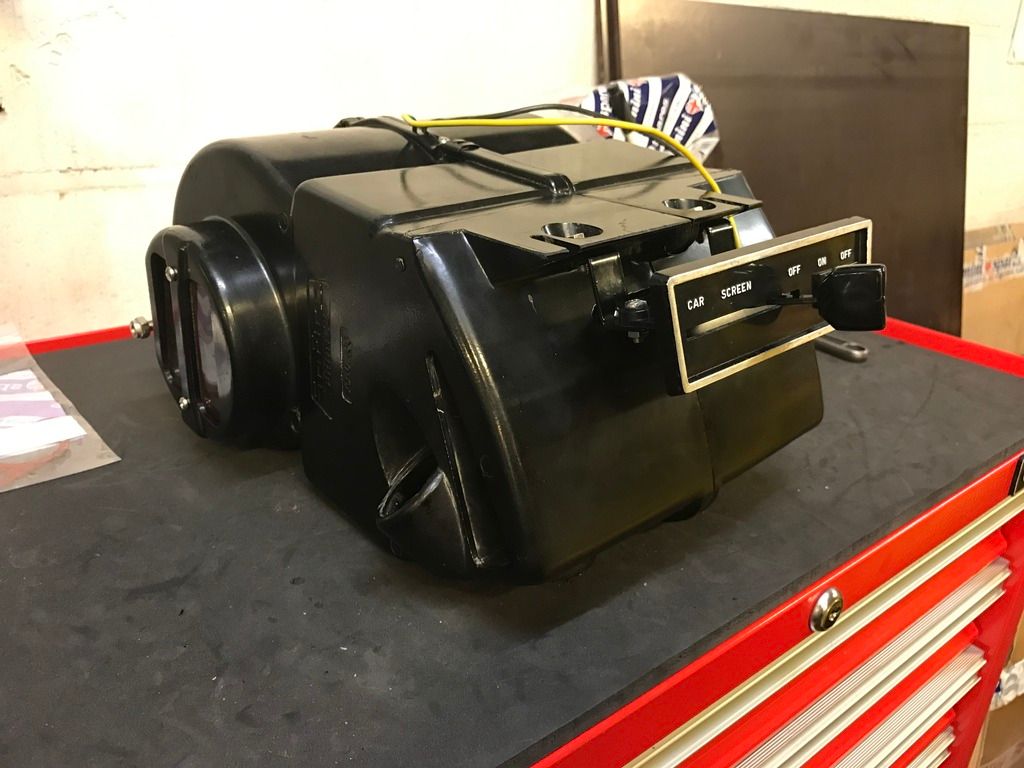
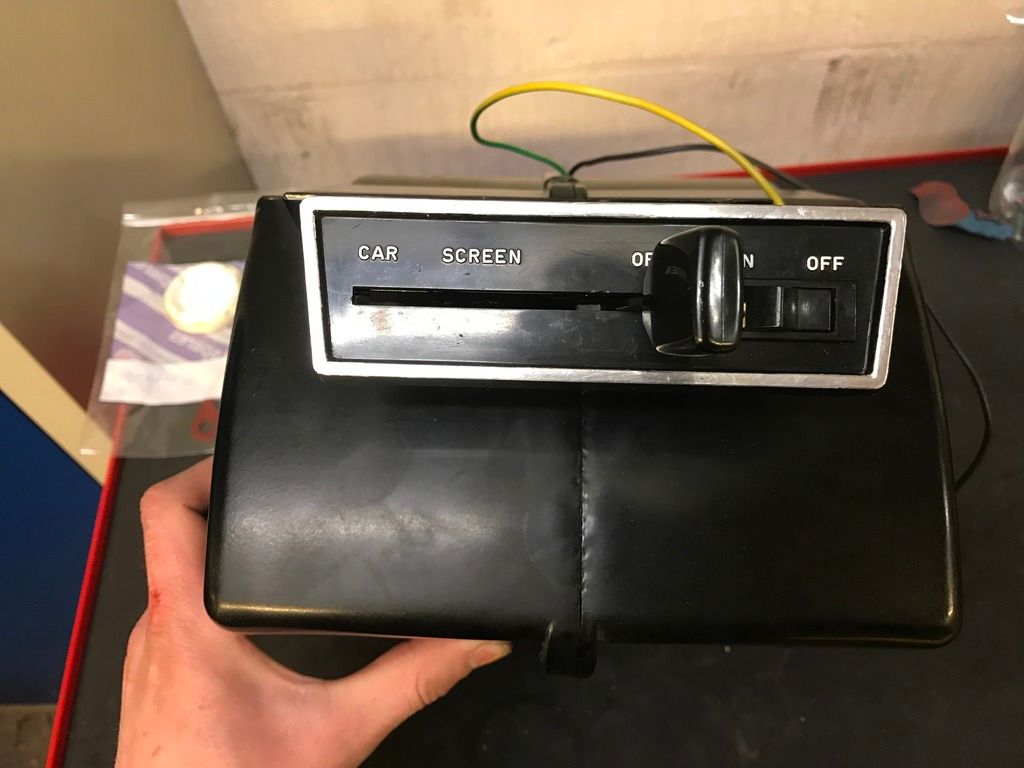
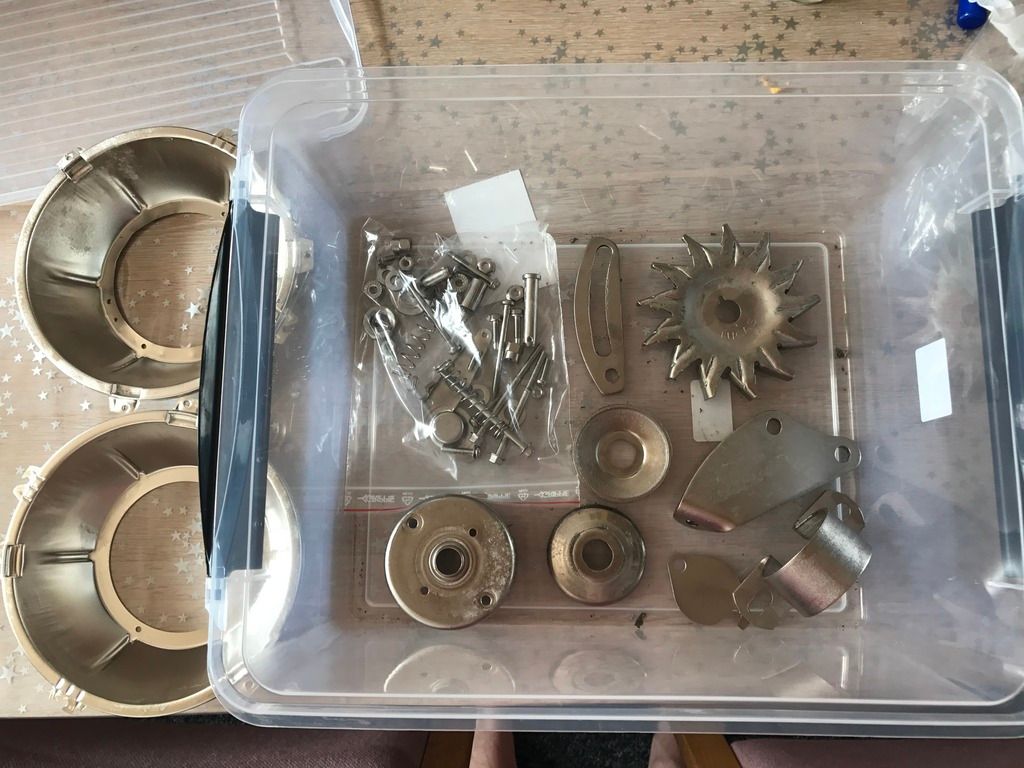
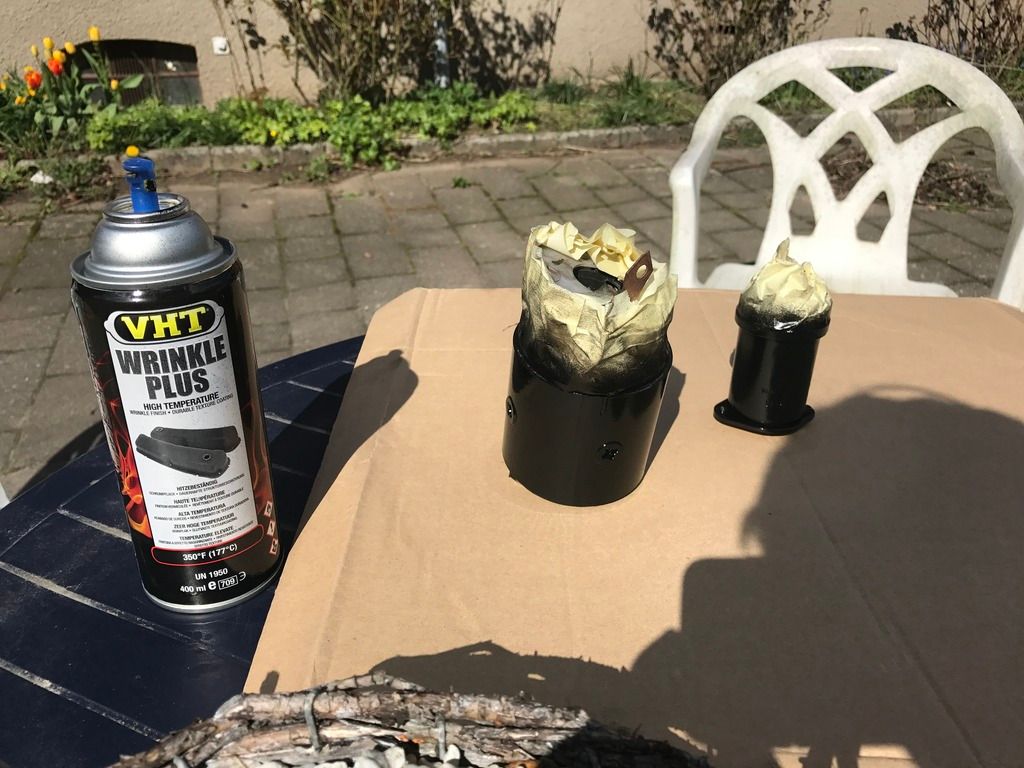
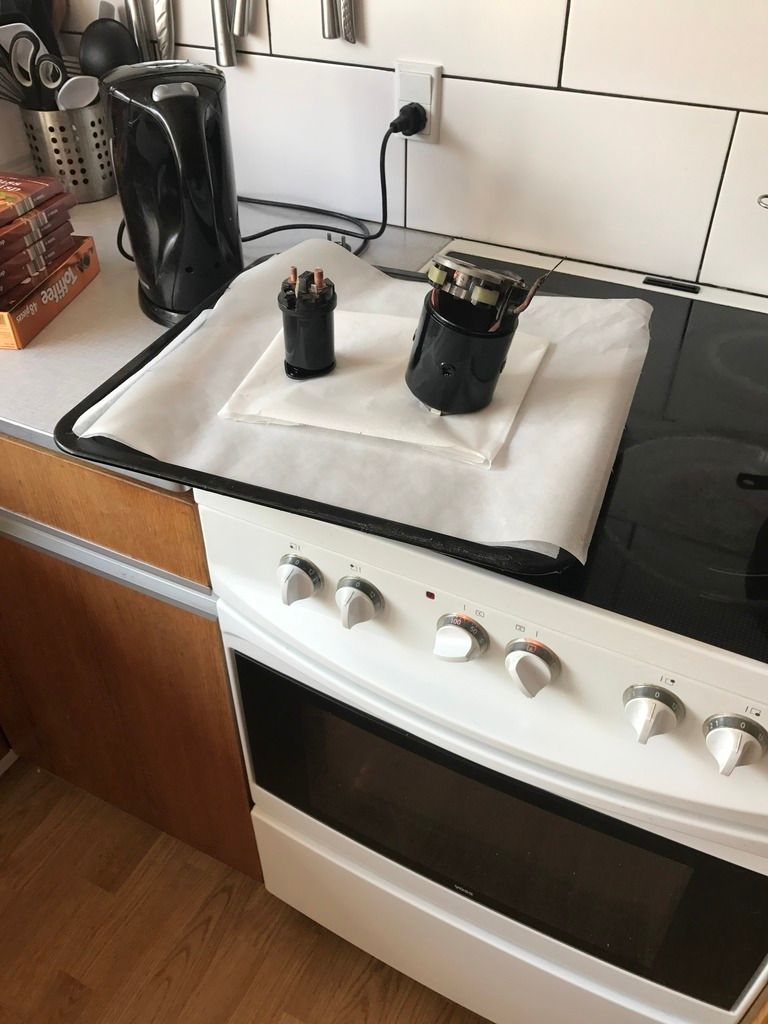
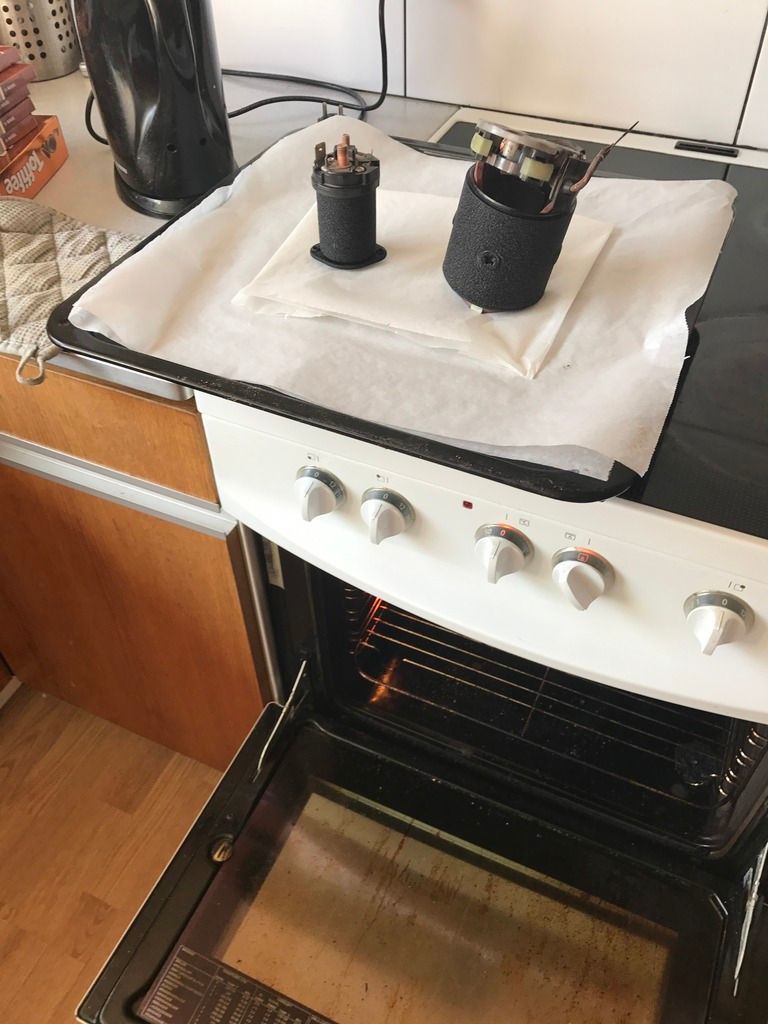
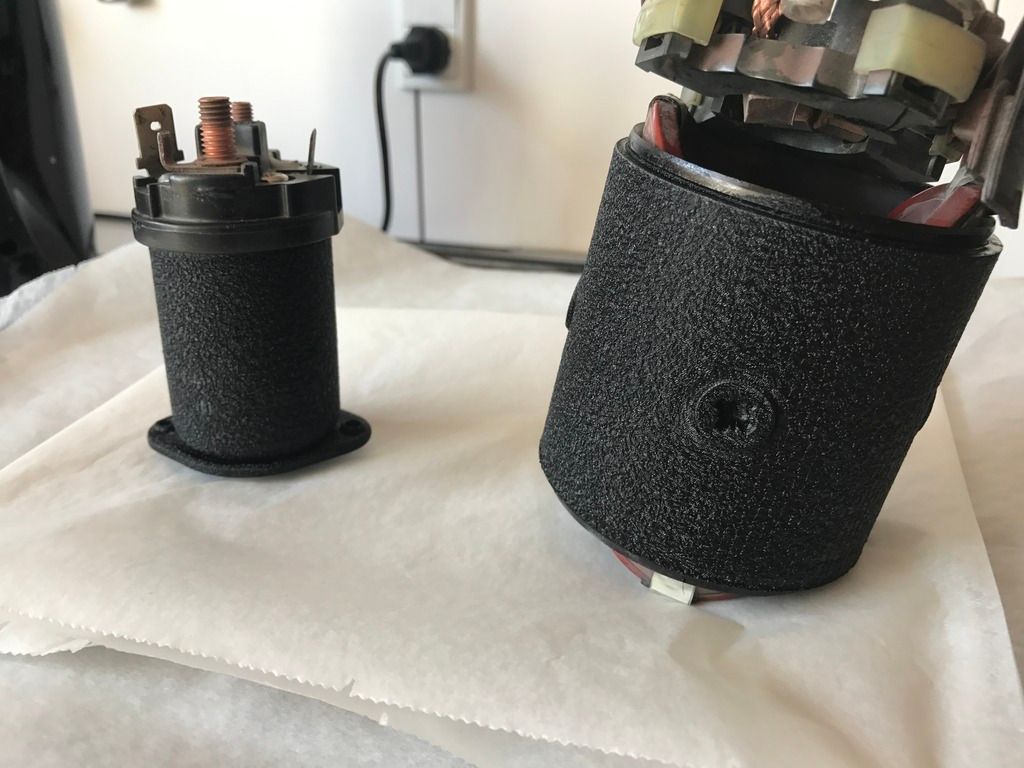
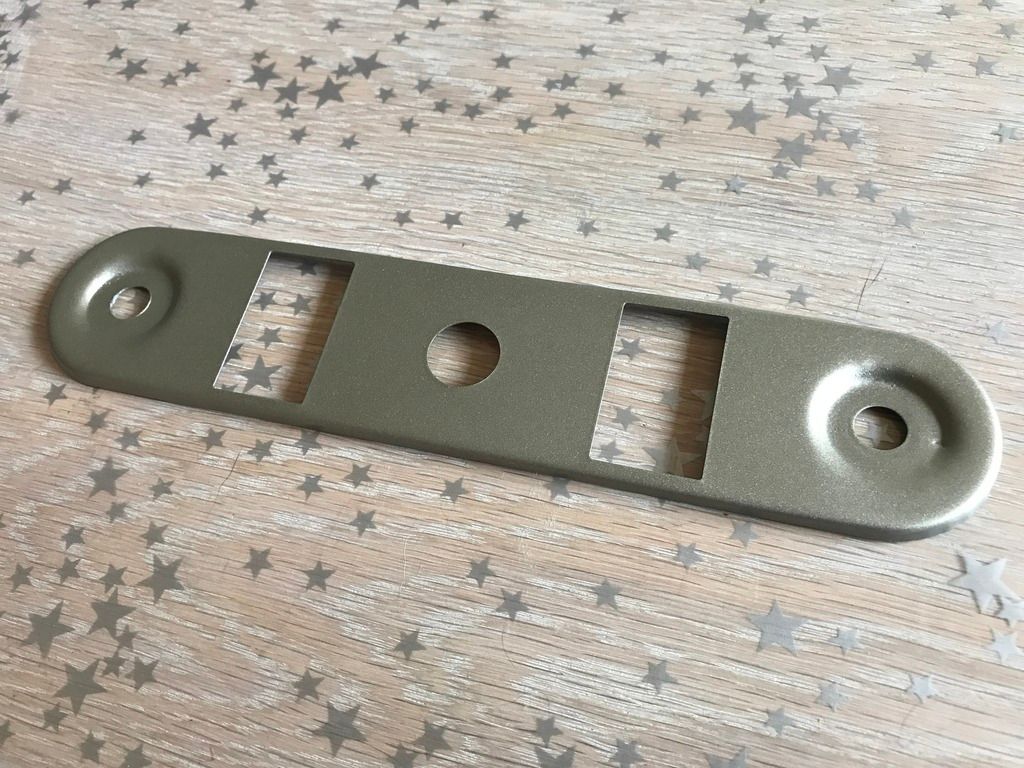
im refurbing my heater, so i think im gonna paint the edge up again on the switch panel, because i think it used to be silver, but only is in a few spots now, after wear :)

IMG_2009_zpst4qyddh7.jpg


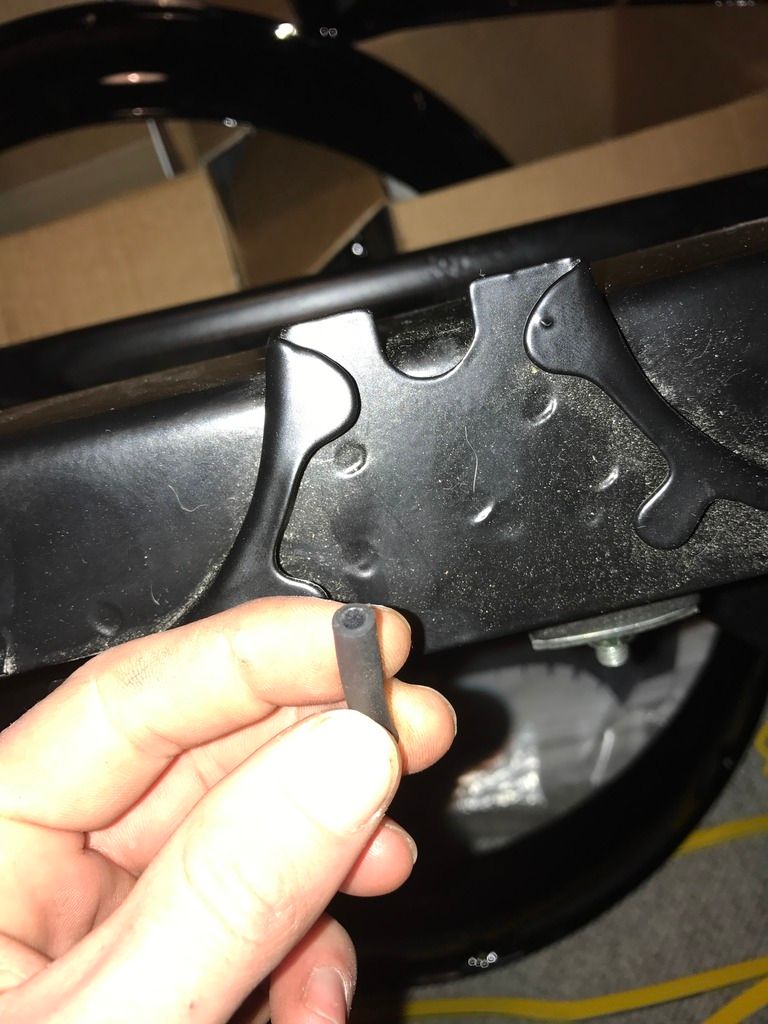
then i have to finde some kind of foam, that was glued on the edge from original to the hatch(?) inside, as i got the old one powder coated. :)


IMG_2255_zpsyk28jbfq.jpg


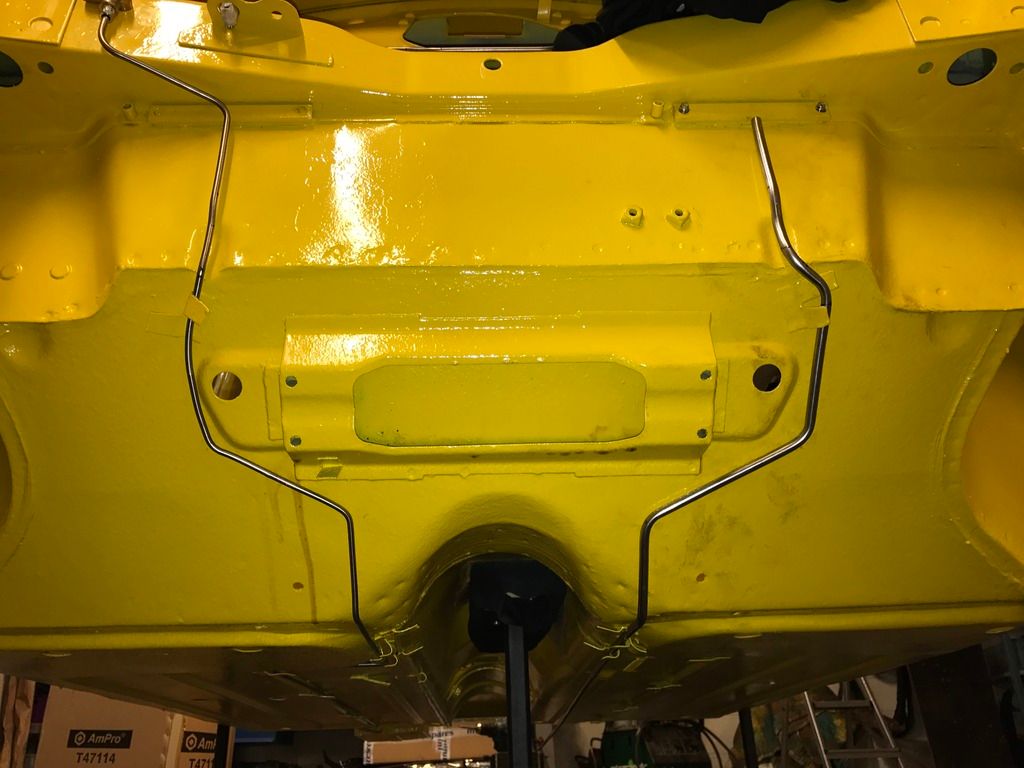
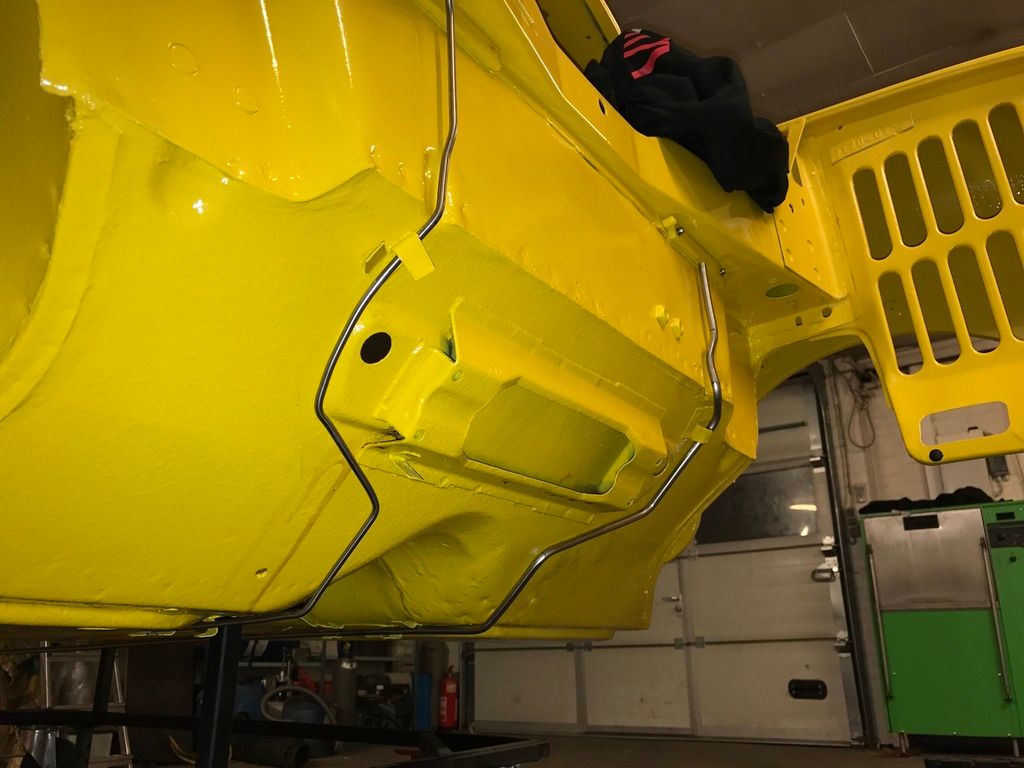
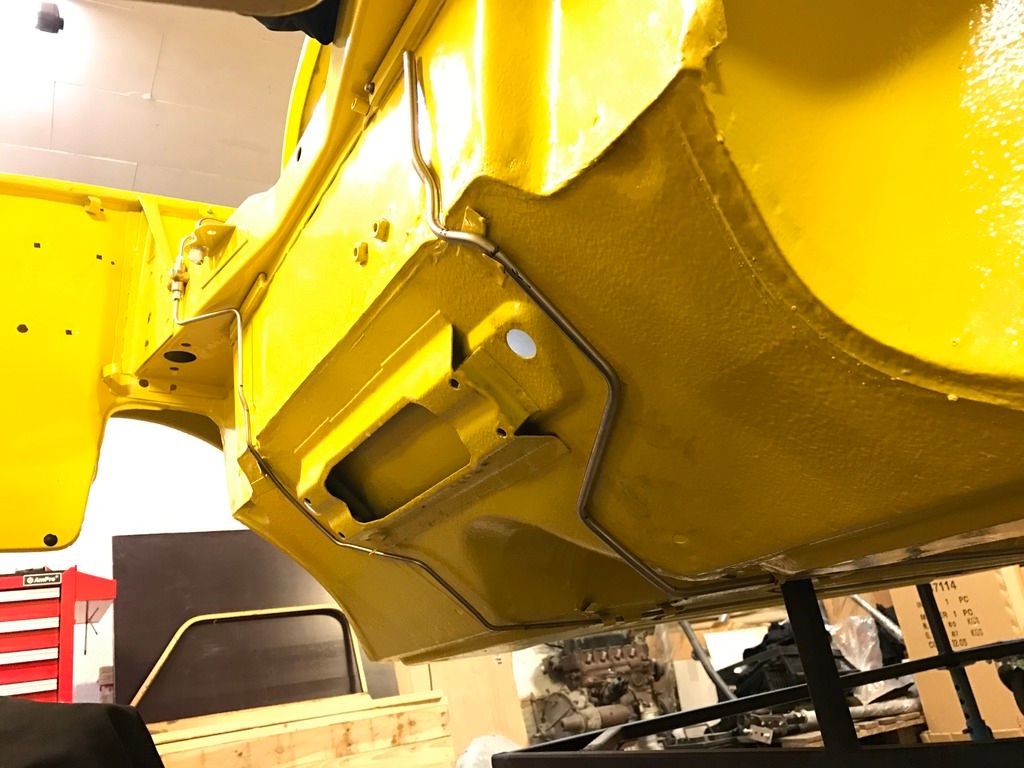
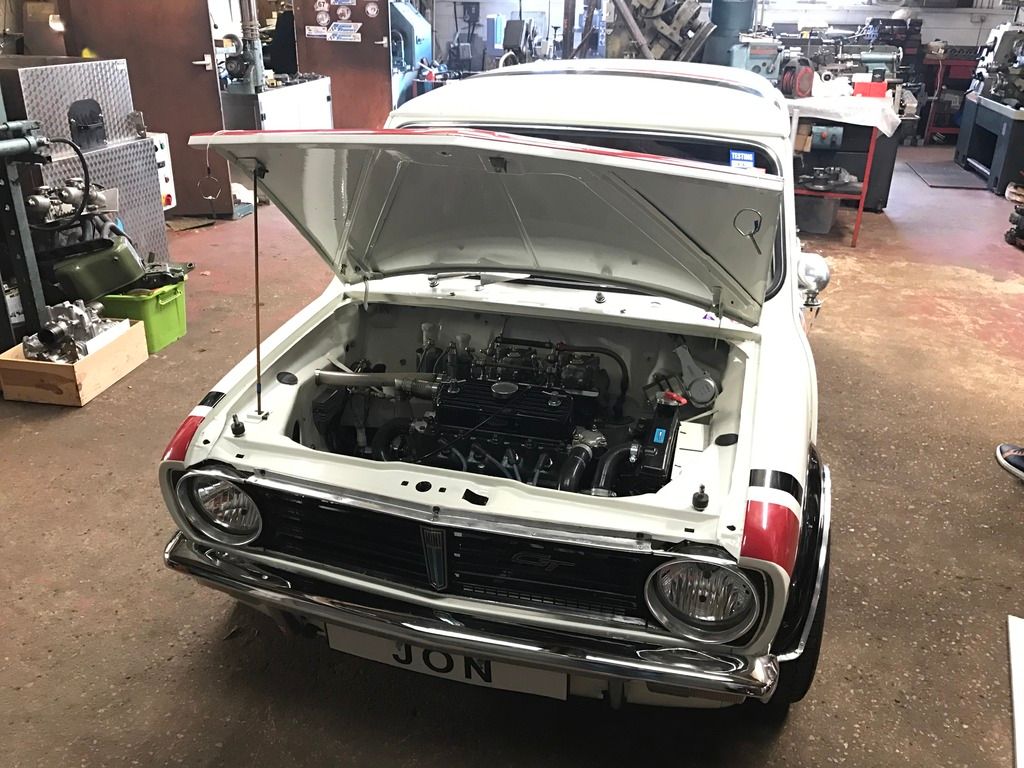
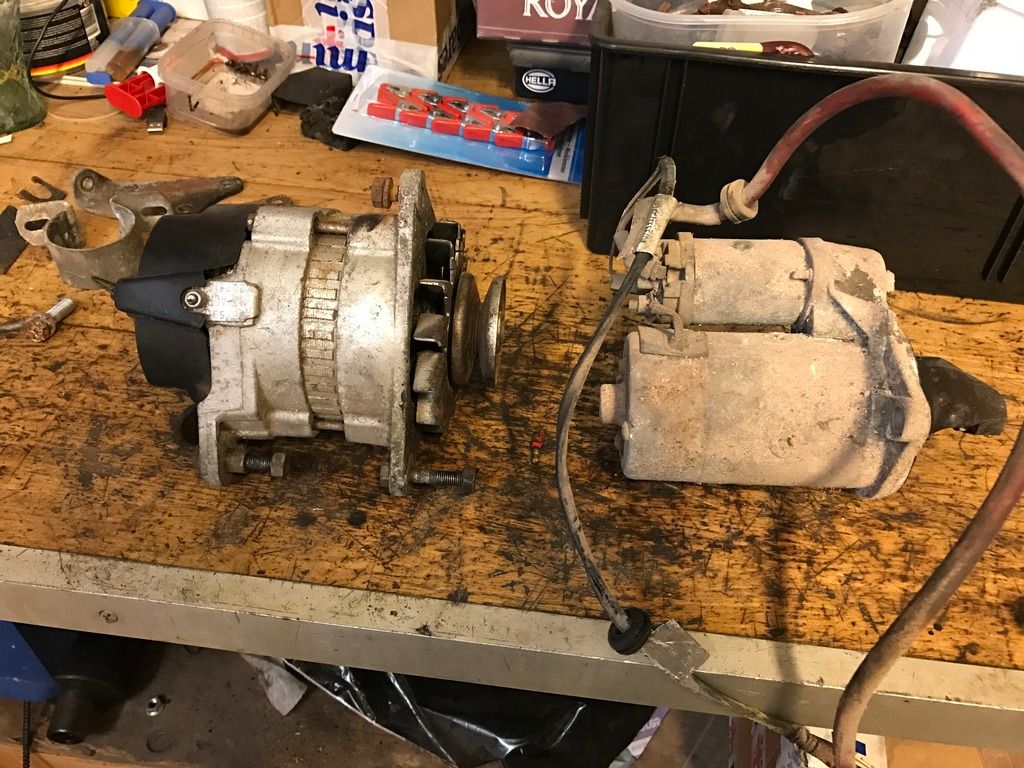
few things came back form Chemical nickel and powder coat. :)


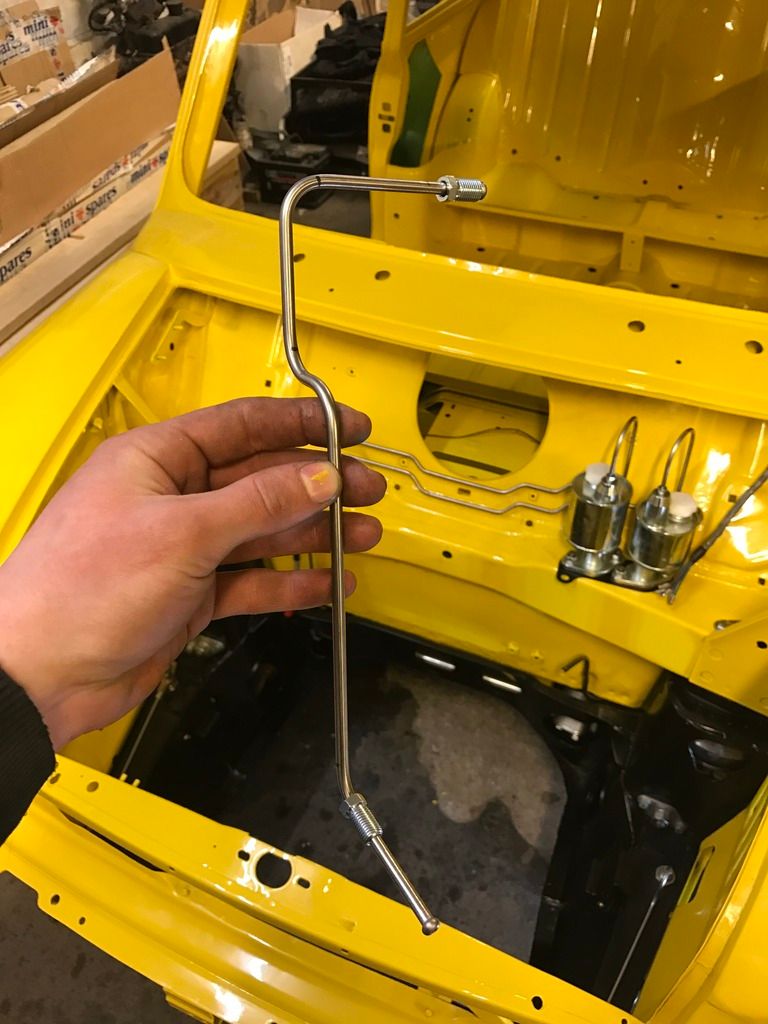
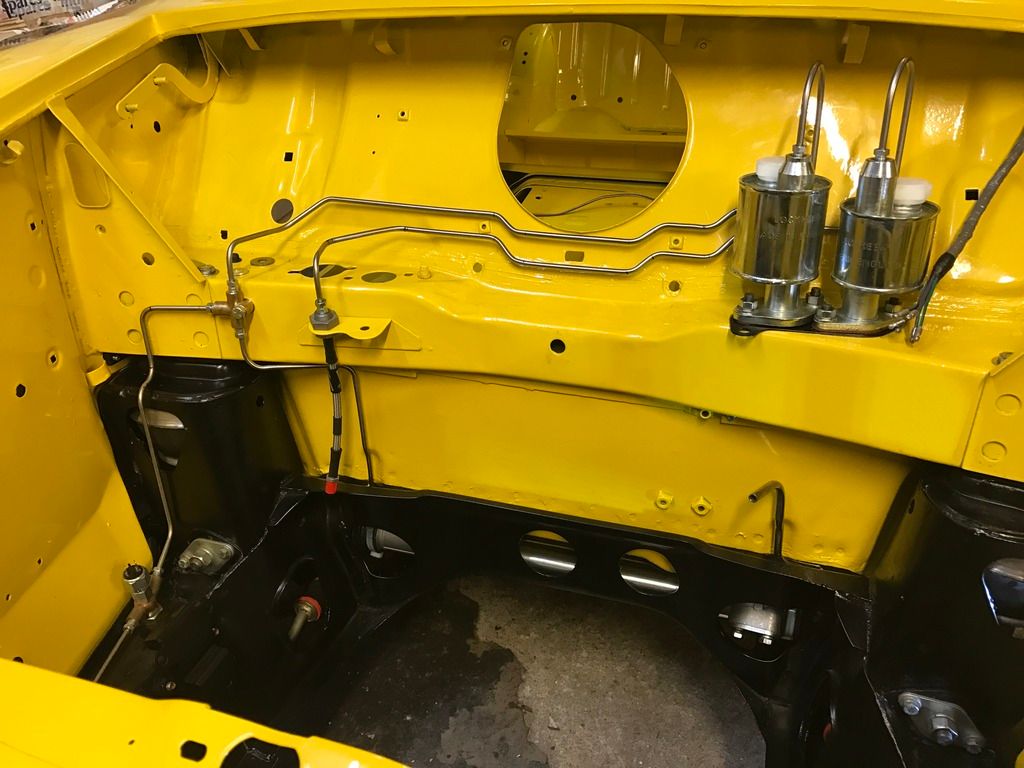
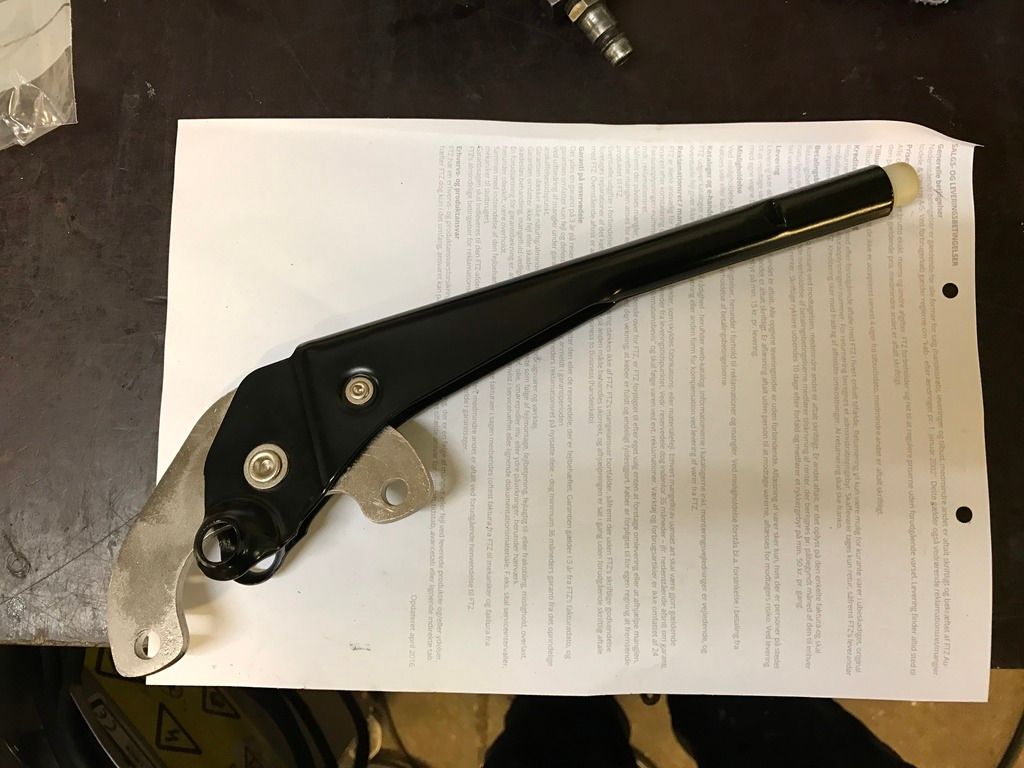
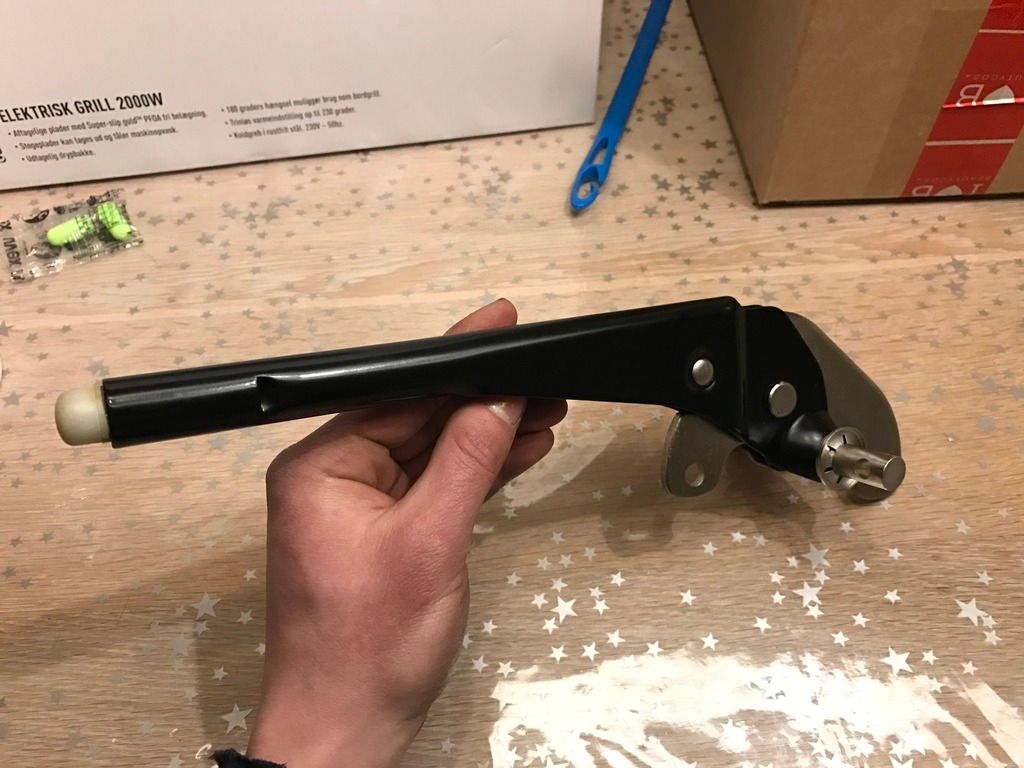
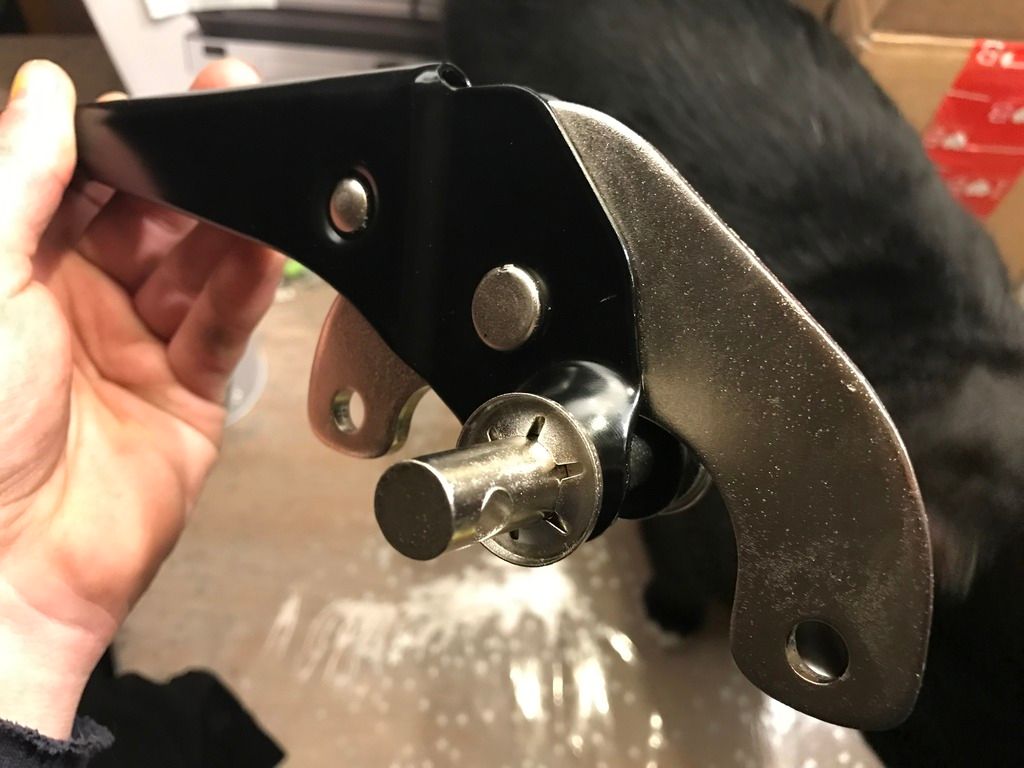
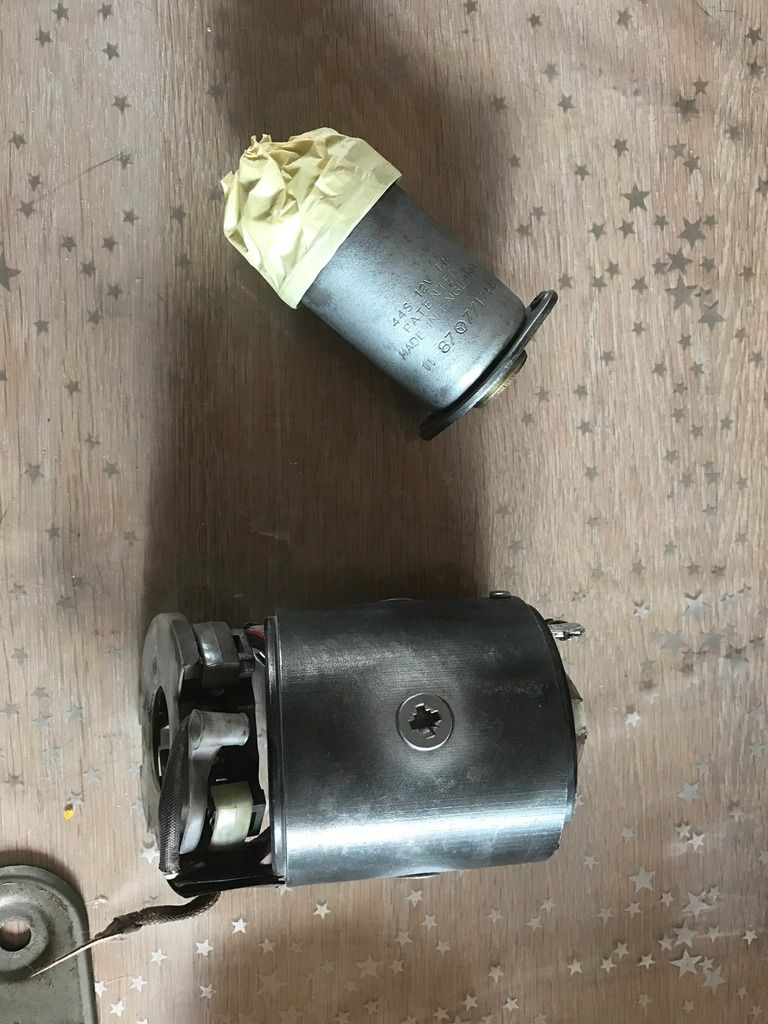
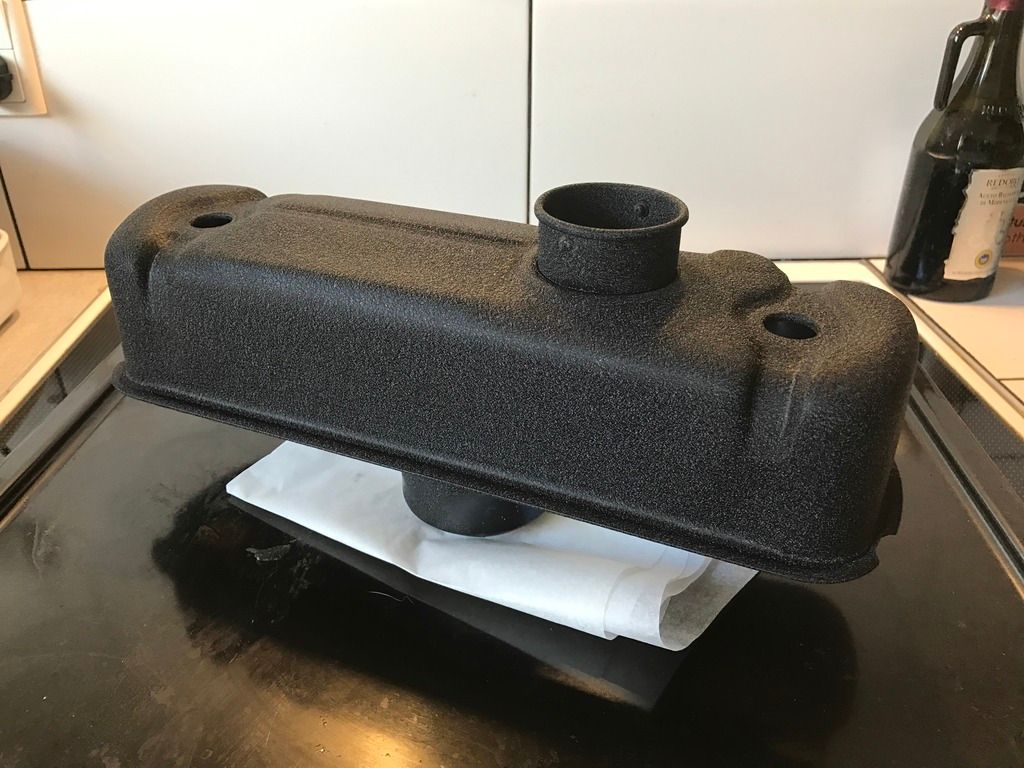
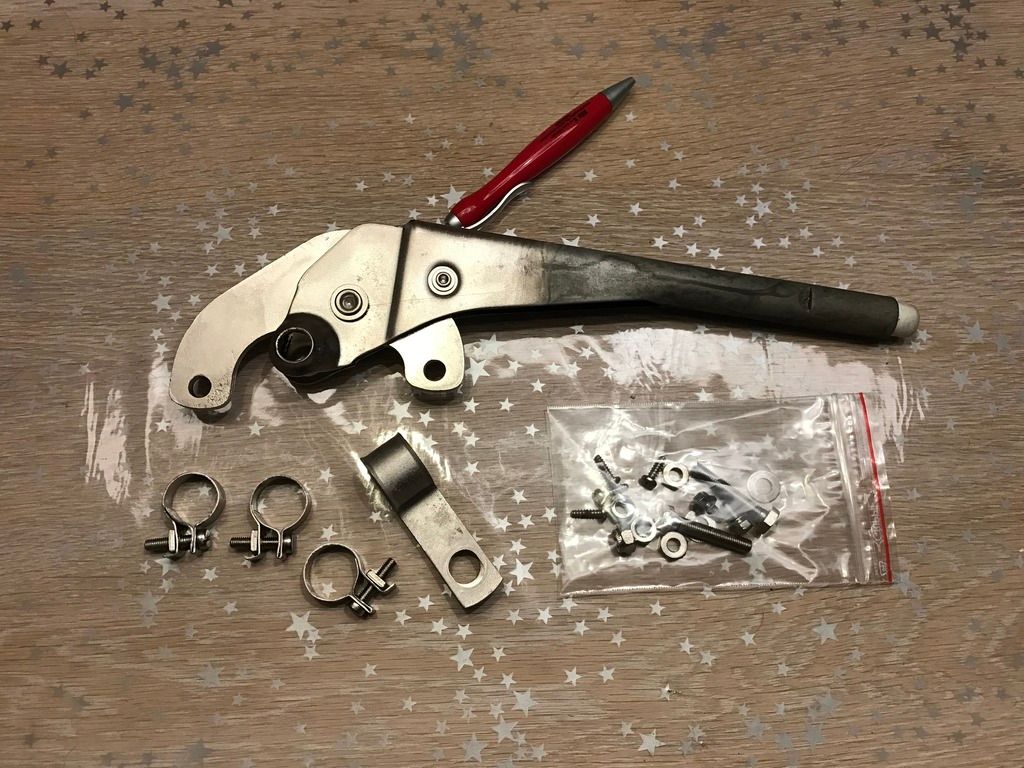
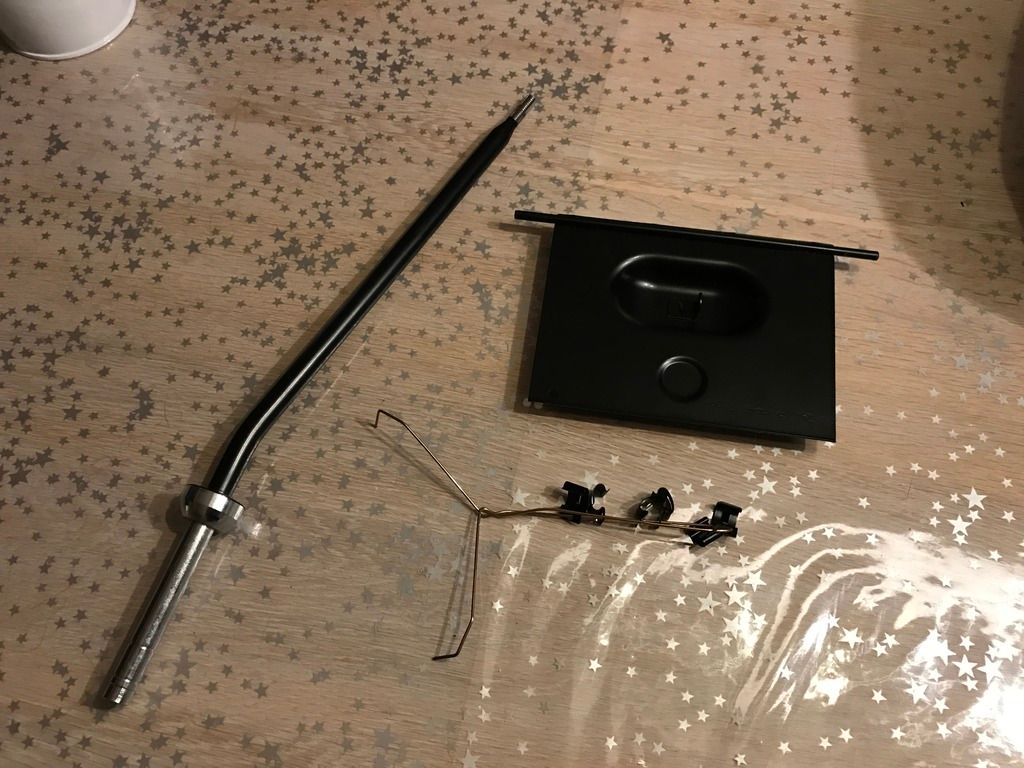
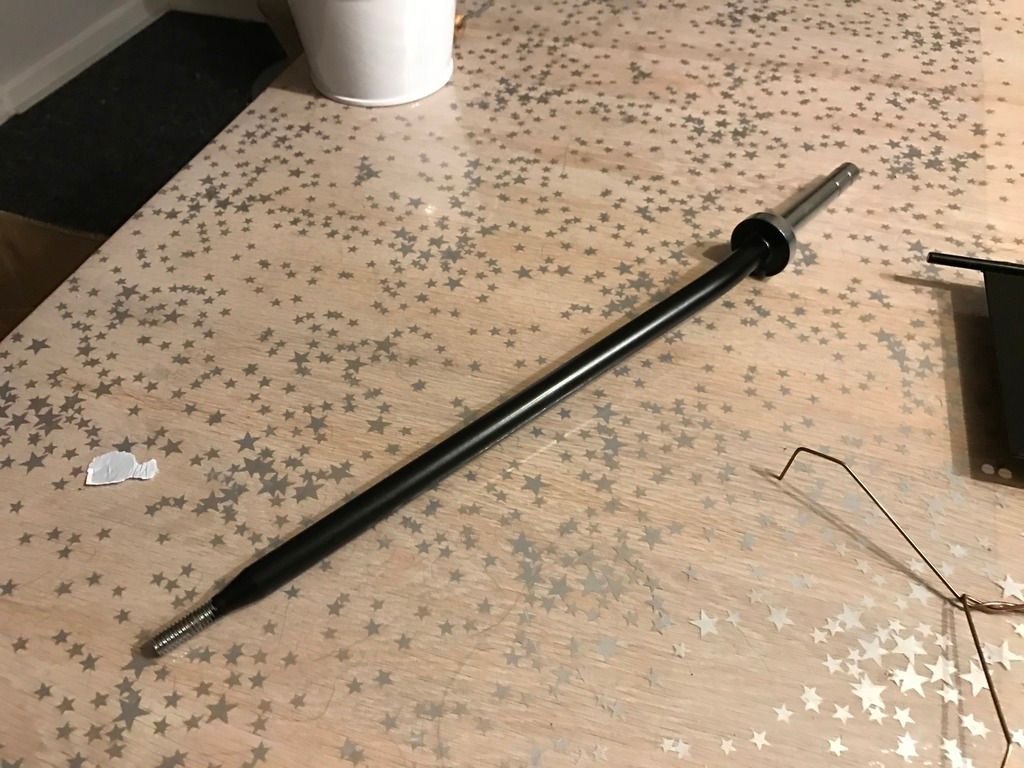
the new quick shifter was chrome and wanted that black as original.

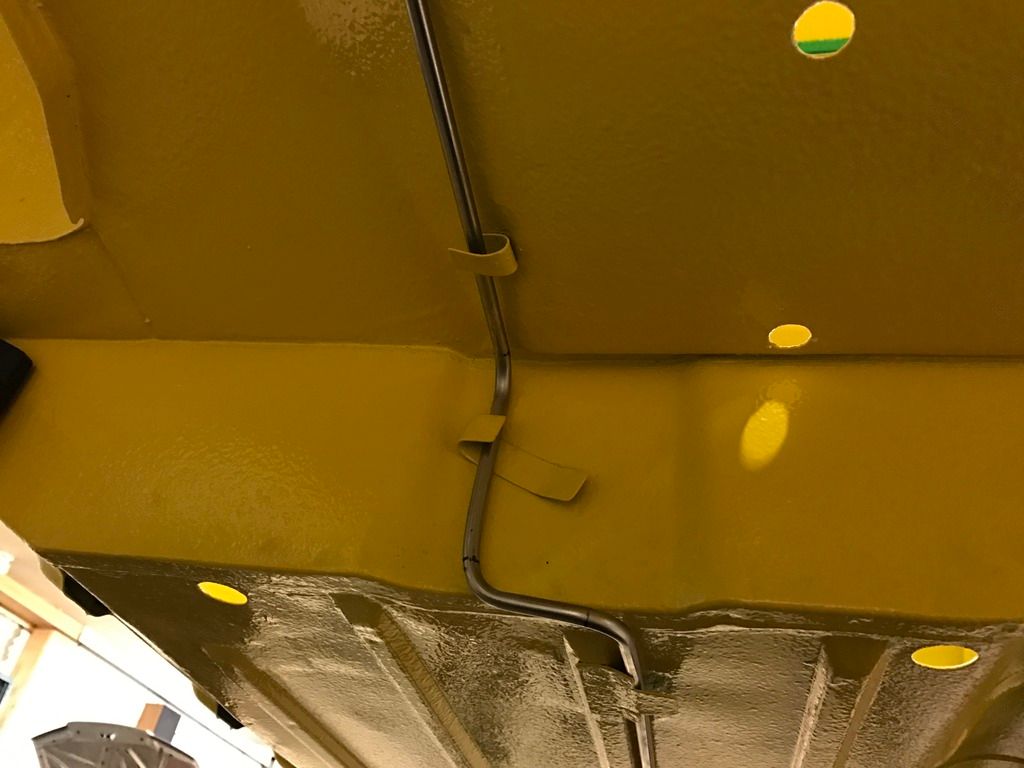
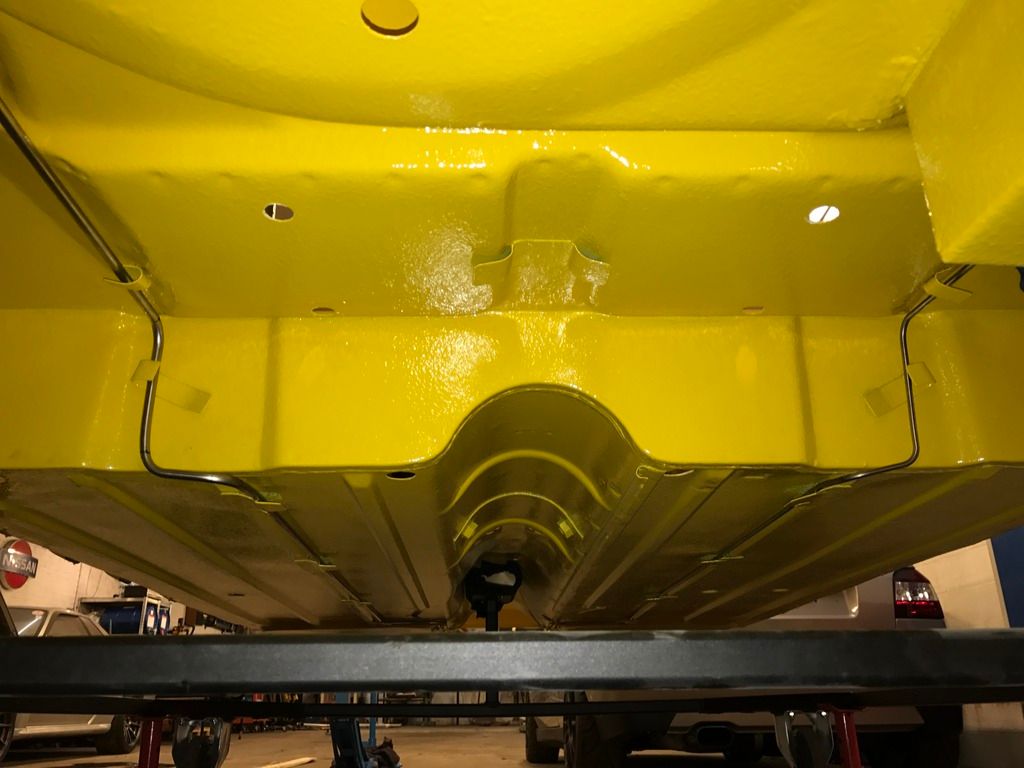
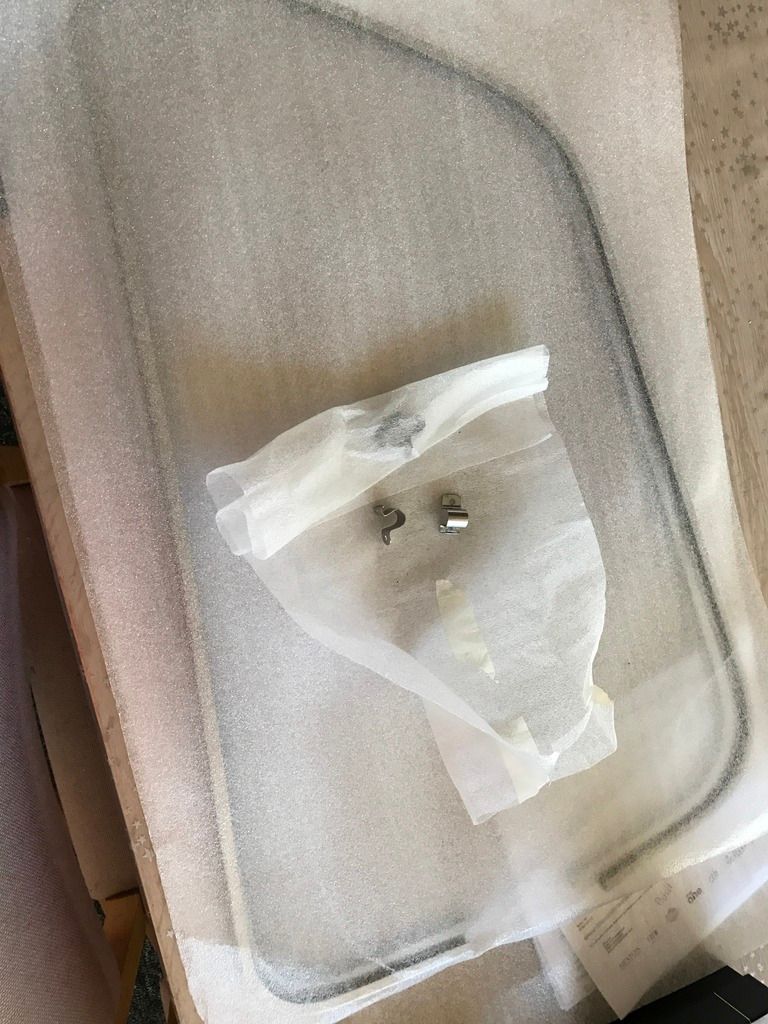
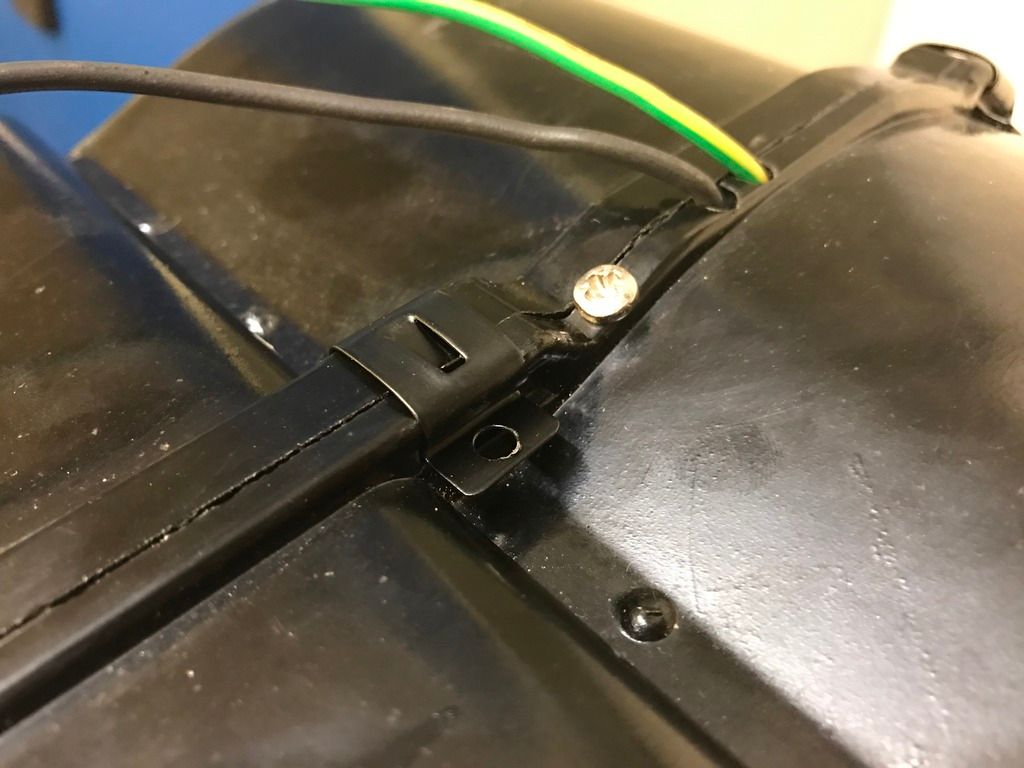
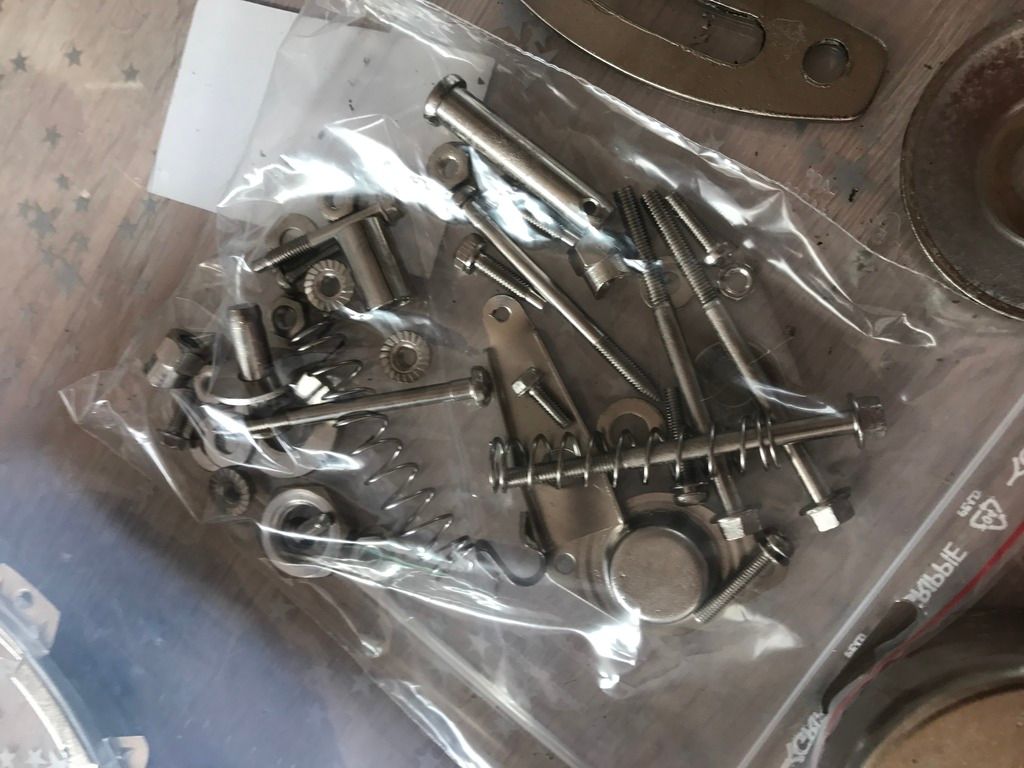
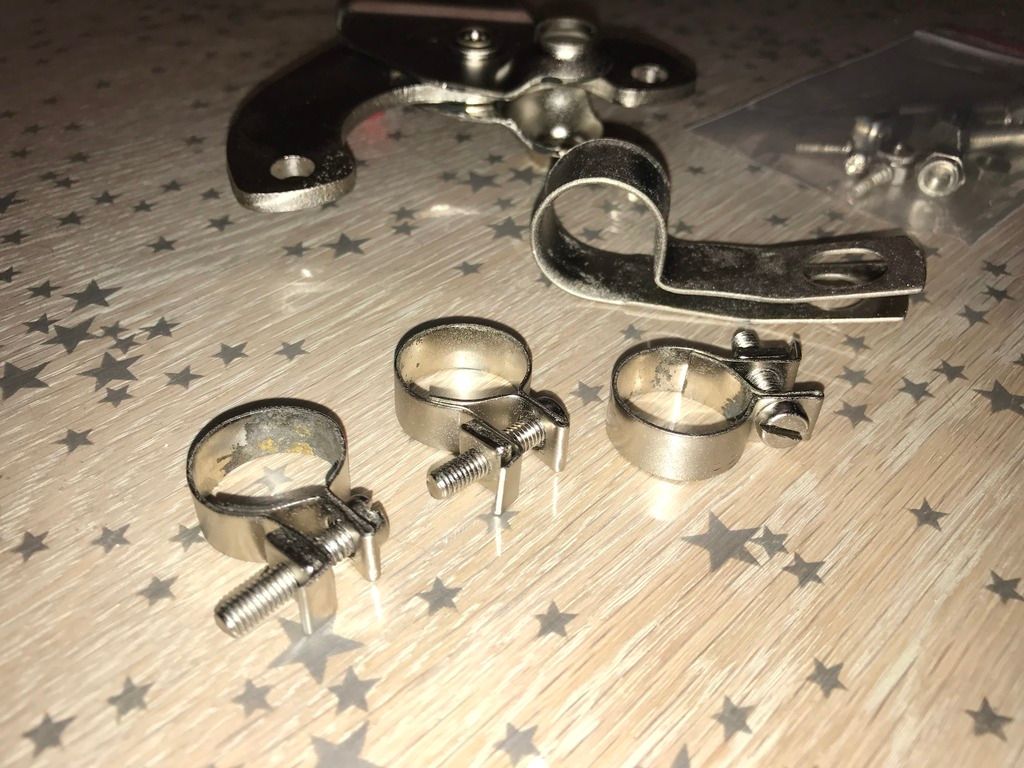
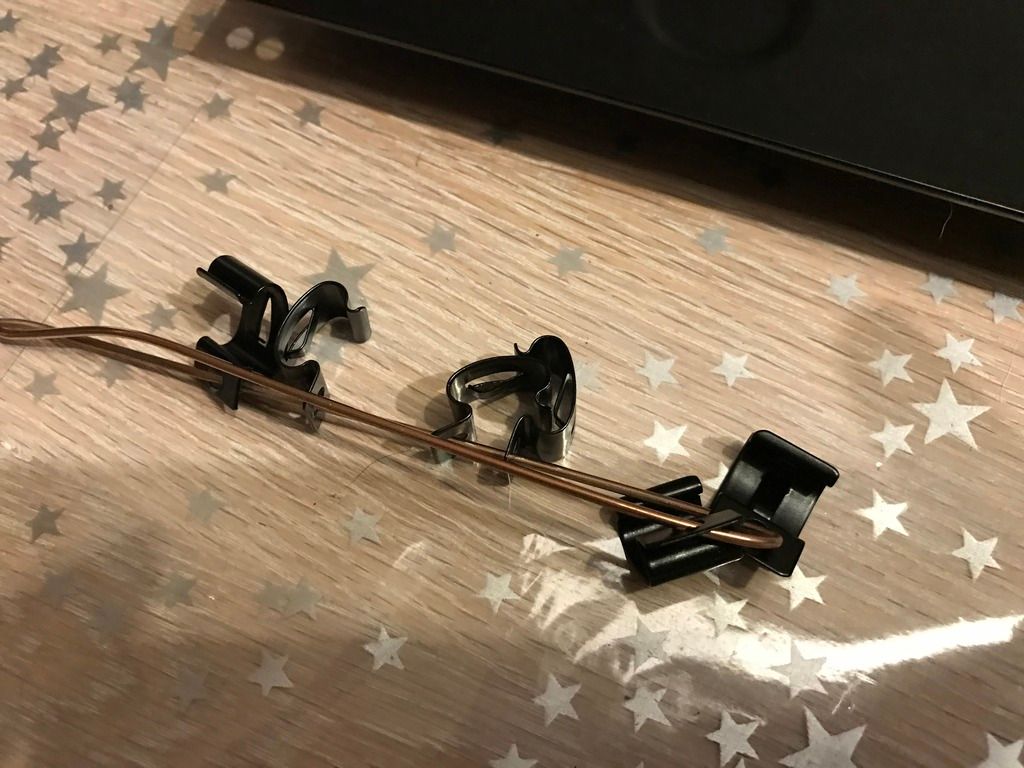
clips for the heater got powder coated also.


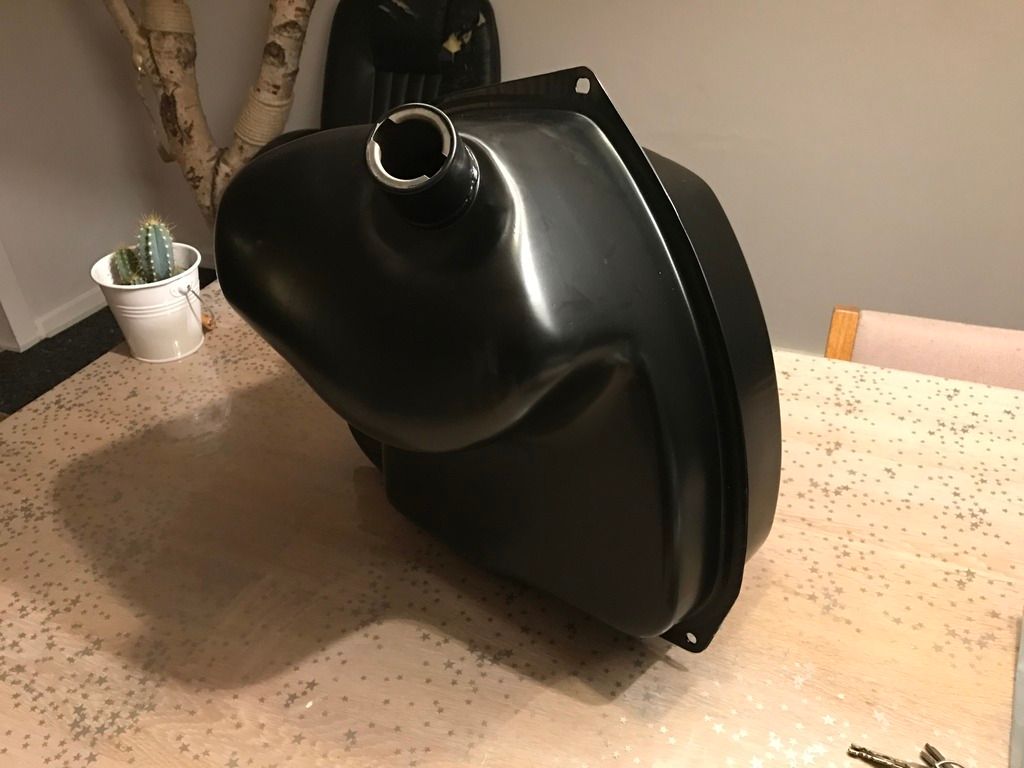
had a issue with the guy i usually get my stuff powder coated at, he didnet want to do my old tank, so finally found another one, who wnated to do it :)


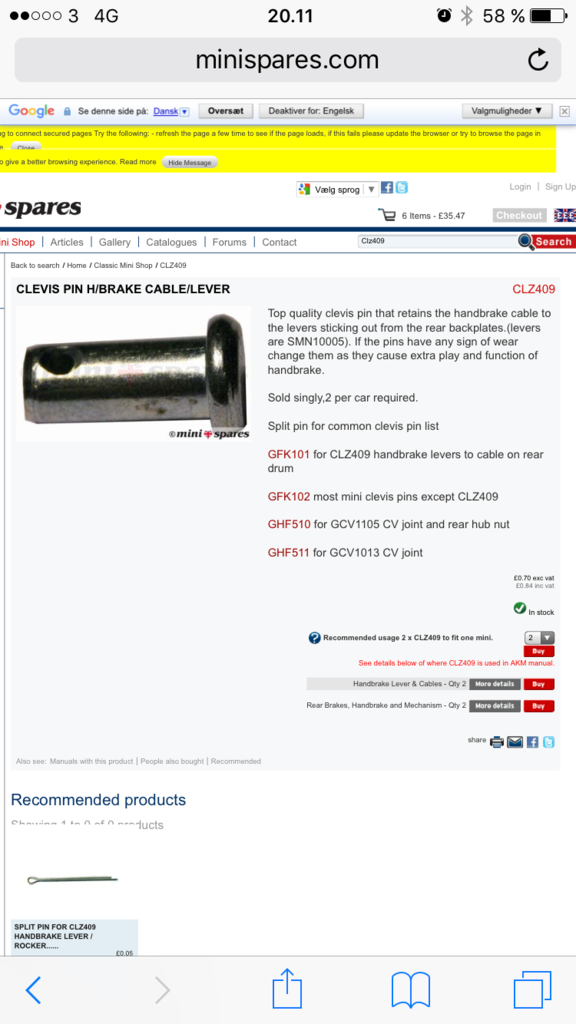
and the didnt know what to do wiht the handbrake either, as i couldnet find new rivets, so asked if they could dip it half, Which they tryed. now of the the painter incl the cage :)


IMG_2139_zpsikv8ejhc.jpg


IMG_2142_zpssq6zjzrg.jpg


IMG_2254_zps2qexroqr.jpg


IMG_2257_zpsapybtyak.jpg


IMG_2256_zpsngezo6xg.jpg


IMG_2248_zpsstcrczhe.jpg


IMG_2249_zpswt967ygk.jpg


IMG_2251_zpsawvtaygs.jpg


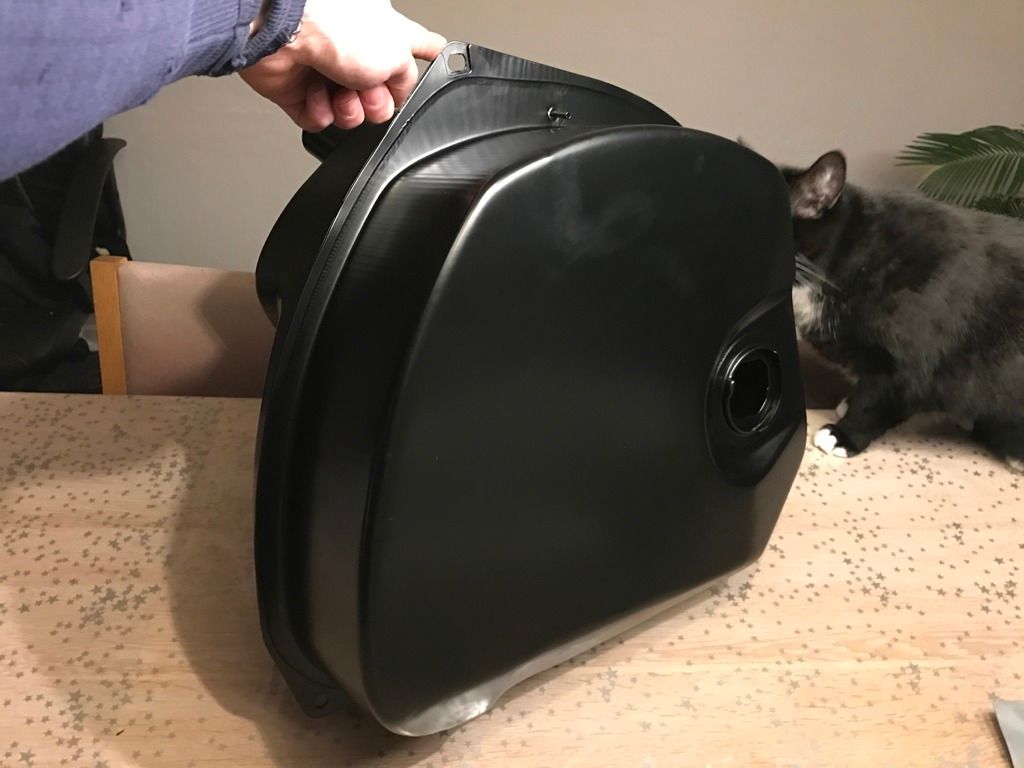
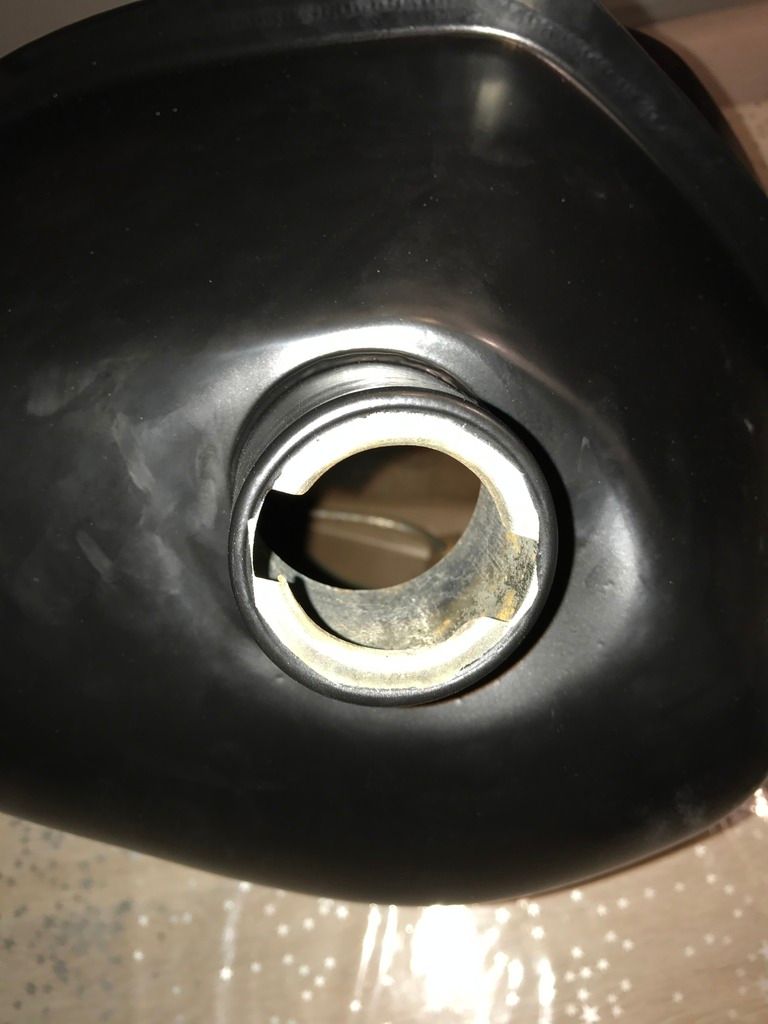
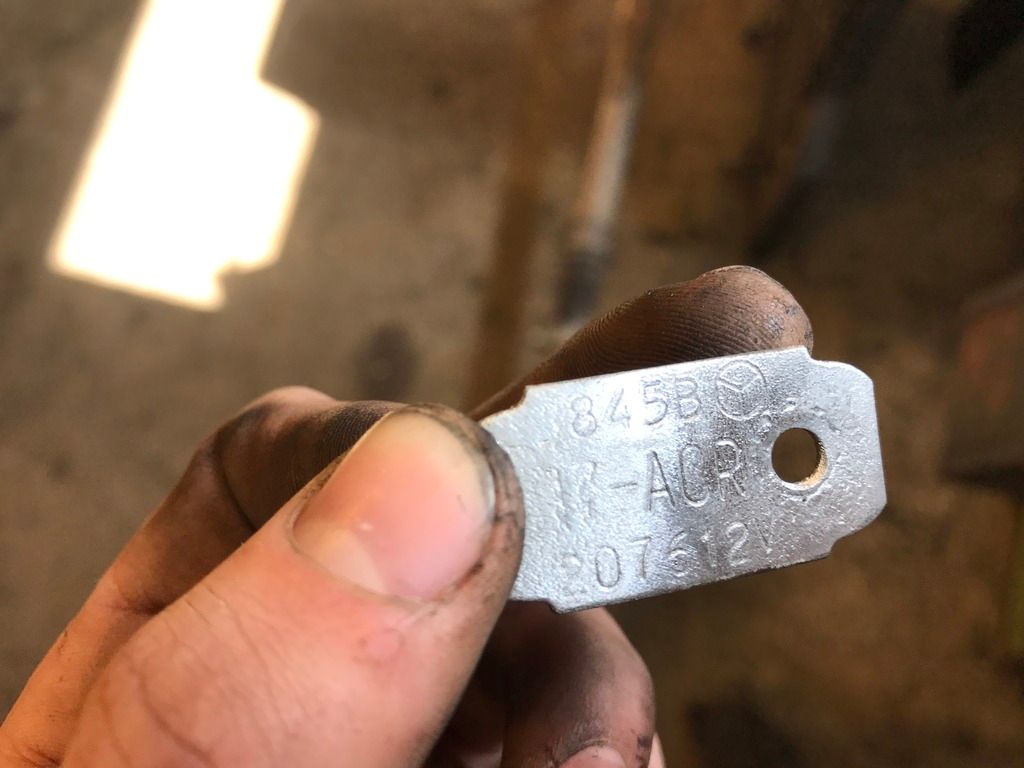
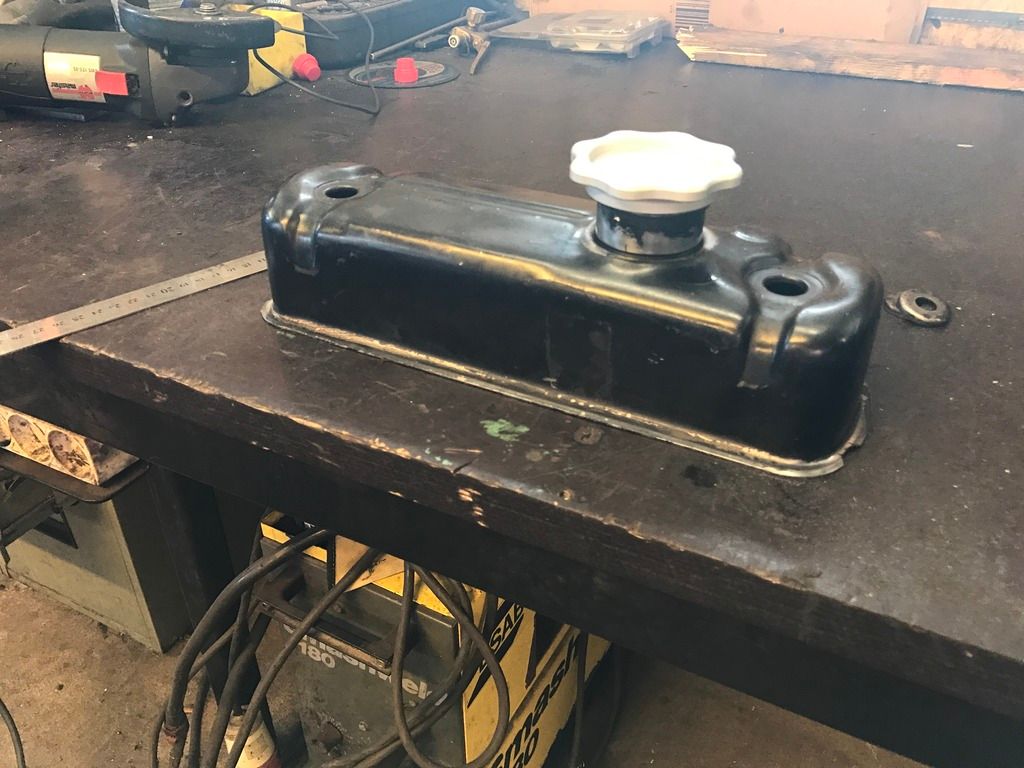
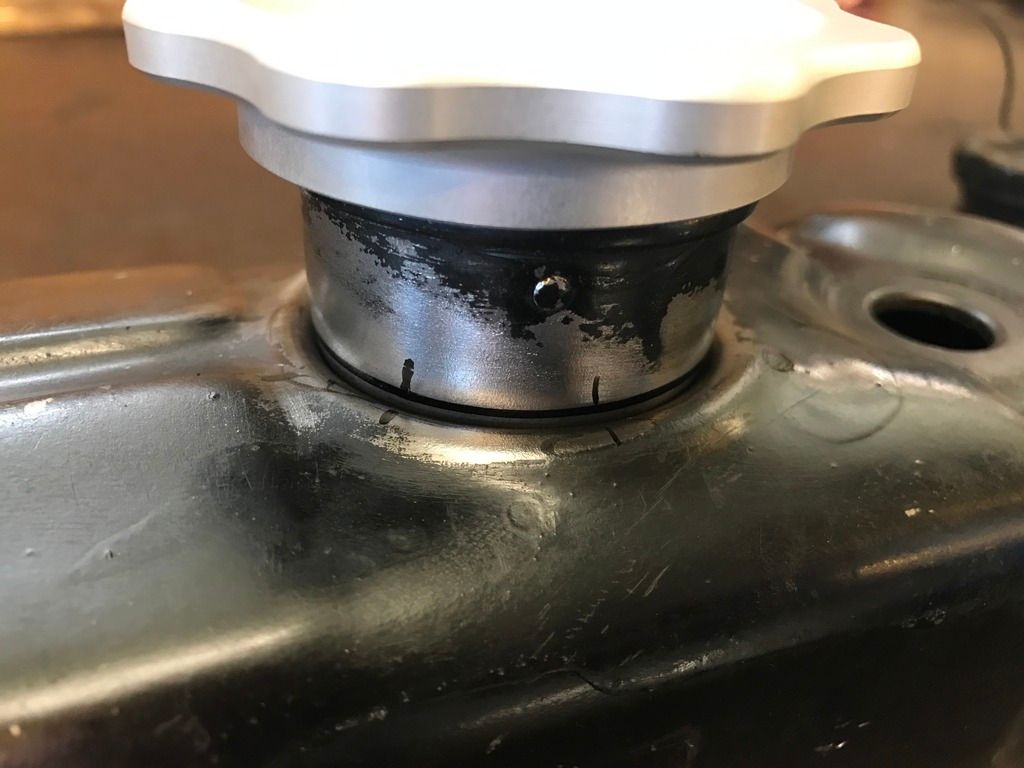
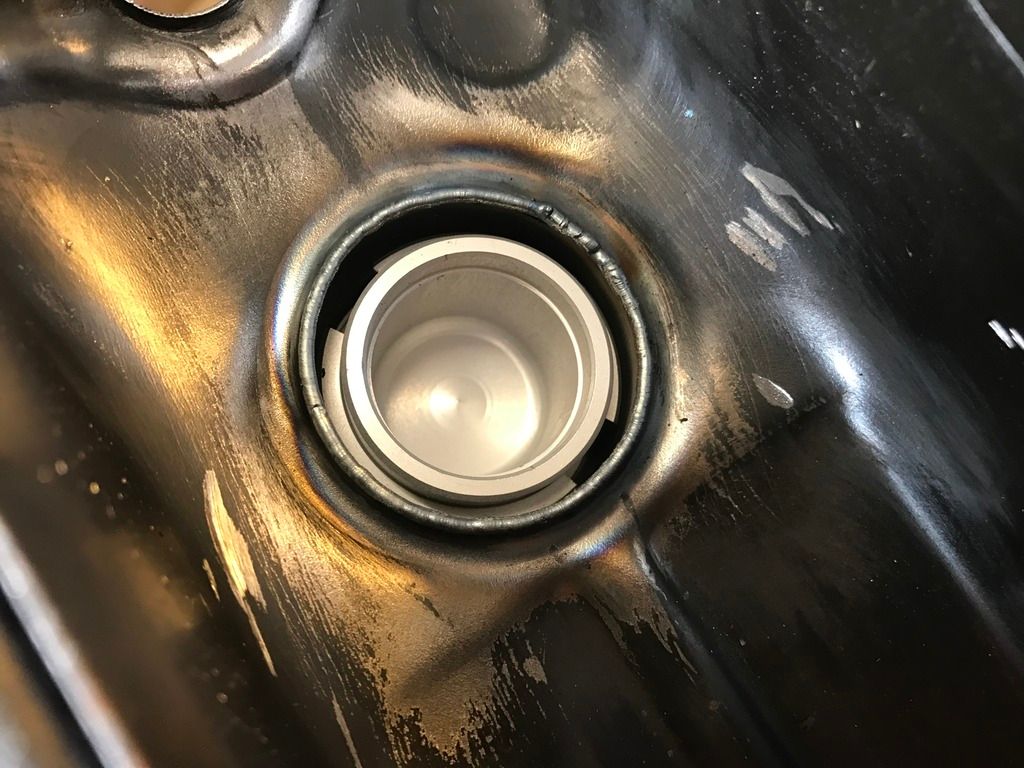
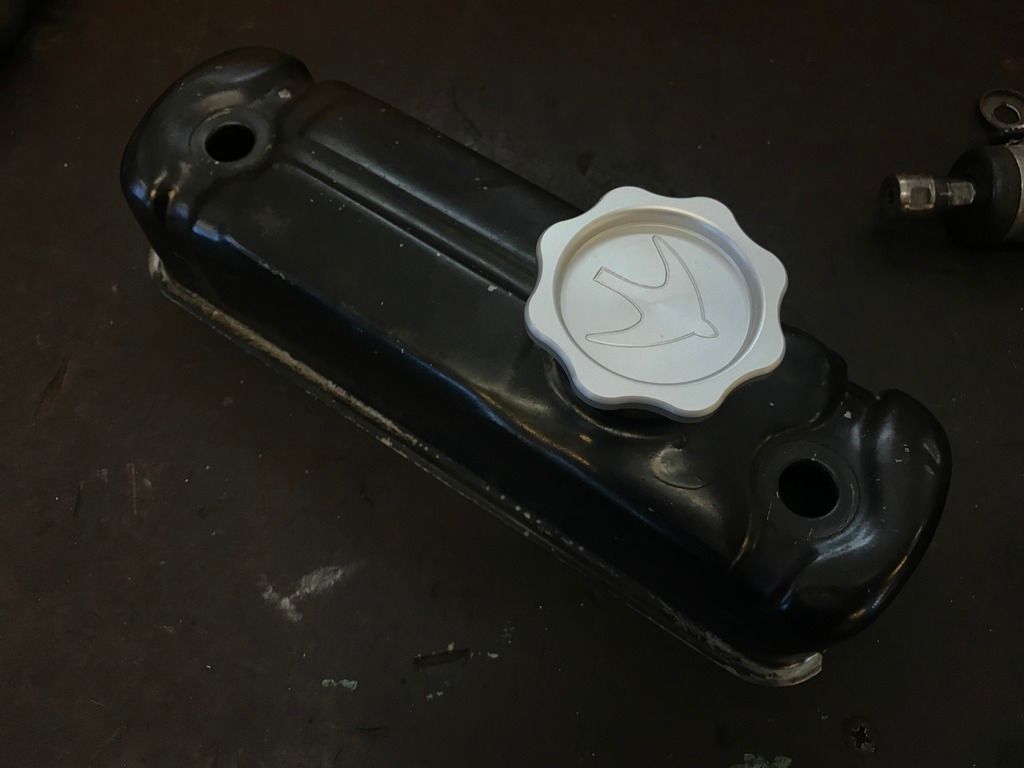
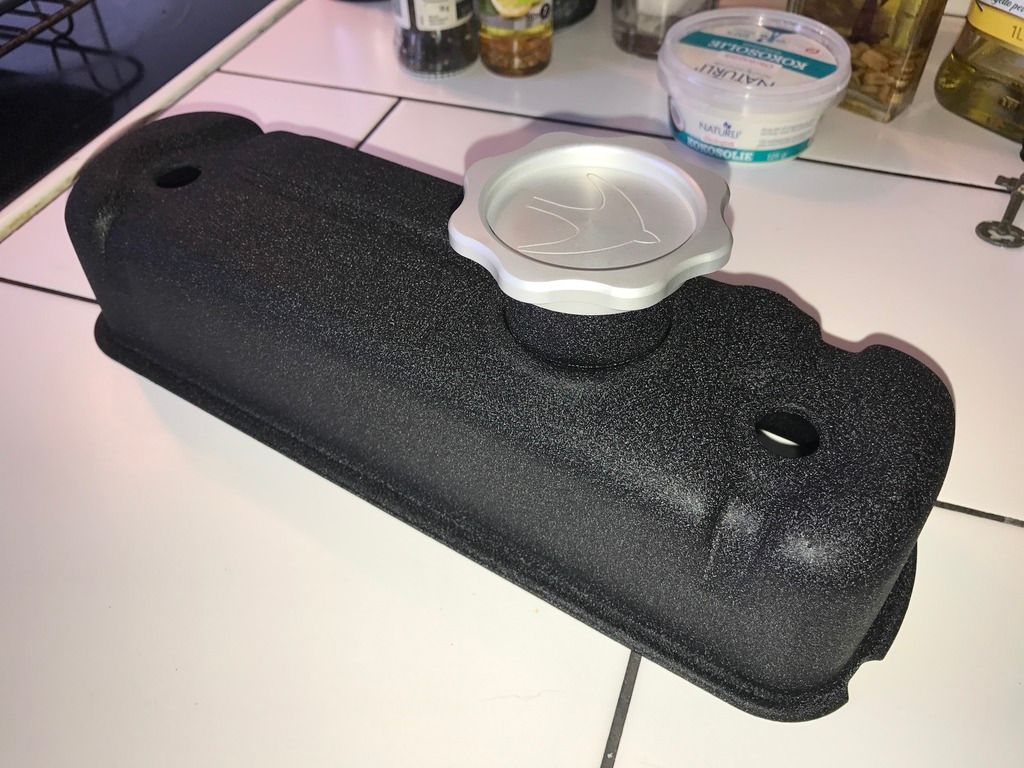
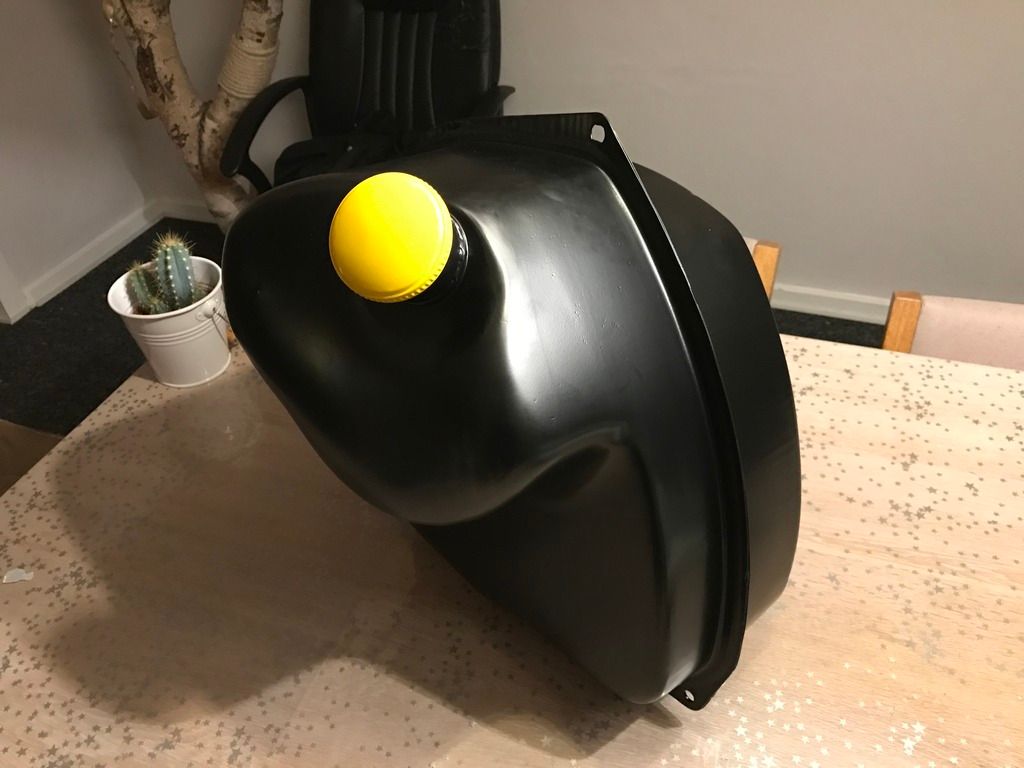
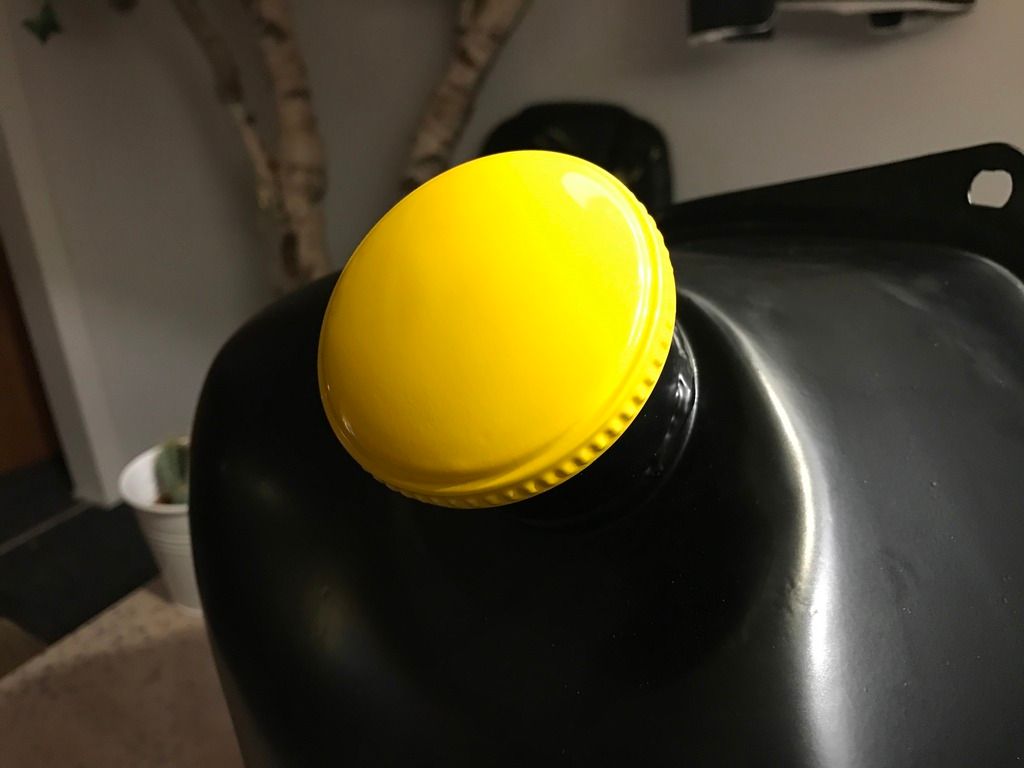
and i had to try to put on the petrol cap on :gimme: 


IMG_2253_zpsq88ad0t3.jpg


IMG_2252_zpskywdi6uf.jpg


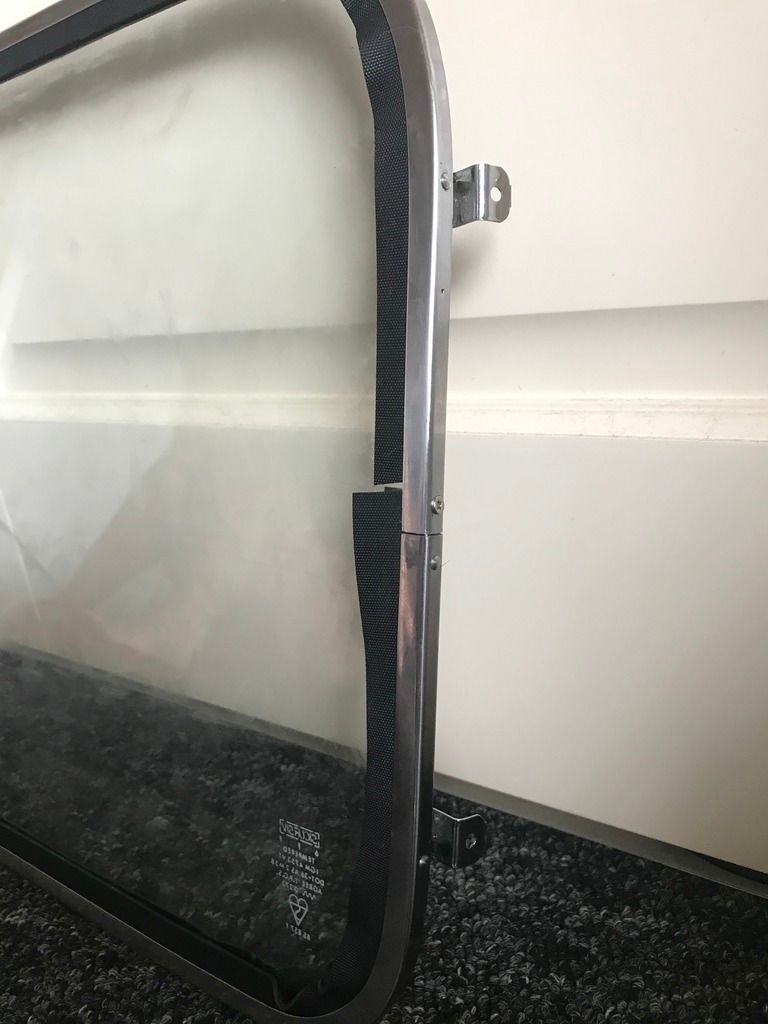
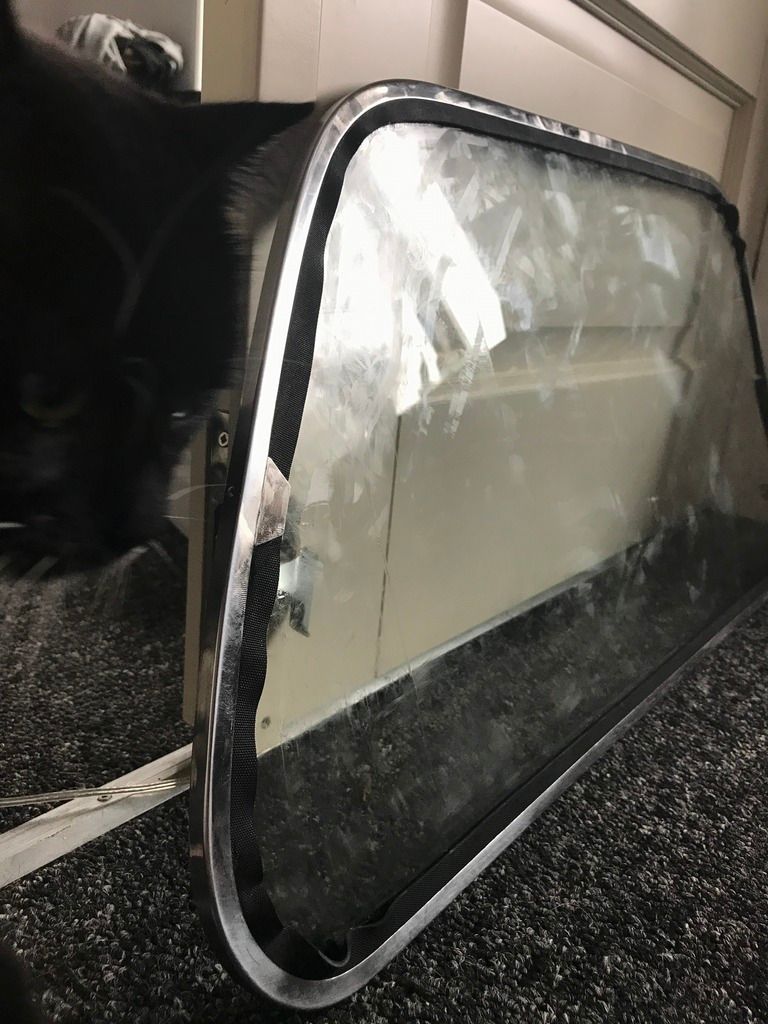
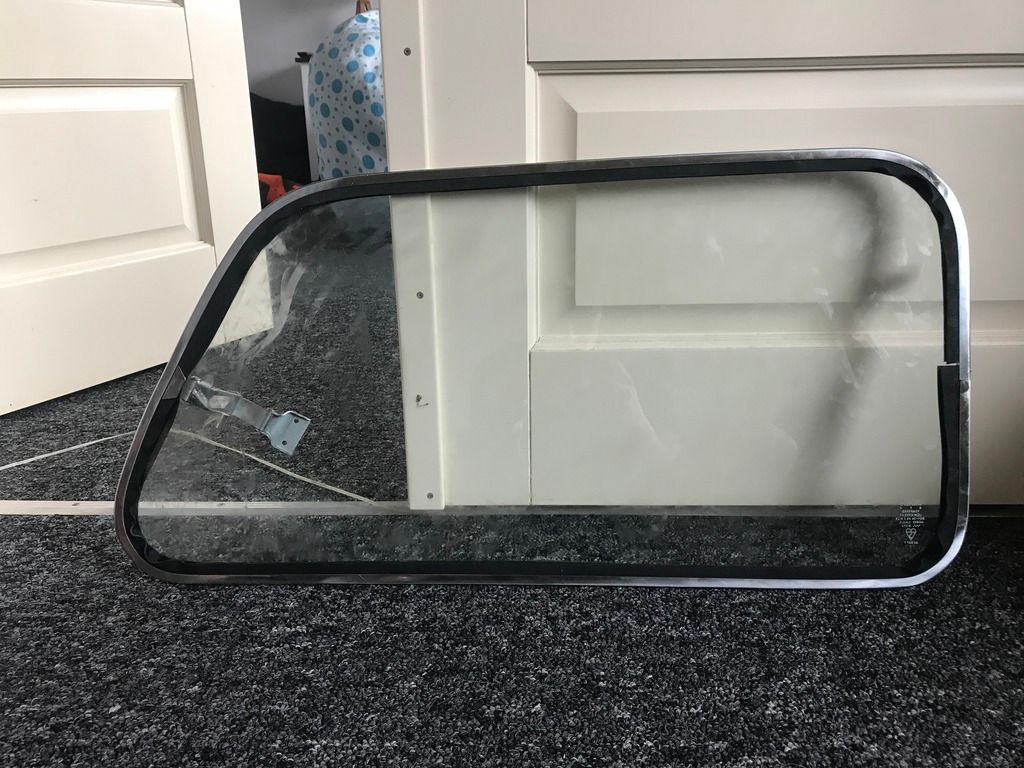
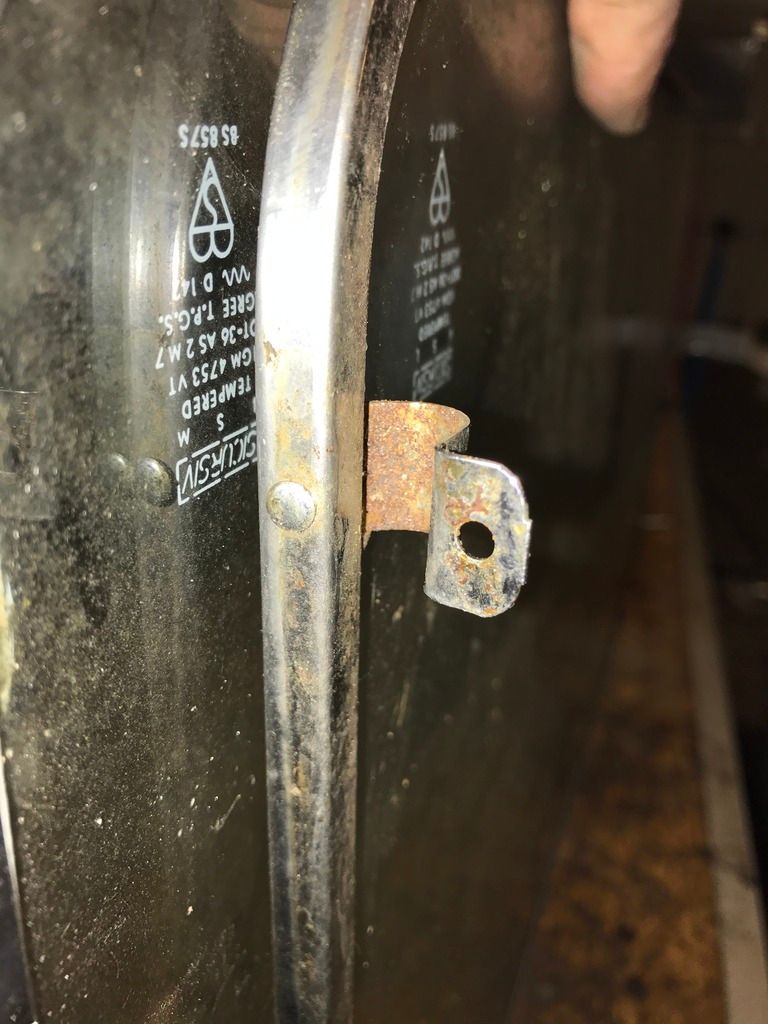
I wanted to have the right windows in, with the original production logo on, so i have been collecting about 4 complete set, to get as little scratches as possible.

i cleaned so many, but sadly in the end with out luck, so ended up buy new ones, because of too many scratchs. im a bit sad about it, but better with clean new one for this car.

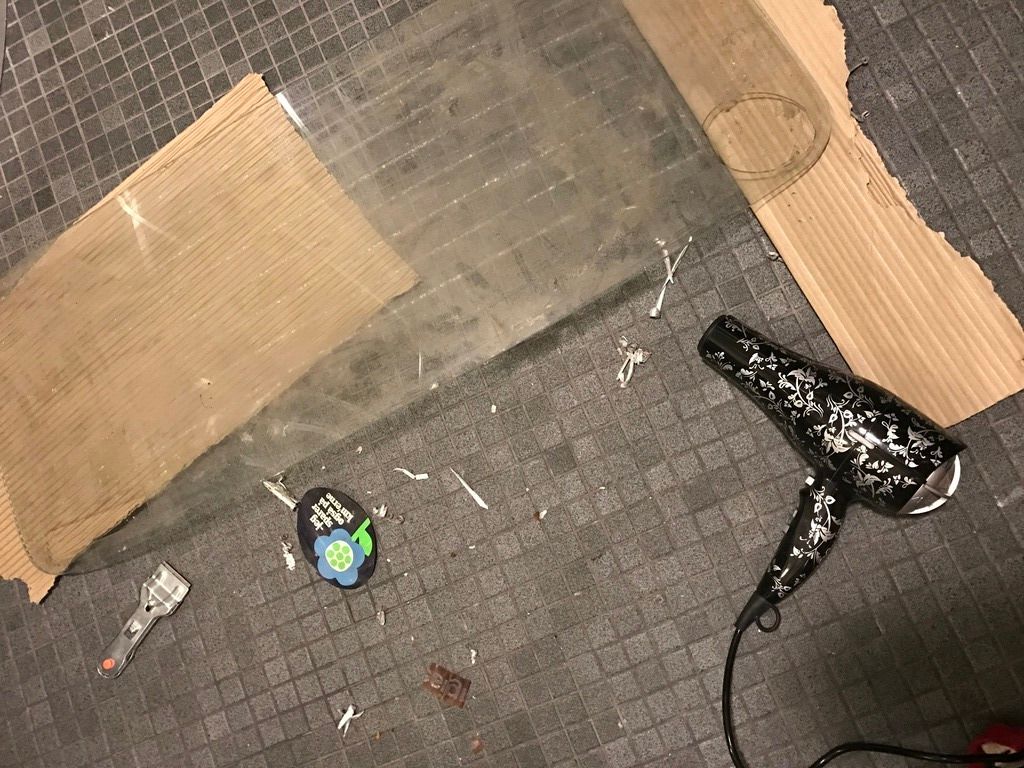
 but the ones i did clean was in the bathroom, as its was to cold out side, and really didnet had a good spot in the garage for it... :D 


IMG_2298_zpsmf7kk1h4.jpg


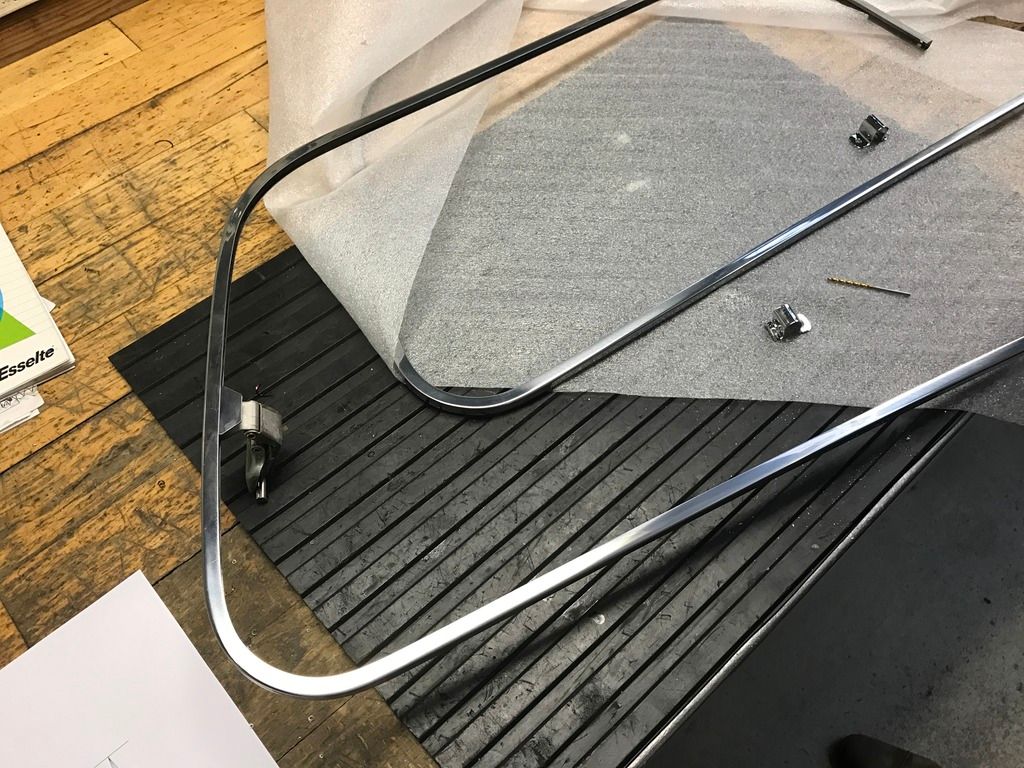
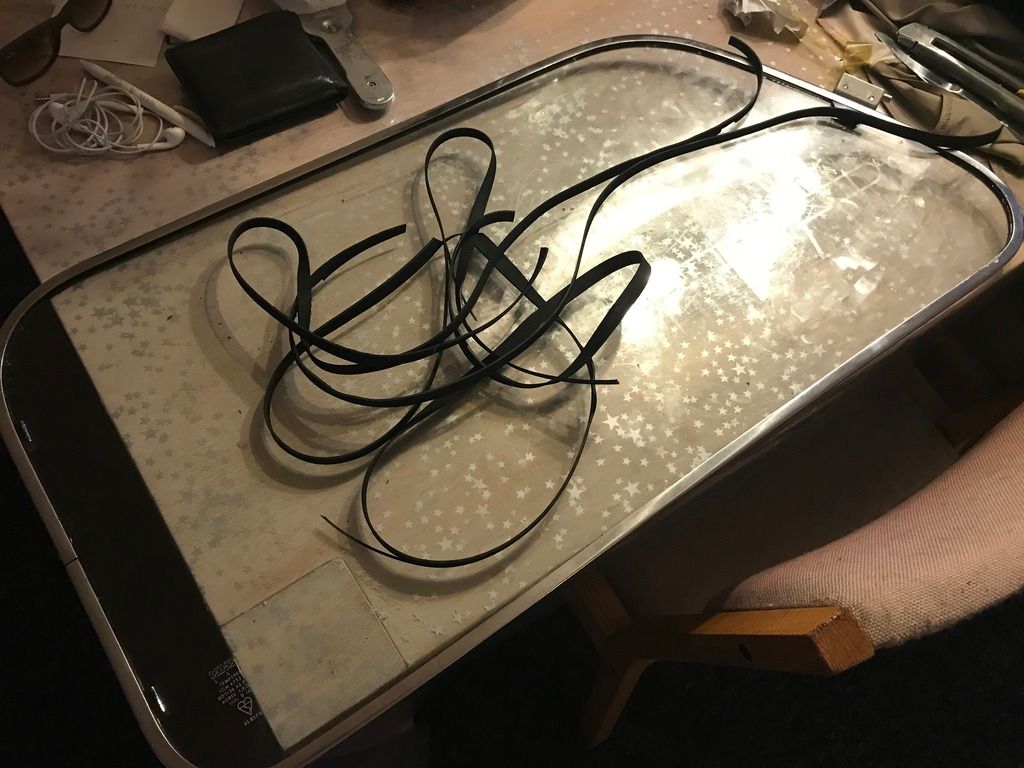
new glass is about to arrive, so i also started preparing the frames


IMG_2218_zpsswqpqgyu.jpg


IMG_2219_zpsnwmfs3wp.jpg


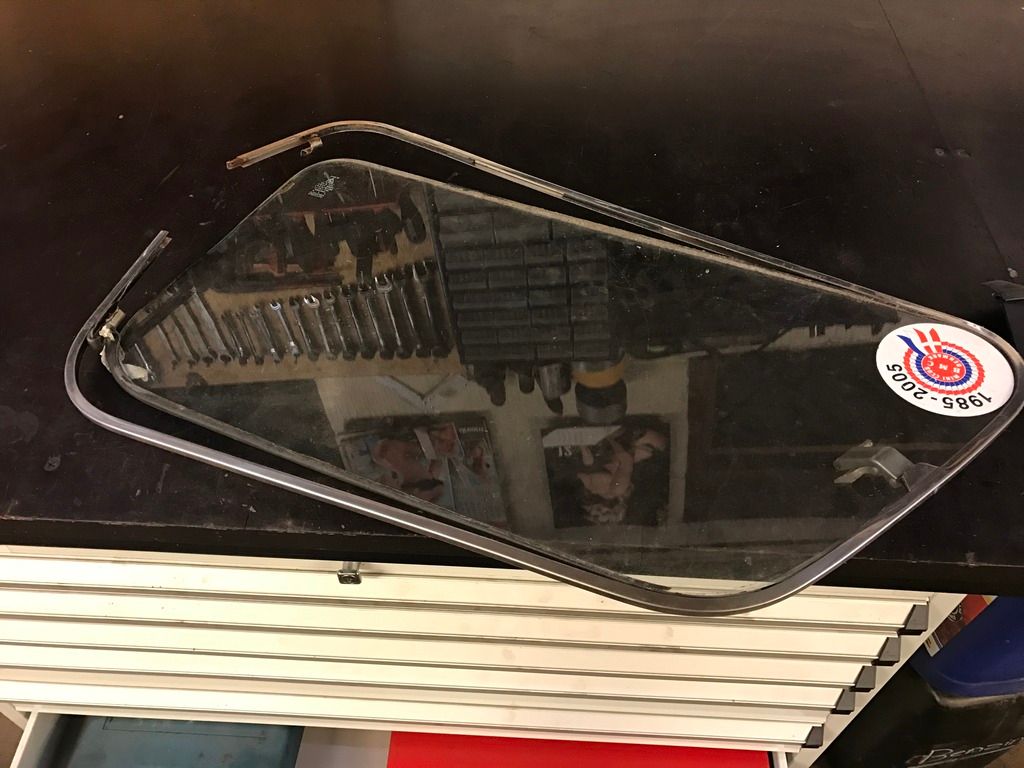
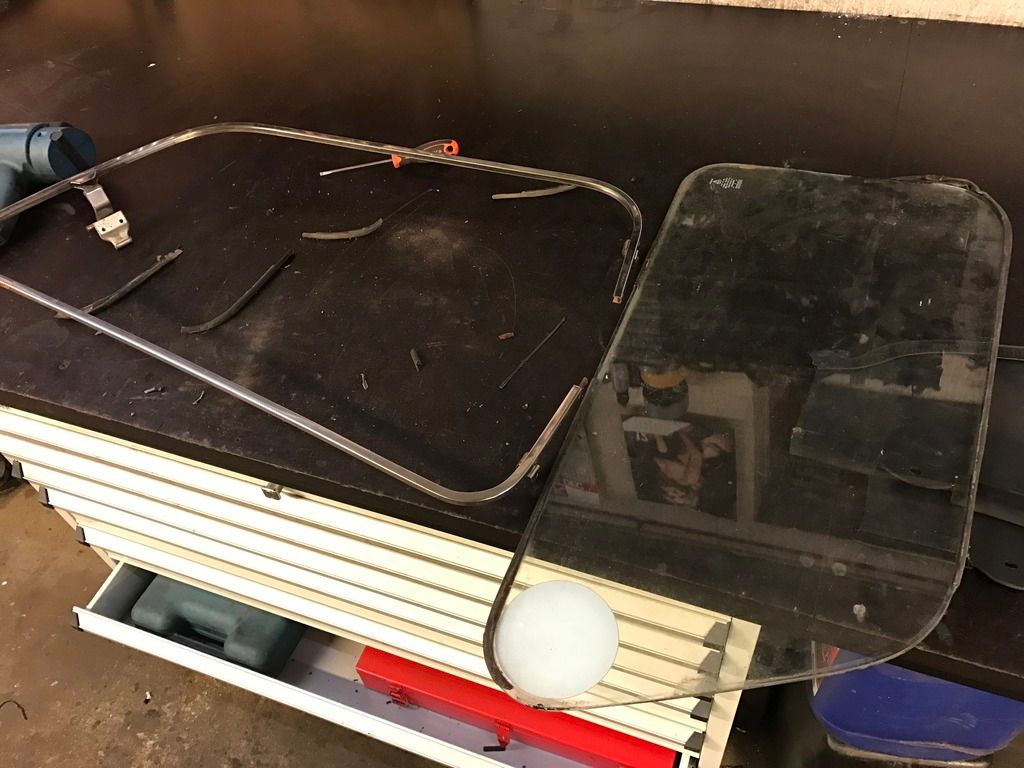
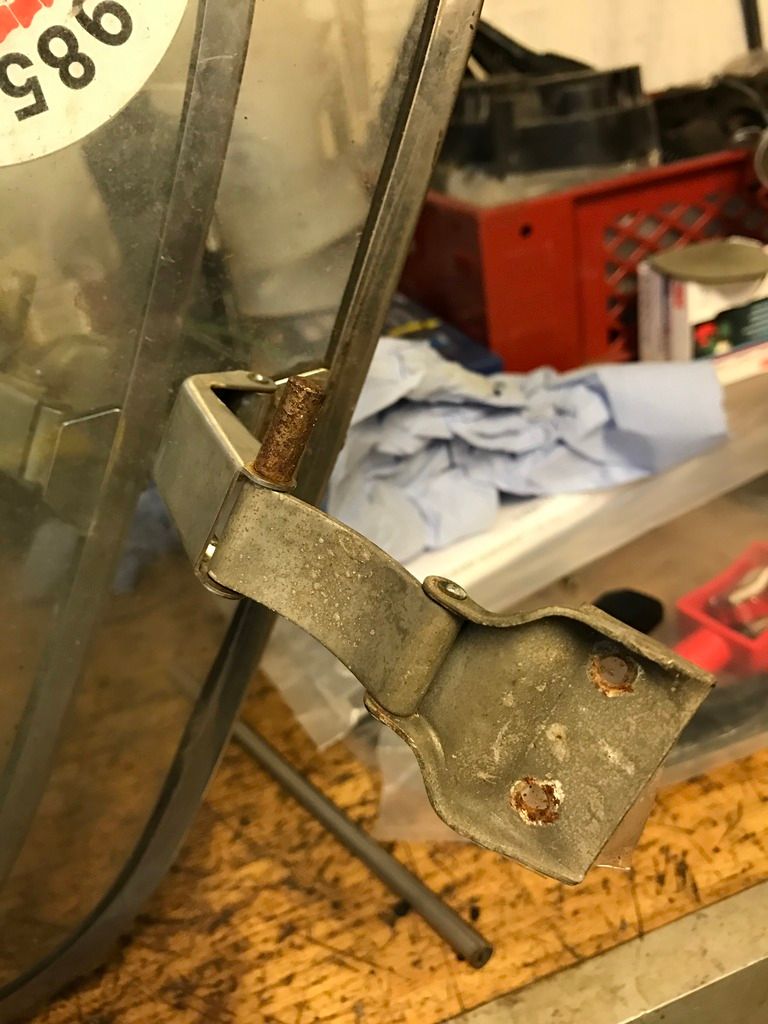
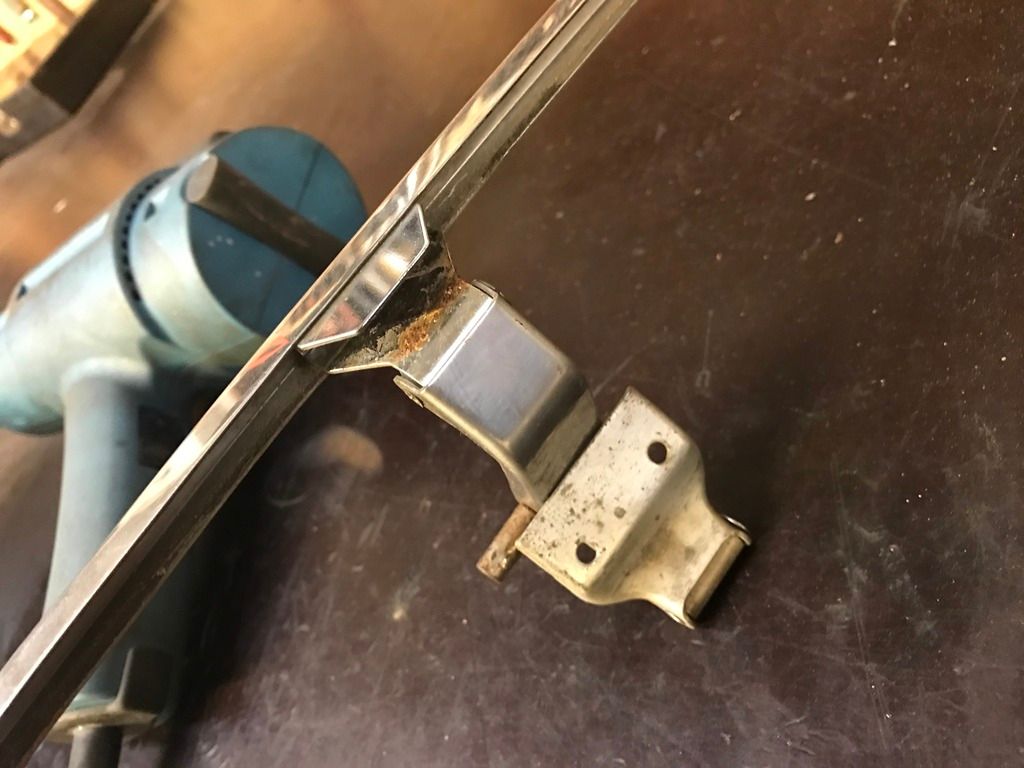
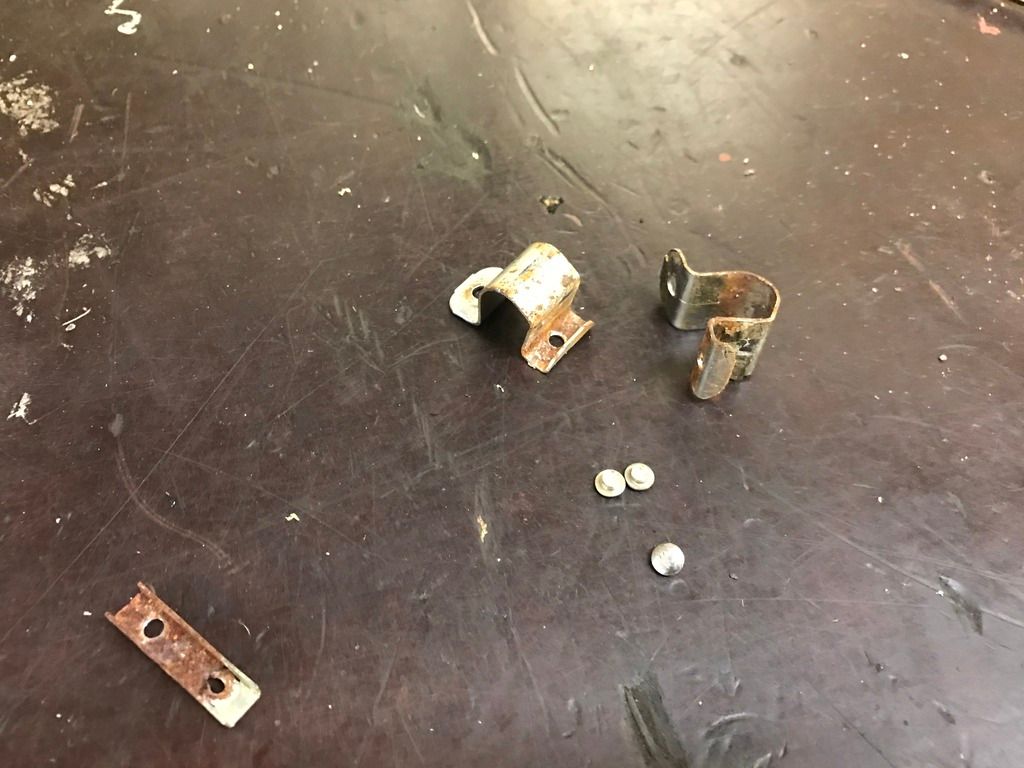
and i could not live with the old rusty mounts and hinges.

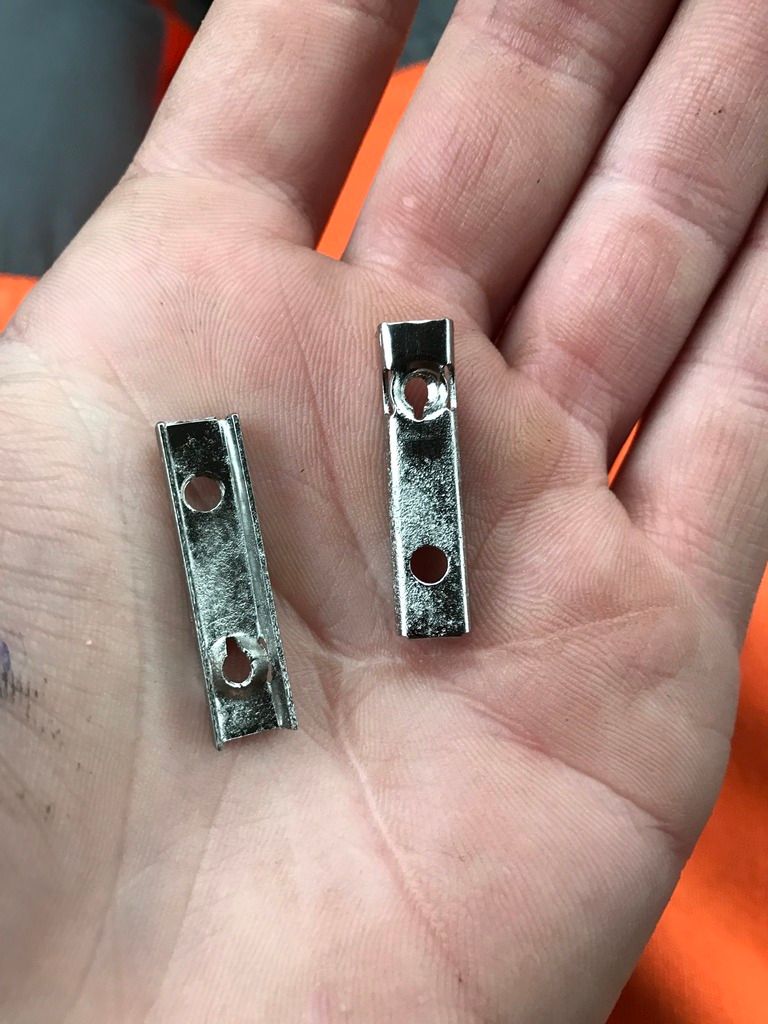
so ordered new hinges and sent the mounts of to rechrome, also i drilled the rivets of, to get the hinges and mounts of, so ill new to make some new ones. :)


IMG_2182_zpsi4sfzzv8.jpg


IMG_2220_zpsuyvm6w65.jpg


IMG_2183_zpsc2qnx6d5.jpg


IMG_2273_zpsz9r5smec.jpg


IMG_2272_zpsxq0qxxab.jpg


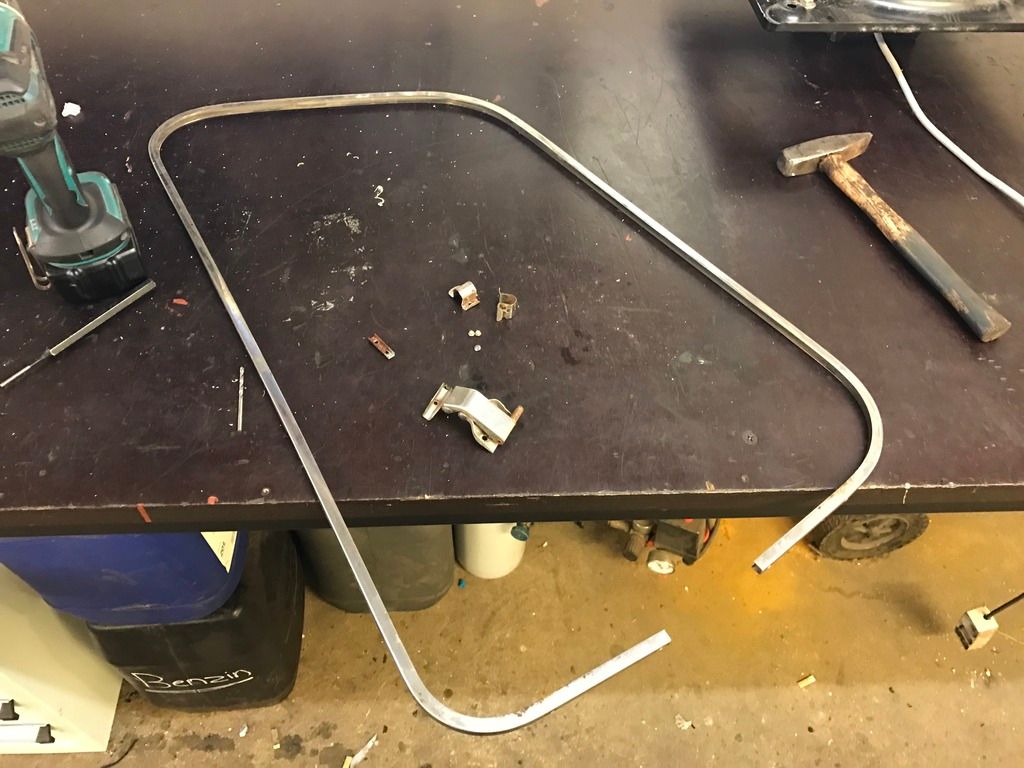
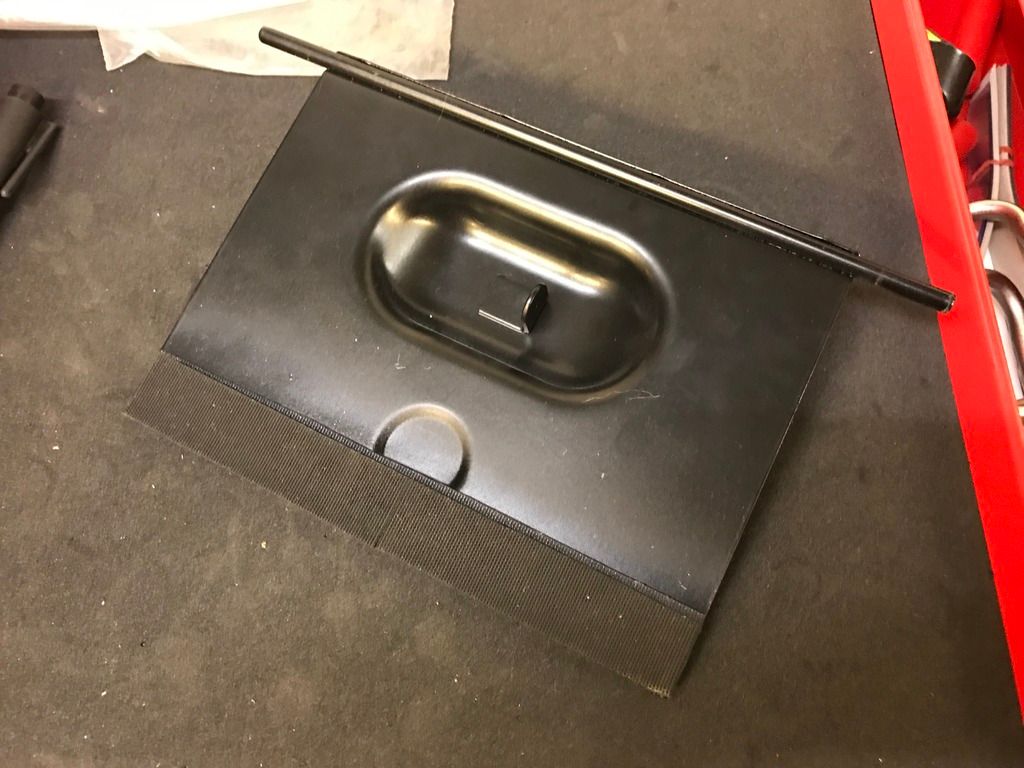
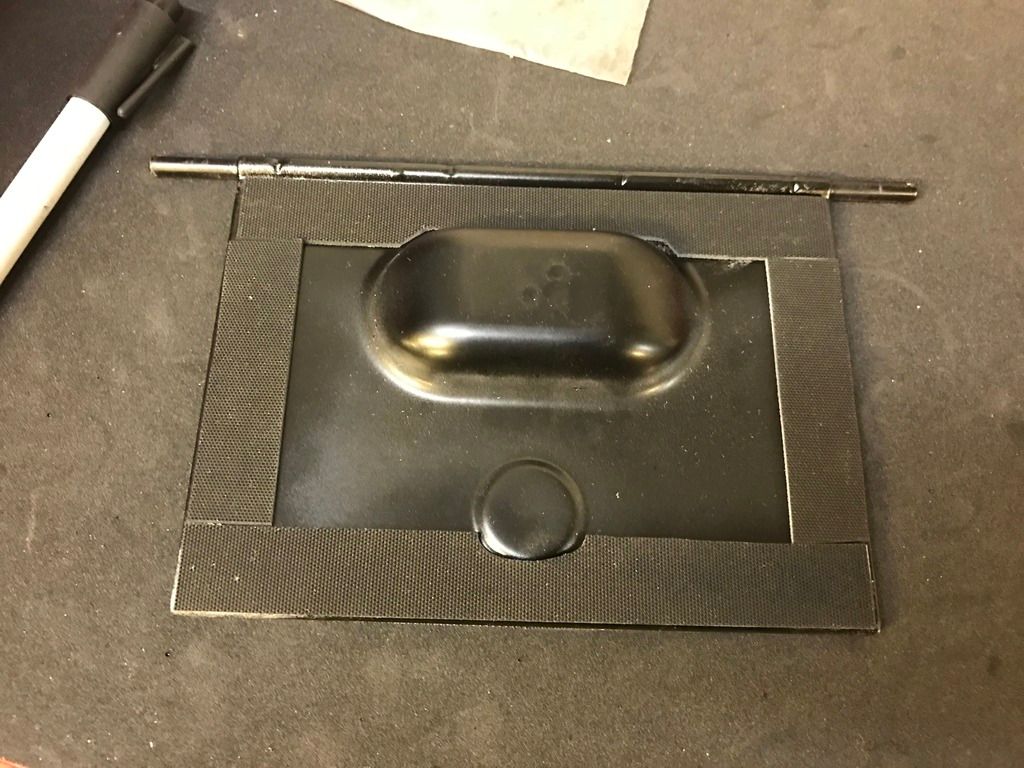
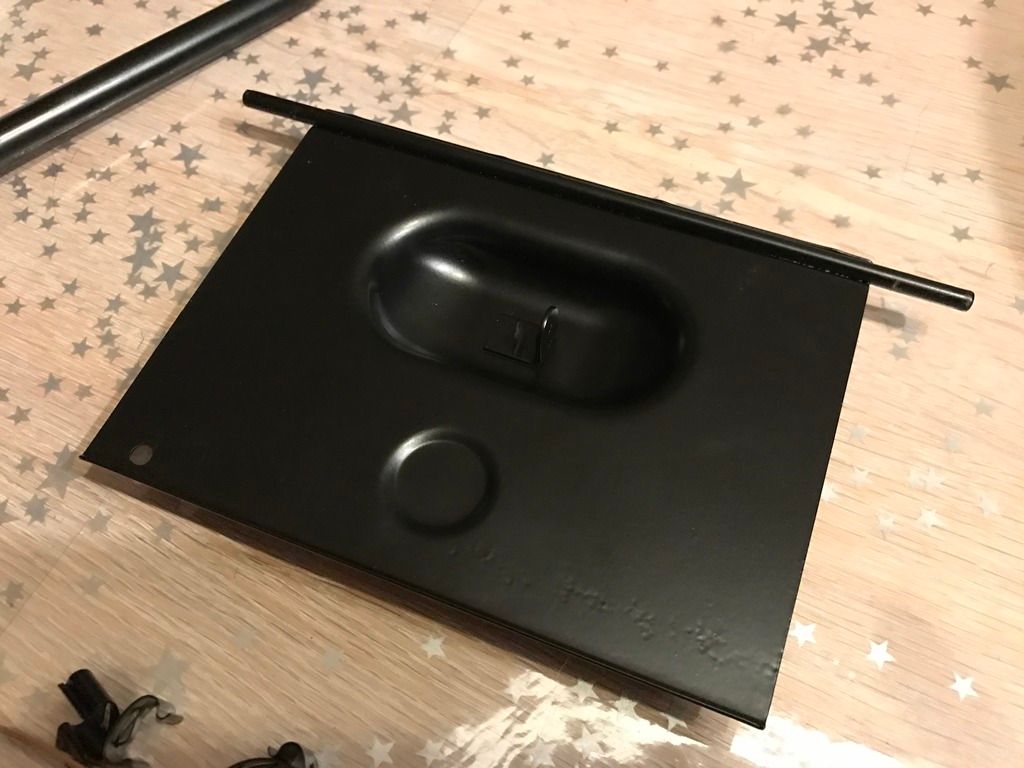
i also started taking this panel apart for paint and new brazel :)


IMG_2271_zps5g76pjhd.jpg


#167 Nino

Nino

    Mini Mad

  • Members
  • PipPipPipPip
  • 178 posts
  • Location: Jutland

Posted 12 February 2017 - 06:57 PM

I removed the old Bitumen deadening on the roof because they usaulally after time drips on the headlining and makes staines, then bougt new ones and applyed them..

forgot how much they heaped. !


IMG_2180_zpsqzcoyoqo.jpg


IMG_2179_zpszdn4wel2.jpg


IMG_2178_zpsnchb15rn.jpg


ive got told that a lot of engine noise came trough the A pillers so i took a piece of cloth and soaked it in Dinitrol and stuffed it in :)


IMG_2301_zpsknnzyrk0.jpg


IMG_2300_zps4tgujxxx.jpg


also sprayed all gaps and box sections till it ran out.


IMG_2266_zpsqzglin54.jpg


IMG_2269_zpstzmuq0ph.jpg


IMG_2270_zpsgjdsrk5e.jpg


Finally i bought my self a nice tool chest ! :) very happy with it.


IMG_2402_zpsxjbij5jj.jpg


and i finally got my tool finished to bend the 8mm petrol pipe. :)

but the first follower i got made was too little, so the bend was horrible..

new one on the left.


IMG_2377_zpsea0vulat.jpg


IMG_2404_zpsxtmyc3by.jpg


IMG_2405_zps7stvhff8.jpg


IMG_2407_zpsxo0qzmig.jpg


IMG_2410_zpsykncxwln.jpg


IMG_2411_zpsq1ssmwbn.jpg


IMG_2413_zpsc7nlwftq.jpg


I reckon that will do ;D  ;D


hope you enjoy :)


#168 Nino

Nino

    Mini Mad

  • Members
  • PipPipPipPip
  • 178 posts
  • Location: Jutland

Posted 20 February 2017 - 09:05 PM

Okay, got a little further these days.


went a little overkill, and got the tiny assembly thingys in the rear quarter frame treated with cemical nickel.


IMG_2474_zpsfzx0oqtf.jpg


i also considered using the heat shrink on the handbrake wire, so the subframe dont rust. but might nok go freely.


IMG_2457_zpsgrc4y5kf.jpg


I learned the hard way, that it was a good idea to heat the pipe brackets so the paint would not crack from low temp. they might have applyed to much paint.


IMG_2463_zpsp29uc8rn.jpg


fitted the new quick rack.... looking forward to try if it has some influence:)


IMG_2466_zpscvf0agpl.jpg


IMG_2468_zpslivstqmm.jpg


Looks good :lol:


and finally it was time to fit the subframes permanently :shifty:


but first i had to do something about this problem i noticed when i trialfitted the rear frame. the damper was slightly too big,and would hit the radius arms.

so i grinded it a tinny bit. to have a ok clearance. the photo is from before.


IMG_2508_zpsavzaejwi.jpg


IMG_2465_zpsar6zilqk.jpg


IMG_2469_zps0mcqynmd.jpg


IMG_2471_zpscqkd6tx7.jpg


IMG_2485_zpszj8qb07a.jpg


IMG_2510_zpsxqxbsrwt.jpg


i know that two 90 degrees is original but liked this better.


IMG_2511_zpspjoj5xlt.jpg


IMG_2512_zpsq0oxlpam.jpg


IMG_2513_zpsf35lxuwr.jpg


IMG_2515_zpscxax1u3o.jpg


IMG_2516_zpsqhunlgpl.jpg


IMG_2517_zps32v8xvgq.jpg


Had to celebrate bit a nice cool drink to this sight !! :shy:


IMG_2518_zps3ylfafks.jpg


then i can finally make the last brake pipe from the T union to the front subframe. :)


IMG_2531_zpsl1dvzqyj.jpg


IMG_2532_zpsojfizuyr.jpg


fits nicely, first try :D and 2 hours spent.


IMG_2533_zpsreqcm39j.jpg


That was all. more to come ... hope you enjoy :)


Edited by Nino, 20 February 2017 - 09:13 PM.


#169 Northernpower

Northernpower

    Mr. 7-Port

  • Members
  • PipPipPipPipPipPipPipPipPip
  • 2,409 posts
  • Name: Graham
  • Location: North Yorkshire (God's County)
  • Local Club: Its out there somewhere

Posted 20 February 2017 - 09:12 PM

Looks great, it's so nice to see a quality build come together.

#170 Nino

Nino

    Mini Mad

  • Members
  • PipPipPipPip
  • 178 posts
  • Location: Jutland

Posted 18 June 2017 - 10:13 AM

Looks great, it's so nice to see a quality build come together.

Thank you. much apperciated :)


#171 Itsaminithing

Itsaminithing

    One Carb Or Two?

  • TMF+ Member
  • PipPipPipPipPipPipPip
  • 851 posts
  • Location: Berkshire
  • Local Club: Not One Worth Mentioning

Posted 19 June 2017 - 11:51 AM

Good to see such attention to detail on this MK3.


Have you found any rivets for the side windows yet?

I think they are 1/8th"x1/8th" semi-tubular, truss head, nickel plated brass.

Only company i could find selling them is a pinball restoration company in America, they don't cost very much -but the postage & insurance costs are crippling!

(believe it or not there is an ancient link between arcade machines & car parts manufacturers! -but i can't remember what it was).


Edited by Itsaminithing, 19 June 2017 - 11:58 AM.


#172 Nino

Nino

    Mini Mad

  • Members
  • PipPipPipPip
  • 178 posts
  • Location: Jutland

Posted 21 June 2017 - 06:25 PM

Good to see such attention to detail on this MK3.


Have you found any rivets for the side windows yet?

I think they are 1/8th"x1/8th" semi-tubular, truss head, nickel plated brass.

Only company i could find selling them is a pinball restoration company in America, they don't cost very much -but the postage & insurance costs are crippling!

(believe it or not there is an ancient link between arcade machines & car parts manufacturers! -but i can't remember what it was).


Many thanks :)


and also huge thanks for the tip about the rivets.


but i acturally ended up with getting some made by my uncle in stainless steel - and the windows are now fitted and working great and most important of all looking soooo shiny :)


here is a photo. - and yes ill soon do a new update.. sorry for being lazy and not updating more often haha :)


IMG_3029_zps5drkxasn.jpg


IMG_3060_zpshyzke4s0.jpg


IMG_3057_zpsubyg3yok.jpg


IMG_3491_zpstppcntcg.jpg


IMG_3492_zpsp5fvhent.jpg


IMG_3490_zpsqthi1klm.jpg


IMG_3506_zpsmfpzdwum.jpg


#173 Petrol

Petrol

    One Carb Or Two?

  • Members
  • PipPipPipPipPipPipPip
  • 967 posts

Posted 23 June 2017 - 09:15 PM

I like this a lot. Mk 3's were the best vintage IMO.

Inner CV's and rod change were great improvement.

Later models had the front subframe rubber mounted and resulted in a loss of steering feel.

Nice build. That GTR looks a bit tasty too  ;D


#174 Sleeping Park Lane

Sleeping Park Lane

    Mini Mad

  • Noobies
  • PipPipPipPip
  • 132 posts
  • Location: Reading

Posted 24 June 2017 - 10:12 AM

Love the work you're doing, car will be amazing when you finish her.

Looking back to 2014 when I first posted on your thread - wow! What a transformation. :)

#175 PaulColeman

PaulColeman

    One Carb Or Two?

  • Members
  • PipPipPipPipPipPipPip
  • 712 posts
  • Location: Bedford

Posted 25 June 2017 - 09:14 AM

If it were mine I'd remove that brake pressure switch in the line and fit an electrical switch to the pedal box. When I restored my Daughter's Mini I didn't and the number of times I followed her only to find her brake lights weren't working was worrying. In the end we pulled the pedal box and modified it to take a switch and now they work every time. Those pressure switches only seemed to last about a month and then fail and I must have replaced it 3 or 4 times (which is a real pain in the a**e as you have to bleed the brakes every time). Whilst you have it apart it's not a big job and it was the best modification I made to the reliability of her car!


Edited by PaulColeman, 25 June 2017 - 09:15 AM.


#176 Nino

Nino

    Mini Mad

  • Members
  • PipPipPipPip
  • 178 posts
  • Location: Jutland

Posted 25 June 2017 - 04:26 PM

Thank you all.


to be honest, i cant tell. i have only driven a mini for a few kilometres, so i dont really have something to compare it to. :)

i just hopes that this one is up to my expetations :)


much apperciated.


the GTR is my mates, its a beast with arond 7 sec. 1/8 of a mile. :D


#177 Nino

Nino

    Mini Mad

  • Members
  • PipPipPipPip
  • 178 posts
  • Location: Jutland

Posted 25 June 2017 - 04:51 PM

Allright, sunday on the sofa, after an awesome GP in Baku, better do another upload, since its been ages. :)


Lets start with the old handbrake.


finally got i dipped and painted.


IMG_2553_zpsn89ena82.jpg


IMG_2555_zpsq8anjk37.jpg


IMG_2556_zpszhubqiq8.jpg


but im having a slight problem with the pins for the handbrake cable, where it fixes to the rear brakes. its too big to slip in the cable. and i dont want to drill up the whole, because then the bracket on the cable will rust. have any of you had this problem. i bougth this one.


IMG_2665_zpslq28qbvs.png


the its the heaters turn.


IMG_2635_zps9hh8jbib.jpg


IMG_2651_zpsemtxv87e.jpg


IMG_2652_zps216qs0kn.jpg


and found a way to do a níce new shiny edge on the panel.


IMG_2644_zpsqofvct2p.jpg


IMG_2648_zpsjc3mfowg.jpg


IMG_2634_zps2p7zcwvu.jpg


IMG_2653_zpsdvyykios.jpg


IMG_2655_zpswnviwjs9.jpg


IMG_2657_zpsyff9gn7f.jpg


IMG_2659_zpsa3e1qs2x.jpg


#178 Nino

Nino

    Mini Mad

  • Members
  • PipPipPipPip
  • 178 posts
  • Location: Jutland

Posted 25 June 2017 - 05:11 PM

In February i went on a little shopping trip. not the more common trip to London, i went to Kent.... :shades: 


IMG_2567_zpsaqwphalr.jpg


IMG_2570_zpsjownkfjb.jpg


IMG_2576_zpseblfbusb.jpg


IMG_2580_zpssmkizmgt.jpg


IMG_2586_zpsqk3lydbb.jpg


lunch time, its mandatory in my book.... :D


IMG_2577_zpshrdppuxp.jpg


out in no where, i found this little beauty in a shop !.


IMG_2572_zpswxtdd3po.jpg


drove by Brands aswell.


IMG_2592_zpsrm112b9u.jpg


IMG_2594_zps6fiqlq9f.jpg


that Weekend was too quickly gone, i just love being in England.


but brought home some parts, just the essentials haha


IMG_2604_zpsicbf6vj0.jpg


#179 Nino

Nino

    Mini Mad

  • Members
  • PipPipPipPip
  • 178 posts
  • Location: Jutland

Posted 25 June 2017 - 05:34 PM

I found an old Lucas Alternator and starter, that i would try to redo my self.


IMG_2752_zpsjynnezxc.jpg


IMG_2754_zpswj9zcvyp.jpg


IMG_2755_zpsnmnk72zy.jpg


IMG_3090_zpskqn8lumu.jpg


IMG_3107_zpsxouobn9w.jpg


IMG_3108_zpsosuotn7g.jpg


One of the long bolts snapped, but found a spare and was lucky enough to weld it out despite the it snapped below in the alloy cast.


IMG_3110_zpschsj5rtm.jpg


IMG_3112_zpsyltyt6j2.jpg


IMG_3117_zps3hamuevh.jpg


IMG_3115_zps2j3gtuag.jpg


IMG_3130_zpscfzimwyi.jpg


IMG_3129_zpsezvheuve.jpg


IMG_3143_zpsqulp94na.jpg


I have for a long time wanted to try wrinkle paint, so figured i would try it on my starter.

the resault came out really good, but i did bake it the be sure.


IMG_3144_zpso7skjuw5.jpg


IMG_3145_zpsn7on4kke.jpg


20 minuts later.


IMG_3148_zpskxe0gyia.jpg


- and yes, i got the clean the oven afterwards ...... haha.


IMG_3149_zpsaiqicj5q.jpg


IMG_3295_zpsgcj49cf1.jpg


IMG_3296_zpsnmoc6iwh.jpg


IMG_3300_zpshtish4eq.jpg


IMG_3321_zpsnfcoj1nc.jpg


IMG_3365_zpswox3m55o.jpg


IMG_3377_zpstr9waot3.jpg


IMG_3379_zps7pti8b23.jpg


all done


IMG_3692_zpsnwuawr1x.jpg


IMG_3691_zpsszf9hpvp.jpg


#180 Nino

Nino

    Mini Mad

  • Members
  • PipPipPipPip
  • 178 posts
  • Location: Jutland

Posted 25 June 2017 - 05:45 PM

While is was at it with the wrinkle paint, i did the wiper motor house and the valve cover aswell.


IMG_3261_zpsavz6wxzs.jpg


IMG_3315_zpsk4s5phal.jpg


i bought a cool oil filler cap on my shopping trip, but i had to turn the neck abit, for the bird to sit even.


IMG_3240_zpsxhfxgtcg.jpg


 IMG_3243_zpsyrk8f5zz.jpg


IMG_3245_zpscfezxdi5.jpg


IMG_3247_zpsz3igv6jl.jpg


perfect :)


IMG_3248_zpsnmzecsri.jpg


IMG_3264_zpsqgcvbqg0.jpg


IMG_3267_zpsy7mxcvze.jpg


IMG_3271_zpsoksfwrk9.jpg


i found a matching colour for my switch panel aswell :)


IMG_3347_zpsnmjanau7.jpg


Also tagged with one or more of these keywords: roundnose

0 user(s) are reading this topic

0 members, 0 guests, 0 anonymous users