
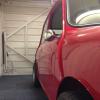
Ruby Two is home


Made up brake & fuel lines


I will remove them and give them a coat of paint before they are fitted for good
Wax oil tonight
Im going to be using an air fed sealey wax oil gun.
Edited by Cookiez, 26 September 2019 - 04:10 PM.
Mini Mad

Posted 11 May 2016 - 07:50 AM
Ruby Two is home
Made up brake & fuel lines
I will remove them and give them a coat of paint before they are fitted for good
Wax oil tonight
Im going to be using an air fed sealey wax oil gun.
Edited by Cookiez, 26 September 2019 - 04:10 PM.
Mini Mad

Posted 11 May 2016 - 07:05 PM
Mini Mad
Posted 12 May 2016 - 09:29 AM
Thanks Nikko, Im just trying to do the best I can with what few skills I have.
It takes me a long time to do some things.
A few more bits that Jack is changing on Ruby Two


The standard shocks, 8.4 disks, Drive flanges and refurbed callipers from Ruby One will be for sale soon if any one wants them.
Saying that I have a big pile of stuff that will be for sale.
Sound deadening fitted back in roof.

Wax Oiled the subframe too last night.
I used an air powered sealey wax oil gun for the first time. What a great bit of kit that is.
Loads better than the pump action one that fits on the wax oil tin.
Edited by Cookiez, 26 September 2019 - 04:12 PM.
Just On Tickover

Posted 13 May 2016 - 12:53 PM
Great project and awesome attention to detail, such a shame about Ruby but Ruby 2 will be better for sure :) Keep up the good work.
Mini Mad
Posted 16 May 2016 - 10:51 AM
Spent most of Saturday cleaning up the engine & box getting it ready to paint
Wheeled Ruby Two outside in the sunshine

Brake & Fuel lines are now painted so we got them fitted
Stainless P Clips and bolts


Next we fitted the rear subframe


Edited by Cookiez, 26 September 2019 - 04:13 PM.
Mini Mad
Posted 17 May 2016 - 08:09 AM
I was fed up with the rubber covers on the radius arms perishing
I found an old silicone hose.
Chopped a slice off and pushed it onto the radius arm instead of the rubber cover
See how long this one lasts
Replaced the nut & washers with stainless ones


Garage Dog came to visit me last night
She was in her usual supervisory role

Edited by Cookiez, 26 September 2019 - 04:14 PM.
I am THE CLAMP MAKER

Posted 17 May 2016 - 08:18 PM
Looks great, liking the silicone hose idea, what diameter is it? Nice supervisor too 
Up Into Fourth

Posted 18 May 2016 - 05:57 AM
This is stunning... this is a perfect build
Speeding Along Now

Posted 18 May 2016 - 08:58 AM
+1 on this! long time since built on a new shell,should remain free of rust for a few years 
like all the mods you have done to make it better.
Super Mini Mad

Posted 18 May 2016 - 06:50 PM
Did you drill holes in the floor for the P clips before going to paint or did you weld in some captive bolts?
Super Mini Mad
Posted 18 May 2016 - 06:50 PM
Looks great by the way 
One Carb Or Two?

Posted 18 May 2016 - 06:52 PM
Mini Mad
Posted 19 May 2016 - 08:34 AM
alex-95, on 17 May 2016 - 9:18 PM, said:
Looks great, liking the silicone hose idea, what diameter is it? Nice supervisor too
Hi Alex
It wasnt a specific bit of silicone pipe, just one I purchased by mistake
The smaller side of the radius arm was easy to get it over.
The larger side was a struggle, but it went on.


minimissions, on 18 May 2016 - 06:57 AM, said:
This is stunning... this is a perfect build
Thank you, It means a lot when other people think what I'm doing is OK
alchall, on 18 May 2016 - 7:50 PM, said:
Did you drill holes in the floor for the P clips before going to paint or did you weld in some captive bolts?
We drilled holes and used stainless clench nuts
Then I welded them on the back, I know its going to the extreme. I have had one come loose and spin on me on the old shell
This was a chance to make sure it didnt happen again
They were all installed before it went to paint. and seam sealed round them.
When it came back from paint they were all tapped out to remove any paint that would cause problems fitting the bolts.
Hope this helps
James_eaton_thewholething, on 18 May 2016 - 7:52 PM, said:
So excited to see this finished, love the paint
Thanks James
The colour looks slightly different from Ruby One
The red is a lot brighter and the white is whiter
On Ruby one the white had a little bit of cream in it.
I supplied the Painter the codes of the original paint
Dunno if its anything to do with it but there is an extra coat of lacquer on Ruby Two
Edited by Cookiez, 26 September 2019 - 04:15 PM.
Super Mini Mad
Posted 19 May 2016 - 05:26 PM
alchall, on 18 May 2016 - 7:50 PM, said:Did you drill holes in the floor for the P clips before going to paint or did you weld in some captive bolts?
We drilled holes and used stainless clench nuts
Then I welded them on the back, I know its going to the extreme. I have had one come loose and spin on me on the old shell
This was a chance to make sure it didnt happen again
They were all installed before it went to paint. and seam sealed round them.
When it came back from paint they were all tapped out to remove any paint that would cause problems fitting the bolts.
Hope this helps
Thanks! that sounds like a neat solution and the result is nice and tidy, where did you get your clench nuts from?
I am THE CLAMP MAKER
Posted 19 May 2016 - 07:17 PM
alex-95, on 17 May 2016 - 9:18 PM, said:Looks great, liking the silicone hose idea, what diameter is it? Nice supervisor too
Hi Alex
It wasnt a specific bit of silicone pipe, just one I purchased by mistake
The smaller side of the radius arm was easy to get it over.
The larger side was a struggle, but it went on.
Ok perfect, I'll get a bit of that, at least it won't perish in a few weeks time.


Projects →
Mini Saloons →
1976 Mini 1000 Le "stripey"Started by cafeclassic , 03 Sep 2025 |
|

|
||
Projects →
Mini Saloons →
Mini Cooper Project - Finally StartsStarted by piphatch , 08 Jan 2025 |
|

|
||
Projects →
Mini Saloons →
1965 Austin Mini Restoration - Canadian Mk1Started by DoubleEh , 14 Nov 2022 |
|

|
||
Projects →
Mini Saloons →
Project Joe - 1991 Mini Mayfair 998Started by Eggers , 02 Jun 2022 |
|

|
||
Projects →
Mini Saloons →
Mpi Dashboad ProblemStarted by mikeprez , 22 Dec 2021 |
|

|
0 members, 0 guests, 0 anonymous users


