Jump to content


Photo
- - - - -

White '93 Sprite Mot Failure

roundnose

  • Please log in to reply
86 replies to this topic

#61 DiscoDarren

DiscoDarren

    Mini Mad

  • Noobies
  • PipPipPipPip
  • 136 posts
  • Location: Billinghay, Lincolnshire

Posted 28 June 2014 - 10:19 AM

Time to bring this up to date, not as much progress as I would of liked tho. Firstly a shot of the finished heelboad, in the daylight as promised.

3577CCEC-F8F9-4889-8091-431035A98177_zps

Next I decided to grab the bull by the horns and make a start on the boot floor. I offered the panel up and traced a line representing the maximum amount I could cut out. The corners were almost rotted through but elsewhere it's really quite good considering the rest of the car. So with this in mind I then marked a cutting line, trying to follow the contours of the panel and remembering the line where the patterned panel seems to fit best. Unfortunately I was so in grossed that I didn't get many photos.

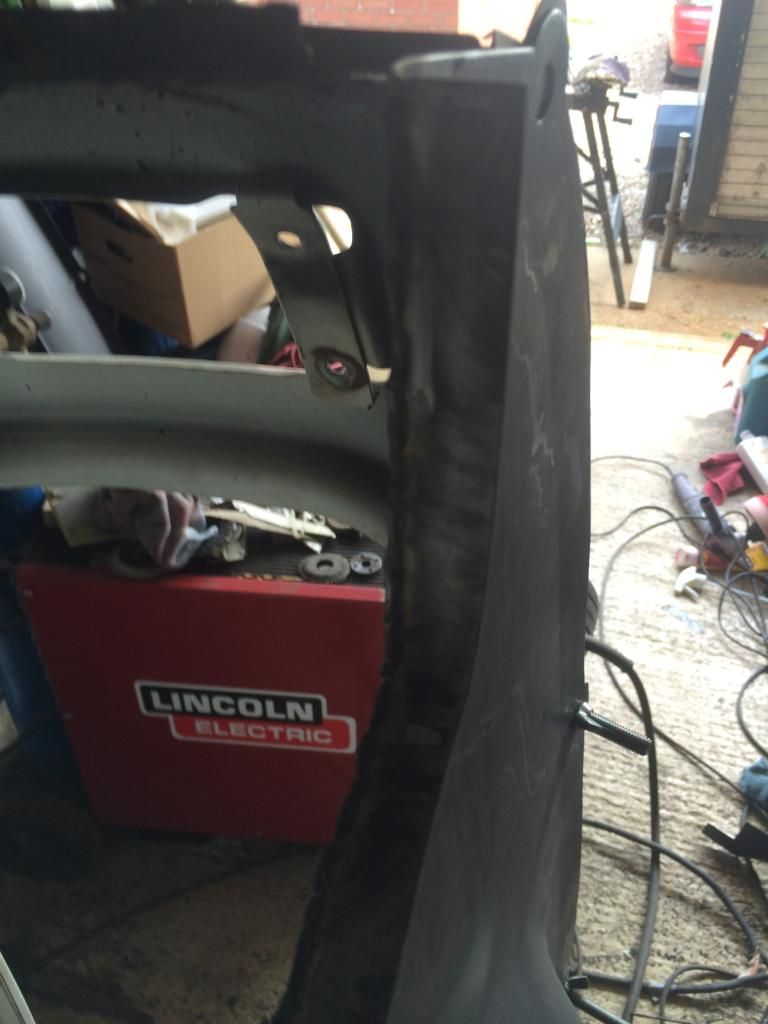
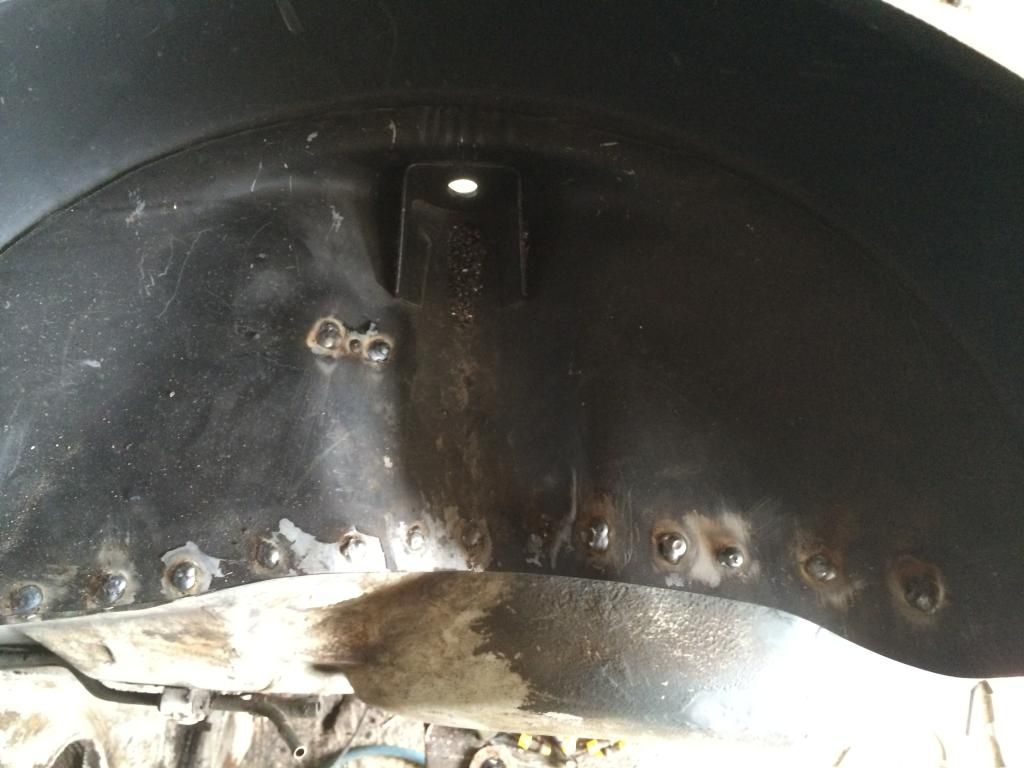
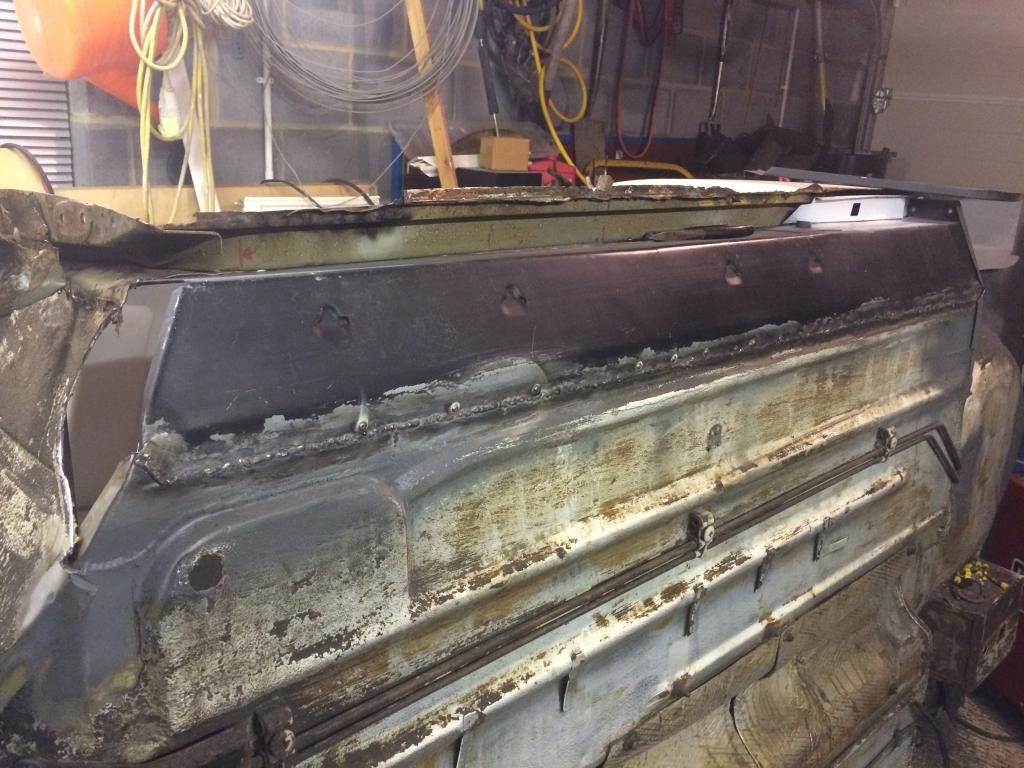
Before I revved up the grinder I decided to unpick all the spot weld along the lip of the boot hinge panel. This turned out to be some of the easiest spots I've done so far on the car. I think largely due to two things, firstly a spot of oil on the tip of the drill bit every now and again, and secondly a tip I picked up reading Bens , recycling the back half of a mini posts, where he drills 3 spots then splits them, drills 3 more and so on. With an old chisel wedged in between the two panels I would drill and the panels virtually popped apart on their own, with just a tap moving the chisel along before drilling the next batch. Might just have been my lucky day, but I got that part done in next to no time.

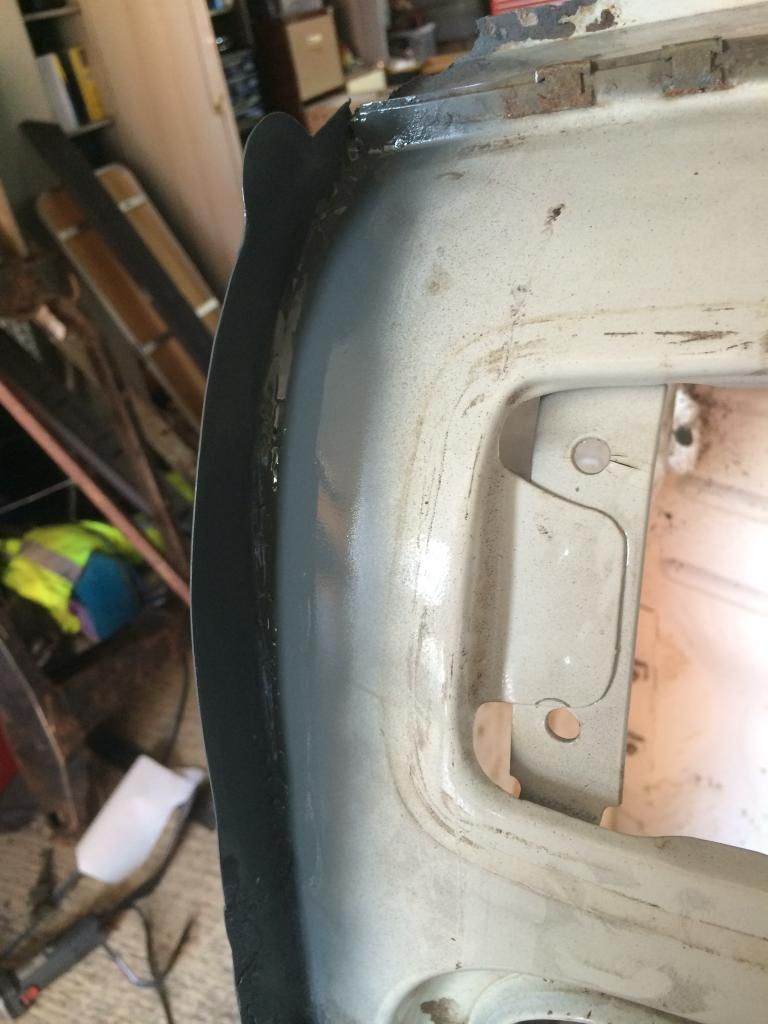
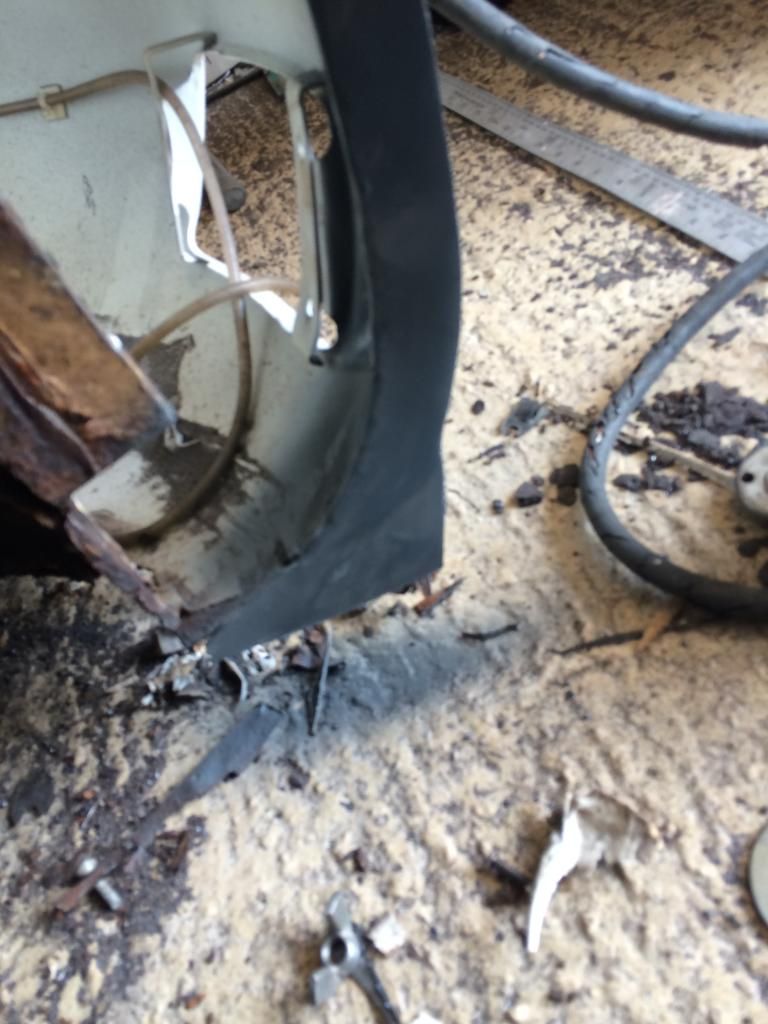
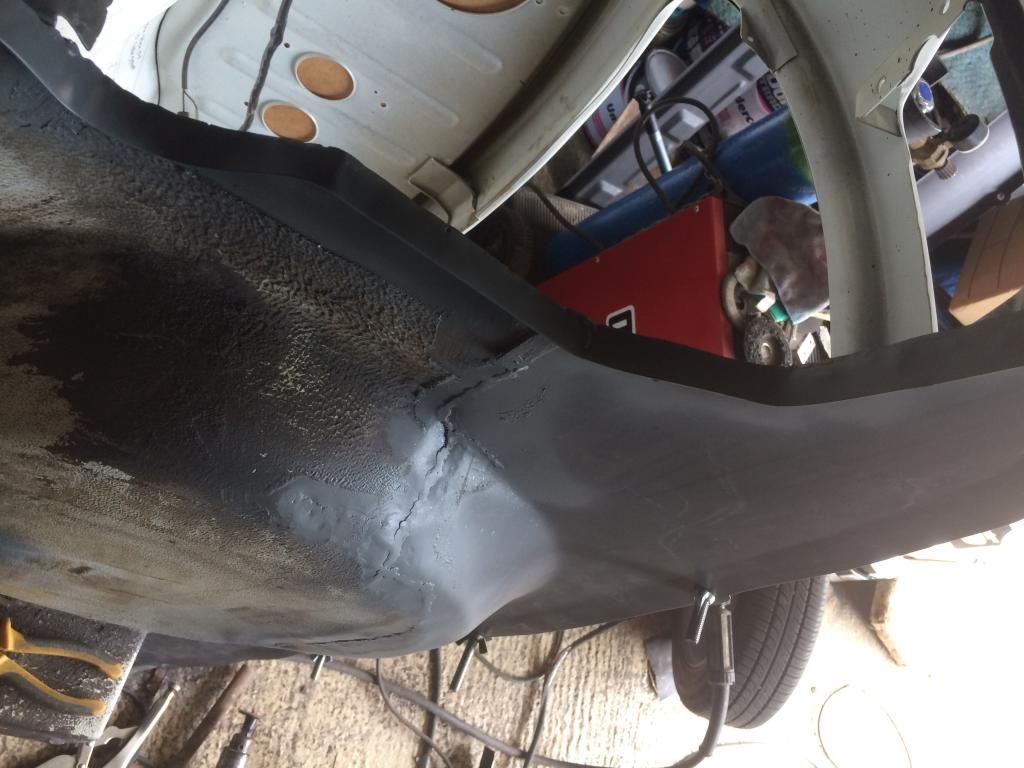
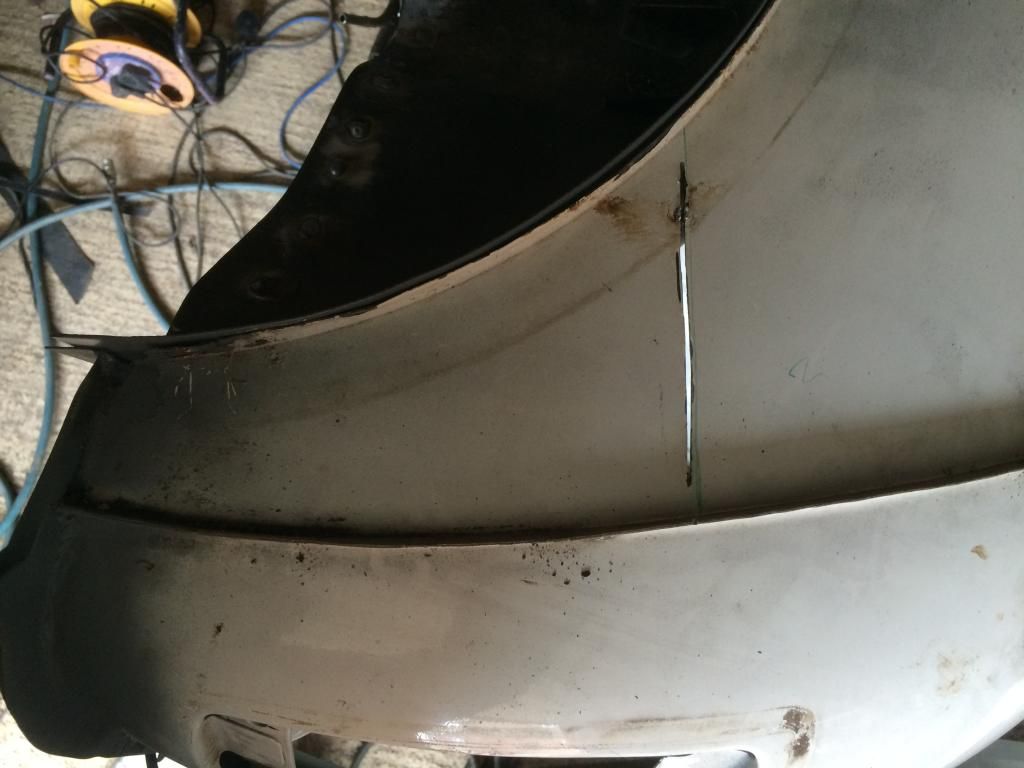
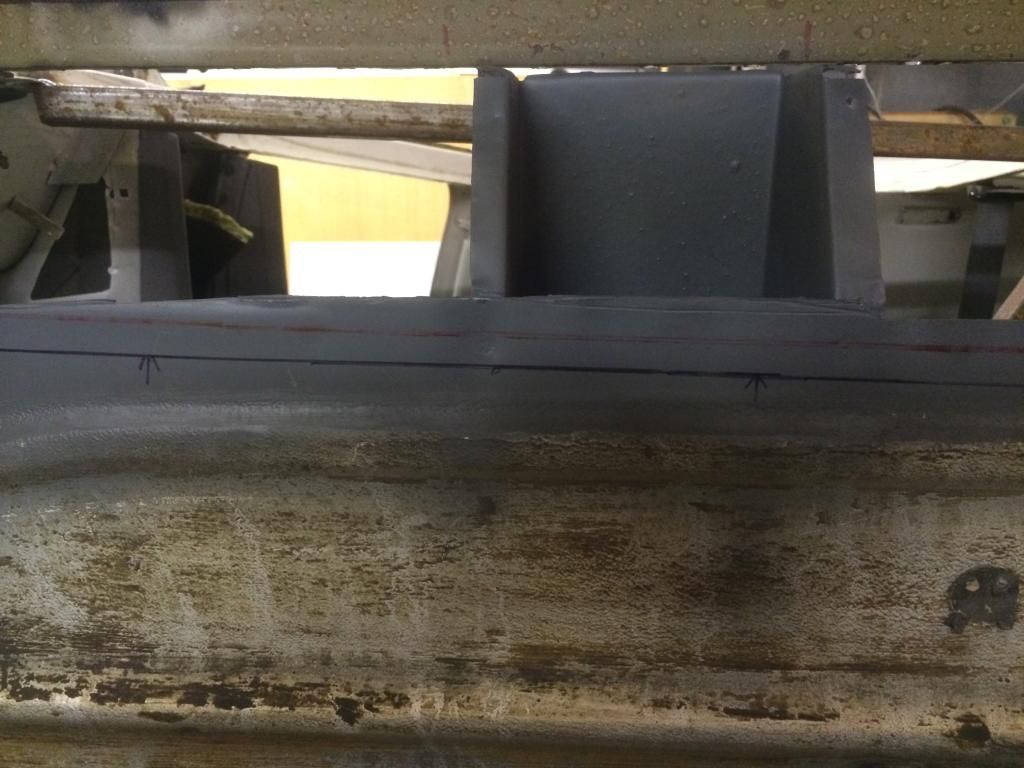
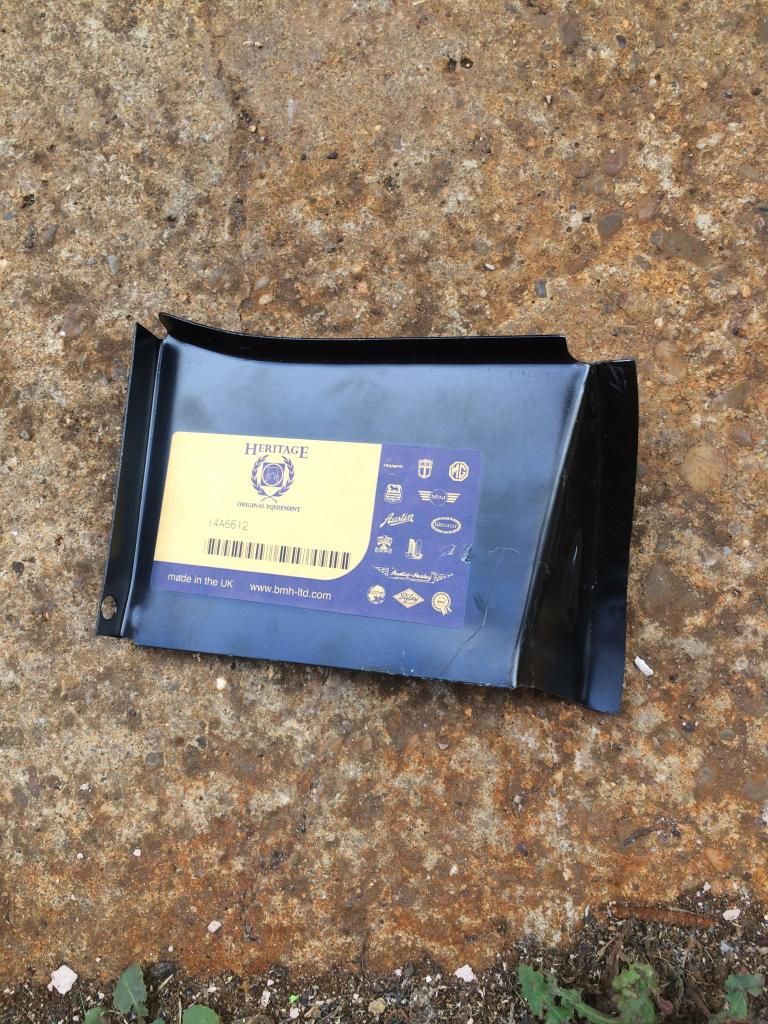
So then I did a cut along the line I'd marked. With the bulk of the rear floor out the way I offered up the repair panel. I tucked it behind the existing floor where I could, I just had to cut a slit near the drivers side subframe stiffener bracket to allow it to fit. Difficult to explain but not really got a picture. I was then able to line the back edge up with the hinge panel and I fastened some bolts through the holes to hold it in place. Here's a picture of the sort of gaps that I'm gonna have to deal with to try and make it fit.

A7C2F954-3AC6-4A87-A135-790B080B2753_zps

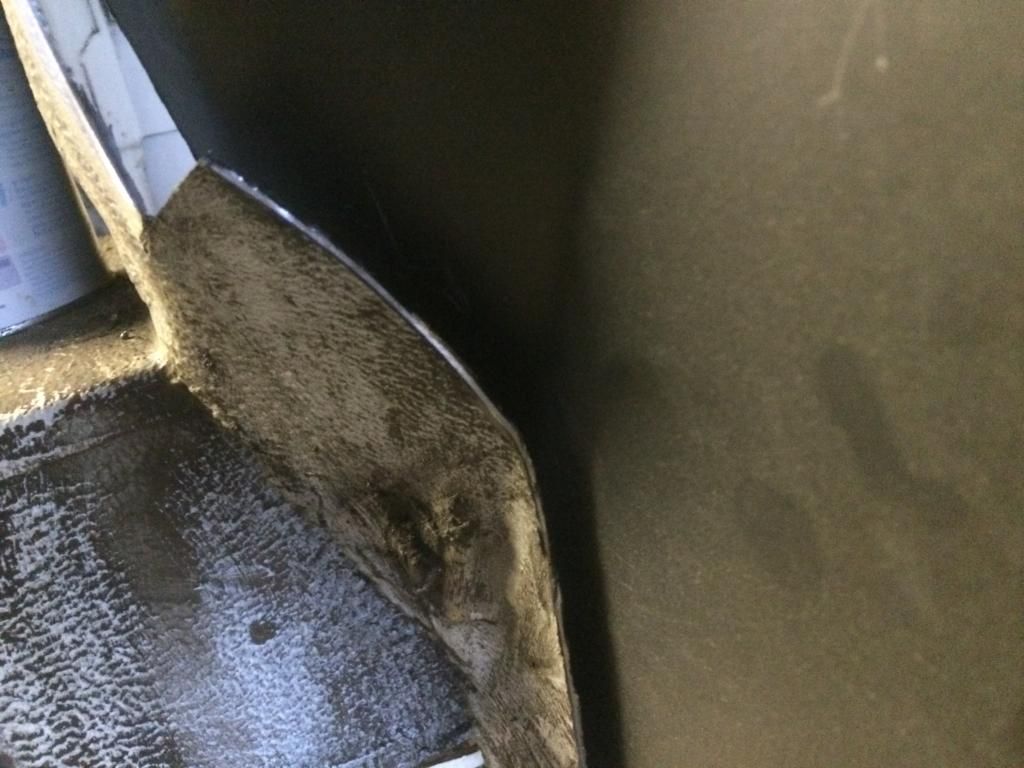
I know it's difficult to make out in the picture, but take my word for it - it's bad!!

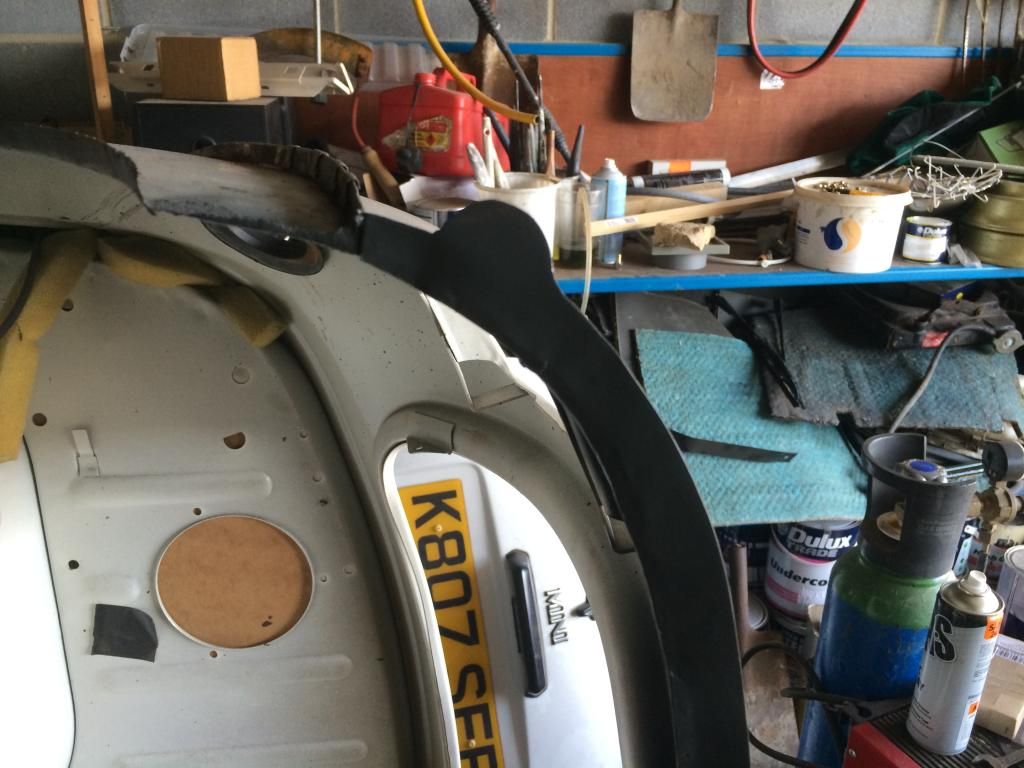
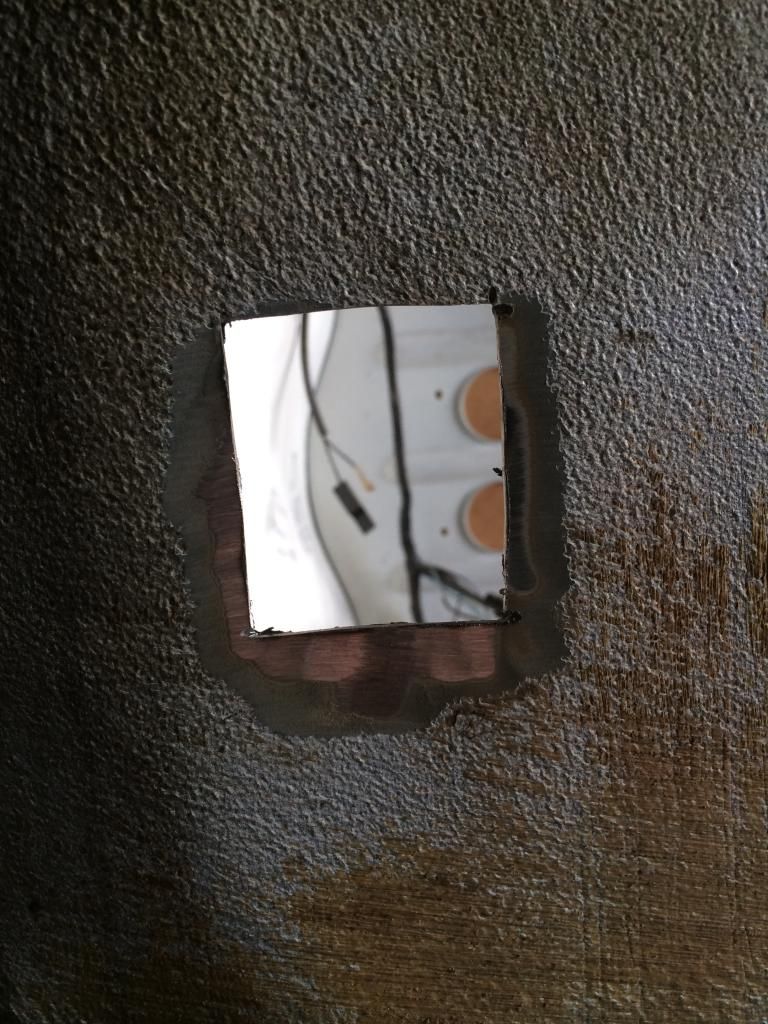
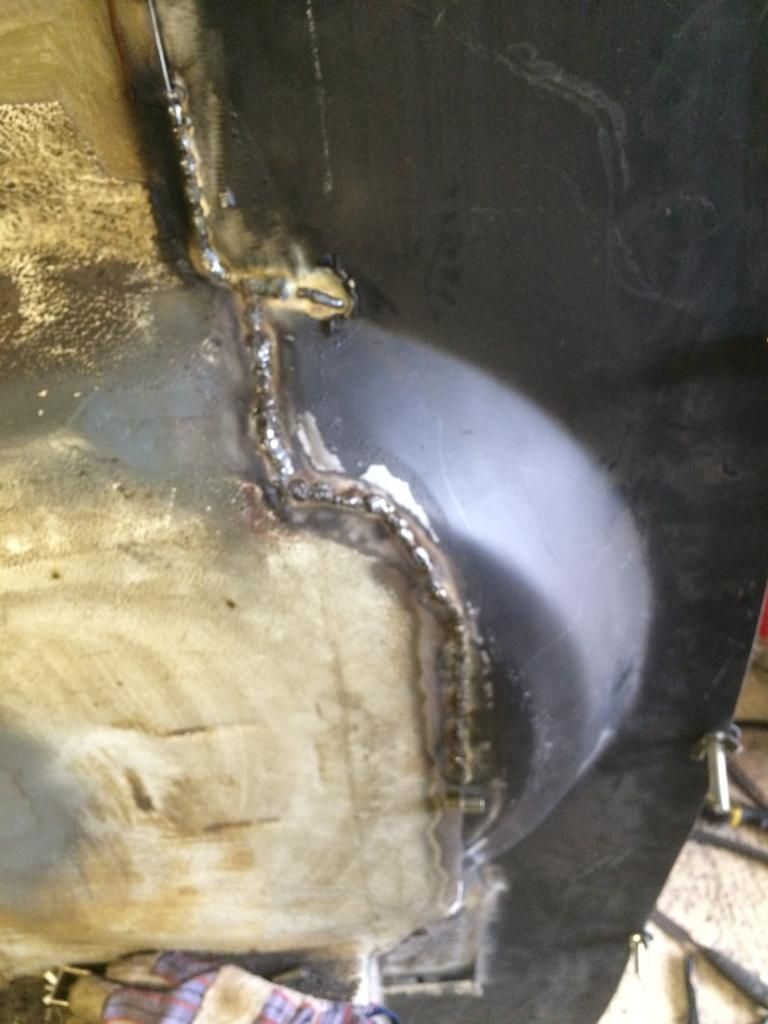
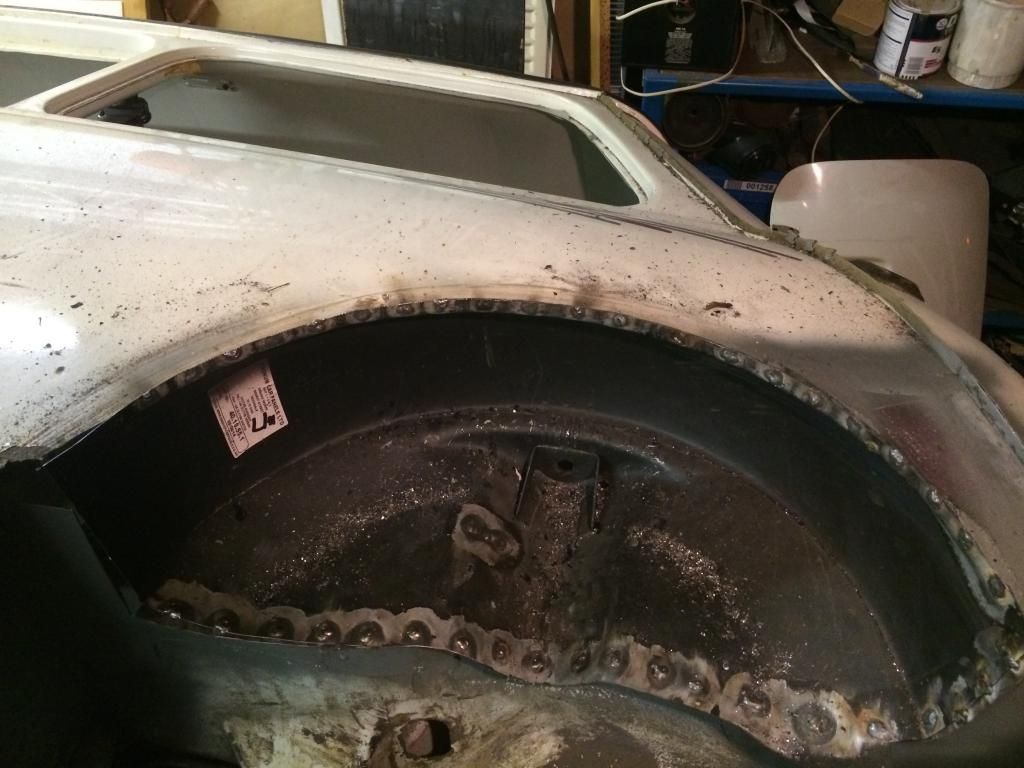
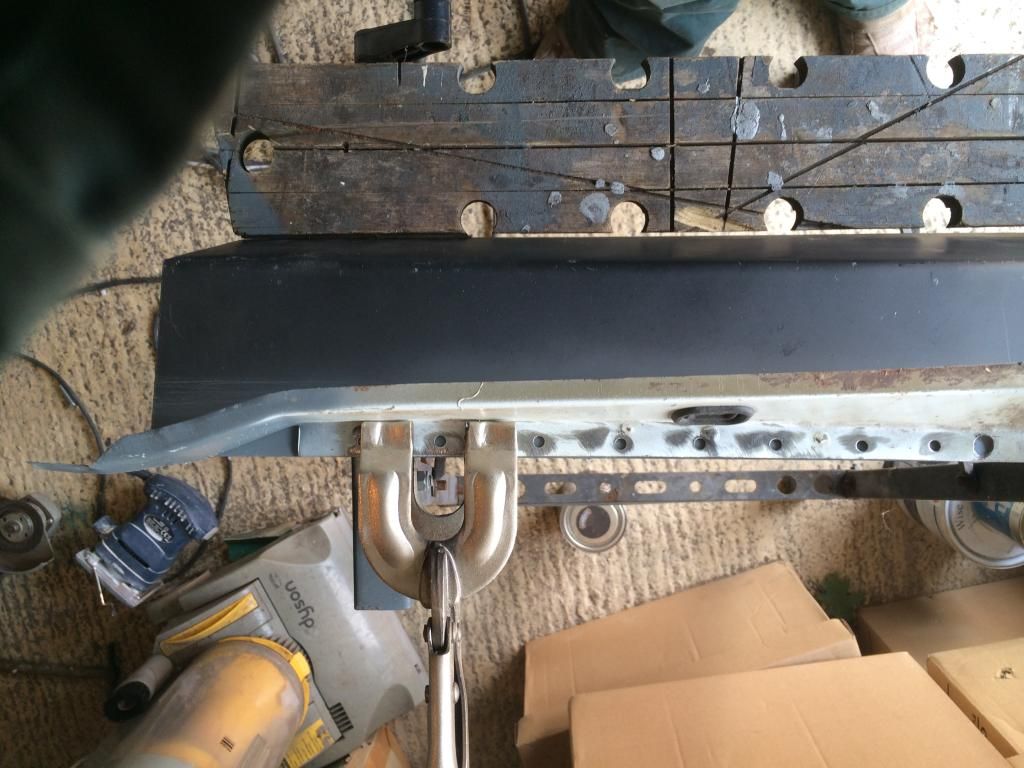
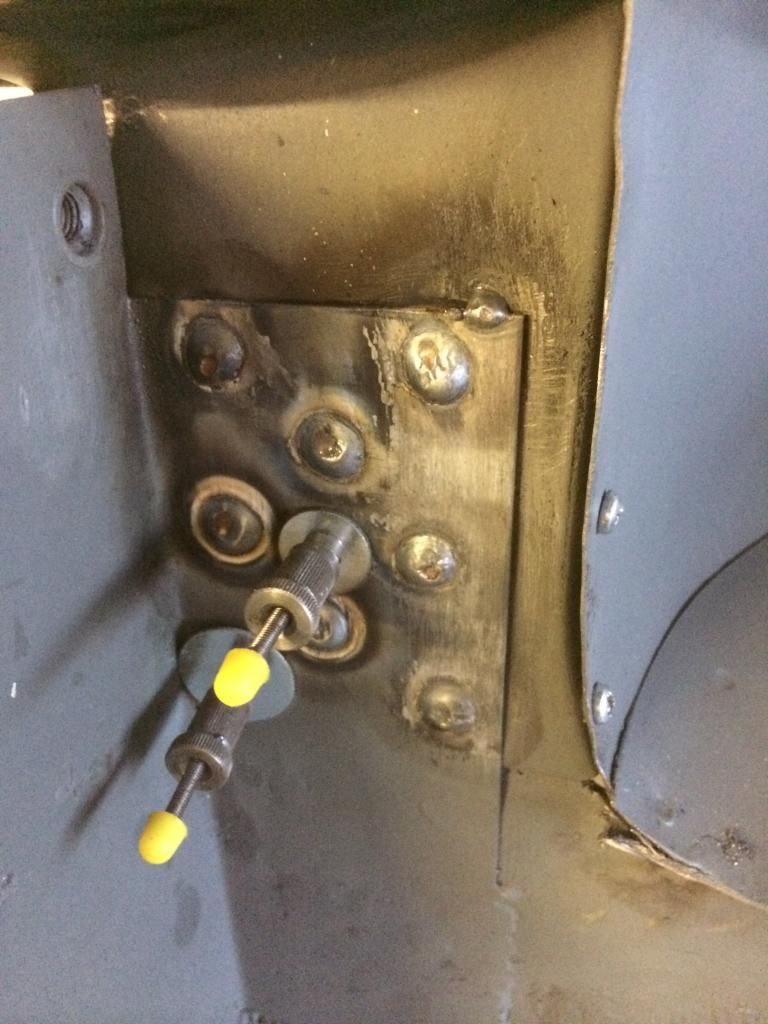
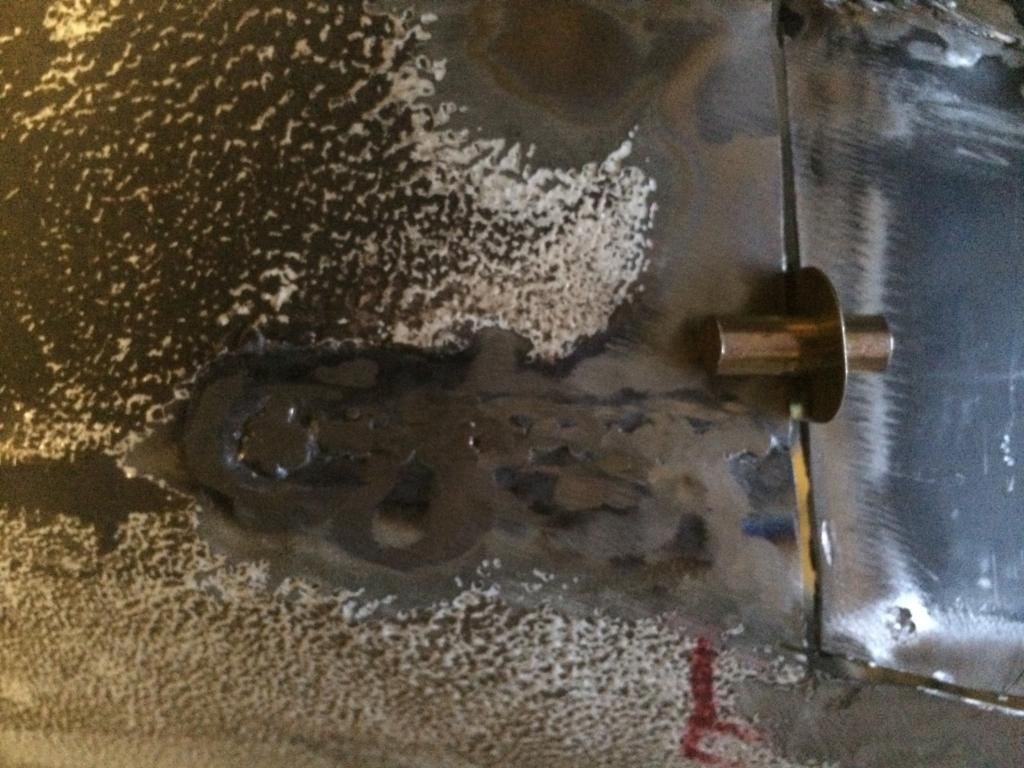
The only way I could think to deal with the ill fitting panel was to make a few nip and tucks here and there, so a ran the cutting disc along one fold and tried to hammer the wheel well into the correct position. It then became clear the depth of the well was different between old and new. So then I cut a v shaped slit along the existing floor, brought the edges back together in the correct alignment and welded it up. Here's a close up of the work in question.

5BB4B584-540B-4F91-B950-6B5539608430_zps

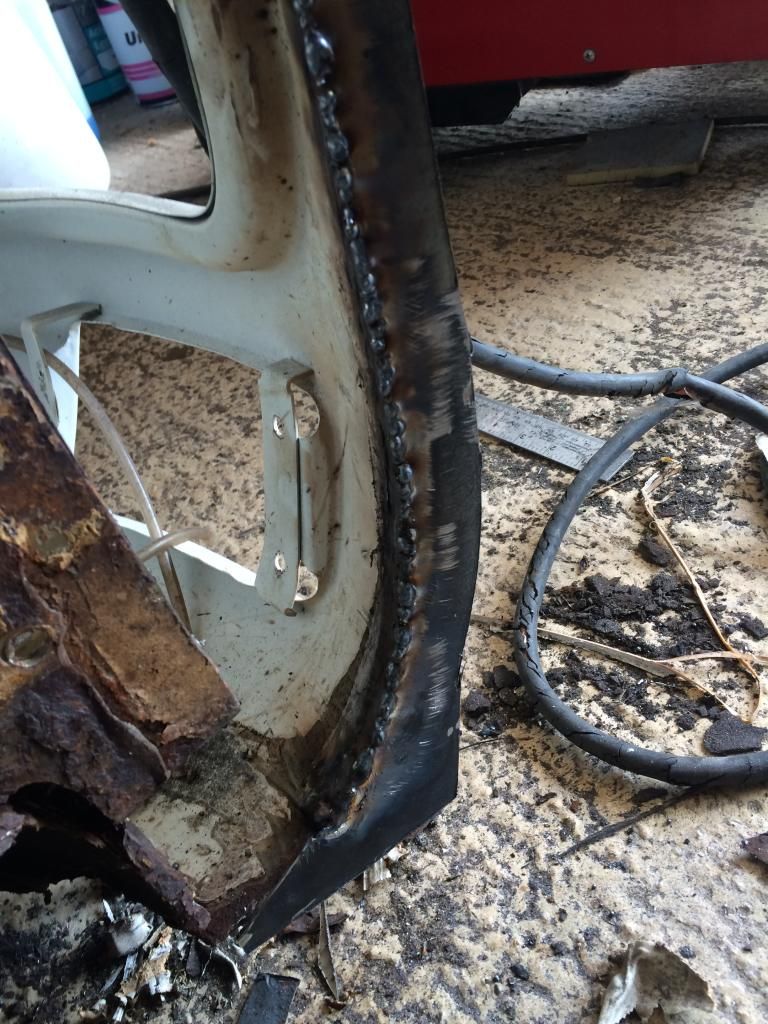
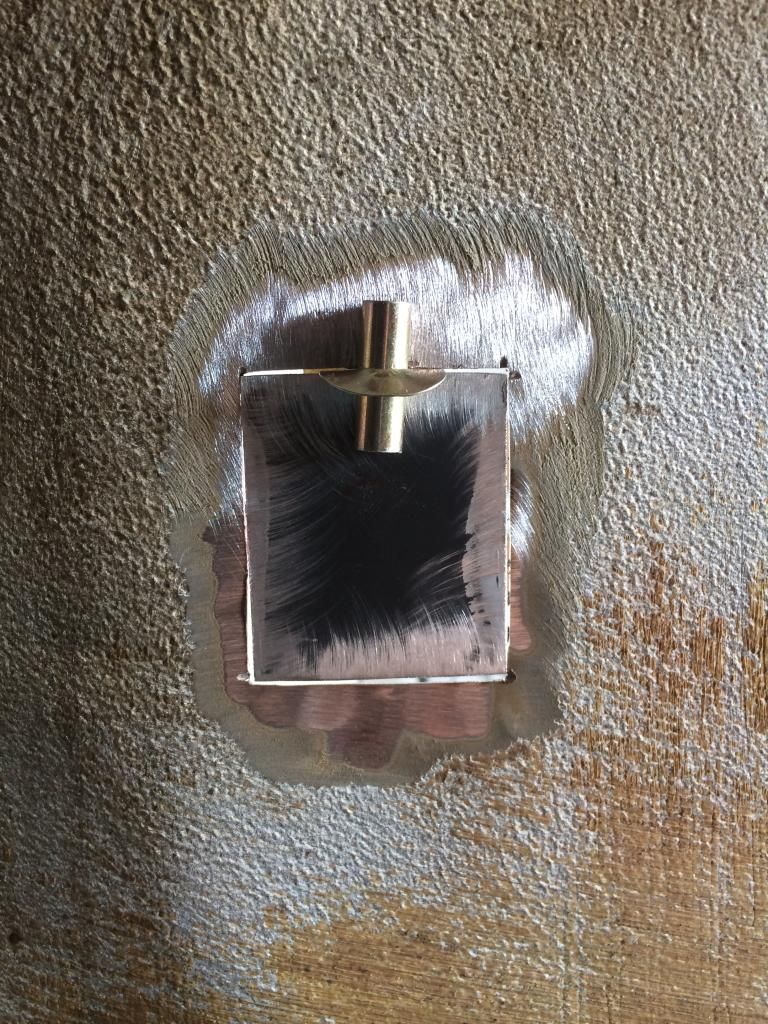
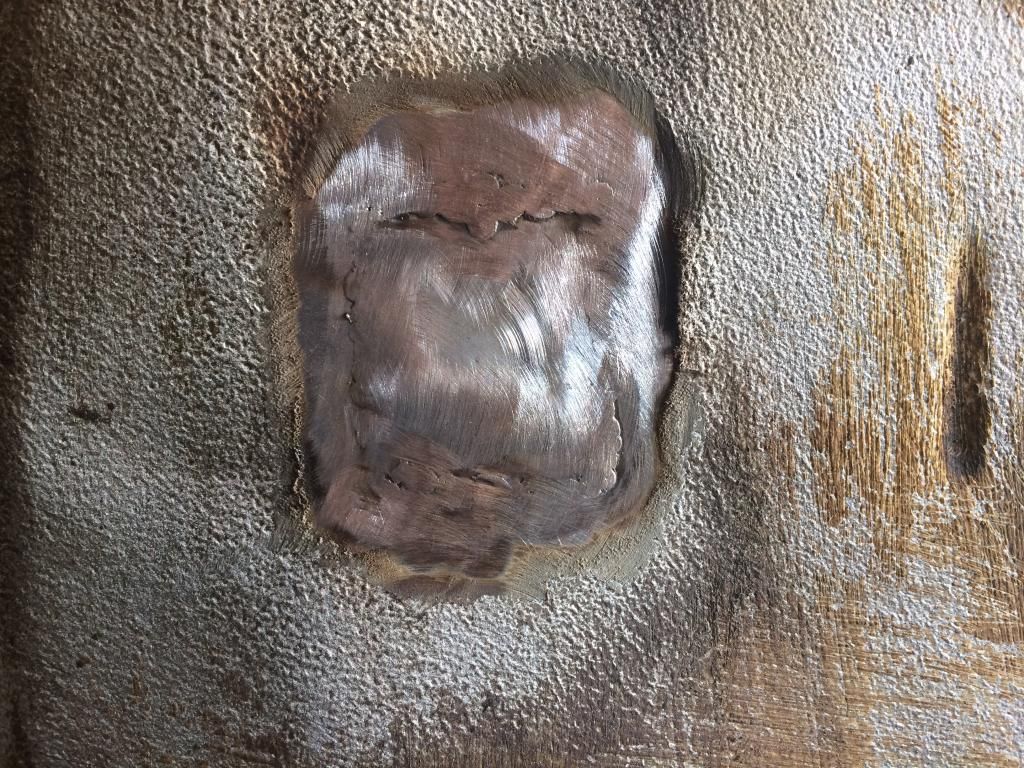
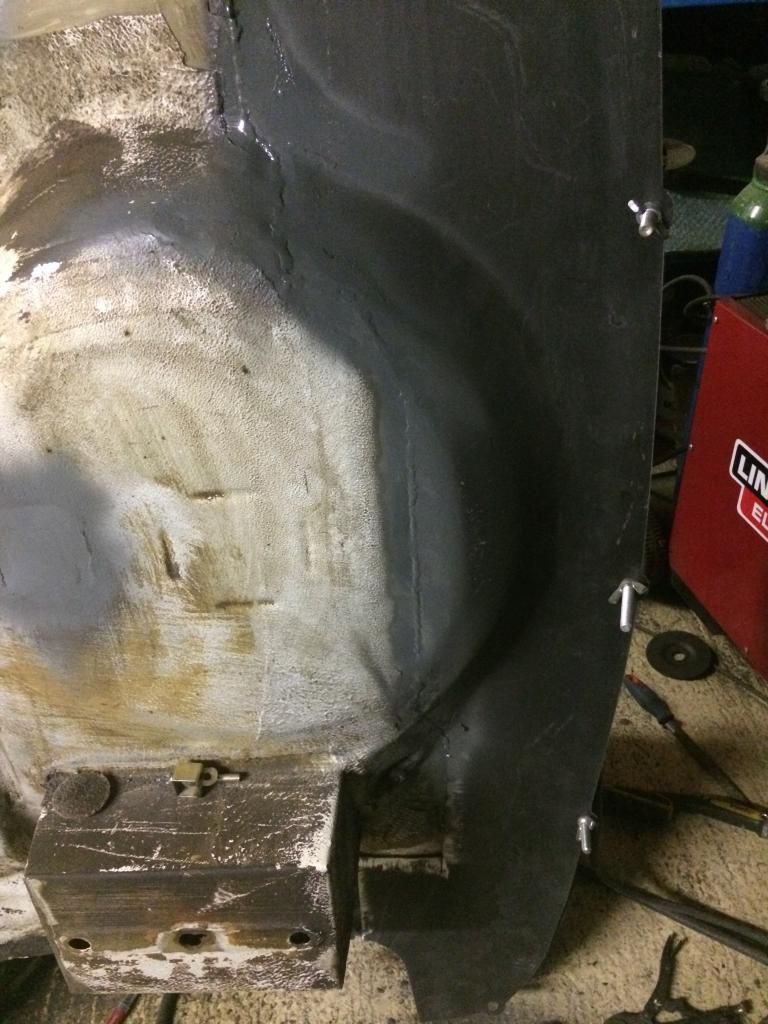
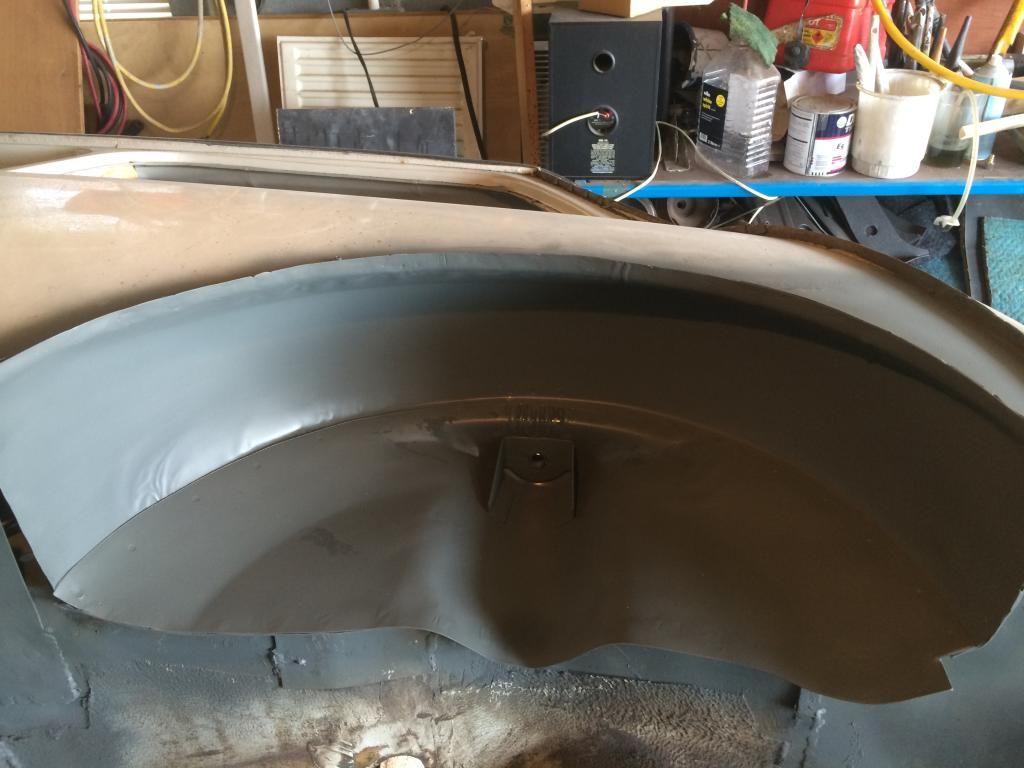
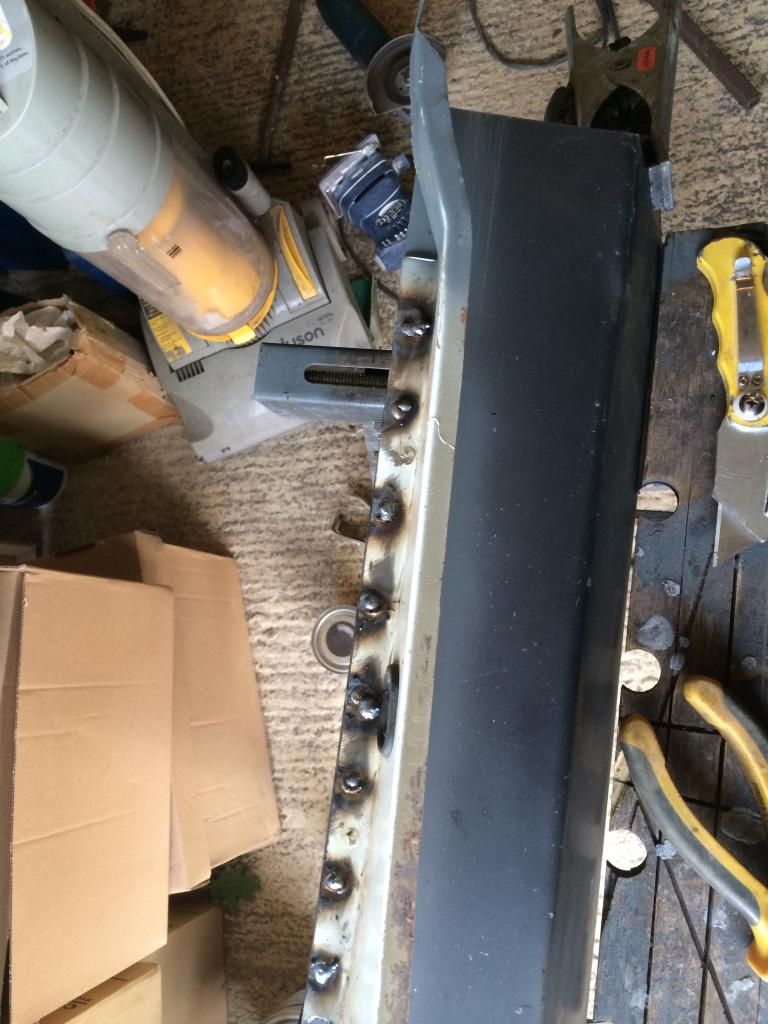
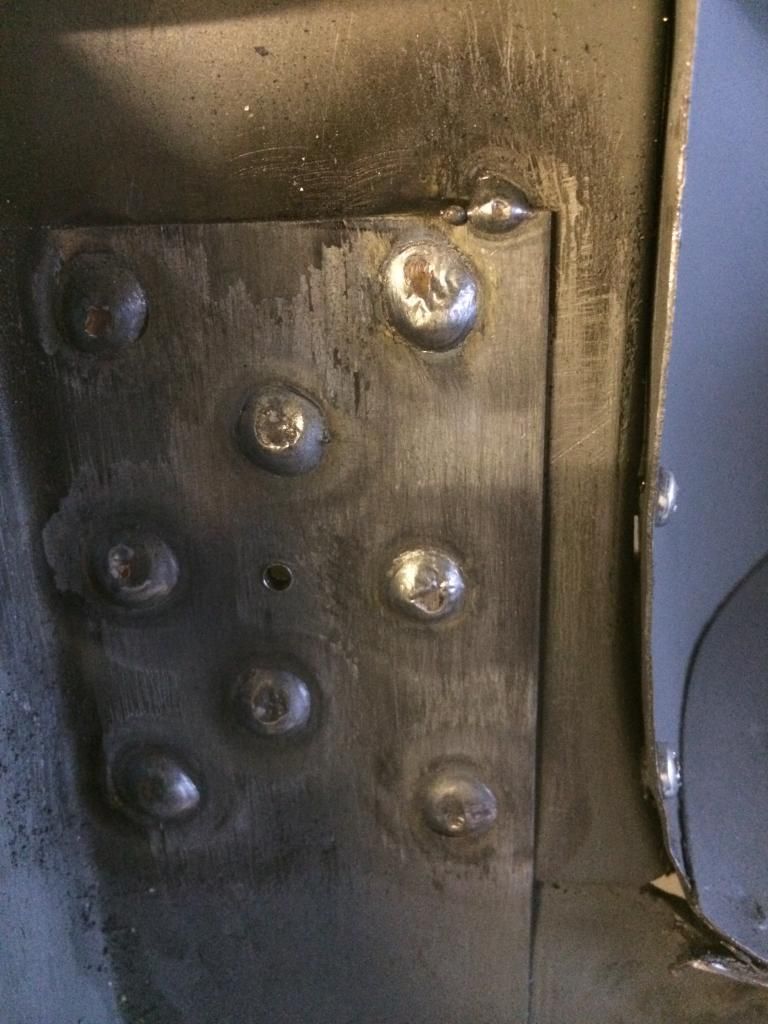
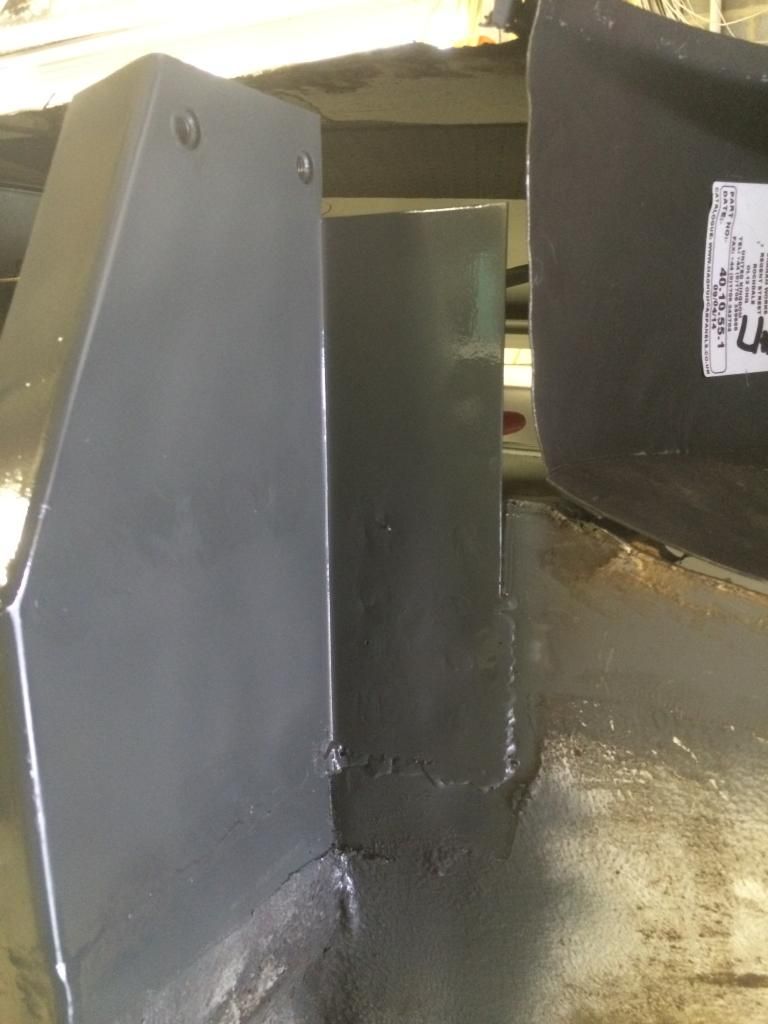
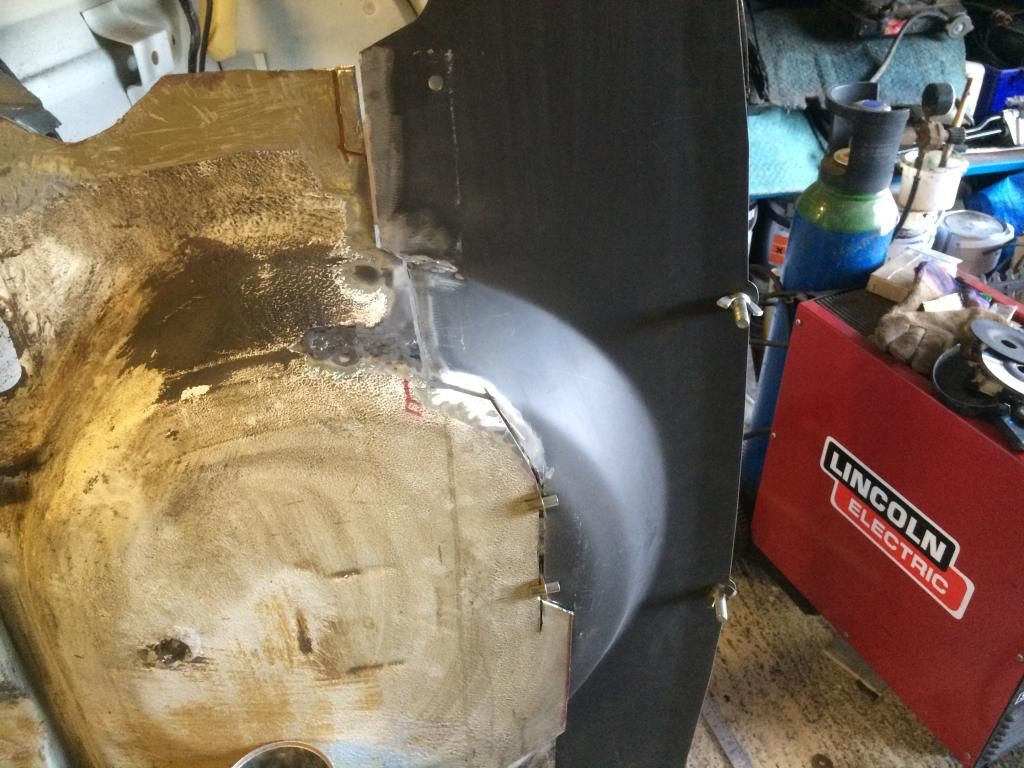
With some of the panel gaps closed up, and the old and new running slightly more true, I took the cutting disc and carefully went through both panels at once. This should leave me with a good line to butt weld. I used a plasma cutting disc, 1mm I think, to try and keep the gap minimal. I should be able to close the gap up a little more once I've got all the way across, with the play that I've got in the bolts holding the rear edge in position. This is how much I've done so far.

5B49FDE7-F797-4AD8-ABE4-BEE02860DC6F_zps

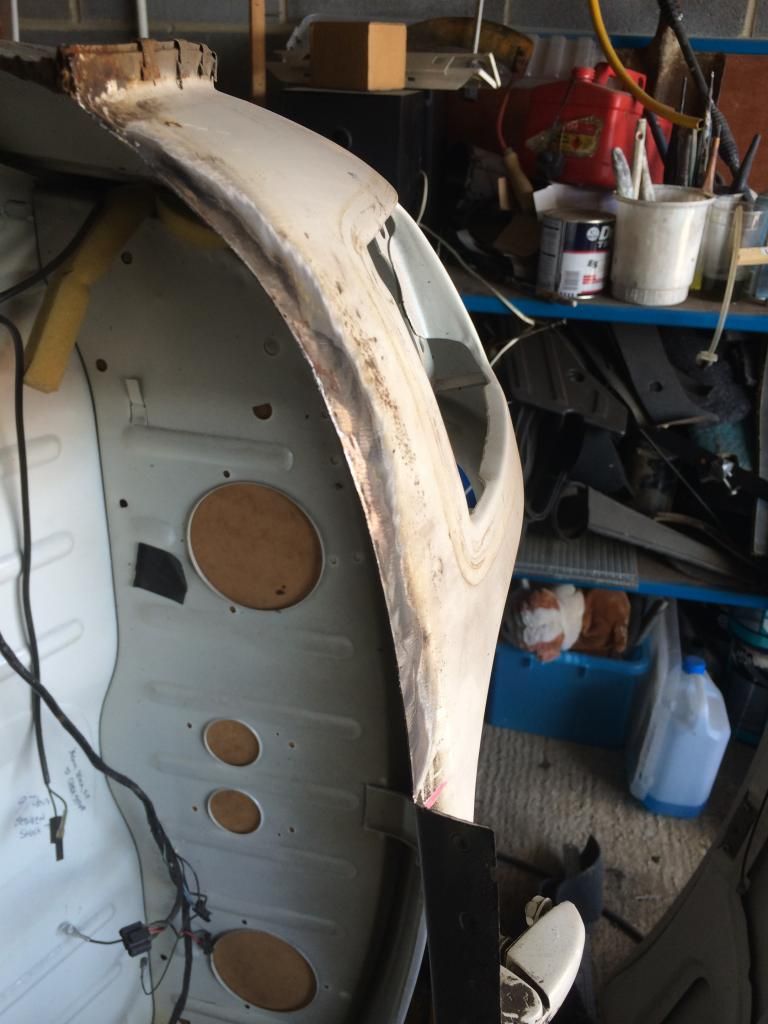
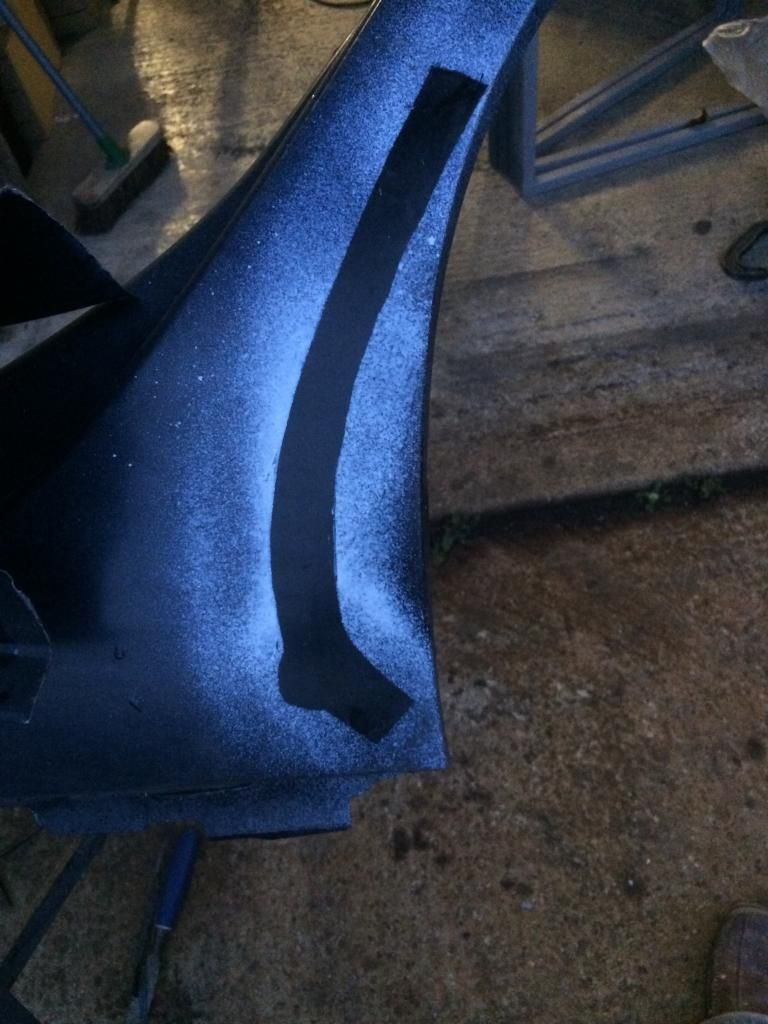
I'm contemplating welding the passenger side up and leaving the other side til I flip the car over. I'm just a bit worried that I may have forgotten to do something and regret it. This did lead me to realise I'm going to have to make a repair to the lip at both ends of the hinge panel. I don't think it's worth getting a new panel tho. So I made a card template and transferred it to metal with a haze of spray to leave a silhouette.

1C9FE521-4120-4BC0-84B2-716C8E2CD00C_zps

I had to leave it there for the night because it was late and I don't think the neighbours appreciate me using the grinder. Hopefully get a bit more done over the weekend.

#62 DiscoDarren

DiscoDarren

    Mini Mad

  • Noobies
  • PipPipPipPip
  • 136 posts
  • Location: Billinghay, Lincolnshire

Posted 28 June 2014 - 10:54 AM

Forgot to mention I managed to blag some material for making patches from, as in the above picture. I called in the garage in the village and spoke to the lads in the body shop. I thought they might have some scrap or accident damage panels in the skip, but ended up coming away with some new stuff that they had surplus to requirements. Bit of a result and thanks again Kev and Tomo. I used to work there in the parts department up until 1996, but I'm sure most garages and body shops have scrap they wouldn't mind giving away, most of them have a soft spot for minis which makes the begging easier. Lol

#63 Ben_O

Ben_O

    Mill Road Garage

  • Paint Doctor
  • PipPipPipPipPipPipPipPipPipPip
  • 9,781 posts
  • Location: Isle of Wight

Posted 28 June 2014 - 03:55 PM

looking good Darren.


Glad my tip helped.


You are right about body shops. The one i worked at always had an overflowing skip full of damaged removed panels. Next time, see if they have any van sides. I was always putting new sides in large vans and tossing the old ones in the skip.


Ben


#64 DiscoDarren

DiscoDarren

    Mini Mad

  • Noobies
  • PipPipPipPip
  • 136 posts
  • Location: Billinghay, Lincolnshire

Posted 08 July 2014 - 11:53 PM

It's about time I brought this up to date again, had a couple of half days and a few evenings last week working on her, so here goes. Got the lip of the passenger side boot hinge panel end trimmed off and cleaned up

BD0B0B43-9B65-45FE-B31B-80A88D638061_zps

Then set about welding on my home made lip

36402DA1-4DDD-47AE-98F3-CD1B37536800_zps

I luckily had a parcel delivered just in time, it was a big bag of various roloc discs I'd ordered. It's the first time I've ever used these but I'm well impressed. Managed to get quite a neat finish both sides.

F55BA132-A1F9-4443-9B74-2767D3FF458D_zps

E57A713E-69C7-4B15-907A-30D7FFAE6894_zps

Then repeated the process for the opposite end of the panel

7329E9CC-3E23-4C41-A3C0-6EF6E40FCF6B_zps

And after a clean up and a spray of zinc primer.....

AD8A16B6-B2C2-498E-AC5F-BC89CB02C33C_zps

I've not bothered trimming this lip back yet, I will do that when the cars flipped over and follow the shape of the boot floor with the cutting disc/grinder.

With these two lips now in place I can press on with the boot floor. Before the rear half repair panel goes in tho I just wanted to sort a patch for where one of the drain plugs had rotted out

CE105BEE-C79F-49BB-8EB2-828481C81DDC_zps

With the rust gone I cut and held in place a repair piece

6370403B-A2A3-4E4E-A6A4-206580D75D97_zps

The finished article

C38CB1E0-1423-46EF-8870-22C1A0712A37_zps

#65 DiscoDarren

DiscoDarren

    Mini Mad

  • Noobies
  • PipPipPipPip
  • 136 posts
  • Location: Billinghay, Lincolnshire

Posted 09 July 2014 - 12:23 AM

Then onto the rear section. I had previously only got about half way across making the cut for the old and new sections of floor to butt up. It was a slow process because of the poor fit of the new panel, but finally got it done. Had to make another "V" cut and tuck in the spare wheel well, but it's not really noticeable. I was careful and managed to leave the drivers side rear subframe mounting bracket firmly in place fastened to the arch tub. Once the floors in I can then drill straight through. Then with loads of clamps to hold the new bit of floor in place I started to weld. Here's a picture before the clean up

DF5A32F2-C018-463D-BD27-CC65C9A780C7_zps

Then after a bit of dressing and a quick spray. As I discussed earlier, I've decided to leave the last little bit till the cars flipped over, when I do the rest of the drivers side repairs

92A93F4B-92F6-4EC1-80A1-E941D4FE8603_zps

That more or less covers the work I got done last week. I had the weekend away at Weston park in Shropshire, our second time at Camper Jam so unfortunately nothing done Friday to Sunday. Was a brilliant show tho, loads of VW's and loads of cider. I wish the mini calendar was as busy as the VW one, there's stuff on most weekends this time of year..

#66 DiscoDarren

DiscoDarren

    Mini Mad

  • Noobies
  • PipPipPipPip
  • 136 posts
  • Location: Billinghay, Lincolnshire

Posted 10 July 2014 - 01:40 AM

After missing a weekend tinkering on the mini I was able to catch up a bit yesterday. With the boot floor in now, I set about replacing the n/s inner wheel arch. But before I could fit the new panel I had to weld on a lip to the floor. I cut a strip of metal about 15mm wide and then tried to figure a way of clamping it in place whilst I welded it. I ended up using a piece of 20mm box section to hold it at 90 deg, with one pair of grips holding the box to the boot floor and another pair hold the strip of new metal in place. It worked a treat. Seemed to take the excess heat away too, which was a bonus. Here's the strip welded in place

97493E93-1354-40F2-BC18-724E2CAC9C90_zps

And then I cleaned up all the welds and gave it a spray of zinc primer

7A943595-3D7F-404B-929F-1D2D0EAFABB2_zps

Was well pleased with how that little bit of fabricating went and it gave me a bit of enthusiasm to get stuck into fitting the wheel arch. I'd been dreading this because, at less then half the price of a heritage panel I knew mine was going to be a poor fit. I was right! The worse thing was that the bottom edge shaping didn't seem right and I was unsure how much of a lip should be at the back edge beneath the boot floor. I put a plee out elsewhere on the forum and after a bit of help and guidance I lined it up as best I could. After a few plug welds and several smacks with a big hammer it looked like this..

18B7112F-4625-4A09-B7E2-0E99140B06BD_zps

The welding looks a bit rough I'm afraid. Not really done any plug welds before. I will get plenty of practice by the time this projects finished tho. I've done a bit of reading up on the subject since and I think where I've been going wrong is starting on the edge and working inward. Will try starting in the middle next time, might not look so lumpy. At this stage I hadn't touched the edge where the arch meets the rear quarter, because I had a lower corner repair to fit first. It might seem wrong doing it this way round but I wanted to get the inner arch in place and lined up against the old panel before I started messing about with it. I marked the panel up an carefully cut out the piece in question.

CBCE0B35-FDC3-4FA3-B3B6-143D403209DD_zps

I drilled out all the spots on the rear seam and test fitted the repair panel. After a touch of filing I was happy with the fit a continued to weld it in place. After a few minutes it was done and I gave it a quick grind before protecting it with zinc primer. I will dress the weld
Better at a later date, but wanted to crack on with the arch. So all that was left was to plug to the quarter around the circumference of the arch. Here's how I left it Tuesday evening, just needs the welds cleaning up and a couple more welds from the inside once the cars back the right way up.

26D0364A-E5F0-4735-BE57-A7FF1E85E026_zps

#67 rooney123

rooney123

    Mini Mad

  • Noobies
  • PipPipPipPip
  • 114 posts
  • Location: lancaster

Posted 10 July 2014 - 11:18 AM

nice progress Darren I'm hoping to get back on mine at the weekend just going though everybody build to give me so motivation keep up good work..................................andy :proud:


#68 Ben_O

Ben_O

    Mill Road Garage

  • Paint Doctor
  • PipPipPipPipPipPipPipPipPipPip
  • 9,781 posts
  • Location: Isle of Wight

Posted 10 July 2014 - 11:35 AM

Thats come out really well Darren  :highfive: 


#69 DiscoDarren

DiscoDarren

    Mini Mad

  • Noobies
  • PipPipPipPip
  • 136 posts
  • Location: Billinghay, Lincolnshire

Posted 10 July 2014 - 03:37 PM

Thanks guys. The forum is what gives me the inspiration when I otherwise wouldn't be bothered. Don't know how much time I'll get in the garage in the coming weeks tho because we're moving house, well sort of. I've got my own place and so has Lisa, but she's selling up to move in at mine. Good news in the long run, because I will be at home all the time instead of half and half. Will be able to shut myself in the garage out the way!! Made some good progress last night tho, so more pics to upload later

#70 Ben_O

Ben_O

    Mill Road Garage

  • Paint Doctor
  • PipPipPipPipPipPipPipPipPipPip
  • 9,781 posts
  • Location: Isle of Wight

Posted 10 July 2014 - 05:32 PM

Congratulations to you both on the Move in.


#71 DiscoDarren

DiscoDarren

    Mini Mad

  • Noobies
  • PipPipPipPip
  • 136 posts
  • Location: Billinghay, Lincolnshire

Posted 11 July 2014 - 01:16 AM

A bit late in the day but it's usually gone midnight before I get a chance to get on here, anyway got some more progress to report to bring this up to date. Firstly on Wednesday I spent what seemed like hours cleaning up my messy plug welds on the n/s arch, but it was worth it I think.

C82C1417-EF73-4094-83BA-49FA77AAF0E0_zps

I'm not entirely sure I've made the right choice but I then decided to make a start fitting the inner sill.....I may live to regret this because I've only just ordered the subframe closing panel, so that's not fitted yet. I was itching to make some progress tho so I started by trimming back the cars floor to leave a 12mm overlap. This being to allow for joggling the edge. Photos are a bit scarce I'm afraid, because I've started to be a bit more careful with my phone since I burnt the case and screen with molten weld. I'm hoping it's just the screen protector but not dared to take it off yet..

E2C28B7A-32AB-4E2D-AF03-CD09E1838DF1_zps

Red line is my cut, and the black line is for the joggle. As you can see the crossmember presents a problem, but I notched a bit out, back to my black line, where the cross member flanges were. The only other bit I couldn't joggle was the bit parallel to the companion bin. The first reason being the flange of the bin was in the way, and secondly because I had chopped too much out when I had original removed the old inner sill. It only just meets the new panel to butt weld a join. I will make sure I don't do that again on the other side off the car!

Next I recycled the closing panel from my old sill and clamped it in place on the new one

DC45EEEA-95FD-46DF-8114-68CEB4294475_zps

Then welded it up

247BB8F7-9342-44B4-B646-9CA4B755DDA7_zps

You can't really see on the pictures but I have been cleaning off all the e coat and zinc priming all the seams prior to welding. Then just scratching it off where the plug weld is. In the case of the closing panel pictured above, I gave it a couple of coats of paint after I'd done the welding. I don't think i will be able to get to it to spray once it's fitted.

With the new sill now in place I started the welding. I had drilled some holes through both panels and used skin pins to hold it in place. I soon realised this was a mistake tho, as the plastic began to melt from the heat of welding. I ended up taking them out and using self tappers, far from ideal but all I could think of. I need to get some all metal fasteners that will stand the heat. Even with the self tappers I found the panel weren't really clamped together tight enough, so it tended to burn through the top panel instead of making a joint. I ended up turning my welder down to the lowest setting and did beads about a inch at a time. I laid the weld down from right to left in the inch long stitches, but started at the left hand side and progressed to the right. I guess it's similar to Friday nights walk home from the pub, 2 steps forward an 1 back. Lol. Anyway a mate recommended trying it to help spread the heat, and it did seem to work. I also had a damp cloth steaming away laid on the sill. There is a bit of distorting but I think is more to do with the poor clamping issues I had. I will hopefully be able to make a tidier job of the other side because I'd just about perfected the technique when I got to the bit where I had to butt weld instead of my joggled part.

This presented some problems too, again some lessons learnt that will hopefully make the other side easier. I struggled to use my intergrips because the joint was more or less in line with the first flute in the floor. This could of been avoided if I had only thought. Also the gap was a bit wide in places so I had to bridge It with weld. It doesn't look too pretty and there's going to be loads of extra grinding to tidy it up but it's done now. Just needs plugging to the heel board and the door step (once the new ones fitted). Here's what it looks like so far.

0AB47A69-14D1-4F18-B6FA-2C314CB140FB_zps

I need to get some grinding discs so I can dress it up and then get some paint on it too. Got a busy couple of days preparing for this Saturdays gigs tho so I don't know when that will happen. All I managed to do tonight was tidy the garage floor and sweep it out, was getting a bit of a health hazard tho. Hopefully will have a bit more progress to report soon, but that's it for now. Thanks for reading

#72 DiscoDarren

DiscoDarren

    Mini Mad

  • Noobies
  • PipPipPipPip
  • 136 posts
  • Location: Billinghay, Lincolnshire

Posted 15 July 2014 - 09:59 PM

Had some more bits arrive today. A pair of subframe closing panels and a pair of rear valance closers c/w the subframe mount. Was lucky because my budgets tight so I'd ordered none genuine, but the subframe closing panels were delivered as heritage ones.

5D064C39-1861-423E-BA48-C33D7DA6AA3F_zps

I had to post a picture because it's probably the only heritage panels I will use. I was worried that I might struggle to fit it tho, because I was impatient and had already fitted the inner sill. Had a bit of a trail fit, and with a bit of wriggling I managed to get it in place - result!

I've still not had a chance to get any grinding discs, but I used the remainder of the old ones I had, and a couple of cutting discs to tidy up the inner sill weld from last week. Took absolutely ages, I hope as my welding gets better the grinding gets less.

Next on to my new panels. I removed the e coat and zinc primed the n/s subframe closing panel. Then after a bit of a struggle I managed to get it clamped into place. I wasn't very pleased with first attempt at plug welding so I was determined to get it clamped tightly. Was well worthy the extra effort I think.

46030ACF-876A-4571-888B-DC3BEB5C823A_zps

With the clamps out and the final welds done.

8468295E-3B8E-487F-9C0C-A707B7338295_zps

That's all I managed to get done tonight, but I'm pleased with the little bit of progress I have made. Still got a couple of bits to seam weld up on this but shouldn't take long. I think the next job will be to temp fit the rear subframe so I can line up the rear valance closing panel. Hopefully that will be one night later this week.

#73 SAL 821X

SAL 821X

    Camshaft & Stage Two Head

  • Members
  • PipPipPipPipPipPipPipPip
  • 1,890 posts
  • Location: Hinckley
  • Local Club: Leicester Mini Owners Club

Posted 17 July 2014 - 08:29 AM

Great project Darren.


Looks like you wont have any problems when you get round to the van. 


If your not buying gen panels speak to M-Machine, I've found that they produce some really good pattern panels themselves.


http://www.m-machine.co.uk/


If you spend 5quid on a TMF+ membership you even get a discount with them.


#74 MrElliott

MrElliott

    Speeding Along Now

  • Members
  • PipPipPipPipPip
  • 419 posts
  • Location: Surrey
  • Local Club: Box Hill Mini Club

Posted 17 July 2014 - 10:07 AM

great skills you are showing off there! wish my welds were as clean as that to start off with


#75 DiscoDarren

DiscoDarren

    Mini Mad

  • Noobies
  • PipPipPipPip
  • 136 posts
  • Location: Billinghay, Lincolnshire

Posted 17 July 2014 - 11:37 PM

Great project Darren.
 
Looks like you wont have any problems when you get round to the van. 
 
If your not buying gen panels speak to M-Machine, I've found that they produce some really good pattern panels themselves.
 
http://www.m-machine.co.uk/
 
If you spend 5quid on a TMF+ membership you even get a discount with them.


Thanks.....I'm really looking forward to doing the van once this is finished. I keep hearing/reading really good reports on the m machine panels and the excellent service they offer, not had any dealings with them yet tho.

With regard to the forum discounts, I keep meaning to become a proper paid up member on here, just not got round to it. I've certainly had my money's worth, don't know where I'd be without the help and info I've got from the forum


Also tagged with one or more of these keywords: roundnose

0 user(s) are reading this topic

0 members, 0 guests, 0 anonymous users