Thanks for the kind comments.
I'd like to hope it'll make a tad over standard hp maybe 175 ish. We will have to see.
As for the final drive, I believe it's the 4.4. I have read up on these and contemplated changing it before fitting the engine. after reading some posts I decided to just give it a go. Seems some people love the standard Honda ratios and some hate them. All depends on where you'll be driving it I guess. As mines not going to be any everyday car, and motorway cruising will be kept to a minimum I just thought I'd suck it and see.


1973 B18C4 Clubman Weekender
Started by
jamus
, Jul 13 2016 09:49 PM
73 replies to this topic
#47

jamus
-
- Noobies
-

- 44 posts
On The Road
- Location: Telford
Posted 14 January 2017 - 02:31 PM
Another update coming soon.
Just a quick one though. I've done a good search on various forums and the net but can't seem to find a definitive answer.
Piping my my rad up and not sure where to plumb this to??
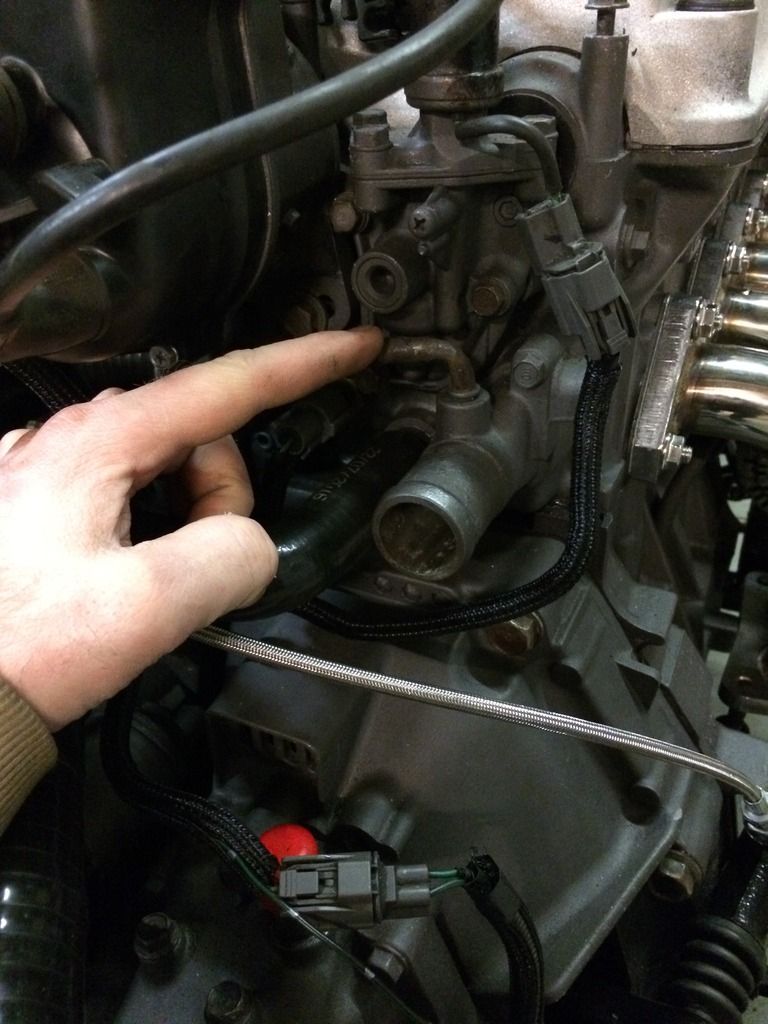
It seemed to fit into a ridged pipe on the Honda which then connects to others. But as I don't have any way of connecting into the other pipes I'm stumped.
Any help much appreciated.
#48
Sleepy Stu
-

- TMF+ Member
-
- 2,564 posts
formerly Stewart_GT
- Location: Worcestershire
Posted 18 January 2017 - 10:47 PM
I don't have that take off on mine so you should be fine just to block it off!
#49
jamus
-
- Noobies
-
- 44 posts
On The Road
- Location: Telford
Posted 21 January 2017 - 11:27 PM
Thanks Stu. Just blocked it off for now.
I'm wanting to order the parts for my exhaust this weekend and just wondered what other people are running??
I've done my research and found the optimum for my engine is 2.5", but from people's experience what's the noise level like? Do you fit a middle box or just straight through?
I do quite like that 'ricer' sound rather than a deep drone. So I'm aiming for this.
Jamie.
#50
Sleepy Stu
-
- TMF+ Member
-
- 2,564 posts
formerly Stewart_GT
- Location: Worcestershire
Posted 24 January 2017 - 06:54 PM
I'm also looking at exhausts at the moment. You gonna make it yourself or get one made?
#51
jamus
-
- Noobies
-
- 44 posts
On The Road
- Location: Telford
Posted 24 January 2017 - 09:17 PM
Making my self Stu.
Ordered the parts on the weekend.
Going for a stainless 2 1/4" system with a single rear box. Using a flexible from my headers to get around the gear linkage, straight pipe to a centre universal silencer. Using some V band flanges/clamps. Shouldn't be too difficult I'm hoping.
But then again, when's anything easy on a bloody mini!! Ha
#52
Sleepy Stu
-
- TMF+ Member
-
- 2,564 posts
formerly Stewart_GT
- Location: Worcestershire
Posted 25 January 2017 - 10:03 PM
Sounds good lots of pics please!! Where you buying the bits from?
Making my self Stu.
Ordered the parts on the weekend.
Going for a stainless 2 1/4" system with a single rear box. Using a flexible from my headers to get around the gear linkage, straight pipe to a centre universal silencer. Using some V band flanges/clamps. Shouldn't be too difficult I'm hoping.
But then again, when's anything easy on a bloody mini!! Ha
Edited by Sleepy Stu, 25 January 2017 - 10:03 PM.
#53
jamus
-
- Noobies
-
- 44 posts
On The Road
- Location: Telford
Posted 26 January 2017 - 09:02 PM
Wil do Stu.
Items such as the flexible pipe, silencer and flanges from good old eBay. And 2m of stainless tube from a company called jpexhausts. Cheapest on the net I could find with delivery etc.
Items such as the flexible pipe, silencer and flanges from good old eBay. And 2m of stainless tube from a company called jpexhausts. Cheapest on the net I could find with delivery etc.
Edited by jamus, 26 January 2017 - 09:04 PM.
#54
jamus
-
- Noobies
-
- 44 posts
On The Road
- Location: Telford
Posted 14 February 2017 - 04:34 PM
Been very busy on the car.
Easier to let the pictures do the talking.
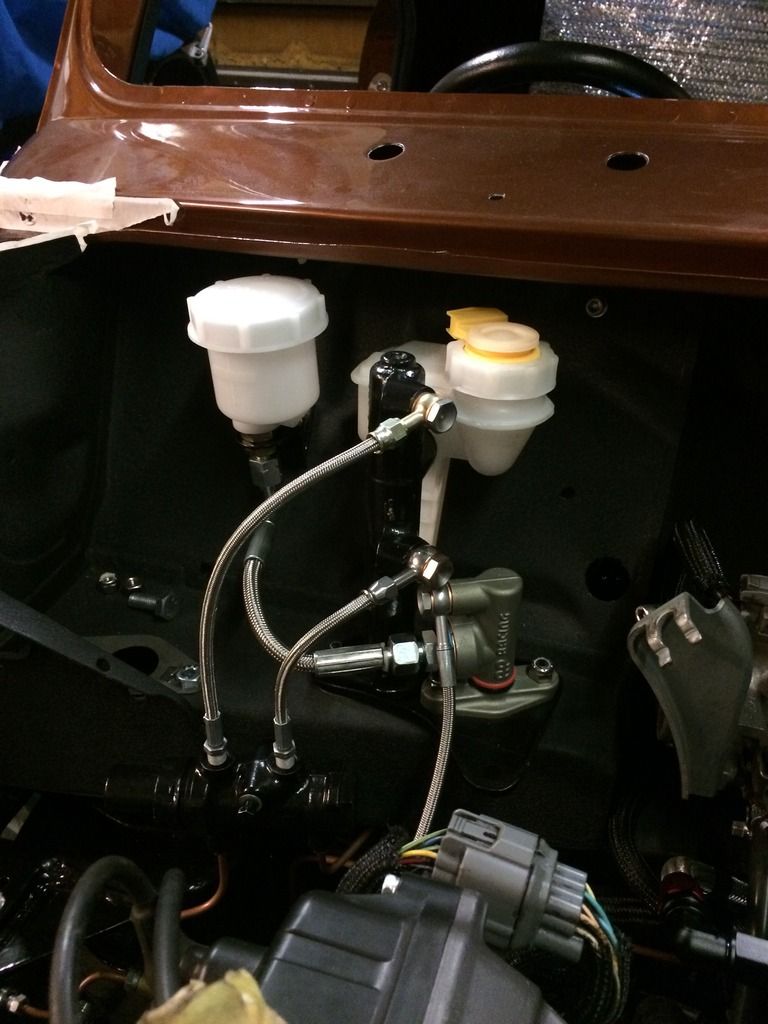
Rad all plumbed in.
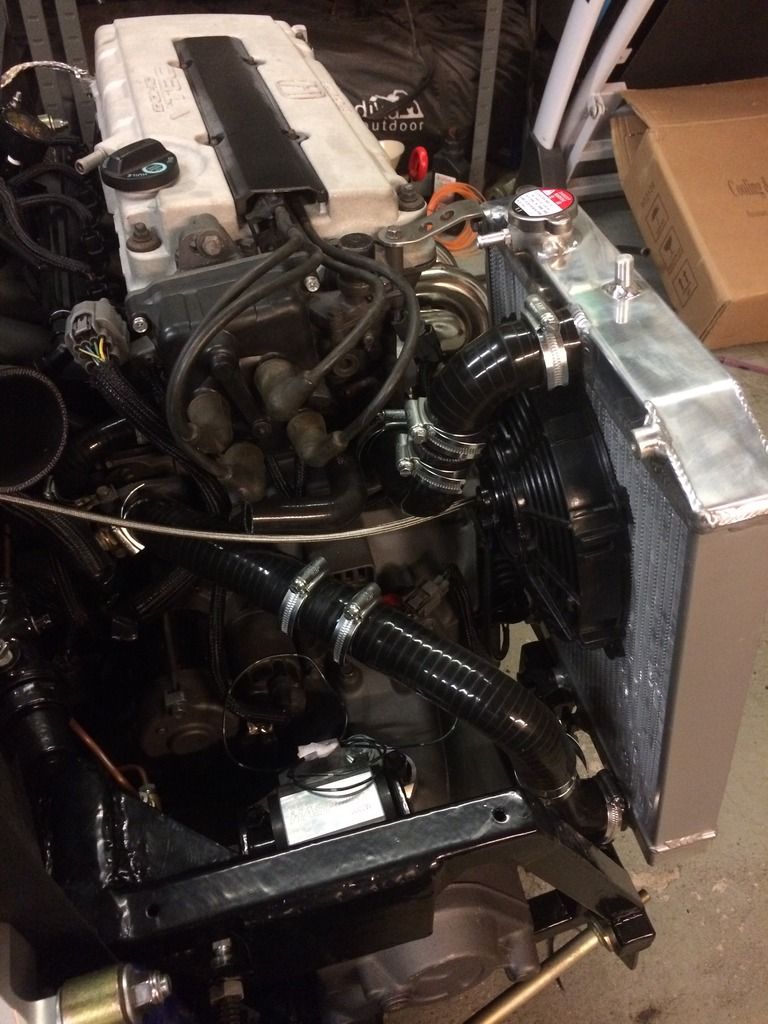
Checked position of rad with front on.
Made a top mount up to hold the rad in position but wasn't happy so made another out of stainless. Will have to revise this again as I have it ridged mounted to the frame, and ridged mounted to the engine which just isn't going to last.
Brake and clutch lines made up. Using a ap racing 14mm master.
Changed out the rusty studs for some nice stainless ones.
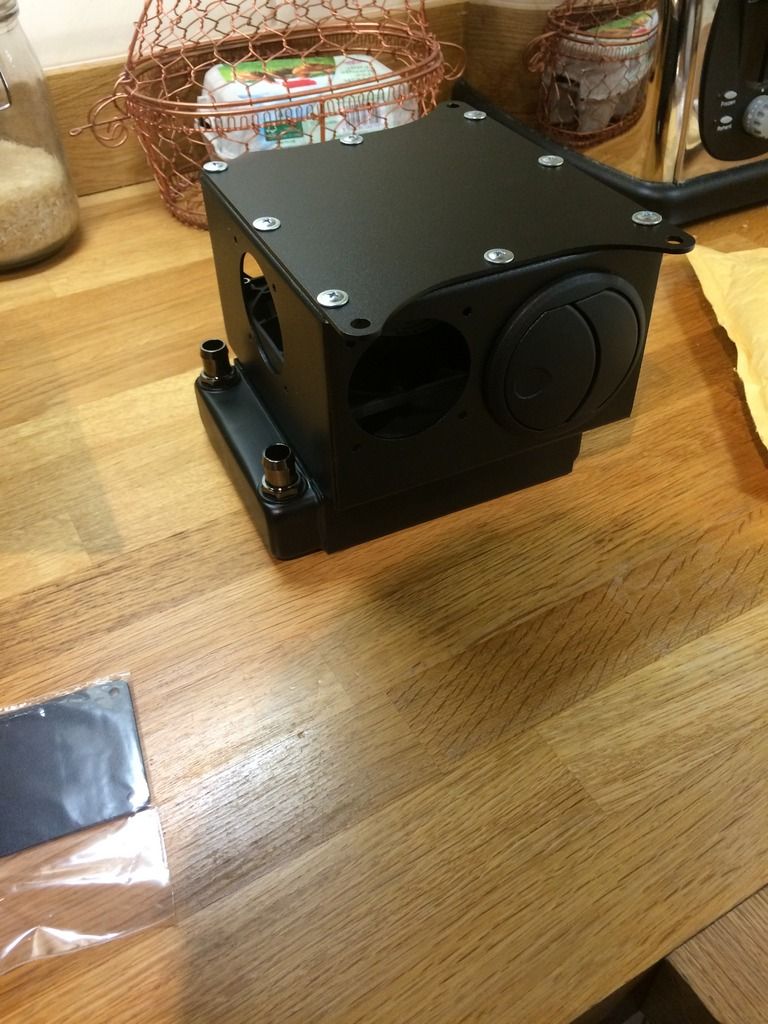
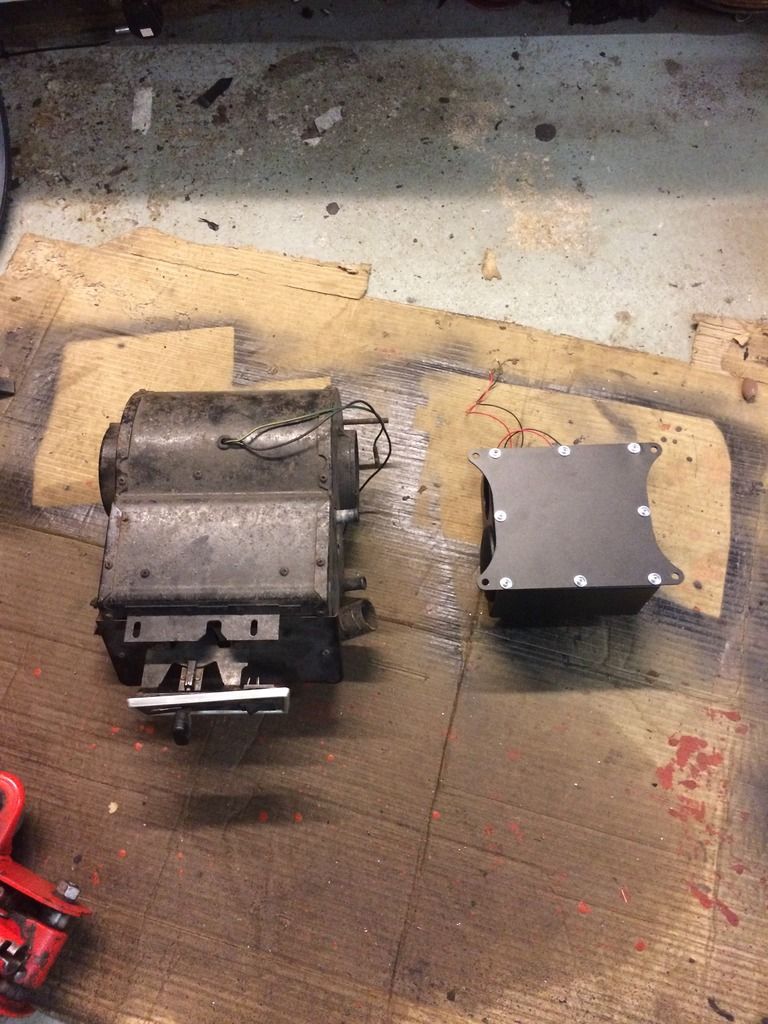
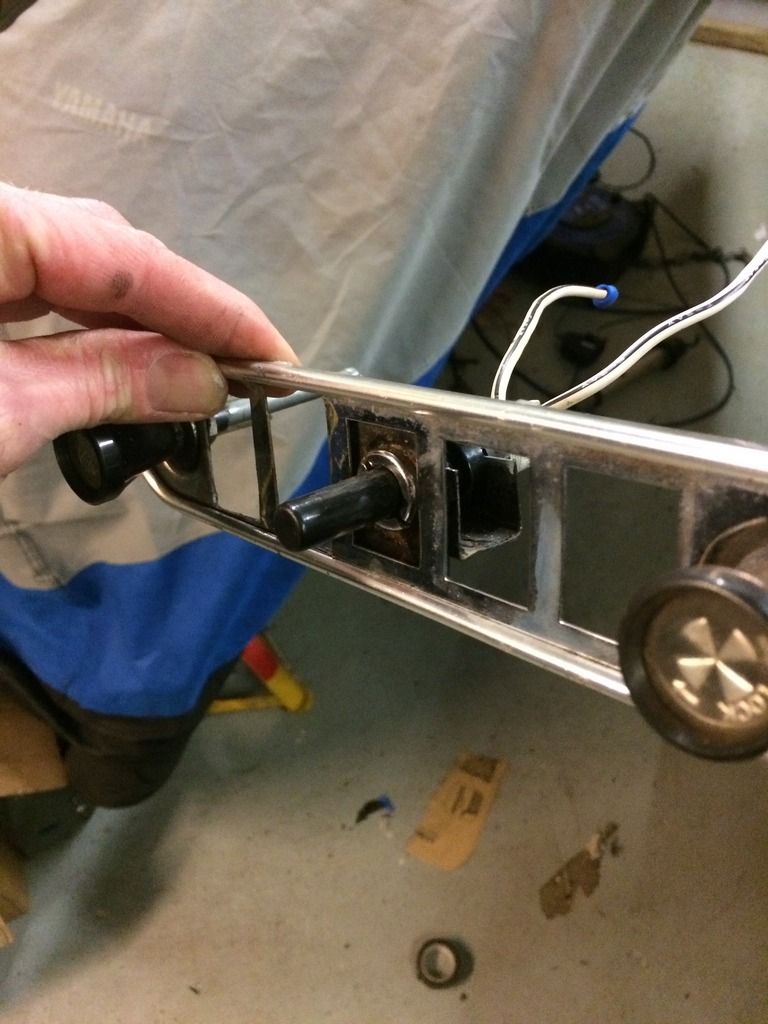
Decided to go for the t7 design heater. Very nice bit of kit.
Old vs new.
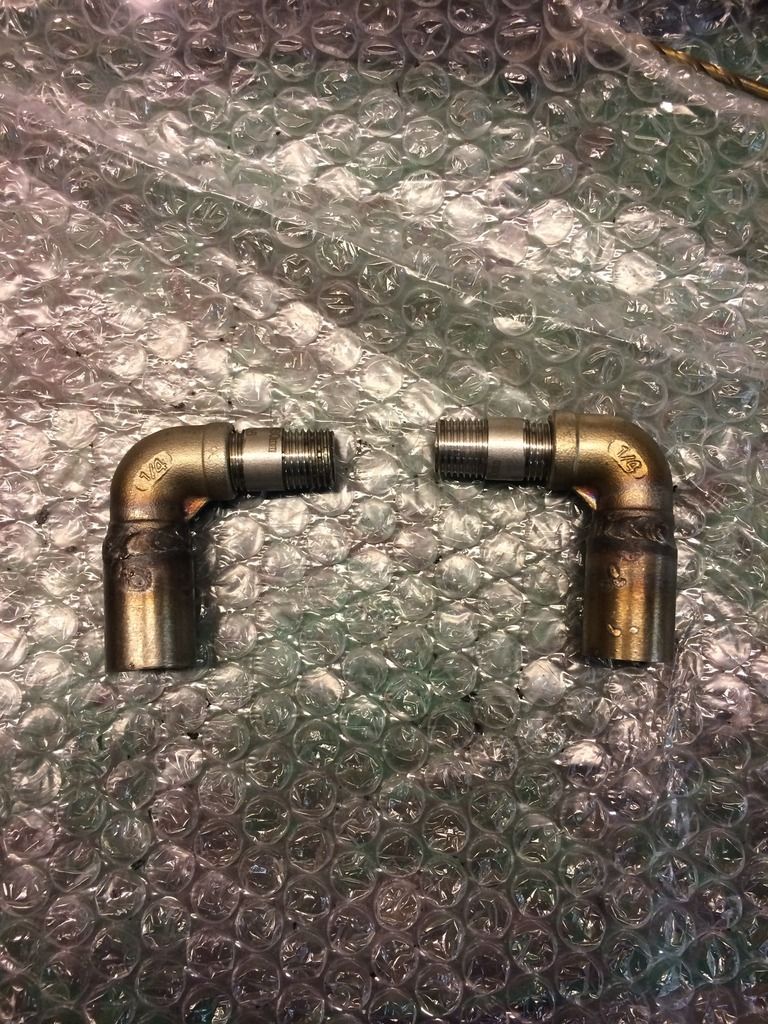
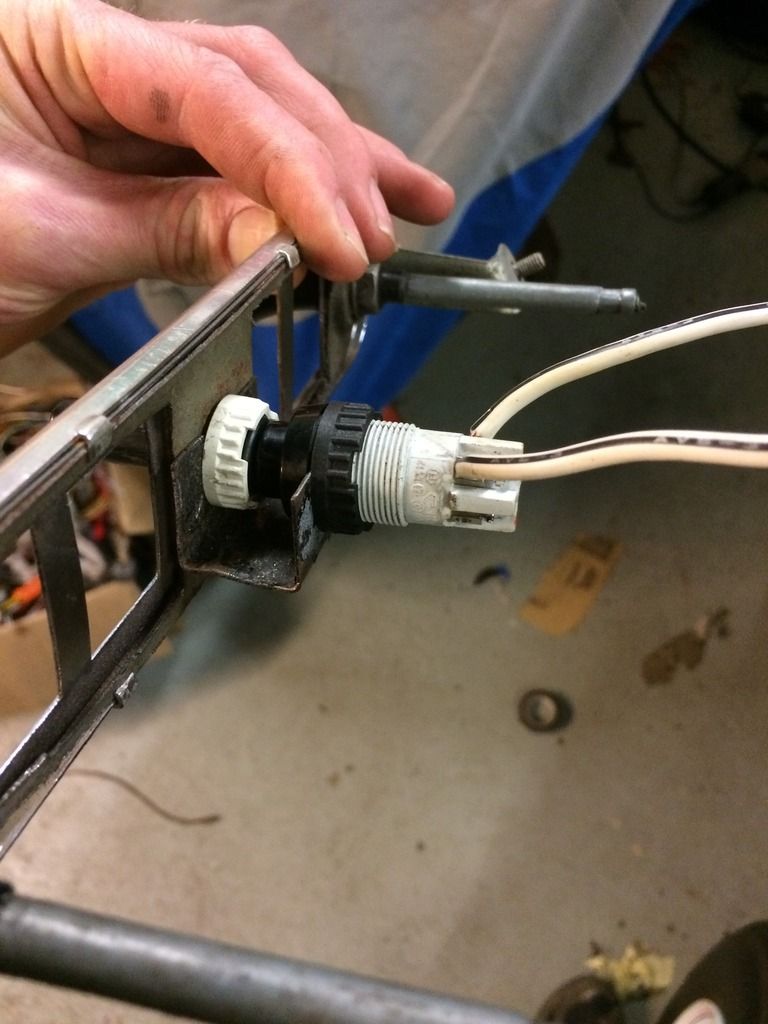
Made some adapter hose connectors up to allow a better entry angle.
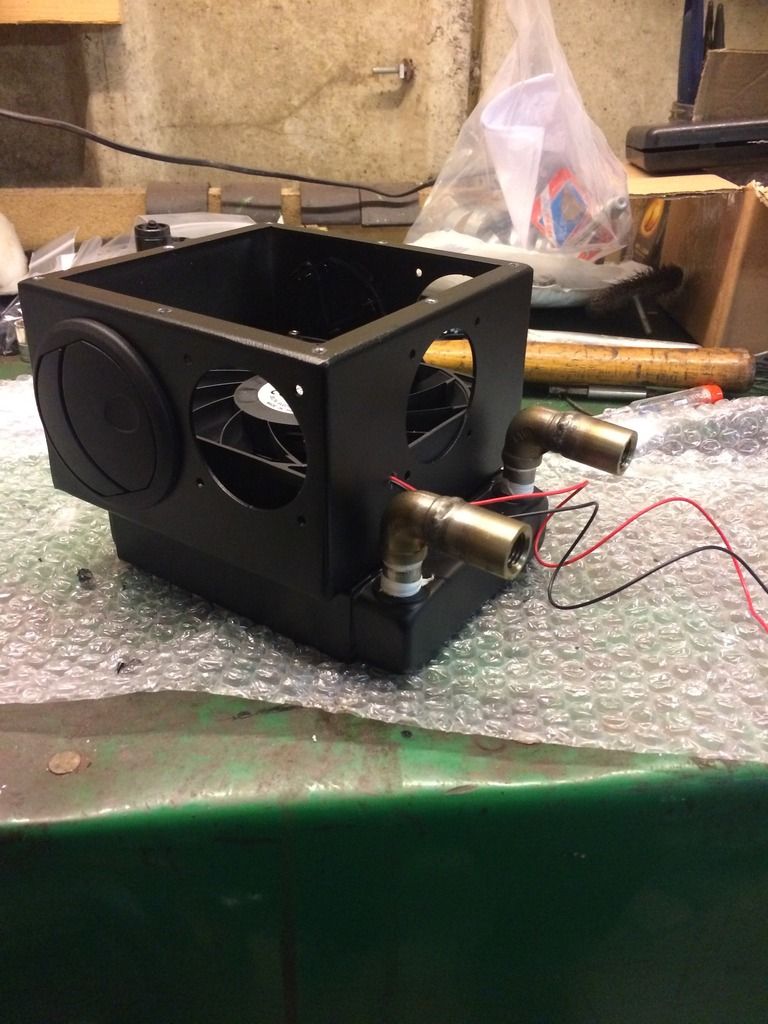
Heater mounted.
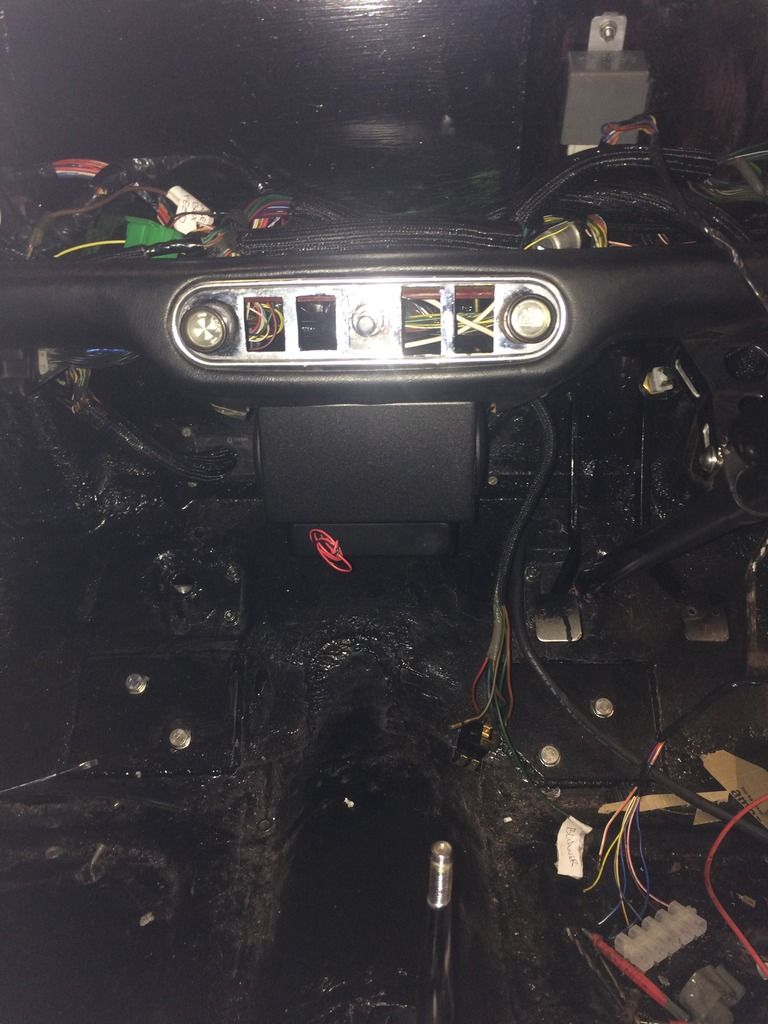
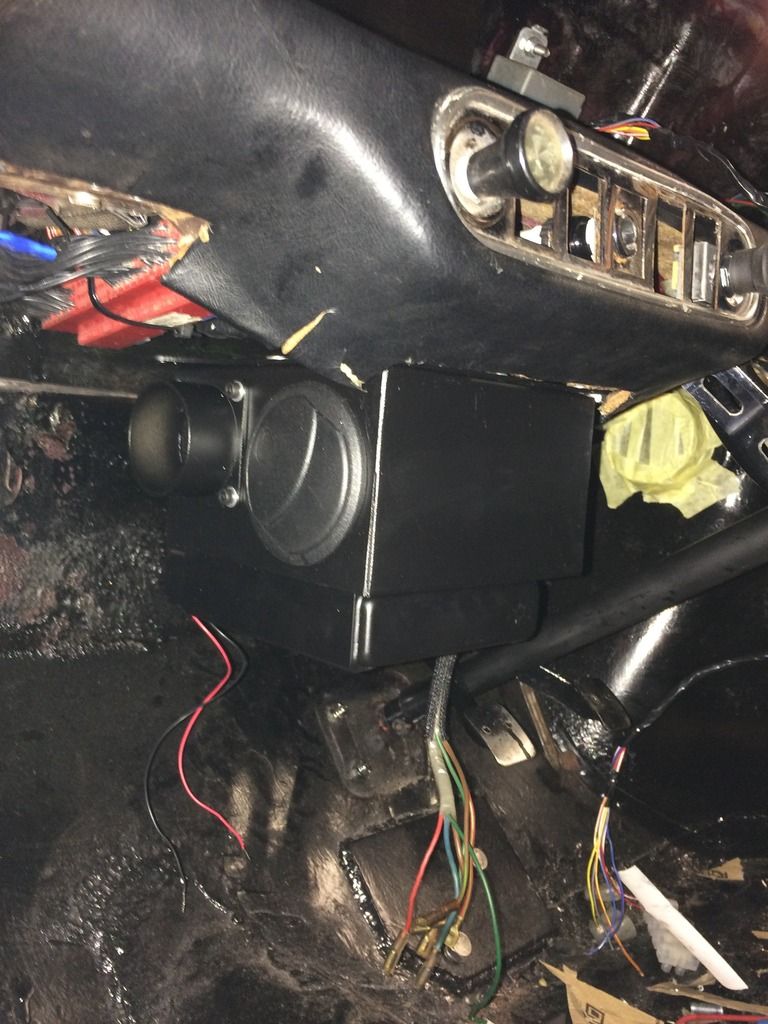
With rotary switch to try and keep it looking fairly original.
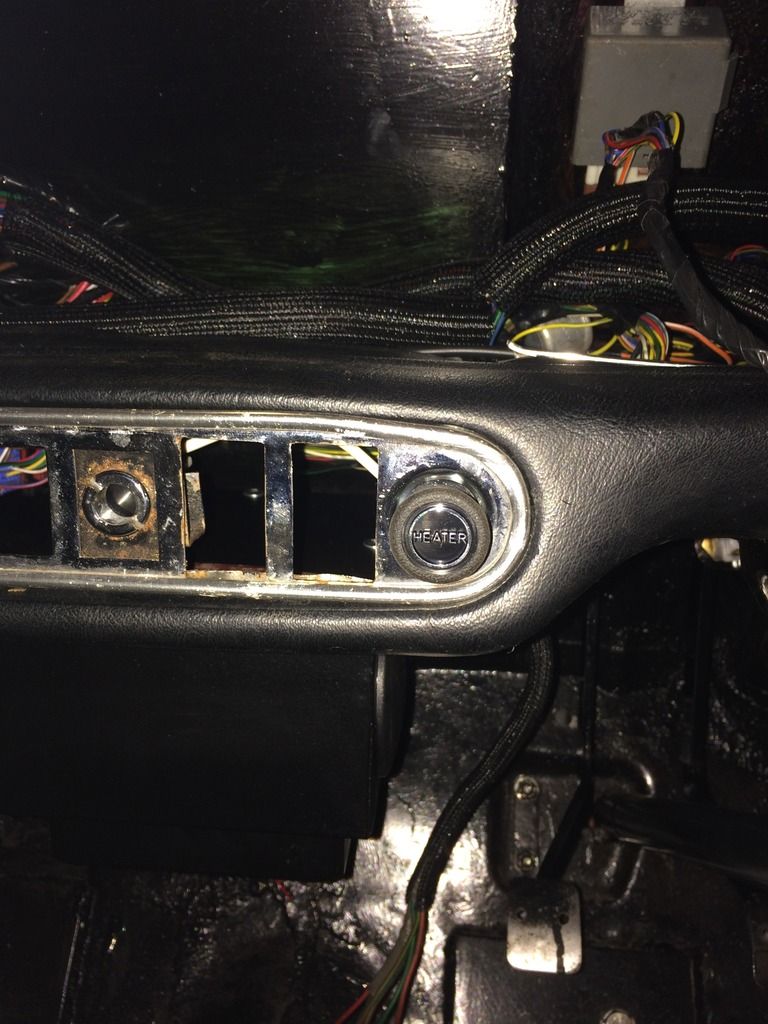
Mocked up for my idea for using the original manual washer pump button for the 'engine start'. Again keeping the looks clean and original.
Then fitted to new facia. Along with toggle switches.
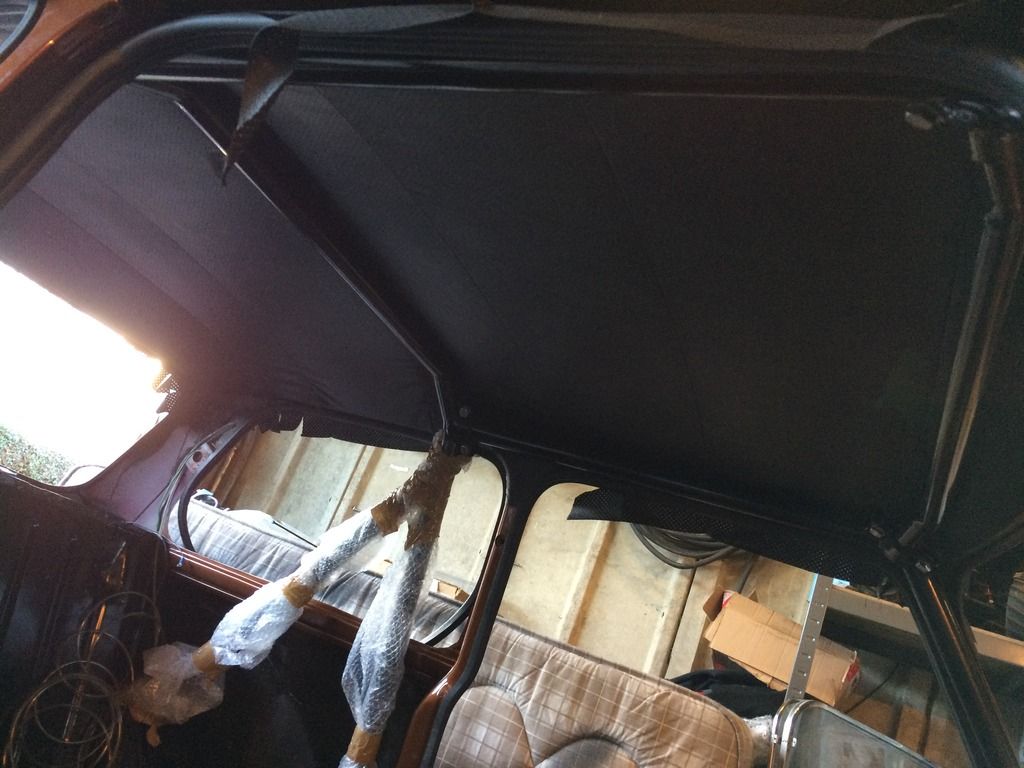
Headliner time. What a pain that has been. Especially with the cage. Decided to get the cage in place prior to fitting the headliner. This enabled me to tension the liner to suit the cage rather than finding out that it was too tight when coming to fit the cage.
Was very tight.
All in now and sorted.
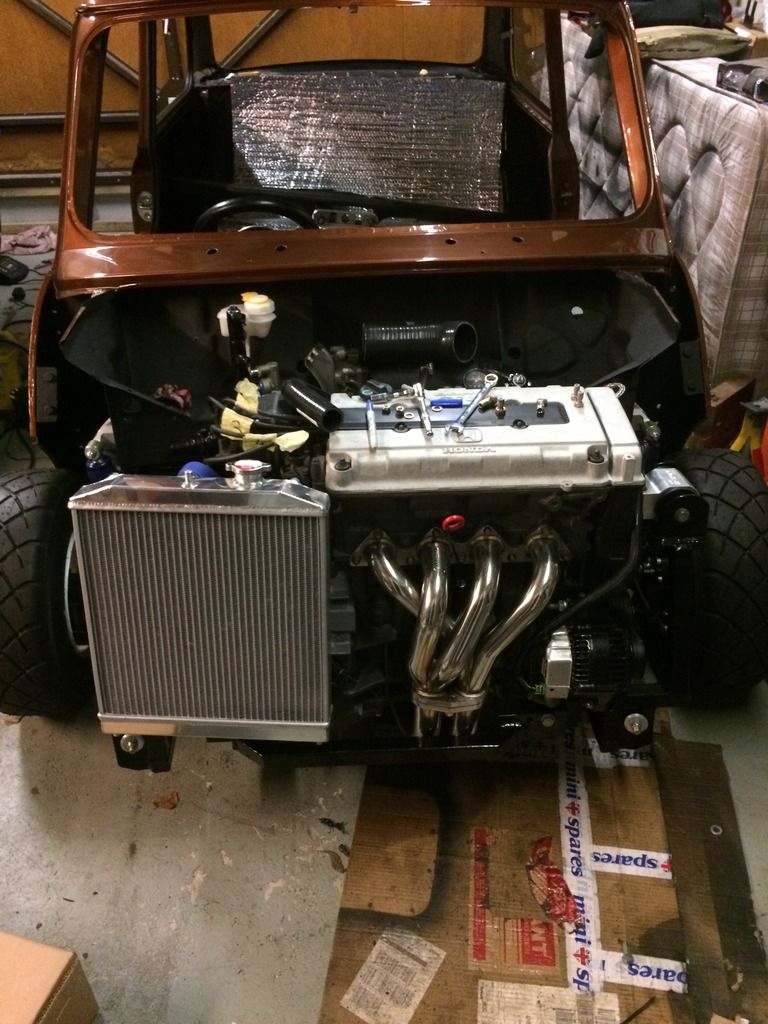
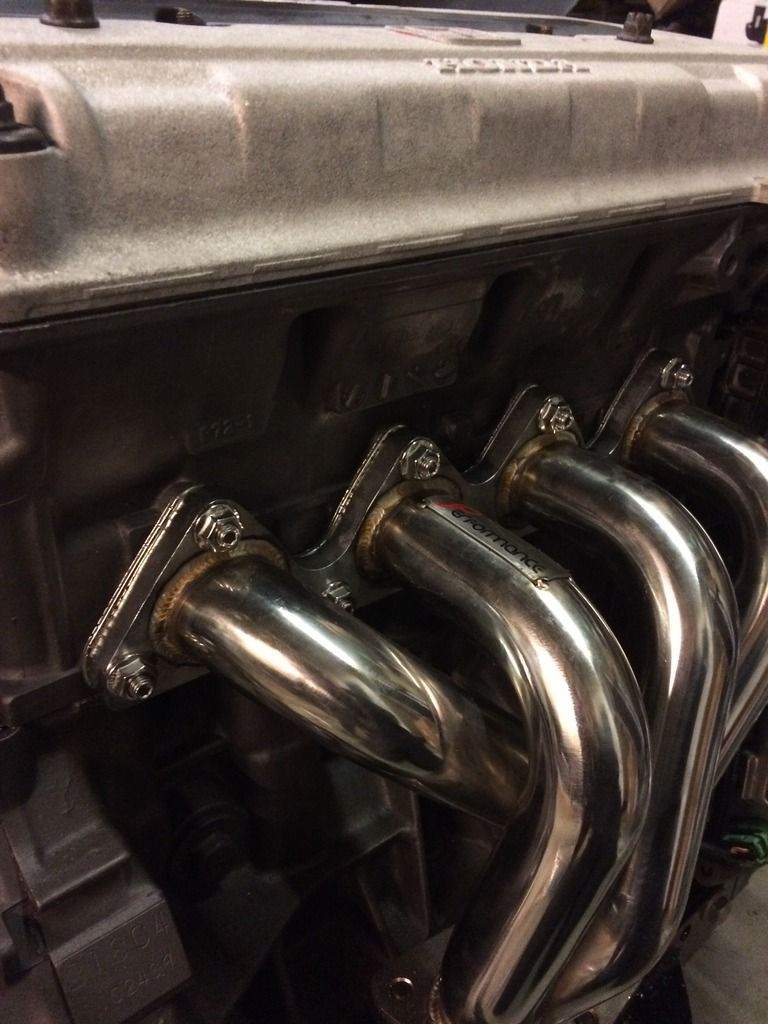
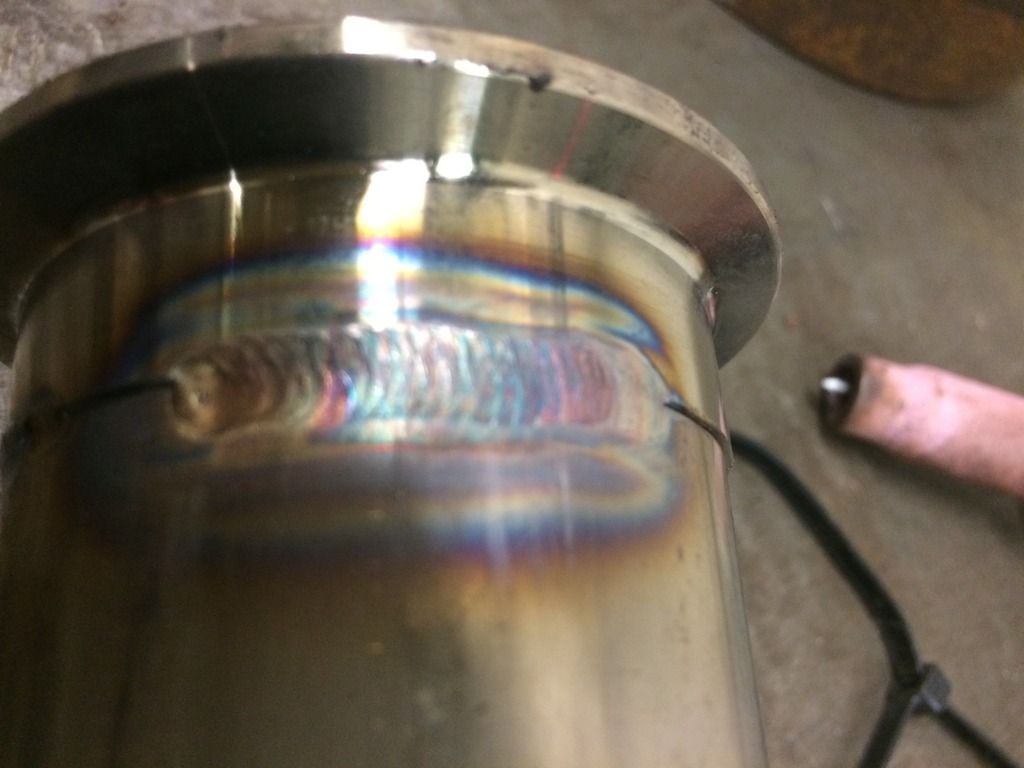
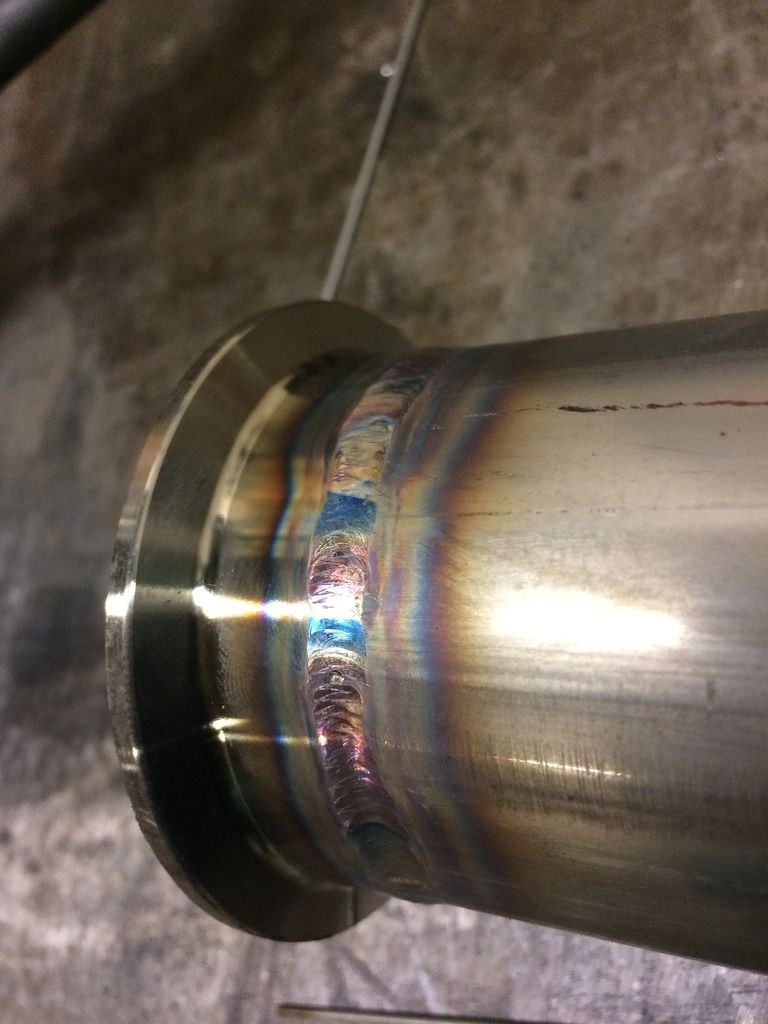
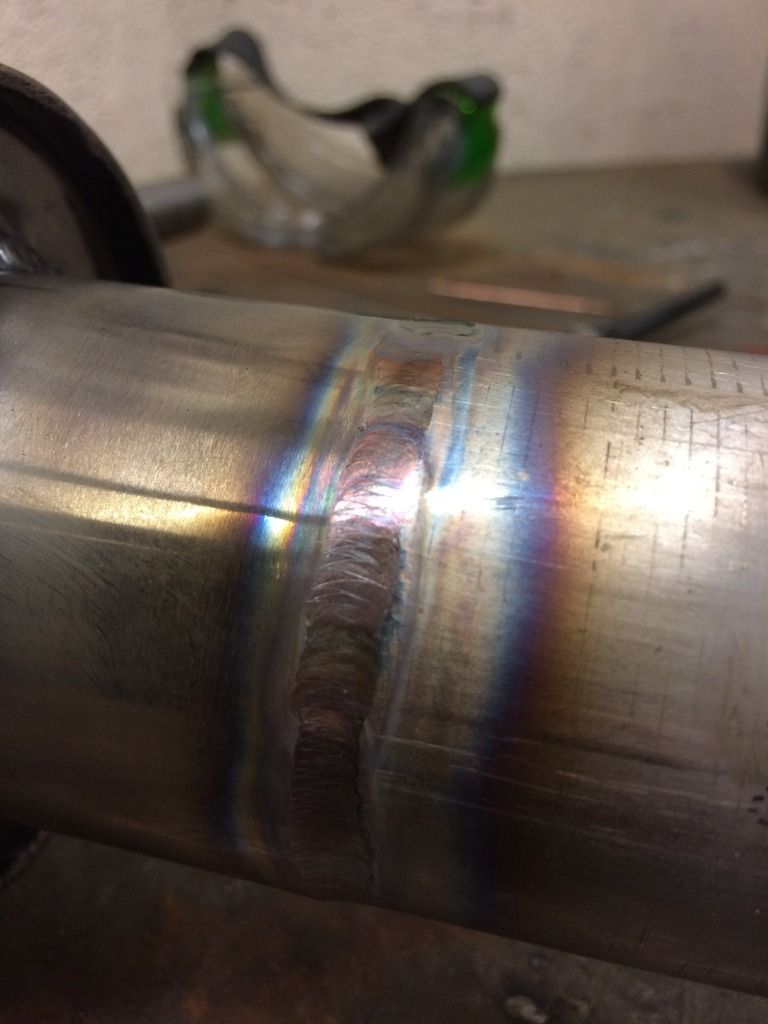
Exhaust time.
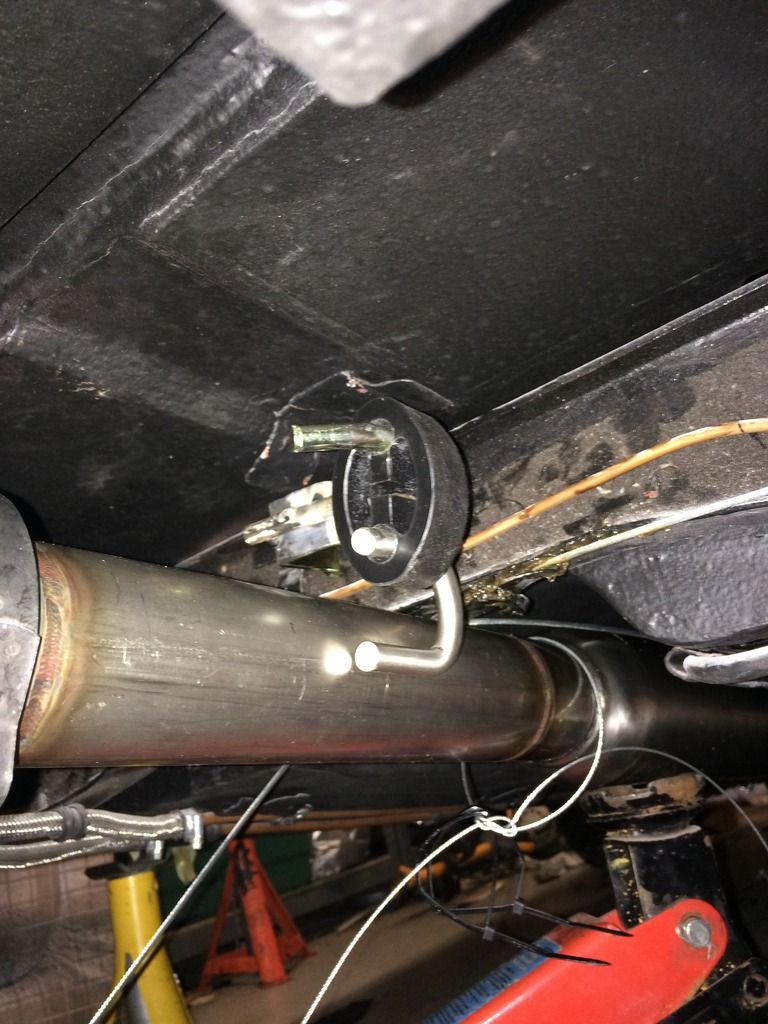
I've gone for a 2 1/4" full stainless system into a universal rear box. Using V band clamps to hold it all together.
Mocking up.
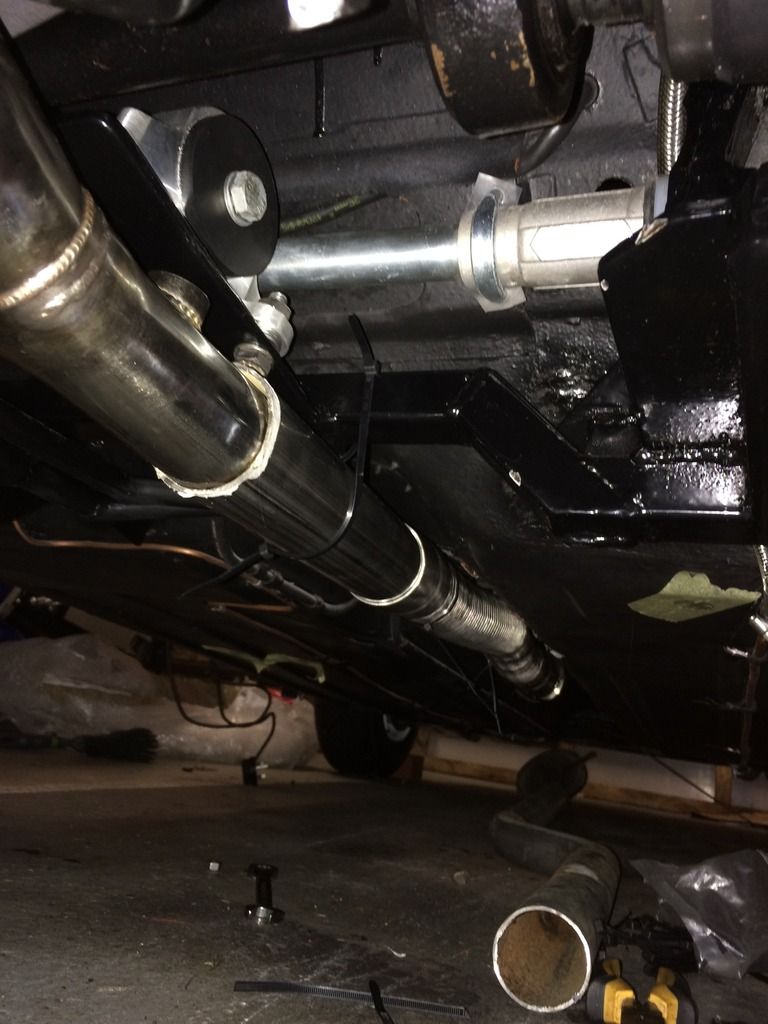
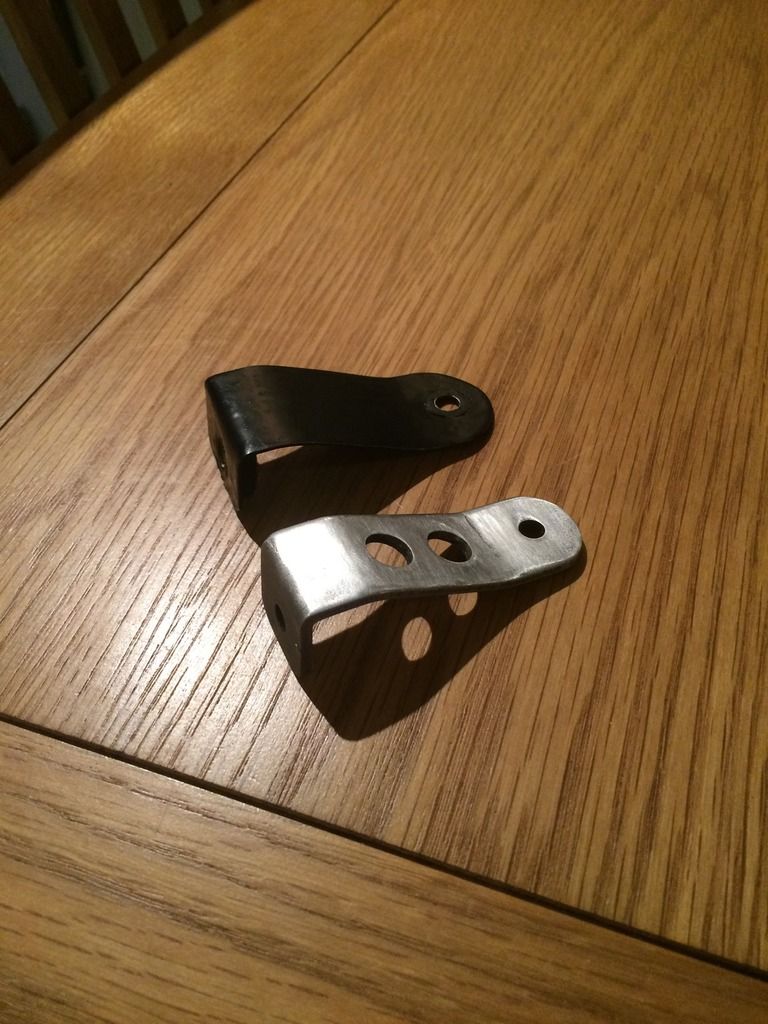
Hangers needed to prevent sag.
V band
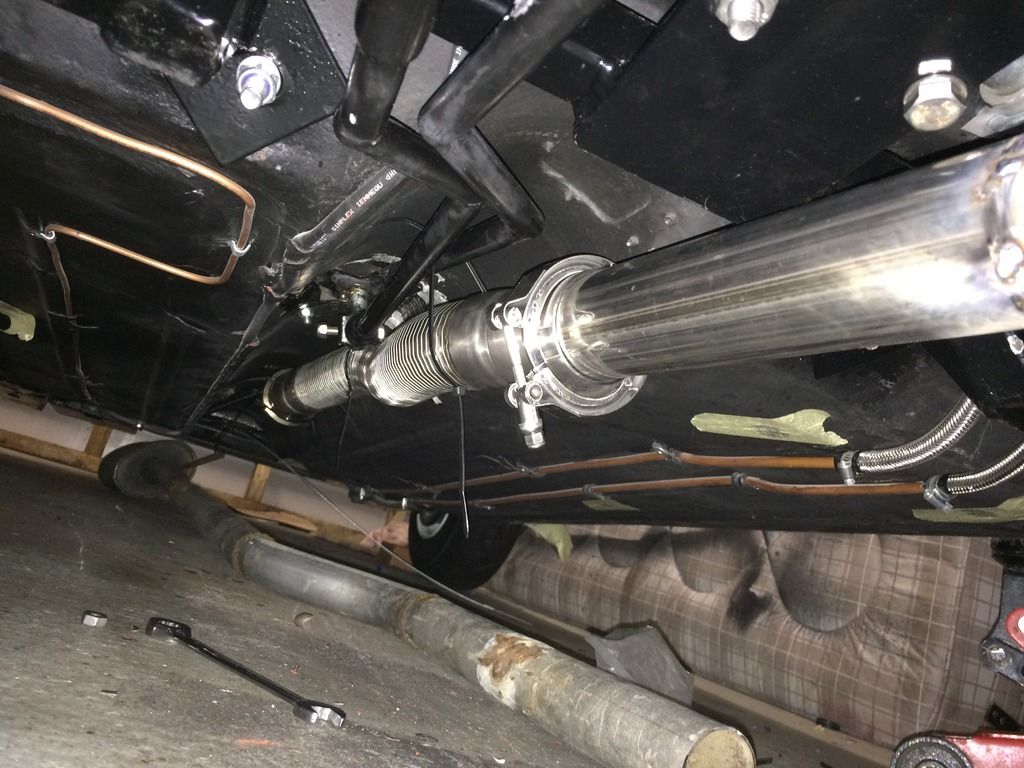
Lengthened and tweeked the angle slightly from the headers. V band collars welded on.

Sitting nicely.
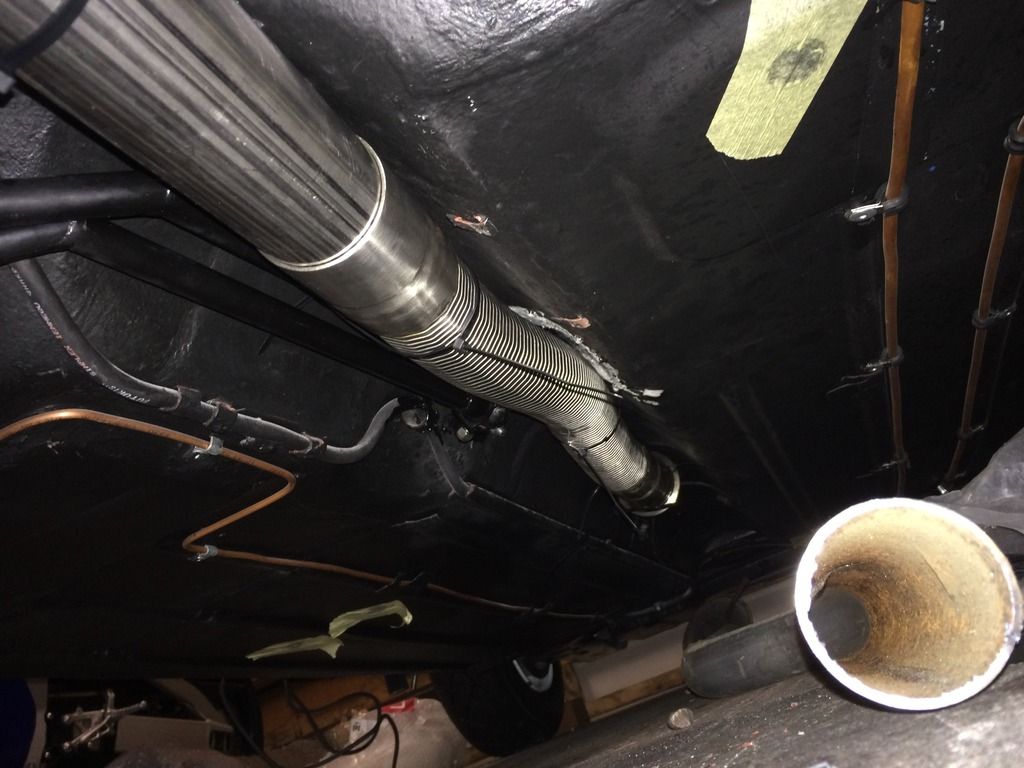
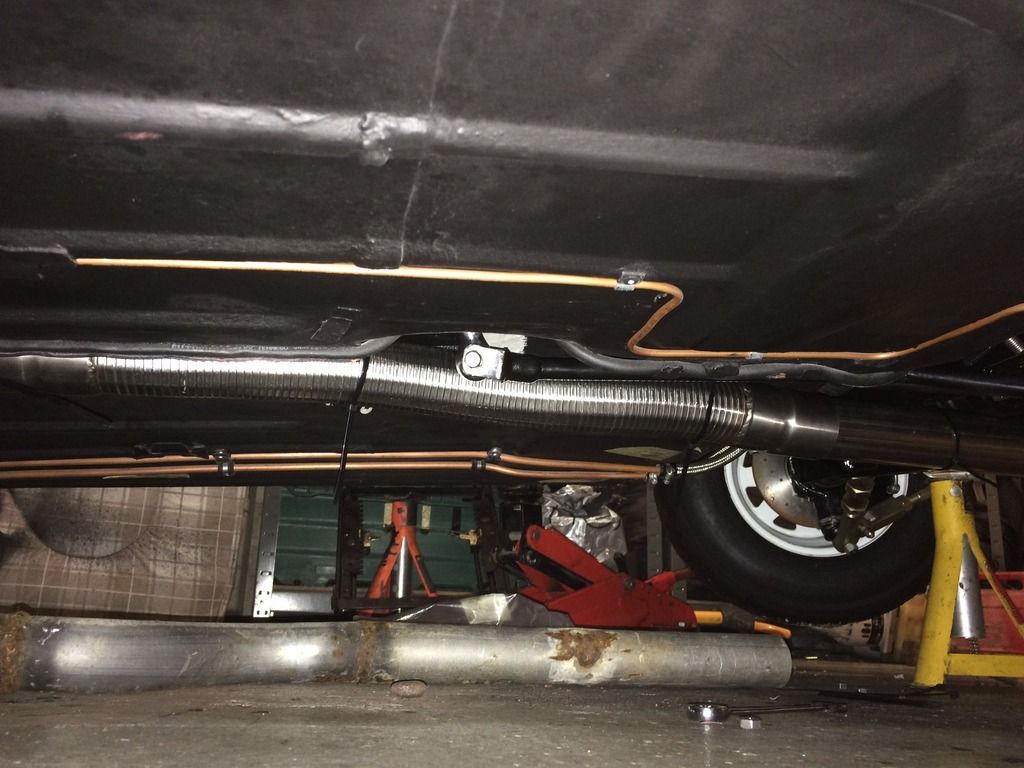
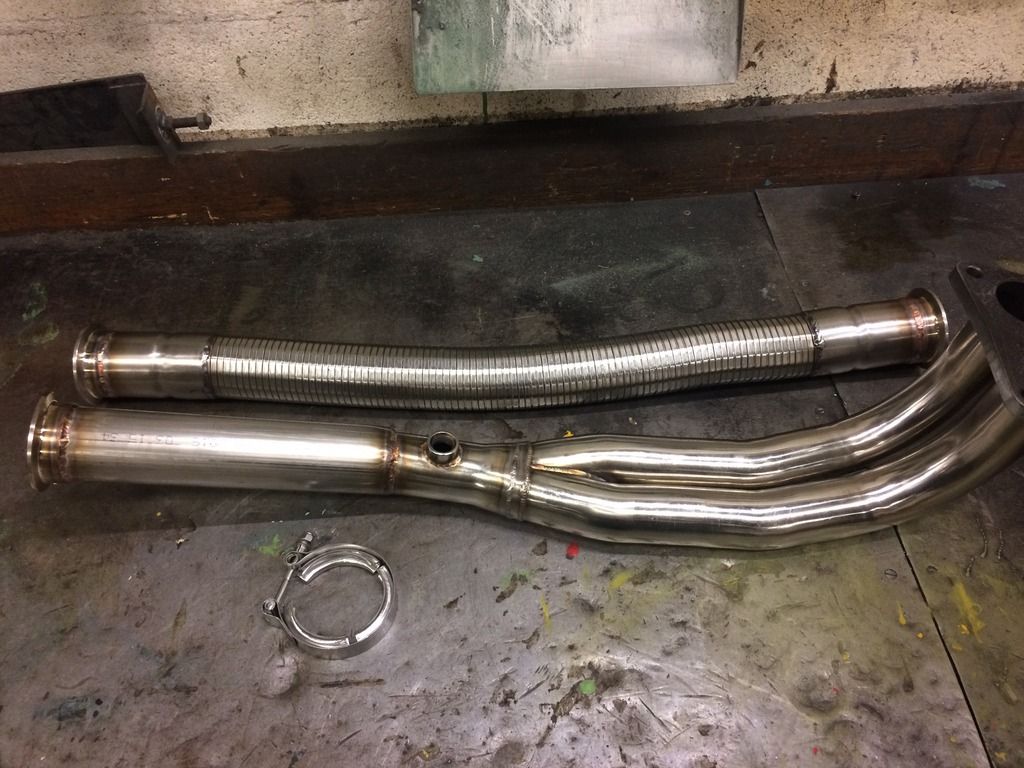
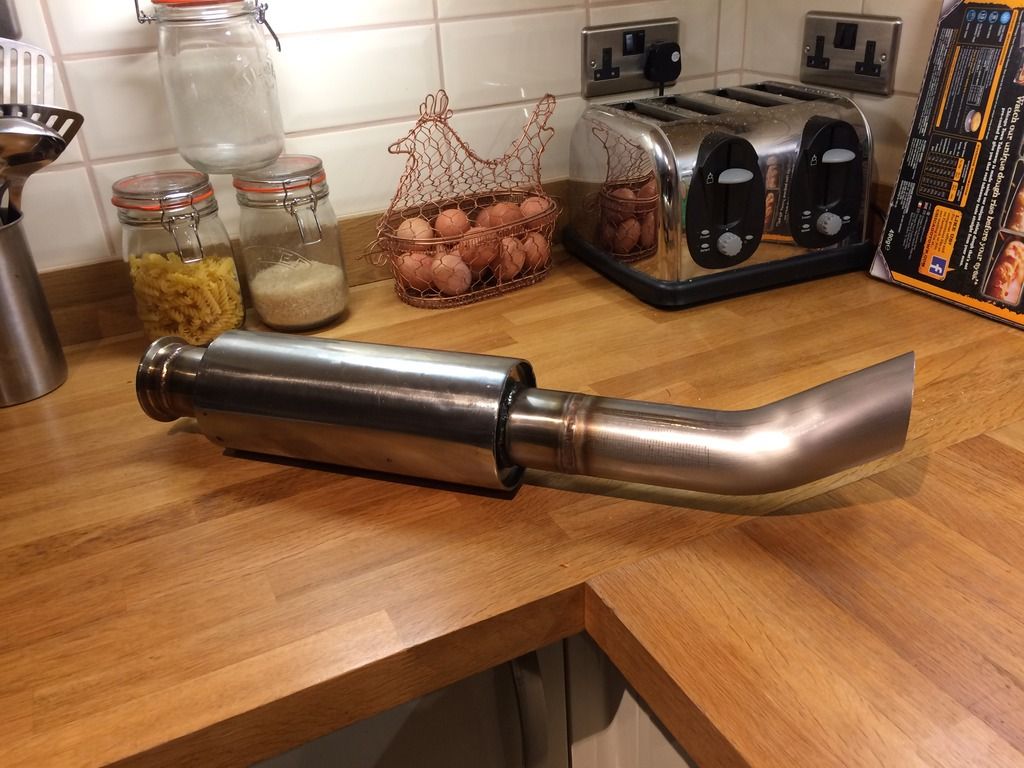
Next section from flex to rear box.
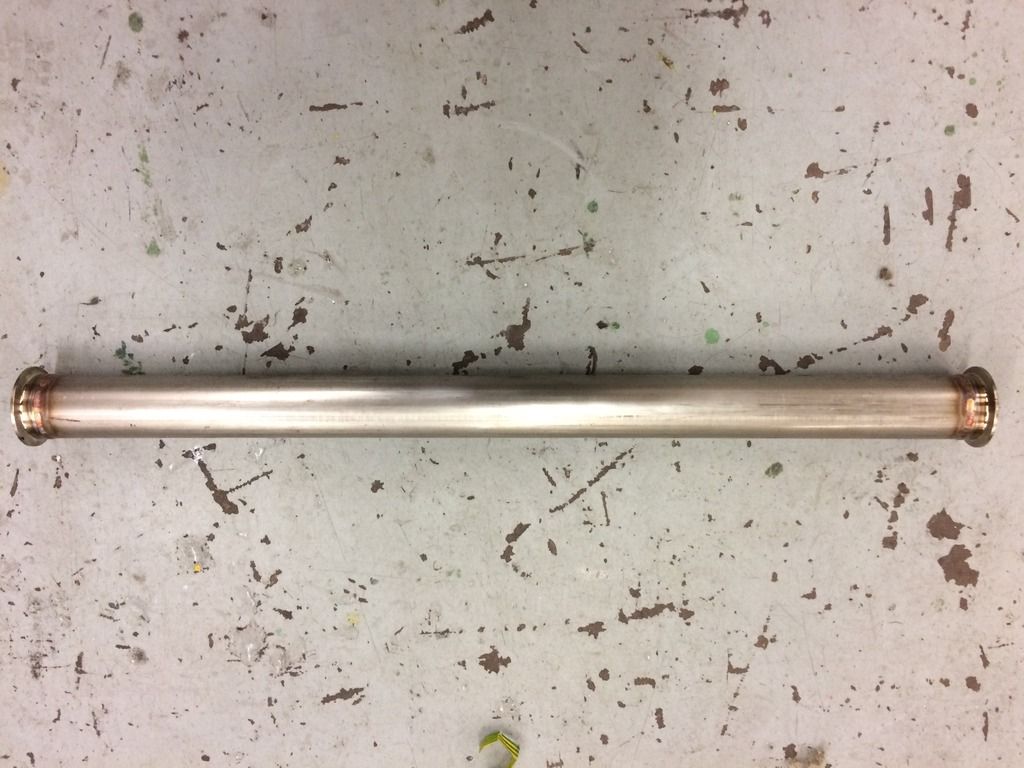
Then to mount rear box and add tail pipe.
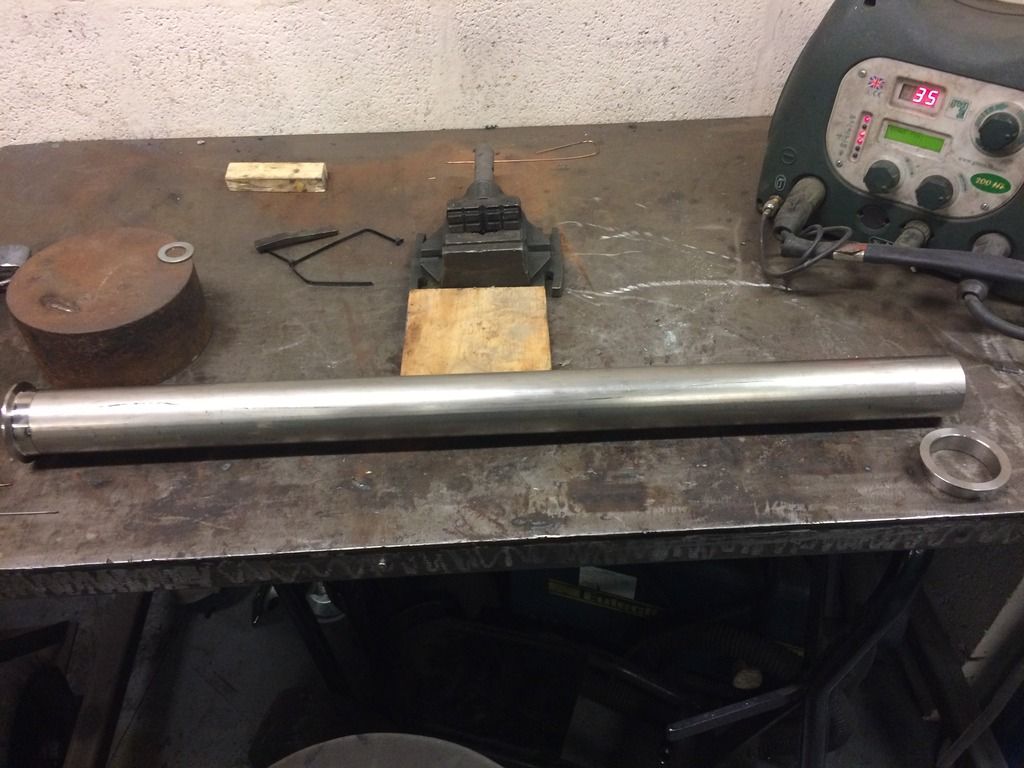
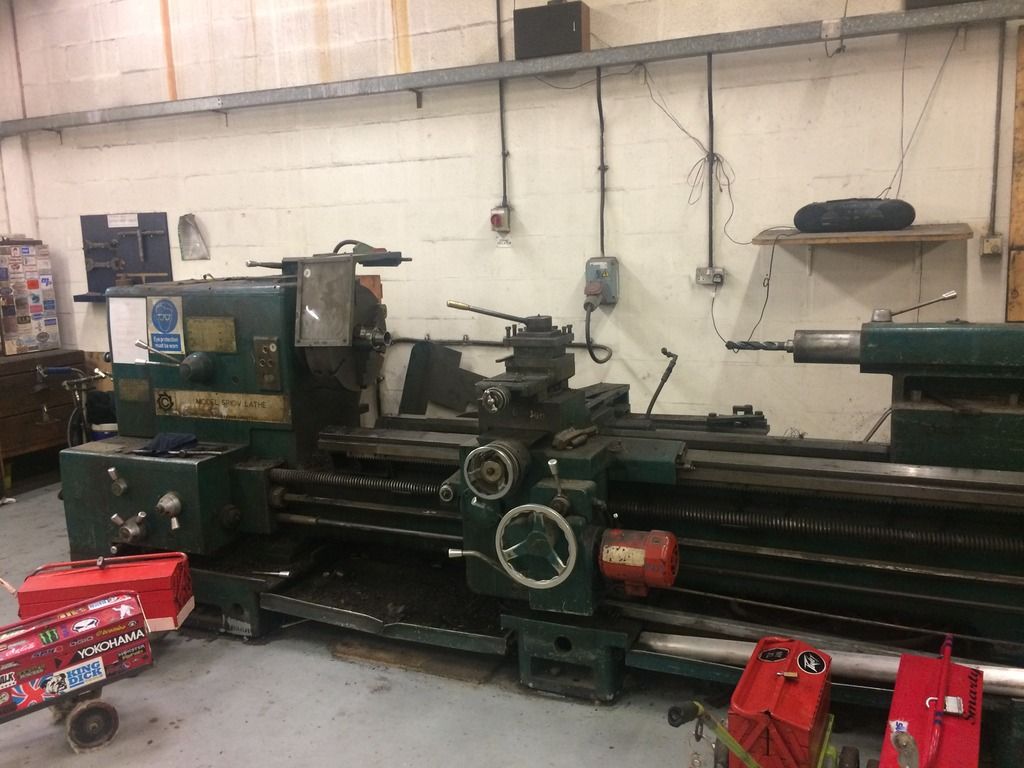
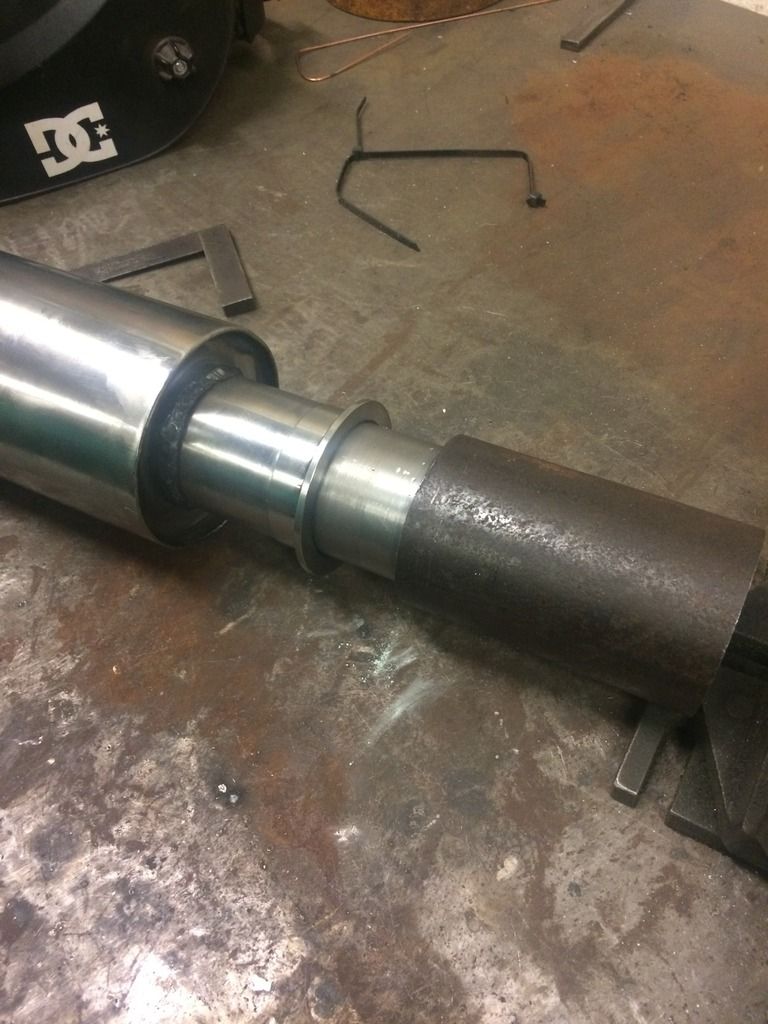
As with the other lengths, used the lathe at work to ensure the ends were square.
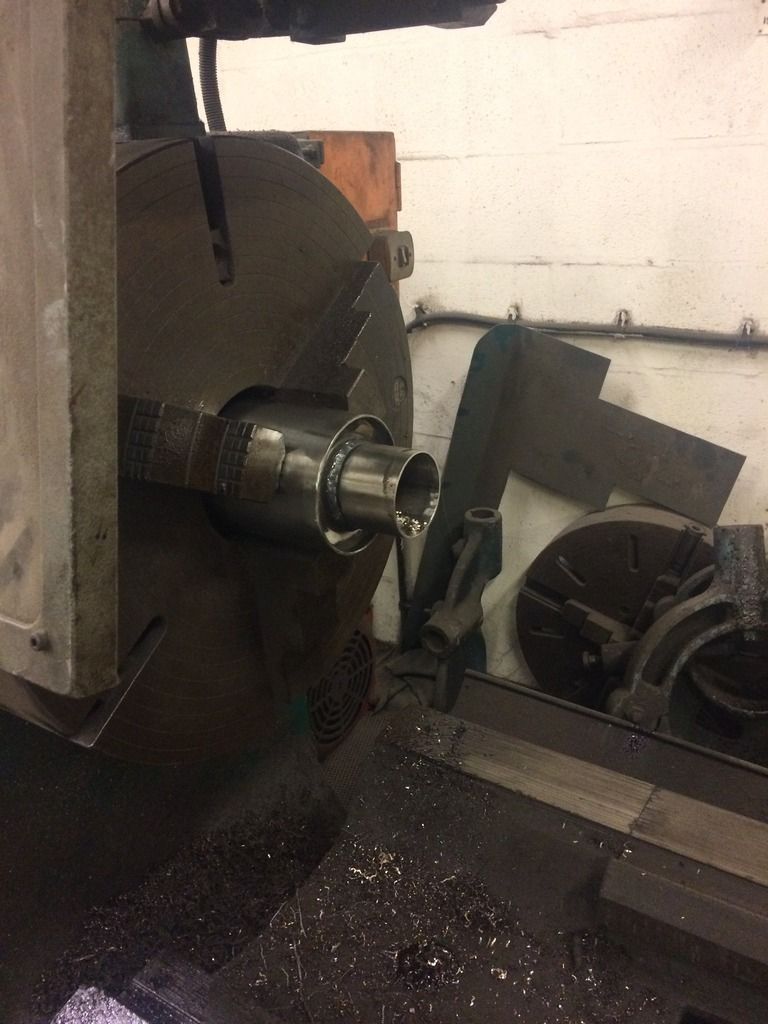
Made a mandrel to align each section of pipe for butt welds.
Tail pipe.
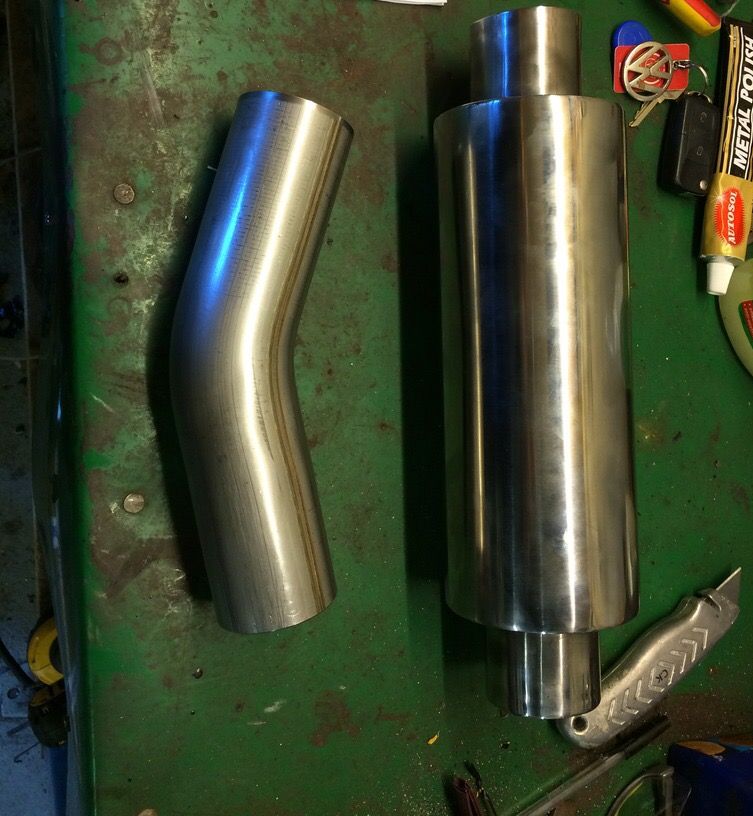
End cut to a nice angle.
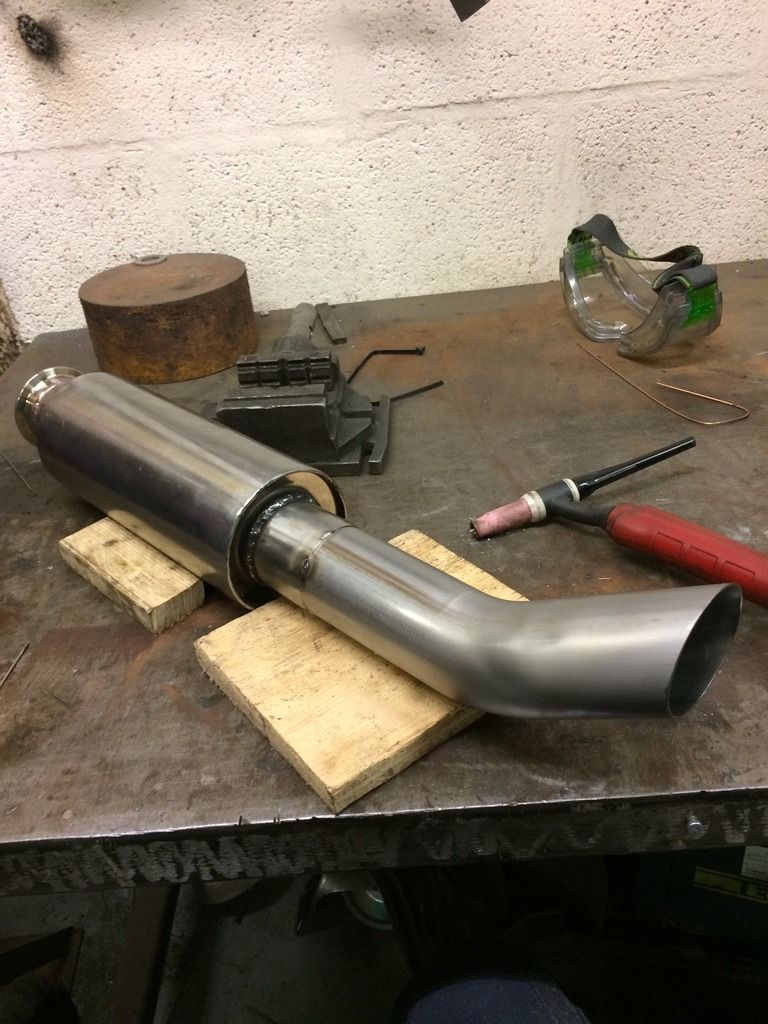
And stuck together.
very happy with the end result.
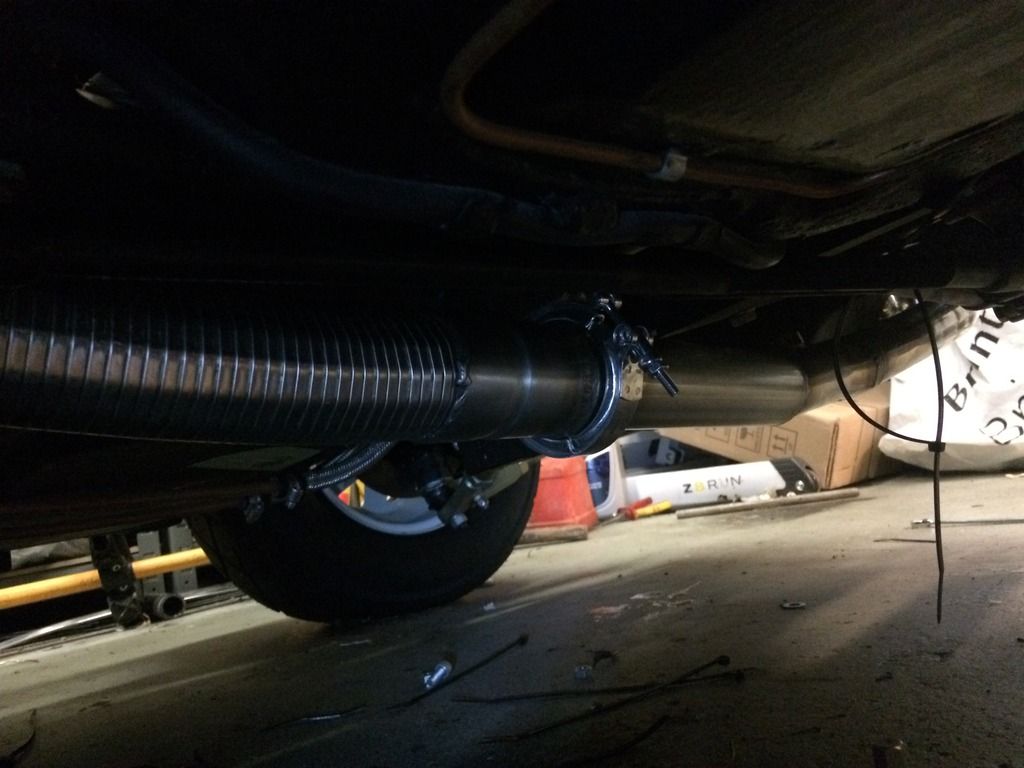
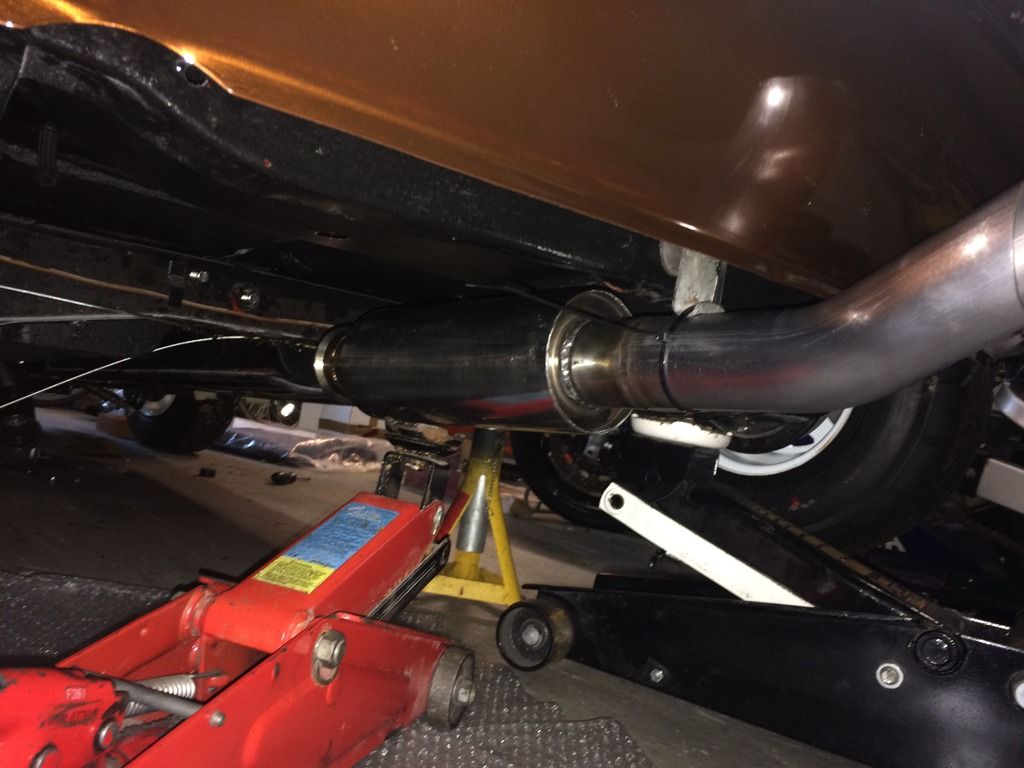
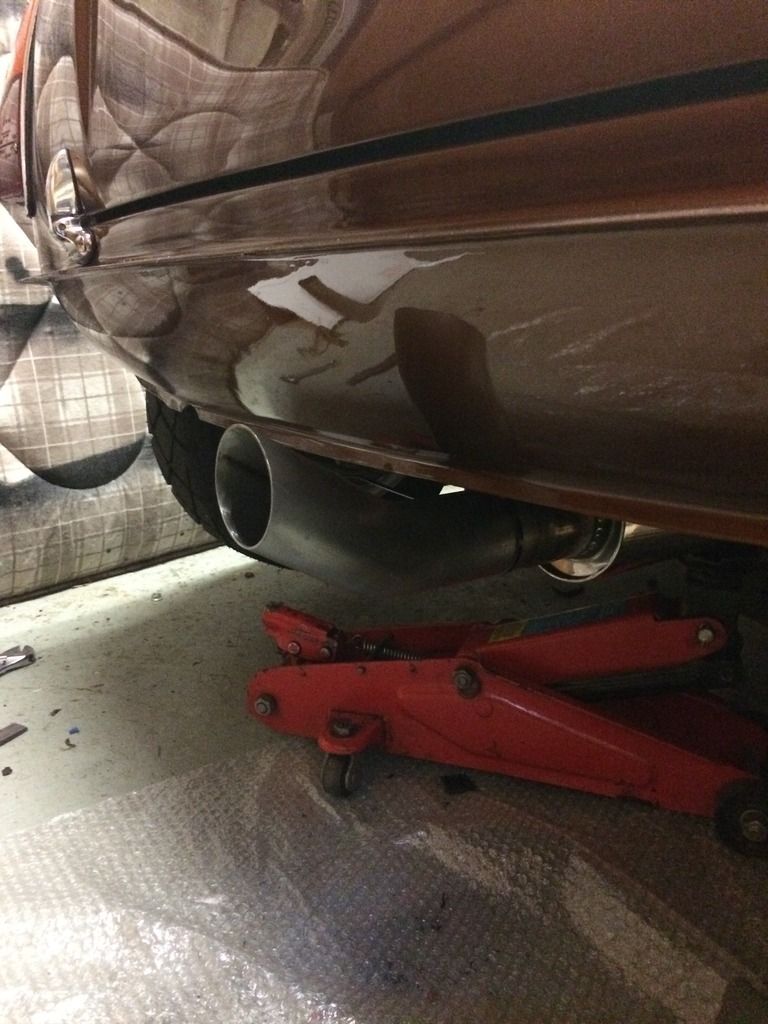
Fitted to car.
Just need to polish the end up.
Modded the 'go' pedal to hopefully give it less of an on/off feel.
Removed an inch from the top and welded to the bottom. Worked nicely. Then made an adapter plate to move the mounting points to compensate for the mods.
http://i177.photobuc...34AA40F3CB6.jpg
http://i177.photobuc...88751902388.jpg
http://i177.photobuc...617FC9402DE.jpg
Will leave it at that in case any more adjustments are needed after I've driven it.
http://i177.photobuc...805827633E1.jpg
Then came the time to hear her purr!!
http://rs177.pbsrc.c...&h=160&fit=clip
What a noise!!
http://rs177.pbsrc.c...&h=160&fit=clip
On tick over.
http://rs177.pbsrc.c...&h=160&fit=clip
As much as I love the sound, can't imagine what it would be like approaching 8000 rpm so may revise the system and add a middle box to get the decibels down a tad.
Just some hangers to make for it then and that will be another job ticked off.
While waiting for the middle box, chucked the side windows in.
http://i177.photobuc...CE6F3181FCF.jpg
http://i177.photobuc...2B07F0AB1A9.jpg
But disaster struck!!! Whilst fitting the drivers side window, managed to drop it and scratch the rear quarter!! Will probably require painting again as it's right down to the primer.
With that in the back of my mind for now, started to get the seats mounted.
They are OMP silverstone classics. Had to make up some adapter plates so they will fit on to the mini subframes.
http://i177.photobuc...9ECF9F43A6F.jpg
Decided to mount them slightly behind the cross member.
http://i177.photobuc...D23849D851D.jpg
http://i177.photobuc...E3F5F8C5C14.jpg
So this is where I stand now. Have made some plates with some captive nuts in that I plan to weld to the cross member, my modded seat runners will then bolt directly to these.
Felt great sitting in it for the first time! Even officially drove it as the clutch is all bled now. Ok it was only about 6", but I'm counting it!!
Easier to let the pictures do the talking.
Rad all plumbed in.

Checked position of rad with front on.


Made a top mount up to hold the rad in position but wasn't happy so made another out of stainless. Will have to revise this again as I have it ridged mounted to the frame, and ridged mounted to the engine which just isn't going to last.

Brake and clutch lines made up. Using a ap racing 14mm master.

Changed out the rusty studs for some nice stainless ones.

Decided to go for the t7 design heater. Very nice bit of kit.

Old vs new.

Made some adapter hose connectors up to allow a better entry angle.


Heater mounted.


With rotary switch to try and keep it looking fairly original.

Mocked up for my idea for using the original manual washer pump button for the 'engine start'. Again keeping the looks clean and original.


Then fitted to new facia. Along with toggle switches.

Headliner time. What a pain that has been. Especially with the cage. Decided to get the cage in place prior to fitting the headliner. This enabled me to tension the liner to suit the cage rather than finding out that it was too tight when coming to fit the cage.

Was very tight.

All in now and sorted.


Exhaust time.
I've gone for a 2 1/4" full stainless system into a universal rear box. Using V band clamps to hold it all together.
Mocking up.


Hangers needed to prevent sag.

V band

Lengthened and tweeked the angle slightly from the headers. V band collars welded on.


Sitting nicely.

Next section from flex to rear box.


Then to mount rear box and add tail pipe.
As with the other lengths, used the lathe at work to ensure the ends were square.


Made a mandrel to align each section of pipe for butt welds.

Tail pipe.

End cut to a nice angle.

And stuck together.

very happy with the end result.

Fitted to car.

Just need to polish the end up.

Modded the 'go' pedal to hopefully give it less of an on/off feel.
Removed an inch from the top and welded to the bottom. Worked nicely. Then made an adapter plate to move the mounting points to compensate for the mods.
http://i177.photobuc...34AA40F3CB6.jpg
http://i177.photobuc...88751902388.jpg
http://i177.photobuc...617FC9402DE.jpg
Will leave it at that in case any more adjustments are needed after I've driven it.
http://i177.photobuc...805827633E1.jpg
Then came the time to hear her purr!!
http://rs177.pbsrc.c...&h=160&fit=clip
What a noise!!
http://rs177.pbsrc.c...&h=160&fit=clip
On tick over.
http://rs177.pbsrc.c...&h=160&fit=clip
As much as I love the sound, can't imagine what it would be like approaching 8000 rpm so may revise the system and add a middle box to get the decibels down a tad.
Just some hangers to make for it then and that will be another job ticked off.
While waiting for the middle box, chucked the side windows in.
http://i177.photobuc...CE6F3181FCF.jpg
http://i177.photobuc...2B07F0AB1A9.jpg
But disaster struck!!! Whilst fitting the drivers side window, managed to drop it and scratch the rear quarter!! Will probably require painting again as it's right down to the primer.
With that in the back of my mind for now, started to get the seats mounted.
They are OMP silverstone classics. Had to make up some adapter plates so they will fit on to the mini subframes.
http://i177.photobuc...9ECF9F43A6F.jpg
Decided to mount them slightly behind the cross member.
http://i177.photobuc...D23849D851D.jpg
http://i177.photobuc...E3F5F8C5C14.jpg
So this is where I stand now. Have made some plates with some captive nuts in that I plan to weld to the cross member, my modded seat runners will then bolt directly to these.
Felt great sitting in it for the first time! Even officially drove it as the clutch is all bled now. Ok it was only about 6", but I'm counting it!!
Edited by jamus, 16 February 2017 - 07:42 PM.
#55
jackjewelljj
-

- Members
-
- 241 posts
Mini Mad
- Location: chard
Posted 14 February 2017 - 10:15 PM
Love this build it's awesome!
#56
jamus
-
- Noobies
-
- 44 posts
On The Road
- Location: Telford
Posted 16 February 2017 - 07:44 PM
Thanks jack.
Feels like I'm getting so close now.
Feels like I'm getting so close now.
#57
Shifty
-

- Admin
-
- 13,146 posts
Sponsored by Fosters (tm)
- Name: Sean
- Location: Shropshire(sunny)
- Local Club: TMF
Posted 16 February 2017 - 08:24 PM
Excellent!!
I'll have to come over and have a looksie!!!
I'll have to come over and have a looksie!!!
#58
jamus
-
- Noobies
-
- 44 posts
On The Road
- Location: Telford
Posted 16 February 2017 - 08:53 PM
Welcome anytime shifty, especially if you want to give me a hand!! The more hands and all that!! Haha
Edited by jamus, 16 February 2017 - 09:04 PM.
#59
jamus
-
- Noobies
-
- 44 posts
On The Road
- Location: Telford
Posted 17 February 2017 - 08:42 PM
My profusion Middle box arrived yesterday.
Got my collars welded on and fitted it today.
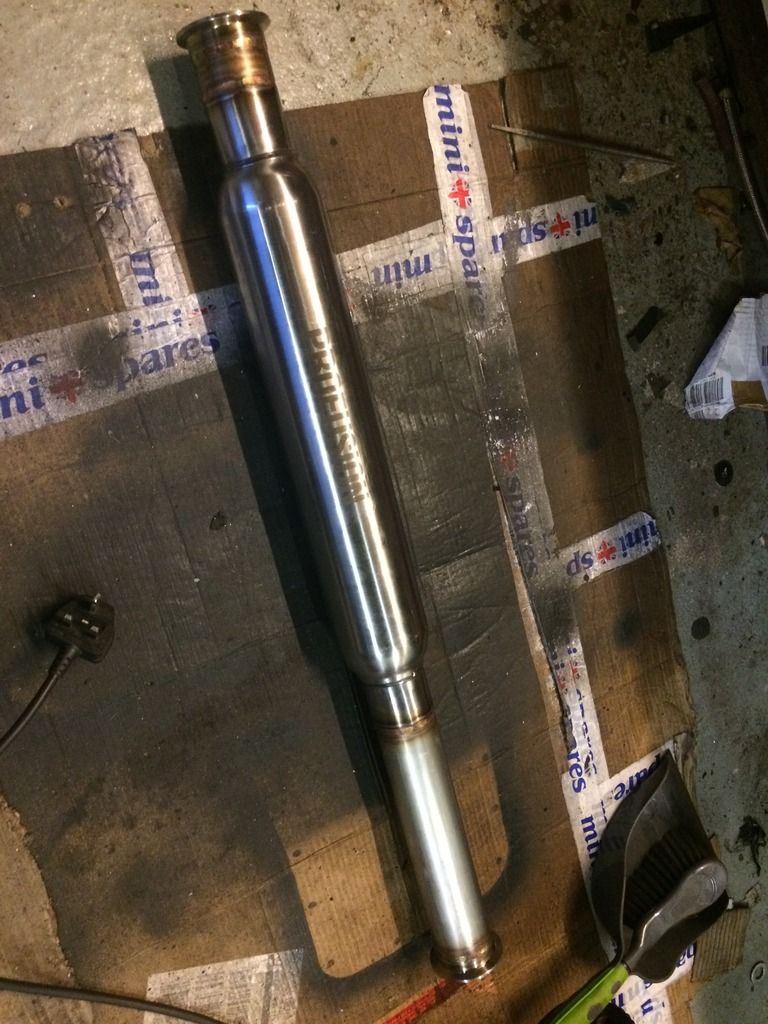
Has made a difference. May not be able to notice that much on the vid, but I'm very happy with it.
Was running very low on fuel in the vids so wasn't running well. Put some fuel in after and ran much better.
http://rs177.pbsrc.c...&h=160&fit=clip
Just the hangers to make now, 2 at the rear and probably need 2 in the centre around the flex part.
Started on the 2nd rear.
Hopefully have it done over the weekend.
Got my collars welded on and fitted it today.

Has made a difference. May not be able to notice that much on the vid, but I'm very happy with it.
Was running very low on fuel in the vids so wasn't running well. Put some fuel in after and ran much better.
http://rs177.pbsrc.c...&h=160&fit=clip
Just the hangers to make now, 2 at the rear and probably need 2 in the centre around the flex part.
Started on the 2nd rear.

Hopefully have it done over the weekend.
#60
lawrence
-

- Members
-
- 1,341 posts
One Carb Or Two?
Posted 17 February 2017 - 11:26 PM
Great build. Liking the exhaust with the v bands and proper mounts. Reminds me of what I need to replace on mine now!


0 user(s) are reading this topic
0 members, 0 guests, 0 anonymous users


