Jump to content


Photo
- - - - -

1979 Mk4 Mini 1000 Full Rebuild

roundnose

  • Please log in to reply
284 replies to this topic

#1 nicnoo

nicnoo

    Mini Mad

  • Just Joined
  • PipPipPipPip
  • 212 posts
  • Location: Leamington Spa
  • Local Club: south warwickshire minis

Posted 22 September 2016 - 07:38 PM

Hi all, I felt inspired by all the great build diaries on here and so I've decided to post a few photo's myself.


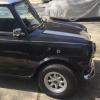
Basically I wanted to restore yet another mini but I just don't have the space to store all the interior bits and bobs, so was just looking for a shell to start with. I put the feelers out and after looking at loads of rubbish on ebay a friend of mine offered me this 1979 Mk4 mini 1000 shell he had sat in his yard for decent money.


So I brought home a solid (looking) shell and started stripping off the few remaining parts (steering rack, subframes and a partial wiring loom)


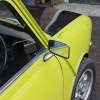
I've done a fair bit already but I'll post the photo's I have so far and try and put them in an order that makes sense. First job was to cut out a bent rear valance, rear boot floor, spare wheel well and closing panels.


Attached File  WP_20151028_23_29_48_Pro.jpg   27K   69 downloads


Attached File  WP_20160108_22_03_06_Pro.jpg   20.57K   47 downloads


Not great photos, I know, but they were taken on my phone I'll take better photos from now on.


I'll post more photos of the other work I've done so far later so its easier to follow


Cheers for now


Nick


Edited by nicnoo, 24 September 2016 - 10:19 PM.


#2 Ben_O

Ben_O

    Mill Road Garage

  • Paint Doctor
  • PipPipPipPipPipPipPipPipPipPip
  • 9,781 posts
  • Location: Isle of Wight

Posted 22 September 2016 - 08:22 PM

Good luck!


Look forward to more updates.


Ben


#3 Gil-galad

Gil-galad

    Passed Test

  • Noobies
  • PipPip
  • 28 posts
  • Location: Decorah, Iowa

Posted 22 September 2016 - 10:07 PM

Looks like a great project. Hope it goes well for you.


Just curious...wasn't 1976 the final year of the Mk3?


#4 nicnoo

nicnoo

    Mini Mad

  • Just Joined
  • PipPipPipPip
  • 212 posts
  • Location: Leamington Spa
  • Local Club: south warwickshire minis

Posted 23 September 2016 - 08:47 AM

It's probably a MK4 then :proud:


#5 nicnoo

nicnoo

    Mini Mad

  • Just Joined
  • PipPipPipPip
  • 212 posts
  • Location: Leamington Spa
  • Local Club: south warwickshire minis

Posted 24 September 2016 - 09:47 PM

OK so just a few pics of some of the work done so far, including rear floor pan corners, both outer sills, O/s companion bin bottom, rear subframe mounting panel ends, O/s front floor, jacking point removal as I never intend to use them anyway and a few extra patches here and there that I've probably forgotten about.


 WP_20160615_23_10_12_Pro.jpg

WP_20160620_22_11_28_Pro.jpg

WP_20160620_22_11_53_Pro.jpg

WP_20160116_12_11_15_Pro.jpg

WP_20160129_22_14_20_Pro.jpg

WP_20160129_22_14_34_Pro.jpg

WP_20160129_22_14_40_Pro.jpg

WP_20160207_22_40_31_Pro.jpg

WP_20160518_12_26_50_Pro.jpg


#6 nicnoo

nicnoo

    Mini Mad

  • Just Joined
  • PipPipPipPip
  • 212 posts
  • Location: Leamington Spa
  • Local Club: south warwickshire minis

Posted 24 September 2016 - 10:04 PM

This is a shot of what it looked like when I had finished the O/s. looks pretty in red oxide doesn't it. shame I later took it all back to bare metal so I could etch it properly :proud:
 WP_20160518_13_18_08_Pro.jpg
 
Also had to replace the rear of both inner wings, check out the 15mm over hang on the bottom of the repair panel. This was later "fixed" using some snips and a big hammer.
 
 WP_20160909_21_04_48_Pro.jpg
 IMG_3343.jpg
 
Don't worry this isn't the final paint job, just a quick brush over of primer to stop the rust for now.
 
As some of you may have noticed from my earlier pics. I'm not opposed to making up some of my own panels (look at the previous post and you'll spot one of the four slinging brackets I made up because i'm too cheap to buy them)

Edited by nicnoo, 14 August 2018 - 08:34 AM.


#7 nicnoo

nicnoo

    Mini Mad

  • Just Joined
  • PipPipPipPip
  • 212 posts
  • Location: Leamington Spa
  • Local Club: south warwickshire minis

Posted 27 September 2016 - 11:21 PM

Well didn't get much done this weekend but did finally get round to changing the suspension rubbers and shocks on the clubman estate.


The rears were suprisingly easy.

 DSCN2417.jpg


You can see why they needed replacing.

 WP_20160925_20_39_40_Pro.jpg


New Vs old.

 WP_20160925_20_39_56_Pro.jpg


Also had to replace the front knuckle, nylon cups as they had completely worn through.

 WP_20160925_21_55_40_Pro.jpg


Now finally I can go over a speed bump without having to replace my exhaust and teeth, 


#8 nicnoo

nicnoo

    Mini Mad

  • Just Joined
  • PipPipPipPip
  • 212 posts
  • Location: Leamington Spa
  • Local Club: south warwickshire minis

Posted 29 September 2016 - 11:51 AM

Did a bit more the other night.


Decided to put on the new cable guide for the underside. started by prepping and giving a quick coat of weld through primer

WP_20160927_19_41_59_Pro.jpg


Next screwed the guide in place with a couple of self tappers, I'm not worried about the holes it makes as these will get welded up when I plug weld


WP_20160927_19_51_23_Pro.jpg


Finally plug welded all the way along.


WP_20160927_20_10_51_Pro.jpg


getting excited now as it's nearly time for a lick of paint to protect the underside and then flip it back over and start making it look like a mini again :D


#9 Gil-galad

Gil-galad

    Passed Test

  • Noobies
  • PipPip
  • 28 posts
  • Location: Decorah, Iowa

Posted 29 September 2016 - 02:08 PM

Am enjoying following your restoration. Please keep it going!


#10 inkyjamesdee

inkyjamesdee

    Stage One Kit Fitted

  • Noobies
  • PipPipPip
  • 83 posts
  • Location: Cambs

Posted 29 September 2016 - 11:50 PM

Good work so far keep it up.

#11 nicnoo

nicnoo

    Mini Mad

  • Just Joined
  • PipPipPipPip
  • 212 posts
  • Location: Leamington Spa
  • Local Club: south warwickshire minis

Posted 30 September 2016 - 06:30 AM

Thanks guys, I hope to get the last of the forgotten bits of welding on the underside done this after noon and who knows maybe a bit of paint. The danger is at this point that i'll rush it and something will get forgotten.


Edited by nicnoo, 30 September 2016 - 06:31 AM.


#12 nicnoo

nicnoo

    Mini Mad

  • Just Joined
  • PipPipPipPip
  • 212 posts
  • Location: Leamington Spa
  • Local Club: south warwickshire minis

Posted 01 October 2016 - 09:44 PM

Tonight i finished all the little bits of welding i needed to do to get the underside ready for paint, flatted them back and gave it a quick spray over.

  IMG_3347.jpg


 IMG_3348.jpg


 IMG_3349.jpg


 IMG_3352.jpg


Not my finest work with a spray gun but it should keep the rust at bay until I can get the rest of the car ready.


Edited by nicnoo, 05 October 2016 - 06:30 AM.


#13 nicnoo

nicnoo

    Mini Mad

  • Just Joined
  • PipPipPipPip
  • 212 posts
  • Location: Leamington Spa
  • Local Club: south warwickshire minis

Posted 05 October 2016 - 07:32 PM

​Last night decided to recreate the rear valance closing panel.


WP_20161003_21_59_16_Pro.jpg


WP_20161003_22_04_59_Pro.jpg


WP_20161005_20_15_19_Pro.jpg


WP_20161005_20_13_37_Pro.jpg


#14 nicnoo

nicnoo

    Mini Mad

  • Just Joined
  • PipPipPipPip
  • 212 posts
  • Location: Leamington Spa
  • Local Club: south warwickshire minis

Posted 07 October 2016 - 09:28 PM

Managed to find a few photos of the car shortly after I started working on her.


 WP_20150918_13_19_34_Pro.jpg


WP_20150918_13_19_04_Pro.jpg


#15 nicnoo

nicnoo

    Mini Mad

  • Just Joined
  • PipPipPipPip
  • 212 posts
  • Location: Leamington Spa
  • Local Club: south warwickshire minis

Posted 09 October 2016 - 10:04 PM

Did a bit more on the rear Valance closing plates tonight, also needed to replace about 1/2 inch of the rear wheel arch. looks a bit of a mess now but should look OK once I've cleaned it all up.


WP_20161009_21_03_23_Pro1.jpg


WP_20161009_21_40_53_Pro1.jpg


Also tagged with one or more of these keywords: roundnose

1 user(s) are reading this topic

0 members, 1 guests, 0 anonymous users