
And I’m guessing I’ll see you at the nationals in October?Not sure if you know or not, you are able to reregister the car and reuse the original plate.
Steve from Classic mini spares in Te puke told me.
Beats changing to a new one.
Yeah, got that teed up already, so ill be keeping the black plates. Wouldve been pretty disappointed if i had to change to white ones.

88 replies to this topic
#61

Chris.Williams
-
- Members
-

- 679 posts
Super Mini Mad
- Location: Matamata
Posted 10 July 2018 - 11:45 AM
#62
kws
-
- Noobies
-
- 63 posts
Stage One Kit Fitted
- Location: Wellington, New Zealand
Posted 10 July 2018 - 08:35 PM
And I’m guessing I’ll see you at the nationals in October?
Not sure if you know or not, you are able to reregister the car and reuse the original plate.
Steve from Classic mini spares in Te puke told me.
Beats changing to a new one.
Yeah, got that teed up already, so ill be keeping the black plates. Wouldve been pretty disappointed if i had to change to white ones.
Not sure yet. Maybe, since its in my neck of the woods.
#63
Chris.Williams
-
- Members
-
- 679 posts
Super Mini Mad
- Location: Matamata
Posted 11 July 2018 - 03:54 AM
Yeah, that was my way of thinking also.
And I’m guessing I’ll see you at the nationals in October?
Not sure if you know or not, you are able to reregister the car and reuse the original plate.
Steve from Classic mini spares in Te puke told me.
Beats changing to a new one.
Yeah, got that teed up already, so ill be keeping the black plates. Wouldve been pretty disappointed if i had to change to white ones.
Not sure yet. Maybe, since its in my neck of the woods.
#64
kws
-
- Noobies
-
- 63 posts
Stage One Kit Fitted
- Location: Wellington, New Zealand
Posted 12 July 2018 - 10:38 AM
That's right, I have finally hit maximum working-ness!
Obviously if you have been following this project, having everything finally working is quite a large achievement, considering that almost nothing worked when I got the car.
The last thing I needed to get working was the reverse lights. Obviously they didn't have bulbs originally, so that situation was easily fixed, but even with bulbs they were a no go.
I found the two wires on the firewall a while back, but they went nowhere.

I then found the disconnected wires that should lead down under the car sitting on the floor under the carpet.

I connected them to the wires on the firewall, plugged a new reverse light switch into them to test, and BAM, reverse lights. Ok, so why was there no switch on the remote housing under the car?

I fed the wires and grommet through the floor and then went under the car to investigate

Well that hole doesn't look like it should

I undid the two nuts on the inside of the car so I could drop the housing down

Well I guess that might be why someone tried to bodge a weird setup with microswitches and random wires run front to back and twisted around the reverse light wires in the back... the old switch was broken off in the housing

This is the sort of situation that a screw extractor is perfect for. I grabbed my smallest one, wound it into the switch remains by hand

And then wound it out with a small spanner. Easy. The extractor has a reverse thread, so as you turn it to screw it in more, it bites hard and actually starts to undo the item its being screwed into. Simple but useful.

I wound the new switch into place, and refit the housing to the car. I plugged the switch in, and with the ignition on and the car in reverse gear, I used a spanner from inside the car to slowly wind the switch in until the lights turned on. I adjusted the switch so that the lights would reliably come on and off as the shifter was moved, and then wound in the lock nut to keep it in place.
Lights!


I found the remains of the old switch in the tub of rubbish/old bits that came with the car

It literally took less time to extract the broken off part of the switch and fit the replacement, than it would have done to do the bodge that was in the car when I got it (that didn't work anyway, it wasn't connected to anything!). C'mon people, just do things properly.
This was a huge milestone. Now everything electric works. All lights, switches, wipers, washer jets, uhhh... what else is electric in a Mini? Not much, but it all works!
#65
kws
-
- Noobies
-
- 63 posts
Stage One Kit Fitted
- Location: Wellington, New Zealand
Posted 12 July 2018 - 11:38 AM
Worn bushes are no fun, and these bushes get a hard time in normal use. My Tie Rod bushes were stuffed and needed replacing.
I replaced the actual rods when I first got the car because the original ones were badly bent. At the time I didn't have replacement bushes, they were still in transit, but they arrived shortly after the arms went in. I knew the bushes were bad, so they needed changing.
Removal of the rods is pretty simple. Two nuts and a bolt per rod. The main nut is in the front of the car behind the valance, and the small nut and bolt is attached to the lower arm. This little one is a bit of a pain, as there isn't much space with the brake pipe and CV boot to get the bolt in and out, but it can be done with some patience and care. I used a screwdriver through the bottom of the rod to line the hole up whilst pushing down on the bolt through the top.

With the rod removed, this is the state of my bushes


Just a bit flat

This is what the bushes should look like. This is the Minispares uprated kit, with a standard rubber bush on the inside and hardened poly bush on the outside. This makes the handling more predictable under acceleration, whilst still allowing the arm to move slightly under braking, which apparently stops weaving under braking.

Refitting is easy (other than fitting the bolt), just remember to get the bushes in the right order. I also waited to tighten the large nut at the front until there was weight on the front wheels, so that the bushes would be compressed in the state they would normally be in during use.

In terms of results, there is a bit more road feel and vibration through the front, but it feels a lot more stable just driving around now. I haven't tested in anger yet, but I suspect it will help handling. Mine must have let the wheel flop around all over the place before. It's a simple and quick job to do, even if it's just to replace old bushes with standard replacements (but the uprated kit is cheap enough I would recommend it).
#66
Readers14
-

- TMF+ Member
-
- 439 posts
Speeding Along Now
- Location: Guisborough
Posted 12 July 2018 - 11:54 AM
Just a thought with reference to the tie rod nut & bolt - would it not be better to put the bolt in from the bottom and the nut at the top, to avoid the clearance issue???
#67
kws
-
- Noobies
-
- 63 posts
Stage One Kit Fitted
- Location: Wellington, New Zealand
Posted 12 July 2018 - 12:13 PM
This darn car. There is always something that makes me shake my fist in frustration.
I'll cut to the chase. I ruined the throttle cable. It sucks, another new one is on the way. I confirmed it by unbolting the bottom of the accelerator pedal and pulling the cable by hand (still attached to the top of the accelerator pedal), sure enough, the binding was there.
How did I ruin it? Grounds. The car had chosen to use the throttle cable as a ground for the engine electrical system. Obviously with such a small metal inner cable, this didn't go well and it has damaged the outer lining.
But I had a ground from the engine to subframe, what happened?
At a quick glance, yes, I had a ground. But wait, what?!

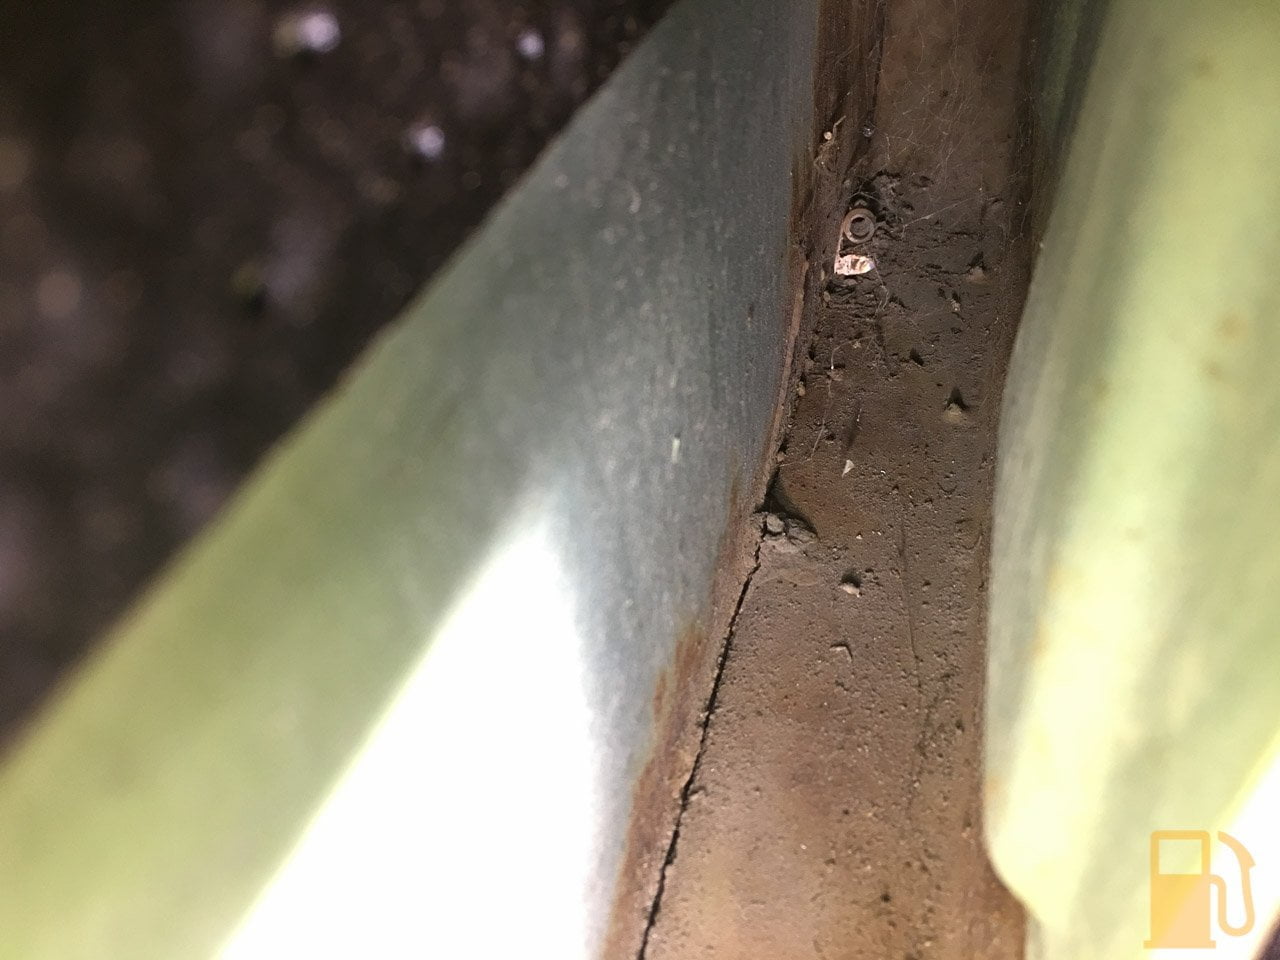
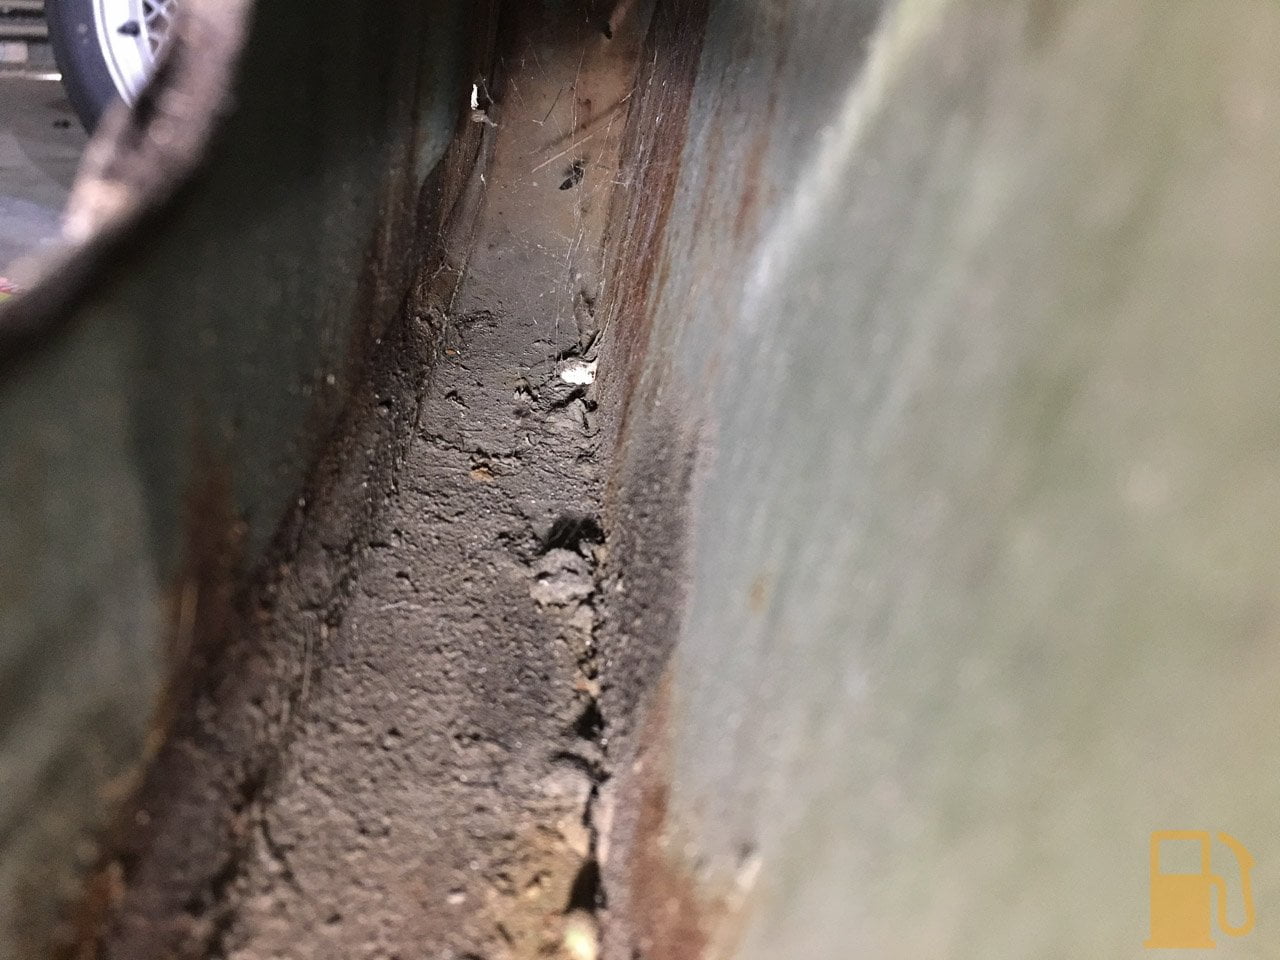
That's not good

The ground IS attached to the bolt, but the bolt is no longer attached to the engine. Looking back through the photos of when I drilled the sump plug, you can see the crack in the plate.

You can also see its broken before

Could this be due to the very tired old stabiliser mounts I recently replaced? It's a solid piece of steel, it must take a lot of force to break it. If the engine was rocking back and forth from having bad mounts this could have finished it off.
I unbolted the ground strap and stuck it straight onto the mounting stud for the plate, on the gearbox.

I don't know if this broke before or after I fitted the extra ground cable, but I suspect before due to the throttle cable damage.
Since hooking the ground back up, there has been a noticeable difference in the amount of flickering the headlights do when idling.
I have a replacement plate now, so I'll need to get around to fitting that. It's not a hard or big job, just need the time and motivation to do it. I'll be taking some time off working on the Mini to focus on fixing Tess and getting her ready for her WOF inspection which is due.
#68
kws
-
- Noobies
-
- 63 posts
Stage One Kit Fitted
- Location: Wellington, New Zealand
Posted 12 July 2018 - 12:14 PM
Just a thought with reference to the tie rod nut & bolt - would it not be better to put the bolt in from the bottom and the nut at the top, to avoid the clearance issue???
I did this originally as a quick fix, but figured there must be a reason its fitted from the top down. Only thing i can think of is that if the nut comes loose the bolt could fall out and then its game over?
#69
timmy850
-

- Members
-
- 3,336 posts
Up Into Fourth
- Location: NSW, Australia
- Local Club: MITG
Posted 12 July 2018 - 09:04 PM
Yep, it’s a good failsafe to have the bolt through from the top. If it did come out you’d be screwed..
Just a thought with reference to the tie rod nut & bolt - would it not be better to put the bolt in from the bottom and the nut at the top, to avoid the clearance issue???
I did this originally as a quick fix, but figured there must be a reason its fitted from the top down. Only thing i can think of is that if the nut comes loose the bolt could fall out and then its game over?
#70
jamesquintin
-

- TMF+ Member
-
- 1,017 posts
One Carb Or Two?
- Location: Harlow
Posted 13 July 2018 - 07:12 AM
I've had the tie bar nut come undone, luckily going slowly, it's not fun.
I've also had the lower arm bolt come undone during an emergency stop. Also not fun...
I've also had the lower arm bolt come undone during an emergency stop. Also not fun...
#71
kws
-
- Noobies
-
- 63 posts
Stage One Kit Fitted
- Location: Wellington, New Zealand
Posted 28 July 2018 - 03:33 AM
Maybe leaving a 38 year old car outside in some of the heaviest rain we have had wasn't such a good idea.
I knew from a previous day of leaving it out in the rain that it would leak, but I originally thought it was through the old door seals and rear side window seals. Apparently I was a little wrong.
Bringing Snicket in from the rain, the interior smelt like wet dog. Not pleasant, and I could see the front carpets were soaked. I had jiggled the rear side windows to make them seal a bit better last time, and it looks like that helped a bit, but the seals are beyond stuffed.
The door seals weren't the cause of the issue though, the real issue was that the rain was entering the door and leaking out from behind the door card and over the door seal into the car.
I needed to pull the door card off to see where the water was coming from. The door cards are easy to remove. Unscrew the door handle, opening lever and window winder. Then there are a series of clips around the bottom and sides of the door card. With the door card off, there was a lot of moisture behind it


This was after a couple of days with a dehumidifier in the car too.
My doors have plastic membranes behind the door card. Designed to stop moisture coming through, but in this case they were actually trapping moisture against the door card. There were massive holes in the door panel, by design. The water is meant to go out the three drain holes in the bottom of the door, but obviously its finding the easiest way out, through the gaping holes

I removed the membrane, and had a nosy at the door. The inside of the door is in reasonable shape, with minimal rust. There was some surface rust in places. The drain holes, as you can see in the photos are clear.

I vacuumed out the inside of the doors to remove the dead spiders and dirt
Whilst in the door I wanted to check the window mechanism as they just weren't operating as smooth as I would hope (and the drivers side makes a horrible noise when lowered). Lowering the window right down I could see why. Completely dry rails


The rollers were a bit out of round, but after a thorough smearing of grease the window rolls up and down a lot smoother. It's hard to get along the whole rail, but I greased as much as possible and just wound the window up and down to even it out along the rail

The other thing I needed to do with the door was to treat the surface rust. I basically covered the whole inside lower quarter of the door with rust converter, until it was running out the drain holes and then left it to cure.

And then I sealed up the holes in the door with duct tape

And then back on the membrane went. I reused the existing butyl sealant on the door, and some more duct tape to help secure it in place

I repeated the work on the driver's side door too, with similar results. I left the door cards off for a couple of days so they could dry out, but they aren't in good shape and will need replacing at some point.
In the mean time I removed the soggy carpet and underlay to expose a soggy and ugly sound deadening. This whole lot stank, so its out of the car airing out, but the sound deadening was glued to the bulkhead and was trapping water. I used some brute force and ripped it all out, and into the bin it went. The carpet is well stuffed and the underlay isn't much better, but both will be reused in the mean time as I cant afford a new set


The floor had some surface rust, so I ground it back and used rust converter to kill it. No serious rust though, just solid metal.
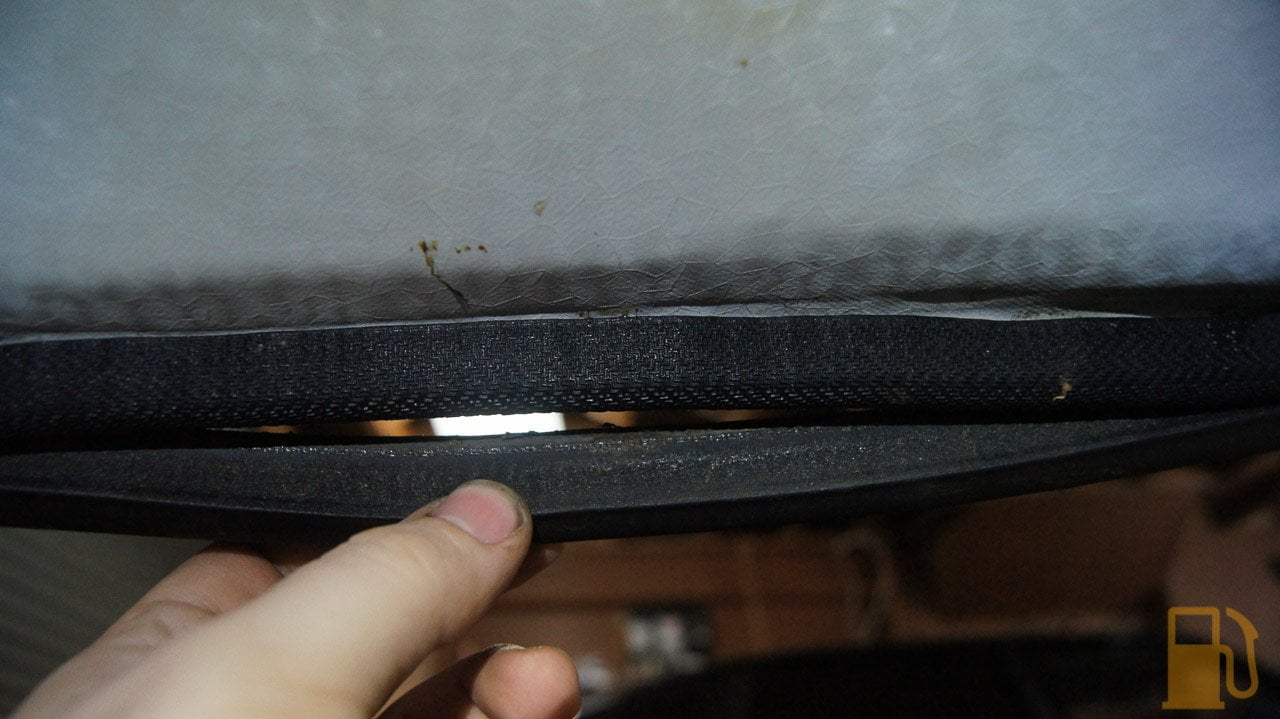
So I had basically stopped water getting through the door, but now how do I stop water getting into the door in the first place? Well, there is a rubber seal that pushes against the window. This was brittle and broken on my Mini, with large sections missing, so I ordered a pair of replacements and clips

Unlike the SD1 where you replace just the rubber section, the whole rubber and chrome comes together. Removal isn't hard, with some gentle levering at the back of the door to pop it up far enough that you can just grab it and pull it free.

You slip the new clips into place first. I purchased mine as a kit, which comes with the "recommended" 4 clips per side, but my old trim had 5 clips per side. Not sure if they had been refitted at some point with an extra clip. I went with the four, evenly spaced new clips rather than re-use an old clip. The flat side goes on the outside of the door.

And the grippy, spiky bits on the inside

The new trim just pushes onto the clips

#72
kws
-
- Noobies
-
- 63 posts
Stage One Kit Fitted
- Location: Wellington, New Zealand
Posted 28 July 2018 - 03:33 AM
I am a little annoyed though, as I went with the newer plastic capped chrome strip from the later cars (as that's what was available at the time), and it seems it's slightly shorter than the old chrome ended strip. Doesn't look or fit require as nicely at the front.


The rear of the trim is OK

You can see the rubber pushes up against the glass nicely with the window closed. This should make a difference in how much water actually gets into the door in the first place

The next task to stop water ingress was to replace the horribly buggered rear side window seals. These were literally falling apart, with the seal section coming free from the U channel section in multiple places
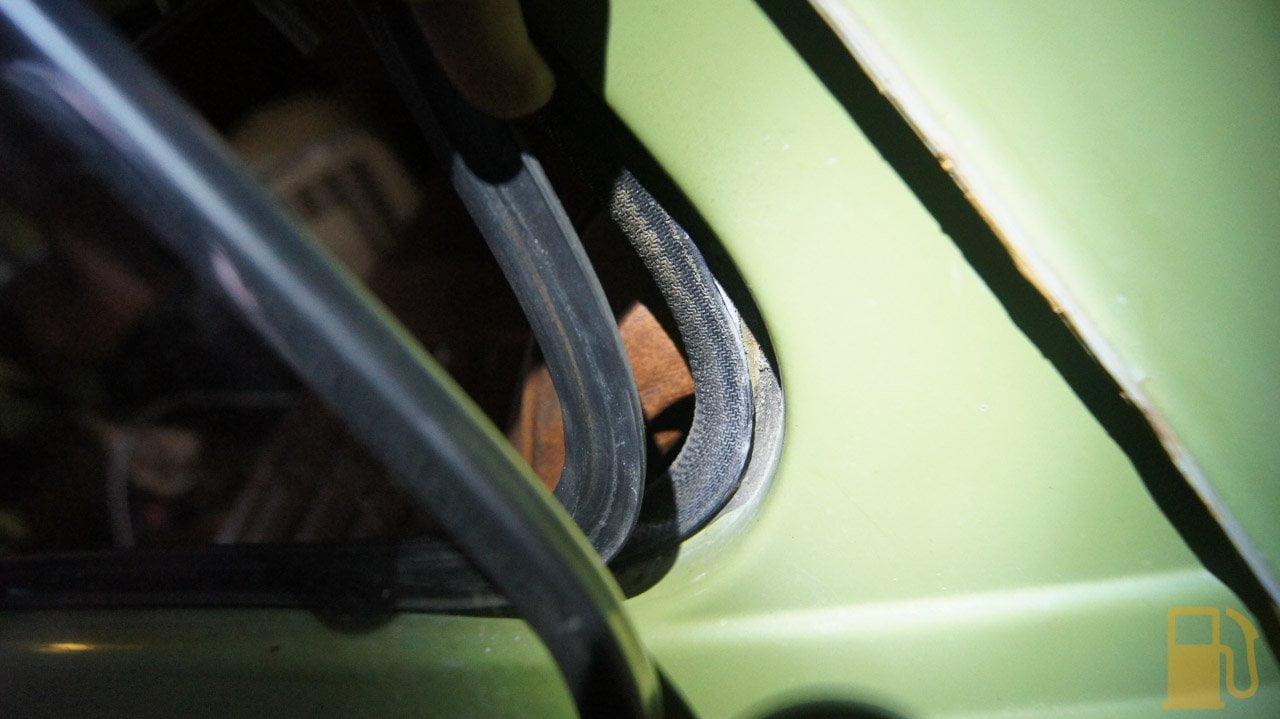
The seal appears to have also shrunk and has been "fixed" with a glob of sealant
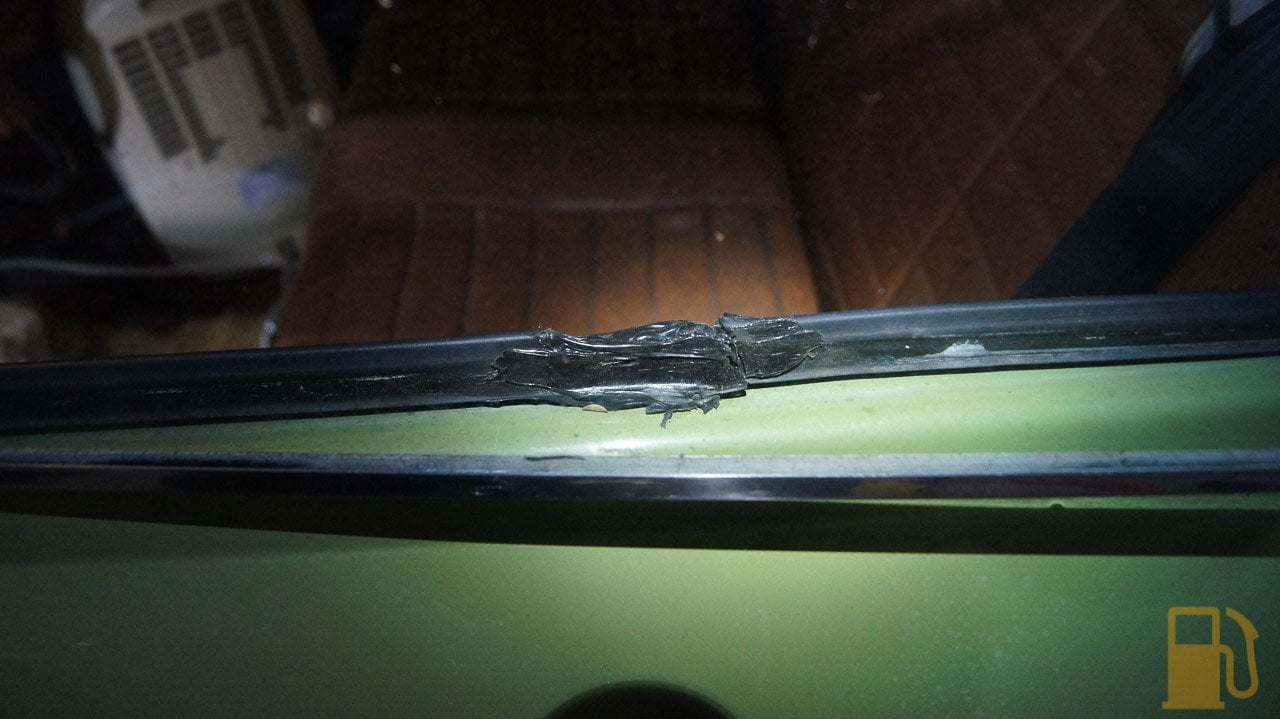
None of this was good and the windows bucketed water in unless you carefully placed the seal whilst shutting the window.
To remove the seal you need to remove the window. This is held in place with two screws on the catch, and two screws at the front on the "hinges"


It's a solid bit of glass, so take care not to drop it.
The seal then just pulls off the body and goes into the bin

Someone had used what I presume was butyl sealant around the seal. This wasn't stuck to the seal at all, but was a pain to remove from the body. I ended up using a plastic scraper, and then brake clean to wipe it away


This did reveal two things. One, someone has previously used a sharp knife around the whole of the window, leaving cut marks in the paint. Two, there was rust under the "glob" of sealant at the bottom, and on the B pillar


This rust was the same on both sides, so I wire brushed it back, and treated it. The car will eventually need paint, so I'm not too worried as long as the rust wont get worse. It was mainly surface with some minor pitting. No deep rust or holes.

Refitting the seals was a crappy job because of the way the seals are folded for packaging. They are twisted so they can be easily folded to halve their size in the bag, but because of this they don't want to easily untwist to how you need them to. With some gentle persuasion, I managed it though. I used a rubber mallet to help gently tap the seal into place. I did not use any sealant under the seal, as the design of the seal is such that it should keep water out of the join.


As a side note, having the windows out gives really good access to clean and inspect your companion boxes. Mine had some rubbish in them, lots of dirt, but only surface rust. Phew. This is after a good vacuum

Refitting the window is really a two person job, just so you don't drop it, but It can be done alone. I used Gummi Pflege to treat the seal, and once that was absorbed I used some silicone spray on the front quarter of the seal (where the hinges are) to help the window slip over the seal into place. I sat on the back seat, fed the window out of the car through the hole, and fitted the hinges and lined it up that way. Once the hinges are over the seal you can hold the catch to support the glass. It'll take some wiggling and jiggling to get the hinge holes to line up nicely

But the new seal butts up nicely against the window all around


With those seals replaced, hopefully now I will have sorted 90% of my water leaks into the car. I'm suspicious of the front windscreen seal, but haven't actually seen any water come in around that. The door seals are stuffed too, and will need replacing, but I think they will hold out water well enough for now.
A the moment I'm waiting for some bits from Minispares, such as front subframe shims (none were fitted when the subframe was refitted, so the front valance has been pulled in), and clips for the four seam trims, so I can fit them. I purchased new seam trims locally, which I'll need to paint soon to match the car, but was a bit disappointed to find the rear "primed" trims I got were completely bare metal inside, no coating. I quickly gave them a coating of Zinc paint on the inside, so that should protect them for a bit. The front trims were primed inside and out.

I also sorted the Statutory Declaration I needed to get signed by a Justice of the Peace to say that I'm the legal, entitled owner of the car, so now I have all the paperwork ready to go and get the car re-registered. Just need to find some time and money to actually the inspection done.
Parts Used
MSSK2103 - Mini 1980 on. Window weather seals set & clips. (www.classiccarparts.co.nz)
EAM7724 - Mini seal for opening 1/4 window. x2
Please note these parts are specific to my car and may vary. Please check before ordering.
#73
kws
-
- Noobies
-
- 63 posts
Stage One Kit Fitted
- Location: Wellington, New Zealand
Posted 12 October 2018 - 07:00 AM
Its been a while, but I finally got around to taking the Mini down for its re-registration inspection so that it can be driven on the road again.

Unfortunately the inspection was a fail,

So I need to sort these,
A new lower ball joint (will do the pair)
A new rackend, which isnt available, so a new steering rack 
Rebuild both rear radius arms
Replace both rear shocks (apparently there is play before the cones compress)
And fix the brake imbalance (LH 10% / RH 93% - Almost nothing from the left), which may be the hard one to do. I don't recall any obvious leaking etc when i last removed the drums, so will strip both down, clean the lot, and replace the rear hoses when I remove the arms. Hopefully there is something obvious that needs to be replaced.
I'm not looking forward to the work, and only have 20 working days to sort it all before i have to pay again and have a full inspection.
#74
Chris.Williams
-
- Members
-
- 679 posts
Super Mini Mad
- Location: Matamata
Posted 12 October 2018 - 07:38 AM
Why can’t you get a rack end?Its been a while, but I finally got around to taking the Mini down for its re-registration inspection so that it can be driven on the road again.
Unfortunately the inspection was a fail,
So I need to sort these,
A new lower ball joint (will do the pair)
A new rackend, which isnt available, so a new steering rack
Rebuild both rear radius arms
Replace both rear shocks (apparently there is play before the cones compress)
And fix the brake imbalance (LH 10% / RH 93% - Almost nothing from the left), which may be the hard one to do. I don't recall any obvious leaking etc when i last removed the drums, so will strip both down, clean the lot, and replace the rear hoses when I remove the arms. Hopefully there is something obvious that needs to be replaced.
I'm not looking forward to the work, and only have 20 working days to sort it all before i have to pay again and have a full inspection.
#75
Chris.Williams
-
- Members
-
- 679 posts
Super Mini Mad
- Location: Matamata


Also tagged with one or more of these keywords: roundnose
Projects →
Mini Saloons →
Mini Cooper Project - Finally StartsStarted by piphatch , 08 Jan 2025 |
|

|
||
Projects →
Mini Saloons →
1965 Austin Mini Restoration - Canadian Mk1Started by DoubleEh , 14 Nov 2022 |
|

|
||
Projects →
Mini Saloons →
Project Joe - 1991 Mini Mayfair 998Started by Eggers , 02 Jun 2022 |
|

|
||
Projects →
Mini Saloons →
Mpi Dashboad ProblemStarted by mikeprez , 22 Dec 2021 |
|

|
||
Projects →
Mini Saloons →
1978 Oew - Willy The MiniStarted by smalltreegrower , 11 Nov 2021 |
|

|
1 user(s) are reading this topic
0 members, 1 guests, 0 anonymous users


