Looking good mate, just need to keep the motivation high!


Getting The Rose Family Mini Back On The Road! (After 5 Years)
Started by
Ben Rose
, Jun 10 2019 03:11 PM
roundnose
297 replies to this topic
#286
: post #286")
jsyjamie
-
- Noobies
-

- 76 posts
Stage One Kit Fitted
- Location: Jersey
Posted 28 September 2020 - 11:47 AM
#287
Ben_O
-

- Paint Doctor
-
- 9,794 posts
Mill Road Garage
- Location: Isle of Wight
Posted 29 September 2020 - 10:29 PM
Looking good Ben.
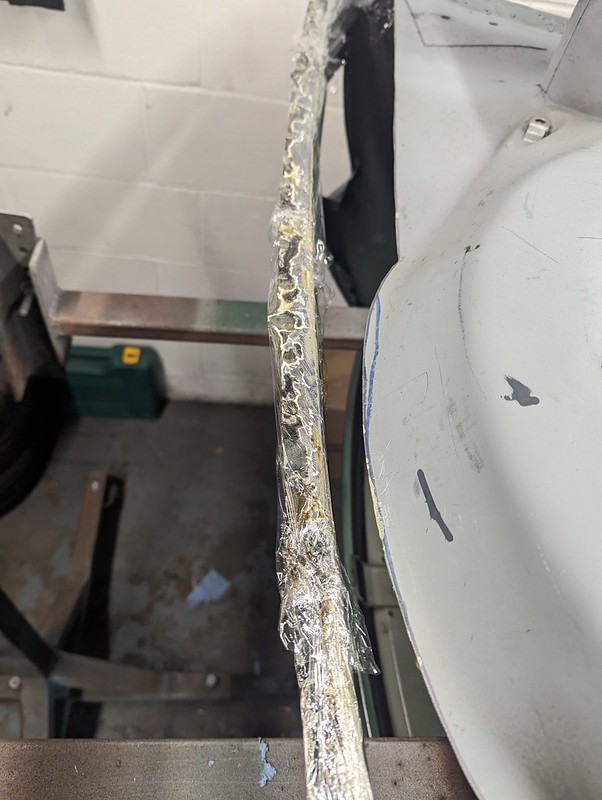
welding isn't too bad at all. You just need to work on your technique but plenty of practice will help there.
It looks from your picture that you may need to up the power and drop the wire speed slightly.
Keep playing with the settings and trying it out joining scrap pieces together and you will get there.
Cheers
Ben
#288
Ben Rose
-
- Members
-
- 210 posts
Mini Mad
- Location: Preston, Lancashire
Posted 30 September 2020 - 11:16 AM
Looking good Ben.
welding isn't too bad at all. You just need to work on your technique but plenty of practice will help there.
It looks from your picture that you may need to up the power and drop the wire speed slightly.
Keep playing with the settings and trying it out joining scrap pieces together and you will get there.
Cheers
Ben
Thanks for the input Ben. I'm going to cut off the front wings so I have more scrap to test with. Practice, Practice, Practice. In terms of using a copper back plate will that make much of a difference? Also I am using 0.6 mig wire now which is helping controllability as I was using 0.8 before. But I am still using pure CO2. Should I swap to Argon\CO2 mix? I have a big bottle I get re-filled.
#289
Ben Rose
-
- Members
-
- 210 posts
Mini Mad
- Location: Preston, Lancashire
Posted 05 October 2020 - 03:09 PM
So I decided to cut out the small repair I made as I wasn't happy. Welded in a new repair section by tacking at first and then filling in the gaps with weld and BOOM blew two huge holes where the metal joins. So frustrating. 
I have ordered a copper back so I can fill in the holes and grind it back. Thought I was getting better to that point. Having said that its all a learning curve. Still enjoying the learning process too.
Tired of watching the boot floor get surface rust all over it so used some Deox Gel overnight to remove the rust. I'll be washing it off tonight and then priming with Electrox.


As soon as the copper backing arrives I will fill in my holes and then weld in the battery box.
#290
Ben Rose
-
- Members
-
- 210 posts
Mini Mad
- Location: Preston, Lancashire
Posted 06 October 2020 - 07:07 AM
Cleaned up the boot floor. Just wanted to give it some protection whilst I worked on it as there was starting to be a fair bit of surface rust building up. The boot lip is too far gone so I am going to try to repair this. By the time I have finished it would have been was simpler and quicker to replace the boot floor but I am using this as good experience and learning as I go.


Had to have a second go over some of the really bad bits but it is incredible how well it has come up.

This sure helps drying the panels and drying paint.


Mask certainly helped...

#291
Ben Rose
-
- Members
-
- 210 posts
Mini Mad
- Location: Preston, Lancashire
Posted 15 March 2024 - 07:33 PM
So how long?!! Oops. 
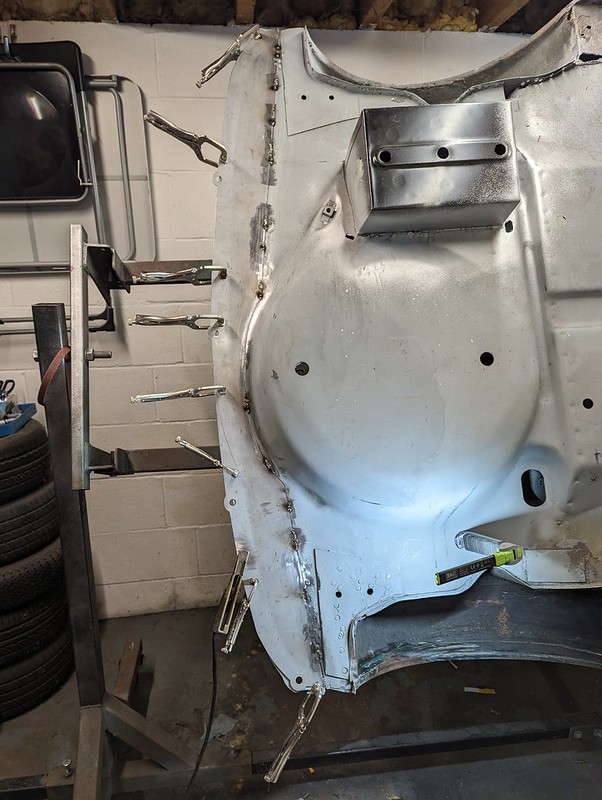
With some help from some good friends (and a bit of well deserved pressure) we started work on the Elephant in my garage on Tuesday.
We started where I left off (I can just about remember that far back), on the boot floor. I'm still learning and I've decided to not make everything perfect but to just get it back on the road and being enjoyed.
"Don't get it right get it running".

Gaz doing a bit of fettling..

Whilst I got the panel ready..

Test fitting...

More fettling...
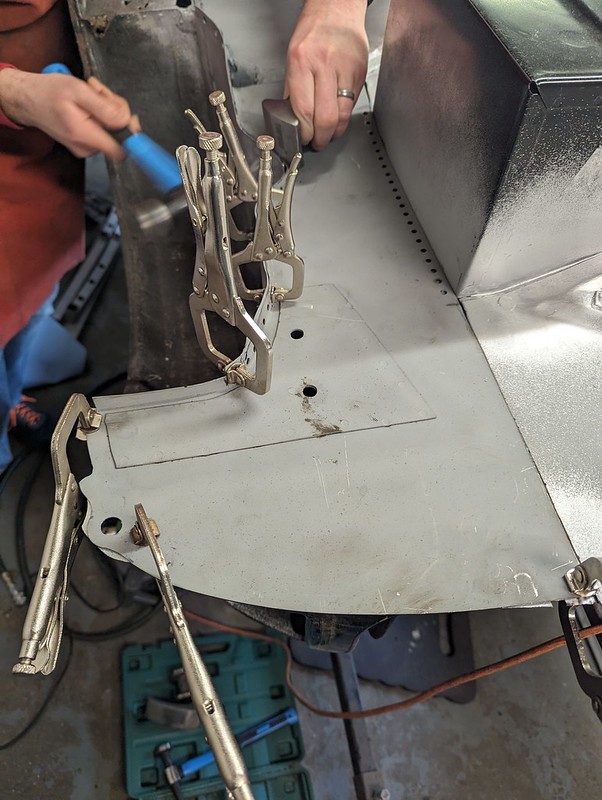
And in it goes...


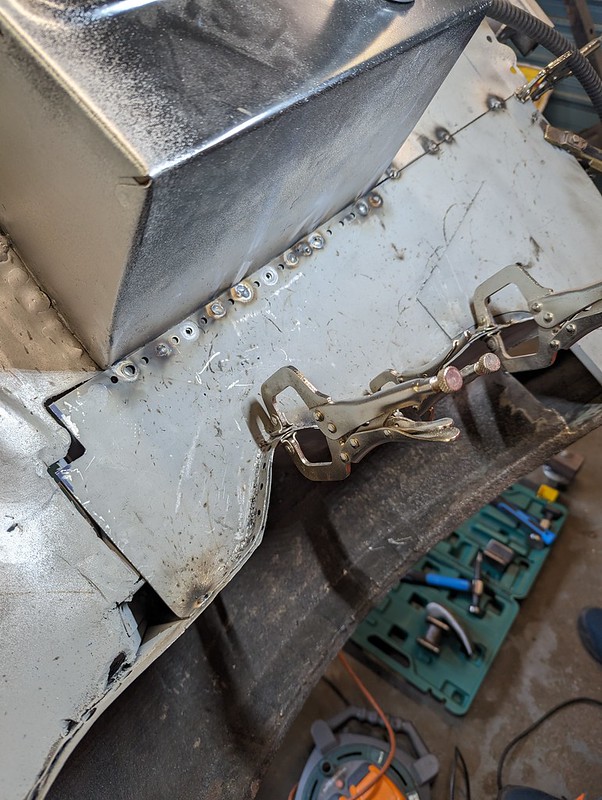


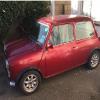
Now on to cutting off the rear lip of the boot floor ready for new metal!


Gaz very noticed at the last minute the bracket for the petrol tank strap, so a few more spot welds to drill out.
Pretty much done for the day other than to treat the boot lip for rust before the new panel can go on.

Rust treatment...

Zinc Primer...
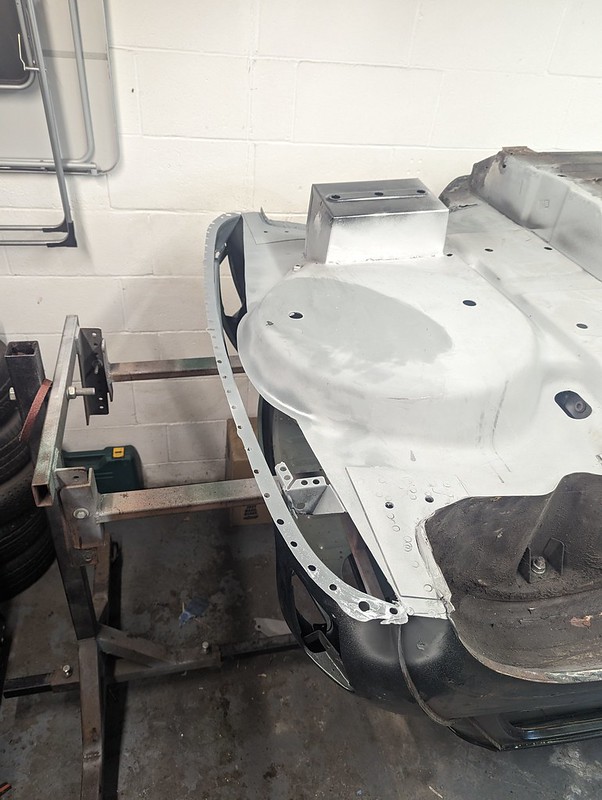
Test fitting new metal...


Not a bad fit at all, fairly consistent gap. I may have to fettle the holes for the bumper mounting but I'll do that when the valance gets prepped.
Massive thanks to Gary for getting me back on it and taking a day of his own time to help. (He loves it really)
Hopefully I can keep up a bit of momentum. 
#292
cooperd70
-

- TMF+ Member
-
- 730 posts
One Carb Or Two?
- Location: London
Posted 15 March 2024 - 09:15 PM
Wondered when you'd be back. Glad to see you back posting on the progress. Gary will have to keep you on the straight and narrow.
Keep up the good work 👍👍
Keep up the good work 👍👍
#293
Ben Rose
-
- Members
-
- 210 posts
Mini Mad
- Location: Preston, Lancashire
Posted 15 March 2024 - 09:51 PM
Yeah it's been a while 🙄. Thanks for still following. 👍
#294
Ben Rose
-
- Members
-
- 210 posts
Mini Mad
- Location: Preston, Lancashire
Posted 25 March 2024 - 07:53 PM
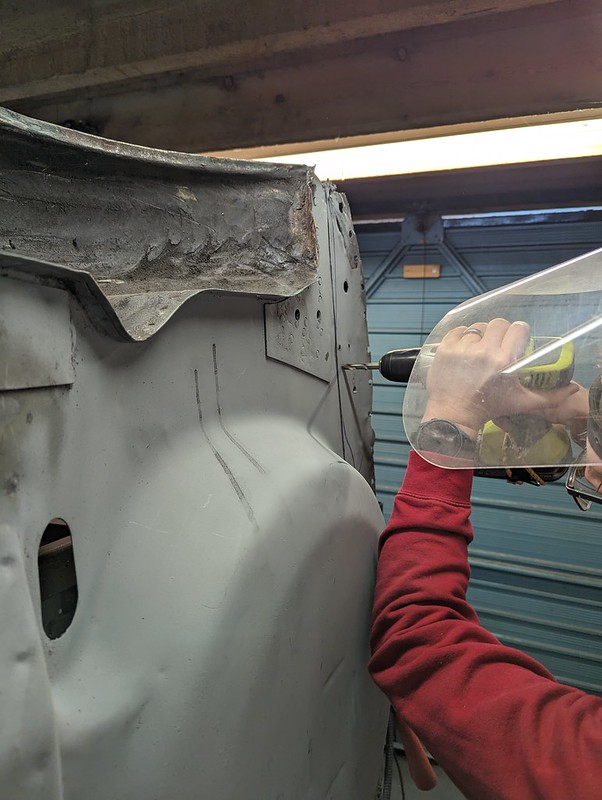
So this last week I have grabbed an hour here or there.
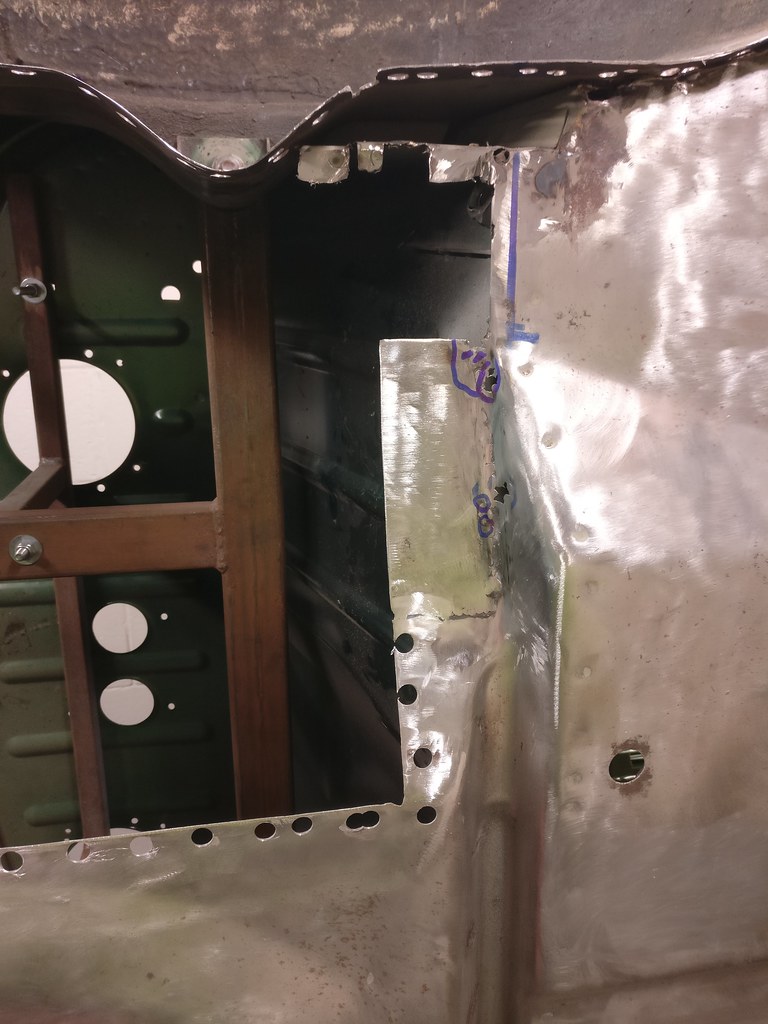
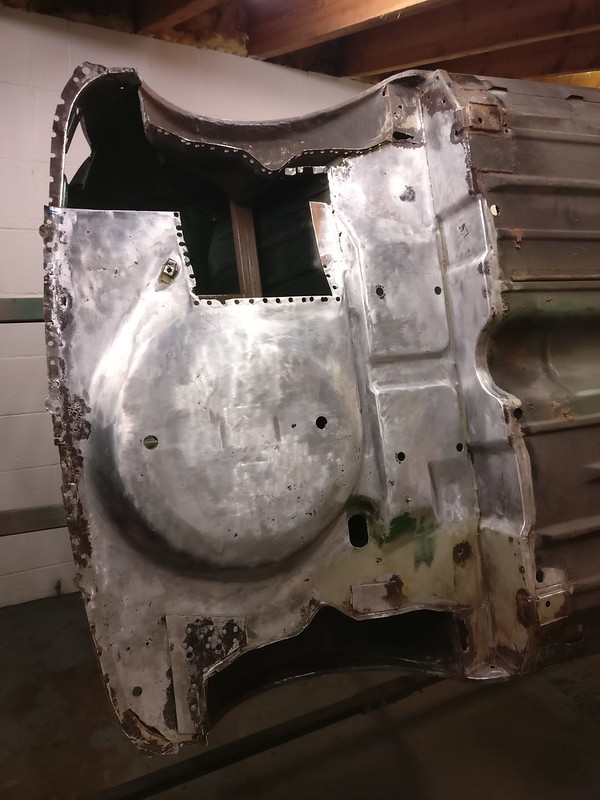
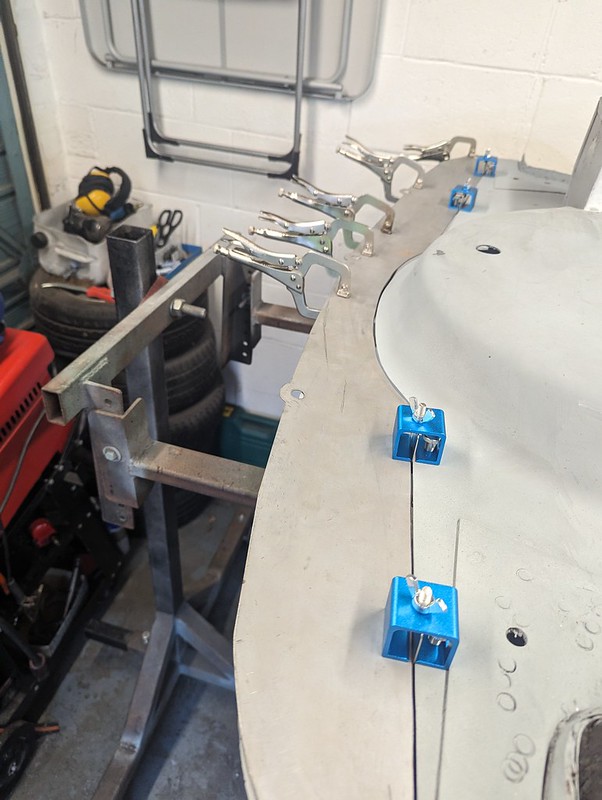
Started with tacking the new rear part of boot floor together.
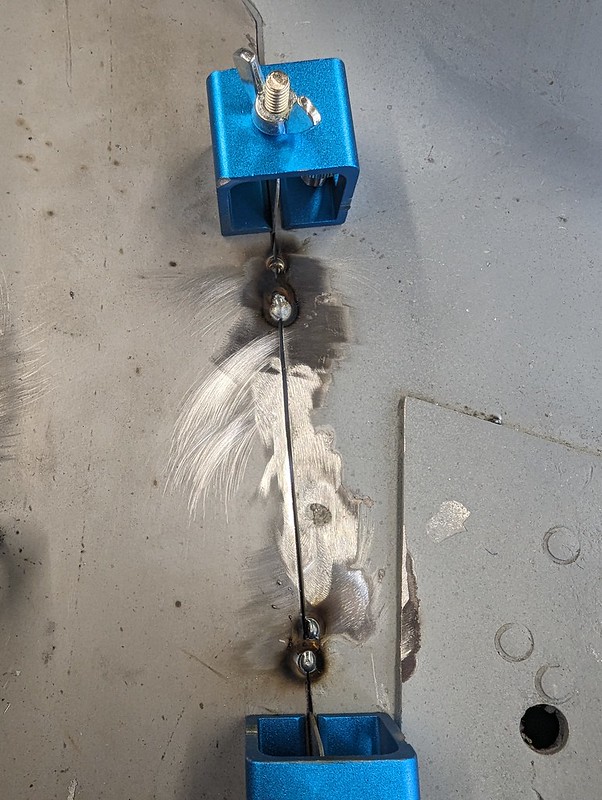

Then continued until all welded in. Not the best welding but well stuck together. 


Then for a bit of grinding back!

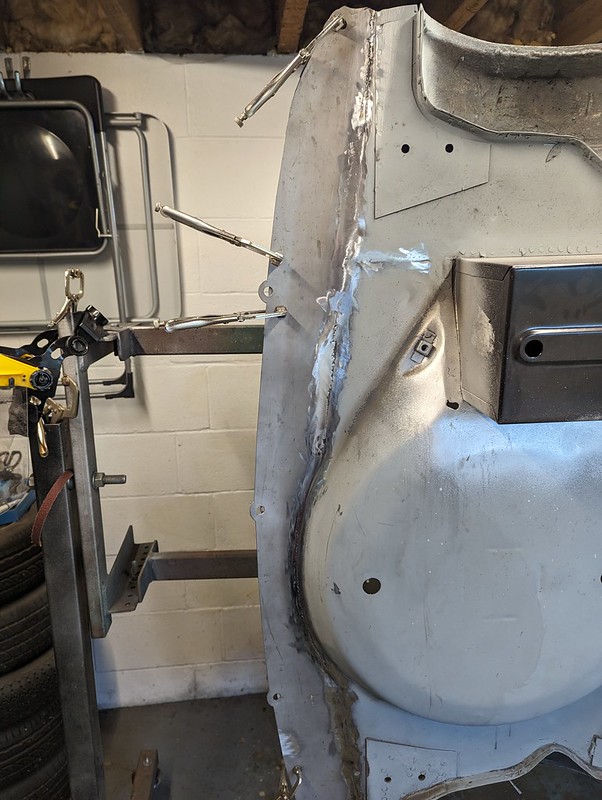


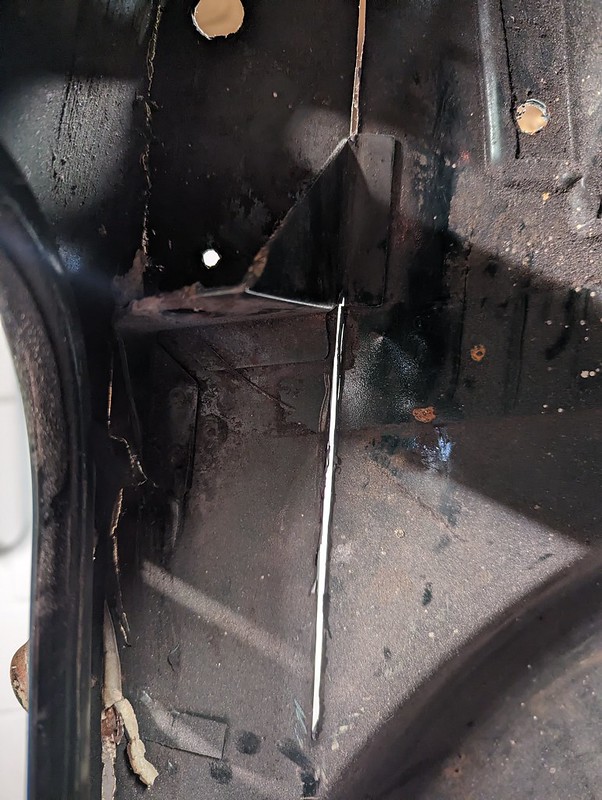
I have found a few pin holes which I will try to fill but its pretty much there.
Next I need to finish some small repairs (RED) and then have a go at replacing the end of the healboard where the rear subframe attaches. I have an M Machine repair panel lined up for that bit. (Any tips welcome!)

Edited by Ben Rose, 25 March 2024 - 07:55 PM.
#295
Homersimpson
-

- Members
-
- 833 posts
One Carb Or Two?
- Location: Redditch
Posted 27 March 2024 - 09:27 AM
That looks great, the thing about butt welding thin sheet steel together is that its actually quite hard to do and the end result never looks that neat compared to someone running a nice thick bead of weld on something more substantial because you can't run a long bead without risking distortion.
I've just built a couple of spring hanger boxes for a frogeye sprite and my welding on them looks really good and was dead easy because they are made of 2mm steel and i'm welding into a valley so loads of power and pull the trigger and go, bodywork just isn't like that.
If you do have any bits that don't look that good just remember "a grinder and paint make me the welder I aint!" 
#296
elliot341
-

- TMF+ Member
-
- 213 posts
Mini Mad
- Location: Blackrod, Bolton
Posted 27 March 2024 - 11:32 AM
I have made up a bit of a jig to allow me to replace sub frame mounting points on my mini (and now also a mates mini). Used two sub frame trunions/brackets and then added two plates in the middle where I can weld bolts to the rest of the heel board and take the jig on and off when i want. By attaching the jig using the existing holes and then welding the bolts on I can then cut out the sub frame mounting areas and use the jig to put the new panels (one at a time) back in the right place
#297
Ben Rose
-
- Members
-
- 210 posts
Mini Mad
- Location: Preston, Lancashire
Posted 27 March 2024 - 02:05 PM
That looks great, the thing about butt welding thin sheet steel together is that its actually quite hard to do and the end result never looks that neat compared to someone running a nice thick bead of weld on something more substantial because you can't run a long bead without risking distortion.
I've just built a couple of spring hanger boxes for a frogeye sprite and my welding on them looks really good and was dead easy because they are made of 2mm steel and i'm welding into a valley so loads of power and pull the trigger and go, bodywork just isn't like that.
If you do have any bits that don't look that good just remember "a grinder and paint make me the welder I aint!"
Thanks for the comment mate.
I am definitely a beginner but at least its the boot floor and once I have a skim of filler, paint and underseal I shouldnt look too bad. The cars been off the road for so long I want to get driving it. 
#298
Ben Rose
-
- Members
-
- 210 posts
Mini Mad
- Location: Preston, Lancashire
Posted 27 March 2024 - 02:11 PM
I have made up a bit of a jig to allow me to replace sub frame mounting points on my mini (and now also a mates mini). Used two sub frame trunions/brackets and then added two plates in the middle where I can weld bolts to the rest of the heel board and take the jig on and off when i want. By attaching the jig using the existing holes and then welding the bolts on I can then cut out the sub frame mounting areas and use the jig to put the new panels (one at a time) back in the right place
Great idea that , I just have the bare subframe to lift in place when I get to that point however I may try creating a small jig to save lifting it on each time. Thanks.


Also tagged with one or more of these keywords: roundnose
Projects →
Mini Saloons →
Mini Cooper Project - Finally StartsStarted by piphatch , 08 Jan 2025 |
|

|
||
Projects →
Mini Saloons →
1965 Austin Mini Restoration - Canadian Mk1Started by DoubleEh , 14 Nov 2022 |
|

|
||
Projects →
Mini Saloons →
Project Joe - 1991 Mini Mayfair 998Started by Eggers , 02 Jun 2022 |
|

|
||
Projects →
Mini Saloons →
Mpi Dashboad ProblemStarted by mikeprez , 22 Dec 2021 |
|

|
||
Projects →
Mini Saloons →
1978 Oew - Willy The MiniStarted by smalltreegrower , 11 Nov 2021 |
|

|
2 user(s) are reading this topic
0 members, 2 guests, 0 anonymous users


