Jump to content


Photo
- - - - -

1969 Bmc Cooper "rally" Project


  • Please log in to reply
69 replies to this topic

#31 teveo

teveo

    On The Road

  • TMF+ Member
  • PipPip
  • 36 posts
  • Location: Viken

Posted 07 February 2021 - 02:58 PM

I had forgotten about my impact sockets, went up to the garage and checked. One of them was 38 mm and deep enough to torque down the ball-joints.  Couple hours later suspension is on.


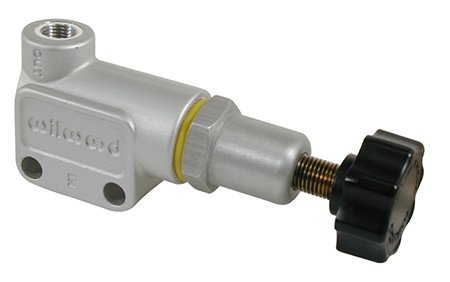
My next step will be hydraulics and also the wiring loom.


The loom is very good but it has been out of car and I have to find some good info on routing and a diagram.


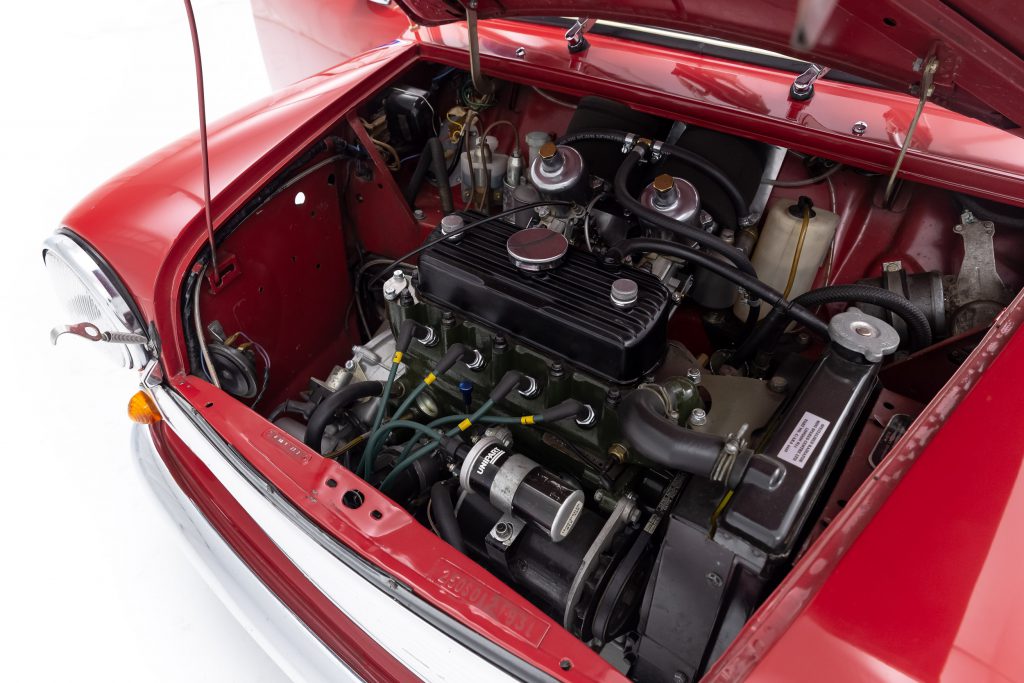
I already studied the brake pipes but have to read up on engine bay for LHD car though.  I would prefer two circuit brake, front-front, rear-rear will do I dont want to do double pipes under the car.


Attached File  IMG_6864.jpeg   76.42K   1 downloads


Attached File  IMG_6865.jpeg   66.83K   4 downloads


Attached File  IMG_6866.jpeg   67.94K   4 downloads


#32 teveo

teveo

    On The Road

  • TMF+ Member
  • PipPip
  • 36 posts
  • Location: Viken

Posted 08 February 2021 - 01:28 PM

About to order another small pile of parts and have two questions:


My car being LHD I have the brake and clutch cylinders on LH side, would it be correct to assume I need the blanking plate w 2 holes for on the RH side for the water hoses to the heater?


What part number is the piece/plate behind the speedometer, closing the coupe from the engine bay?


I assume the lump of the wiring loom go here but I dont have this piece.


Thank you for any advice.


Edited by teveo, 08 February 2021 - 01:29 PM.


#33 Gilles1000

Gilles1000

    Speeding Along Now

  • TMF+ Member
  • PipPipPipPipPip
  • 438 posts
  • Location: Karlsruhe

Posted 08 February 2021 - 01:57 PM

You're right, you should order the blanking plate with two holes.


On mine, and I think all cars with speedo in the middle, there was no closing plate between the cabin and the engine bay. In fact you can see the rear of the speedo from the engine bay. 

I know in Japan there is a nice cover made up for I think 80 pounds plus taxes. Or you take one from a later car, but I can't find it on the Minispares catalogue...


#34 teveo

teveo

    On The Road

  • TMF+ Member
  • PipPip
  • 36 posts
  • Location: Viken

Posted 09 February 2021 - 06:06 AM

Thanks, it is on the list.


I got the wheels back from fitter yesterday, I think it will be fine with 1.75" arches. The wiring seem quite easy, I think I have it figured out to 95%.  I need some good engine photos to place regulator box and fusebox correctly else it is all there. 


Also considering getting a dynator and dummy regulator at the same time.

https://www.powerlit...tes/rac006.html

or

https://www.autoelec...71/category/197


Looks like RB106 is correct.

https://www.autoelec...roduct_list/169


This should  be fine with arches installed.


Attached File  IMG_6868.jpeg   34.6K   1 downloads


The wiring that goes to the rear, up and right in the photo should rather be behind the dash, right?

Attached File  IMG_6869.jpeg   70.09K   0 downloads


#35 KTS

KTS

    Up Into Fourth

  • TMF+ Member
  • PipPipPipPipPipPipPipPipPip
  • 2,265 posts
  • Location: Herts

Posted 09 February 2021 - 08:46 AM

rear loom wiring would normally go up the windscreen pillar direct from engine bay rather than as you have pictured


#36 Gilles1000

Gilles1000

    Speeding Along Now

  • TMF+ Member
  • PipPipPipPipPip
  • 438 posts
  • Location: Karlsruhe

Posted 09 February 2021 - 09:00 AM

But is there a way to go directly from the engine bay to the A-pillar?


I think it's right how teveo did, only that the loom should be pushed and hold in place directly under the scuttle


#37 KTS

KTS

    Up Into Fourth

  • TMF+ Member
  • PipPipPipPipPipPipPipPipPip
  • 2,265 posts
  • Location: Herts

Posted 09 February 2021 - 09:32 AM

But is there a way to go directly from the engine bay to the A-pillar?


yes - there is a gap between the top of the inner wing and the underneath of the scuttle panel at the rear corners of the engine bay that leads into the void created by the scuttle end closure panels.  windscreen pillars also open out into that void


#38 Spherix

Spherix

    Speeding Along Now

  • TMF+ Member
  • PipPipPipPipPip
  • 479 posts
  • Location: The Netherlands
  • Local Club: Mini Seven Club Netherlands

Posted 09 February 2021 - 10:21 AM

I'm in the middle of building up a LHD shell, it currently sits without engine or wiring, so let me know if I can take any pictures for you. Heating hose routing differs per build year / engine spec though.


#39 GraemeC

GraemeC

    Crazy About Mini's

  • TMF+ Member
  • PipPipPipPipPipPipPipPipPipPip
  • 7,314 posts
  • Location: Carnforth

Posted 09 February 2021 - 10:33 AM

The rear loom goes up the pillar from inside the car.  It doesn't normally come into the engine bay at all and joins the main loom at the back of the dash area


#40 Gilles1000

Gilles1000

    Speeding Along Now

  • TMF+ Member
  • PipPipPipPipPip
  • 438 posts
  • Location: Karlsruhe

Posted 09 February 2021 - 10:51 AM

Hmm, the rebuild of my car will be interesting. Until now we have three different routings for the rear loom :)

And in my rush at the time I did not take pictures...


WAIT...

Just thought of the Automatic I bought last summer. It's a 1979 car which has not been modified too much, and the loom goes as per teveo's picture:

OUzfy0vh.jpg


Gilles


Edited by Gilles1000, 09 February 2021 - 10:52 AM.


#41 teveo

teveo

    On The Road

  • TMF+ Member
  • PipPip
  • 36 posts
  • Location: Viken

Posted 09 February 2021 - 12:00 PM

Thanks everyone, I did some google searches and find hardura covers in many of the images, it is a good solution/material.

It will hide the cabling and soften the engine noise.


Fusebox, this location looks fine compared to my loom/car, it has been converted to alternator so the regulator is gone though.

1970-morris-mini-cooper-s-mkii-saloon.jp


Regulator/control box, mine seem to go in front of the little panel the loom goes through, maybe they can squeeze in together behind it. 

 
Mini-Cooper-race-0182-1024x683.jpg


#42 teveo

teveo

    On The Road

  • TMF+ Member
  • PipPip
  • 36 posts
  • Location: Viken

Posted 09 February 2021 - 01:00 PM

Another matter is the brake bias valve. They seem to be out of stock "everywhere", was thinking about getting a Wilwood unit. 


https://www.wilwood....temno=260-12627


260-10922-med.jpg


Any similar and moderately priced parts out there?


#43 Spherix

Spherix

    Speeding Along Now

  • TMF+ Member
  • PipPipPipPipPip
  • 479 posts
  • Location: The Netherlands
  • Local Club: Mini Seven Club Netherlands

Posted 09 February 2021 - 01:47 PM

The control box sits in a different spot on my '71 LHD Mk3, see https://i.imgur.com/tB0zmIU.jpg


#44 teveo

teveo

    On The Road

  • TMF+ Member
  • PipPip
  • 36 posts
  • Location: Viken

Posted 09 February 2021 - 04:39 PM

The control box sits in a different spot on my '71 LHD Mk3, see https://i.imgur.com/tB0zmIU.jpg


Thanks, that is the location my regulator should fit, the holes in the inner fender are there.


#45 teveo

teveo

    On The Road

  • TMF+ Member
  • PipPip
  • 36 posts
  • Location: Viken

Posted 12 February 2021 - 05:11 PM

Even if I have had decent progress it has been very cold over here last few weeks, minus 10-15 since early January.  In my main "workshop/ storage" I could hardly keep 6-8 degrees and I finally rolled the Mini into a smaller room. Here I can get the heat up to 14-15 degrees.


Hope to finish the brake lines this weekend, new masters cylinder is on order.  The fuel lines that came with the car is a braided rubber hose with AN fittings, I will mock it up and see if I like it but leaning on a hard line. 


Looking good.

Attached File  IMG_6878.jpeg   86.74K   5 downloads


Attached File  63459189448__97E77903-E2FA-4056-B0A5-21E85163816F.jpeg   80.43K   5 downloads


0 user(s) are reading this topic

0 members, 0 guests, 0 anonymous users