1969 Bmc Cooper "rally" Project
#46

Posted 14 February 2021 - 02:40 PM
#47

Posted 14 February 2021 - 06:13 PM
Doesn’t look right to me - think they may get in the way of the engine like that!
The fitting you’ve used as a T piece is an alternative to the one you’ve used on top of the LH hose
#48

Posted 15 February 2021 - 02:20 PM
Doesn’t look right to me - think they may get in the way of the engine like that!
The fitting you’ve used as a T piece is an alternative to the one you’ve used on top of the LH hose
Thanks, yes I guess but I was referring to the connections not really the layout. I will later on bend and shape the lines close to the chassis.
Looks like I have to order:
- the connector + banjo that join Master-front-rear lines unless it is the angled brass connector.
- the banjo + sensor for brake pressure, seem to go on the frame where brakeline connect to to front RH brake hose
#49

Posted 15 February 2021 - 02:38 PM
Assuming you are going with a simple single circuit and no bulkhead mounted PDWA valves, then the front and rear join with one of these:
http://www.minispare...|Back to search
There is no banjo connection there.
The pressure light switch
http://www.minispare...|Back to search
uses this:
http://www.minispare...|Back to search
with appropriate copper washers
Edited by GraemeC, 15 February 2021 - 02:38 PM.
#50

Posted 15 February 2021 - 04:20 PM
#51

Posted 15 February 2021 - 08:56 PM
Thanks, I have that 3 way but used it for the pipes in the rear subframe, I did not get the regulator valve with the parts that followed the car and did not read up enough to see that it was expecting a regulator. Those regulators seem to be on back order or very expensive if someone have old stock.
I ordered a spare 3 way a couple days ago and should get it with new master. I will be using that Wilwood regulator inline after the rear pipe from the 3 way and with the possibility to adjust in the engine bay, could even drill or find an unused bulkhead hole and have the knob under dash sort of.
With some luck my order will show up before weekend. In the meantime I will start on the interior. Dynamat on the bulkhead only, floors will be with felt.
 IMG_6890.jpeg 70.46K
2 downloads
 IMG_6889.jpeg 89.85K
4 downloads
#52

Posted 16 February 2021 - 11:27 AM
Mocked up brake lines, does this look correct? It will be tidied up later.
The floating one (http://minispares.co...sic/21A654.aspx) needs to be the one on the subframe (UK Drivers side)
The sensor linked above then goes vertically in that one, acting as a banjo to the sensor and right hand flexible hose.
See https://i.imgur.com/PMLGzlF.jpg for routing from subframe to regulator (note regulators sit close to the right when a servo is in place, otherwise they sit approx where the servo is on the bulkhead.)
Edited by Spherix, 16 February 2021 - 11:30 AM.
#53

Posted 22 February 2021 - 09:34 AM
Thank you for the feedback. It looks like my master cylinder and the other brake parts are being delivered today and time to move forward on brakes this week.
I did a little interior work in the weekend and also trial fitted grille and prepared for window install. Windows looks straightforward, never used sealer on window install but I suppose I will have to use sealer as most sources say so. My windows install experience is from German cars and I would usually install the window with aluminum strip mounted in the seal and use a lubricated (fatty soap) cord to install a front or rear screen but Mini looks different.
Grille install, have a new grille waiting for install but when I mockup the grille it does not fit well. I am getting the "grille surround moulding set" as well today and maybe it will enlighten me?
I was even thinking that my car had the wrong front panel but I see they are all the same pre 76 and that was kind of a relief but still does not help much in how to install. ![]()
 IMG_6896.jpeg 85.42K
5 downloads
 IMG_6897.jpeg 80.41K
4 downloads
#54

Posted 22 February 2021 - 10:52 AM
Front and rear screens are not fitted with cord. Fit the seal to the car, fit the screen into the seal, fit the chrome/plastic strip to lock the screen in place.
Sealant is the choice of the fitter - some swear by it, some never use t (me included).
The grille goes much higher - flush with the slam panel. The top finisher is then attached to the bonnet
Edited by GraemeC, 22 February 2021 - 10:54 AM.
#55

Posted 23 February 2021 - 02:14 PM
Thanks Graeme, I'll install with no sealer unless it seems loose.
I received more brakeparts yesterday and mocked up the system, there is a lot of pipe, the rear pipe and the pipe connecting the front to connection, even the master to connection is way too long. I will just have to cut them or make large "curves and waves".
I also "discovered" that I will have to use the bracket below master and clutch cylinder on RH side, that bracket is where the engine stabilizer bar go. What did LHD car have under the brake and master cylinder, just a gasket to bare metal?
 IMG_6906.jpeg 84.16K
1 downloads
Cannot finish the brake system until I have a few more parts and decided to take a closer look at the engine. I could see rust around the intake valves when I collected the car and was thinking it was from storage. Decided to take off the cylinder head and maybe freshen guides, seats and valves.
It looks like the engine had work to it recently with nice and clean pistons. They had carbon residue but it cam off very easy. The cylinder head is another story, why would someone potentially fix the block but install a cylinder head with worn valves and perhaps guides as well?
The guides seem decent I need to measure, the valve stems are quite worn though. Ok, new valves, guides on the shopping list.
 IMG_6900.jpeg 77.34K
2 downloads
 IMG_6899.jpeg 85.14K
1 downloads
#56

Posted 23 February 2021 - 02:25 PM
There would've been something under the master cylinders. Item 2 here:
https://www.somerfor...ealing-hardware
#57

Posted 23 February 2021 - 04:07 PM
Regarding the grill, if you look carefully at the first picture you posted (post #1) there's evidence of the mounting holes in the old front panel, it's easy to see where rust has probably been ground back.
Now if you have the old front panel ...... okay, probably not!
Stu.
Edited by Bobbins, 23 February 2021 - 04:08 PM.
#58

Posted 23 February 2021 - 04:30 PM
There would've been something under the master cylinders. Item 2 here:
If I remember well it was more the item 3 on my '79. I can't remember of a stepped plate like n2.
#59

Posted 04 March 2021 - 06:39 AM
Thanks for advice. I finally got the brake bias valve and can proceed with brakes. I will try to fabricate the plate under master cyl & clutch from 2 mm aluminum. Time to order parts for cylinder head, looks like I have approx 1" exhaust valves and 31 mm inlets all with large collet.
Would these be the one vendors list as "12G295" inlet/exhaust valves and is it possible to use valves with 3 grove collet if they are available? One of the reason for the sooted cylinder head may be the lack of stem seals, nothing but a poor fitting o-ring.
#60

Posted 11 March 2021 - 06:55 PM
I made a plate to mount under the pump, it is a mix between #3 and #2 in the figure. According to Somerset the number 2 "accepts fuel pipe and hydro". I just made a smaller tab to possibly secure the fuel pipe but it can easily be cut off if in the way.
Regarding grille, the holes were welded by former owner and the body was restored when I bought the car so have no old pieces. I have ordered 3 mm rivets nuts and will look at using rivets nuts to secure the grille.
Now waiting for the valve-train parts to redo top end, in the meantime I will lower the engine into the car to get an idea about how to make the very long brake pipes a little more tidy. I may have to cut some of them, they are like 10-15 inches longer than needed. They came from a kit though.
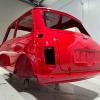
Happy in the air, it will get some attention this coming weekend.
 IMG_6951.jpeg 79.15K
5 downloads
0 user(s) are reading this topic
0 members, 0 guests, 0 anonymous users


