Jump to content


Photo

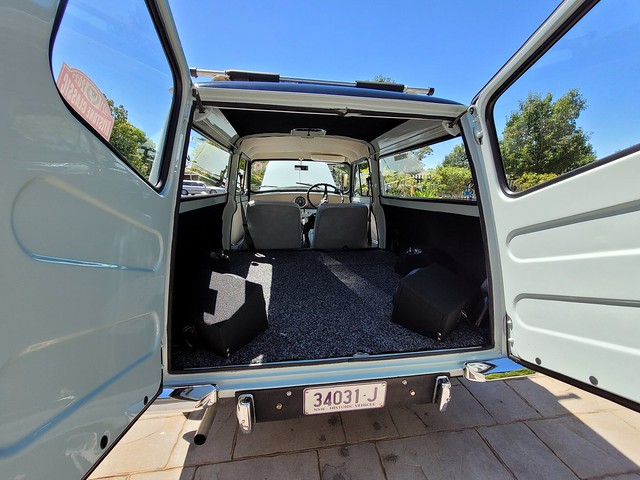
Australian 1970 Morris Mini K Van

van

  • Please log in to reply
21 replies to this topic

#1 braad

braad

    Stage One Kit Fitted

  • Noobies
  • PipPipPip
  • 85 posts
  • Location: Sydney
  • Local Club: Inner West Minis & Ausmini

Posted 16 March 2023 - 04:56 AM

The facts before the waffle:
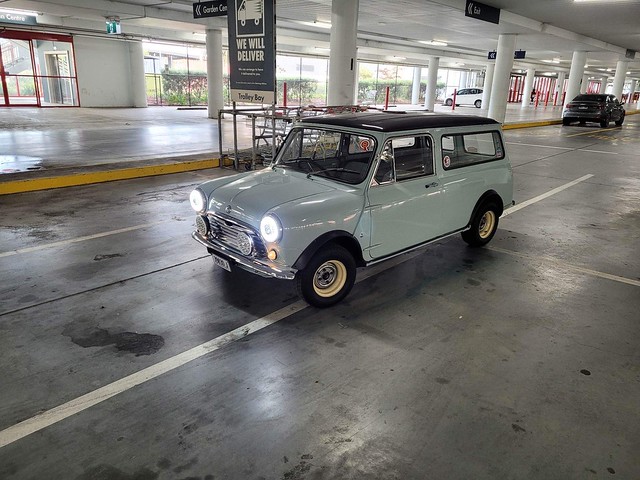
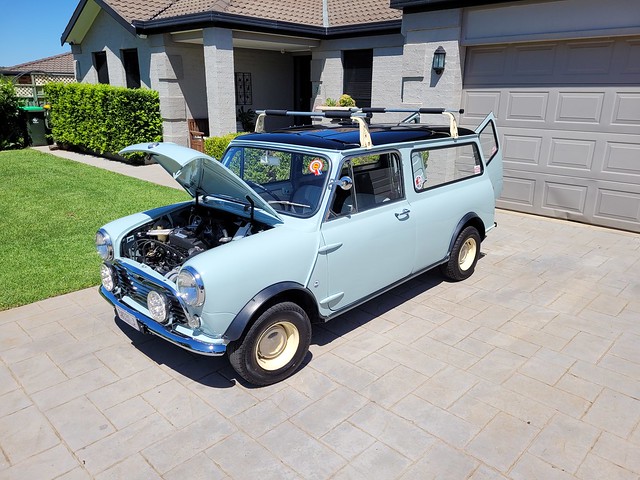
04/1970 Australian Morris mini K panel van
1098cc
Remote change 4 synchro
Apparently rebuild finished in 2020/21 (trying to get in contact with the builder)
“Smoke Blue” colour, 2K, black roof
Widened steel wheels
Falken fk07 tyres
Drum brakes all around
Plastic flares
LED spotties
Bluetooth stereo under passenger seat

The waffle:
So it’s been a big month for me, as after having my Morris 850 since the year 2000 (as a teen), I finally have a running mini! Truth be told, this is the first time I’ve even driven a mini, as every other time in some else’s I was a (happy) passenger. I think it’s sort of crazy I’ve been in (and out) if the mini scene for 23 years and had never driven one :o

I’ve been very fortunate to have been able to manage to get another mini, so as I’m fond of words, it happened as below!

Like a few in the local NSW mini scene, I had seen this 1970 Morris mini K panel van on fb marketplace in Dubbo, NSW, over the past few months. Not sure why I chose the moment I did, but figured I’d ask what the colour was, as it looked close to the Smoke Grey my 1963 Morris 850 was from factory.
I got the itch to confirm that it couldn’t be as good as the pictures suggested. So as a bit of a spur of the moment thing I decided I’d head up to inspect it, only a 5 hour trip from Sydney. I stayed with a friend in Kandos one Friday night, and then Saturday morning we headed off to Dubbo, we took a wrong turn and it’s took us an hour longer than expected, but the sellers were accommodating of our idiocy (we should have just trusted Google maps).
52732428712_e6b5474a22_z.jpg

52732953296_a148cddcf3_z.jpg

52732428637_fa8e493327_z.jpg

52732953166_9234b681af_z.jpg

52733436838_5fee68e011_z.jpg[

52732953061_016e26f298_z.jpg


Unfortunately for my bank account, the van was in as good a condition as depicted in the pictures online (and the extras the seller sent me privately). It started first go without choke, drove nicely, and everything we inspected completely checked out. In Australia we still get rust, but usually nothing like I’ve seen from the UK, so we don’t really do much reshelling/rebodying. The body is in great condition.

The only negative was that the door pins need rebushing, and as such the B-pillars have lost some paint from rubbing. After a while we thanked the sellers and headed home. I dropped my mate off in Kandos and went back to Sydney, arriving home having driven 9 of the previous 12 hours.


Then the mental gymnastics began, as I had to decide whether I wanted to jump at the van, or follow up on some good mini sedans I knew about. I definitely knew I did NOT want a project, but I can definitely handle something that needs tinkering with. The fact this was a late round nose van was incredibly appealing, because I’ve always loved the vans but never thought I’d be in a position to acquire one.

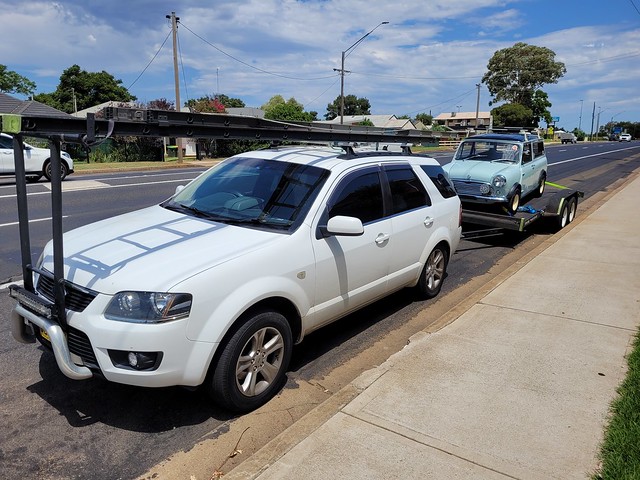
Having to jump through the hoops of being with an online only bank and not being able to withdraw large cash amounts (limited to $2k per day - at the post office), was a pain in the ass, but we settled on a figure and I did a telegraphic transfer the following Thursday. My father in law jumped at the chance to come collect the car with me, so exactly a week after initially inspecting it, we cruised up to Dubbo and brought the van home on a trailer. It was a big day, with a massive storm following us from Lithgow to Sydney, but getting it safely tucked away in the garage was very relieving!
52733364090_ce7d4e73cd_z.jpg

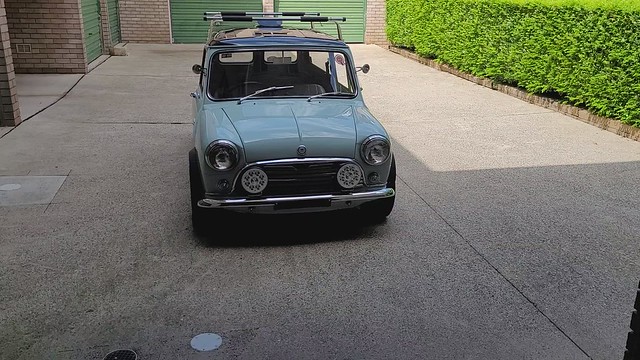
The picture below is a walk around video, click on it to be taken to the Flickr video
52733436223_955d3203bf_z.jpg

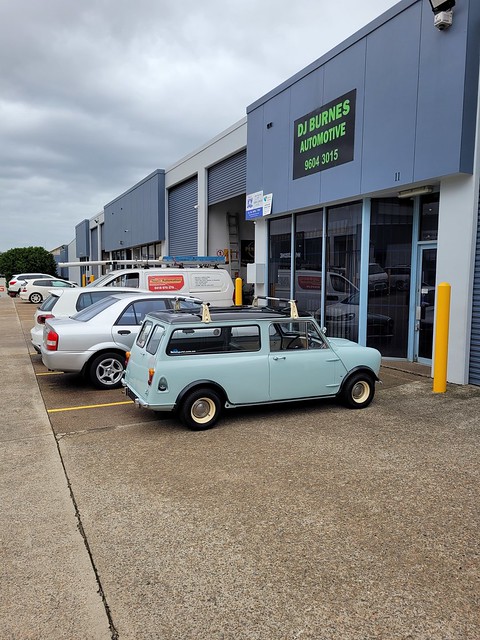
My mechanic, Darren Burnes, knew of my plans so I was able to drop it off to his shop to service/check and issue a pink slip for club rego the week after we brought the van from Dubbo. It passed no worries, with Darren’s inspection showing someone previously replaced a lot of stuff, giving credibility to the sellers comments that the builder did a rotisserie restoration.
52732428457_796869d2dd_z.jpg

As I was dropping my focus off for some planned work, I set off to get the van home and head to Service NSW for rego with pink slip in hand. Within the last 800m to home the van coughed and died (in light traffic thankfully), but started at first attempt while rolling. It died again a few hundred metres up a slight hill. Again, started first go and the last 200m home were fine.
I went and got rego without issue, so got to throw the new plates on the van and enjoy the moment. As it was only mid morning, I decided I’d head to Mums place to drop something off she needed and surprise her with the van.
Great idea, but it didn’t work! :(
As I was travelling down the busy Woodville Rd it coughed and died again, thankfully being able to pull into a side street out of danger. This was the beginning of my 4.5km journey to Darren’s Worksop that took me 4.5 hours. I tried to get back home to Parramatta but that ended up failing poorly too.

52733203309_efd7dd861d_z.jpg

Needing a tow, I called 6 or 7 towies with no one able to come out until that night at the earliest (it was midday at the time). After sitting in the shade for about 45 minutes I decided I’d try the NRMA (NSW’s version of the RAC), after signing up with them again they notified it’d be 3 hours.
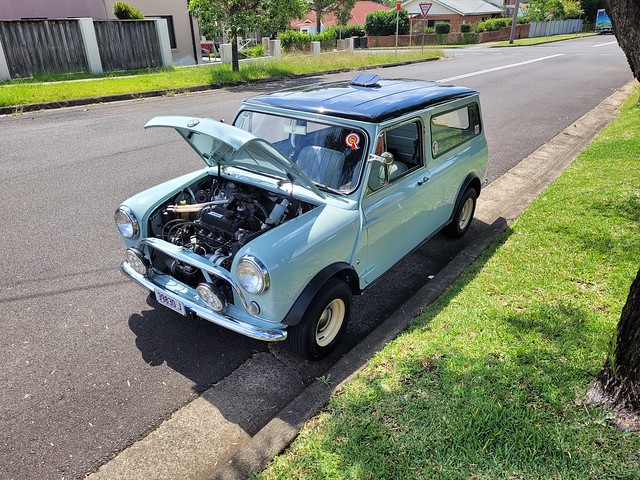
52732952926_c118e0a346_z.jpg

Thinking “that’s a f****** joke”, the Van and I sparked back up and tried to back road it to Darren’s through Western Sydney to Smithfield. Street by street we would travel and die, cooling off for a while and then continuing on. Eventually I managed to end up about 2km from the workshop, but with a crossing of the Cumberland Hwy unavoidable I decided I’d walk to Darren’s and grab a new coil to see if that’d work. Thankfully it was only 3pm on a hot Sydney summers day.
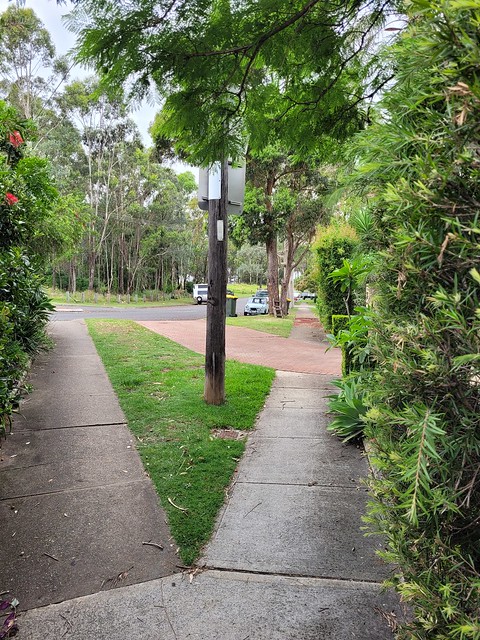
52733436623_81d796e338_z.jpg

Either way, as I was on my way back to the van with a new Lucas coil in hand, I was notified the tow truck was about 20 minutes away. As I had been messaging my (and everyone’s) mate Scott, he was coming through Smithfield for work so popped past to check on me (possibly the van). As we were about to replace the coil the flatbed tow truck arrived. Considering the daunting trip across the Cumberland Hwy was needed, I happily took the tow.

52733203244_86641d53cf_z.jpg

52733363795_cda4d9af31_z.jpg

Bidding thanks and farewell to Scott, the (seemingly heroic - maybe my desperation coloured this) towie and I took off for the huge 1.8km trip to the workshop.
At Darren’s I was able to replace the coil, but on the test drive it still died after about 15 minutes. Assuming the heat was messing with something, we replaced the points and condenser, checked the battery and voltages. After starting it for another test drive, I flicked the headlights on and the car died completely. We checked the fuses in the original style two fuse fuse box and found the main fuse (was 25A, but I believe it should be 35A?) was blown, despite not visually being damaged. Still, after each of these efforts the car was still running beautifully up until it got warm, where it would cough and die.
We pulled the fuel supply off the carb and threw a gauge on and with the engine idling there was minimal pressure, but with RPM there was no pressure. A second gauge confirmed what was happening, as did the lack of fuel loss when we disconnected the hose. So it was the electric Aeroflow fuel pump, despite being audible when the car was on, would stop pumping once it got warm - but still make noise which mislead us.
After we figured that out, it was time to call an end to the day at 8pm. Darren would replace the fuel pump over the next day or two, and hopefully that would let the van run as well as it had (prior to the pump dying).

The van was ready to go two days later on Wednesday, so I grabbed the van and got it home (via its first fill up at BP - I don’t trust the fuel gauge yet).
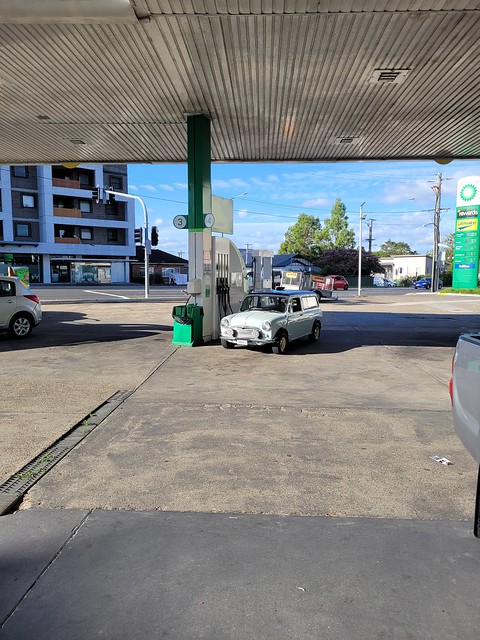
52733363730_a19ddc2519_z.jpg

As my focus was getting half of its suspension replaced, I needed to borrow my wife’s car to get to work, but over the weekend it wasn’t available so the K van had its first proper test trip. Nothing like a baptism of fire of Silverwater Rd! Thankfully it was early on the weekend, and it performed perfectly for the whole 25 minute trip. Working again on Sunday meant it was driven to work twice in a row, but with the trip home via West Pennant Hills, it meant I got to put a confidence inspiring 80kms on the van over Saturday and Sunday. Again, mechanically performing lovely. The speedo doesn’t work, fuel gauge and warning lights do. The GPS speedo is laggy and doesn’t work in tunnels :D

special parking at work

52733363660_b75538e206_z.jpg

52732952581_a9d3550f71_z.jpg


I have noticed a few little niggly issues that I’m hoping to sort out soon. Minisport (in South Australia) has taken a bunch of my money with new retractable seatbelts, a new window washer pump, some spare 35A & 25A fuses, a digital speedo (+ sender), and two yoko A008’s.

My main aim with the van is to make minor improvements to it and make sure it’s a nice reliable cruiser, so hopefully it’ll be racking up lots of kilometres! The van is already signed up for the Rylstone Classic. For non-Australians check out Rylstone Classic, as it’s a free annual long trip through mid-NSW over a weekend in August for 200-ish classic minis

below the K van is tucked away behind my 1963 Morris 850
52733202284_48355a0d9a_z.jpg


Figured I’d take some pictures of the speedo before I attempt an install this weekend. I did look into them, and a few of the different styles of mini speedos are available digital, but they’re from vendors that are charging a decent amount more. The black dial I got (SN4421-33CC) is $695 from minisport (Aus) the same from Howard’s instruments is $911. The necessary speedo adaptor (GSD1000) is $125. For me it’s a no-brainer, but if you want the closest digital speedo you could get for your mini, there is that option.

For a look at the different styles available out there (minisport.com.au only have two styles) check out the link below, I think pages 6 and 7 have the electronic
https://www.howardin...ogue - Mini.pdf
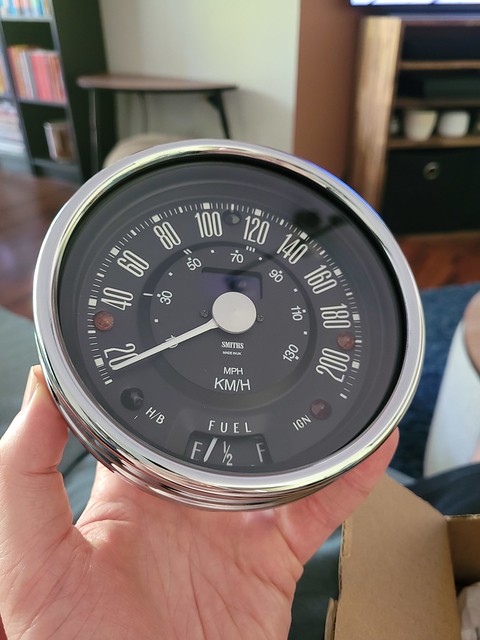
52738103530_9aaff234bb_z.jpg

52737693031_017c9d2277_z.jpg

52738173973_11bb3019a0_z.jpg

And the Speedo adapter

52737707976_3ec7348b3d_z.jpg


I need to fix those door hinges, and the blinkers seem to only work when the stalk is in a particular spot (so maybe a new stalk, maybe I can adjust the current one). I’d also like to update the headlights at some point, and go electronic ignition.

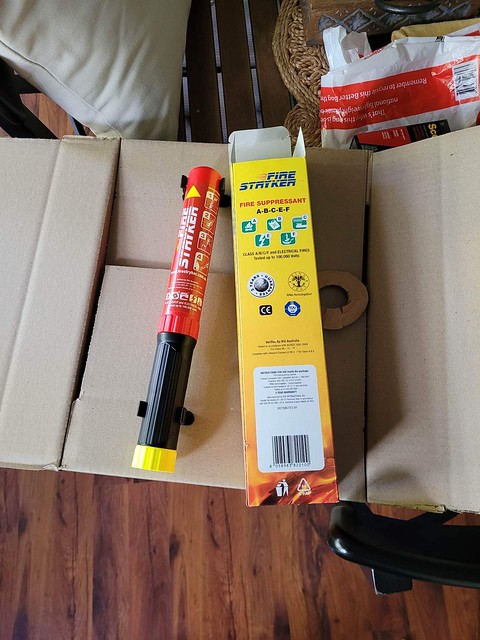
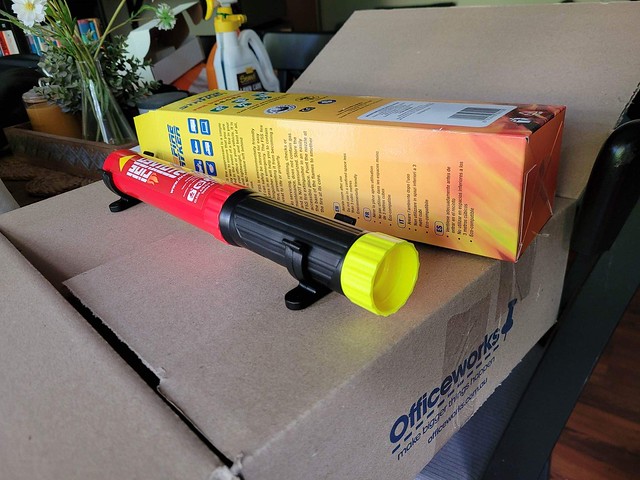
A question for anyone reading, what sort of fire extinguisher do people use, and where do they mount them? I was originally thinking of a standard extinguisher and mounting it just behind the passenger seat, but I just found out about the FireStryker today (works like a flare, unsure if available in the UK) so possibly go down that route as they are small, light, don’t go out of date, don’t need to be recharged, and seem to do a reasonable job.

Also, before winter arrives, I will need to sort either a way to demist the windscreen; or get a heater that can also demist. Any advice? I am completely open to getting a small modern heater if it works/packaged better than a standard mini heater, so have seen the T7design heater that I could use with a Lucas off/on rheostat.
Thankfully our winters in Sydney aren’t at the level of UK winters, but we can get really high humidity here, which can make demisting a struggle
#2 Designer

Designer

    One Carb Or Two?

  • TMF+ Member
  • PipPipPipPipPipPipPip
  • 761 posts
  • Location: Surrey
  • Local Club: LSMOC

Posted 16 March 2023 - 07:06 PM

Hi,


Love the van but surely you cannot leave your first Mini stranded at the back of the garage. I would have been desperate to have got it on the road.


#3 braad

braad

    Stage One Kit Fitted

  • Noobies
  • PipPipPip
  • 85 posts
  • Location: Sydney
  • Local Club: Inner West Minis & Ausmini

Posted 16 March 2023 - 09:13 PM

Hi,
 
Love the van but surely you cannot leave your first Mini stranded at the back of the garage. I would have been desperate to have got it on the road.


It’s not stranded, there’s an actually realistic plan for it now

#4 marksmini

marksmini

    Mark - Founder of TMF since 2003 - Onwards

  • Admin
  • PipPipPipPipPipPipPipPipPipPipPip
  • 49,445 posts
  • Name: Mark
  • Location: Nottingham
  • Local Club: TMF

Posted 01 April 2023 - 04:47 PM

tidy 


#5 bpirie1000

bpirie1000

    Up Into Fourth

  • Area Managers
  • PipPipPipPipPipPipPipPipPip
  • 2,567 posts
  • Location: Aberdeenshire
  • Local Club: Amoc

Posted 02 April 2023 - 10:10 AM

Love the colour, love the style, love how clean it appears, love the wheels,

Simply lovely.......

#6 braad

braad

    Stage One Kit Fitted

  • Noobies
  • PipPipPip
  • 85 posts
  • Location: Sydney
  • Local Club: Inner West Minis & Ausmini

Posted 01 June 2023 - 06:04 AM

tidy

  
Thanks Mark!

Love the colour, love the style, love how clean it appears, love the wheels,

Simply lovely.......


Thank you :)

#7 braad

braad

    Stage One Kit Fitted

  • Noobies
  • PipPipPip
  • 85 posts
  • Location: Sydney
  • Local Club: Inner West Minis & Ausmini

Posted 01 June 2023 - 06:10 AM

Just because it’s a cool picture, here’s the speedo drive for the digital speedo

52941544334_abeb72da92_z.jpg


I’ve been up to a few different things the past 2 months, with the main thing being driving the van wherever whenever the opportunity arose.

52941394906_c07f3de221_z.jpg

52941858438_72d9894ff9_z.jpg

52941394816_a82074ae83_z.jpg


Early mornings at work

52941784005_03a786b304_z.jpg


Besides driving the van, I’ve had a few additions turn up. The plan is to make it as comfortable, safe and reliable as possible before the Rylstone Classic in August here in NSW.

I grabbed a new indicator from https://minisport.com.au/'>Minisport as the contacts in my original were shot. So threw that in, fixed the bullet connectors and mounted the flasher (it was flapping about when I got the van). Now my indicators work consistently, and I don’t have to flap the indicator stalk around like I’m in Harry Potter

52941544304_77f1689b30_z.jpg

52941784070_fb47b5e837_z.jpg


As the van didn’t come with them, I sourced a van jack and wheel clamp through Link Automotive in Victoria. Very helpful guys!

52941544269_23d021afa9_z.jpg

52940796897_6f7961fd27_z.jpg


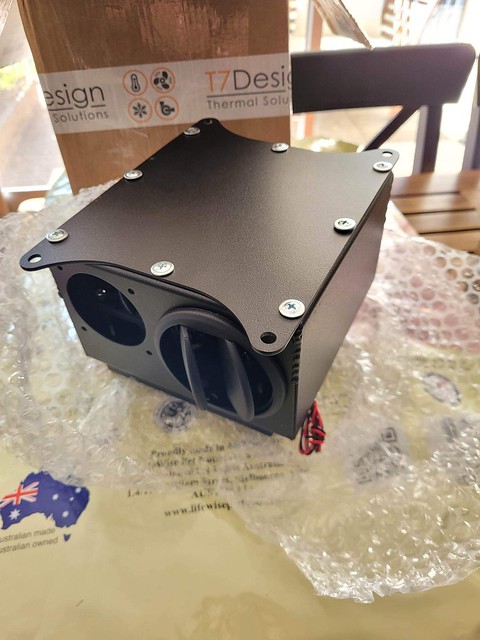
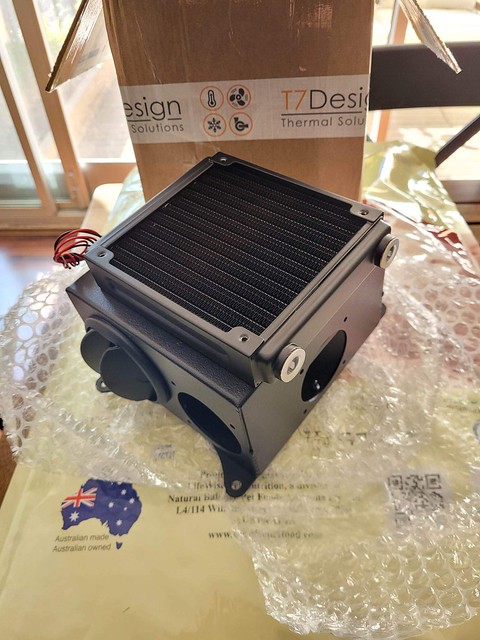
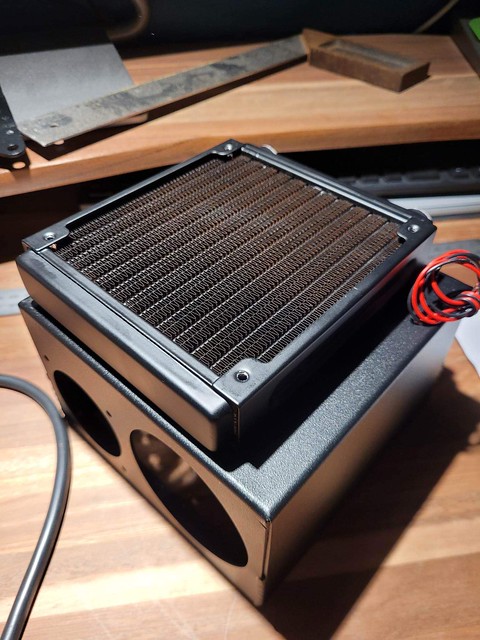
With comfort in mind, I ordered a T7Designs 3.5kw heater, which is the heater Minisport and various other mini stockists sell.

52941783925_f314276354_z.jpg

52941783920_377c2c54ba_z.jpg

52941394701_238ae13195_z.jpg

52941544134_9aca3e26c9_z.jpg

52940796762_15692a0c79_z.jpg

52941544109_13e67d0ea8_z.jpg


I ordered mine directly from T7Designs in the UK and got it sent Australia, as I wanted to specify the outlet sizes to match up to the new demister vents I ordered from an online shop called Third Shed moto. The shop is run by a guy from NZ called Will, and through numerous emails back and forth, not only did I order a bulkhead blanking plate from him, but I’ve discovered he has a mini too!

52941394261_c3be4f3e33_z.jpg

52941857823_002bea8ef9_z.jpg


I still need to grab some 1.75” ducting to run between the heater and vents, so hopefully that stuff will arrive in the next month or two.

To control the heater unit, T7Designs recommended using a PWM controller for excellent low speed control, but in my communication with them (hoping to run something that looks era correct) they did suggest utilising a Lucas 78384. After a search, Emberton Imperial had what I wanted (the knob too). Whether using the PWM controller or the Lucas an on/off switch is still needed, so I’ve grabbed one from minisport. The heater runs between 2 and 3Amps, so it’s not a huge load on the electrical system.

52941544104_aca3d9315d_z.jpg


Now, I hope to never use this, but I grabbed a Fire Stryker. It now lives in the drivers door pocket, easily within reach

52941858258_52c854a388_z.jpg

52940796802_2caf59e4ab_z.jpg


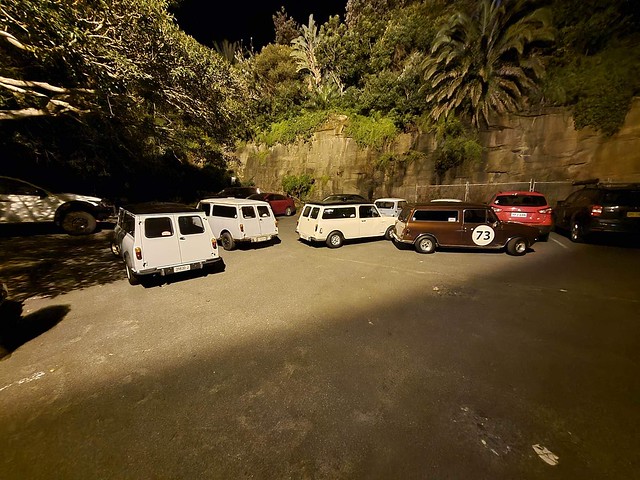
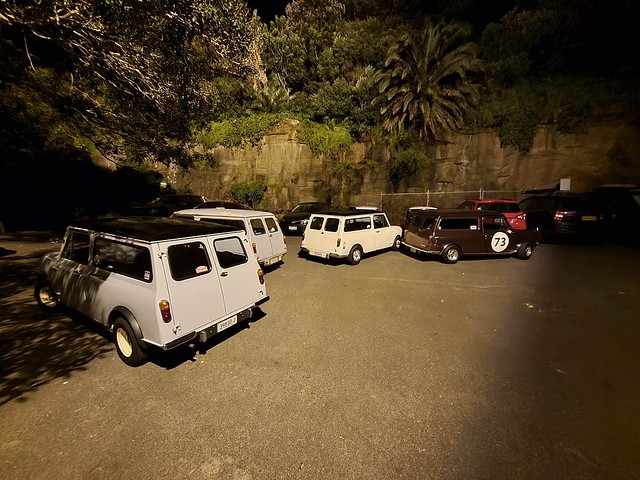
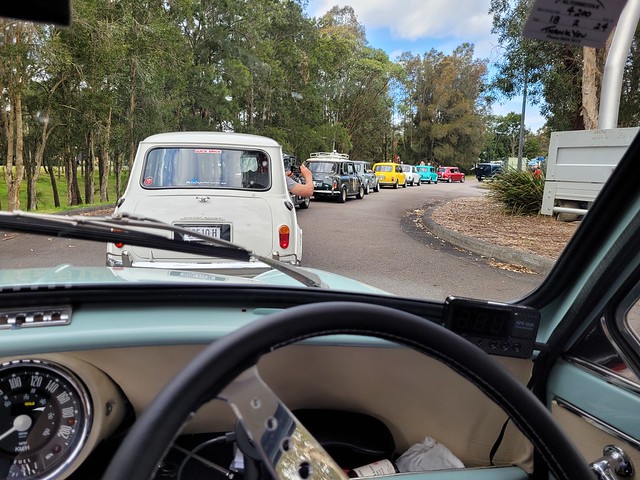
Last month we had Sydney Minis vantastic SWOM meet up, had a great turn out at Paddy’s and a decent bunch for the drive out to Watsons Bay.

52941544094_2168f52e9f_z.jpg

52941544044_29bcb375cb_z.jpg


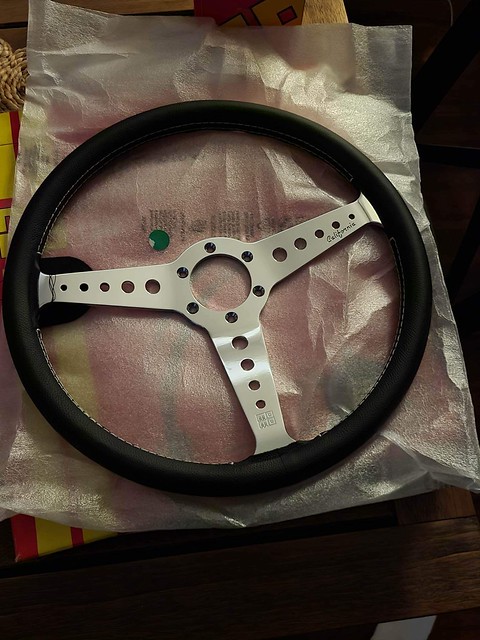
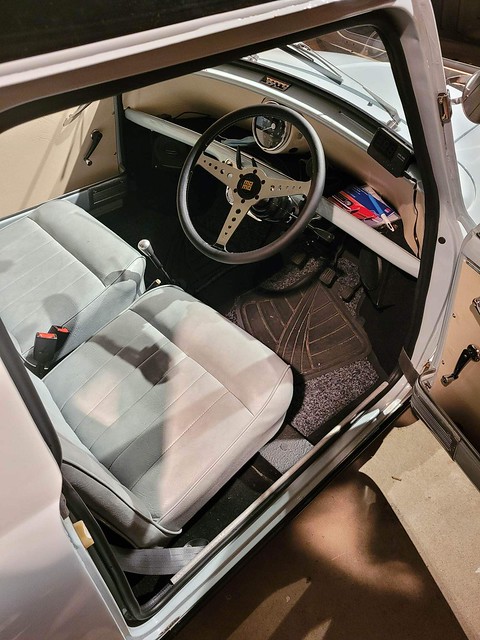
While spending a bunch of time driving I decided to get a more comfortable and reassuring steering wheel. The bus wheel looks cool, but the wrap has a bit of movement in it, and is pretty big at 40cm diameter.
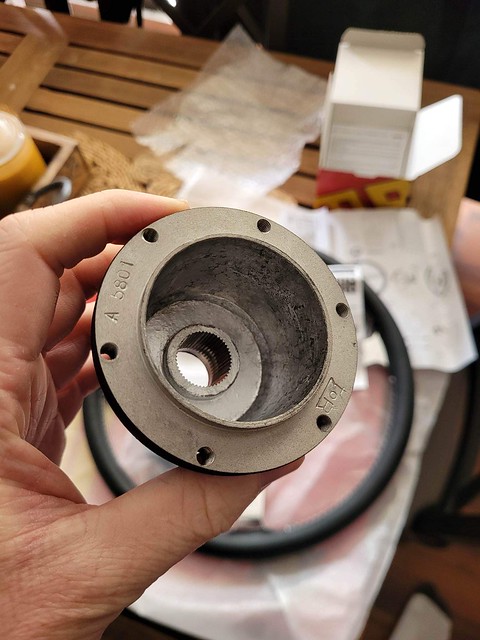
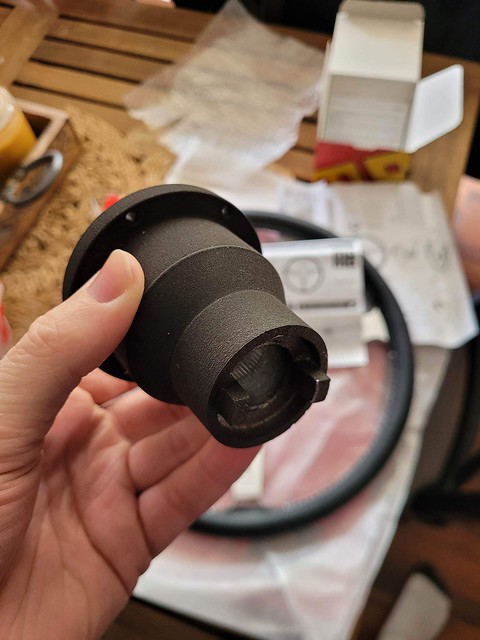
After some time looking I settled on a MOMO California leather, and at 36cm dia I gain a little room! I grabbed it from a good little shop down in southern Sydney called Retro Autotek. Michael runs the place and was helpful in sorting out the right boss kit. For reference, the kit used was the boss kit #5801

52941858103_cd0c8c7fa0_z.jpg

52941858093_b4891a5cdf_z.jpg

52941783820_642db5d90e_z.jpg


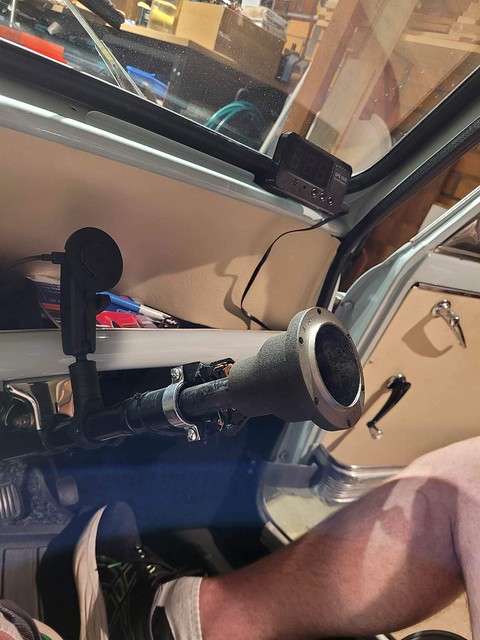
Everything I’ve read and seen about removing our steering wheels makes it sound easy. Mine was on and would not budge at all (even with a rubber mallet). So out came the puller, and off it came!

52941543919_403e74bdc0_z.jpg

52941858008_8776b8f23a_z.jpg

52941783690_3b865e9ebd_z.jpg


The final update so far is that after a long search for headlight upgrades, I found Bangin Headlights from Perth, Australia, make a LED projector 7” light. Considering half the cars in the world used a 7” round headlight up until the 1970’s, it’s taken a long time for companies to twig on to the fact people would want decent headlights in old cars.
Before anyone gets on their high horse, THESE ARE NOT LED BULBS THROWN INTO A HALOGEN LIGHT HOUSING.

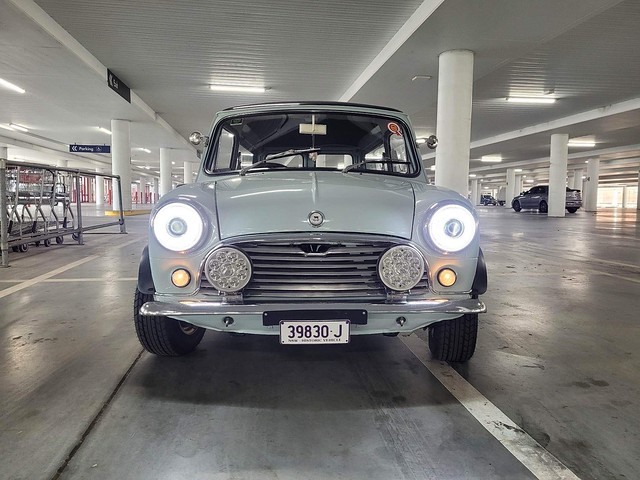
Anyway, these aren’t for the purist, but I want(/need) some proper lighting for driving in Sydney. If you opt for these without the Halo they look more original, but I want the halos as a DRL option. The lenses are glass too.

They are currently testing another 7” LED projector model that looks VERY original, which could become very popular with a lot of classic car & bike owners. That model doesn’t have a halo, and while the light output isn’t quite as good as the model I have, it still looks far superior to the H4 options I’ve seen. Anyone interested I’ve been told they’re hoping to start production of the really original lights in around July this year. I’ve added a picture of it at the end.

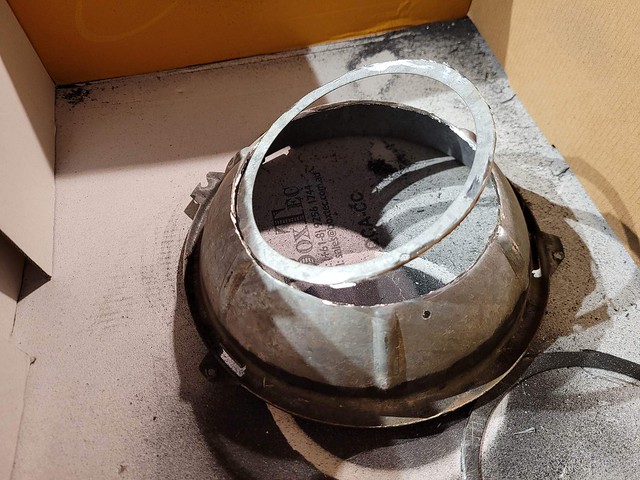
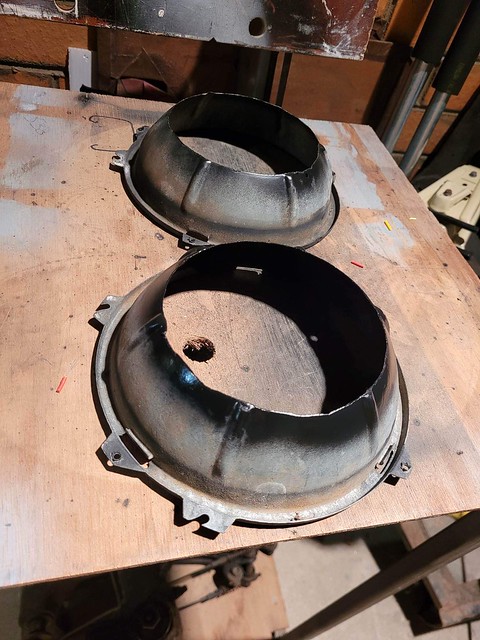
Anyway! To fit the lights you seem to need to trim part of the light bucket. This isn’t an issue with the typical American cars these lights have been installed in, but being a mini it doesn’t surprise me there’s less space.
Once trimmed you need to redrill the hole for the spring to attach to

52941857913_6d489564ce_z.jpg

52941394326_d03a668960_z.jpg

52941394311_3100703bde_z.jpg

52940796397_eeed7f55b6_z.jpg

52941857858_f3229e0d7f_z.jpg


The below are just the low beam

52941783540_8848ae819a_z.jpg

52941394276_e1b23a1b45_z.jpg


I hooked the Halos into the parker and indicator circuits, and run the van like this during the day now

52941857723_4b4eb1530d_z.jpg

52941394176_aff2d9eea8_z.jpg

52940796217_00c5a0cbc2_z.jpg

52941394116_f138099ae4_z.jpg

52941394121_236a68b986_z.jpg


And for anyone interested in the more original LED projector light that I mentioned before, here is a picture at the link. I’m unsure why it’s not embedding like the others, but it’ll just take you to the picture on Flickr

https://live.staticf...099d6ec24_z.jpgBangin headlight LED by brad g, on Flickr

Edited by braad, 01 June 2023 - 06:16 AM.


#8 braad

braad

    Stage One Kit Fitted

  • Noobies
  • PipPipPip
  • 85 posts
  • Location: Sydney
  • Local Club: Inner West Minis & Ausmini

Posted 19 June 2023 - 08:06 AM

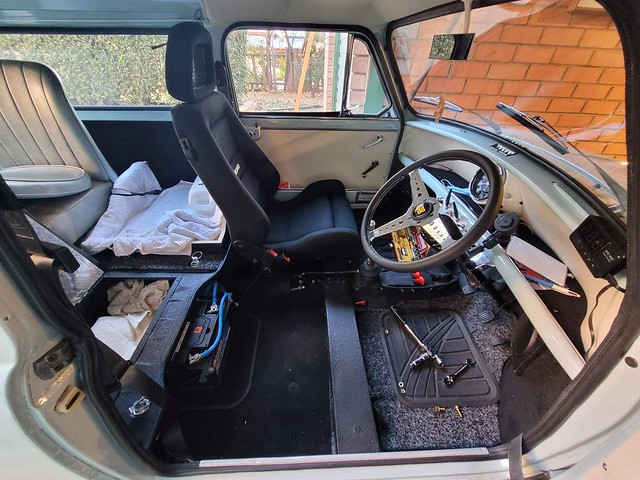
Another task on my list was to upgrade the seating. I’m too big for the low back seats on longer trips, so took a wild swing and got Recaros.

Firstly, can the old seats go back in? Yes, I can bolt them back in, and might for shows.

Secondly, in the Recaros I sit further back and lower. They also have support, so cornering is much easier.

These are Recaro LXC, which by our measurements are the smallest classic Recaro reclining seats. The LX and LS share the same seat base (whether that’s the ‘A’, ‘B’ or ‘C’ base), but the LS has bigger bolsters.
Grabbed some cobra seat bases, a large 5mm thick plate and a heap of M8 high tensile bolts, washers and lock nuts; and got it mounted with lots of effort and swearing.

52984519587_07f53f9a7c_z.jpg

52984519597_1be56766ec_z.jpg

52985579983_2a9c9457a9_z.jpg

52985579978_e9a97d0bcb_z.jpg

52985120096_f0c8114a70_z.jpg

52985493515_eac555590b_z.jpg


Lots of measuring resulted in a fit as close as possible without interference with the van load floor. I was expecting to get a new smaller battery, but there was no need. I just had to redrill the battery mount and cut the excess length off the bolts, and the seat base fits nicely.

With the seat back locked in there was about 10mm gap to the load floor. In other words, perfect!

Another consideration was clearance between the passenger seat and the gear stick when shifting into second gear, while also not getting too close to the passenger side door pocket on the other side.
The passenger seat was mounted with a 5mm angle outwards, which helped keep about 10mm gap to the door pocket and my hand just brushes the inner seat bolster of the passenger seat. That’s al dente

52984519492_3b18d2ea49_z.jpg

52985493495_6614639dc3_z.jpg

52985265319_bbd88998a4_z.jpg

52985493455_c89736f950_z.jpg

52985579848_0f5cfc8a6e_z.jpg

52984519402_901c6f16b9_z.jpg

#9 braad

braad

    Stage One Kit Fitted

  • Noobies
  • PipPipPip
  • 85 posts
  • Location: Sydney
  • Local Club: Inner West Minis & Ausmini

Posted 05 October 2026 - 02:31 AM

So it’s been a LONG time since my last update in 2023, so I have broken these next posts up as they're a bit big for one post

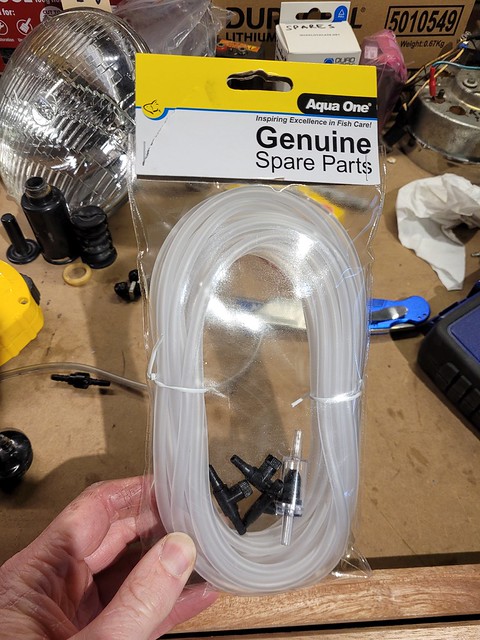
Leading up to the 2023 Rylstone Classic (held in August in NSW Australia every year) I had a rebuilt set of Cooper S 7.5" brakes replace the front drums, re-painted a set of LP883 wheels, fitted some Yoko A008 tyres, removed the plastic arches, and fixed up the old wiper pump with some aquarium pieces. 
 

55569644141_d9b9efe4bb_z.jpg


55569801464_c469d329b9_z.jpg


55570058340_1c3d60bfc5_z.jpg


55569801319_ed64187f7e_z.jpg


55569749998_3ae18e9206_z.jpg

55569801404_d2f1bef772_z.jpg
 

55569750198_4bd21f53f5_z.jpg


55570058235_89a12e0643_z.jpg


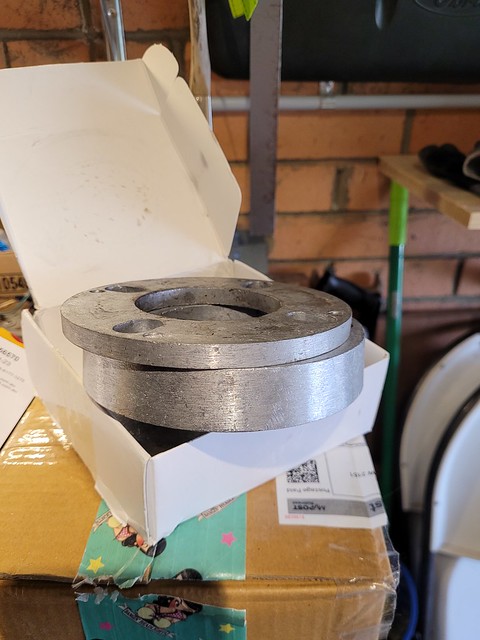
Like the rest of the world at the time, we did have issues sourcing stepped rear drums last year so initially had to run a 3/8” spacer on standard drums. I had to run LP883 wheels as the front had the discs and the widened steelies looked ridiculous not being on drum fronts. With the 3/8” spacer the rear didn’t quite have enough track width for the A008 165’s as they’d slightly rub on the trailing arm under fast cornering. Having only put the wheels back on the night before The Rylstone Classic 2023 (which is when the plastic flares came off), I didn’t experience the issue during the easy test drive. Oops  :D

After Rylstone I managed to source some 1” spacers (which we couldn’t source like the stepped drums) and solved the track width issue. We did get some actual stepped drums a few months later.


55569643651_28fa11837d_z.jpg20231011_101337 by brad g, on Flickr


It became obvious that those Recaros weren't far enough back for me to drive the van longer than maybe an hour without leg cramps, but I will address that in a later update.


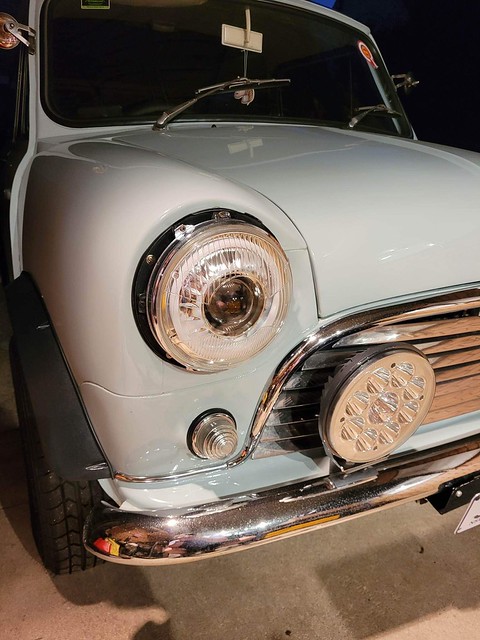
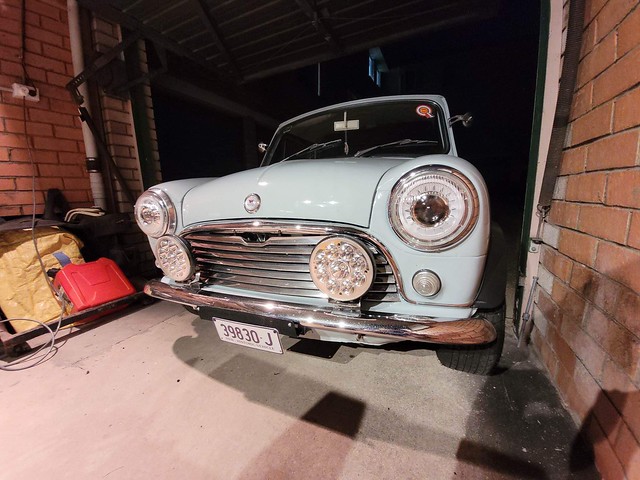
I grew tired of looking at the van with it's googly eyed headlights, so grabbed a set of the Bangin Headlights Traditional LED projector lights. The headlights are fantastic, and look pretty original too. I've now run them for over two years and I would never go back. They draw significantly less current (and hence, watts). The light colour is a warm white. Glass lenses, ADR (Australia) and DOT (USA) approved. Very popular with Muscle/Pony car and hot rodders, and more and more minis in Australia are running them, especially with the little parker light option
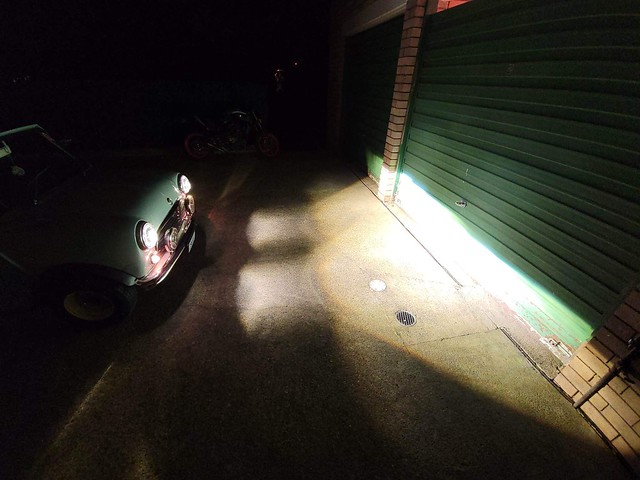
 

See them at Bangin Headlights


The restomod lights (they are incredible but clearly dont Look original) are now fitted to a mates Caterham. He loves them, and they legitimately look pretty cool on that.


Below: Bangin Headlights Traditional next to the Bangin Headlights Ultimate


55568618082_e5a46c7085_z.jpgBHresized01 by brad g, on Flickr


Below: Lucas sealed beam on left, Bangin Headlights Traditional on right


55570057900_b06649f667_z.jpgPXL_20240110_032603568 by brad g, on Flickr

Below: Bangin Headlights traditional on left, Ultimate on right


55569749723_f046c932a2_z.jpgBHresized03 by brad g, on Flickr

Below: the Traditionals fitted


55569801004_692acbaa38_z.jpgPXL_20240110_033412431 by brad g, on Flickr


Below: Parkers on

55568618102_5b83518be7_z.jpgPXL_20240111_190543874 by brad g, on Flickr


The next update was new suspension! I always felt the van handled odd, and was quite uncertain in corners. It looked like it may have had possibly slightly positive camber on one of the front corners, and toe in drivers rear. A mate called Harry was nice enough to take me out for a good spin in his mini (admittedly a sedan) and it was chalk and cheese. So I basically copied what he has  :P 
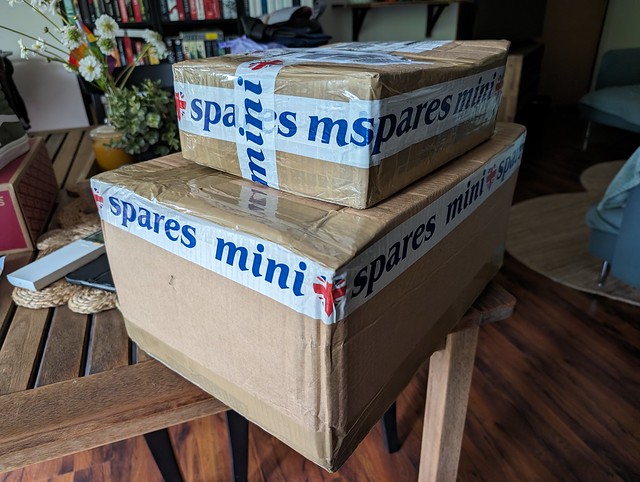
It came in kit form from MiniSpares UK (kit MSSK3012)
- KYB AGX shocks
- HILO set (Ripspeed version)
- HILO rods & plugs
- Lower arms on car adjustable
- Lower arm bush set
- Tie rods heavy duty adjustable 
- Tie rod bushing kit
- track rod ends longer competition 
- Rear camber & toe brackets
- Standard genuine cones
 

55569749673_cd141e7dcc_z.jpgPXL_20240129_222322090 by brad g, on Flickr

55569643431_fd699d06ed_z.jpgPXL_20240130_032232641 by brad g, on Flickr

55570057530_d62a7bc22c_z.jpgPXL_20240130_034054180 by brad g, on Flickr


I threw in a painted Paddy Hopkirk accelerator pedal


55569801079_1d5b8869ab_z.jpg20231012_115132 by brad g, on Flickr


Next was just driving the van and enjoying it. A popular trip for me is to go up to a place called Wisemans ferry. Any car/bike people in Sydney should know about it, but it's a nice drive with gentle twisting roads that head to a Ferry crossing.


55568617892_1c344a32f7_z.jpgPXL_20240319_015056963 by brad g, on Flickr

My Cocker coming for a run'


55568617952_846f75d4b5_z.jpgPXL_20240319_001923495.MP by brad g, on Flickr

55527140726_e891c47706_z.jpgPXL_20240918_005327107 by brad g, on Flickr

55527242983_fe3772940d_z.jpgPXL_20240607_064407762 by brad g, on Flickr


It was on one of these trips back from Wisemans Ferry that we had a serious downpour and the van completely died. I had to push the van into a safe spot off the road and try and figure out why I had lost everything suddenly. As the main glass fuse had completely blown it definitely pointed to a dead short somewhere. Relatively massive fault current was the issue. Fortunately I had some spares in the van to get it home. Over the next few months it would randomly die and blow the main fuse. 


55570057310_72343974a5_z.jpgPXL_20240402_011633353 by brad g, on Flickr


55568617517_c5869a9938_z.jpgPXL_20240410_084431086.NIGHT by brad g, on Flickr


55568617562_a9e1620ca6_z.jpgPXL_20240410_090134223 by brad g, on Flickr

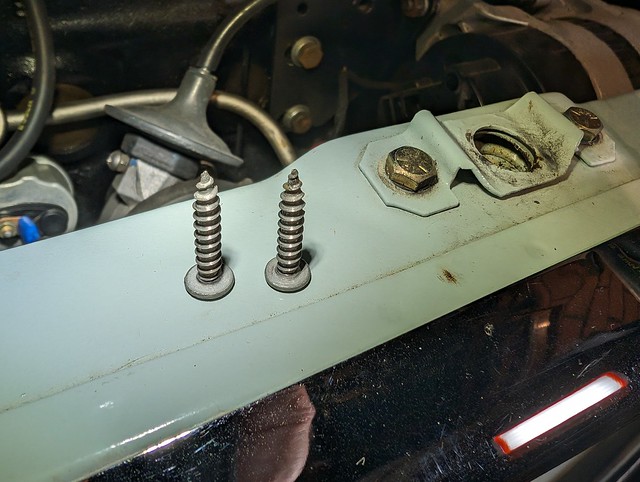
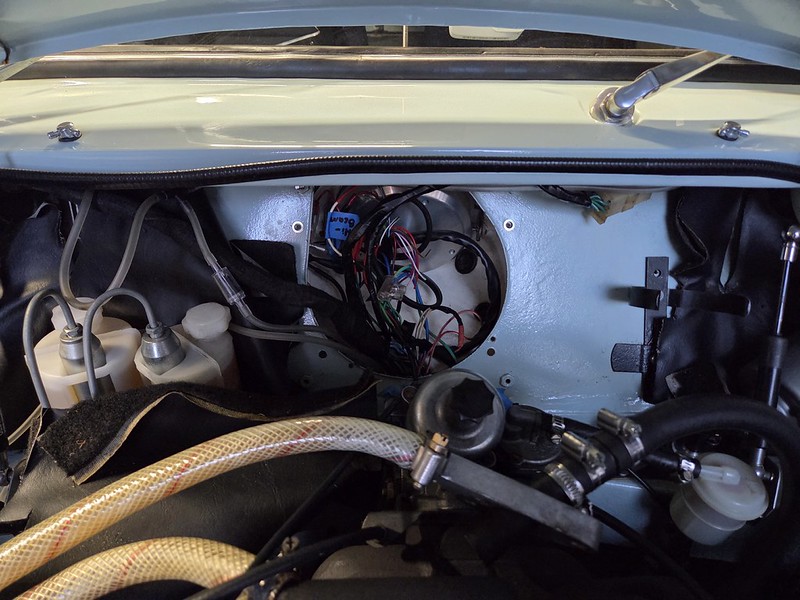
So, after a lot of investigating and blown fuses it turned out that the loom to the passenger side headlight was being pierced by one of the screws holding the grille moustache in. What was happening was, the screw had slowly punctured the loom, and when the headlights were on, and some moisture was added, it was shorting and blowing the main fuse. It took a long time to figure it out, but once found I could make repairs.


55523335708_8b55aa90e3_z.jpgMini van by brad g, on Flickr

55570057210_2745acff62_z.jpgPXL_20240602_013451726 by brad g, on Flickr

55569643001_ca13cf9b26_z.jpgPXL_20240602_013849793 by brad g, on Flickr

55523233996_ce2954df71_z.jpgMini van by brad g, on Flickr


The common result


55523335628_85b780d300_z.jpgMini van by brad g, on Flickr


The offending screws


55523383724_fee4ece566_z.jpgMini van by brad g, on Flickr


#10 braad

braad

    Stage One Kit Fitted

  • Noobies
  • PipPipPip
  • 85 posts
  • Location: Sydney
  • Local Club: Inner West Minis & Ausmini

Posted 05 October 2026 - 02:35 AM

Update #2


The next update was a big life one. We bought a house, so everything car based was basically stagnant for a while until we sold our unit, settlement was done, we had moved in (early 2025), and we had adjusted to our new financial situation. 
Thankfully the van and 850 fit together in the garage with all my stuff

55523233956_22c30b0458_c.jpgMini van by brad g, on Flickr

55523383649_1bb2a0134b_c.jpgMini van by brad g, on Flickr


One of the times I did drive the van was out to the 2025 HSRCA winter festival at Eastern Creek. I had a great day, but on the way home I noticed the oil pressure gauge was reading zero. I had no idea how long it had read zero pressure, so pulled over about 10 mins from home, pulled the oil cap and saw plenty of oil up top, pulled the dipstick and plenty still in the gearbox, so decided to just drive home cautiously and hope it was the gauge.
Got home and earthed the lead from the oil pressure sender and the gauge worked. Figured it was the sender, but wanted to check it with a mechanical gauge. In the meantime the van sat contently in its new home and time passed. Months even.

55523620240_a3f0026865_c.jpgMini van by brad g, on Flickr


Fast forward to Feb 2026 and it was rego time, so the van came out again and passed with flying colours. The oil pressure was checked mechanically and is fine. 
I decided to finally order a few bits from Japan that I'd had my eye on for a fair while. From David at Classic Minis Japan I sourced some BMC Vulcanised rubber mats, a centre post mirror and acrylic sun visors.

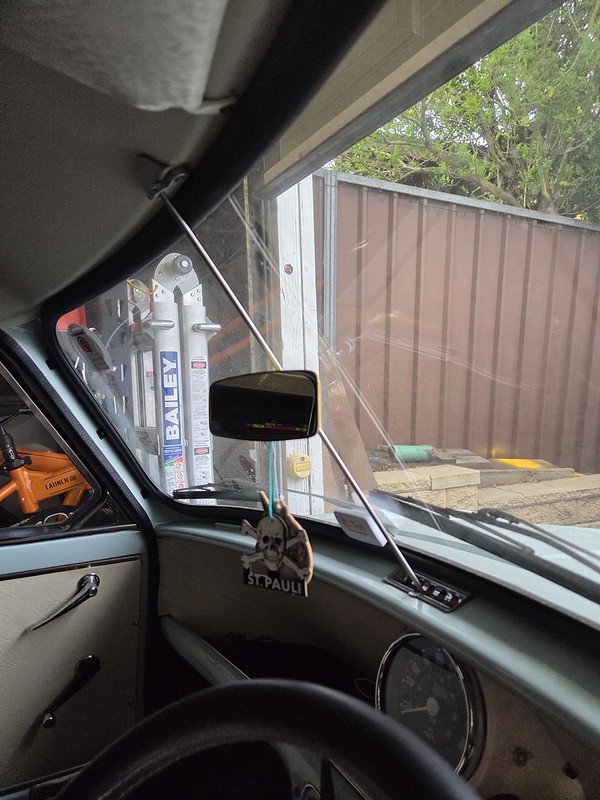
The mats are great quality and suit a commercial van, the centre pillar mirror was a good work around the standard one that is too high as I am too tall, and the visors are very beneficial as I'm too tall for the original visors to be effective as they block my entire view if used at all.
David is very helpful and can source other Japanese items if you'd like, he sells a lot of stuff that’s not on his website. 
They can be found at https://classicminis...nd-accessories/

55522215052_889572e79f_c.jpgMini van by brad g, on Flickr

55523335348_5430115f93_c.jpgMini van by brad g, on Flickr

55523335283_5b60a05dcb_c.jpgMini van by brad g, on Flickr

55522215007_761d324e96_c.jpgMini van by brad g, on Flickr

55523383464_aa659e4f41_c.jpgMini van by brad g, on Flickr


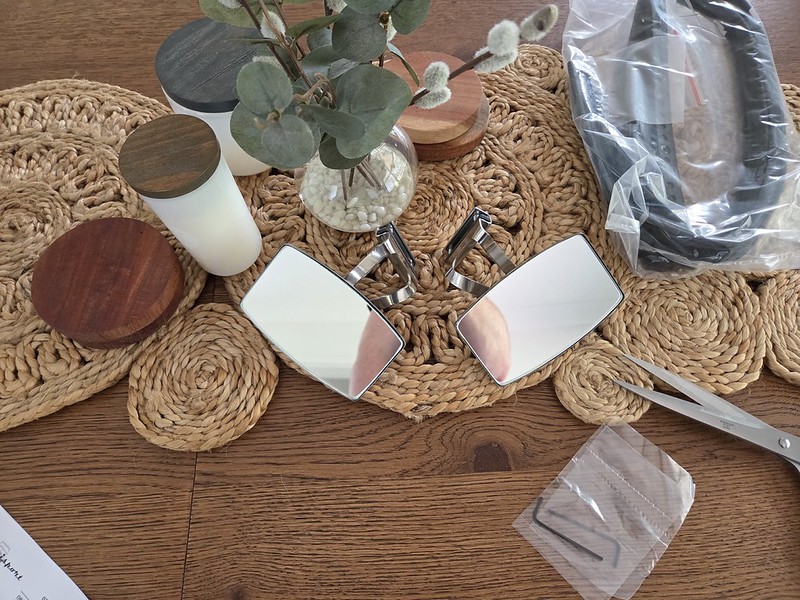
In Feb I upgraded my side mirrors via Minisport. I like the clamp on style that I had, but the round mirrors were legitimately useless. I went for the larger rectangular style, and they are an improvement. Not great, but I can use these at least for seeing some things!

55527517050_d63685ffeb_c.jpg20260203_120848 by brad g, on Flickr

55527283179_5b86b9fdc5_c.jpg20260203_122441 by brad g, on Flickr

55527230723_f1c5f8b4d0_c.jpg20260203_122538 by brad g, on Flickr


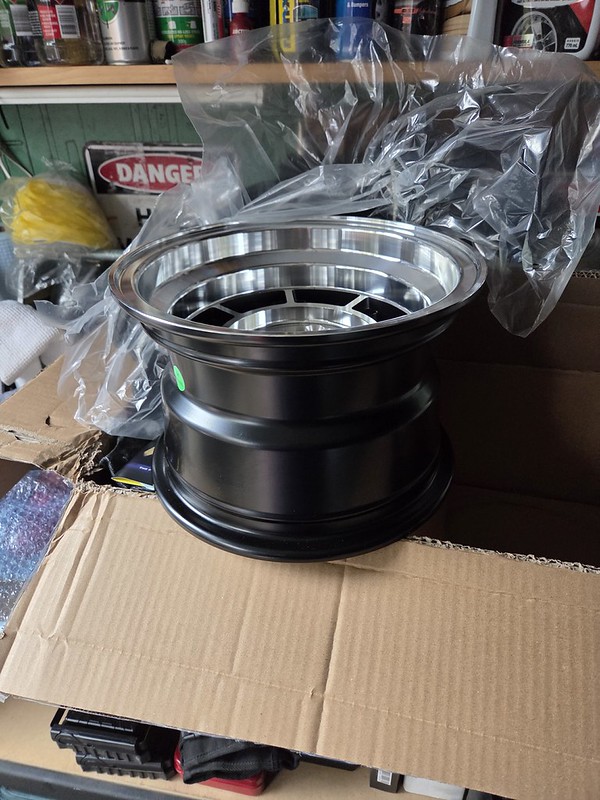
Also around this time, I found a pair of chunky boi 10x7 SSR FL-2’s in Victoria and had them sent to me. I have contacted a few suppliers about sourcing SSR FL-2’s, but they only come in 6.5” wide. SO, maybe one day. They’re also quite expensive at AU$3-3.5k for a new set.
In the meantime, I’ll keep my eyes peeled for some of the older generation 10x7’s to try and make a set. Worst case is that they make cool garage art.

55527230678_84f8bb3d27_c.jpg20260212_110158 by brad g, on Flickr

55527516955_0759d312d5_c.jpg20260212_110209 by brad g, on Flickr

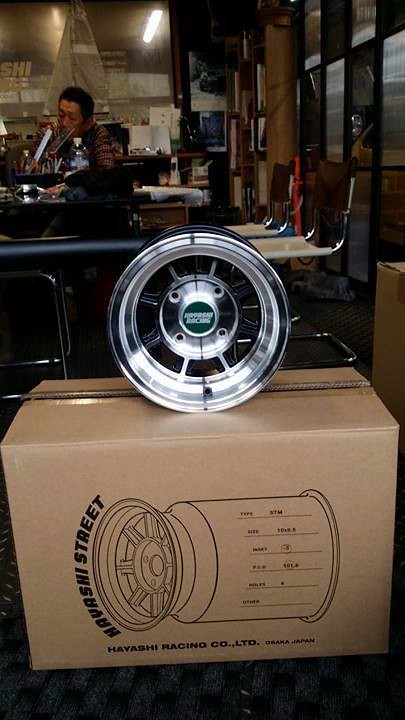
This wheel stuff got me thinking about finally upgrading the shoes on the van. Many years ago I saw that Barrel Bros in Padstow were bringing in some sets of Hayashi Racing 10x6.5” Streets. I saved the pics on my PC and phone and thought they’d be a sick wheel. Around that time I already had my set of 10x7 Force Racing mesh wheels, so I didn’t act on it. Barrel Bros has since stopped doing any of that, including rebuilding wheels. Many moons ago I popped in and actually sourced some new valves for the Force racing wheels, but they were starting to close down then. 

In feb I asked David at Classic minis Japan about them and he said he thinks he could source some through his contacts. At the same time I figured I should just send Hayashi Racing an email enquiring if they still make the wheels in mini pcd/size.
As their website is completely in Japanese I wasn’t sure what I’d get back, but to my surprise an Aussie guy named Jamie handles all of their correspondence.

55526114952_e640c82753_c.jpgHayashi Racing 10x6.5 from 2018 by brad g, on Flickr


#11 braad

braad

    Stage One Kit Fitted

  • Noobies
  • PipPipPip
  • 85 posts
  • Location: Sydney
  • Local Club: Inner West Minis & Ausmini

Posted 05 October 2026 - 02:39 AM

Update 3

Fast forward to May 2026 and I’m watching one of my favourite youtube channels (Juiceboxforyou), and they do a tour of Hayashi Racing, going through the place with Jamie. It was a great couple of videos, but it made me think that Jamie never got back to me! I checked my emails, and the idiot was I. I had drafted a response in February and never sent it. So the email was updated, as I wanted to order a set of 5, with caps, valves etc.
Jamie was awesome to deal with, the wheels were in stock, so they were shipped from Osaka quickly.

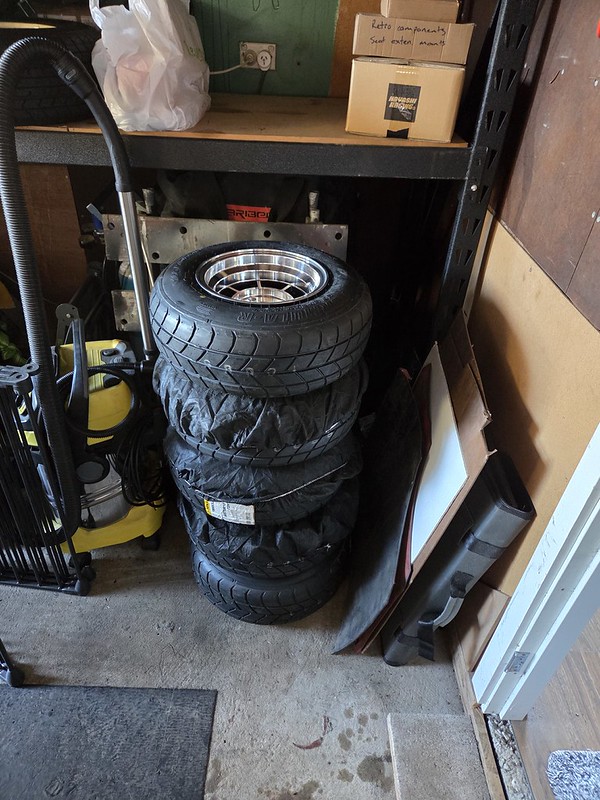
The wheels arrived in June, and I decided to tell no one that I had them. While I really wanted to unveil them at Rylstone 2026, I knew that I would then need flares, modifying the guards and other fiddly stuff, but I wasn’t sure if I would be able to complete all that work beforehand. Plus getting new tyres and fitting them, which can be a bother as some tyre places don’t like doing such small and wide wheels. I didn’t want to tell people I had some cool bits, but it turn up in Rylstone looking exactly the same as it did last time it made it in 2023.

55527127991_606810d06a_c.jpg20260630_153228 by brad g, on Flickr

55527128026_bfa84d7dca_c.jpg20260630_153208 by brad g, on Flickr


So the van had a few runs out and about in the months following the rego renewal in February. One of the things that has always bothered me is that the external lighting is horrible. These are tiny cars, and I want to be seen!
The Bangin Headlights traditional headlights solved the front end, but the rear end has always been too dim (and not helped by being low).

55527242983_fe3772940d_c.jpgPXL_20240607_064407762 by brad g, on Flickr

55527140726_e891c47706_c.jpgPXL_20240918_005327107 by brad g, on Flickr

Earlier this year a guy had posted on facebook that he was remaking some lenses for minis, and one pair were the original style for vans (he also does tinted, smoked etc). While I'd taken a mental note of his FB post, I hadn't thought much more until I stumbled across his eBay account. There were the van lenses, still available. So, I purchased them and they are great quality. The old lenses were showing their age and were a bit dull. One of the pics below show the old lenses beside a new, and the flip side shows the higher quality reflector on the inside. Time will tell how they hold up, but as the van resides in a garage the lenses probably won’t deteriorate from UV exposure too badly.

The second piece to the puzzle is yet to be solved, but I tried some replacement LED stop/tail and indicator bulbs. The indicators are great, super bright.
The stop lights are great, but there's something going on that the tail lights aren't working. They worked in my garage prior to Rylstone (I did video it), but weren't working on the Classic. So…yeah, need to figure that out


55523620140_0b15ee1518_c.jpgMini van by brad g, on Flickr

55524825443_999d71e127_c.jpgNew lense vs original lenses by brad g, on Flickr

55524825463_730322f6e1_c.jpgNew lense vs original lenses by brad g, on Flickr


#12 braad

braad

    Stage One Kit Fitted

  • Noobies
  • PipPipPip
  • 85 posts
  • Location: Sydney
  • Local Club: Inner West Minis & Ausmini

Posted 05 October 2026 - 02:41 AM

Update 4

So, going back to the July-August Rylstone 2026 rush, the main issue I had was that the seat was not far enough back for me to complete the Rylstone Classic. I did it in 2024 in that seating position and had serious leg cramping after about 3 hours, and I was not doing that again. I didn’t even make it to Rylstone, turning home.
I ordered some seat extension and steering column drop brackets from Retro components in the UK in preparation for the seat changes
https://www.retro-components.co.uk/

Having heard great reviews of the Odyssey PC680, I decided that would be the new smaller battery for me. A local battery place had them on special, so I ordered a PC680MJT. That 'MJT' suffix would cause me a little bother later on, but I was unaware!

55523233601_ae5c4224b5_c.jpgMini van by brad g, on Flickr

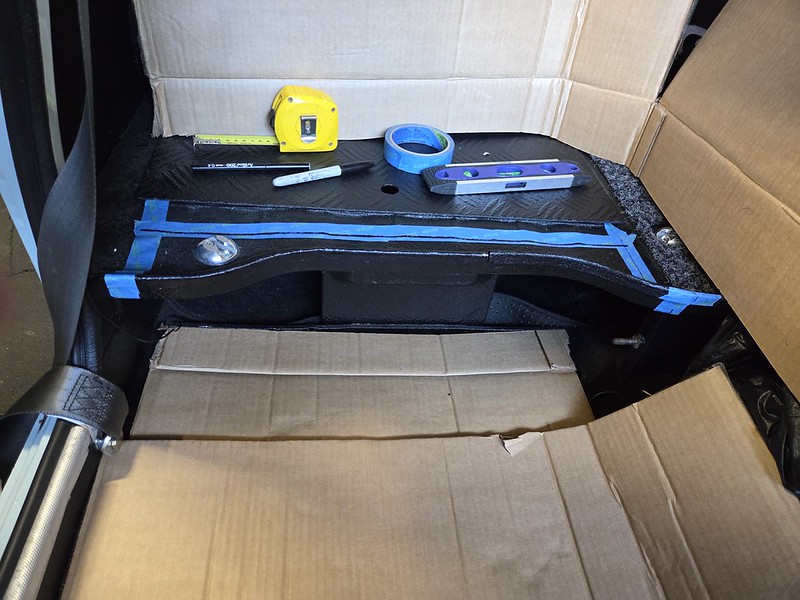
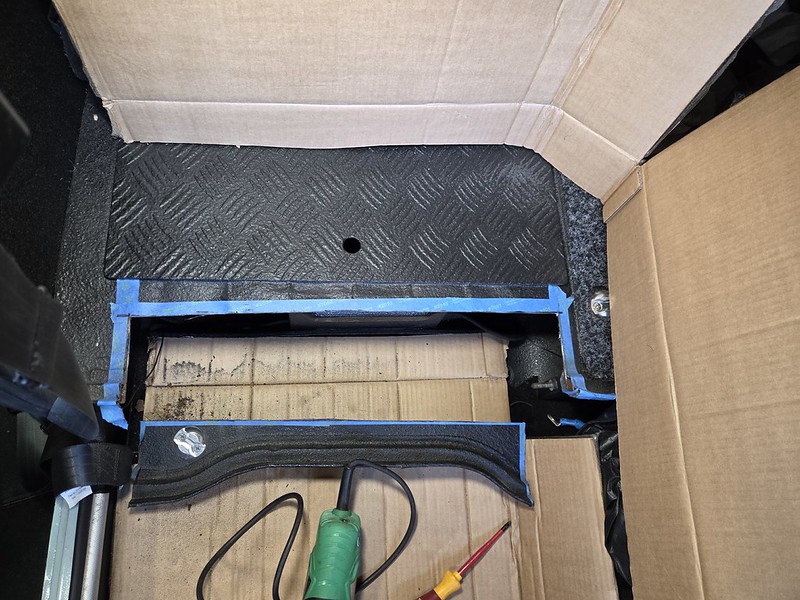
While those items were on the way I got stuck into cutting the load floor behind the drivers seat. A previous owner already modified the area behind and had a chequer plate lid/hatch, and with the vertical support providing strength I didn't want to encroach on those. It meant I definitely had a hard limit, but it still seemed enough.

I've daily driven a Focus XR5 (they’re manual) for the past 12 years, so I know the distance between the back of the seat base and the pedals in that work for me whether on a freeway or stuck in shitty sydney traffic. That measurement was 1010mm, whereas the equivalent measurement in the van with the Recaros was 870mm. 
I figured if I could gain an extra few inches of leg room it would make a big difference to my driving experience. I knew I probably couldn’t get to 1010mm, but even half way between those lengths would make me and my legs much happier.
After measuring what felt like a thousand times, the grinder finally did its job and I decided I had to be happy with my work. My grinding skills are superior to my welding skills, so gotta cut it right the first time!

55523619985_319c09dce2_c.jpgMini van by brad g, on Flickr

55523620005_be958f9dcf_c.jpgMini van by brad g, on Flickr

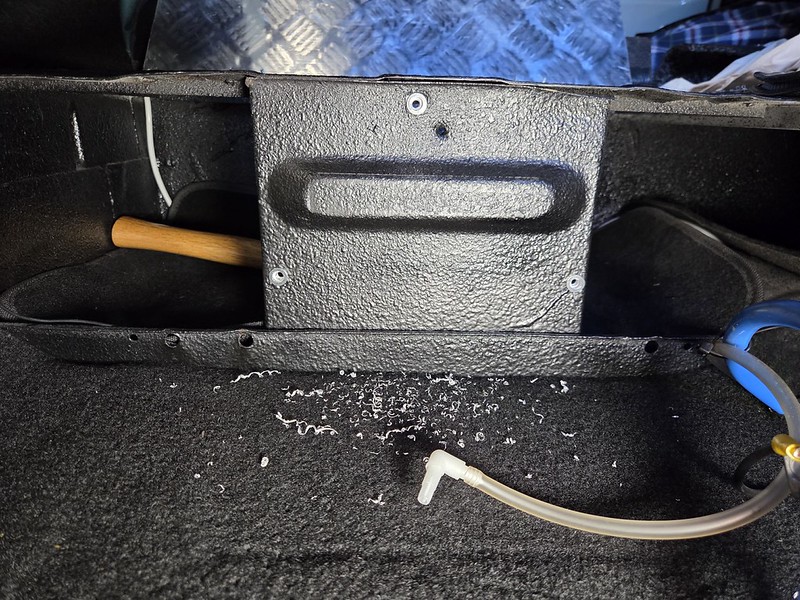
At the same time I was trying to figure out how I would securely mount the new battery. The answer was rivnuts. Now that I have a rivnut gun, the answer is often rivnuts!
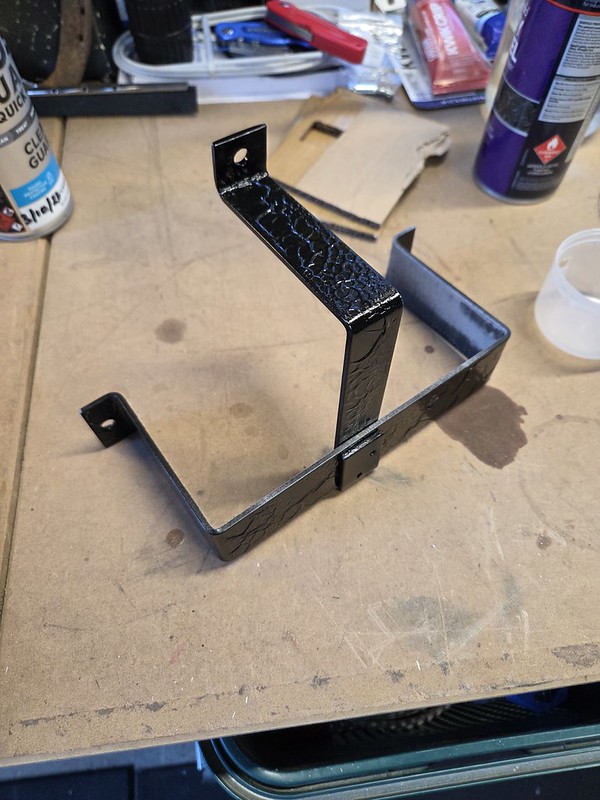
A length of flat scrap aluminium was agriculturally bent up to make a battery bracket that could be bolted in to the vertical support behind the drivers seat. There’s a bit of foam lining the inside of the bracket where it touches the battery case.

It's definitely not my finest work, but it fits snugly, and that battery does not move. The idea was for it to be temporary, as I know I could gain extra space with no battery occupying that space at all, but that was a future plan. It just had to be safe and secure for the Rylstone Classic 2026. Painted black it looked good enough.

55523233501_a9f2d525d7_c.jpgMini van by brad g, on Flickr

55523383244_48c283e196_c.jpgMini van by brad g, on Flickr

55523619935_4650ee9f69_c.jpgMini van by brad g, on Flickr

55523619895_67effcedfb_c.jpgMini van by brad g, on Flickr

55523618212_0f58c245ca_c.jpg20260814_103209 by brad g, on Flickr

55524788504_8cd7f4250d_c.jpg20260814_150912 by brad g, on Flickr

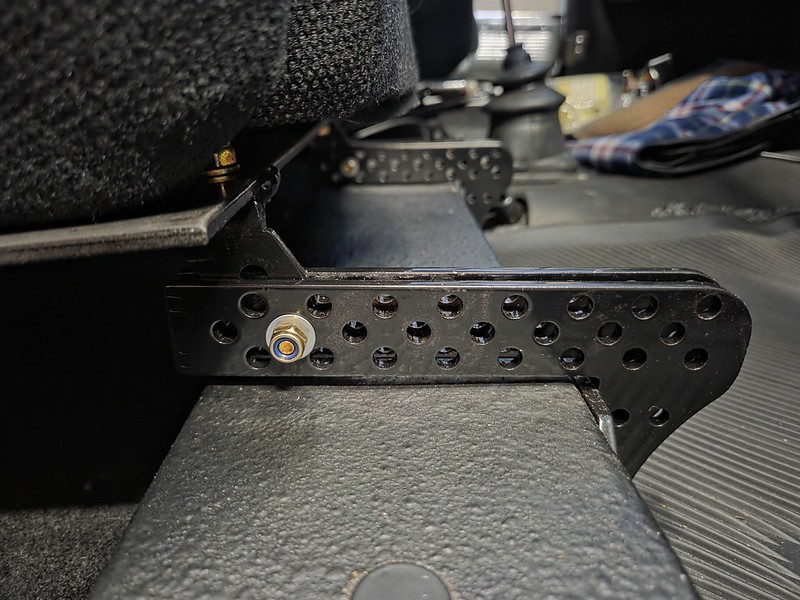
Having cut the load floor I threw the seat back in with my new Retro Components seat extension brackets... and it sat way too high. My hair was brushing the roof. It seemed that I had swapped one issue for another.
The old seat mounts had sliders, so I figured they could be removed. The way I made the original seat mount was never a fix-all, so I knew this day was coming where I’d need to re-make it. The original was a massively compromised design because I couldn’t use my welder.
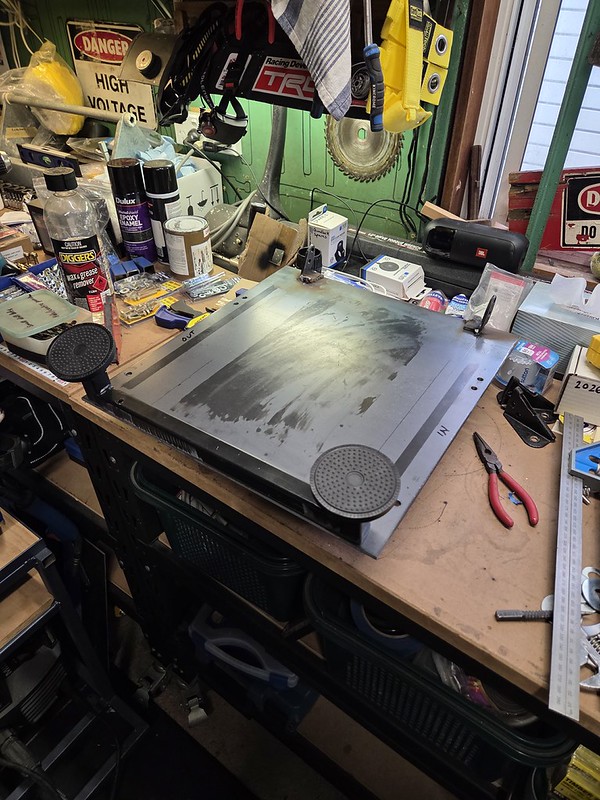
So, new 5mm steel plates were bought from Edcon steel and I used the old base plate as a drilling guide. The new plates were the same width but needed to be 40mm longer. 430x470x5mm for the record.

I threw some square bar together with some adjustable feet on the back, and front L-brackets cut off from the old cobra seat mounts and hey presto! Lower seats that sit further back naturally, even before the seat extension brackets. For this, I had to crack out my MIG welder for the first time in a decade. I can tell you I am most definitely rusty!

The new setup measures 950mm from pedals to the back of the seat base, with the new Odyssey battery mounted behind the driver’s seat. That extra 80mm was a huge improvement over previous. It’s such a difference that I can now actually get into the car easier! 

55523233356_63d9467314_c.jpgMini van by brad g, on Flickr

55523619855_c072f7ac97_c.jpgMini van by brad g, on Flickr

55523335003_32591e19ee_c.jpgMini van by brad g, on Flickr

55527127951_b801b88598_c.jpg20260809_130621 by brad g, on Flickr

55523233281_a8dbf3f0c5_c.jpgMini van by brad g, on Flickr

55523472403_034edee848_c.jpgVan mods by brad g, on Flickr

55522351932_8c34aac277_c.jpgVan mods by brad g, on Flickr


I had a nagging thought that with the seat moved further back I would run into issues with the steering wheel. As mentioned previously I had a nice steering dropper bracket from Retro Components, but that would only do so much for reach. Despite loving the Momo California steering wheel that I bought a few years previously, I opted to grab a new Momo Mod07 for it’s extra dish. 
The California is a 360mm wheel, with 34mm dish. I did not want a smaller diameter wheel, but needed dish. I loved the idea of getting something fully black, but wasn’t going to pay $600+ dollars for one. I stuck with Momo as I already had a Momo boss kit and knew it would be a direct fit. So the options were a few Momo Mod07’s and Mod08’s (colours and materials). 
I absolutely loved the look of the Mod07 Heritage, but paying extra for a wood rim (which I don’t like driving with) was not on the list. So I was quite fortunate that a few sales were on and I was about the grab the standard leather Mod07. It’s 350mm diameter with a 72mm dish. Slightly smaller than the California, but a good 38mm closer. I was able to pick it up the week of Rylstone, and fitted it two days before Rylstone.

55526108392_428577c4f7_c.jpg20260904_144921 by brad g, on Flickr

55526108402_500068a19b_c.jpg20260904_170852 by brad g, on Flickr


I reached out to Will at Thirdshedmoto about his tiny stereo amplifier as the existing single DIN stereo in the van was rubbish. It was mounted on top of the crossmember under the passenger seat, which made the seat sit high and difficult to access any settings on the stereo. 
The new stereo amp was (like most of this post) only bought a few weeks before Rylstone 2026, but it had been a wanted improvement for at least a year. It defaults to Bluetooth connection, unless one of the other inputs are plugged in. It’s perfect for my setup where I run everything off my phone.

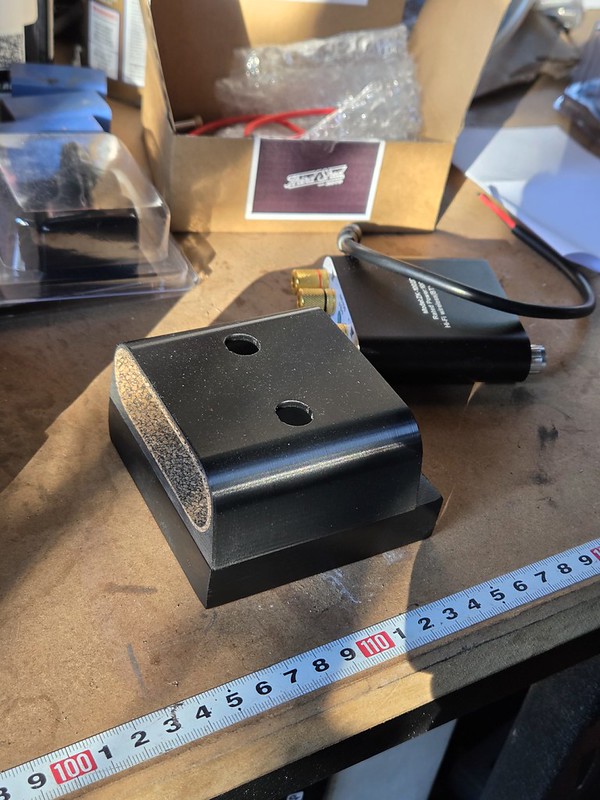
Once it arrived I set about installing it. I bought it with the under-dash mount because I had a feeling it would offer the most mounting options in the cabin. Being so small, I was able to mount it between the seats on the front most vertical support for the load floor. It’s almost exactly the right size, missing by only a millimetre or two.
Once again, the new rivnut gun made an appearance, providing the secure mounting holes for the stereo amp.
The amp did sit too deep by itself, so I happened to have some pine sitting about that could bring it out enough for it to be exposed to be able to be used easily. A bit of cutting to size, two holes drilled to line up with the stereo amp mount and a splash of black spray paint and it looks like it’s meant to be!

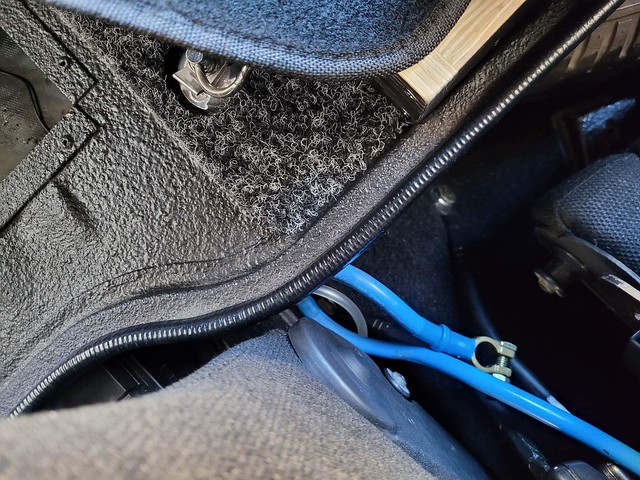
One positive of the previous stereo being mounted under the passenger seat was that all of the speaker cables were already run to the base of the B-pillar. After extending a couple of the speaker and power cables, I was able to plug them in and wrap them in loom tape to neaten them up. I do plan to have a piece of black fabric the same width of the stereo amp wedged between the pine, this is to be able to flop over the stereo amp and hide it completely. In amongst the black carpet, black load floor, and black recaros, it will disappear but be perfectly functional.

Alongside the stereo amp, I also finally installed the Thirdshedmoto bulkhead plate and the heater/demister vents that i bought a few years ago. I had to drill the dash on the passenger side to allow the piping to get to the vent whenever I do get the heater unit installed. 
The bulkhead plate has made a very noticeable difference in me stinking of oil and fuel, which my wife is a big fan of.

55522214532_02f08f9d7c_c.jpgMini van by brad g, on Flickr

55523233071_e6e40ea9bd_c.jpgMini van by brad g, on Flickr

55524144972_975d05d9fa_c.jpg20260811_084941 by brad g, on Flickr

55523233056_52c4a4db8f_c.jpgMini van by brad g, on Flickr

55523334728_087a70ddd9_c.jpgMini van by brad g, on Flickr

55523370046_b5cfc37922_c.jpgVan mods by brad g, on Flickr

55523522319_d8c14b7d6d_c.jpgVan mods by brad g, on Flickr

55523756685_21d6d20e30_c.jpgVan mods by brad g, on Flickr

55523756725_9c00821128_c.jpgVan mods by brad g, on Flickr

55526108577_ddc6bd199a_c.jpg20260814_172137 by brad g, on Flickr

55522214407_8d876c96be_c.jpgMini van by brad g, on Flickr


#13 braad

braad

    Stage One Kit Fitted

  • Noobies
  • PipPipPip
  • 85 posts
  • Location: Sydney
  • Local Club: Inner West Minis & Ausmini

Posted 05 October 2026 - 02:43 AM

Update 5

So, I had the set of five Hayashi Racing wheels glistening away but no tyres. After getting recommended by another Inner West mini friend, I contacted DMS Oz in South Aus. They’re a Dunlop motorsport dealer, and stock the Dunlop Formula R 93J in 165/70 R10. At $189 a tyre I was pretty happy to order (I needed 5) and get them sent to my mechanics shop (shipping is cheaper to a business address).
https://dmsaust.com....r10-72h-fmr93j/

To get them fitted I was wondering if one of the tyre shops near me would be able to, but wasn’t sure. By pure chance I went down the road to Motorsport Connections Seven Hills to get an adaptor for the new oil pressure sender I had acquired, and the guy behind the desk turned out to not only be the owner, but also a new owner of a classic Cooper S. 
His name was Mark, and was very helpful, and best of all he had just had a set of tyres mounted on to some nice dished minilite wheels by Kings Langley tyres. So off I went, and they were able to mount my tyres that day for about $20 a tyre. Had a lovely chat to the tyre fitter Ronnie, who used to have a mini. Note for others, they found it much easier to get the tyre onto the wheel then adding the valves after the tyre was over the lip.

55527140706_1f73f89045_c.jpg20260813_145242 by brad g, on Flickr

55523334678_0dcc320faa_c.jpgMini van by brad g, on Flickr

Having tyres fitted to the wheels meant I had to put them on, and showed I desperately needed big flares plus fixings. Before getting the tyres fitted I ordered some Group 2 race flares from Minispares as a guesstimation, and they had arrived a few days prior to the tyre fitting. I grabbed some of the wheel arch rubber SPL0060 from MiniSport to be able to neaten it up, thankfully those guys ship quickly.

55527516810_05715dee54_c.jpg20260813_153352 by brad g, on Flickr

55522214437_f5d6fa981d_c.jpgMini van by brad g, on Flickr


Before I had bought the rivnut gun a few months earlier, I knew it was the method I wanted to use to fix any flares to the van. They’re neater and re-useable.
Once the wheels were on the time came to offer up the flares and mount them. I pre-drilled the holes in the flares at 6.5mm as I’d decided to use M6 bolts. This meant I was drilling 9mm holes all over the guards for the rivnuts, which was quietly terrifying as I was sat on my ass on the garage floor drill in hand. 
After each hole I used my little deburrer, then a q-tip covered in paint to provide some sealing to the metal. 

Lots of masking tape was used to dummy fit the flares, and after stuffing about for ages I had a decent idea of where I wanted the flares to sit. One end of the flares sits just above the side seam, and then trying to centre the flares over the wheels seemed to give a decent idea of where to mount them. Once lined up it allowed me to cut the flares to fit around the A-pillar seam.
I started with the top most hole near the wheel centreline, using an M6 bolt to fasten the flare on before marking up the next hole. One by one I worked my way around the flare and guard to get it aligned. Thankfully it seemed to work pretty well on the first one which gave me confidence for the rest. The rear flares needed trimming and modifying beneath the bumper seam line but otherwise were a relatively straight forward job once I had my process down.

Next was that SPL0060 rubber trim. I lined it up, trimmed to length for each section, and cut out little squares where the flare bolts would pass through the rubber. It worked a treat, and between it and the black pinchweld running along the edge of the flare and body seam, it helped finish it off.
The flares do need a proper black paint job, but they're tidy enough as it stands. The van isn’t perfect anyway, so they don’t overly stand out as a blemish.

55527295109_594ab7050a_c.jpg20260813_155712 by brad g, on Flickr

55526108582_3326264e43_c.jpg20260820_115805 by brad g, on Flickr

55527230498_8bb7629c55_c.jpg20260820_124107 by brad g, on Flickr

55527295099_a46bea3813_c.jpg20260820_124749 by brad g, on Flickr

55527529365_c07b56058a_c.jpg20260820_124755 by brad g, on Flickr


The rear flares needing that mod. They actually needed more than I've photographed here, but they just do not follow the profile of the valance at all either side. Other than this issue, the flares fit quite nicely

55527295054_7857638953_c.jpg20260820_155519 by brad g, on Flickr

55527242873_a57470b0e2_c.jpg20260820_155528 by brad g, on Flickr

55527282879_918e68574f_c.jpg20260820_162344 by brad g, on Flickr


The flares were finally mounted two days before Rylstone. Next was clearancing the front guards for the wide wheels when turning. The grinder came out again, and as it was literally the day before the Rylstone Classic 2026, I had to act quickly. 
The passenger wheel was only able to get to about 60% steering lock so I had to remove about an inch along the front of the wheel arch.
The drivers side had more clearance, but as I sit that side I removed a similar amount so it sort of matches side to side. I noticed nearing the end of the cutting (because I did it in stages) that when the wheels were pointed straight ahead I could run the head of my grinder along the tyre and use that as a guide for the cut. Time will tell if I have removed enough metal or not, but on my local blast the day before Rylstone it seemed fine.

55527529320_b677367854_c.jpg20260827_171226 by brad g, on Flickr

55527242858_da318a5f24_c.jpg20260827_171231 by brad g, on Flickr

55523619490_d74197c0f7_c.jpgMini van by brad g, on Flickr

So the two days before Rylstone were busy. Final fitting and checking of the new items, finishing off the wheels/flares, etc. 
It was great to take it for a quick drive to test the seating position, the new steering wheel, operate the new stereo amp in the car, check the oil pressure sender (which is backwards, but at least shows it’s sensing pressure), and just blow a few cobwebs out as the car had been sitting in various states for a few weeks.

55523619475_980ba745d0_c.jpgMini van by brad g, on Flickr

55527266933_bf98244436_c.jpg20260828_172456 by brad g, on Flickr

55527318489_5a11e052b5_c.jpg20260828_172617 by brad g, on Flickr


The next post will be a Rylstone specific one. Unfortunately for anyone reading this, I don’t have many pictures to share of the event, as I spent so much time enjoying myself!


#14 Mr.greenPullover

Mr.greenPullover

    Stage One Kit Fitted

  • TMF+ Member
  • PipPipPip
  • 69 posts
  • Location: Hamburg, Germany

Posted 05 October 2026 - 02:08 PM

Hi,

love Your build, making it gradually its best version to suit Your needs as a daily (?) driver without ruining the character and clean look of Your lovely Van.  :proud: 


And it shoved me again, I like Minis with the right arches more than Minis without them... 

I also like, that You don't let money stop Your pursuit for good but inconspicuous lighting! Well done!

May I ask You a technical question about the T7 heater? It looks to me, as it's "only" a recycled air heater and there is no way get fresh outside air into it and direct it heated to the screen vents...


But there is one thing, I absolutely can not get my head around it: Why in the Schnitzel is there a St. Pauli air freshener at Your lowered mirror?  O_O  ;D 


#15 braad

braad

    Stage One Kit Fitted

  • Noobies
  • PipPipPip
  • 85 posts
  • Location: Sydney
  • Local Club: Inner West Minis & Ausmini

Posted 06 October 2026 - 12:27 PM

Hi,
love Your build, making it gradually its best version to suit Your needs as a daily (?) driver without ruining the character and clean look of Your lovely Van.  :proud: 
 
And it shoved me again, I like Minis with the right arches more than Minis without them... 
I also like, that You don't let money stop Your pursuit for good but inconspicuous lighting! Well done!

May I ask You a technical question about the T7 heater? It looks to me, as it's "only" a recycled air heater and there is no way get fresh outside air into it and direct it heated to the screen vents...
 
But there is one thing, I absolutely can not get my head around it: Why in the Schnitzel is there a St. Pauli air freshener at Your lowered mirror?  O_O  ;D


Hello there!

Even though it would be cool, the van isn’t a daily driver. In Australia we have historic registration that lets us drive old cars up to 60 days per year, and is much cheaper than full registration! Insurance is cheaper too.

The T7 heater just sucks in air where it is, so from in the cabin. However, a pipe could be run to direct air from outside to the heater if you wanted to! I was going to 3D print an adaptor so I could run a fresh air hose, but the weather doesn’t get that cold here in Australia.

Well the St Pauli thing. I have German/Bavarian family. Jackson Irvine was Captain. A few reasons. Most people in Australia have no idea!


Also tagged with one or more of these keywords: van

3 user(s) are reading this topic

0 members, 3 guests, 0 anonymous users