Jump to content


Photo
- - - - -

Mini Van Rebuild - Slow N Steady.


  • Please log in to reply
141 replies to this topic

#76 dave21478

dave21478

    Super Mini Mad

  • Members
  • PipPipPipPipPipPip
  • 639 posts

Posted 27 April 2009 - 09:32 AM

Got the shell tipped over again and primed the floor over the stone-chip coating....
Posted Image
Posted Image

Once dry, I gave it 2 coats of topcoat...
Posted Image
Posted Image

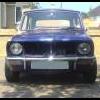
This is the first time I have seen the colour aside from a sample on the lid of the tin and im pretty pleased with it.

#77 GraemeC

GraemeC

    Crazy About Mini's

  • TMF+ Member
  • PipPipPipPipPipPipPipPipPipPip
  • 7,440 posts
  • Location: Carnforth

Posted 27 April 2009 - 10:02 AM

I would be fitting the battery cable, fuel and brake lines whilst it is in that position :w00t:
Maybe even the subframes if you can mask them off when the rest is painted.

#78 Saxo-Fiesta-Mini

Saxo-Fiesta-Mini

    Up Into Fourth

  • Members
  • PipPipPipPipPipPipPipPipPip
  • 2,889 posts
  • Local Club: LCMOC

Posted 27 April 2009 - 06:17 PM

Battery cable isnt difficult to run hahah
took me 20 mins today to swap mine over and that was with just the front end up

#79 Guest_ratty_*

Guest_ratty_*
  • Guests

Posted 28 April 2009 - 11:54 AM

Always nice to have a clean underside :thumbsup:

I cant wait until Ted is at the same stage now

#80 dave21478

dave21478

    Super Mini Mad

  • Members
  • PipPipPipPipPipPip
  • 639 posts

Posted 28 April 2009 - 03:41 PM

Thanks for all the encouragement so far.

Today has been spent messing with a red aerosol for a guide coat, sanding blocks and wet n dry paper. No photos simply because its so damn tedious.
Im waiting for hopefully the last bit of filler to dry before I rub it down on the front panel, then thats it done. Hopefully.
This evening, I will blow the dust out of the interior and get at least one coat of green all over the inside. If I get that finished tonight, then tomorrow I can mask off the openings, and give the outside a final clean then a few decent coats of primer. If all goes to plan, it should be painted by thursday or friday.

#81 analogue_radio

analogue_radio

    Up Into Fourth

  • TMF+ Member
  • PipPipPipPipPipPipPipPipPip
  • 4,897 posts
  • Location: Melton Mowbray, UK.

Posted 28 April 2009 - 06:35 PM

Nice work Dave :)

#82 dave21478

dave21478

    Super Mini Mad

  • Members
  • PipPipPipPipPipPip
  • 639 posts

Posted 28 April 2009 - 07:14 PM

Interior and engine bay are now done, although I will need to pass a quick second coat tomorrow as I have missed a few spots.

Posted Image
Posted Image
Posted Image

#83 dave21478

dave21478

    Super Mini Mad

  • Members
  • PipPipPipPipPipPip
  • 639 posts

Posted 30 April 2009 - 10:02 AM

Well, I got the topcoat done last night. 3 coats of paint has given A nice thick coverage.

Posted Image
Posted Image
Posted Image
Posted Image
Posted Image

If I'm honest, the finish isnt as good as I had hoped - its a bit orange-peely and there are a few flaws - a drip from the gun on one side panel and quite a few its of dirt have stuck to it.
Should come good with an overall flatting with fine wet n dry and polishing it back to a shine though.
I need to get it shifted out of the garage though as I don't want to wet flat it in there.

Still got the doors and bonnet to do too. :P

Edited by dave21478, 30 April 2009 - 10:03 AM.


#84 Down&Out

Down&Out

    The King Of Retro Cool

  • Traders
  • PipPipPipPipPipPipPipPipPip
  • 4,853 posts
  • Location: -

Posted 30 April 2009 - 03:42 PM

Nice seeing you've painted that a retro colour :P. Looking forward to seeing it all done :lol:.

#85 dave21478

dave21478

    Super Mini Mad

  • Members
  • PipPipPipPipPipPip
  • 639 posts

Posted 17 May 2009 - 09:09 PM

Not much to show of late - the dayjob is taking up my time, sadly.

I have ordered a machine polisher to sort out the paint job. Thing is....im now 100% not happy with the quality of finish I have got. It all looked fine in the wee workshop, but the limited space meant it was hard to get a clear look at the panel prepwork. Now its back at the farm and in the open, quite a few flaws have become visible.....Dunno what to do. I will flat and polish it anyway and see how it looks, but if I am still not happy, I think I will re-do both sides of the van. I should have plenty paint left after doing the doors and bonnet.

Speaking of which, I am slowly plugging my way through the prep and sanding on the doors whenever I have the time.

I have also started on the mechanicals that will go back onto it. I have already cleaned up and painted the subframes - today I stripped the rear trailing arms from the donor cars subframe and stripped them down - need to order 2 new wheel cylinders and 4 wheel studs. I will give them a clean and paint tomorrow. Before ordering the parts, I want to have a look at the front calipers to see if they need anything as well.

#86 dave21478

dave21478

    Super Mini Mad

  • Members
  • PipPipPipPipPipPip
  • 639 posts

Posted 18 May 2009 - 06:58 PM

Today was spent getting filthy.
Took apart the old mechanical parts from the donor car, wire brushed them, degreased them, a rinse with the karcher, then painted them. All chassis and suspension stuff got a few coats of chassis black, the calipers, drums and discs got painted red. Everyone knows red calipers give an extra 5bhp.

Posted Image

I then attacked the engine. Never thought to take a before pic, but it was minging. Years of baked-on oil and crud had turned it black. A whole bottle of fairy liquid and a good brushing, then a squirt of degreaser, then another brushing, then a blast with the Karcher again brought it up as clean as its going to get. Good enough, I think....yeah, I would ilke to have a perfectly clean, shiny engine, but frankly, I don't have the time or inclination to clean this one further, then paint it etc.

Posted Image

Tomorrow is a treasure-hunt. I need to go into town to find some 4mm (or larger, don't suppose it would matter) id pipe to use as a fuel line. The donor cars is in good enough condition, but is too short for a van. I also need a few other bits n bobs for the C15 fleet. I can hear my wallet complaining already.

#87 Retro_10s

Retro_10s

    Moderator

  • Members
  • PipPipPipPipPipPipPipPipPipPipPip
  • 10,139 posts
  • Location: Bromsgrove

Posted 18 May 2009 - 11:02 PM

looking good - the fan's on backwards by the way ;)

#88 dave21478

dave21478

    Super Mini Mad

  • Members
  • PipPipPipPipPipPip
  • 639 posts

Posted 19 May 2009 - 07:03 PM

Well spotted! I havent touched it so its probably been like that foryears in the donor car.

Todays efforts...
Got the rear subframe on and completely finished apart from the wheel cylinders, which are gassed. Need to order a new pair, and 4 wheel studs for one side as they were quite badly rusted.

looking good....
Posted Image
All new nylon bushes for the subframe, new flexi hoses for the brakes, hi-los and new suspension knuckles. The arms were given a good clean up before painting. The mountings are in good enough condition so I reused them and gave it plenty of fresh grease.
I had confidence that I had welded the shell straight, but it was a relief none-the-less when the subframe went on without too much fuss!
I also ran the new fuel line and the front - rear brake line, mounted the steering rack and made a start to assembling the front subframe.
Putting it back together is a serious mojo restoration tonic. Yeah, the paint is sketchy, but it is back on course for being finished in time for summer.

Oh, and speaking of sketchy paint, I ordered a bad-ass polishing machine from ebay germany, which arrived today so decently smooth paint should only be a few hours work away!

#89 dave21478

dave21478

    Super Mini Mad

  • Members
  • PipPipPipPipPipPip
  • 639 posts

Posted 24 May 2009 - 06:30 PM

Meh, got foundations to dig for work, so mini progress has slowed again.

I have managed to get the front subframe fitted and assembled....
Posted Image
Again, all new nylon bushes, hilos, new knuckles and flexi hoses.


I shoved the wheels and arches on to get an idea of how it will look....
Posted Image

No, the wheels wont be staying red. Will probably do the centres body coloured.

#90 RetroRay

RetroRay

    One Carb Or Two?

  • Members
  • PipPipPipPipPipPipPip
  • 836 posts
  • Location: London

Posted 24 May 2009 - 06:50 PM

That looks mint so far :) ... would never have thought to put a set of revos on a van !


1 user(s) are reading this topic

0 members, 1 guests, 0 anonymous users