Dave you have done loads since I lasted looked nice one!


Mini Van Rebuild - Slow N Steady.
Started by
dave21478
, Mar 02 2008 09:19 PM
141 replies to this topic
#91

Rosslin Racing
-

- Traders
-

- 2,408 posts
Up Into Fourth
- Location: Burgdorf.
- Local Club: SMP beo BMC swiss
Posted 24 May 2009 - 07:02 PM
#92
dave21478
-
- Members
-
- 639 posts
Super Mini Mad
Posted 26 May 2009 - 02:18 PM
Thanks for the comments.
Im suffering from serious insomnia just now, so at 5am, with nothing better to do, I attacked the mini.
I stripped the donor cars driveshafts, as they need new CV boots. As a temporary measure, I fitted the outer ends to the mini, which allows me to tighten up the hubs and fit some wheels on the front to roll it around. Round the back, I still have not fitted new wheel cylinders etc, but shoved the drums on anyway to get it rolling.
A quick look in the pile of wheels showed 3x12" and 1x10" steels that hold air,so thats what its sitting on. It also seems to be a bit squint due to uneven hilo adjustment. I banged an old steering column shaft and steering wheel on and now I can roll it around with ease.
I then attacked the orange-peel paint finish. I wet-sanded the whole shell with 1500 grit and loads of water till it was a matt finish and most of the defects had gone, then attacked wth my new electric polisher and G3 compound. Its come up pretty well, although its still not comparable to a pro paint job - for an amateur effort, its not bad at all. My pre-paint prep wasnt good enough to be honest. One reason was that as I was crammed in such a wee garage to do it, I couldnt see the car from any distane so it was much harder to spot the defects. Anyway, whats done is done, and there is no point crying about it.
Although, I will need to re-spray one of front wings - it would seem that the paint was on very thinly indeed and he polisher rubbed through it in an eye-blink. I still have the doors to paint, so will do the wing at the same time.
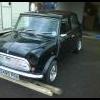
It was too dark for the before and during photos to come out well but the after ones show a whole new car! These are taken with a different digicam to the previous few, so the colour looks different for some reason.
Just used the karcher to clean off the G3 residue and splatters....


Im suffering from serious insomnia just now, so at 5am, with nothing better to do, I attacked the mini.
I stripped the donor cars driveshafts, as they need new CV boots. As a temporary measure, I fitted the outer ends to the mini, which allows me to tighten up the hubs and fit some wheels on the front to roll it around. Round the back, I still have not fitted new wheel cylinders etc, but shoved the drums on anyway to get it rolling.
A quick look in the pile of wheels showed 3x12" and 1x10" steels that hold air,so thats what its sitting on. It also seems to be a bit squint due to uneven hilo adjustment. I banged an old steering column shaft and steering wheel on and now I can roll it around with ease.
I then attacked the orange-peel paint finish. I wet-sanded the whole shell with 1500 grit and loads of water till it was a matt finish and most of the defects had gone, then attacked wth my new electric polisher and G3 compound. Its come up pretty well, although its still not comparable to a pro paint job - for an amateur effort, its not bad at all. My pre-paint prep wasnt good enough to be honest. One reason was that as I was crammed in such a wee garage to do it, I couldnt see the car from any distane so it was much harder to spot the defects. Anyway, whats done is done, and there is no point crying about it.
Although, I will need to re-spray one of front wings - it would seem that the paint was on very thinly indeed and he polisher rubbed through it in an eye-blink. I still have the doors to paint, so will do the wing at the same time.
It was too dark for the before and during photos to come out well but the after ones show a whole new car! These are taken with a different digicam to the previous few, so the colour looks different for some reason.
Just used the karcher to clean off the G3 residue and splatters....
#93
GreaseMonkey
-

- Members
-
- 3,663 posts
Has Ratchet, Will Make Noises
Posted 26 May 2009 - 03:03 PM
I think the paint look nice 
#94
dave21478
-
- Members
-
- 639 posts
Super Mini Mad
Posted 27 May 2009 - 06:41 PM
Remember this petrol tank?


I bought it from a forum member here in France who assured me it was good. Turned out the bottom was rotten so I cut the base off with the intention of putting a patch on.
Well, today I put the patch on....filled it with water to check for leaks and found a few pinholes in my welding - no problem, I welded them up....then found some leaks in the side, so I welded them, then found more leaks in the sides...welded them up....found a few more leaks...welded them up..then found it was rotten where the filler neck joins the tank, so I got angry.
I attacked it with the knottwheel in the grinder and its completely buggered. Chasing the leaks with the MIG is pointless as there are dozens of places where the metal is dangerously thin.
Its rare for me to lose my temper - very rare, but an afternoons fannying with this supposedly good tank did it. I got the sledge hammer out and squashed it flat.

Need a new petrol tank now.
I bought it from a forum member here in France who assured me it was good. Turned out the bottom was rotten so I cut the base off with the intention of putting a patch on.
Well, today I put the patch on....filled it with water to check for leaks and found a few pinholes in my welding - no problem, I welded them up....then found some leaks in the side, so I welded them, then found more leaks in the sides...welded them up....found a few more leaks...welded them up..then found it was rotten where the filler neck joins the tank, so I got angry.
I attacked it with the knottwheel in the grinder and its completely buggered. Chasing the leaks with the MIG is pointless as there are dozens of places where the metal is dangerously thin.
Its rare for me to lose my temper - very rare, but an afternoons fannying with this supposedly good tank did it. I got the sledge hammer out and squashed it flat.
Need a new petrol tank now.
#95
analogue_radio
-

- TMF+ Member
-
- 4,897 posts
Up Into Fourth
- Location: Melton Mowbray, UK.
Posted 27 May 2009 - 06:49 PM
Haha! oh dear  well at least you tried?
well at least you tried?
#96
Saxo-Fiesta-Mini
-

- Members
-
- 2,889 posts
Up Into Fourth
- Local Club: LCMOC
Posted 27 May 2009 - 07:13 PM
looks like my brake hose did yeturday we tried 40 different tools and 4 of the neighbours still didnt budge ended with 2 grinder wheels and a 40 ounch hammer 
#97
dave21478
-
- Members
-
- 639 posts
Super Mini Mad
Posted 08 June 2009 - 07:11 PM
I have decided to buy a brand new tank. 130€ all in inc delivery isnt as dear as I thought it would be. Buying the tank from a UK supplier would be slightly cheaper for the purchase, but the high shipping cost means I'm as well getting one from a French supplier. They arent in stock just now, but its not exactly crucial for the minute.
Anyway, back to making proper progress, I hope. I have approx 4 weeks free time starting today. I have a few other bit n bobs to finish off round the complex, but apart from that, I can concentrate on the mini 100%. If the Gods are on my side, we should be rolling by the end of June. I have started the paperwork trail to register it in France, (Its got a normal uk V5 in my name) but I forsee problems getting french approval. I might be able to wing it, but it depends on how *rec of the tum* the tester wants to be. First prolem is the engine. I have a MG Metro engine for it. This is a bread n butter conversion in UK, but vans were never homologated for a 1275cc engine here, therefor the engine swap shouldnt pass inspection. Will some tester who checks Meganes all day be able to tell the difference between a 1275 and a 998cc A series engine? I'm hoping not. The MG metro engine number plate fell off when I cleaned the motor, so I will make a new plate with the engine number from the V5 on it. I'm 80% confident this will work. If not, I will need to swap in a 998 engine for the test.
Second problem is the wheels and tyres. Tyres are the new "big thing" for testers in France. Regulations have been amended to make it obligatory to keep the standard size tyres on a car, or an alternative size specified by the manufacturer for that specific model. I have 165/60/12`s, where the van should have 140r10`s. Again, this is a common swap in UK, but here its not. I'm hoping that the tester has no data for this model, so wont be able to say they are wrong. I'm kind of boned if he does pick it up though - I will have to buy a set of 10`s for my scabby 10" steels, but the 10`s wont fit over the disc brakes......dunno what to do there. Cross that bridge when I come to it, I suppose.
"Enough rambling" you say - "make with the pics"
well, ok - todays progress was to do some non-photo-worthy stuff like fitting the newly bought rear wheel cylinders, handbrake cables, and to fit the pedals and brake and clutch master cylinders.
After that, I attacked the wiring.
Mini wiring looms are crap. They are a very bad design, poorly laid out and are just generally rubbish. Non waterproof joints behind the grill, a non waterproof fusebox in the engine bay and loads of other design flaws, plus this donor loom as loads of crap the van doesnt need. The van never had a loom, so a while back, I looked at the donor cars loom. It was thoroughly buggered. Loads of chopping and splicing by old owners - mice have been at bits of it, and it was just a headache waiting to happen, so I sacked it off and am making a custom loom. Another reason for doing this is to go for a "tucked" look under the bonnet with minimal wiring on view, which I think is smart.
Autosparks.co.uk provided loads of different coloured wires, some fuse boxes and other bits n bobs and today I got stuck in.
Doing this is also a way for me to finaly get over my hatred and fear of car electrics. Talk about jumping in at the deep end
Look at the state of that...

Mice would account for the non-functional wiper motor...

My custom loom design...

Making a start - the main runs are wrapped in plastic spiral wrap to keep everything neat without the need to tape the whole loom up. The main feed to the front lights and everything in the engine except the wipers goes under this wing, hidden from sight...

The wiring inside is starting to tape shape. Again, once its all cut, I will wrap it in spiral wrap to tidy it up. I have fitted 2 blade fuse boxes which will be mounted on the dash area away from damp.

Should get most of it finished tomorrow.

Anyway, back to making proper progress, I hope. I have approx 4 weeks free time starting today. I have a few other bit n bobs to finish off round the complex, but apart from that, I can concentrate on the mini 100%. If the Gods are on my side, we should be rolling by the end of June. I have started the paperwork trail to register it in France, (Its got a normal uk V5 in my name) but I forsee problems getting french approval. I might be able to wing it, but it depends on how *rec of the tum* the tester wants to be. First prolem is the engine. I have a MG Metro engine for it. This is a bread n butter conversion in UK, but vans were never homologated for a 1275cc engine here, therefor the engine swap shouldnt pass inspection. Will some tester who checks Meganes all day be able to tell the difference between a 1275 and a 998cc A series engine? I'm hoping not. The MG metro engine number plate fell off when I cleaned the motor, so I will make a new plate with the engine number from the V5 on it. I'm 80% confident this will work. If not, I will need to swap in a 998 engine for the test.
Second problem is the wheels and tyres. Tyres are the new "big thing" for testers in France. Regulations have been amended to make it obligatory to keep the standard size tyres on a car, or an alternative size specified by the manufacturer for that specific model. I have 165/60/12`s, where the van should have 140r10`s. Again, this is a common swap in UK, but here its not. I'm hoping that the tester has no data for this model, so wont be able to say they are wrong. I'm kind of boned if he does pick it up though - I will have to buy a set of 10`s for my scabby 10" steels, but the 10`s wont fit over the disc brakes......dunno what to do there. Cross that bridge when I come to it, I suppose.
"Enough rambling" you say - "make with the pics"
well, ok - todays progress was to do some non-photo-worthy stuff like fitting the newly bought rear wheel cylinders, handbrake cables, and to fit the pedals and brake and clutch master cylinders.
After that, I attacked the wiring.
Mini wiring looms are crap. They are a very bad design, poorly laid out and are just generally rubbish. Non waterproof joints behind the grill, a non waterproof fusebox in the engine bay and loads of other design flaws, plus this donor loom as loads of crap the van doesnt need. The van never had a loom, so a while back, I looked at the donor cars loom. It was thoroughly buggered. Loads of chopping and splicing by old owners - mice have been at bits of it, and it was just a headache waiting to happen, so I sacked it off and am making a custom loom. Another reason for doing this is to go for a "tucked" look under the bonnet with minimal wiring on view, which I think is smart.
Autosparks.co.uk provided loads of different coloured wires, some fuse boxes and other bits n bobs and today I got stuck in.
Doing this is also a way for me to finaly get over my hatred and fear of car electrics. Talk about jumping in at the deep end
Look at the state of that...
Mice would account for the non-functional wiper motor...
My custom loom design...
Making a start - the main runs are wrapped in plastic spiral wrap to keep everything neat without the need to tape the whole loom up. The main feed to the front lights and everything in the engine except the wipers goes under this wing, hidden from sight...
The wiring inside is starting to tape shape. Again, once its all cut, I will wrap it in spiral wrap to tidy it up. I have fitted 2 blade fuse boxes which will be mounted on the dash area away from damp.
Should get most of it finished tomorrow.
#98
dave21478
-
- Members
-
- 639 posts
Super Mini Mad
Posted 09 June 2009 - 07:32 PM
More wires....

All wrapped up in spiral conduit....

Looks pretty damn good even if I do say so myself. Just need to fit all the connectors for the switchgear and thats the loom done.
I also realised today that I have forgotten to weld on some fittings to hold the battery down. Will figure that out tomorrow.
All wrapped up in spiral conduit....
Looks pretty damn good even if I do say so myself. Just need to fit all the connectors for the switchgear and thats the loom done.
I also realised today that I have forgotten to weld on some fittings to hold the battery down. Will figure that out tomorrow.
#99
Rosslin Racing
-
- Traders
-
- 2,408 posts
Up Into Fourth
- Location: Burgdorf.
- Local Club: SMP beo BMC swiss
Posted 09 June 2009 - 07:54 PM
wow not long to go then dave, nice one, you should have given me a shout a have a rusty tank you could of had  really its ok.
really its ok.
#100
JordanRaisbeck
-
- Members
-
- 408 posts
Speeding Along Now
- Local Club: NEMC
Posted 09 June 2009 - 08:10 PM
Very nice project mate, love the colour and all the hard work put into it! good luck on completing the wiring and getting the engine in!
Jordan.
Jordan.
#101
dave21478
-
- Members
-
- 639 posts
Super Mini Mad
Posted 10 June 2009 - 07:38 PM
Man, this wiring lark is taking a lot longer than expected. I keep needing to take short breaks from it, as it all starts to blur together and I cant tell a blue/purple from a blue/brown!
Today though, I finished everything I can for now. Got all the switches mounted and wired, mounted and wired the fuse box, flasher units, and the relays for the headlamps. I also ran the main battery cable, fitted new battery clamps, fitted a main battery isolator switch and made a good earth point. Still to do is the wiring for the dash, which will have to wait for now and the engine bay wiring, but thats only 10 or so wires, so wont take long.
Forgot the camera today, so no pics. Blurry phone pics are getting on my tits so I will start using the proper digicam again tomorrow.
#102
dave21478
-
- Members
-
- 639 posts
Super Mini Mad
Posted 11 June 2009 - 07:01 PM
Well, the engine was supposed to go in today. In a rare stoke of luck, I decided to give it a quick paint before putting it in, and spotted that the diff casing was cracked, which saved me finding this out too late and having to hoik it all out again. But then, a cracked diff casing is hardly
lucky is it? but what was bloody lucky is that I have a spare diff casing in my parts pile!
Swaping the casing...

I need to pick up a few gaskets and seals before putting it in now, so spent today on other things.
Sound deadening the upper bulkhead...

Final fit of brake and clutch master cylinders and wiper mechanism...

Fitted the steerng column. I flung an old seat in too so I can sit in it and make "broom broom" noises...

Also, the postie has been today and left a note saying I need to collect a parcel from the post office. This is 98% likely to be my new petrol tank.
lucky is it? but what was bloody lucky is that I have a spare diff casing in my parts pile!
Swaping the casing...
I need to pick up a few gaskets and seals before putting it in now, so spent today on other things.
Sound deadening the upper bulkhead...
Final fit of brake and clutch master cylinders and wiper mechanism...
Fitted the steerng column. I flung an old seat in too so I can sit in it and make "broom broom" noises...
Also, the postie has been today and left a note saying I need to collect a parcel from the post office. This is 98% likely to be my new petrol tank.
#103
Tomf
-

- Traders
-
- 6,440 posts
Baby Tom
Posted 11 June 2009 - 07:26 PM
Looks really nice, should be done in no time at the rate your working.
Nice to see you have been modding the paint aswell.
Nice to see you have been modding the paint aswell.
#104
dave21478
-
- Members
-
- 639 posts
Super Mini Mad
Posted 13 June 2009 - 08:02 PM
2 steps forwards, 4 steps back.
The last few days have see the wiring finished off, the engine mounted, driveshafts rebuilt and fitted, gearchange mounted and a few other bits n bobs. Progress has been pretty good.
However, today I got some brake fluid so went to fill and bleed the brake and clutch systems. No amount of bleeding would get a drop through, so I took both master cylinders off again, and they are both goosed.
They worked fine in the donor car, but I assume that having been stored empty for so long after I stripped the donor that the seals have dried out and they have rusted internally. I managed to get the clutch cylinder to bits, so it should be good with just a rebuild kit, however the brake cylinder simply wont come apart, the piston is completely jammed inside it.
I need a few things from a scrapyard, so will see if I can find another cylinder.
The engine in and finished apart from exhaust and carb....

The camera shows up all the dusty farm related shart that has accumulated on the car, but the engine bay is pretty close to how I wanted it, with almost no wiring on show.

The last few days have see the wiring finished off, the engine mounted, driveshafts rebuilt and fitted, gearchange mounted and a few other bits n bobs. Progress has been pretty good.
However, today I got some brake fluid so went to fill and bleed the brake and clutch systems. No amount of bleeding would get a drop through, so I took both master cylinders off again, and they are both goosed.
They worked fine in the donor car, but I assume that having been stored empty for so long after I stripped the donor that the seals have dried out and they have rusted internally. I managed to get the clutch cylinder to bits, so it should be good with just a rebuild kit, however the brake cylinder simply wont come apart, the piston is completely jammed inside it.
I need a few things from a scrapyard, so will see if I can find another cylinder.
The engine in and finished apart from exhaust and carb....
The camera shows up all the dusty farm related shart that has accumulated on the car, but the engine bay is pretty close to how I wanted it, with almost no wiring on show.
#105
dave21478
-
- Members
-
- 639 posts
Super Mini Mad
Posted 14 June 2009 - 09:12 PM
Todays conclusion is that Im not cut out for paintwork. Or more accurately, I need a lot more practice or a few hours following a pro.
Over the last few eveings, I have been prepping the doors and bonnet, and this afternoon I sprayed them green. Much less orange-peel than before, but still far from a reasonable out-of-the-gun finish. Plus a few runs too.
So, looks like tomorrow will see more wet flatting and the polishing machine will get its second outing.
I also managed to get the brake master cylinder apart. It was seized solid, but I left it last night soaking in a tin of diesel and today, after batterng it off the vice, the piston finally popped out. I think that with a clean-up with wire wool, the bore will be ok, and the seals look saveable too, so all being well, it should go back together fine.
The clutch cylinder seals are dud though. Will see what I can come up with tomorrow.


0 user(s) are reading this topic
0 members, 0 guests, 0 anonymous users


