Jump to content


Photo
- - - - -

The Fiancé's Wedding Present

roundnose

  • Please log in to reply
91 replies to this topic

#31 inkyjamesdee

inkyjamesdee

    Stage One Kit Fitted

  • Noobies
  • PipPipPip
  • 83 posts
  • Location: Cambs

Posted 05 December 2013 - 05:06 PM

The sand does get everywhere and it’s a right pain to get rid of. A hood makes all the difference. I bought one of these but the plastic screen lasted about 10 mins before it was frosted. I took the screen out and use safety goggles. Never had a problem with grit in my eyes.

http://www.northernt...cap_15548E.html

I have just ordered one of these

http://www.ebay.co.u...=item46144315f4

Hopefully it will be a bit better than the last one.
 

Pete


Thanks for that Pete still haven't got round to getting a mask yet.

But did do a bit more last night.

I fitted the little D-shaped panel that goes under the scuttle. It was an absolute ball ache to get into place on the drivers side and took some thrashing of the innerwing to get it into place. The passengers side fits a treat however and is all cleaned up and ready to weld into place then I will be working on getting the scuttle and dash top into place.

20131204_213905_zps33203c53.jpg


#32 inkyjamesdee

inkyjamesdee

    Stage One Kit Fitted

  • Noobies
  • PipPipPip
  • 83 posts
  • Location: Cambs

Posted 01 January 2014 - 10:18 PM

Finally drag my self back out into the shed. Want to get this mini done so I can do my own project so got a fair amount done.

Wanted to get the front end done so using all the clamps at my disposal got every thing into place. I also cut the grotty old scuttle and upper dash out and did a small repair on the bulk head.


20131208_185301_zps16212cf5.jpg

20131208_185338_zpsxagutvia.jpg

20131209_192417_zpsi1eujr5p.jpg

20131209_192441_zps0h76cqsd.jpg

20131209_192453_zps15j3jrvo.jpg


I finished welding the scuttle in today and messed around with the wings to try and get the bonnet gap to look good and thats as far as I got.

Still plenty to do but I feel like a made good progress today. Getting the wings A panels and front panels into place will be the next job to do.

20140101_204424_zpsxnoqwnon.jpg

20140101_204500_zpsd9vzajeg.jpg


#33 inkyjamesdee

inkyjamesdee

    Stage One Kit Fitted

  • Noobies
  • PipPipPip
  • 83 posts
  • Location: Cambs

Posted 20 January 2014 - 11:57 PM

Done some more to the mini tonight got the front end spotted into place. Although  I haven't been doing much lately its starting to take shape. I also had a result on getting some sourcing some panels that I still need from my local paint supplier and I because I know they guys in there really well got a 15% discount too :-)

I drafted in some expert help tonight in the from of my Dad. He's an old hand a body work and gets more done in an hour than I do in half a day but that experiance for you.

IMG-20140120-WA0014_zpsp648k0eg.jpg

Cheers dad :-)

IMG-20140120-WA0012_zpsm2ougojw.jpg

IMG-20140120-WA0015_zpsx7cqqt5x.jpg

IMG-20140120-WA0016_zpsjtkr9lgp.jpg

IMG-20140120-WA0017_zps2gdeswbi.jpg

IMG-20140120-WA0018_zpsdupqpq2x.jpg

IMG-20140120-WA0019_zpsngrqsipv.jpg

IMG-20140120-WA0020_zpsgvtftit1.jpg

IMG-20140120-WA0022_zpsaivm7kka.jpg

Its all looking good now I'm not 100% happy with the bonnet gap on the drivers side but I am confident I can address that with a hammer. Will be doing that tomorrow tho as it was getting late and I have angry neighbours.


On a less possitive note I hacked the dash out inside as it was a) abit rotten and b) getting in my way I had know idea how expensive they are to replace and thats one pannel my local firm can't supply... Bummer :-(

IMG-20140120-WA0013_zpsfghc0ewa.jpg


#34 Petrol

Petrol

    One Carb Or Two?

  • Members
  • PipPipPipPipPipPipPip
  • 967 posts

Posted 21 January 2014 - 11:54 PM

Dad's made a good job of that - I hope he didn't burn his Vans :D I bet that lower dash rail could be fettled up and welded back in ;D


Pete


#35 inkyjamesdee

inkyjamesdee

    Stage One Kit Fitted

  • Noobies
  • PipPipPip
  • 83 posts
  • Location: Cambs

Posted 22 January 2014 - 09:05 AM

Dad's made a good job of that - I hope he didn't burn his Vans :D I bet that lower dash rail could be fettled up and welded back in ;D


Pete

Cheers Pete think I am going to try and save the dash rail but replace the rear frame part. Until then there are plenty of other bit to be getting on with ordered a passenger side step yesterday to collect today to address some more grot issues and car is going back on the jig tonight now I'm happy with the front end. 

Also added some casters to the jig so I can move it, be interesting to see if it tries to fall over.


#36 inkyjamesdee

inkyjamesdee

    Stage One Kit Fitted

  • Noobies
  • PipPipPip
  • 83 posts
  • Location: Cambs

Posted 02 February 2014 - 09:11 PM

Been doing bits and pieces this week, firstly rolled the car on to its side and cleaned the underneath getting the dirt, crap and flaky under seal off took absolutely ages. I also removed all the spot welds from the front pas side floor ready to cut that away and replace it, along with the door jamb and the door hinge strengthener and outer sill... so plenty to do there, think I'll wait until my dad is around to give me a hand with that as it'll take me all day on my own.

20140127_180659_zpsoijghdqg.jpg

Underside de-gunged

20140127_180731_zpsxfnnzsjx.jpg

The offending door Jamb area O_O

20140127_201257_zpspts20clh.jpg

20140127_201303_zpscy0c0mdm.jpg

floor pan partially removed


Moving away from the passenger floor I primed and undersealed the drivers side front inner wheel arch.

20140202_201623_zpsnhkh33yl.jpg

The big strip down the middle is due to me having to cut the inner wing panel to get the wings to line up. Annoying considering it is a heritage panel and wasn't cheap.


I don't work Mondays so will probably anti-gravel the arch and if I can drag my dad away from his carbon fiber making get him to help me with the floor.


Edited by inkyjamesdee, 02 February 2014 - 09:13 PM.


#37 domdee

domdee

    Formally known as dominicdee

  • Members
  • PipPipPipPipPipPipPip
  • 1,183 posts
  • Location: hull
  • Local Club: hull clubs on FB

Posted 03 February 2014 - 10:04 AM

brilliant work mate!


#38 GiorgioMalteser

GiorgioMalteser

    On The Road

  • Noobies
  • PipPip
  • 39 posts
  • Location: MALTA
  • Local Club: Malta Mini Owners Club

Posted 03 February 2014 - 11:48 AM

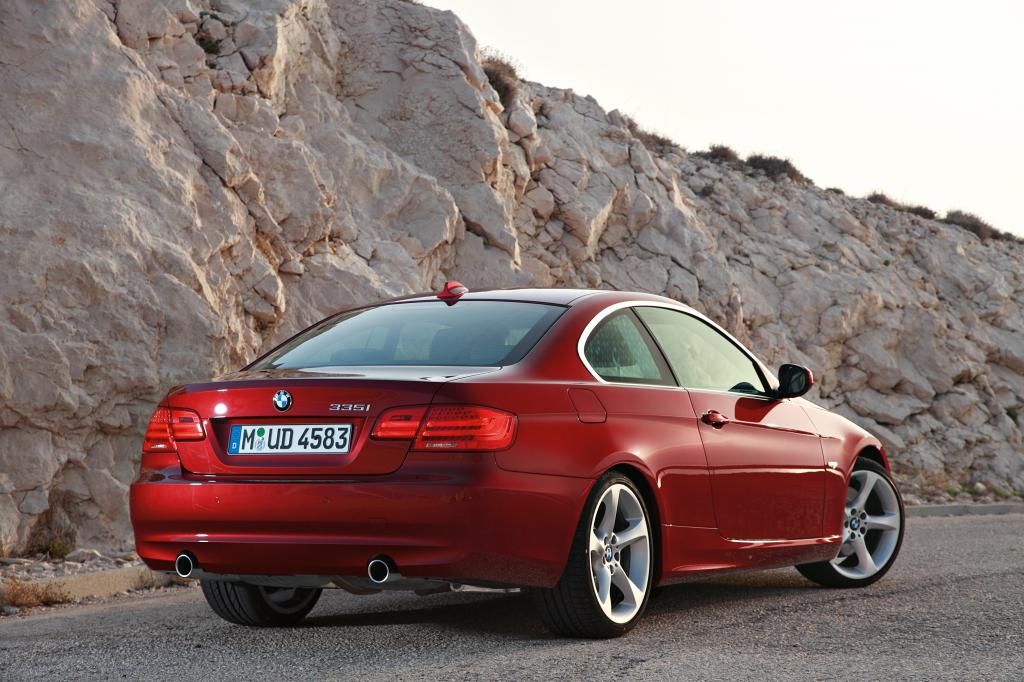
Great work!, nice Girlfriend and dog. Since red is your choice of colour may I suggest the BMW Vermillion Metallic, which would look the nuts on a Classic Mini :kiss:


492.jpg


#39 inkyjamesdee

inkyjamesdee

    Stage One Kit Fitted

  • Noobies
  • PipPipPip
  • 83 posts
  • Location: Cambs

Posted 03 February 2014 - 02:34 PM


Great work!, nice Girlfriend and dog. Since red is your choice of colour may I suggest the BMW Vermillion Metallic, which would look the nuts on a Classic Mini :kiss:


492.jpg


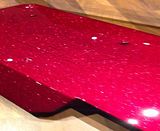
Thanks for the reply, I really like this colour. Good shout there. I had my heart set on a candy colour and have been trying some candy paints out on some parts. although I think this colour would be easier and cheaper to do and look pretty much as good so I'm torn now.


Here is a video of some of the candy red I have been playing with.

th_F9D177EF-80F6-4D52-8190-CCE63ECB3EE2_


Edited by inkyjamesdee, 03 February 2014 - 02:35 PM.


#40 GiorgioMalteser

GiorgioMalteser

    On The Road

  • Noobies
  • PipPip
  • 39 posts
  • Location: MALTA
  • Local Club: Malta Mini Owners Club

Posted 03 February 2014 - 03:07 PM


Great work!, nice Girlfriend and dog. Since red is your choice of colour may I suggest the BMW Vermillion Metallic, which would look the nuts on a Classic Mini :kiss:


492.jpg


Thanks for the reply, I really like this colour. Good shout there. I had my heart set on a candy colour and have been trying some candy paints out on some parts. although I think this colour would be easier and cheaper to do and look pretty much as good so I'm torn now.


Here is a video of some of the candy red I have been playing with.

th_F9D177EF-80F6-4D52-8190-CCE63ECB3EE2_


It's the closest colour you can get to candy paint at a fraction of the cost, you can also consider BMW Calypso Red, which is a tad deeper. Calypso is a 2 stage finish, which is waterborne metallic colour and 2K HS Lacquer on top. Not sure about Vermillion, need to check with my paint supplier. My next Mini project will definetly be in one of these colours. :D


#41 inkyjamesdee

inkyjamesdee

    Stage One Kit Fitted

  • Noobies
  • PipPipPip
  • 83 posts
  • Location: Cambs

Posted 03 February 2014 - 09:55 PM

Made a move on the pas floor pan. Dad was on site to help me (and by help i mean do most of it for me).

20140203_194701_zpsk34p9prh.jpg

I decided the shed was to much of a mess to work in at the minute so made a start on tidying it.

20140203_194735_zpscfxlvtli.jpg

pushed the mini against the wall and got all this crap out from underneath

20140203_194721_zpsgsihh4gr.jpg


I also graveltex the drivers arch but for got to take a photo of that but will no doubt be doing some more this week so will get some pics of that too. Got to keep plugging away at this want to get it in paint asap would like to think it will be done in time for the summer but not holding my breath.


Edited by inkyjamesdee, 03 February 2014 - 09:58 PM.


#42 inkyjamesdee

inkyjamesdee

    Stage One Kit Fitted

  • Noobies
  • PipPipPip
  • 83 posts
  • Location: Cambs

Posted 13 February 2014 - 11:16 PM

Had a free day at work so I bunked of to work on the mini. Wanted to work on getting the grotty door jamb sorted. started by chopping all the grot out.

IMG-20140211-WA0003_zpsv2jg63cy.jpg

IMG-20140211-WA0005_zps7fwoyhbe.jpg


The door strengthening panel I brought was a poor fit but the original wasn't rotten like I first thought so I ended up recycling that instead.

IMG-20140211-WA0004_zpsvsjksghh.jpg


Cut out the old sill

20140213_164357_zps4ney8q4l.jpg


The door jamb was replaced as well a big portion of the door step and inner wing panel. I grabbed a last minute photo as I shut up the shed for the night but will get some better pics of the work over the weekend.

20140213_220552_zpsxcmba0o6.jpg


Won't get out there now until monday with it being valentines day tomorrow.

That's really broke the back as far as the welding goes. Got the back of the boot floor to repair and rear valance to fit as well as the front of the rear arches need patching but then that really is the welding done. Can't wait to get that out of the way. I can get the shell seam sealed up then and start attacking it with primmer.


#43 1293gt

1293gt

    Speeding Along Now

  • TMF+ Member
  • PipPipPipPipPip
  • 306 posts
  • Local Club: nonw

Posted 14 February 2014 - 11:29 AM

Quality!

I'm buying myself an engagement engine!!


#44 inkyjamesdee

inkyjamesdee

    Stage One Kit Fitted

  • Noobies
  • PipPipPip
  • 83 posts
  • Location: Cambs

Posted 14 February 2014 - 12:04 PM

Quality!

I'm buying myself an engagement engine!!

Lol I keep forgetting its not mine and looking at engine conversions etc. It is going to stay 1000cc with good brake if the missus is driving it.


#45 inkyjamesdee

inkyjamesdee

    Stage One Kit Fitted

  • Noobies
  • PipPipPip
  • 83 posts
  • Location: Cambs

Posted 17 March 2014 - 07:05 PM

Done a fair bit more recently but haven't had much time to sit down and up date my post.

Had to sort out the sub frame mounting point on the back. Was a bit of a pain as some rust had gotten behind it and the new sill was blocking access to it so had to trim a bit off :-( and make a repair at the back.

20140224_172625_zpsdxxkn3wt.jpg

Also repaired the rear quarter.

20140303_132806_zpsgcsqzrfv.jpg

20140303_145809_zpsj6fct9z0.jpg

20140303_153112_zpsot673hh9.jpg


I also had some problems with the A panel on the passenger side looking at the photo I think it could have been a bad press...

20140224_152912_zpsok596cqi.jpg


Had to play around with the wing and A panel but i have got it looking just about right. New bonnet in stock and some ultra-precise pieces of folded cardboard to get the spacing right.


20140317_182730_zpsouqdjc8b.jpg

20140317_182737_zps9a5fngfi.jpg


Last two jobs on the body work will be

20140317_182755_zpsj2rawss7.jpg

Drivers rear wheel arch and

20140317_182813_zps24ibhhtl.jpg

the boot floor corners.

More soon


Edited by inkyjamesdee, 17 March 2014 - 07:07 PM.


Also tagged with one or more of these keywords: roundnose

0 user(s) are reading this topic

0 members, 0 guests, 0 anonymous users