Jump to content


Photo
- - - - -

White '93 Sprite Mot Failure

roundnose

  • Please log in to reply
86 replies to this topic

#31 DiscoDarren

DiscoDarren

    Mini Mad

  • Noobies
  • PipPipPipPip
  • 136 posts
  • Location: Billinghay, Lincolnshire

Posted 07 June 2014 - 08:37 AM

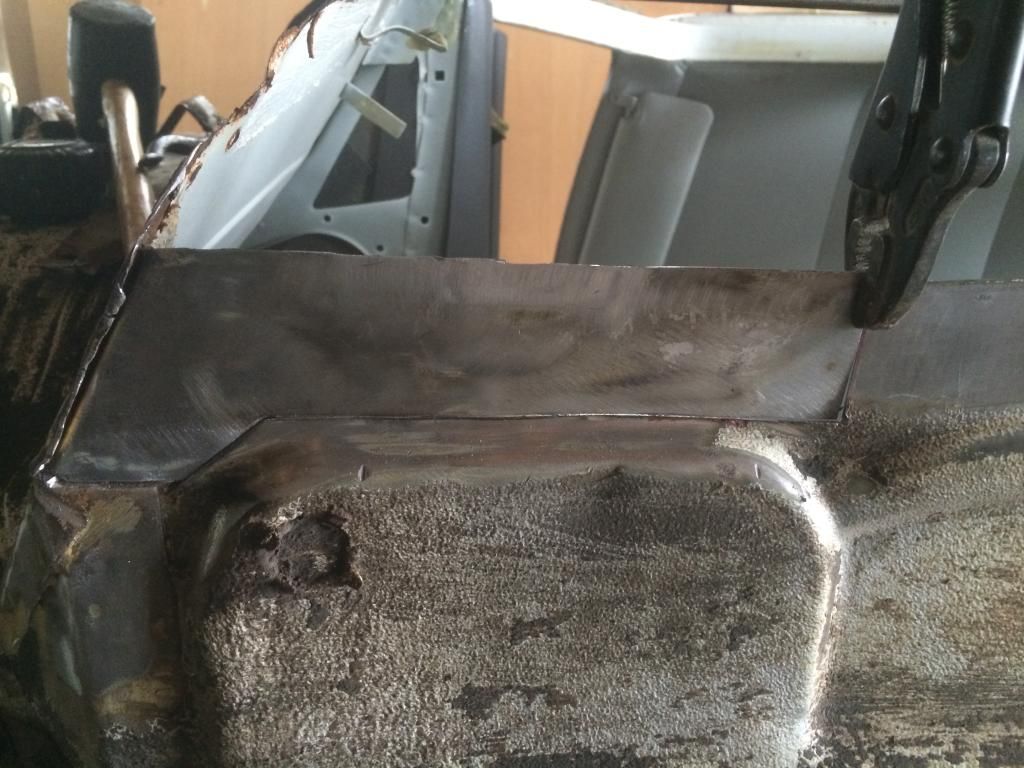
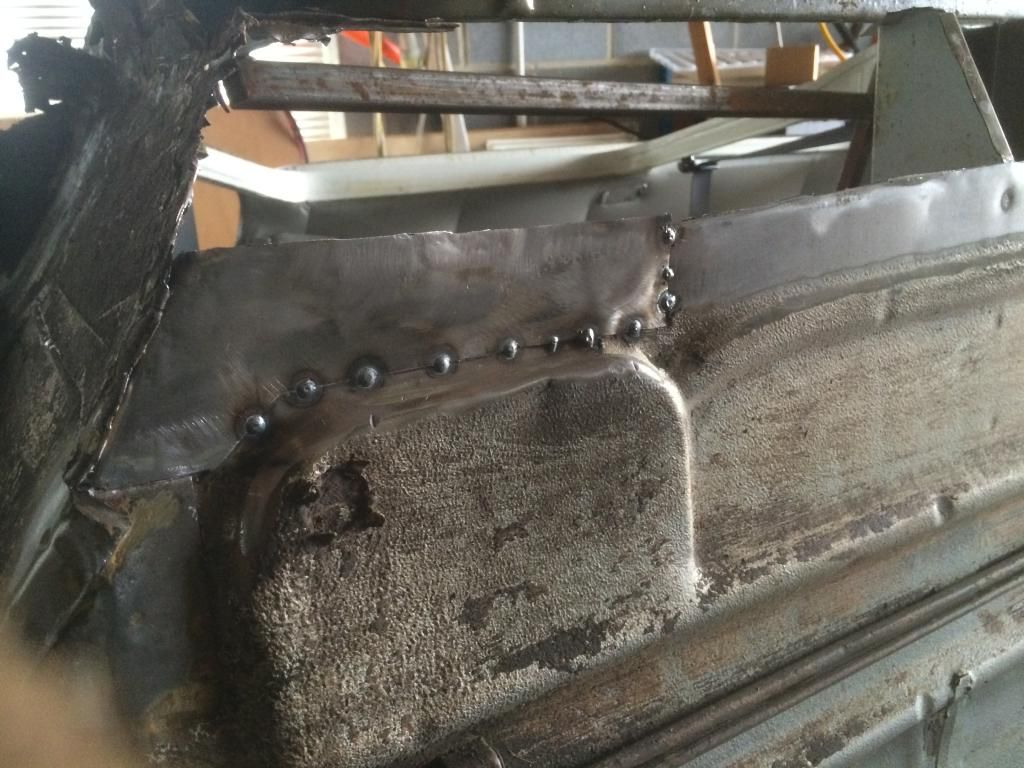
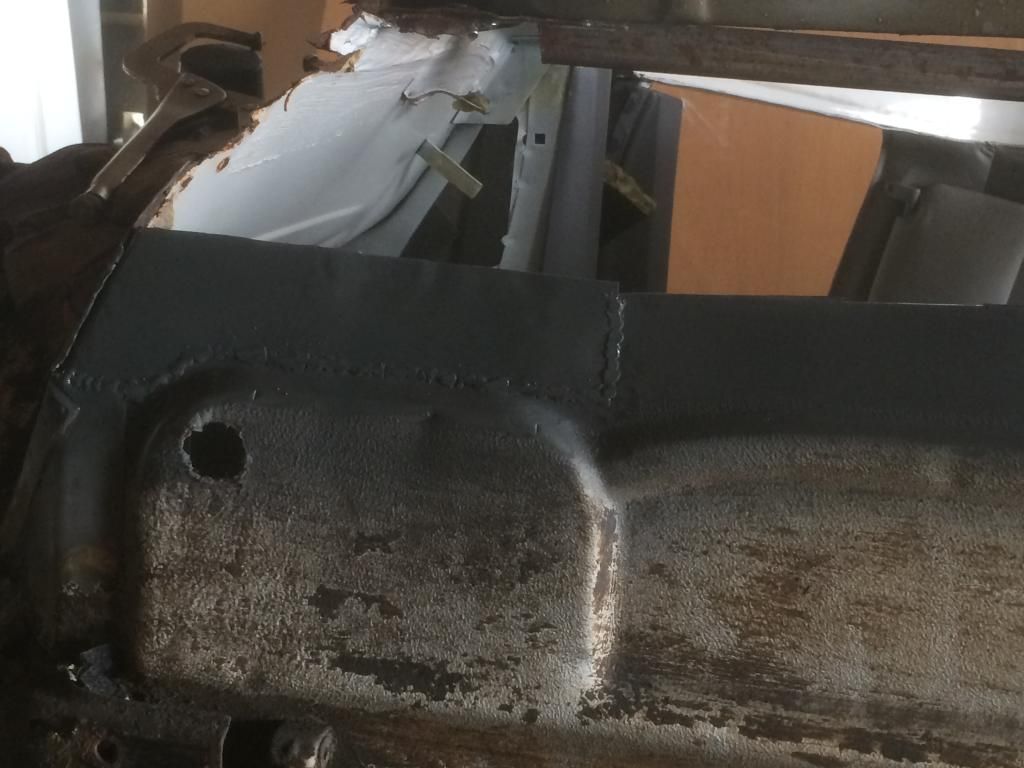
Making good progress! I dont know if I would have the courage or patience to go to that extreme of repairing rust. Keep it up!


I've gone too far to look back now. Just hope the lack of funds don't slow me down too much otherwise I fear I may loose interest. I had originally set out to get her finished for this summer. In fact for July 21st - I may explain he significance of that date later, but it's a long story. However the scale of the project has grown significantly since then. Realistically it may not get finished this year even. Although I still want to get the bulk of the work done while we've got decent weather. I don't mind being out in the garage 12 or 15 hours a day when it's nice enough to have the door up. It's a different story when It's dark nights and freezing cold

#32 Ben_O

Ben_O

    Mill Road Garage

  • Paint Doctor
  • PipPipPipPipPipPipPipPipPipPip
  • 9,781 posts
  • Location: Isle of Wight

Posted 07 June 2014 - 02:44 PM

Nice through job you are doing Darren.


It is always a massive task when they are as bad as this but it sure is satisfying when you end up with a solid Mini that you know is welded properly and no nasty surprises at the end of it.


Keep it up!


Ben


#33 DiscoDarren

DiscoDarren

    Mini Mad

  • Noobies
  • PipPipPipPip
  • 136 posts
  • Location: Billinghay, Lincolnshire

Posted 13 June 2014 - 10:59 PM

Well it's been almost a week since I posted on here and not much to show for it I'm afraid. I seem to have lost steam a bit, I think it's because I'm skint at the minute and I've been holding off buying any new panels. There is other little bits I could of got on with, but i want to address the rust issues first. I've not dared to chop any more bits off though, until I can offer up the repair panels to mark a cutting line. Good news is that I ordered a load of panels yesterday, so I should be back in full swing next week. Not everything I need, but hopefully enough to do the boot and n/s. The o/s and front end will have to wait. They're only magnum panels, but because of how work is at the minute, I've got more spare time than I have spare money. So hopefully it will work out ok.

With regard to the car I did manage to get a couple of hours on it this evening. I set about trying to remove the slinging point at the rear. It certainly wasn't gonna drop off, even tho it was quite rusty. The floor around where it fits is going to need repairing, but yet again, my lack of panels has held up progress. I really need the heel board repair panel, so I can mark up and cut off the old, then with it out the way I can repair the little section of rear floor. Anyway even tho I didn't actually get much done i feel better for doing something and I can't wait til my stuff arrives.

#34 DiscoDarren

DiscoDarren

    Mini Mad

  • Noobies
  • PipPipPipPip
  • 136 posts
  • Location: Billinghay, Lincolnshire

Posted 21 June 2014 - 04:29 PM

At long last I can finally report my first batch of panels have arrived. But not until yesterday, so none are on the car yet. They're only magnum panels so I might have a bit of fun making them fit. The one I was dreading the most ie the door steps, don't look too bad. The folds look pretty square and true, however there's a bit of a ripple on the curve where it meets the pillar, nothing a bit of filler won't sort tho.

Think I've ordered the wrong outer sills tho. I will take a picture and post it up at some point, but I think I will end up chopping about 2inches off there width.

I also ordered myself a joggler, because after a lot of helpful responses to my "to joggle or not to joggle" post, I've decided to put a step in the edge of the floor panel for the joint with the new inner sill. The joggler arrived today so might have a play on some scraps of metal later.

Waiting for my panels has really held up progress, but on Wednesday I did manage to get my first bit of welding and fabrication done on the car. My floor pans were in pretty good shape apart from around the slinging brackets. I intend sorting the rear one whilst fitting the heel board repair panel, but I set about doing the front one.

Firstly I made a cardboard template and transferred it to a scrap of metal

A1A55CC1-09EB-4197-8A13-CD3A0D3942F0_zps

Then a trial fit. After a bit of filing it looked like this

1B37C89E-CFF0-4FC5-A9AC-DCC4E8011044_zps

Then tacked into place. I turned up a lip on the metal to fix it to the fitch but that won't get welded til the fitch repair panels fitted.

1C8779A0-52F4-44C5-9DDF-860D0CD1DA17_zps

#35 DiscoDarren

DiscoDarren

    Mini Mad

  • Noobies
  • PipPipPipPip
  • 136 posts
  • Location: Billinghay, Lincolnshire

Posted 21 June 2014 - 05:19 PM

Then I welded fully around the edge. My weldings not brilliant, but with the amount of practice I will get doing this car I'm hoping it will get better. I did this as a series of pulses. I found out to my expense tho that I need to wait for it to cool a bit longer between the pulses, because I burnt threw in a couple of places where I was rushing. I'm not sure I've got the best settings on the mig either. I think a lot of the skill of welding is knowing how to set the machine correctly in the first place. Unfortunately I'm not experienced enough to recognise what needs adjusting when it's not going right. Having said that tho, I'm getting on a lot better since I got my new welder. It's a Lincoln electric compact 185, so well boss of the job. I've wound the power down to 2 and wire speeds on 3. It did spit a bit in a place or two but I think it may have been because I didn't clean all the underseal residue from the inside and it had a habit of catching fire. Lol

Anyway it's in and a bit of a milestone for me, being the first repair. I got the high spots ground off the weld and gave it a couple of coats of zinc. Doesn't look too bad, The seam sealer will make it look even better. The inside has a nice bead of weld tho so it's penetrated ok and I'm happy it's strong enough.

05767456-D983-4FFF-991D-D8B5B4DCFF27_zps

#36 big-jay

big-jay

    Super Mini Mad

  • Members
  • PipPipPipPipPipPip
  • 518 posts
  • Location: Birmingham
  • Local Club: British Mini Club

Posted 21 June 2014 - 08:17 PM

Great read so far, looks like you've got a great little project there !

Keep going and Good luck :-)

#37 DiscoDarren

DiscoDarren

    Mini Mad

  • Noobies
  • PipPipPipPip
  • 136 posts
  • Location: Billinghay, Lincolnshire

Posted 21 June 2014 - 09:27 PM

Great read so far, looks like you've got a great little project there !
Keep going and Good luck :-)


Thanks jay, hopefully now I've got my panels I will start to make some good progress. I've got a feeling I might be burning the midnight oil next week. I'm a bit nervous about doing the rear inner arches tho, so scanning other peoples build threads tonight to get some help and inspiration.

#38 Blitzman

Blitzman

    On The Road

  • Noobies
  • PipPip
  • 40 posts
  • Location: Banff & Donegal

Posted 22 June 2014 - 04:06 PM

Great project.

It's shocking how much those oversills cover.

I'd ban them lol.

It is great how much info there is on here about all aspects of restorations.

Good luck with her. :-)


#39 DiscoDarren

DiscoDarren

    Mini Mad

  • Noobies
  • PipPipPipPip
  • 136 posts
  • Location: Billinghay, Lincolnshire

Posted 22 June 2014 - 05:19 PM

Great project.
It's shocking how much those oversills cover.
I'd ban them lol.
It is great how much info there is on here about all aspects of restorations.
Good luck with her. :-)


Thanks for checking in and having a look. It never fails to amaze me the wealth of knowledge and skills of the forum members. Just wish I had more time to check out more of the build threads.

#40 rooney123

rooney123

    Mini Mad

  • Noobies
  • PipPipPipPip
  • 114 posts
  • Location: lancaster

Posted 22 June 2014 - 06:38 PM

keep going Darren every little bit counts I try to get a bit done when I can what with work, kids and looking after the missus look at  everyone's threads give ideas how to tackle problems should you come across any keep up  the good work...............................andy :proud:


#41 DiscoDarren

DiscoDarren

    Mini Mad

  • Noobies
  • PipPipPipPip
  • 136 posts
  • Location: Billinghay, Lincolnshire

Posted 22 June 2014 - 10:16 PM

Thanks Andy I'm hoping I might get a full day on it this week, either Tuesday or Wednesday - fingers crossed. Failing that a few late nights. Lol. I've got quite a lot on besides the mini tho, we're selling up my girlfriends bungalow and moving into my house - and having some building work done so it's all go. Sometimes 2 or 3 hours in the garage out the way can be quite therapeutic tho :)

#42 rooney123

rooney123

    Mini Mad

  • Noobies
  • PipPipPipPip
  • 114 posts
  • Location: lancaster

Posted 22 June 2014 - 11:34 PM

well I hope everything goes ok look forwards to the updates.........................andy :proud:


#43 DiscoDarren

DiscoDarren

    Mini Mad

  • Noobies
  • PipPipPipPip
  • 136 posts
  • Location: Billinghay, Lincolnshire

Posted 23 June 2014 - 11:26 PM

Had a bit more time out in the garage this afternoon so a little bit of progress to report. Ever since I started the project tho I've always been a bit undecided in what order to tackle the repairs. I had planed to do the heelboard a inner sill repair panels first but i changed my mind and decide to chop out the rotten rear inner arch and fit that first. Its one part of the restore I've been dreading the most, so had a bit of a read on here at the weekend for inspiration.

The car was already on its side with the full access to the passenger side so that's where I started with the drill. It was really difficult to find the spot welds in the arch. I spent ages, then equally as long with a chisel and old screwdriver splitting the arch from the boot floor. There not much of a flange left, so I'm going to have to make and weld a piece in.

I thought it might now be easier if the car was right way up so i could get to the welds on the inside of the car. Since the last time I shifted the shell I've managed to aquire a couple of wooden pallets so by adding a set of castors I also made this today.
D2FBCA1C-4815-4D02-BA32-00F68B197418_zps

#44 DiscoDarren

DiscoDarren

    Mini Mad

  • Noobies
  • PipPipPipPip
  • 136 posts
  • Location: Billinghay, Lincolnshire

Posted 24 June 2014 - 12:01 AM

So with the car now sat right way up on my new dolly I climbed in the back and drilled out the spot welds where the arch joins the seat back and also the joint with the companion bin. There's loads of welds on these arches!! Into the boot then, there's two support pieces each with beads of weld and a bead between the arch and seatback. Most if these are pretty inaccessible with a 4 1/2 inch grinder. I've got a 3" air powered grinder which took care of one bead but I was struggling big style, doesn't help that my little compressor isn't boss of the job either. Resorted to trying die grinder, for some reason the compressor does better with this, but still not really getting anywhere. I then realised these brackets/stiffeners are also spotted to the arch as well as the beads I had been struggling with. I could only get the drill into one from inside the boot and couldn't see the dimples from inside the arch. It was at this point I decided I was going to have to get a bit brutal with it.

CD9353D9-179E-4445-A0CB-F62725B7AB87_zps

I ended up cutting around the stubborn bits so I could get the old arch out of the way. Hopeful with it removed I will be able to get the grinder in to tidy up the flanges and remove any remaining bits of arch. That will have to be a job for next time tho. Doesn't look much once it's out but it sure was a pain in the arch.

6FDD89B1-5FDE-48D0-97EF-F7F6D63C0EAE_zps

Hopefully fitting the new one will go a bit smoother, worse thing is I've got the same repair to do on the drivers side. Wish me luck, I think I'm gonna need it!!!

#45 Ben_O

Ben_O

    Mill Road Garage

  • Paint Doctor
  • PipPipPipPipPipPipPipPipPipPip
  • 9,781 posts
  • Location: Isle of Wight

Posted 24 June 2014 - 01:27 PM

nice going Darren. I feel your pain with that arch mate. Just finished removing the back seat brace panel (the panel you lean against when you sit in the back seat) from a donor shell. They really made sure that was on there! seam welds, spot welds and all that. Mine also had a few seam welds between the seat brace and arch.


When i split the seam between the quarter panel and arch, i got a thin cutting disc and cut a groove around the radius of the arch from under the arch cutting through all of the spot welds which made things easier.


Oh and good luck with the other side!


Ben


Also tagged with one or more of these keywords: roundnose

0 user(s) are reading this topic

0 members, 0 guests, 0 anonymous users