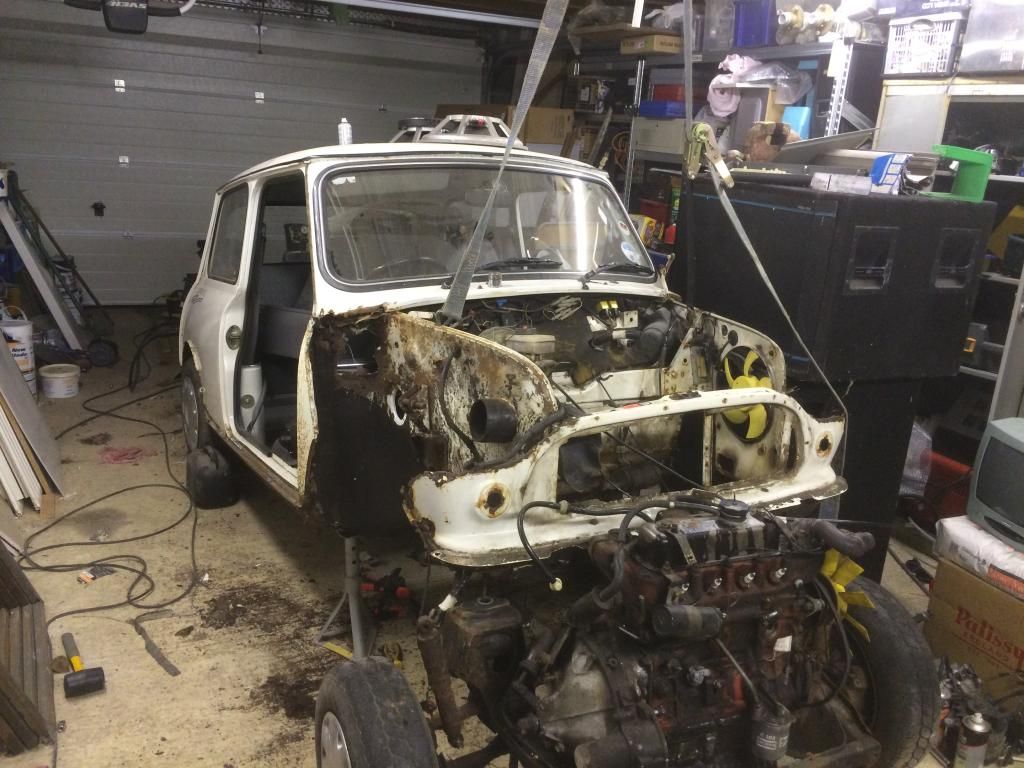
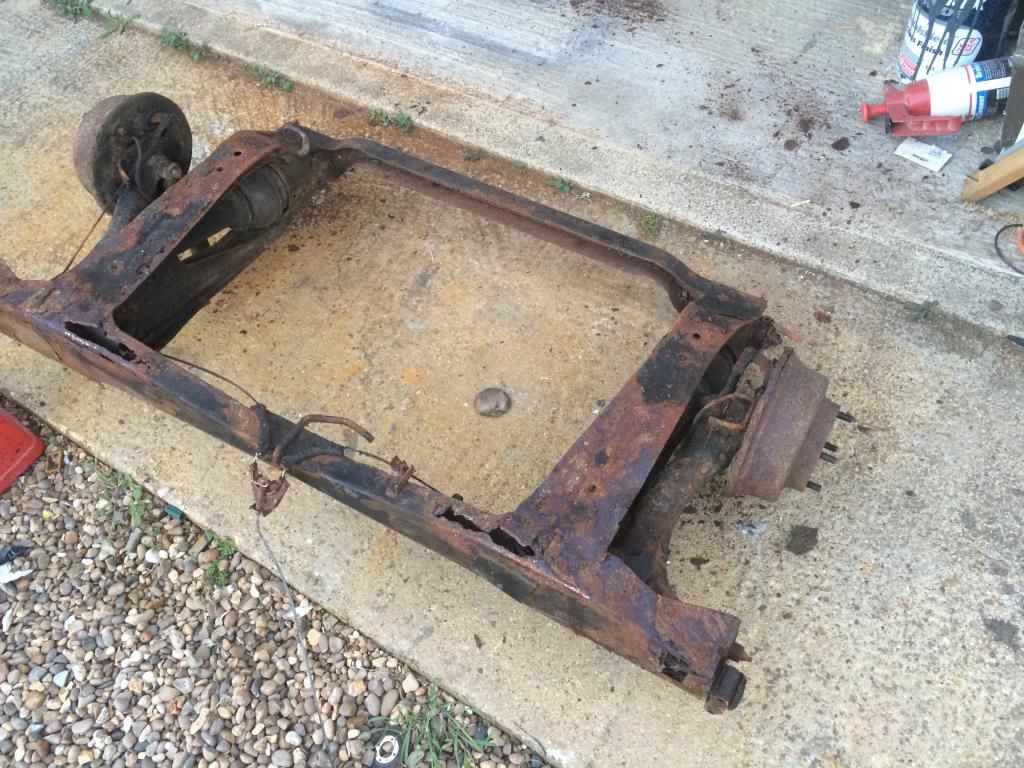
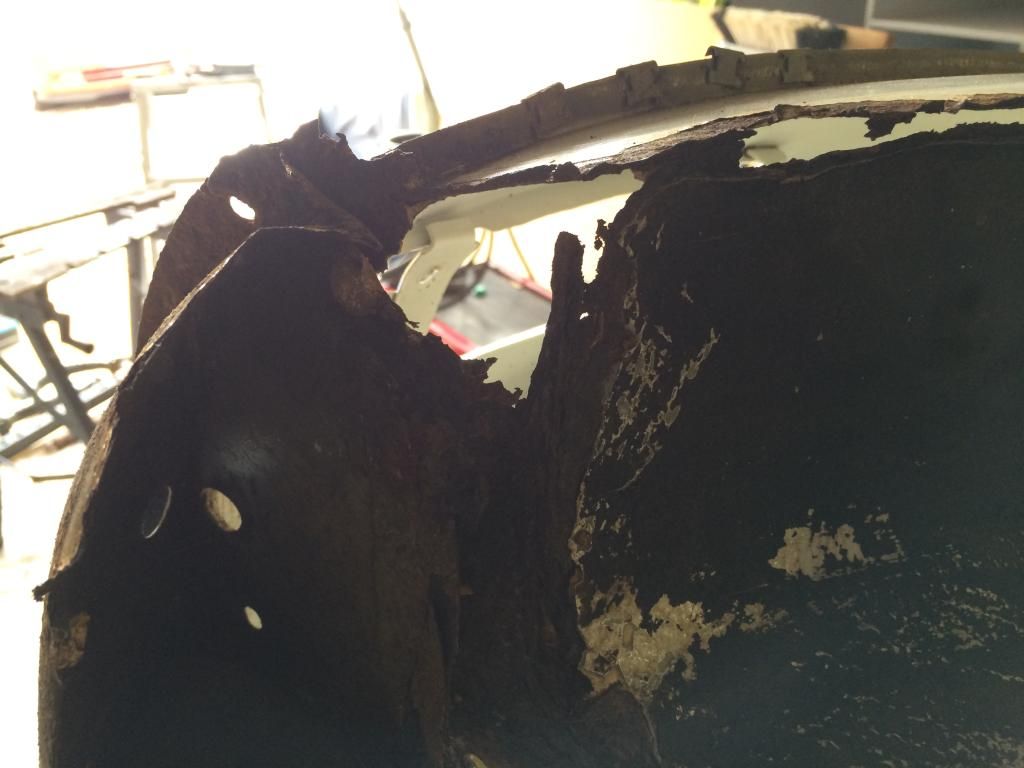
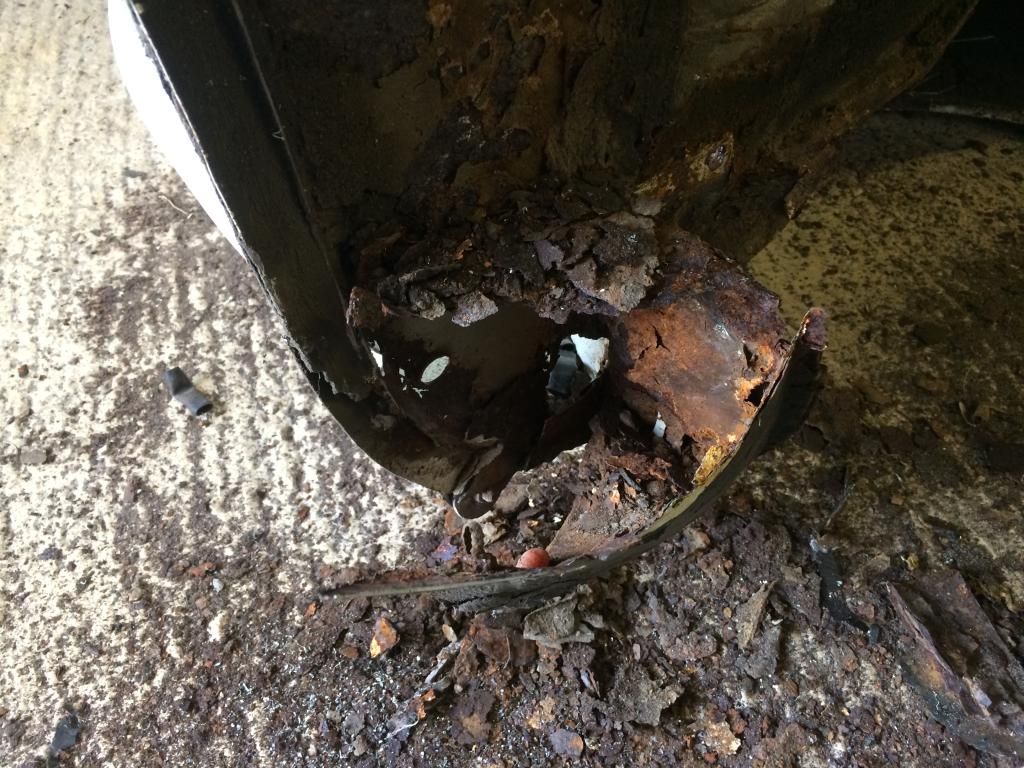
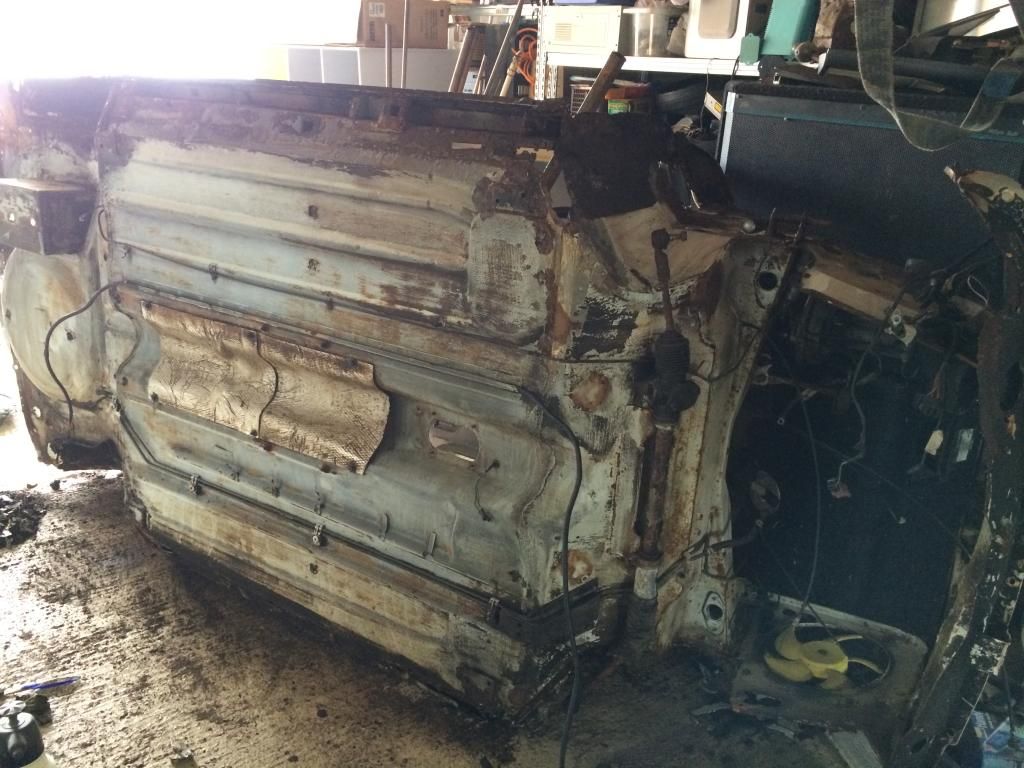
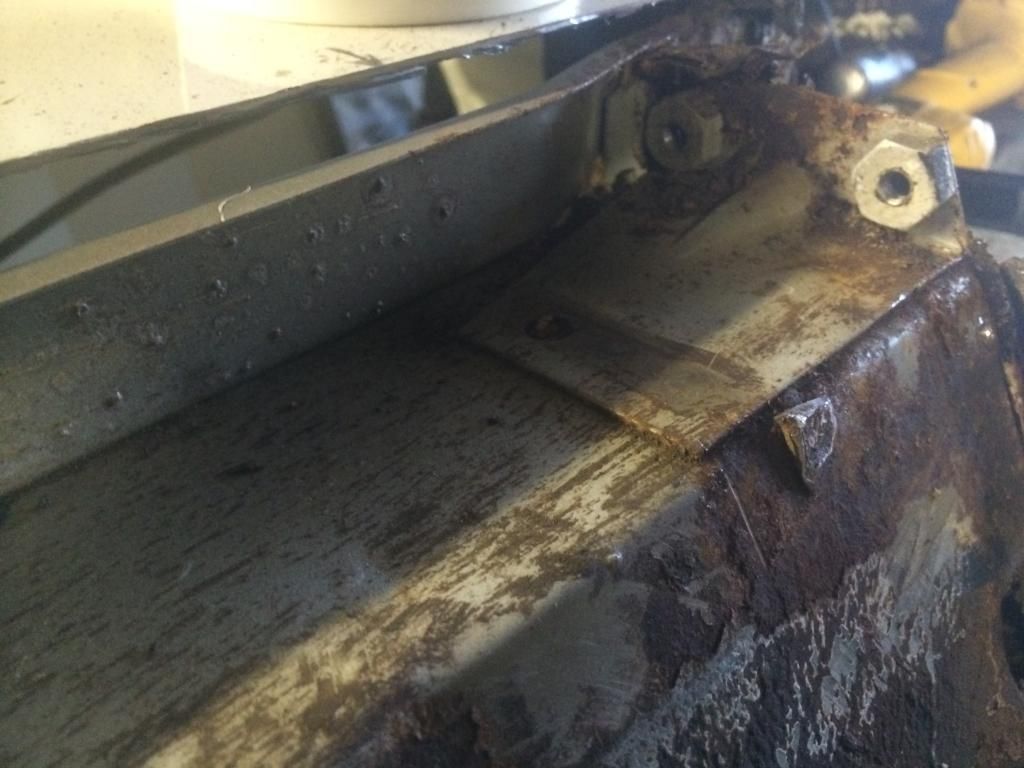
#16
Posted 01 June 2014 - 06:02 PM
I'm becoming more and more aware that this is turning into a full blown project. I came to the conclusion the only real way forward and for me to be able to tackle it is to strip the shell down to the point where I can flip it over. So I set about stripping all the engine electrics and bits necessary to lift the body off the front subframe.
#17
Posted 01 June 2014 - 09:25 PM
#18
Posted 01 June 2014 - 09:34 PM
yes I was the same with the roll pin lots of swearing the air as blue as summer sky then it dropped out but you learn looks like getting a lot done good for you...............................andy
#19
Posted 01 June 2014 - 09:43 PM
That pretty much brings you up to date with my work for now
#20
Posted 01 June 2014 - 09:51 PM
yes I was the same with the roll pin lots of swearing the air as blue as summer sky then it dropped out but you learn looks like getting a lot done good for you...............................andy
Thanks, should have been out there tonight really, but I wanted to get all my posts on here up to date. I'm getting to the point where I'm a little unsure what repair panels I need, so was hoping to throw it open to you guys on here. I'm gonna get some pics posted tomorrow all being well, to illustrate my dilemma. I'm unsure whether I need front floors or inner sills or both ?
#21
Posted 03 June 2014 - 12:51 AM
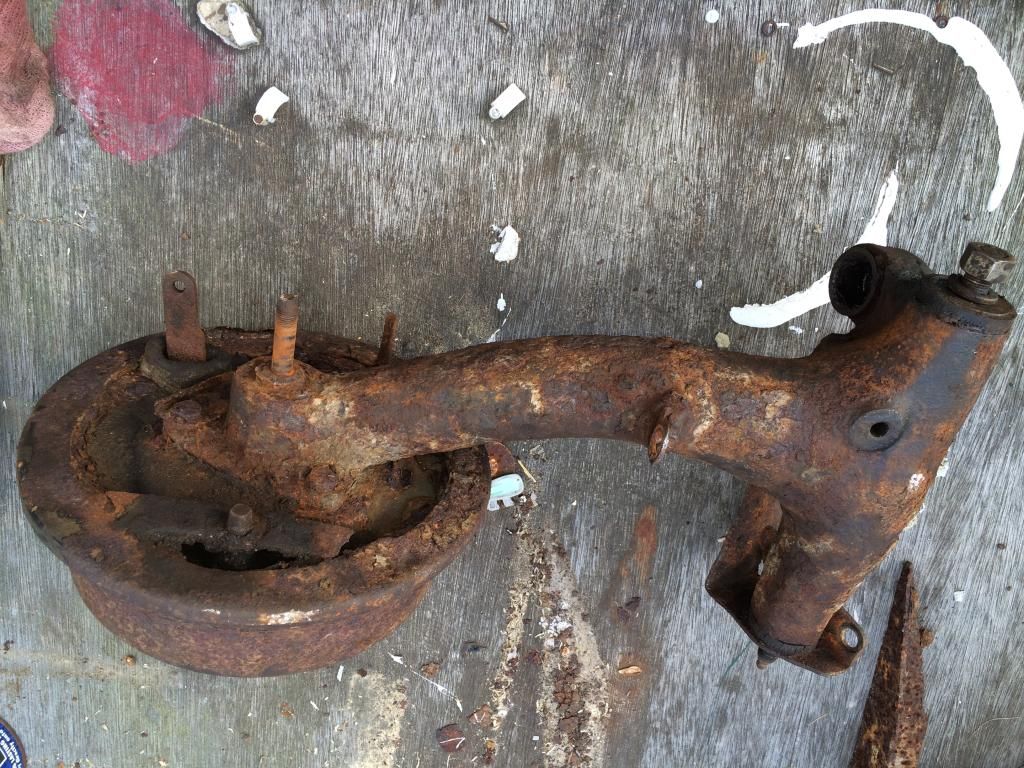
Once I eventually managed to get the radius arms off, I removed the drum, hub and back plate from both. I also hammered the pin out and removed the handbrake cable guide to make it easier to prep for paint. Both brake back plates are a bit worse for wear and I think I will buy some new ones. One wheel cylinder is brand new but the other has been leaking and needs replacing. I will also need to make up new brake pipes and replace the flexi's.
I managed to get both radius arms, both drums and a pair of the trunnions cleaned up with the wire wheel in my grinder. I then gave the said items a couple of coats of paint. Here's a before and after.
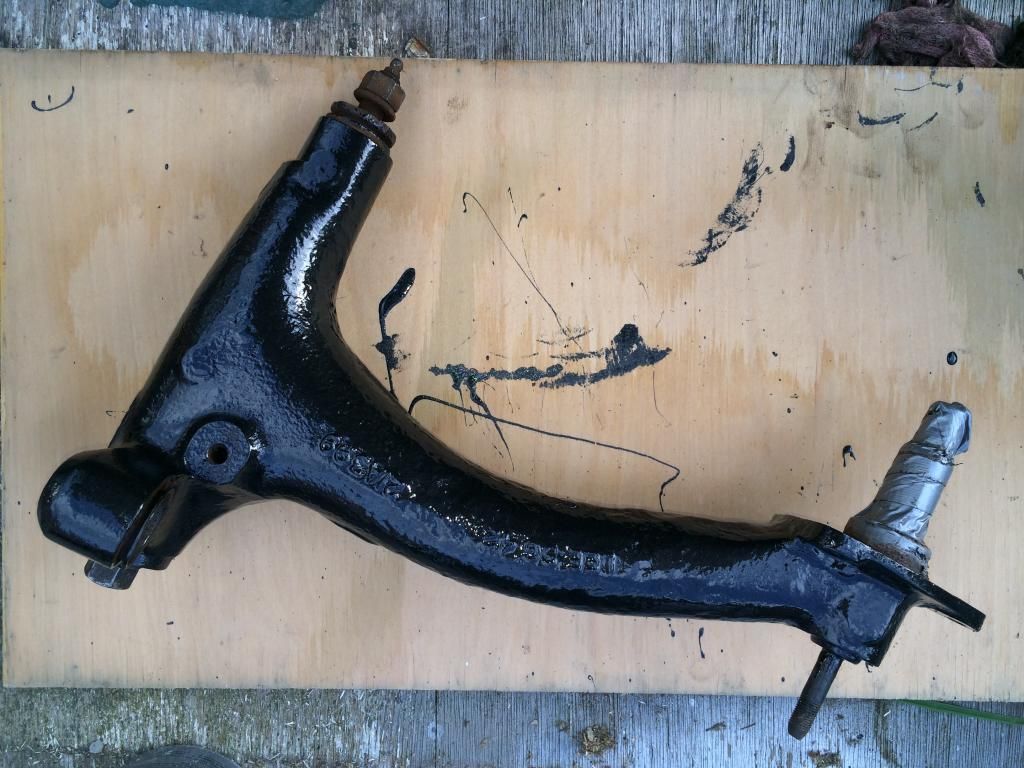
The pictures after one coat, but I gave them another for good measure. It's only hammerite, but I'm happy enough with how they've turned out, my cars never gonna be a show winner. I just want it to be solid and a tidy car. I'd be too scared to use it if I went for the straight out the showroom restore.
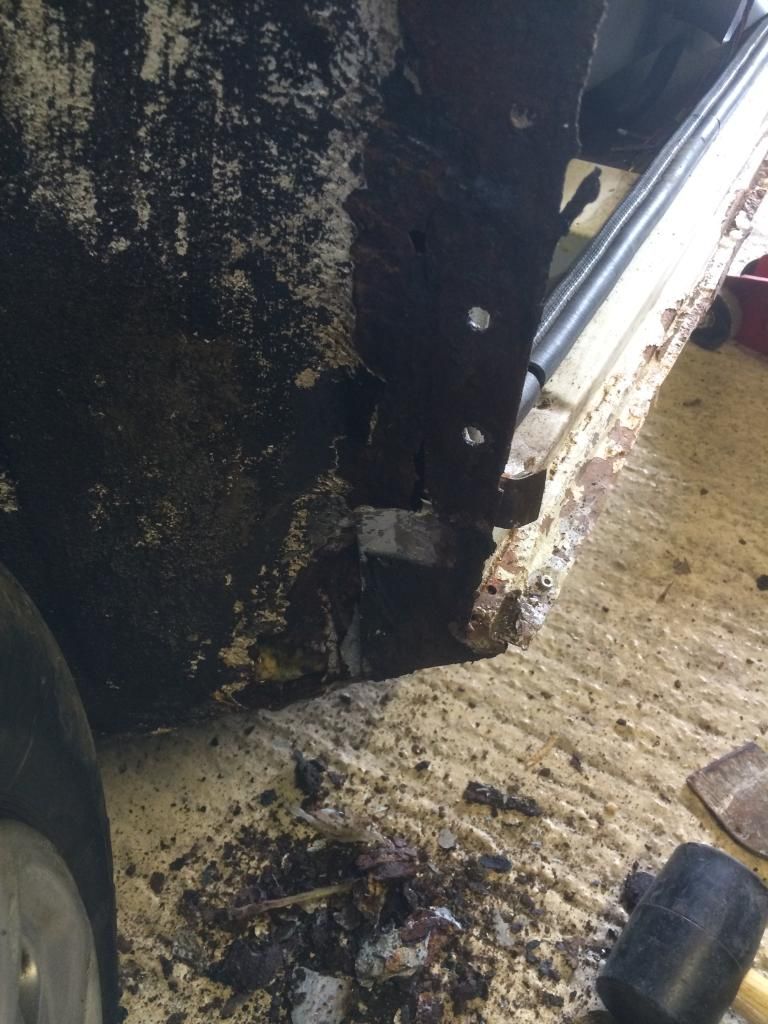
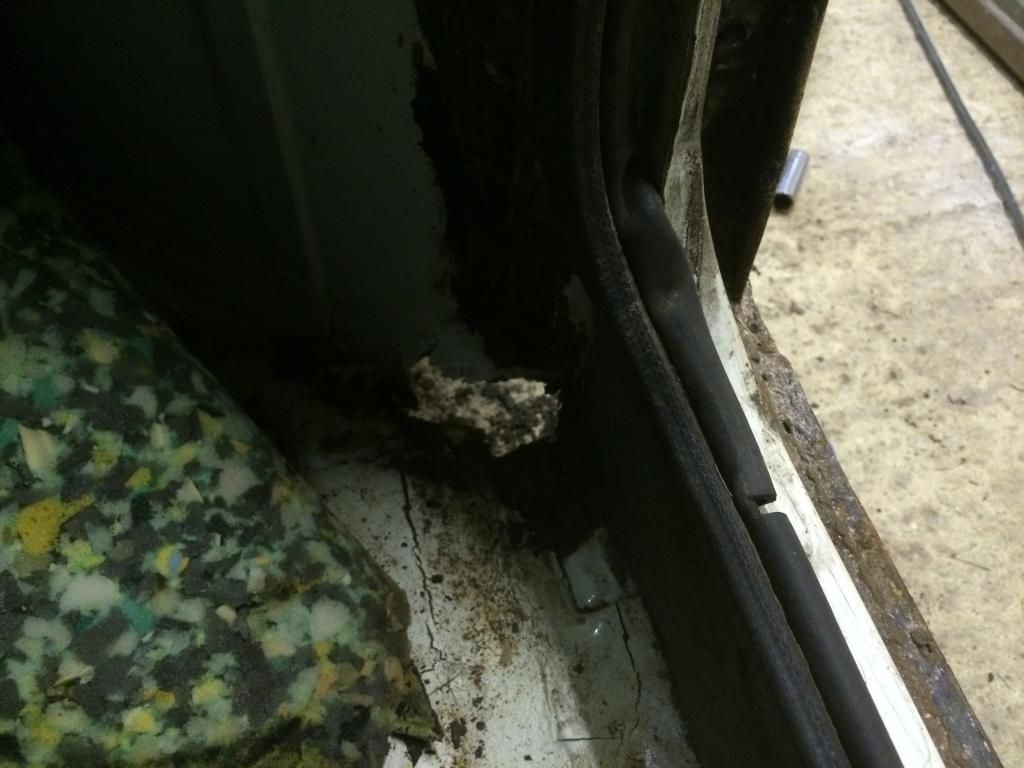
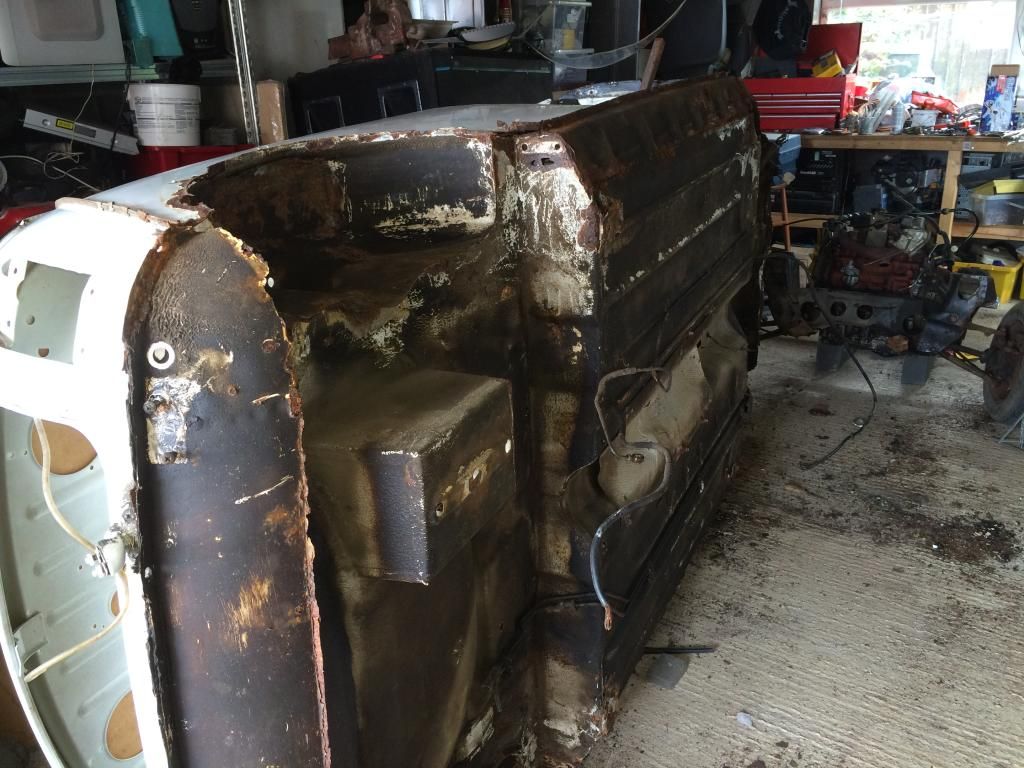
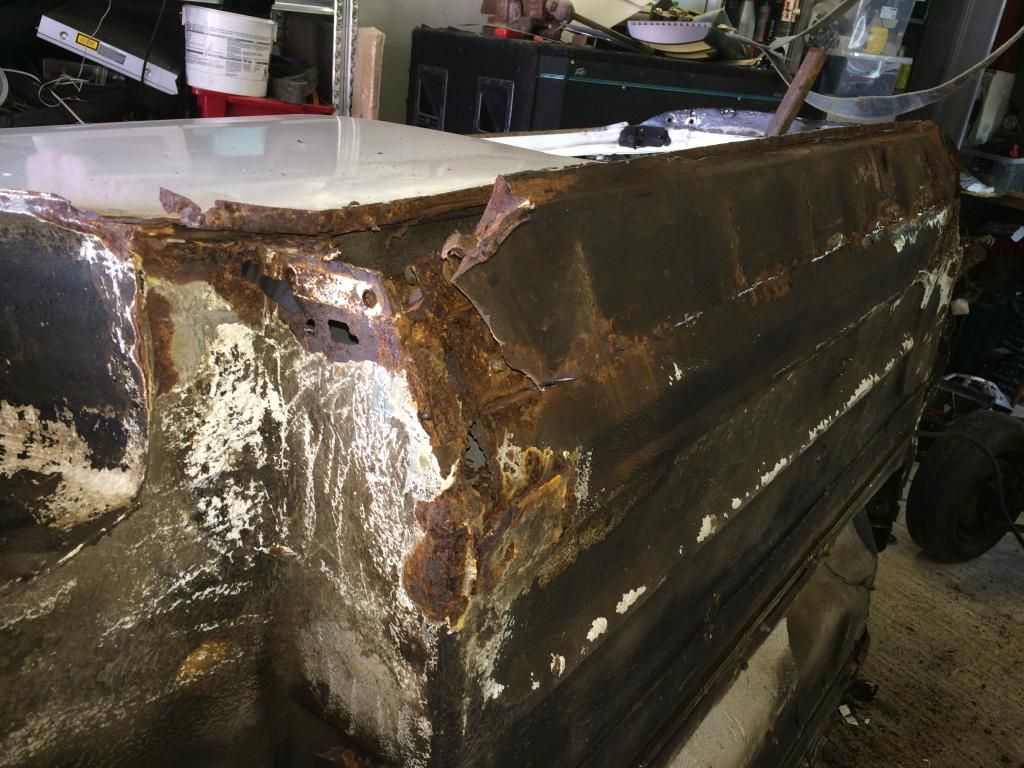
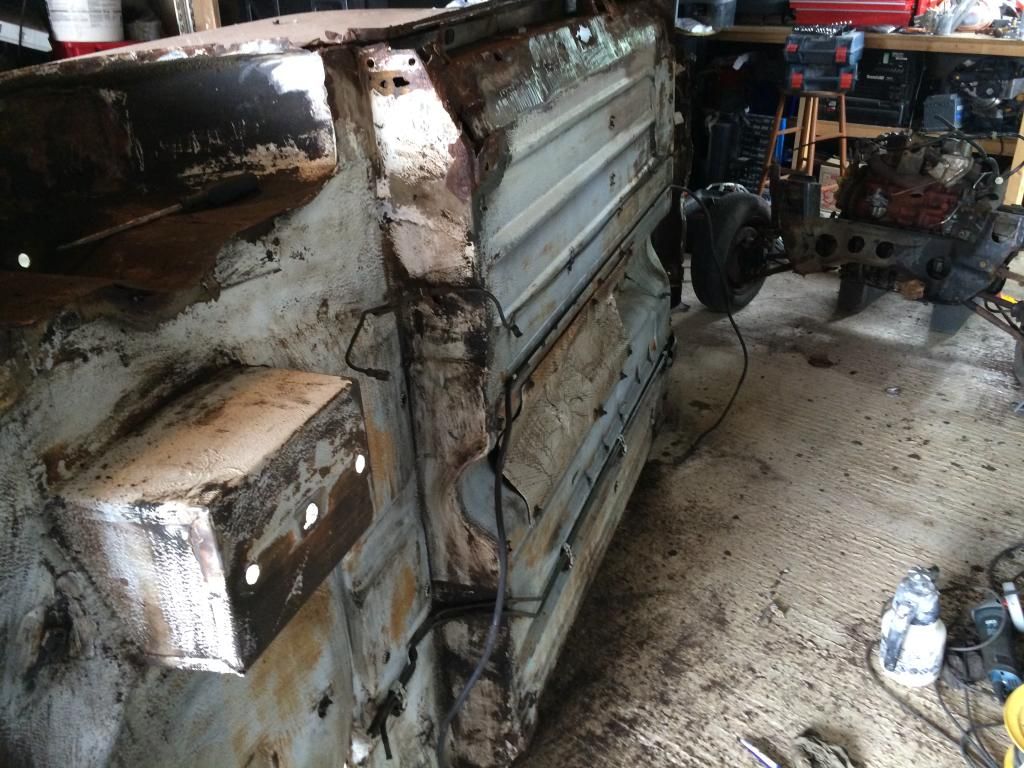
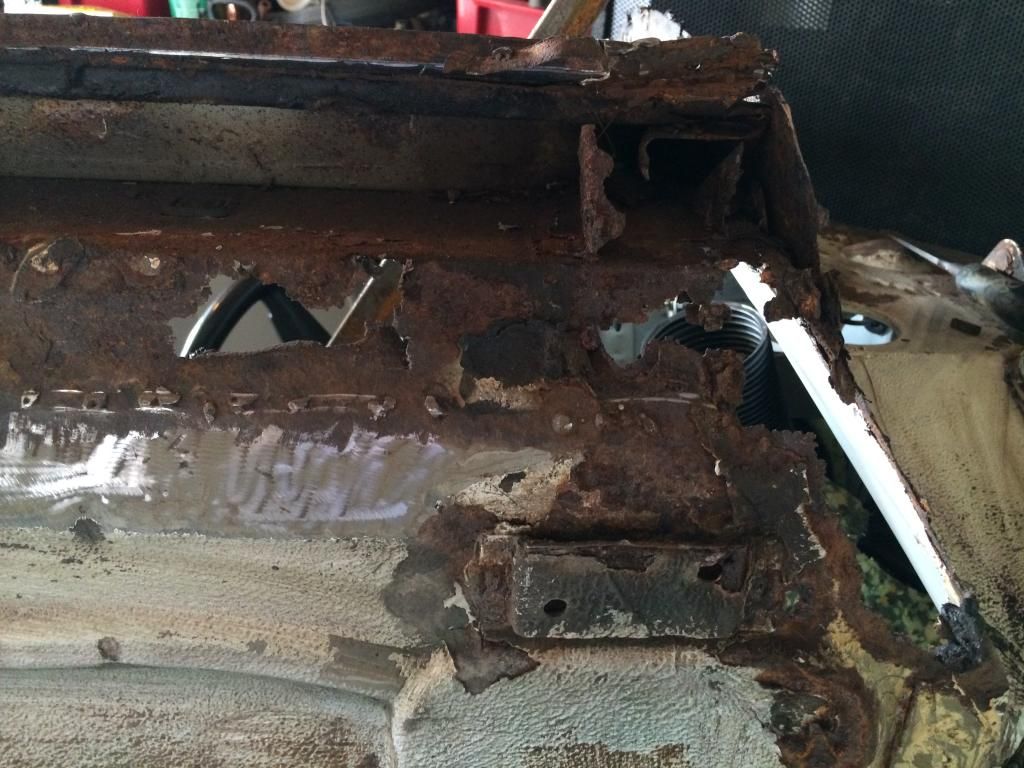
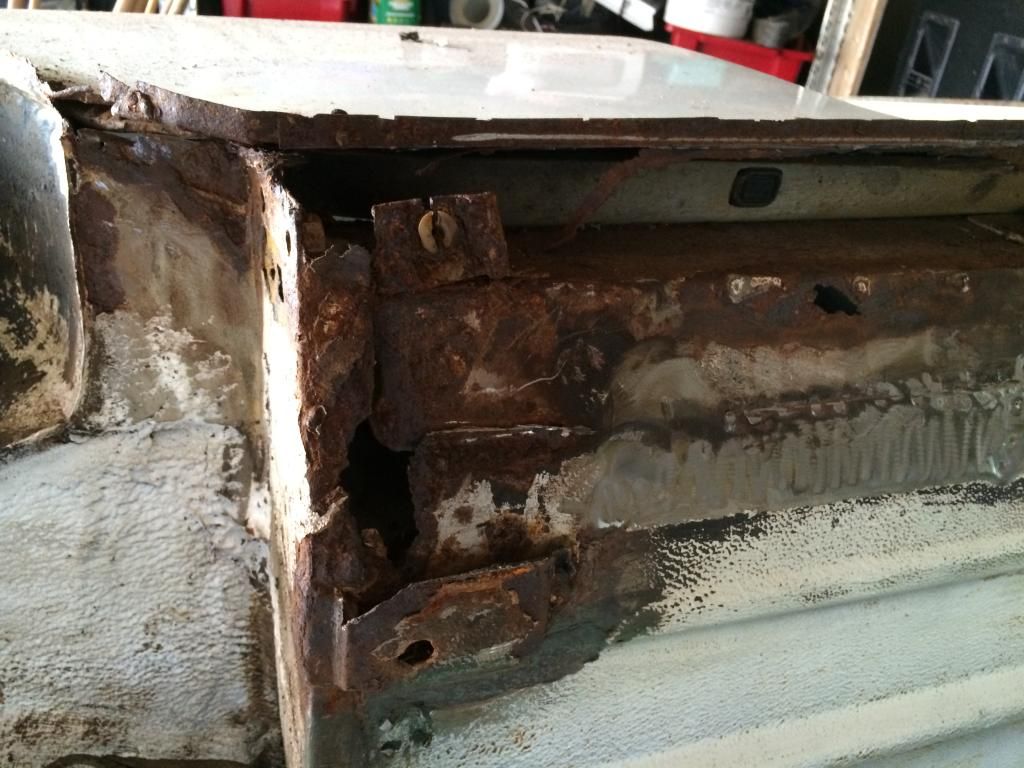
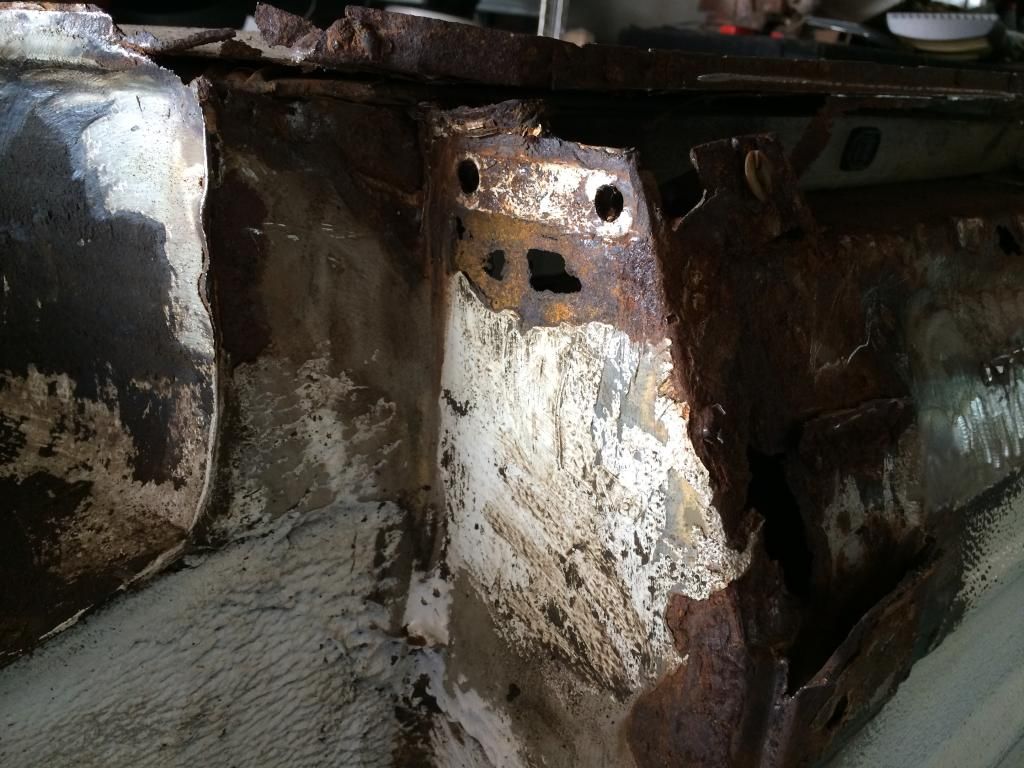
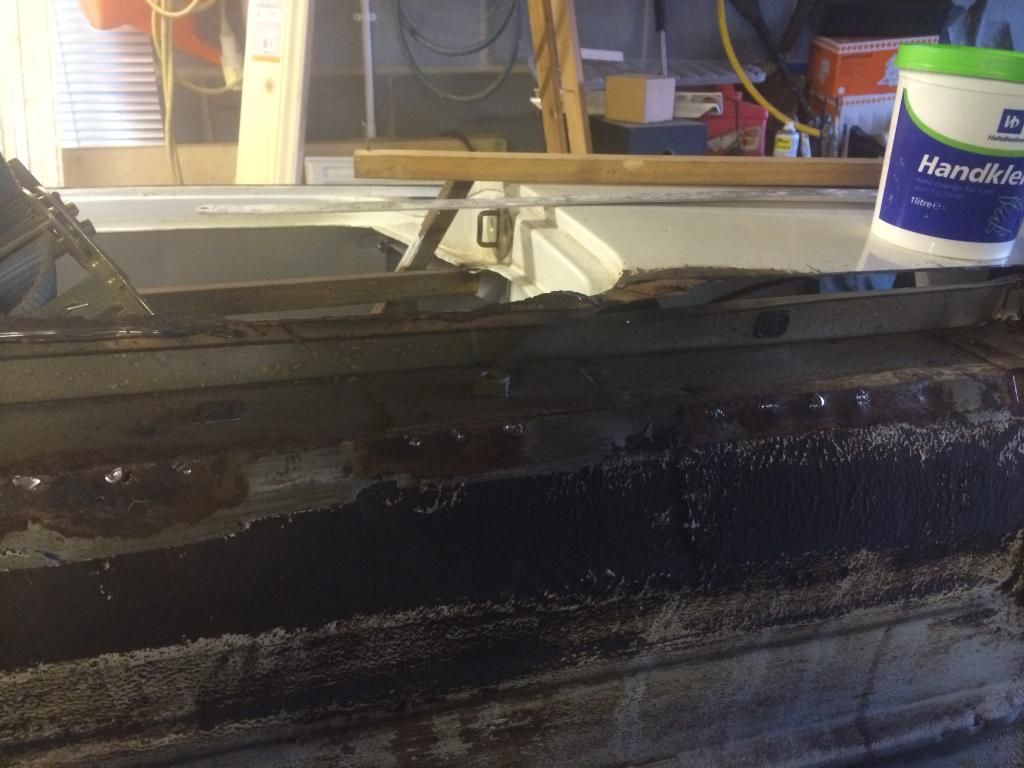
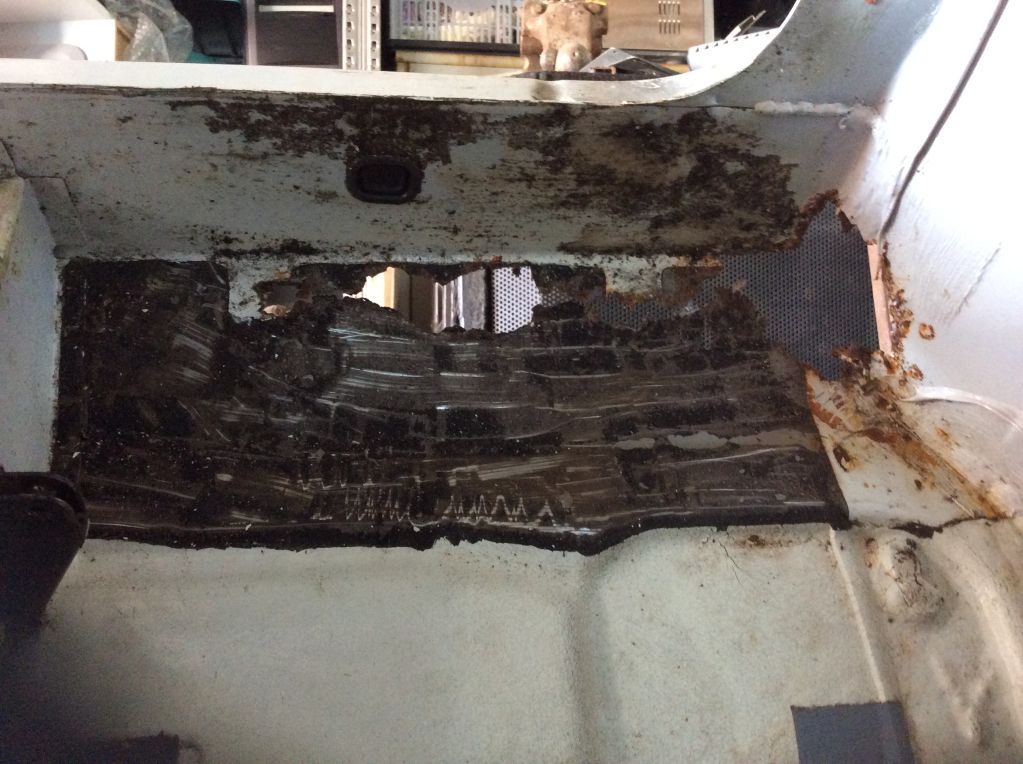
The only other thing I managed to do was scrape a load of that black gunk off the inside of the floors to try and see how far the rust goes. Will get the pictures posted on here later
#22
Posted 03 June 2014 - 06:05 PM
wow what a project!
I am very surprised how bad this mini is! Mine was buried in a garden for years and isn't that bad!! LOL
Looks like you are making cracking progress and i will be following.
Nothing keeps your enthusiasm going like followers on here.
Good luck with it
Ben
#23
Posted 05 June 2014 - 12:33 AM
wow what a project!
I am very surprised how bad this mini is! Mine was buried in a garden for years and isn't that bad!! LOL
Looks like you are making cracking progress and i will be following.
Nothing keeps your enthusiasm going like followers on here.
Good luck with it
Ben
Thanks for checking in Ben. Your right the forum does help keep the enthusiasm going, not to mention the help and guidance available on here too. I read a fair chunk of your thread, before I started mine, it's inspired me to try and fabricate a few parts where I think my skills will allow. I can only hope my metal work, welding, and ultimately my mini, turns out as good as yours.
As for the mini, I have to say its a heck of a lot worse than I expected, or budgeted for. I know it's usual to find a bit more than anticipated, but I think it must have been parked in a pond. Need a new knotted wire wheel for my grinder already. :) I have managed to get a bit more done since my last post on here tho. My phones on charge at the minute, but hopefully will get time to upload the picture tomorrow morning.
#24
Posted 05 June 2014 - 06:38 AM
I just read all this thread, now I'm dreading lifting my carpet to see what lies beneath.
Surprised at all the rust for a '93!
Keep up the good work!
#25
Posted 06 June 2014 - 10:13 PM
.I just read all this thread, now I'm dreading lifting my carpet to see what lies beneath.
Surprised at all the rust for a '93!
Keep up the good work!
Must admit its definitely caught me out. I would never have paid so much for it if I had realised. I was obviously aware of the condition of the wings and front panel. When I looked round prior to buying it I did lift the carpets and it looked sound. What I didn't realise was all the rust and holes hiding beneath the sound deadening/underseal stuff. Too late to worry about it now tho. Just need to make sure I do a good job so i get plenty of trouble free (expense free) years of motoring out of her. Anyway thanks for your interest Colin and I hope you don't find too many horrors when you lift the carpets
#26
Posted 06 June 2014 - 11:35 PM
Anyway with both sub frames now off I was keen to get the shell rolled over, to see what I'd let myself in for. However I thought it might be safest to get her braced up a bit before I lifted it and got carried away chopping bits off. I found a few bits of inch box hiding in the garage, that should do the trick. my girlfriend thinks I have an obsession for hoarding junk, but it pays off sometimes. I welded one across each door opening and then diagonally between the two. I intend to remove then replace one panel at a time, rather than chop all the rot out in one go, so I think think my bracing will be sufficient. Also I'm hoping it will be easier to get stuff to line up doing the repairs one by one.
So with a complete disregard for health and safety I lifted the shell up on my own and onto its side.
Bit of a hole near the subframe mountings.....think that May well be one of the items it failed its mot on prior to my purchase. Lol
#27
Posted 06 June 2014 - 11:54 PM
Thought I better set about removing the rear valance to see if there were any more hidden surprises. I cut It off with a grinder then drilled out the spot welds and removed the flange as well. The valance closing panels and associated support bracket/stiffener were completely shot.
Particularly the N/S one which you can see had been gobbed up with fibreglass filler
#28
Posted 07 June 2014 - 12:47 AM
Thursday morning I also got a chance to see the result of my clean up effort in proper daylight. I had been out in the garage til way after midnight de-gunking the whole underside of the car. I did it in the hope that looking at some clean white solid bits of floor might cheer me up a bit. Also thought the neighbours might be a bit annoyed if I had been out there til 1am with the grinder chopping sills off. I wasn't at work Thursday day time so a chance to make some noise now and get the drivers side outer sill off.
Here's the floor looking fairly clean now
The inner sill has loads of rust. Luckily the passenger side doesn't seem as bad as this. Fingers crossed
The heel board ends not good either
I put a lot of this rot down to the fact that a new outer sill had been fitted but very little attempt to protect it with paint or underseal had been made. The other side of the car still has the factory fitted panels.
I've made a few enquiries elsewhere on the forum and now ordered some weld through zinc primer. I thought i could then use It to protect any good bare metal that i reveal as I continue removing the rot. That's about all I got done to the min on Thursday, because I've got another little project running along side this. I'm making a dj booth for the disco and I wanted to get it welded up to I could have a test fit of the star cloth we have bought.
#29
Posted 07 June 2014 - 01:09 AM
Finally a picture of the passenger side inner sill taken from inside the car. I think a full length inner and outer sill is needed both sides of the car. Also door steps and lower part of the rear quarter between the door and wheel arch for both sides too. A lot more work and expense than I had bargained for.
#30
Posted 07 June 2014 - 02:05 AM
Making good progress! I dont know if I would have the courage or patience to go to that extreme of repairing rust. Keep it up!
Also tagged with one or more of these keywords: roundnose
Projects →
Mini Saloons →
1965 Austin Mini Restoration - Canadian Mk1Started by DoubleEh , 14 Nov 2022 roundnose |
|
|
||
Projects →
Mini Saloons →
Project Joe - 1991 Mini Mayfair 998Started by Eggers , 02 Jun 2022 roundnose |
|
|
||
Projects →
Mini Saloons →
Mpi Dashboad ProblemStarted by mikeprez , 22 Dec 2021 roundnose |
|
|
||
Projects →
Mini Saloons →
1978 Oew - Willy The MiniStarted by smalltreegrower , 11 Nov 2021 roundnose |
|
|
||
Projects →
Mini Saloons →
1968 Mk2 Cooper BuildStarted by Minime998 , 15 Sep 2021 roundnose |
|
|
0 user(s) are reading this topic
0 members, 0 guests, 0 anonymous users