 Hope you get everything done you want to.


Mini Sky Rebuild
Started by
emalee
, Oct 20 2008 08:33 PM
454 replies to this topic
#46

buddylove
-

- TMF+ Member
-

- 1,640 posts
Camshaft & Stage Two Head
- Location: North America
- Local Club: SAMOA
Posted 27 December 2008 - 01:49 AM
Coming along nicely Hope you get everything done you want to.
Hope you get everything done you want to.
#47
flat-eric
-
- Members
-
- 435 posts
Speeding Along Now
- Local Club: anyone that will have me?
Posted 27 December 2008 - 07:58 PM
i've got similar work started on my clubby.
keep the pics coming as your helping me out big time!
rob.
keep the pics coming as your helping me out big time!
rob.
#48
emalee
-
- Members
-
- 813 posts
One Carb Or Two?
- Local Club: west of england
Posted 27 December 2008 - 08:41 PM
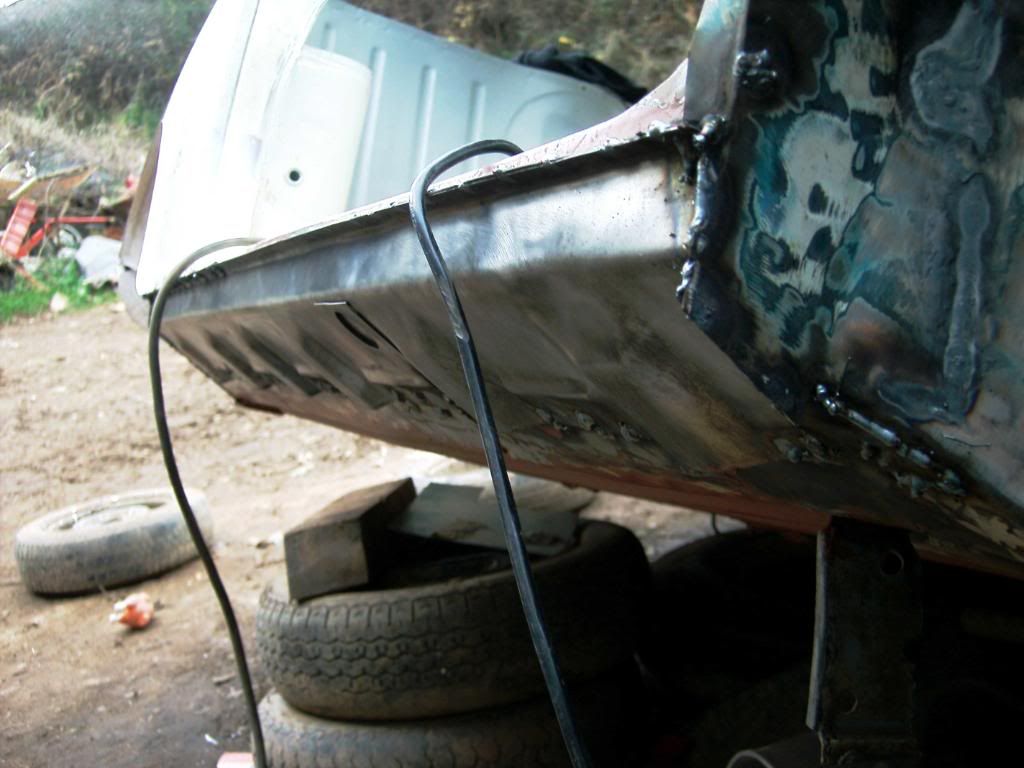
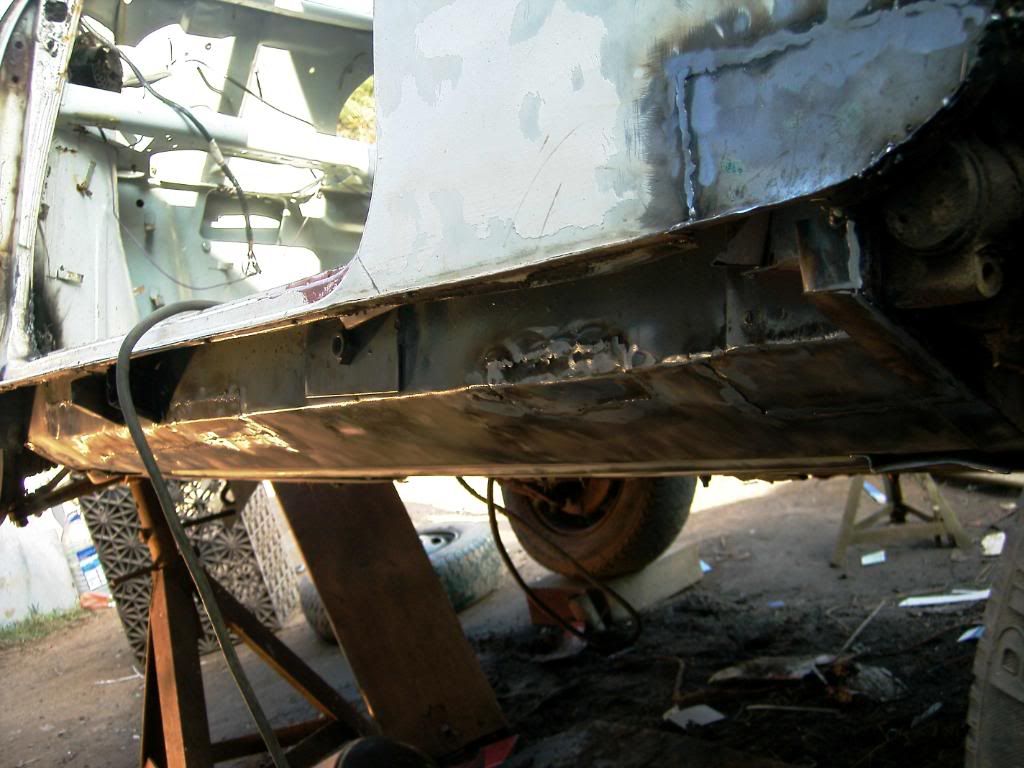
day 2 FAIL!!!!
i din't manage to get the sill on, so im already a behind on day two!!! DOH!, hopefully i'll make it up tomorrow tho...
right so today, prep'ed the panel, it would of been a lot easier if i could remember which way to fold the bends,
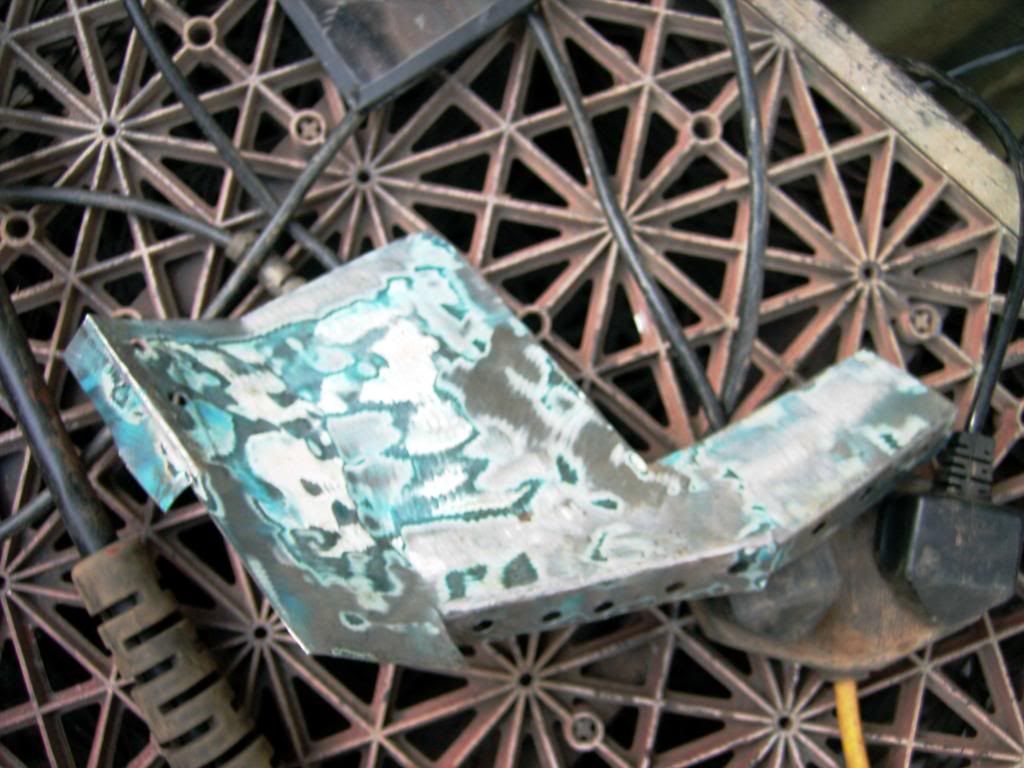
and welded in:
then i closed off the gaps for the pants inner sill:
and tackled the lovely jacking point again;
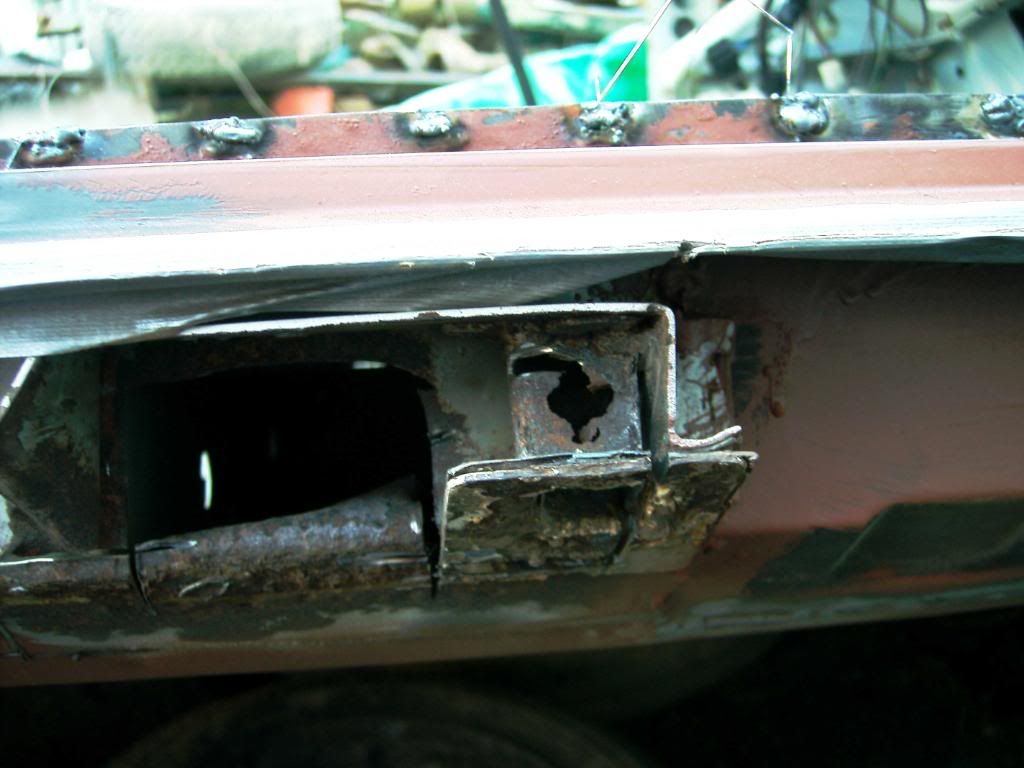
cut it out
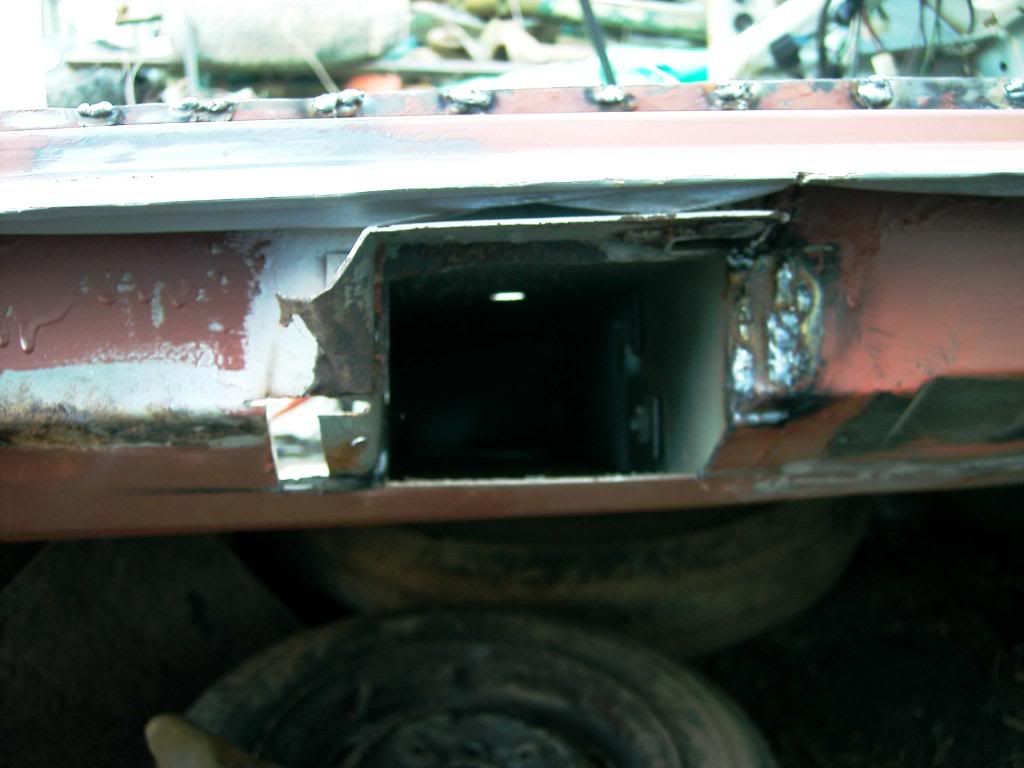
and rebuilt the tunnel, if it wasn't around xmas time and i was doing my usual weekend work, then i would of got the repair panel for this section which includes the jacking point, but rather than waiting around for the panels, i repair the section and left the jacking point out
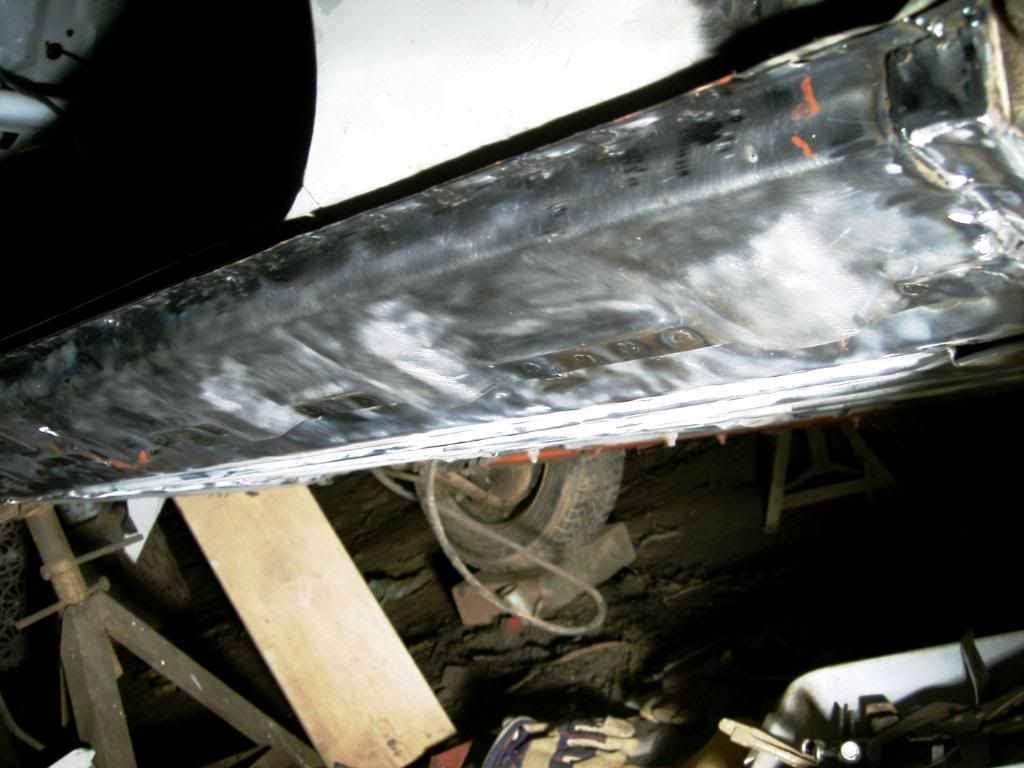
so welded up the hole in the sill

then removed the rest of the sill lip from the body and painted the inner sill ready for the new sill:

then preped the sill to go on tomorrow morning

so the plan for tomorrow is weld the sill on, find the subframe bolts (they are in a box somewhere!!!) throw the old subby on, get it on all four wheels, push it out, and turn it round, then take the engine out, and my dad is only gonna be around in the morning so i've probably gotta take the engine out by myself.......
should be fine!!!!
i din't manage to get the sill on, so im already a behind on day two!!! DOH!, hopefully i'll make it up tomorrow tho...
right so today, prep'ed the panel, it would of been a lot easier if i could remember which way to fold the bends,
and welded in:
then i closed off the gaps for the pants inner sill:
and tackled the lovely jacking point again;
cut it out
and rebuilt the tunnel, if it wasn't around xmas time and i was doing my usual weekend work, then i would of got the repair panel for this section which includes the jacking point, but rather than waiting around for the panels, i repair the section and left the jacking point out
so welded up the hole in the sill
then removed the rest of the sill lip from the body and painted the inner sill ready for the new sill:
then preped the sill to go on tomorrow morning
so the plan for tomorrow is weld the sill on, find the subframe bolts (they are in a box somewhere!!!) throw the old subby on, get it on all four wheels, push it out, and turn it round, then take the engine out, and my dad is only gonna be around in the morning so i've probably gotta take the engine out by myself.......
should be fine!!!!
#49
edi57
-

- Members
-
- 821 posts
One Carb Or Two?
Posted 27 December 2008 - 10:12 PM
Nice work mate. You should definitely hit your target with your to-do list... as long as you stick to the jobs you mentioned.
Keep those updates coming!
Ed
Keep those updates coming!
Ed
#50
buddylove
-
- TMF+ Member
-
- 1,640 posts
Camshaft & Stage Two Head
- Location: North America
- Local Club: SAMOA
Posted 27 December 2008 - 11:42 PM
Nice progress for the day, keep it up
#51
mk1leg
-

- Members
-
- 9,343 posts
Crazy About Mini's
- Location: Jersey
- Local Club: Mini Club Jersey, MCR
Posted 28 December 2008 - 12:07 AM
Wow that sure has come on along way since I last read well done.......hope to see it at IMM and Mini50 where I hope to bring mine finished.................. 
#52
emalee
-
- Members
-
- 813 posts
One Carb Or Two?
- Local Club: west of england
Posted 28 December 2008 - 11:11 PM
thanks for all the comment guys!!
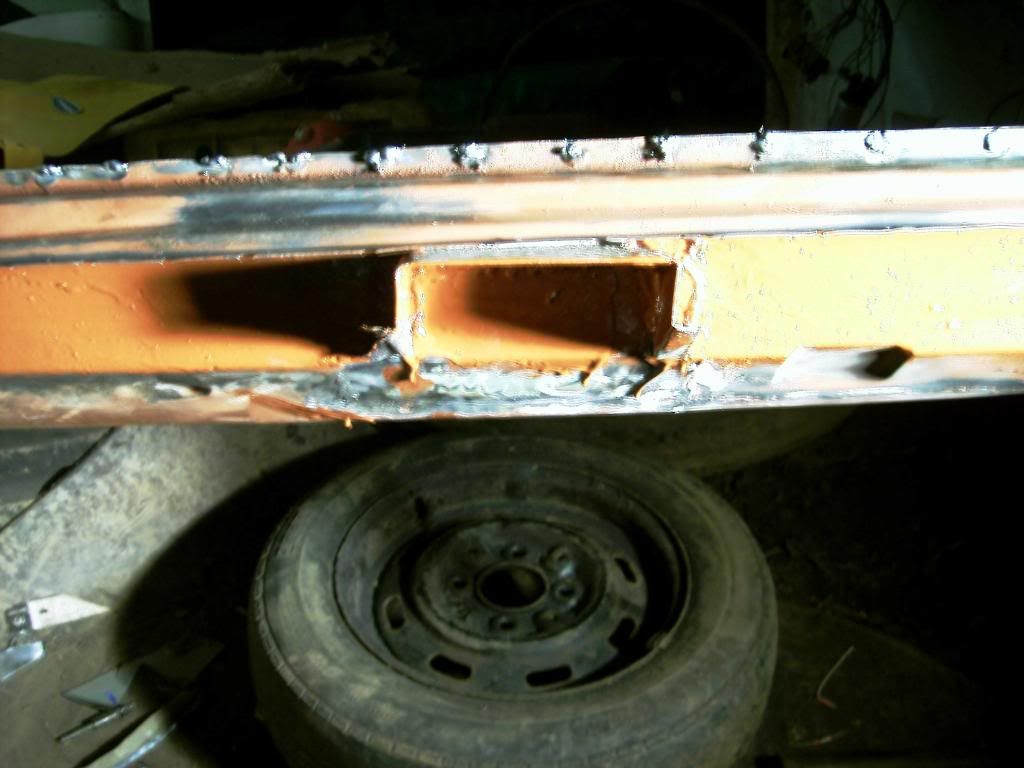
day 3 kinda fail because i did day 4 work....
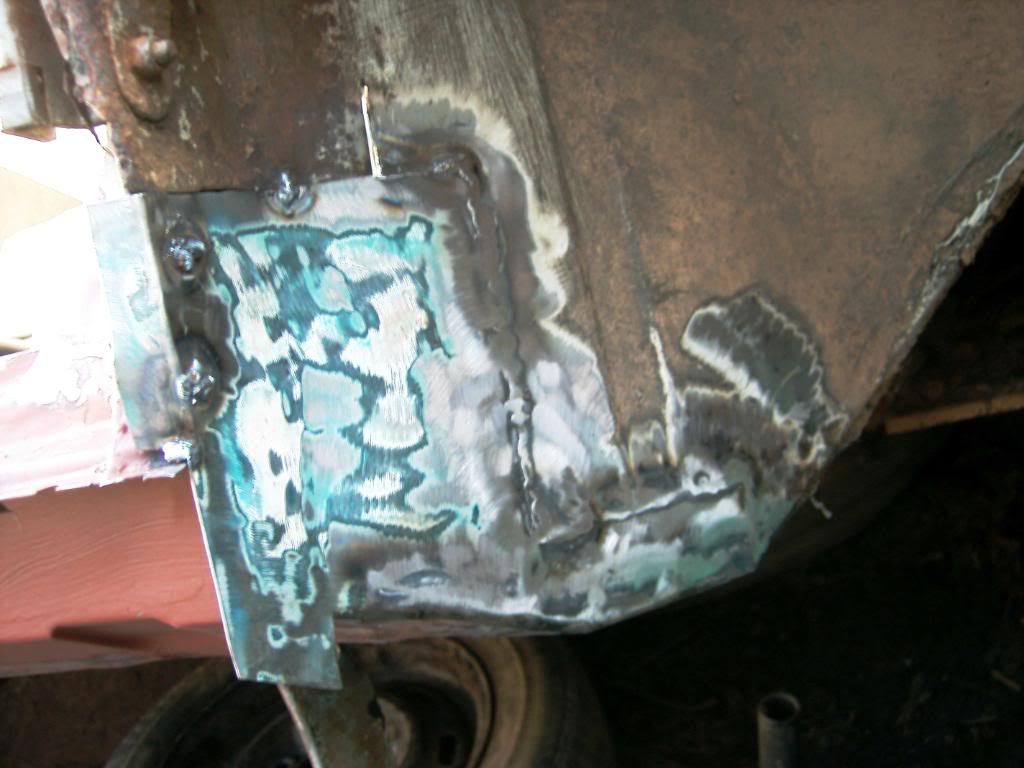
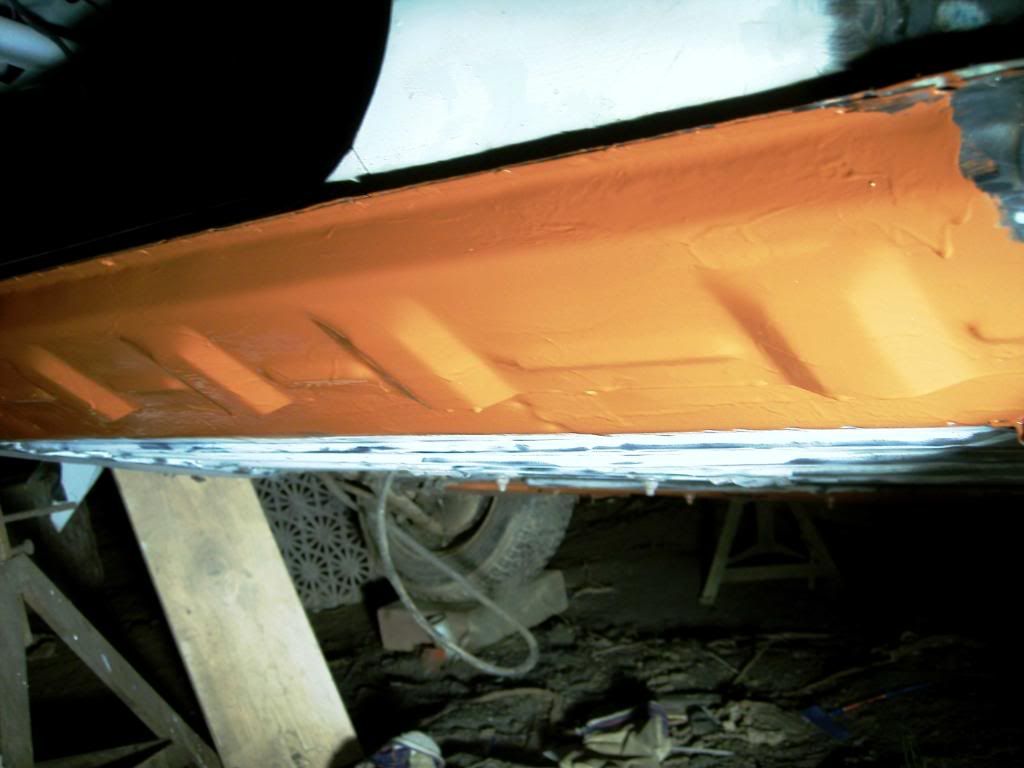
right welded the new sill on
painted

sill got a bit of grinding back to do!!
then put the rusty rear sub back on
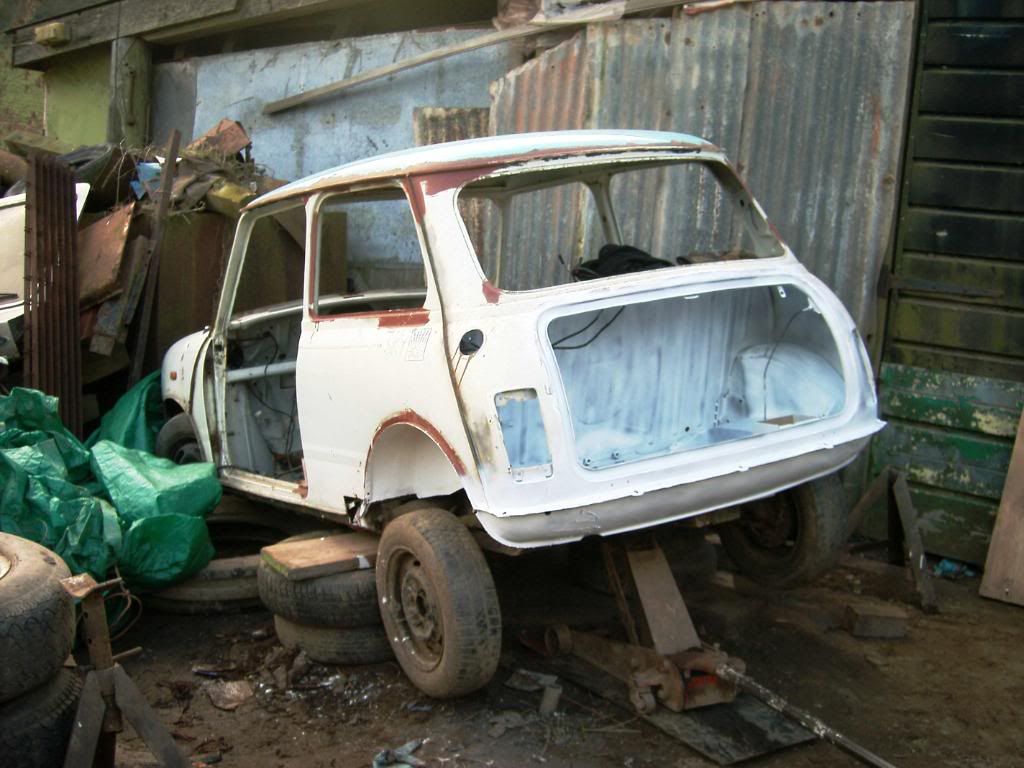
pushed him out of his corner
and put a random boot on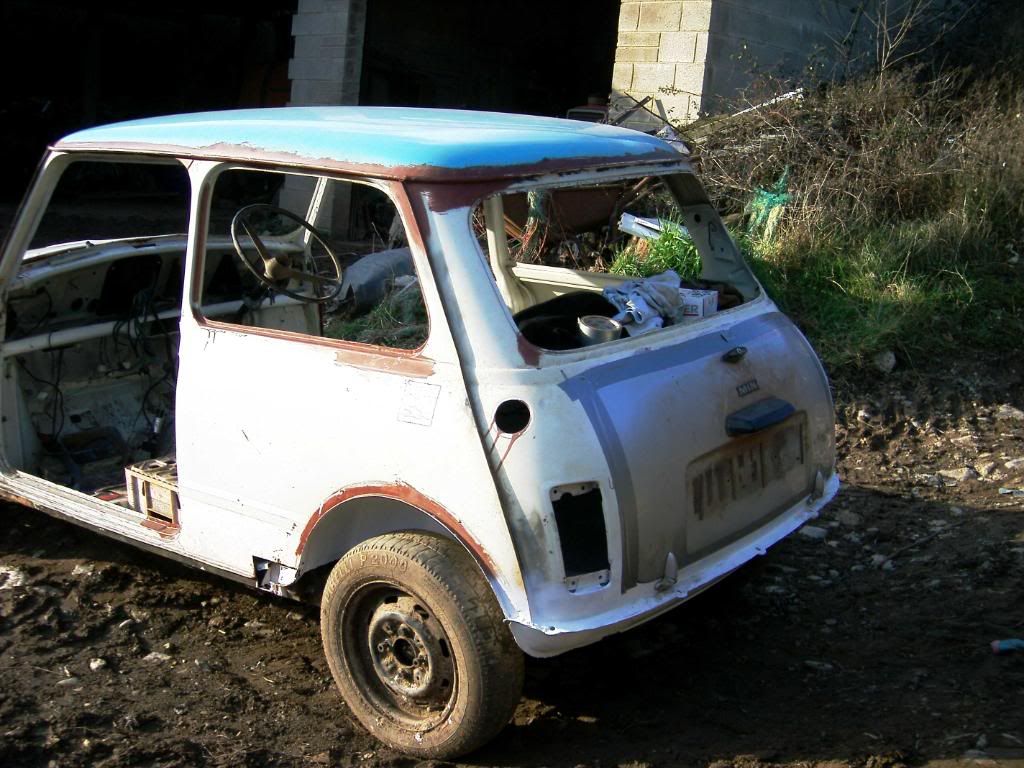
dad grafer taped it up, so i wouldn't fill it with stuff!!!, and we also taped up the rear lights
then put it forwards back into the space
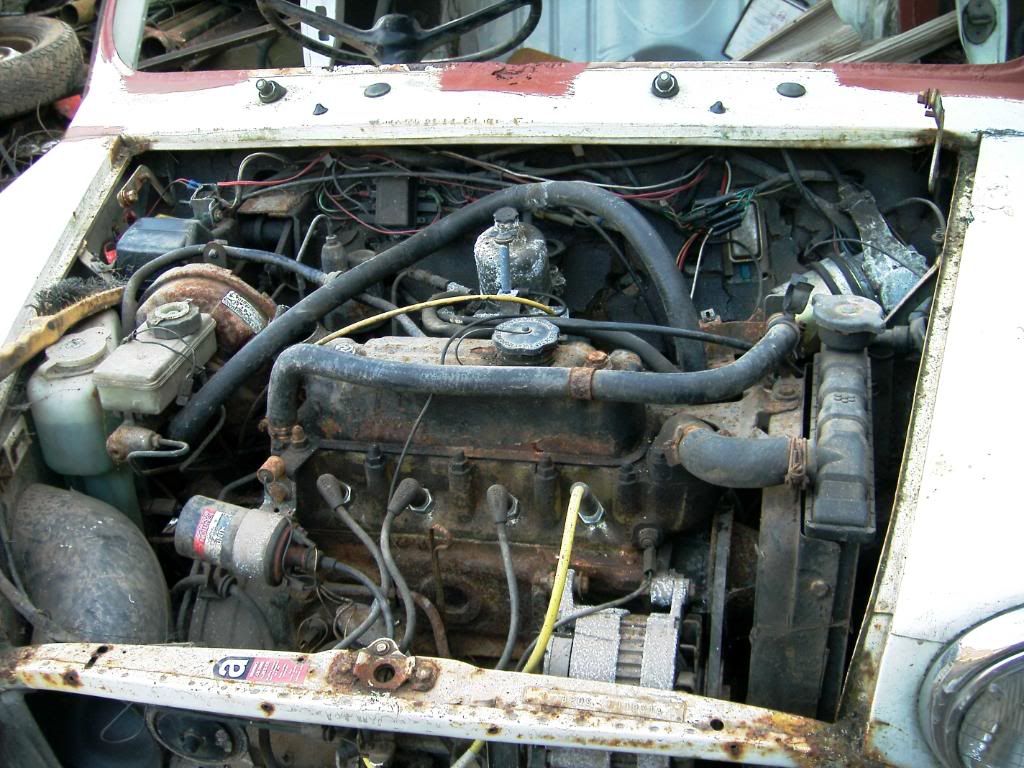
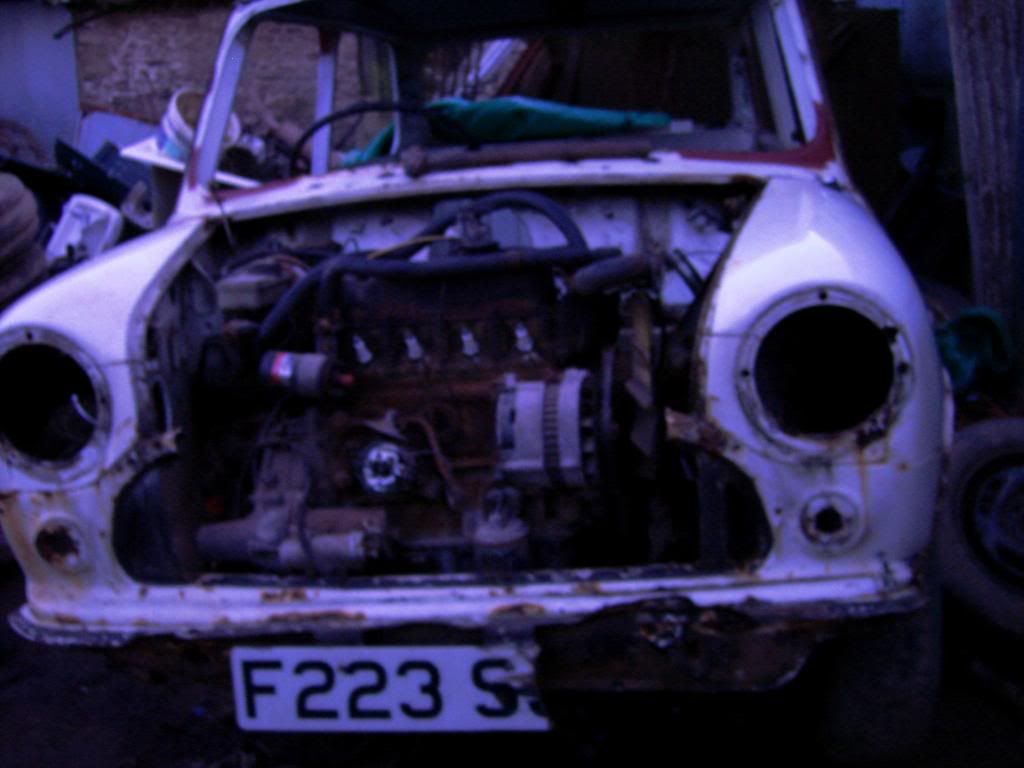
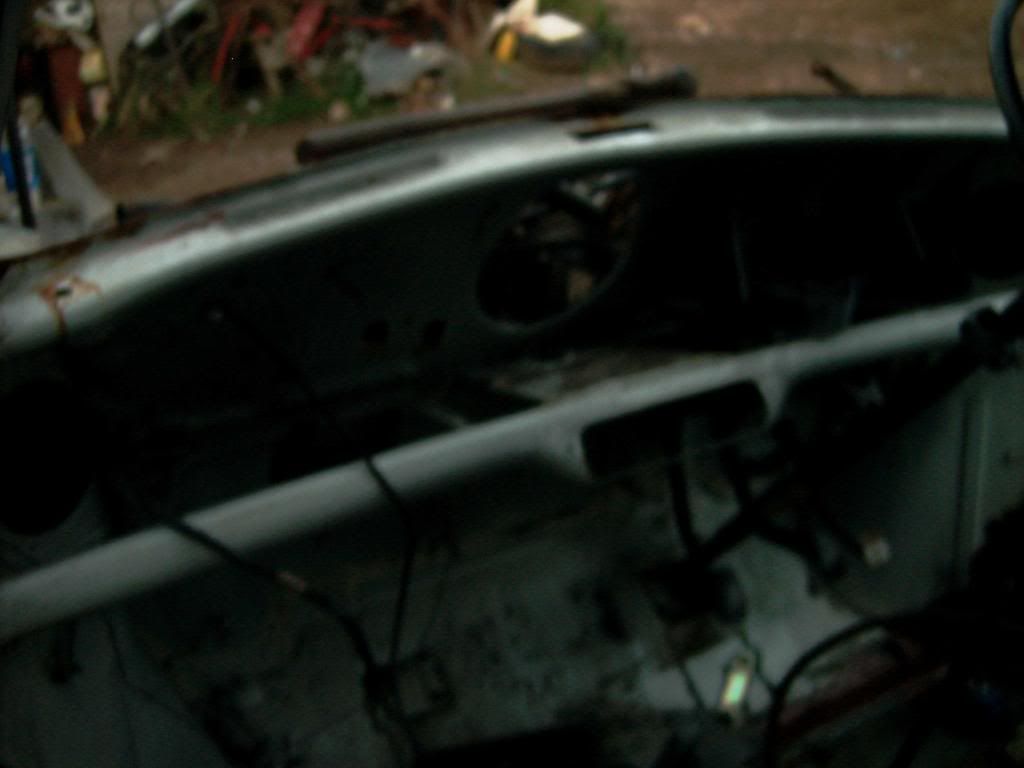
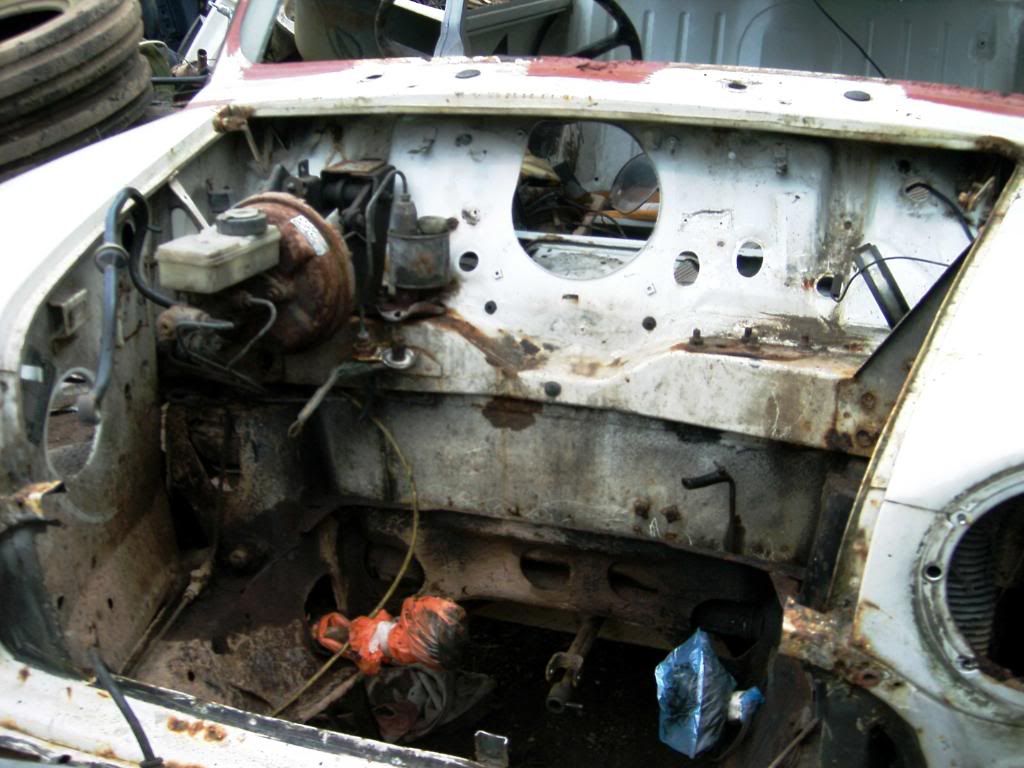
and started stripping the engine etc, cut the front slam panel off, the alternator was right up againt it!!!

took all the lovely foam off
and then the wiring loom, and wiper motor etc, got rid of all the additional random wiring so all is now well on the wiring side, i probably will retape it all when i've cleaned it all up tho....
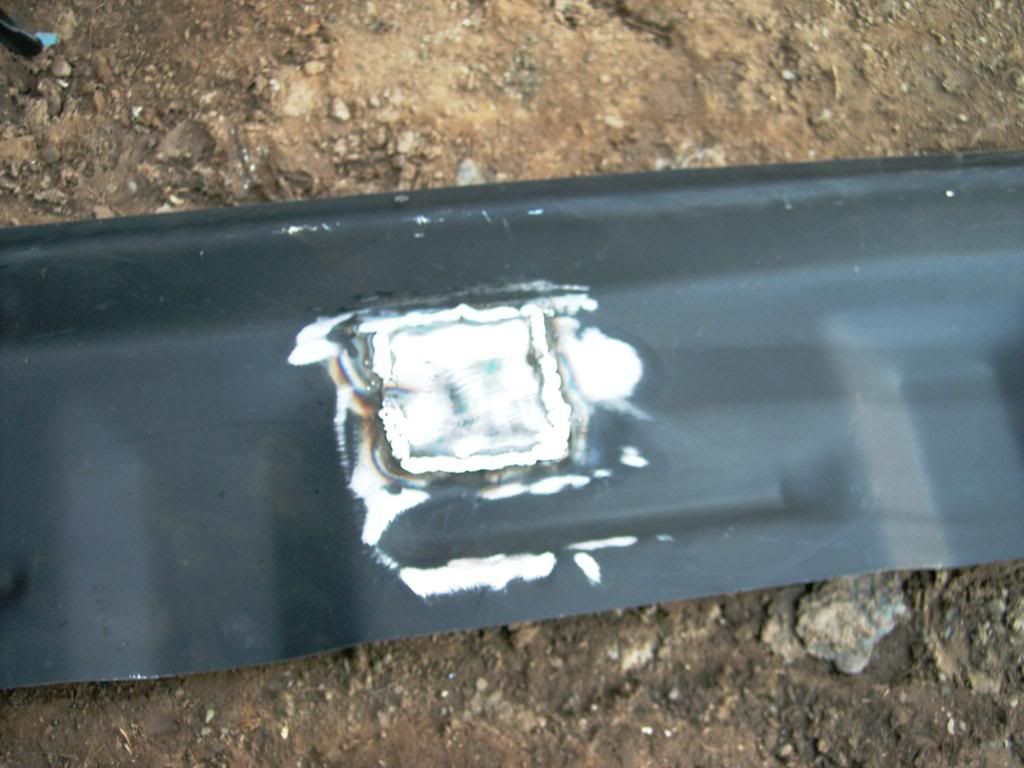
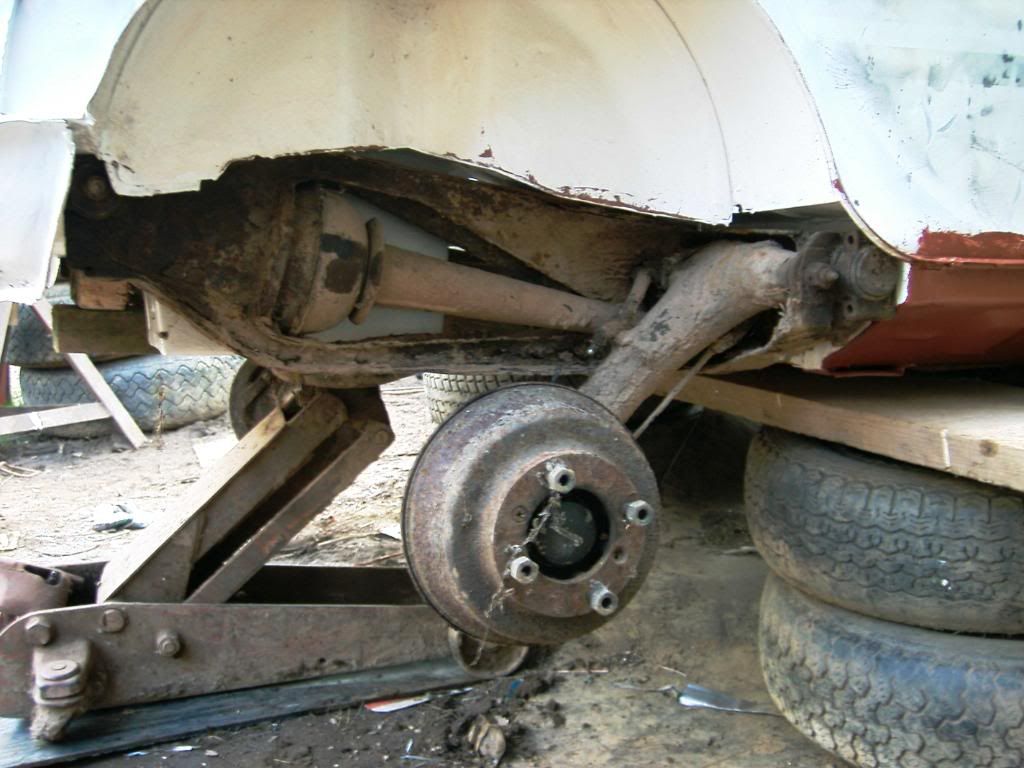
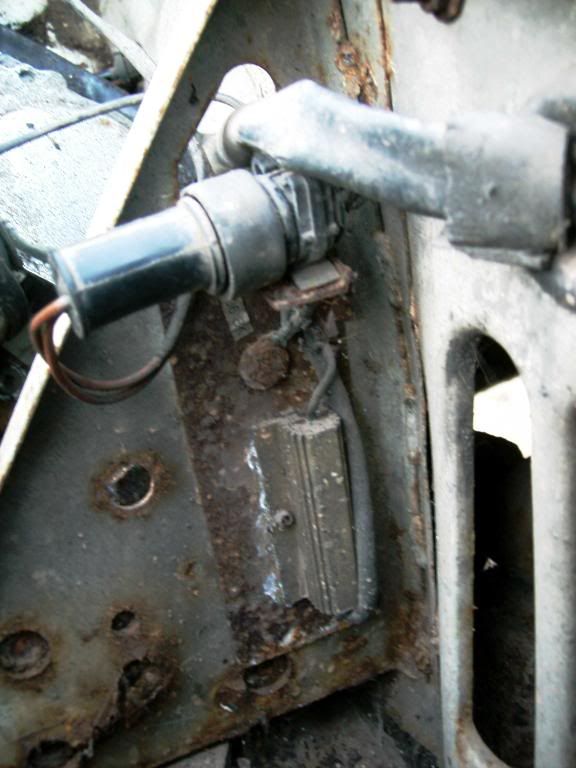
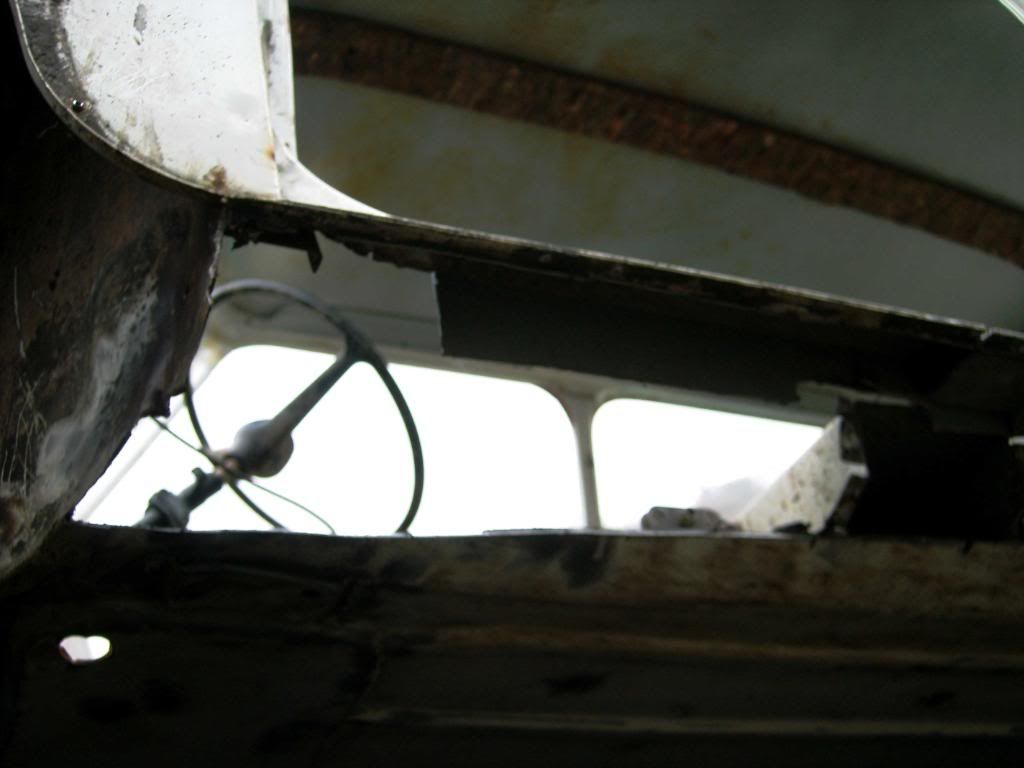
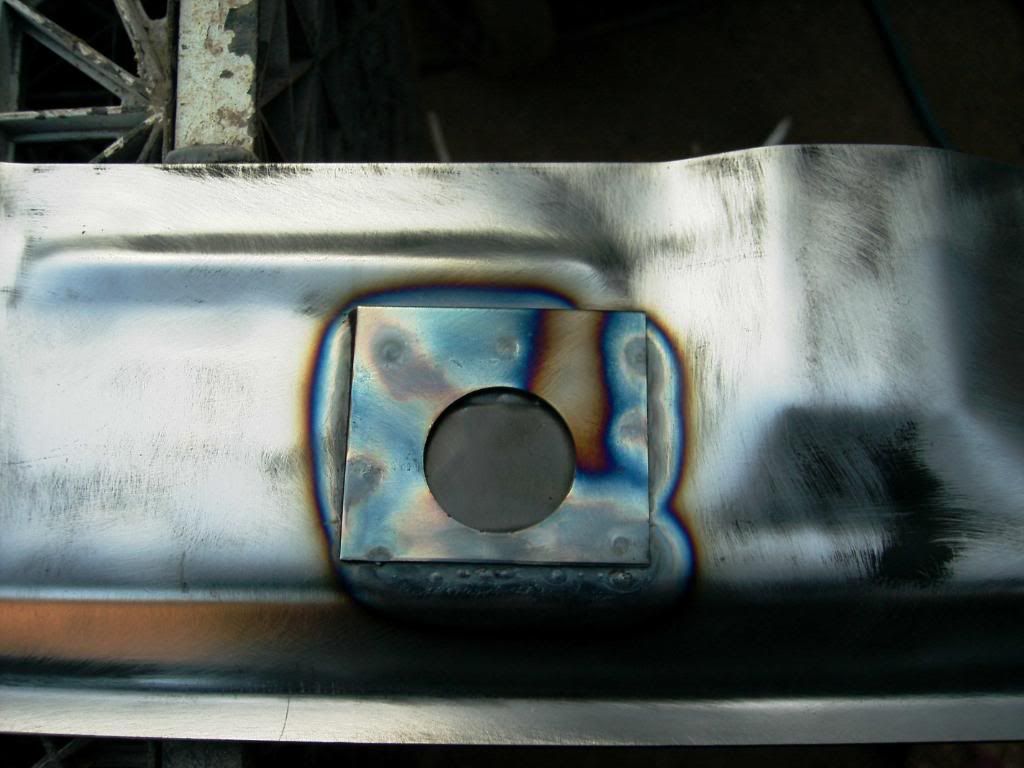
also dones any one know what this is??????????
day 3 kinda fail because i did day 4 work....
right welded the new sill on
painted
sill got a bit of grinding back to do!!
then put the rusty rear sub back on
pushed him out of his corner
and put a random boot on
dad grafer taped it up, so i wouldn't fill it with stuff!!!, and we also taped up the rear lights
then put it forwards back into the space
and started stripping the engine etc, cut the front slam panel off, the alternator was right up againt it!!!
took all the lovely foam off
and then the wiring loom, and wiper motor etc, got rid of all the additional random wiring so all is now well on the wiring side, i probably will retape it all when i've cleaned it all up tho....
also dones any one know what this is??????????
#53
john1.2pearl
-

- Members
-
- 341 posts
Speeding Along Now
- Location: England
Posted 28 December 2008 - 11:21 PM
iirc its something to do with the Dip/Main headlights.....
#54
buddylove
-
- TMF+ Member
-
- 1,640 posts
Camshaft & Stage Two Head
- Location: North America
- Local Club: SAMOA
Posted 29 December 2008 - 01:00 AM
Ya someone said in the other thread that it was a dip relay. Keep up the good work!
#55
emalee
-
- Members
-
- 813 posts
One Carb Or Two?
- Local Club: west of england
Posted 29 December 2008 - 10:24 PM
thanks for letting me know, i found out in the other thread its the resistor for the dip/main lights, these modern things!!!, my 81 citys not even got a relay!!! LOL
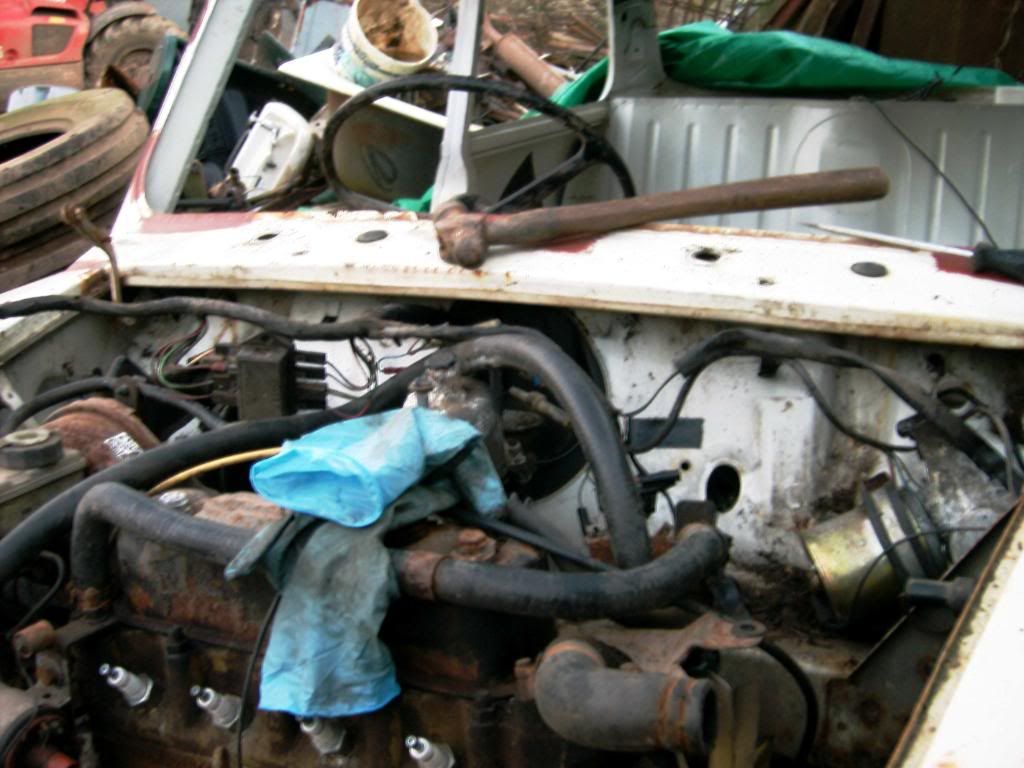
day 4
SUCCESS at last!!!!
finished disconnecting the engine

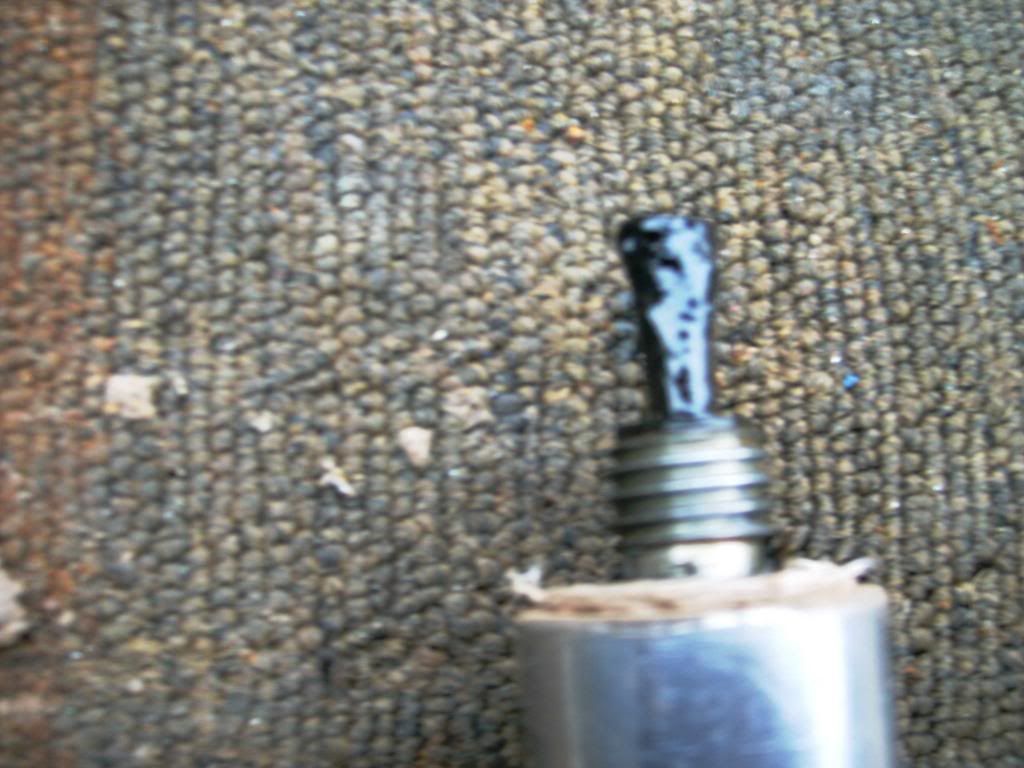
drained the oil, (to find a lovely cleanish sump plug, i love this engine!!!)
took the engine out
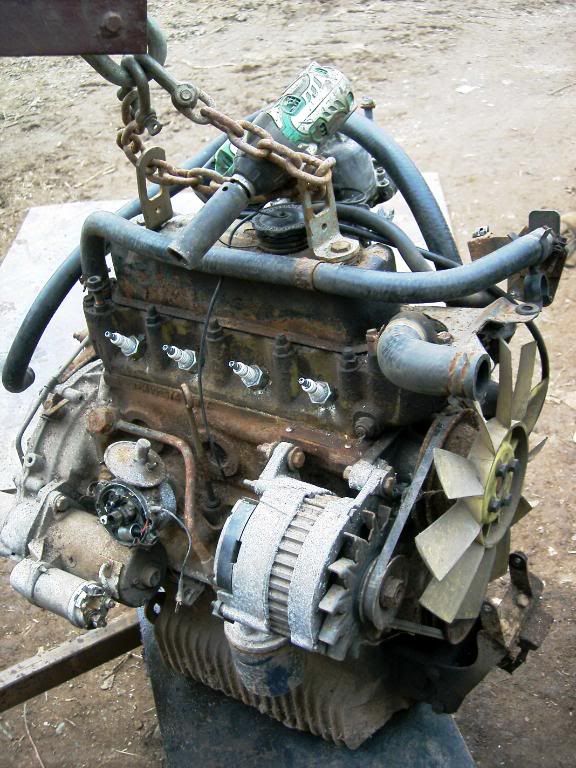
and ran the air line over the engine and engine bay
then ran the hammer along the sill...
DOH!!!!
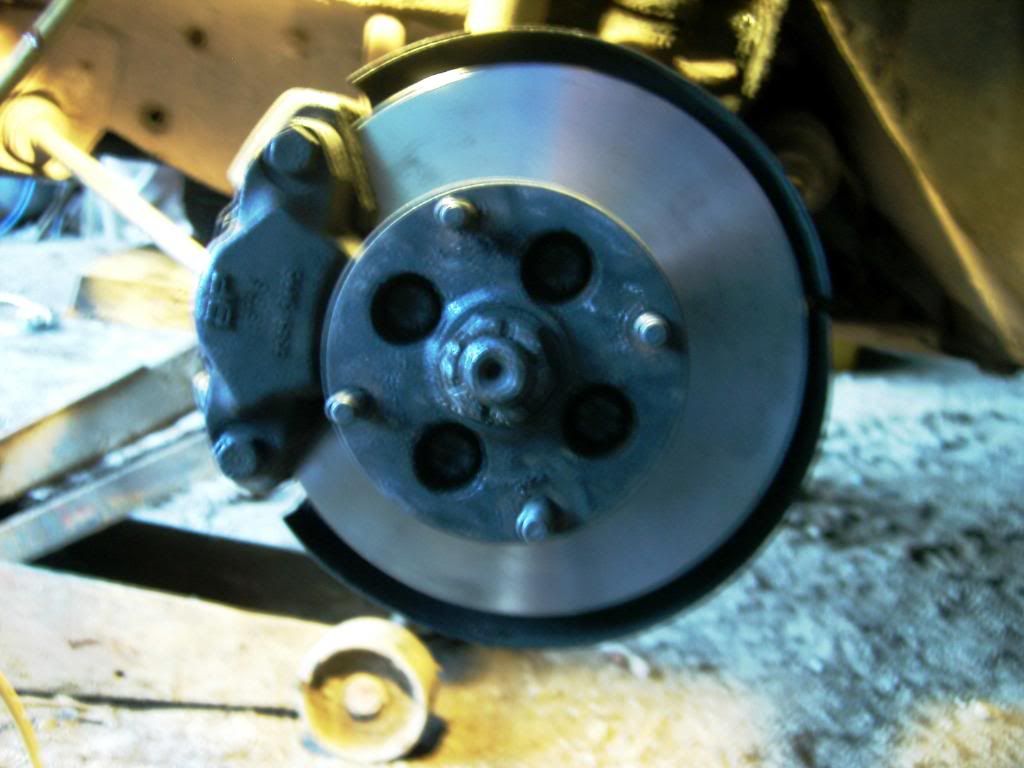
and i even found time to change my discs on the green mini and weld the brackets back on the dust covers (which are now touching the discs and screeching..... never finished with a mini!!! LOL)
so tomorrow i need to move the sky around, so its tilted on its side, then cut the sill off and access the damage!!! it is better than the drivers side tho!!! and clean up all the floor, i actually enjoy taking underseal off, its just wrong!!!
day 4
SUCCESS at last!!!!
finished disconnecting the engine
drained the oil, (to find a lovely cleanish sump plug, i love this engine!!!)
took the engine out
and ran the air line over the engine and engine bay
then ran the hammer along the sill...
DOH!!!!
and i even found time to change my discs on the green mini and weld the brackets back on the dust covers (which are now touching the discs and screeching..... never finished with a mini!!! LOL)
so tomorrow i need to move the sky around, so its tilted on its side, then cut the sill off and access the damage!!! it is better than the drivers side tho!!! and clean up all the floor, i actually enjoy taking underseal off, its just wrong!!!
#56
edi57
-
- Members
-
- 821 posts
One Carb Or Two?
Posted 29 December 2008 - 11:09 PM
You enjoy removing underseal??? That's just sick!!!
Totally rubbish job in my opinion!
Totally rubbish job in my opinion!
#57
emalee
-
- Members
-
- 813 posts
One Carb Or Two?
- Local Club: west of england
Posted 01 January 2009 - 10:04 PM
i think its because there is a wax kinda stuff under the underseal so i peels off quite easily!!! (not so good when it sticks in your hair tho!!! LOL)
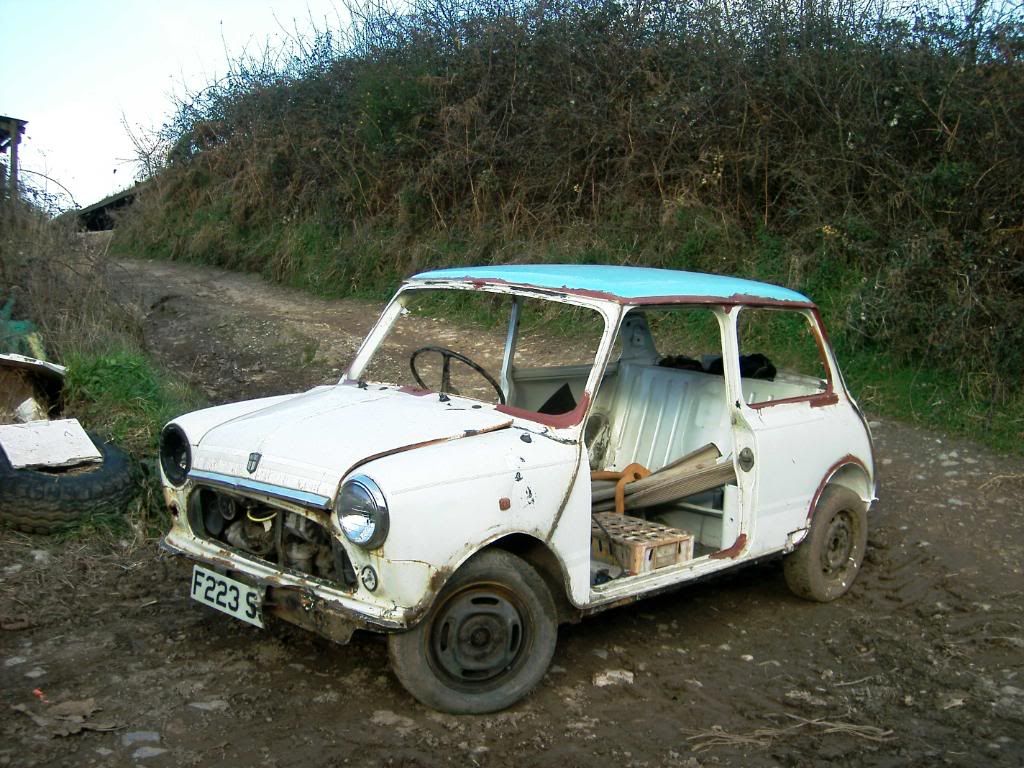
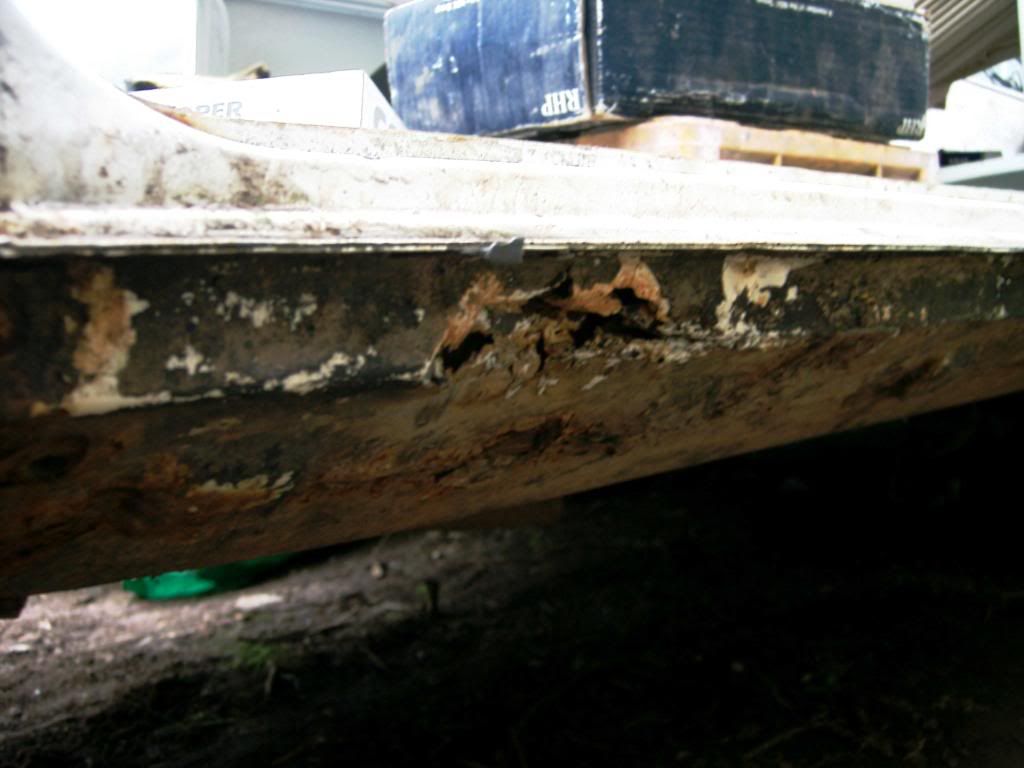
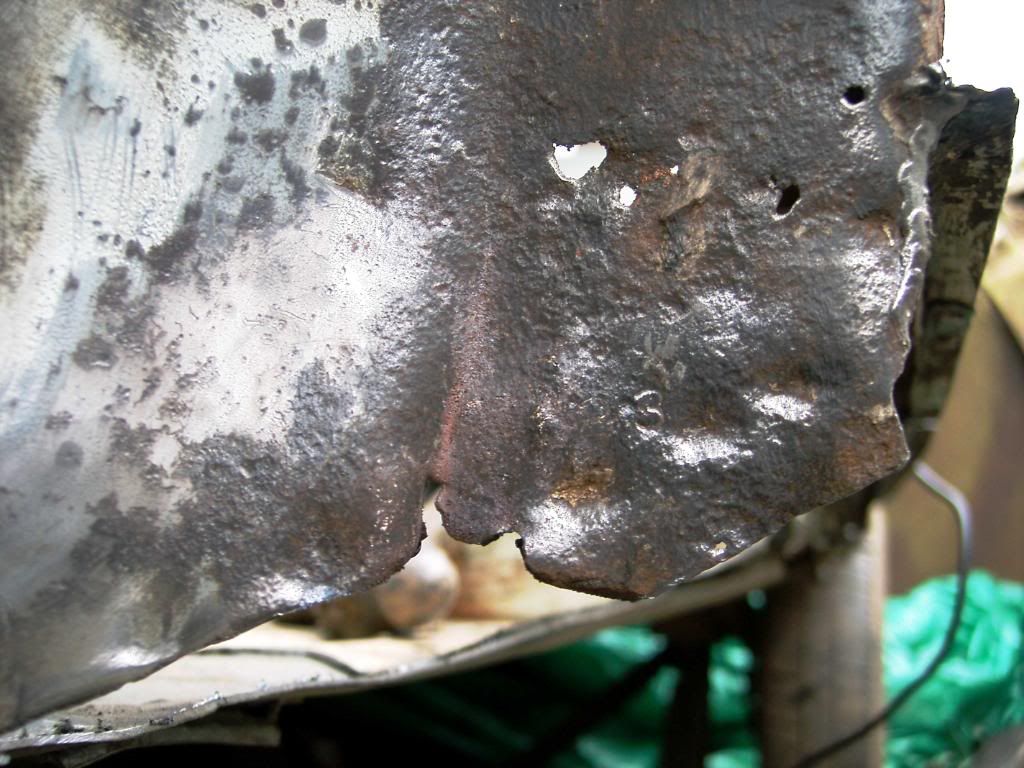
ok so this sides sill was a lot worse than the driver side!!, because it had no visible holes i thought it was alright, but... well it is a mini
so day 5, 6 + 7 FAIL!!! LOL
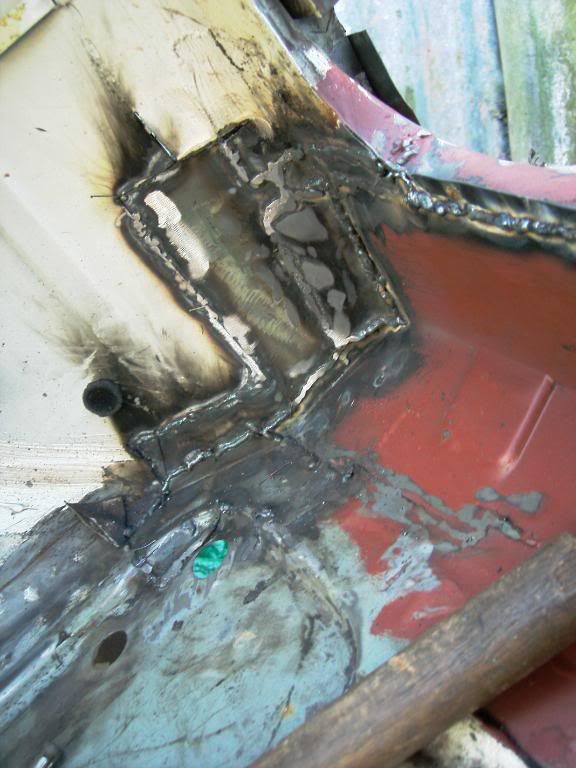
ok, so cleaned up the floor

inner finch
then i took my mums metro to be tuned up as it was running a bit pants and constantly misfiring, and a general pig to drive, its all lovely again now tho(for a metro)
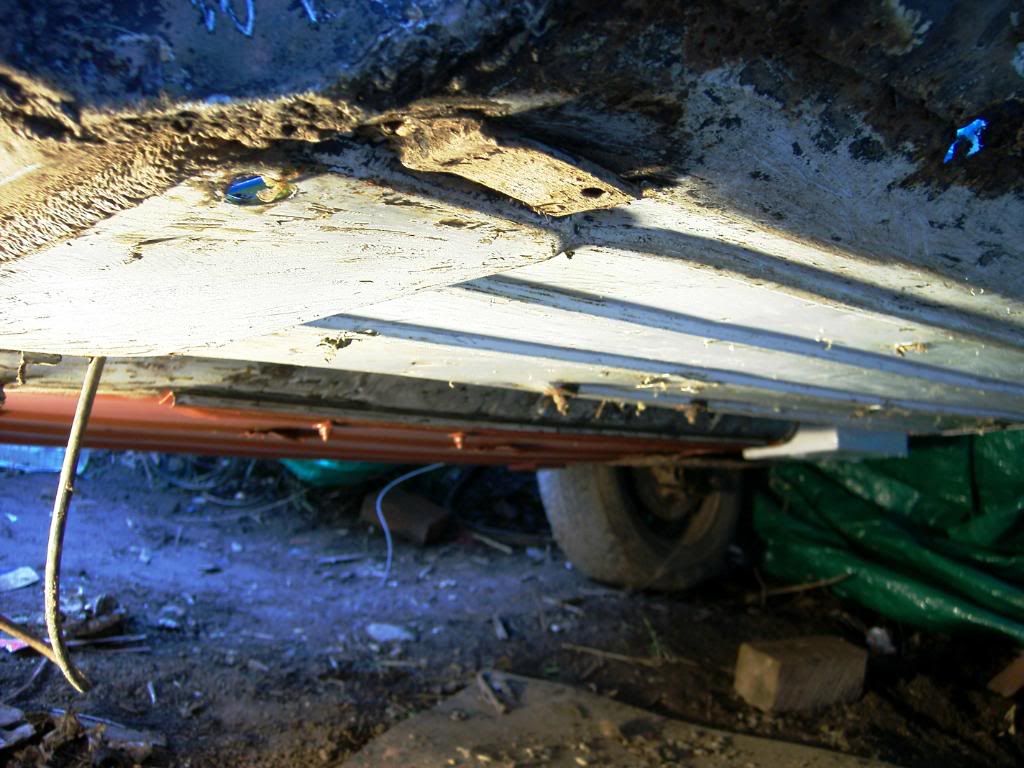
then a came back and cut the sill under the seam with the body, at which point the side decided to pop out where the hole is infront of the rear arch, so i needed to weld this up before i started anything else

i'm getting quite good at this panel making thing!! LOL, even if i did get a bit carried away with the tin snips and have to remake it!!!
day 6
welded the repair section in

cut the sill off
lovely jacking point again

rust cut out

and replaced


Rear half waiting to be done!!!

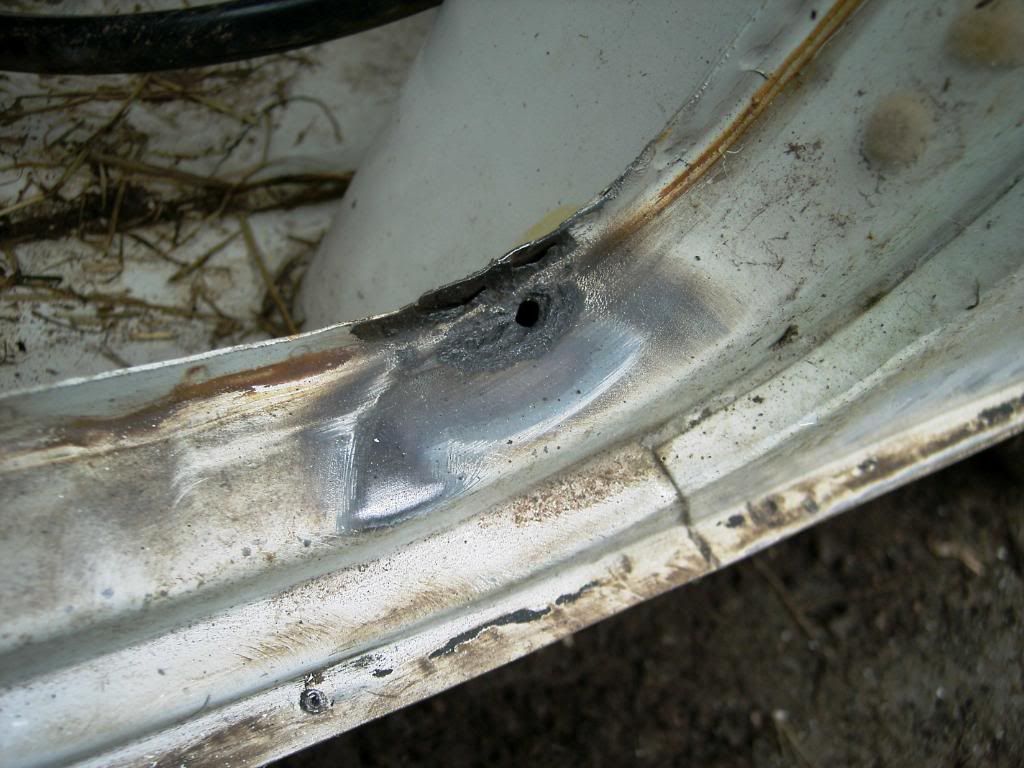
i don't know if you can see but the inner finch had the number 23 stamped on it, does anyone know what this means?????
Day 7 - forgot my camera, doh!!!
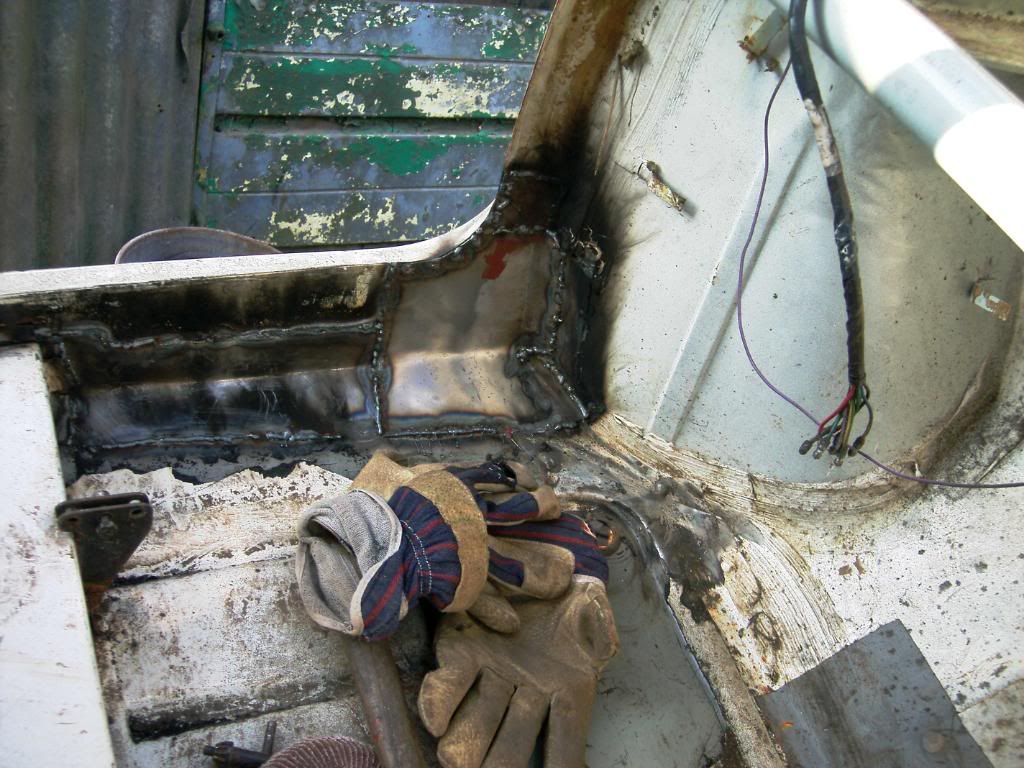
repaired the rest of the inner sill and bottom of the rear heal board,
repaired the crossmember end section,
repaired the hole in the doorstep, and found another and repaired that,
finished the inner a post (not too sure whats its called, but its not rusty no more!!!)
then repaired the inner finch!!
so tomorrow, finished the inner finch repair (the welders nib has got something stuck in it and i was too lazy to fix it tonight!!!)
grind back all the welds, remove the lip of the sill, prep the new sill and weld it on, then hopefully make a start on the doors (and take some pics!!!)
ok so this sides sill was a lot worse than the driver side!!, because it had no visible holes i thought it was alright, but... well it is a mini
so day 5, 6 + 7 FAIL!!! LOL
ok, so cleaned up the floor
inner finch
then i took my mums metro to be tuned up as it was running a bit pants and constantly misfiring, and a general pig to drive, its all lovely again now tho(for a metro)
then a came back and cut the sill under the seam with the body, at which point the side decided to pop out where the hole is infront of the rear arch, so i needed to weld this up before i started anything else
i'm getting quite good at this panel making thing!! LOL, even if i did get a bit carried away with the tin snips and have to remake it!!!
day 6
welded the repair section in
cut the sill off
lovely jacking point again
rust cut out
and replaced
Rear half waiting to be done!!!
i don't know if you can see but the inner finch had the number 23 stamped on it, does anyone know what this means?????
Day 7 - forgot my camera, doh!!!
repaired the rest of the inner sill and bottom of the rear heal board,
repaired the crossmember end section,
repaired the hole in the doorstep, and found another and repaired that,
finished the inner a post (not too sure whats its called, but its not rusty no more!!!)
then repaired the inner finch!!
so tomorrow, finished the inner finch repair (the welders nib has got something stuck in it and i was too lazy to fix it tonight!!!)
grind back all the welds, remove the lip of the sill, prep the new sill and weld it on, then hopefully make a start on the doors (and take some pics!!!)
#58
buddylove
-
- TMF+ Member
-
- 1,640 posts
Camshaft & Stage Two Head
- Location: North America
- Local Club: SAMOA
Posted 02 January 2009 - 01:14 AM
Coming along quickly now, keep up the good work
#59
emalee
-
- Members
-
- 813 posts
One Carb Or Two?
- Local Club: west of england
Posted 02 January 2009 - 10:03 PM
ok this is yesterdays progress
inner sill
cross member

inner finch

rear floor and heel board

then today
cleaned up the inner sill
then welded up the jacking point hole in the sill
pretty colours
then welded it on
and painted
so tomorrow i'll move it round so its sat on 4 wheels, then grind down all the welds inside then paint all the floors
and make a start on the doors
inner sill
cross member
inner finch
rear floor and heel board
then today
cleaned up the inner sill
then welded up the jacking point hole in the sill
pretty colours
then welded it on
and painted
so tomorrow i'll move it round so its sat on 4 wheels, then grind down all the welds inside then paint all the floors
and make a start on the doors
#60
emalee
-
- Members
-
- 813 posts
One Carb Or Two?
- Local Club: west of england
Posted 03 January 2009 - 10:24 PM
quick update, not that much done today, cleaned up all the welds inside the car, then cleaned up all of the inside and redoxided where needed, then started on the drivers door, which need most of the lower edge replacing (typical mini door!!!),
sorry no pics today as my camera ran out of battery!!! doh
tomorrow i will continue to weld up the bottom edge of the door, but i can only spend a couple of hours doing it as i've gotta go to my nans for dinner, then wash the green one (and sort out its brakes!!!)
and i've just put in a massive mini spares order, mainly for the new scuttle and closing panels, but loads of gaitors, mounts and bushes for the suspension and engine!!
i love getting the parcels and remembering what i ordered!! LOL


1 user(s) are reading this topic
0 members, 1 guests, 0 anonymous users


