Jump to content


Photo
- - - - -

My Mini ;) The Second Chapter.


  • Please log in to reply
647 replies to this topic

#421 carboy001

carboy001

    One Carb Or Two?

  • TMF+ Member
  • PipPipPipPipPipPipPip
  • 1,065 posts

Posted 18 May 2010 - 08:28 PM

Posted Image

Make sure your mum doesnt see that youve used the clean towels! :wub:

Good progress Luke, hopefully being making progress in that direction this weekend as ive done my one and only exam today, done for the year :wub:

The upper arms apparently you have to grind down the bulge where the bolts go through to the hub as they catch 7.5" discs, this is because we arent using 'cooper s' upper arms. Just a word of warning :thumbsup:

#422 analogue_radio

analogue_radio

    Up Into Fourth

  • TMF+ Member
  • PipPipPipPipPipPipPipPipPip
  • 4,897 posts
  • Location: Melton Mowbray, UK.

Posted 18 May 2010 - 08:59 PM

Good progress there mate, when you starting on getting the body done?


Ben


Next couple of weeks! :wub:

Posted Image

Make sure your mum doesnt see that youve used the clean towels! :wub:

Good progress Luke, hopefully being making progress in that direction this weekend as ive done my one and only exam today, done for the year :wub:

The upper arms apparently you have to grind down the bulge where the bolts go through to the hub as they catch 7.5" discs, this is because we arent using 'cooper s' upper arms. Just a word of warning :thumbsup:


Yeaah I've got 4 months of summer now! trying to find a full time job though, proving a challenge at the moment.

I think I know which bit you mean, I'm sure I'll come across the problem when I get round to that part, cheers though Chris :wub:

#423 analogue_radio

analogue_radio

    Up Into Fourth

  • TMF+ Member
  • PipPipPipPipPipPipPipPipPip
  • 4,897 posts
  • Location: Melton Mowbray, UK.

Posted 20 May 2010 - 07:55 PM

Posted Image

Lovely new shiney bearings, I've taken great care and attention whilst installing these.
(before grease, just placing everything in to make sure I've got the right order)

Posted Image

Other side, with added grease for extra bonus points.

Posted Image

Both installed & packed with grease. Happy with these ;) feel nice, free and secure.
(i need to repaint the hubs, having them clamped in the vice has taken the paint off)

Posted Image

Using valve grinding paste to smooth down the ball joints. After this was done everything was cleaned throughly.

Got dark and is getting late so I decided I'll carry on with this when I next get time.

Got a job induction tomorrow morning at half 8 :( and it's my birthday! :D

#424 danie garry

danie garry

    I love BMW minis

  • Members
  • PipPipPipPipPipPipPipPipPip
  • 2,296 posts
  • Location: malmo
  • Local Club: IMOC-Irish Mini Owners Club

Posted 20 May 2010 - 08:04 PM

moving along anyway, the boredom of balljoints hit u yet!?!?!?!
good luck with u'r job thingy and happy b-day!!

#425 tomgale

tomgale

    Super Mini Mad

  • Members
  • PipPipPipPipPipPip
  • 561 posts

Posted 20 May 2010 - 09:04 PM

happy birthday man!! its mine too! nice progress with the hubs, i did the same but i have realised i may have left the spacer out of one.... :D

#426 carboy001

carboy001

    One Carb Or Two?

  • TMF+ Member
  • PipPipPipPipPipPipPip
  • 1,065 posts

Posted 20 May 2010 - 09:39 PM

Happy Birthday for tomorrow mate ;)

The hubs look well :D

#427 analogue_radio

analogue_radio

    Up Into Fourth

  • TMF+ Member
  • PipPipPipPipPipPipPipPipPip
  • 4,897 posts
  • Location: Melton Mowbray, UK.

Posted 31 May 2010 - 08:56 PM

Haven't been around for a while :( was my birthday, girlfriends parents were away, had my macbook in for repair AND I've started a new job over summer. I'll be debt free and have hopefully a few grand to spend on my mini in no time :)

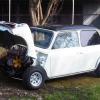
Spent a really good day on her yesterday, one of those days where everything just goes to plan :proud:

Posted Image

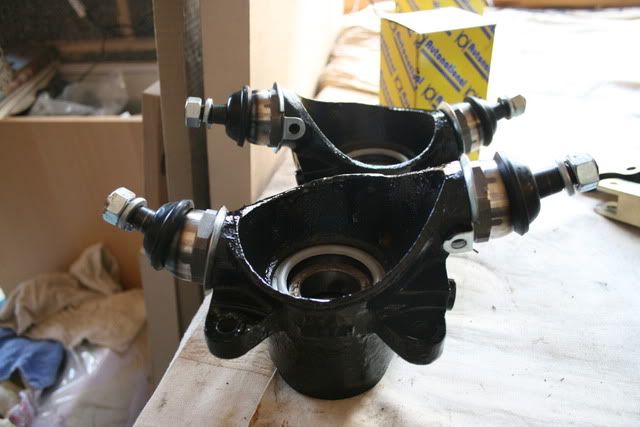
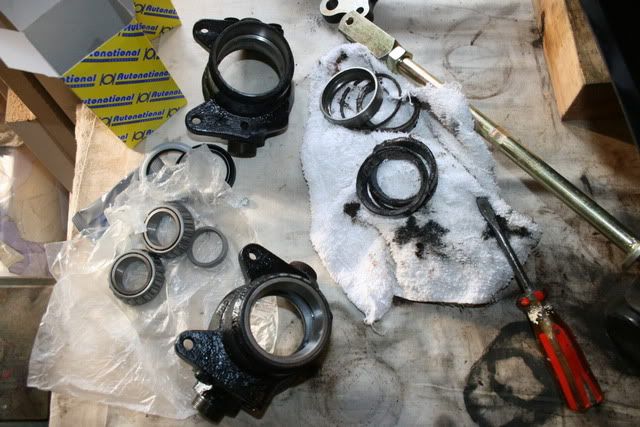
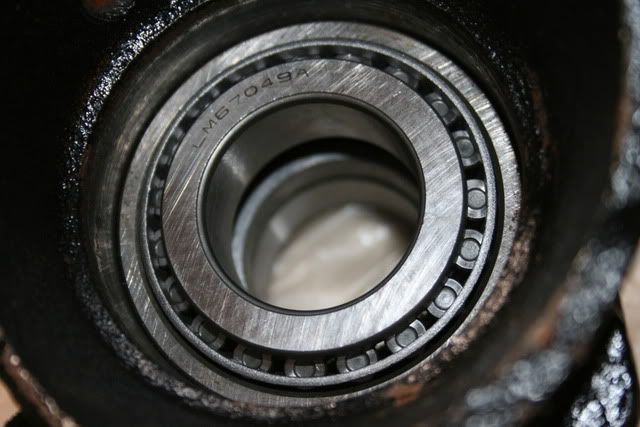
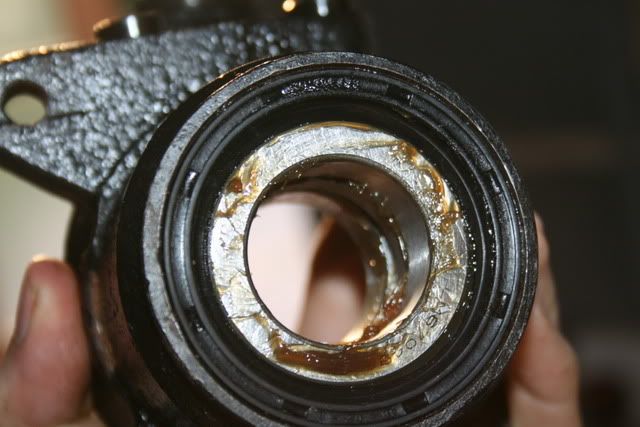
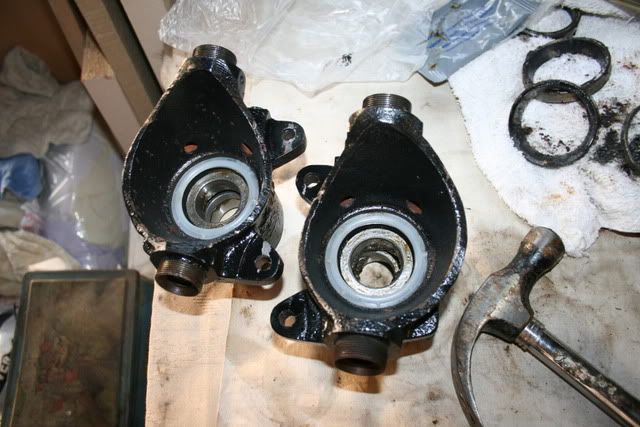
First of all got the hubs almost done, gave them another lick of paint in places where they had chipped in the vice. I just need to get some grease nipples and then smush a load of grease into the balls and tighten everything down.

Posted Image

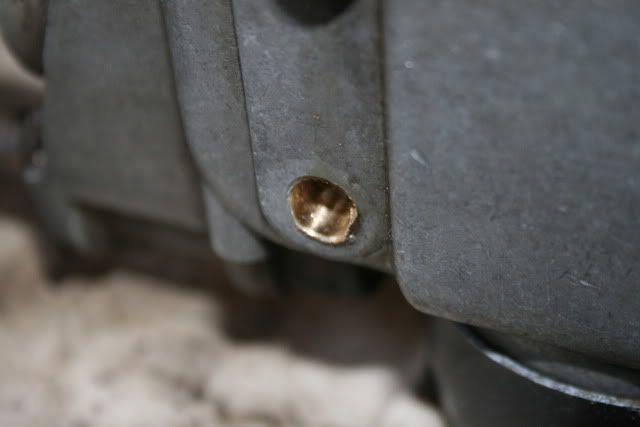
Also had a go at trying to get the broken thread out of the gearstick housing, which was a nightmare. I just ended up making things smooth.. which isn't a problem, I'll just stick a switch for the reverse light on the dashboard :)

Posted Image

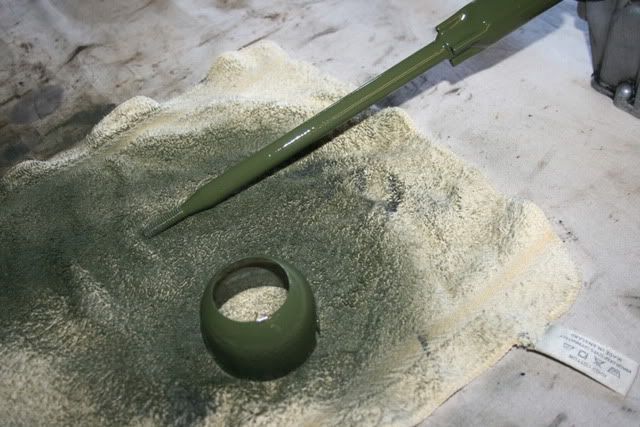
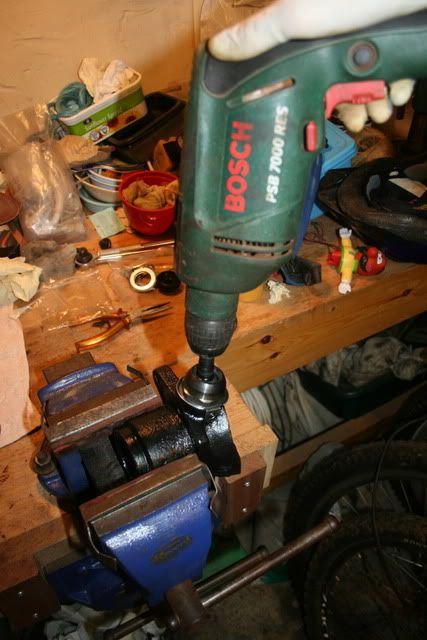
Also gave the bits a coat of BMC green rather than the matt black they were before, not sure on this.. doubt you'll even notice it when it's in the cab. But I'll still know it's there.

Posted Image

Posted Image

Posted Image

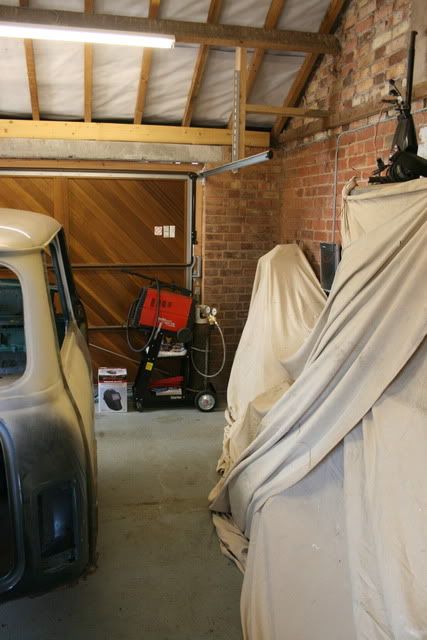
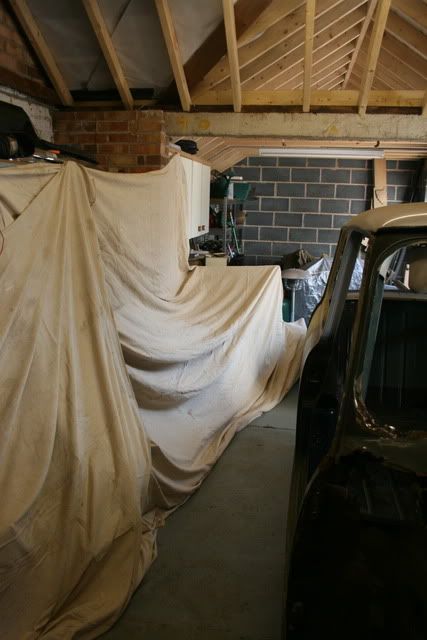
Then in preparation for the bodywork I had a good tidy up, moved all my new panels, subframes, engine etc.. under the dustsheets and got it all protected and out of the way. Reason for doing this is that I don't want dust/rust & bits of metal all over my new things. The shelves are still accessible if I need any tools, just need to move the sheets to one side.

Posted Image

Posted Image

Posted Image

Posted Image

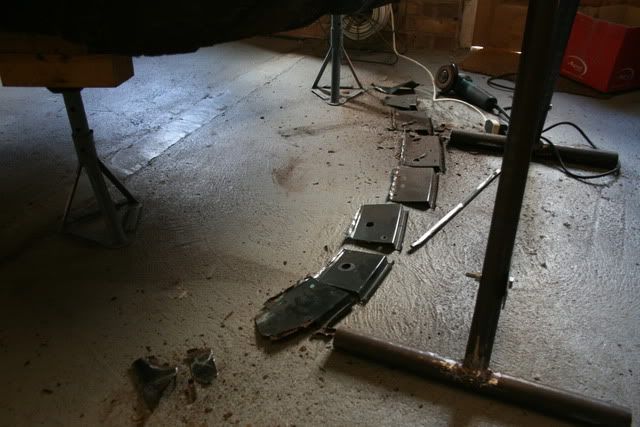
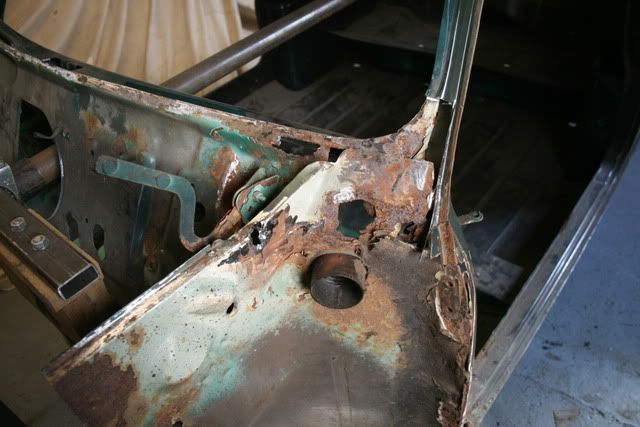
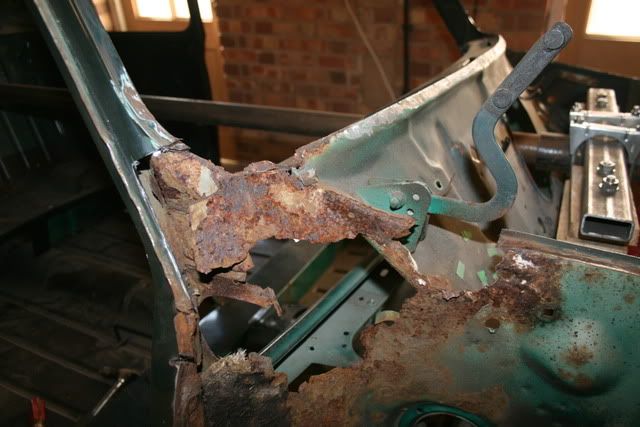
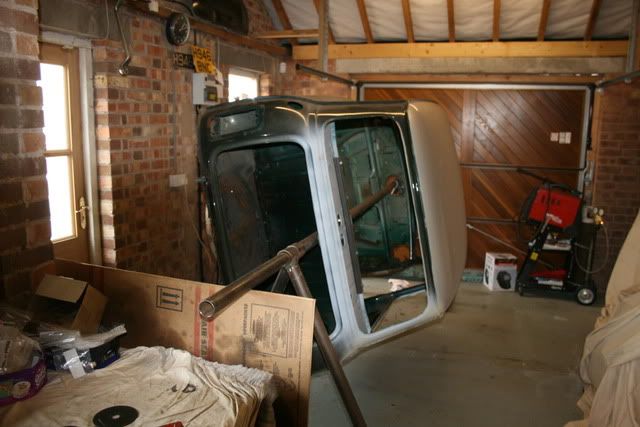
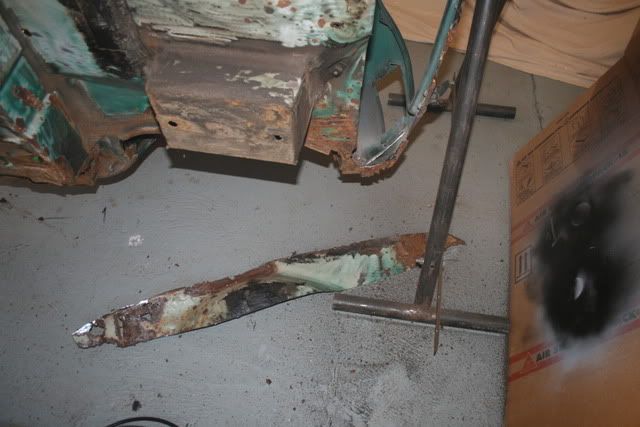
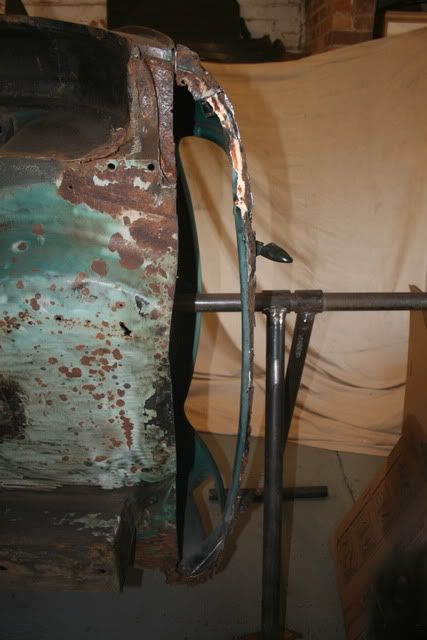
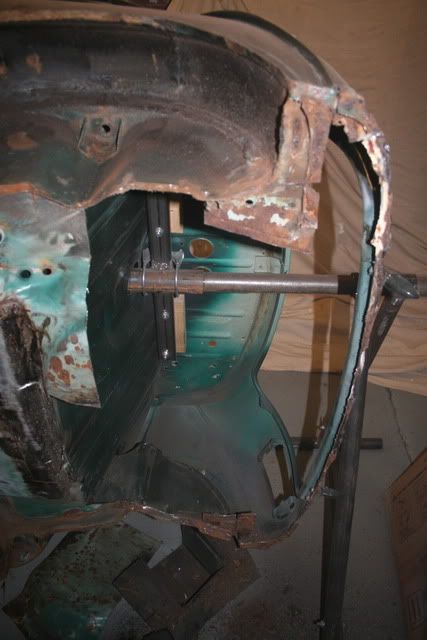
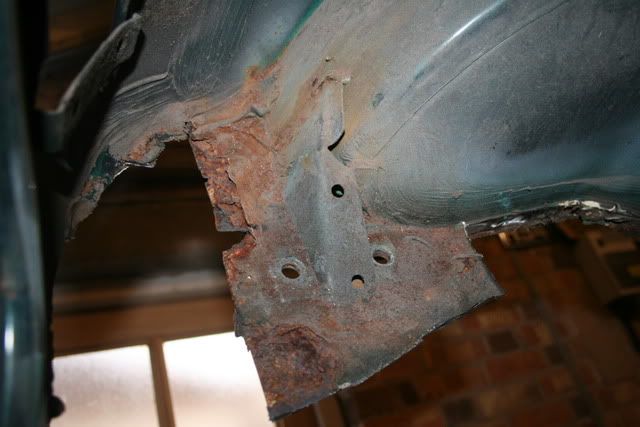
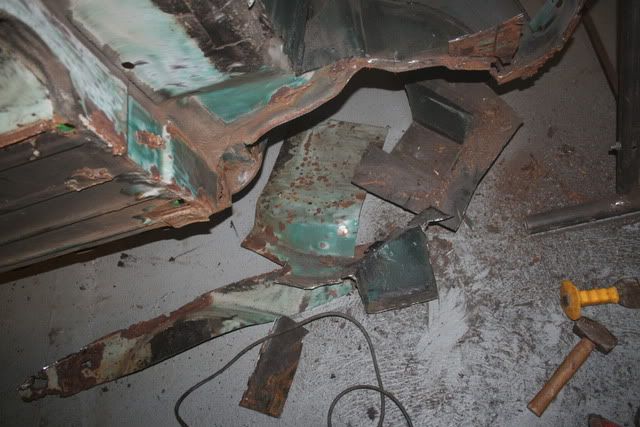
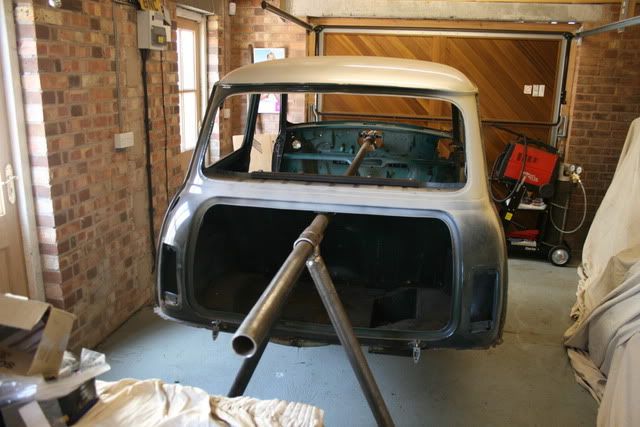
& off came the scuttle in sections, revealing more holes!

Posted Image

Posted Image

Posted Image

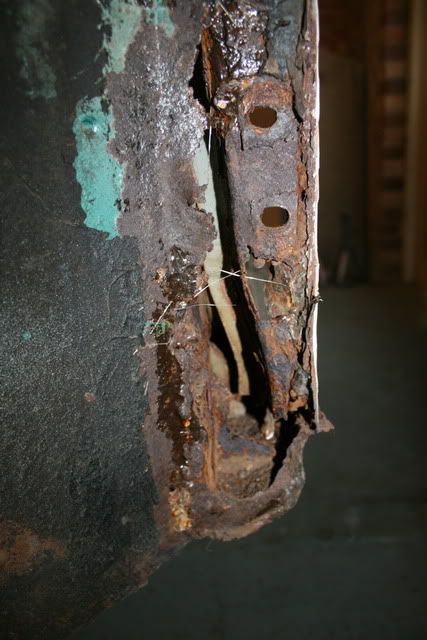
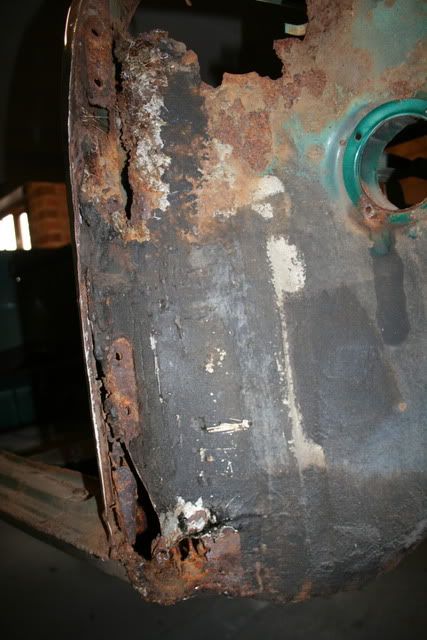
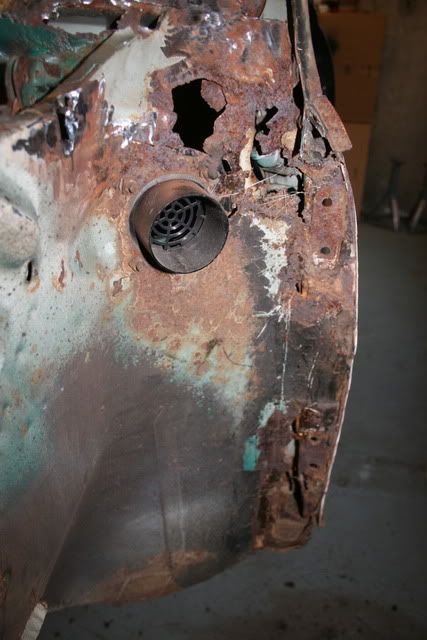
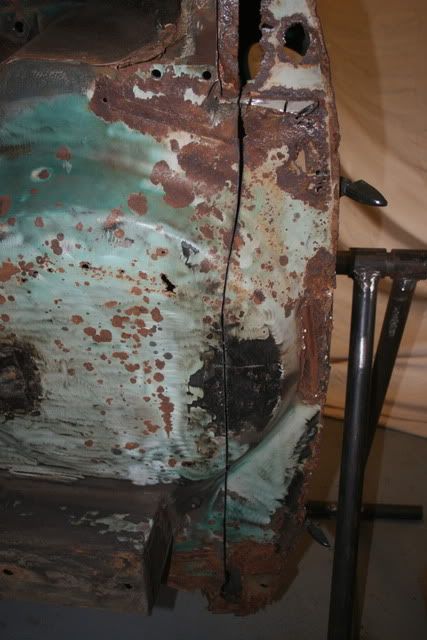
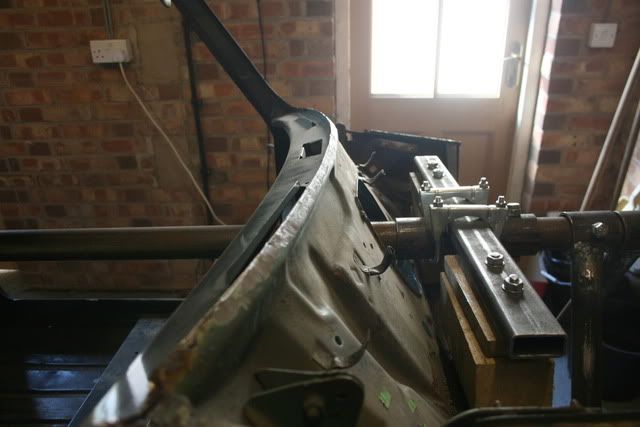
Had a good poke around as well.. pulled off the fibreglass we'd laid over the top for some temporary protection, don't know if it's done it's job or made things worse. But there is no telling.

So.. I'll hopefully get a hold of this Plasma cutter soon, and then the boot will come out :unsure:

:)

Edited by analogue_radio, 31 May 2010 - 08:57 PM.


#428 mighty mini jack

mighty mini jack

    Mighty Before a Pint

  • Members
  • PipPipPipPipPipPipPipPipPipPip
  • 5,095 posts

Posted 31 May 2010 - 09:02 PM

Nice work there Luke, didn't think it'd be that rusty!

Liking the BMC green bits.

#429 sweetser

sweetser

    Up Into Fourth

  • Members
  • PipPipPipPipPipPipPipPipPip
  • 3,995 posts

Posted 31 May 2010 - 09:26 PM

Looking good mate :proud: wish i had time/money to do something like this

#430 carboy001

carboy001

    One Carb Or Two?

  • TMF+ Member
  • PipPipPipPipPipPipPip
  • 1,065 posts

Posted 31 May 2010 - 09:30 PM

Nice work Luke, a good days work there. Was starting to wonder where you had gone on the forum today actually, good to see an update :proud:

The BRG bits look good but hope you didnt get to much paint on the thread at the top or you'll struggle getting the gear knob on.

#431 analogue_radio

analogue_radio

    Up Into Fourth

  • TMF+ Member
  • PipPipPipPipPipPipPipPipPip
  • 4,897 posts
  • Location: Melton Mowbray, UK.

Posted 31 May 2010 - 09:37 PM

Cheers boys :proud: I'm working again tomorrow.. not really sure how much I am working to be fair, probably could do with finding out :unsure:

Next job is as above, boot floor! I'll badger Dad and get him to sort the plasma cutter from our mate.

Nah it shouldn't be a problem, if it is I'll just mask off the stick and nitromors the thread.

Might start faffing with my dashboard as well, will be a pretty cool side project.

#432 analogue_radio

analogue_radio

    Up Into Fourth

  • TMF+ Member
  • PipPipPipPipPipPipPipPipPip
  • 4,897 posts
  • Location: Melton Mowbray, UK.

Posted 08 June 2010 - 05:40 PM

I WON ITTTTTTTTTT! love that feeling you get from winning something on Ebay :P

Grease Monkey knows what I'm talking about ;)


Will post pictures when it arrives :lol:

I'm working so damn much lately, really eating away at my summer holiday. But in the long run it means I can get her on the road a lot quicker than I thought! :mrcool: I've got this Sunday free, and it's staying free, I'm going to start attacking the boot floor.

Check back Sunday night for an update ;)

#433 analogue_radio

analogue_radio

    Up Into Fourth

  • TMF+ Member
  • PipPipPipPipPipPipPipPipPip
  • 4,897 posts
  • Location: Melton Mowbray, UK.

Posted 13 June 2010 - 05:32 PM

Todays efforts :-

Getting savage with an angle grinder, lump hammer and a chisel.

Posted Image

Up on her side.

Posted Image

First incision.

Posted Image

Came off pretty easy.

Posted Image

Hole!

Posted Image

& a few more.. :shifty:

Posted Image

Not sure how to get these out..?

Posted Image

The sections I've done things in, finding it easier this way than one huge section.

Posted Image

And back round to a level setting, don't want the shell up on it's side all the time. Can't be good for it.


I've also worked out, that with the amount of contracted hours I've got at work and the amount of weeks left I've got for summer.. I will definitely have enough money to pay my small debt off, pay for EVERYTHING to get the mini finished and still have plenty left over for the MOT, tax and insurance >_< :genius: :-

I just need the time now!

Edited by analogue_radio, 16 June 2010 - 08:22 PM.


#434 sonikk4

sonikk4

    Twisted Paint Polisher!!!

  • Admin
  • PipPipPipPipPipPipPipPipPipPipPip
  • 16,053 posts
  • Name: Neil
  • Location: Oxfordshire

Posted 13 June 2010 - 06:19 PM

Are you replacing the full boot floor including the seat pan?? if so for the moment leave the rear subframe reinforcement brackets in. The reason i say this is once you have cut off all the old boot panel then when you offer up the new one you can use the old brackets as a guide to make sure everything lines up.

Once you are happy with your fit you can then carefully cut out/ grind away the old brackets so you can install new ones. Your other option is providing you are not cutting off the heelboard then you can cut those brackets off altogether place in your new boot floor and then slave in your rear subframe. You can check then to make sure the holes in the new boot floor line up ok with the subbie. Now you can also tack in your new reinforcement brackets.

It sounds a bit long winded but at least everything will line up.

Unfortunately for us i had to replace the full boot floor including seat pan, rear heelboard and inner arches plus the reinforcement brackets were shot. To many bodged patches didn't help so i have had to rely on lots of measurements.

The proof will be when we offer up the rear subframe to fit, i'm confident it will be ok but there's always sods law to deal with.

#435 analogue_radio

analogue_radio

    Up Into Fourth

  • TMF+ Member
  • PipPipPipPipPipPipPipPipPip
  • 4,897 posts
  • Location: Melton Mowbray, UK.

Posted 13 June 2010 - 06:50 PM

That's amazing mate, I was actually meaning to keep those in so I could do just that. Line up the subframe to make everything was lined up and in check, I guess I just got a bit trigger happy with the angle grinder :shifty:

I'm not really sure where or what I should be cutting next.. I've got a full boot floor waiting to go in, so the seat needs to come out as well.


1 user(s) are reading this topic

0 members, 1 guests, 0 anonymous users