Jump to content


Photo
- - - - -

Mini Virgin Rebuild Of 83 Mayfair.


  • Please log in to reply
1006 replies to this topic

#136 grahama

grahama

    Up Into Fourth

  • Members
  • PipPipPipPipPipPipPipPipPip
  • 2,442 posts
  • Location: Warrington
  • Local Club: None in my area !!

Posted 29 April 2011 - 06:12 PM

Update part 2.


Posted Image

Posted Image

Posted Image

Posted Image

The next bit was to cut some of the flitch rot out, caused by a bloody mud flap just screwed into the flitch, ahhhhhh !!! Started to cut out but didn ‘t do it all till I have more time to make a panel as I won’t need to buy one for this repair. The rusty flitch to floor joint will be cut out and replaced.

Posted Image

Posted Image

Posted Image


The inner floor was also mint, so only a repair around the flitch area to do. The doorstep was also in great condition, just a small patch as seen and forward to the flitch, no problem for a man of my candelabra.

Posted Image

All in all great progress and a new pile of dead mini !!!

Hope you enjoyed,

Graham

Edited by grahama, 29 April 2011 - 06:21 PM.


#137 The Goot

The Goot

    Learner Driver

  • Noobies
  • PipPip
  • 18 posts
  • Local Club: Mini WIPS

Posted 29 April 2011 - 08:31 PM

looks awesome, keep at it! Will keep reading your journey...

Cheers

#138 grahama

grahama

    Up Into Fourth

  • Members
  • PipPipPipPipPipPipPipPipPip
  • 2,442 posts
  • Location: Warrington
  • Local Club: None in my area !!

Posted 30 April 2011 - 11:06 AM

Cheers, however it could turn into a long project this one, trying to fit it inbetween work and jobs from the wife !! However lots of pics along the way.

Graham

#139 hughJ

hughJ

    Soldiering Along

  • Members
  • PipPipPipPipPipPipPip
  • 727 posts
  • Location: Highlands, Scotland

Posted 30 April 2011 - 07:14 PM

Graham, more tidy work as ever. You wanted to know what I was priming with - it is UPOL Power Can Etch Primer - Etch Primer Ebay. As you know I'm no expert but the overall advice on the forum seems to be to use an etch primer first. It seems to help adhesion to the metal. I hope it works as over the years a lot of my paint touch up repairs have been poor flaking off after a while.
I would like to ask you a question - how did you manage the very tidy relief bend on the boot panel?
Keep going Graham. A really nice thing is that this car and this work is for your boy! The work is almost overwhelming enough to do it for yourself. Your a good father as well as a good fabricator. Don't think I'd do it for my two boys!
Hugh

Edited by hughJ, 30 April 2011 - 07:17 PM.


#140 grahama

grahama

    Up Into Fourth

  • Members
  • PipPipPipPipPipPipPipPipPip
  • 2,442 posts
  • Location: Warrington
  • Local Club: None in my area !!

Posted 30 April 2011 - 08:24 PM

Hugh,

at times I think of ringing the scrap man I can tell you, then out of the blue I find something to make me carry on, like the sill for eg. After this I will have to do another for my daughter who is 15 this year and then I may do something for myself, (thinking BMW 2002 or campervan ! ).

Anyway, the boot panel bend was done using my very high tech vice !! I merely offered the panel into position, marked the depth of the bend and slid the panel into the vice. The vice jaws are only 5" wide so after pushing the panel to the desired angle I moved the panel along and repeated along the whole edge upto the ends where no relief bend was required.

As I have said before I will at some point be found out with my small fabrication toolkit !! I have found that low tech is working fine thus far though.

Looking forward to a little welding of panels next week so Matt can get stuck in rubbing the boot area down.

Graham

by the way thanks for the link, I have been paying nearly double that for the same stuff, ahhhhhhhhhhhhhhhh !!

Edited by grahama, 30 April 2011 - 08:26 PM.


#141 Brams96

Brams96

    Up Into Fourth

  • Members
  • PipPipPipPipPipPipPipPipPip
  • 2,308 posts
  • Local Club: Kentish Mini Club

Posted 02 May 2011 - 09:33 PM

Just read your whole thread & have subscribed. You've done really well with your repairs for doing it for the first time & with a limited toolbox. It's really inspiring to see work like you've done, it makes me want to get out to the garage myself (stuck at work tho, doh!). I'll be keeping an eye on this thread. Keep up the great work ! :( :proud:

#142 grahama

grahama

    Up Into Fourth

  • Members
  • PipPipPipPipPipPipPipPipPip
  • 2,442 posts
  • Location: Warrington
  • Local Club: None in my area !!

Posted 04 May 2011 - 02:10 PM

Hi all,

Small update of a very frustrating pattern panel, but first some paint..

Posted Image

Posted Image

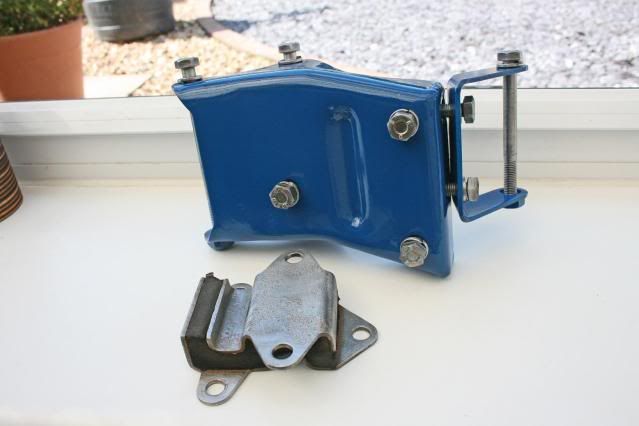
Yes I have been a little sad and cleaned and painted the NS engine mount and buffed up all the screws !! Primed, two coats and two coats top coat, and questions section said that should be ok without lacquer. I haven't got time or money for powder coating on this car so it will have to do.

Posted Image

Posted Image

Posted Image

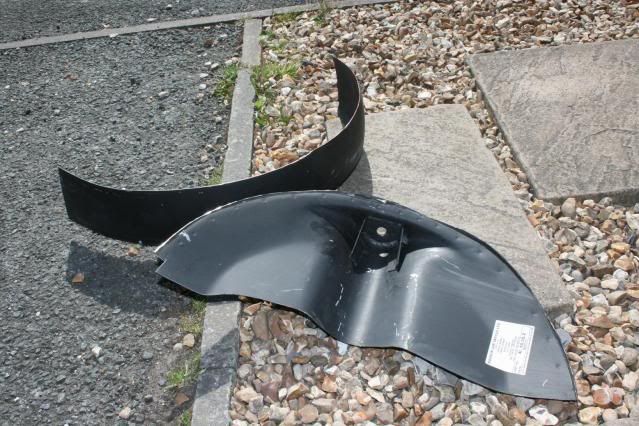
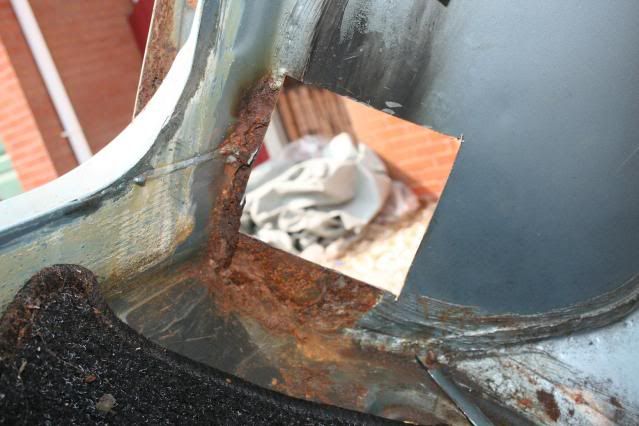
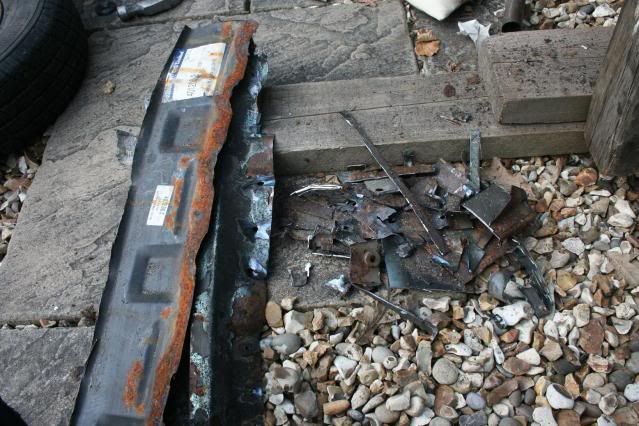
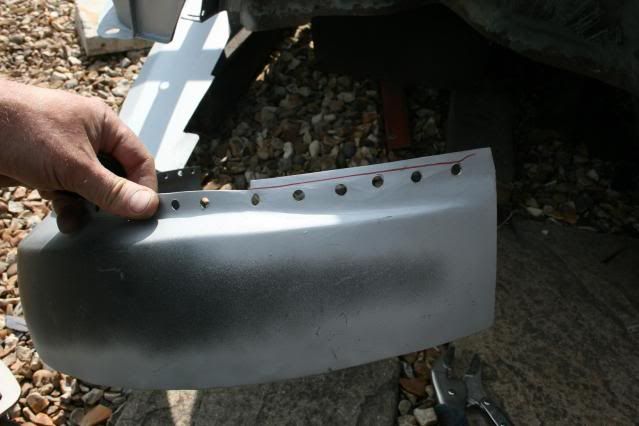
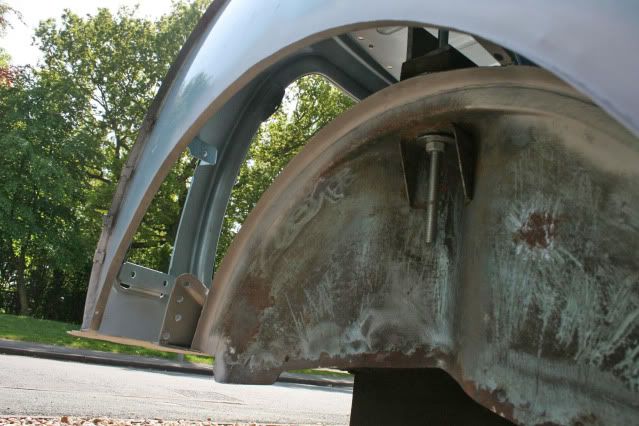
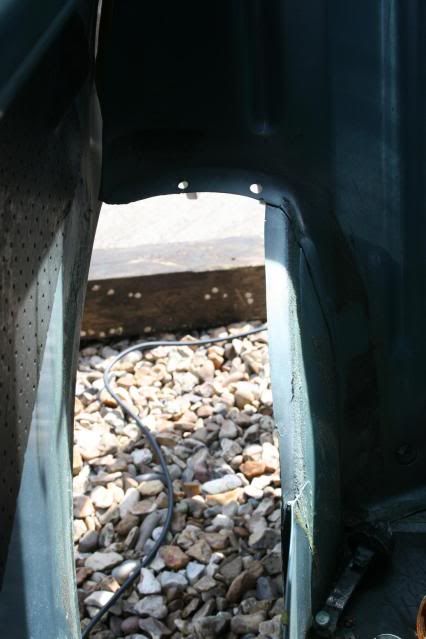
Anyway I cut my pattern wheel arch panel in two as only needed the top section, I know you can get just the top now !!!! So marked the arch to size and cut away for a trial fit.

Posted Image

Posted Image

Posted Image

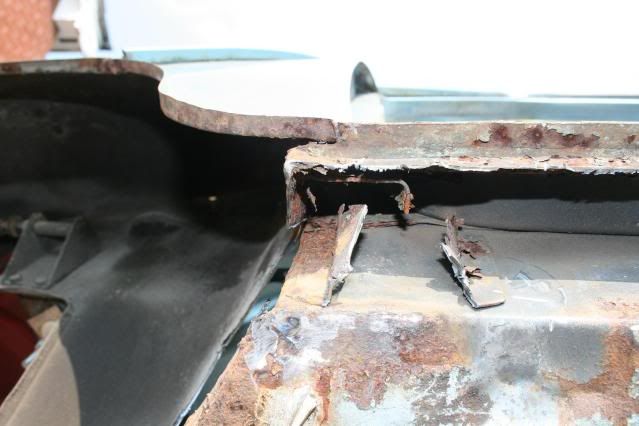
Gaps too big along the very carefully cut line and at the rear there was yet another 1” gap to contend with and the flange didn’t line up either so all in all crap, crap, crap!! With the workshop in full swing and all my fabrication tools out I hammered it and bent it round my knee, as you do, swore a little and two hours later a bit better.

Posted Image

Posted Image

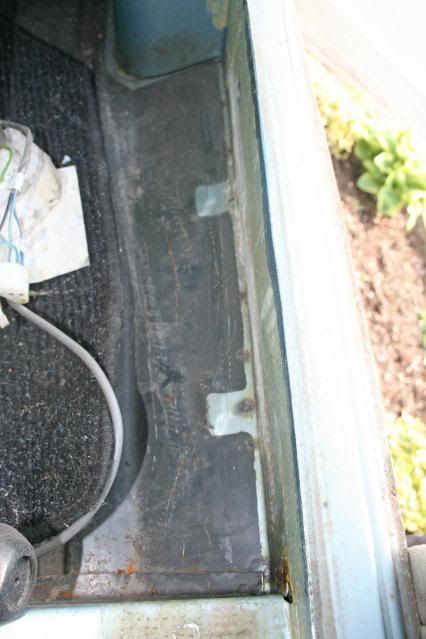
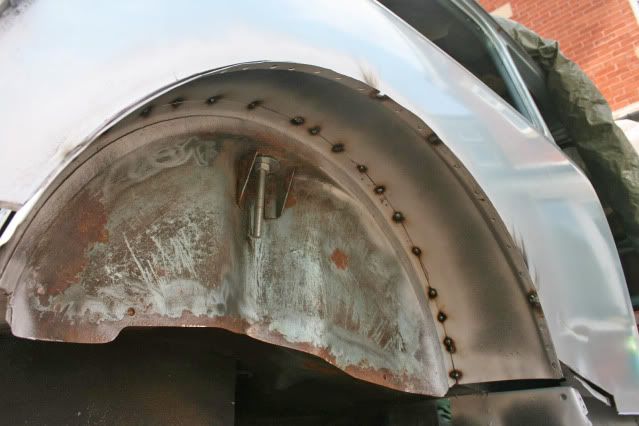
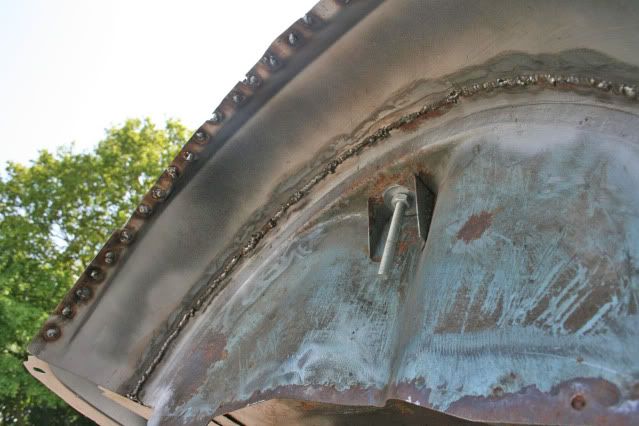
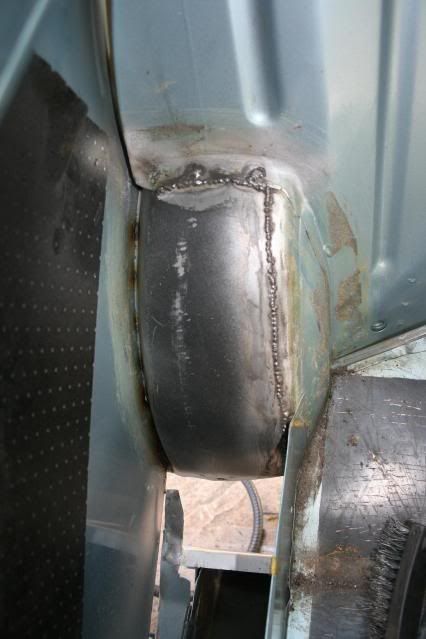
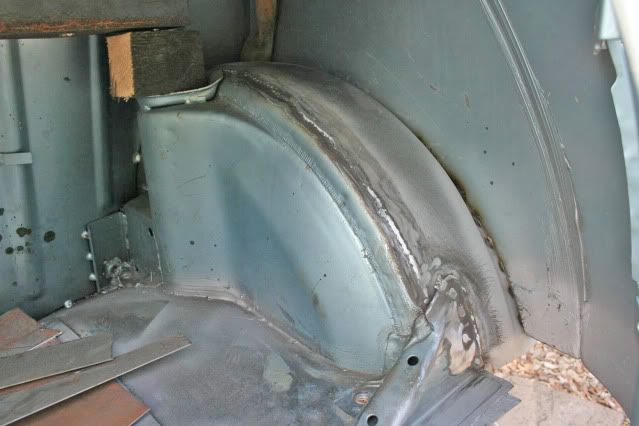
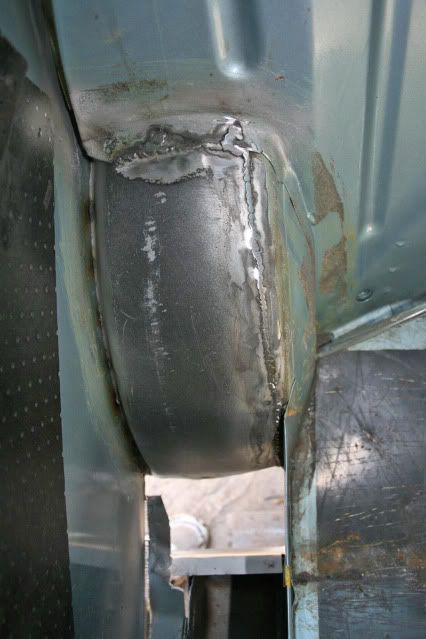
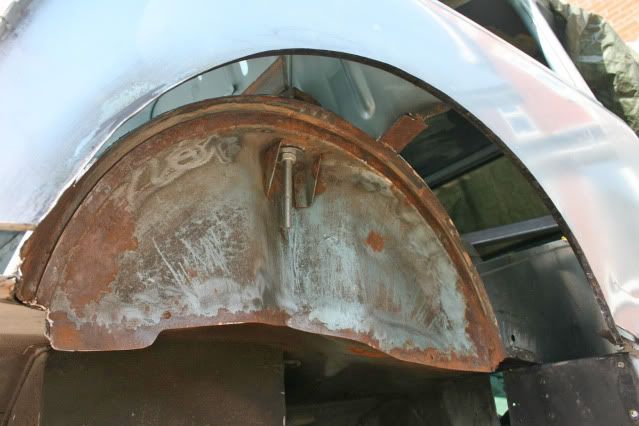
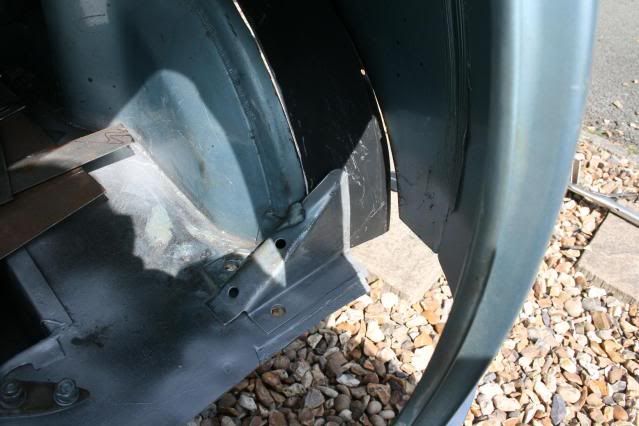
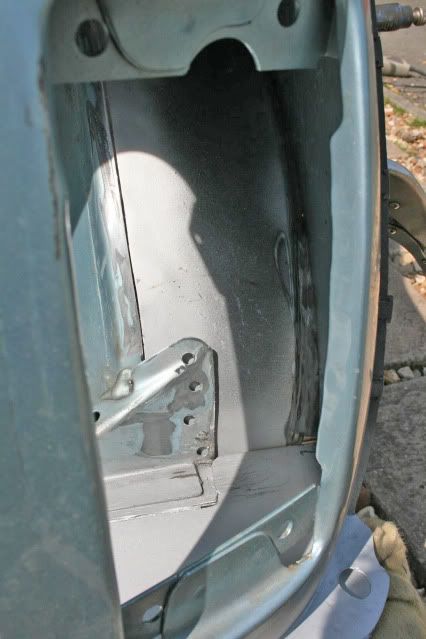
I weld thru primered the inside after cutting free the sub frame mount and drilling a few replacement plug weld holes. Will be putting some extra weld down the sides of the mounts as before for extra strength.

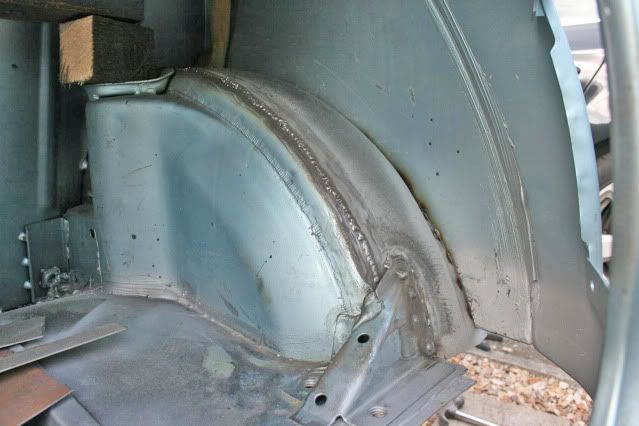
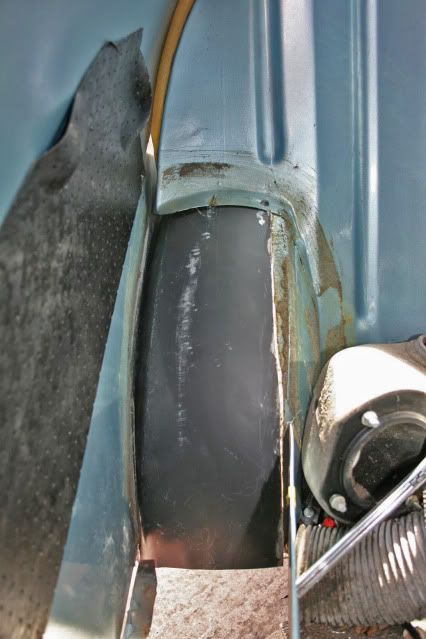
The flange on the rear of the panel didn’t get to the start of the rear quarter section so I had to cut a piece and weld it in.

Posted Image

Posted Image

Posted Image

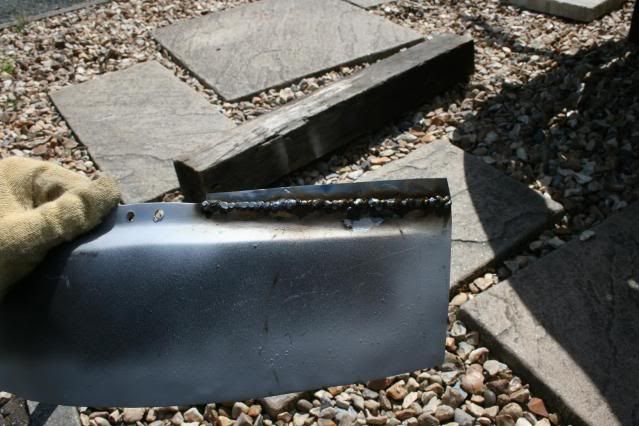
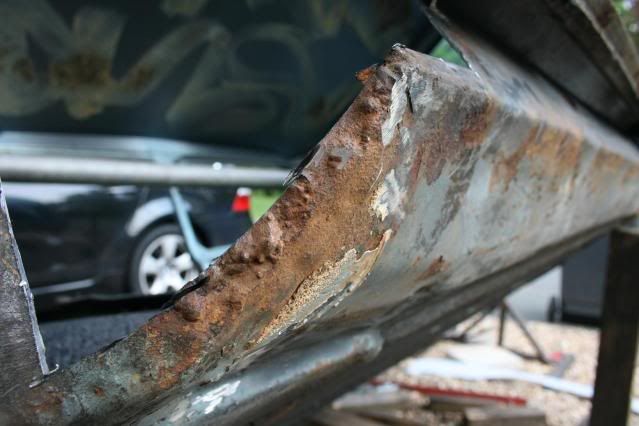
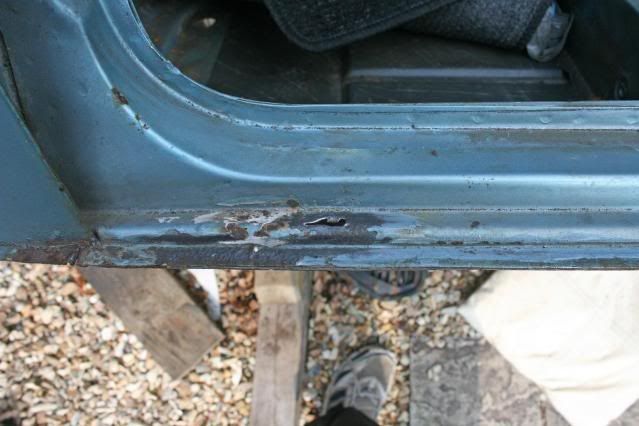
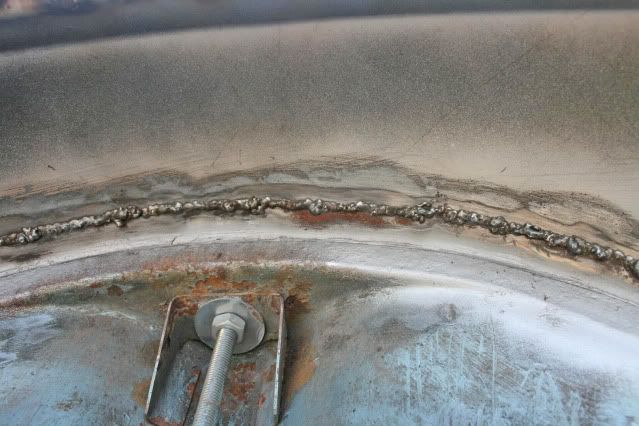
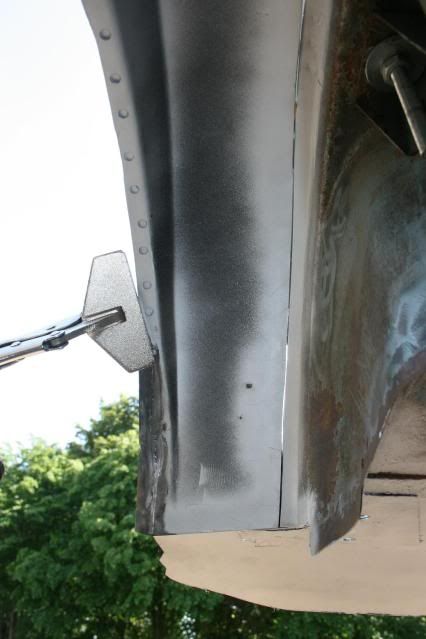
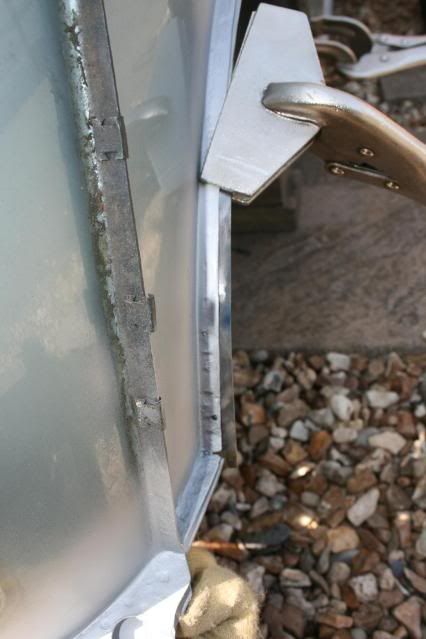
Flap disked this smooth as going to be seen but still not sure about taking welds all the way back, seems sort of wrong to me, but that’s probably my inexperience of weld strength. Gave everything a weld thru primering.

Posted Image

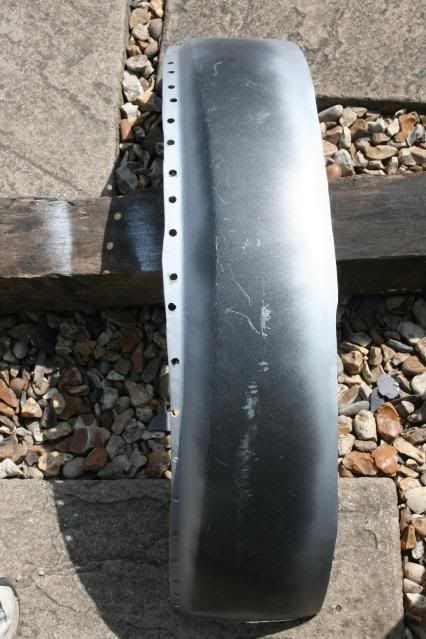
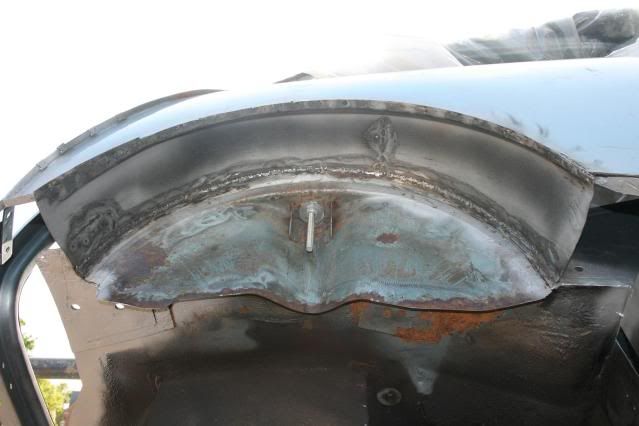
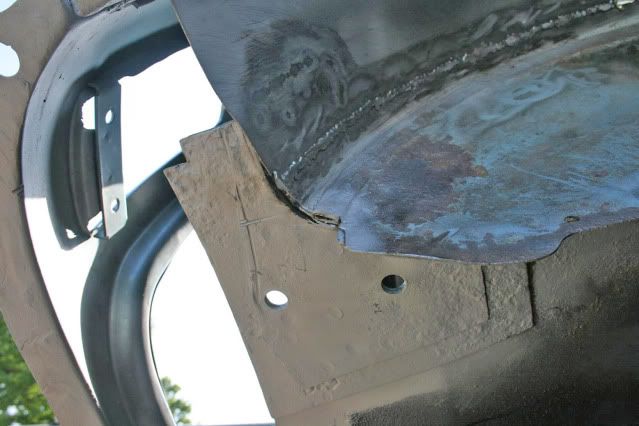
The flange on the pattern part is all over the place if you look carefully, not a good sign but didn’t spot it until I had cut it up! Gave the new section a good fettling all in all with tools, knees and grinder and ended up with something weldable.

Posted Image

Posted Image

Posted Image

Posted Image

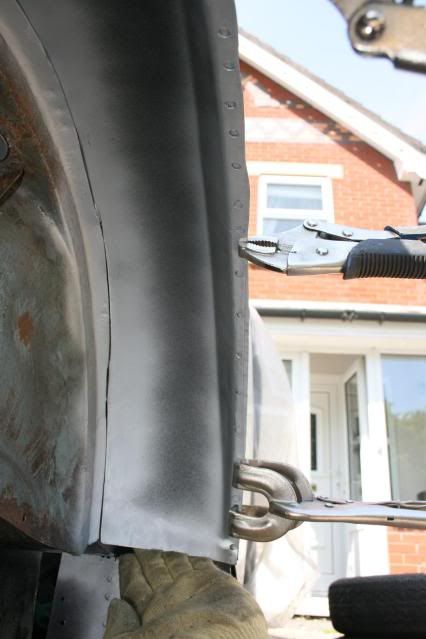
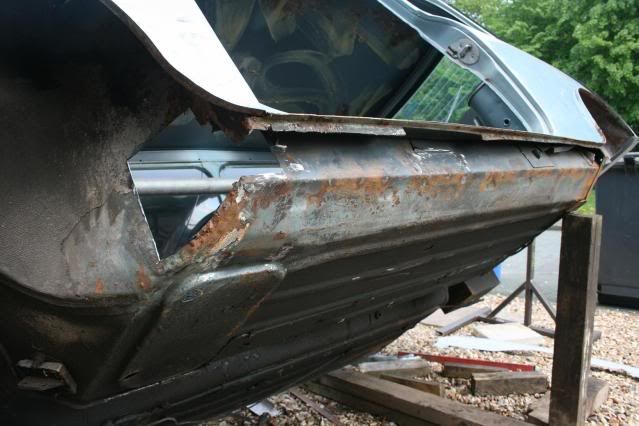
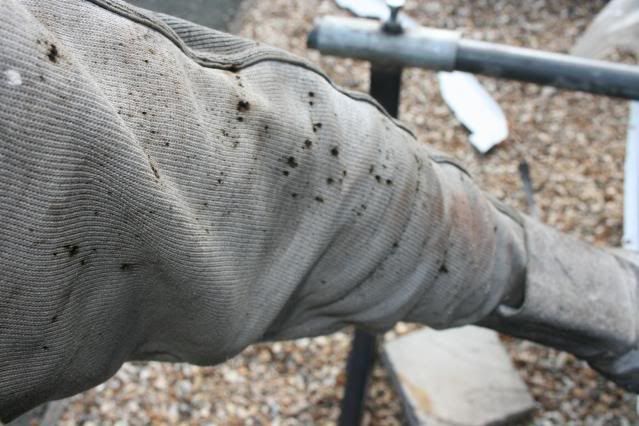
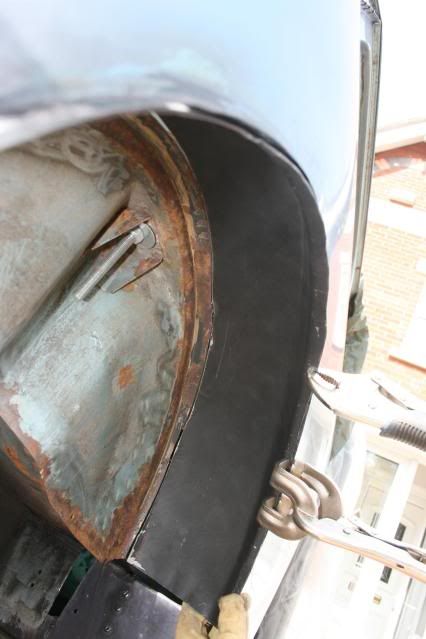
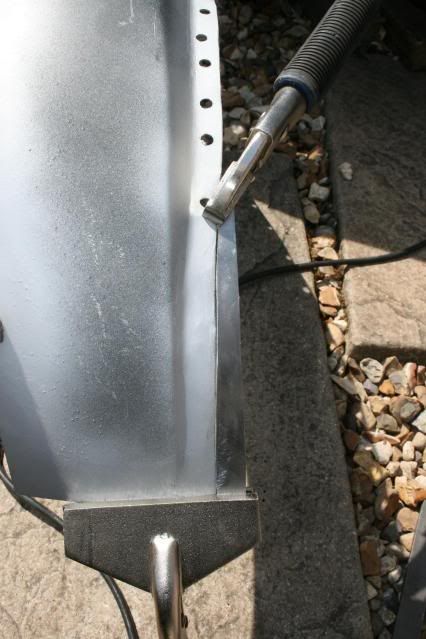
Those with keen eyes will have spotted my gloved hand holding the panel in place at the front, that’s because it’s still a little wonky but only a little pressure required to make it all fit. Matthew will be holding this as I weld it in so the fit is correct. Along the cut line the gap is now correct, for me anyway, so am quite happy.

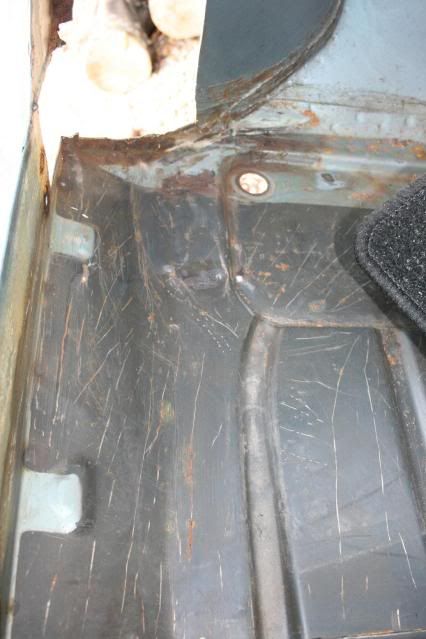
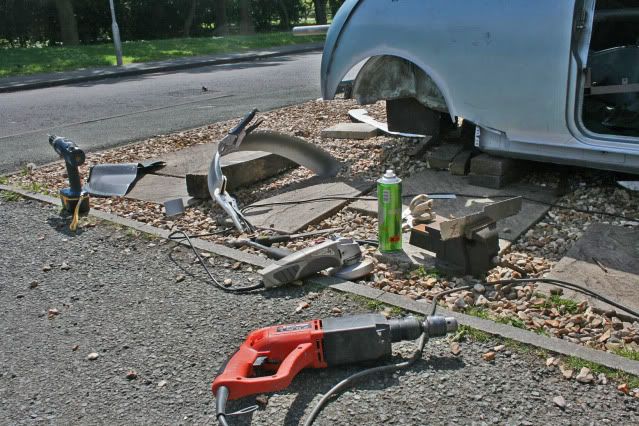
I have been dreading this repair as all inside the arch and didn’t want to put it on the spit to do in case it twisted with the wheel arch cut out, so it ended a cramped 4 hours from start to finish. All in all quite happy with the result I have got and doing the NS repair should now be easier if not quicker as I have a pattern arch panel for there too !

Hope you enjoyed and not too many pics of a small repair !

Graham

Edited by grahama, 04 May 2011 - 02:12 PM.


#143 sonikk4

sonikk4

    Twisted Paint Polisher!!!

  • Admin
  • PipPipPipPipPipPipPipPipPipPipPip
  • 16,034 posts
  • Name: Neil
  • Location: Oxfordshire

Posted 04 May 2011 - 04:20 PM

You've done well with that arch Graham, when i did the l/h one on Erm it was an inch out so go figure. Much application of my large calibrated impact device later, swearing and general head scratching it fitted so you have done well there mate.

I would not worry about powder coating to be honest, even though we have done a lot at least with paint it will be a damn sight easier to touch up.

Are you going to Himley on sunday by the way, if so we could meet up at the TMF stand to put the world to rights.

Neil

Edited by sonikk4, 04 May 2011 - 09:36 PM.


#144 grahama

grahama

    Up Into Fourth

  • Members
  • PipPipPipPipPipPipPipPipPip
  • 2,442 posts
  • Location: Warrington
  • Local Club: None in my area !!

Posted 04 May 2011 - 09:13 PM

Alas no, not this year!! Hopefully will be at some next year when I have a working mini, that's if I can borrow it off MAtt!! Really pleased it came out so well, just got to weld it in now, hopefully tomorrow if I have enough gas.

Graham

#145 minimuk

minimuk

    Camshaft & Stage Two Head

  • Members
  • PipPipPipPipPipPipPipPip
  • 1,946 posts
  • Location: Midlands

Posted 05 May 2011 - 04:45 PM

Graham, did you get the imperial "nut", through the post yet, is it the right one?

#146 grahama

grahama

    Up Into Fourth

  • Members
  • PipPipPipPipPipPipPipPipPip
  • 2,442 posts
  • Location: Warrington
  • Local Club: None in my area !!

Posted 05 May 2011 - 06:12 PM

Not yet, will let you know when it arrives, we are still on carrier pidgeons up North for post, it may be too heavy for them !!

Graham

#147 minimuk

minimuk

    Camshaft & Stage Two Head

  • Members
  • PipPipPipPipPipPipPipPip
  • 1,946 posts
  • Location: Midlands

Posted 05 May 2011 - 06:43 PM

I might have cooked them pigeons, and served with a beetroot salad!!
I am sure yu will get it tmr.

Edited by minimuk, 05 May 2011 - 07:45 PM.


#148 grahama

grahama

    Up Into Fourth

  • Members
  • PipPipPipPipPipPipPipPipPip
  • 2,442 posts
  • Location: Warrington
  • Local Club: None in my area !!

Posted 06 May 2011 - 05:49 PM

Hi all,

this section continued to frustrate me today on the welding front. Firstly my cylinder was nearly on empty and secondly I hate welding upside down !!

Posted Image

Posted Image

I finished off drilling the new flange section for plug welding and tacked it in, this went ok but my welder was throwing a wobbler today, producing loads of spatter, even though lots of gas comming out and an electric noise rather than a sizzling noise !!! Any ideas ??

Posted Image

Posted Image

Posted Image

The welding today had lots of blow throughs and bits dropping all over my arms, which now have several small burns on them ! The top welds were done pretty much upside down as were some of the plugs. They are strong enough considering it is only a wheel arch but I decided to seam weld the other side too just to make sure as these would need a dressing down.

Posted Image

Posted Image

Doing the double seam where I can gives me some scope to dress down the welds a little further for me to neaten them up. These have not been my best welds, but when I blew through I just turned the power down, blobbed some weld in and turned the power back up and went over. That's my technique anyway and it seems to do well for me.

Posted Image

Posted Image

Posted Image

I also plug welded the rear subframe mount back onto the arch but as with this panel it didn't meet so I had to a large blunt fabrication tool to get it in place ! Also on the rear bin inside a couple of plug welds as before.

Posted Image

One thing I will have to do besides the closing plate from heel board to arch is a plate over the layers of boot strengthening panel around the subframe mount or it will simply rust away quickly. I was thinking of plug welding a plate onto the existing plates and folding it up into the arch and plug and seaming it to seal it, if you know what I mean ??

Anyway, off to Spain for a few days so all wrapped up till next week .

Graham

#149 ryanill

ryanill

    Stage One Kit Fitted

  • Noobies
  • PipPipPip
  • 90 posts

Posted 06 May 2011 - 05:58 PM

just read this thread!
impresive work mate good luck with the rest of the rebuild looks like its all under controle to me !

#150 grahama

grahama

    Up Into Fourth

  • Members
  • PipPipPipPipPipPipPipPipPip
  • 2,442 posts
  • Location: Warrington
  • Local Club: None in my area !!

Posted 06 May 2011 - 06:26 PM

I'm like a swan with this rebuild, calm on the surface but legs going like the clappers underneath !!!


2 user(s) are reading this topic

0 members, 2 guests, 0 anonymous users