Great project, keep up the good work.


Mini Virgin Rebuild Of 83 Mayfair.
Started by
grahama
, May 22 2010 05:09 PM
1006 replies to this topic
#121

jagman.2003
-

- Members
-

- 1,307 posts
One Carb Or Two?
- Location: In the shed.
- Local Club: Owner of my own club of Minis
Posted 06 April 2011 - 07:21 AM
#122
grahama
-
- Members
-
- 2,442 posts
Up Into Fourth
- Location: Warrington
- Local Club: None in my area !!
Posted 06 April 2011 - 06:57 PM
Hi all,
thought I'd make up for lost time today so shipped all the tools outside and then the grinder packed up, an essential tool as you all knoe so packed up and went to get another, ahhhhhhhhhh.
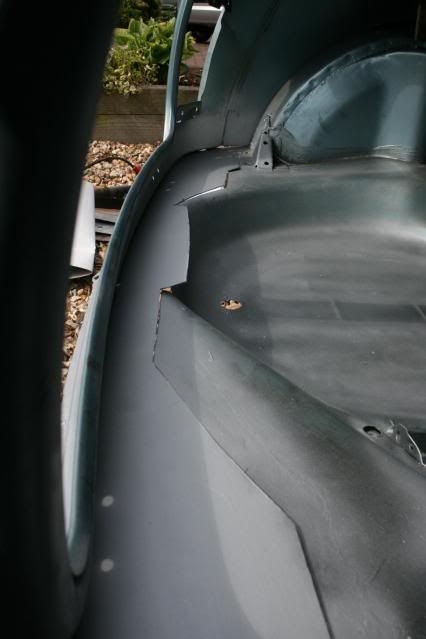
Took everything outside again and trial fitted the heelboard to arch closing plate I made yesterday.
This will need some fettling to get a good fit but will wait till I am doing the wheel arch, which needs a patch on the outside as the rest looks fine.
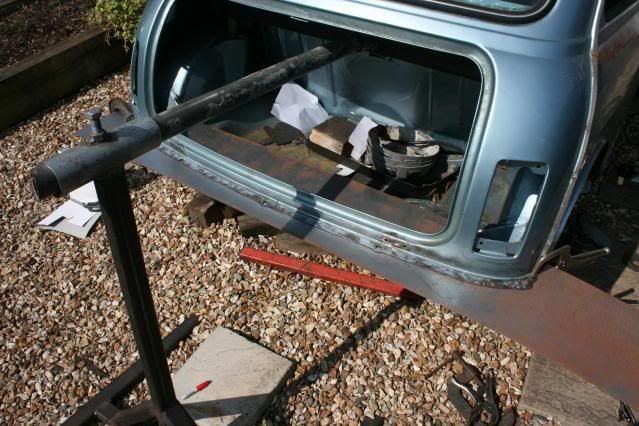
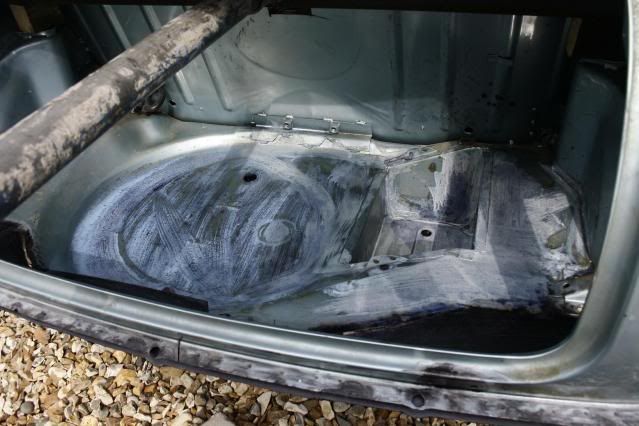
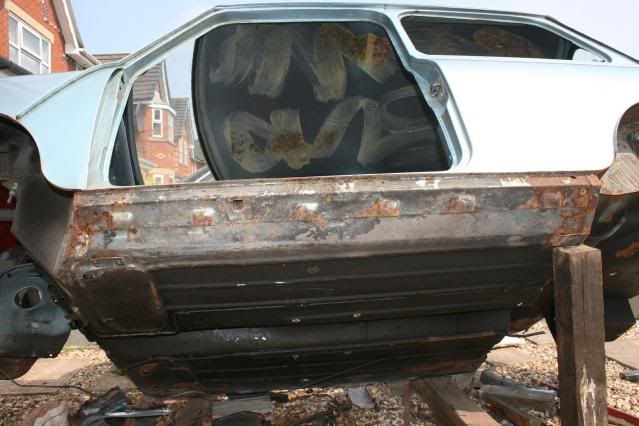
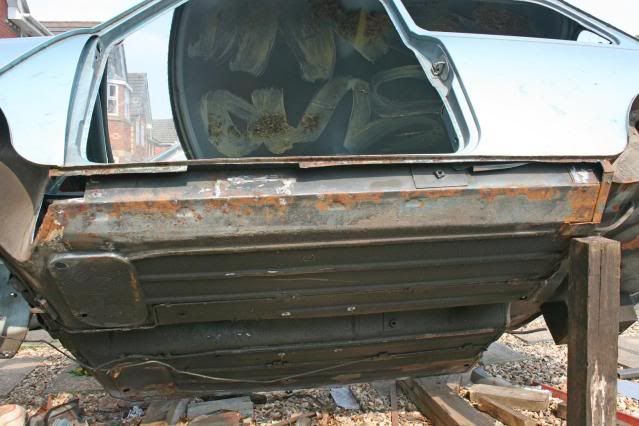
This will need a full width bit both ends so off came the valance to reveal my mint boot floor, errr, no !!!
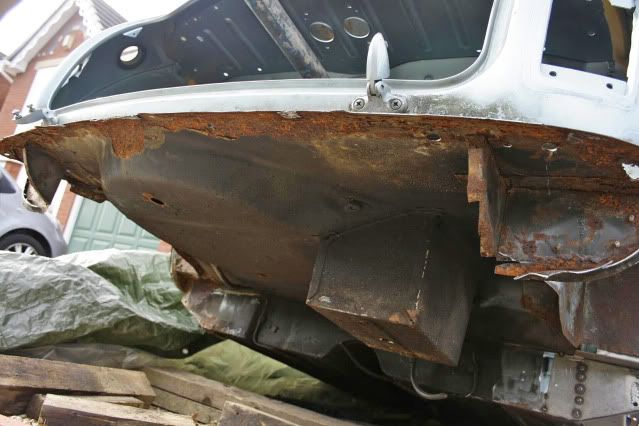
Had a stab around with a screwdriver and through it went. Most is fine but the under valance section is shot, The corners I knew needed a patch each so I will just get a half boot floor section and fit straight across.

The three layers of metal and rust made drilling spot welds out impossible so grinder it was, got about half the double layer off to reveal a good boot hinge section so not all bad.
Work tomorow so a couple of days off, but will comtinue cleaning stuff up and painting as it feels asthough I am making progress when things get painted !!
Regards,
Graham
thought I'd make up for lost time today so shipped all the tools outside and then the grinder packed up, an essential tool as you all knoe so packed up and went to get another, ahhhhhhhhhh.
Took everything outside again and trial fitted the heelboard to arch closing plate I made yesterday.
This will need some fettling to get a good fit but will wait till I am doing the wheel arch, which needs a patch on the outside as the rest looks fine.
This will need a full width bit both ends so off came the valance to reveal my mint boot floor, errr, no !!!
Had a stab around with a screwdriver and through it went. Most is fine but the under valance section is shot, The corners I knew needed a patch each so I will just get a half boot floor section and fit straight across.
The three layers of metal and rust made drilling spot welds out impossible so grinder it was, got about half the double layer off to reveal a good boot hinge section so not all bad.
Work tomorow so a couple of days off, but will comtinue cleaning stuff up and painting as it feels asthough I am making progress when things get painted !!
Regards,
Graham
#123
remi
-

- Members
-
- 154 posts
Mini Mad
Posted 06 April 2011 - 07:14 PM
My rear is in a very similar state, i keep putting off learning but il keep a close eye on your next few posts and how you go about repairing it all.... so plenty of pictures please 
keep up the good work
keep up the good work
#124
hughJ
-

- Members
-
- 727 posts
Soldiering Along
- Location: Highlands, Scotland
Posted 20 April 2011 - 08:42 PM
Hi Graham
Your work's going great and looks great! You are tackling some pretty tricky jobs. What amazes me is your car, or your son's car, looked very nice in the early pictures. Yet under it all is this terrible rust. At least mine looked really rusty! Keep up the good work. Hope the decking goes well and the wife is happy.
Best wishes - Hugh
#125
MINI-TURBO
-
- Members
-
- 230 posts
Mini Mad
- Location: newmarket
Posted 21 April 2011 - 02:56 PM
it coming along realy well.  i bet you cant wait until it 100% rust free lol
i bet you cant wait until it 100% rust free lol
#126
grahama
-
- Members
-
- 2,442 posts
Up Into Fourth
- Location: Warrington
- Local Club: None in my area !!
Posted 22 April 2011 - 02:23 PM
Hi all,
progress over the last few days on the decking front meant I could do some on the mini today so i did !!
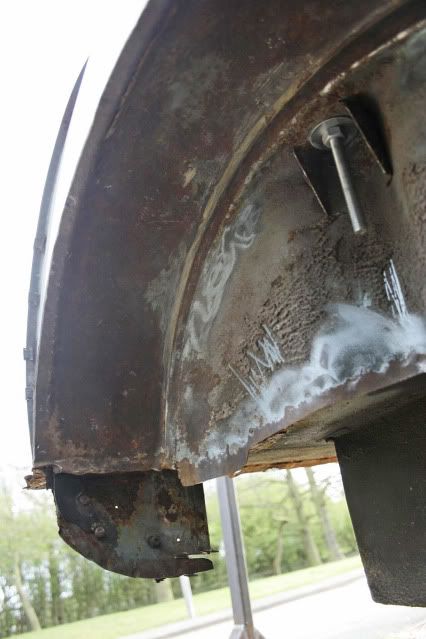
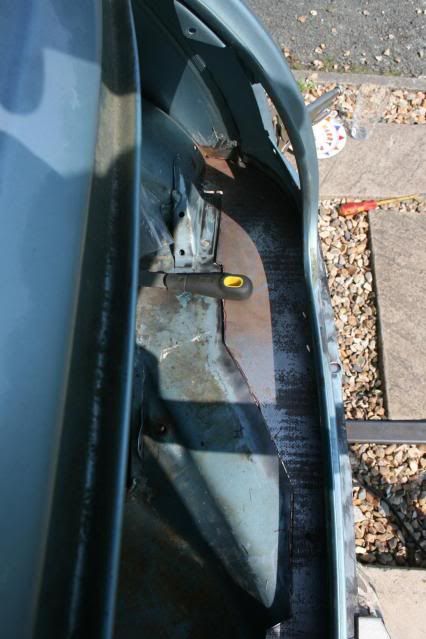
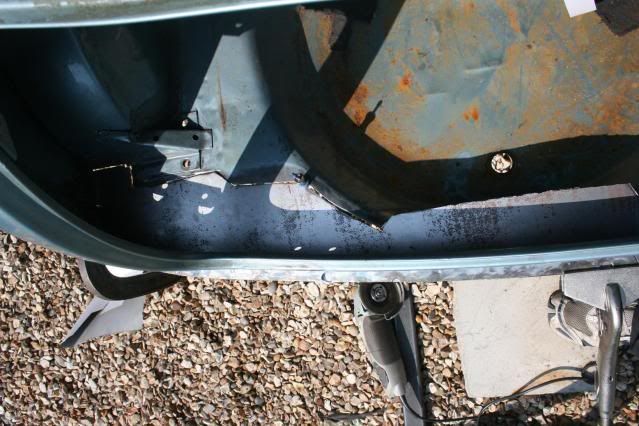
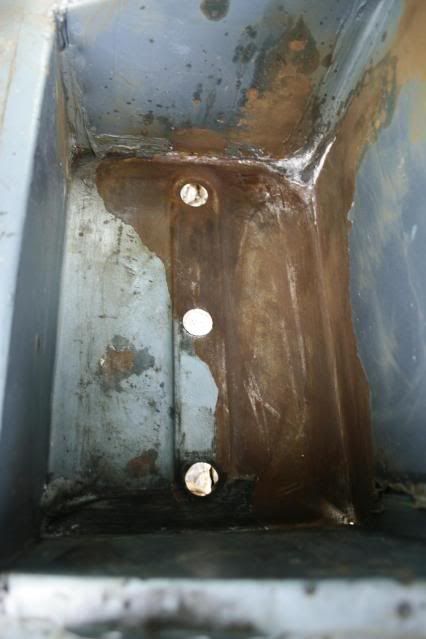
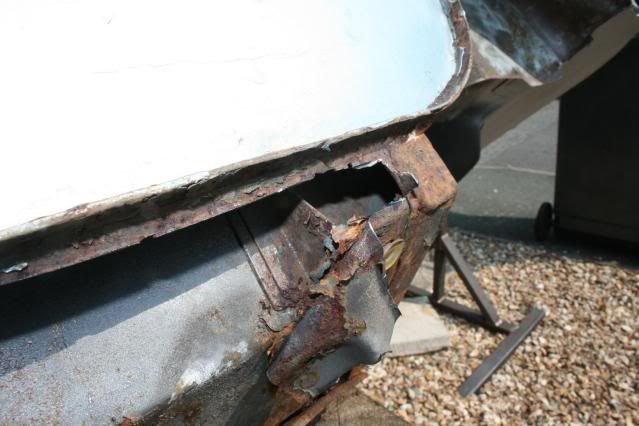
The corners had similar rot so I cut it out to good metal and fortunately the subframe mounts were ok so left them in place.
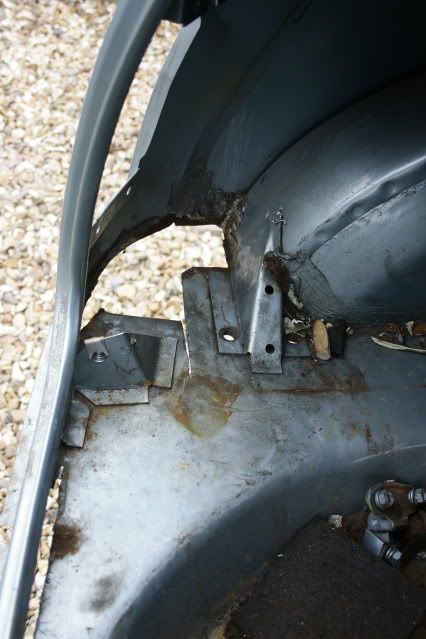
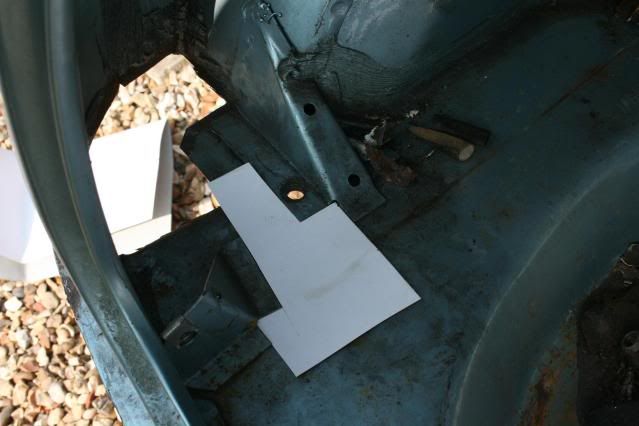
I ground the layers of metal down to the hinge panel and after hours it was free and in good nick. The rot cut out of the corners I had to make a template for the petral tank mounting strap bracket to be re positioned when the new floor is in.
Cut all the bad metal out and under the subframe mounts were three layers of metal, one the boot floor and the other two strengthening plates I guess. I took up the boot floor from the plates so I can plug weld the floor there as before. This will also make the whole joint in the corner stronger so glad I took the time to do it.
To get to here has taken me two half days of grinding and a quarter day cutting carefully, way longet thanI expected. The boot area was supposed to be the easy bit !! Anyway more mini bit the dust and headed for the recycling bin.
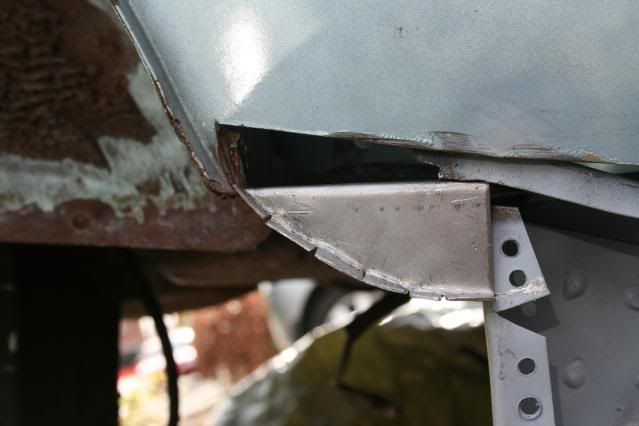
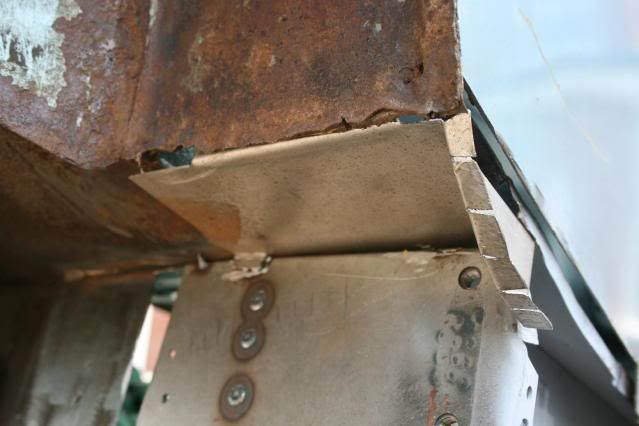
Time for some more basic fabrication, I say basic as anything more and my limited toolbox would throw in the towel. The metal has been stored inside and still it rusts, ahhhhhhhhhhhhhhh, will I ever be rust free ?? Clamped the new boot floor in place and drew round the hinge panel and cut away section for the new bit.
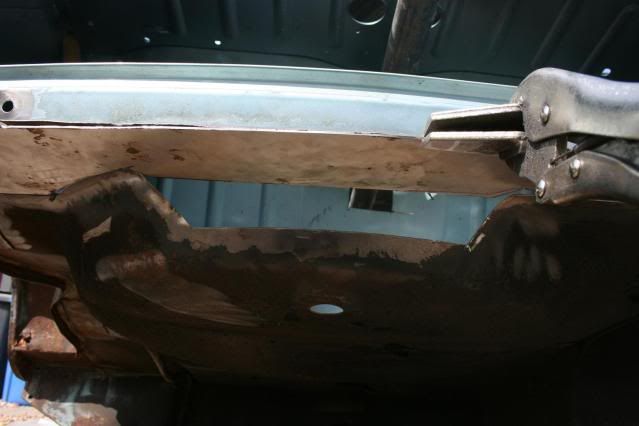
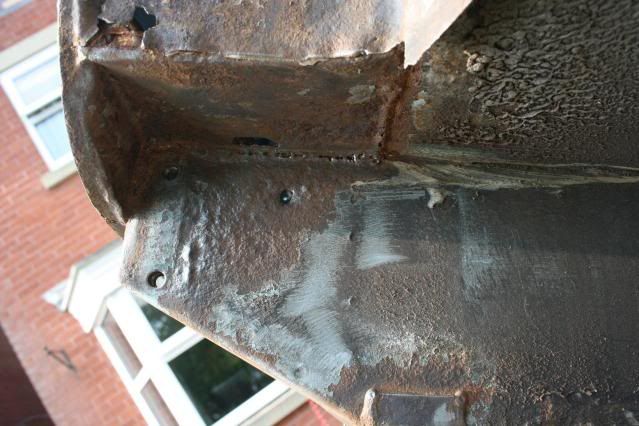
Cut out with the grinder I test fitted it and shaved bits off here and there to get a good fit. I have a couple of areas where the gap is larger than I would have liked but I can easily sort this out. Under the floor panel is the spare wheel area which I will piece in when this is all in correctly, which brings me onto my problem in this area!!
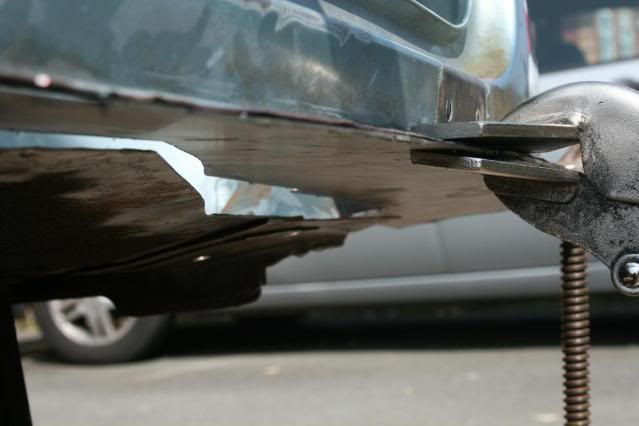
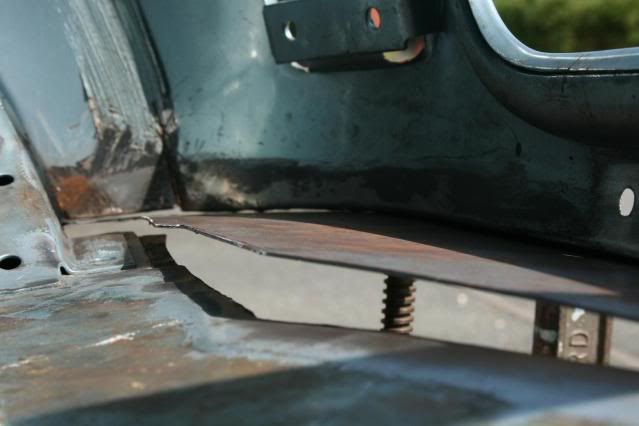
The hinge panel is sloping towards the ground and the boot floor seems to be sloping towards the floor to creating a small angle inbetween the two. I think have to put a bend into the panel I have made at the inner edge of the hinge panel to get it to fit well. As you can see with the panel clamped to the hinge panel flush for plug welding the gap can be seen. Is the bend the correct thing to do or does the hinge panel flange need to be straighter allowing the panel to meet the boot floor or should I just buy a boot floor section !!!
Hope you enjoyed,
Graham
progress over the last few days on the decking front meant I could do some on the mini today so i did !!
The corners had similar rot so I cut it out to good metal and fortunately the subframe mounts were ok so left them in place.
I ground the layers of metal down to the hinge panel and after hours it was free and in good nick. The rot cut out of the corners I had to make a template for the petral tank mounting strap bracket to be re positioned when the new floor is in.
Cut all the bad metal out and under the subframe mounts were three layers of metal, one the boot floor and the other two strengthening plates I guess. I took up the boot floor from the plates so I can plug weld the floor there as before. This will also make the whole joint in the corner stronger so glad I took the time to do it.
To get to here has taken me two half days of grinding and a quarter day cutting carefully, way longet thanI expected. The boot area was supposed to be the easy bit !! Anyway more mini bit the dust and headed for the recycling bin.
Time for some more basic fabrication, I say basic as anything more and my limited toolbox would throw in the towel. The metal has been stored inside and still it rusts, ahhhhhhhhhhhhhhh, will I ever be rust free ?? Clamped the new boot floor in place and drew round the hinge panel and cut away section for the new bit.
Cut out with the grinder I test fitted it and shaved bits off here and there to get a good fit. I have a couple of areas where the gap is larger than I would have liked but I can easily sort this out. Under the floor panel is the spare wheel area which I will piece in when this is all in correctly, which brings me onto my problem in this area!!
The hinge panel is sloping towards the ground and the boot floor seems to be sloping towards the floor to creating a small angle inbetween the two. I think have to put a bend into the panel I have made at the inner edge of the hinge panel to get it to fit well. As you can see with the panel clamped to the hinge panel flush for plug welding the gap can be seen. Is the bend the correct thing to do or does the hinge panel flange need to be straighter allowing the panel to meet the boot floor or should I just buy a boot floor section !!!
Hope you enjoyed,
Graham
#127
hughJ
-
- Members
-
- 727 posts
Soldiering Along
- Location: Highlands, Scotland
Posted 22 April 2011 - 06:17 PM
Graham, as usual your work looks so tidy. I can't advice as you know!! I would probably buy the panel. If I had to make it I would do it in sections and weld them together. I could never bend and panel beat into the right shape. You seem very skilled with your hands so maybe you could do it. Keep us informed. It would certainly be more interesting if you fabricated the whole piece!
Hugh
Hugh
#128
grahama
-
- Members
-
- 2,442 posts
Up Into Fourth
- Location: Warrington
- Local Club: None in my area !!
Posted 22 April 2011 - 09:09 PM
Hugh,
that sounds like a challenge to me !!! Will give it a go, but panel manufacturers will be on speed dial !!!
Graham
ps, it doesn't look so neat close up, weld will hide any little errors, and my outside workshop is anything but tidy
that sounds like a challenge to me !!! Will give it a go, but panel manufacturers will be on speed dial !!!
Graham
ps, it doesn't look so neat close up, weld will hide any little errors, and my outside workshop is anything but tidy
#129
JustSteve
-
- Members
-
- 1,883 posts
Puke-Boy!!
- Location: Long Eaton, Nottingham
Posted 23 April 2011 - 02:02 PM
Hey Graham, as you know, I'm also a beginer in a similar position to you.
I know I'm not an expert but thought I'd share my opinion on the boot floor.
I wouldn't bother with a proper panel, I would go with what you have. The problem is that the seam is not at 90 degrees. I would first weld it up inside the boot and leave the seam till last, welding it as the three pieces together, rear panel, boot floor and valance. The reason for that is to get the boot straight, however the three seams will not match... BUT when you clamp them together to weld, they will follow the average shape.
I'm sorry if that didn't make sense, I'm rubbish with words (took me 3 attempts to pass GCSE English language)
E.g of my logic: ( 3* + 3* + 0* ) / 3 = 2* <- so the seam would end up at a slightly lesser angle, but leaving the boot straight.
I know I'm not really in any position to tell you what is right or wrong, but thats how I see it.
Also, good work!
Steve.
#130
vincent300
-

- Noobies
-
- 100 posts
Mini Mad
Posted 23 April 2011 - 03:45 PM
awesome work man! I am aslo contemplating geting a new boot floor, or having a go repairing it.
#131
grahama
-
- Members
-
- 2,442 posts
Up Into Fourth
- Location: Warrington
- Local Club: None in my area !!
Posted 23 April 2011 - 07:06 PM
Thanks for the comments.
Steve, I get what you are saying but I think I will have to weld the three seams separately, hinge seam to boot floor then floor to vallance so will have to do it in staes. The slope on the hinge panel if it is correct can be accomodated quite easily really so will press on. I am going to do the boot floor them wheel arches and leave the vallance till near the end.
Thanks again,
Graham
#132
JustSteve
-
- Members
-
- 1,883 posts
Puke-Boy!!
- Location: Long Eaton, Nottingham
Posted 23 April 2011 - 09:01 PM
Sorry Graham, but I don't understand why you can't do it together?
#133
grahama
-
- Members
-
- 2,442 posts
Up Into Fourth
- Location: Warrington
- Local Club: None in my area !!
Posted 24 April 2011 - 06:38 AM
the three seams were spot welded on so I was going to plug weld them along th length. I, in my novice state still, am presuming I can only plug weld two thicknesses at once then add the next layer. Were you thinking of just welding along the edge seam of all three??
#134
JustSteve
-
- Members
-
- 1,883 posts
Puke-Boy!!
- Location: Long Eaton, Nottingham
Posted 24 April 2011 - 06:15 PM
I did question that issue when learning to weld and have been assured all three can been plug welded at once ( I.e hole in top two, no hole in bottom)
#135
grahama
-
- Members
-
- 2,442 posts
Up Into Fourth
- Location: Warrington
- Local Club: None in my area !!
Posted 29 April 2011 - 06:11 PM
Hi all,
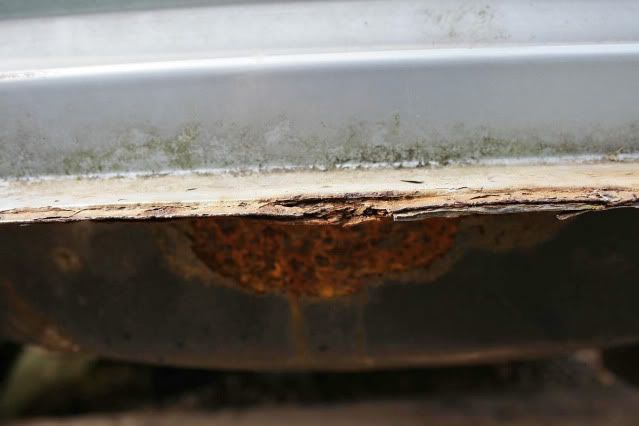
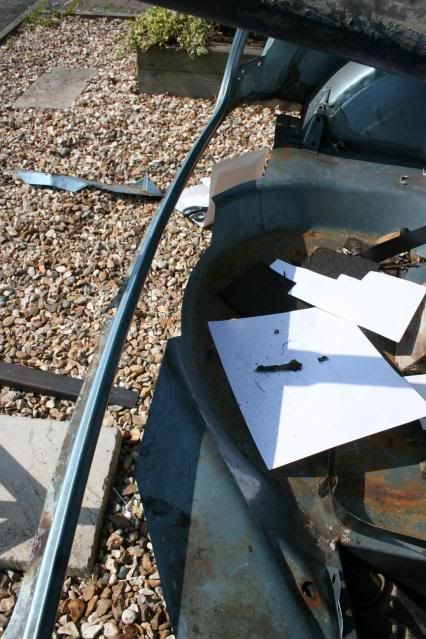
Had a couple of days on the mini, especially today with the royal wedding on !! Had some good and some frustrating bits and on absolute belting find, (only a mini so not too exciting tho !! )
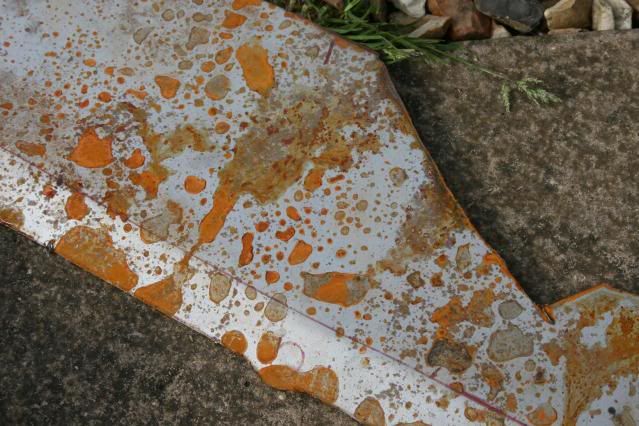
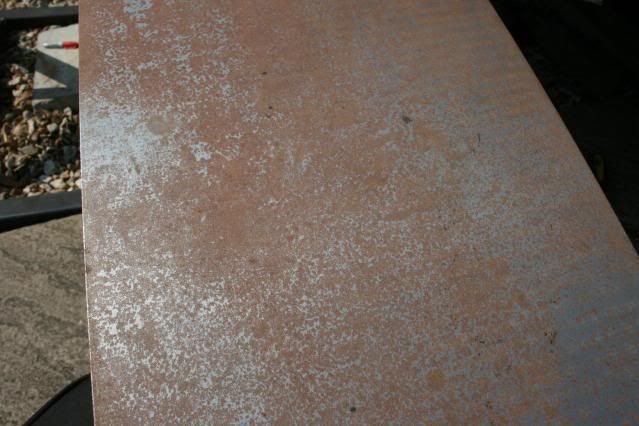
The only night of rain we have had recently produced a load of surface rust on my new boot panel, honestly will there ever be a min I with no rust on when steel does this !!

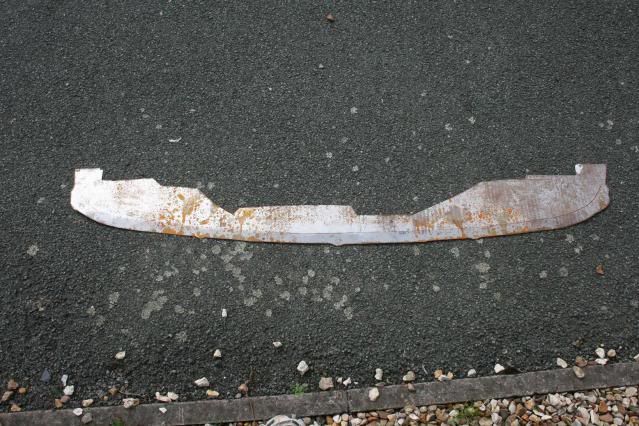
I decided not to force the panel to join up to the boot floor so I put a relief bend in the section that will be plug welded to the hinge panel flange. I also gave it a liberal coating of kurust and some weld through primer.
The boot floor had also suffered at the hands of the elements so I gave that a scotch cleaning, kurusting and prime too.

The battery box was also a little crusty, surface rust only so again, a clean, kurust and a prime to keep the tin worm at bay !!
Anyway today I had my coffee, bit of my dark chocky easter egg, and watched the drivel on tv that was the commentary from women about who had the best hat !! So outside I went, lol,
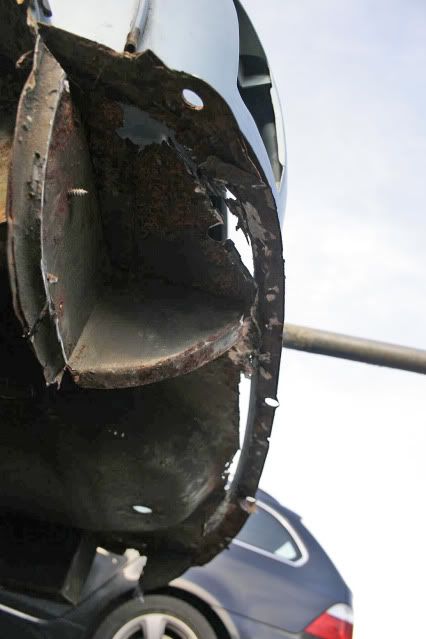
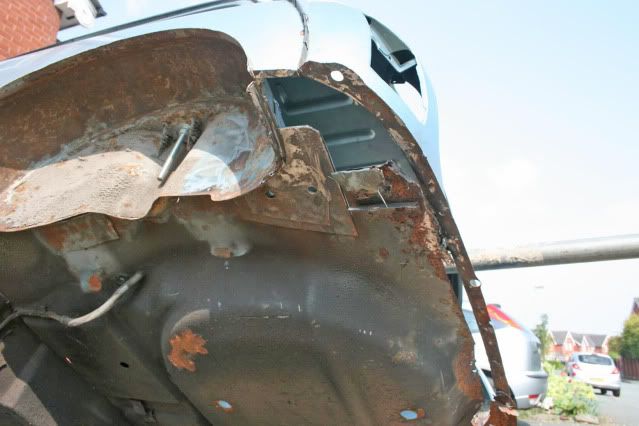
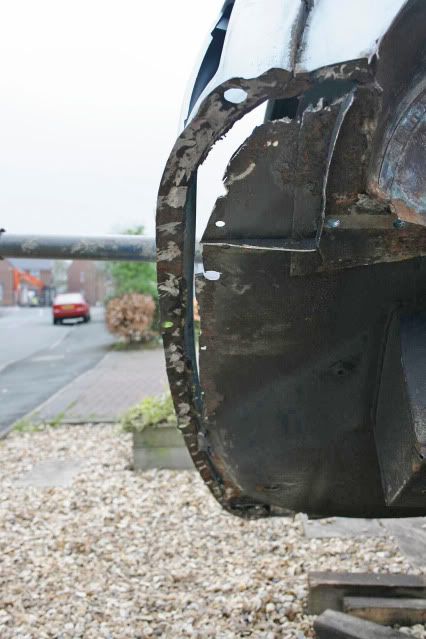
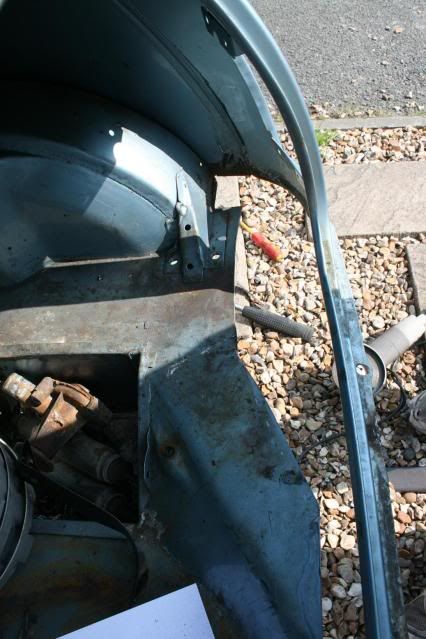
The wheel arch had been giving me problems. I have found out that the rear quarter panel to arch joint had beel roller welded and spot welded by the sound of it and as such took me an age to grind the rear quarter panel free from the arch.
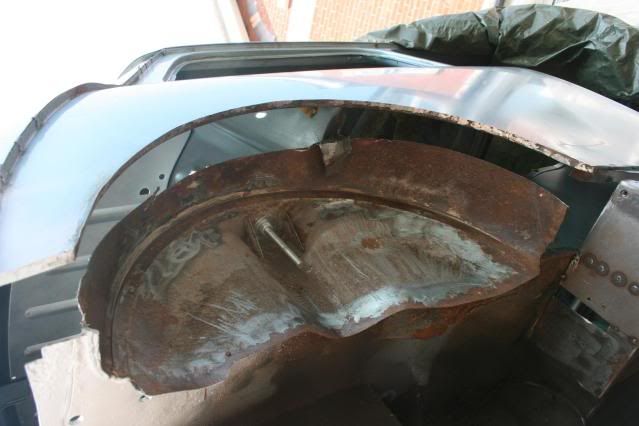
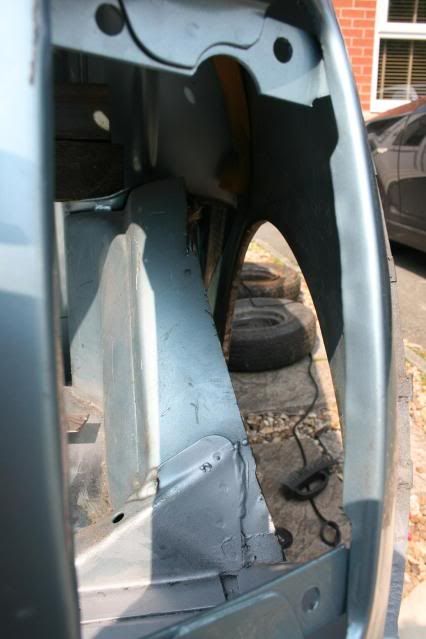
I have replacement arch panels but the shop gave me two identical panels labelled up wrong so I have to take one back so left t there for now. Don’t want to weld the wrong one in !!
On to the next area. NS sill, what delights have I got behind there?? Answer none, weh hey, ( that was the surprise by the way ! ).

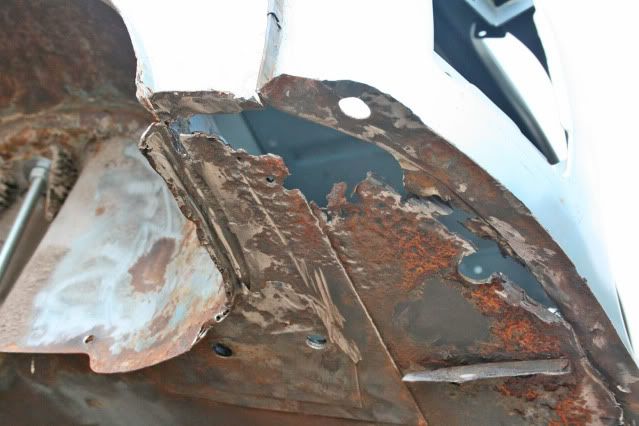
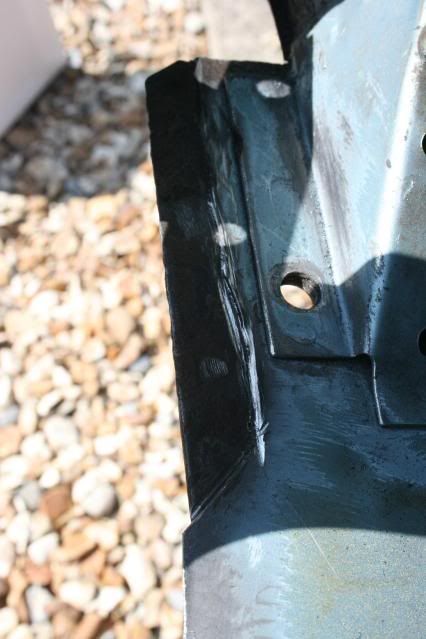
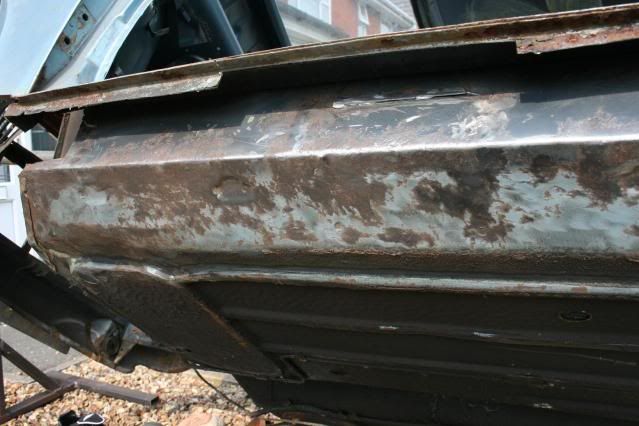
So off it came and I was gobsmacked to find it not too bad behind the sill. As I dug and dug the good inner sill appeared before my eyes. It doesn’t even need a patch the metal is so good. Except at the flitch area where it needs a small bit.
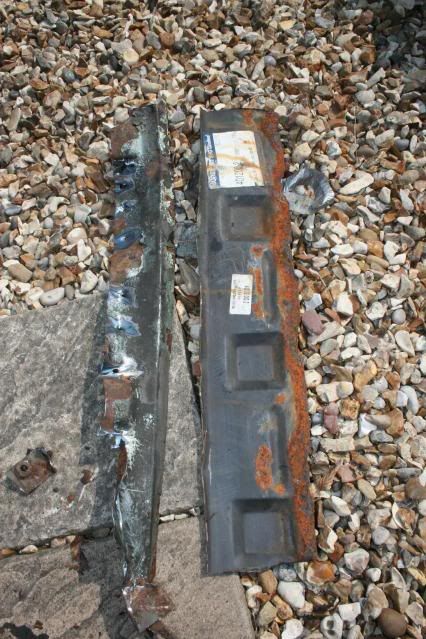
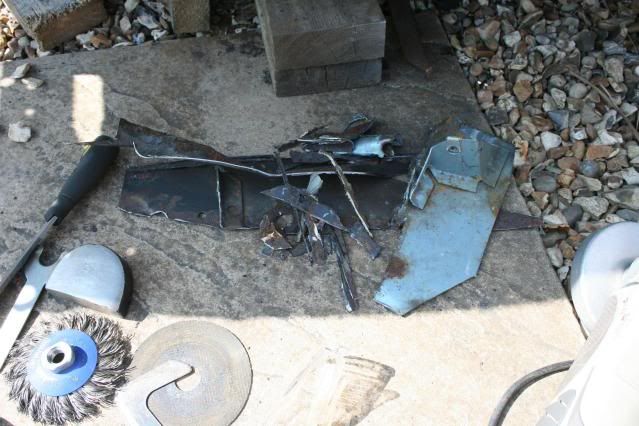
These are the two sills, larger from the OS, a repair and produced loads of rust and problems, the thinner sill is from NS and it all looks original, neat spot welds, no extra weld at the edge of the outer sill, think I have been very lucky. The clock said 10k on the clock but I thought too good to be true but you can’t argue about the originality of things. Engine does look longer in the tooth than that though so still not sure.
I gave the inner sill a good wire wheel going over and a kurust for the surface rust and it came up a treat. Looking inside the subframe mounts was a surprise, so different from the OS, perfect but the otherside needs a patch !!!
Carry on to next post, too many pics !!
Had a couple of days on the mini, especially today with the royal wedding on !! Had some good and some frustrating bits and on absolute belting find, (only a mini so not too exciting tho !! )
The only night of rain we have had recently produced a load of surface rust on my new boot panel, honestly will there ever be a min I with no rust on when steel does this !!
I decided not to force the panel to join up to the boot floor so I put a relief bend in the section that will be plug welded to the hinge panel flange. I also gave it a liberal coating of kurust and some weld through primer.
The boot floor had also suffered at the hands of the elements so I gave that a scotch cleaning, kurusting and prime too.
The battery box was also a little crusty, surface rust only so again, a clean, kurust and a prime to keep the tin worm at bay !!
Anyway today I had my coffee, bit of my dark chocky easter egg, and watched the drivel on tv that was the commentary from women about who had the best hat !! So outside I went, lol,
The wheel arch had been giving me problems. I have found out that the rear quarter panel to arch joint had beel roller welded and spot welded by the sound of it and as such took me an age to grind the rear quarter panel free from the arch.
I have replacement arch panels but the shop gave me two identical panels labelled up wrong so I have to take one back so left t there for now. Don’t want to weld the wrong one in !!
On to the next area. NS sill, what delights have I got behind there?? Answer none, weh hey, ( that was the surprise by the way ! ).
So off it came and I was gobsmacked to find it not too bad behind the sill. As I dug and dug the good inner sill appeared before my eyes. It doesn’t even need a patch the metal is so good. Except at the flitch area where it needs a small bit.
These are the two sills, larger from the OS, a repair and produced loads of rust and problems, the thinner sill is from NS and it all looks original, neat spot welds, no extra weld at the edge of the outer sill, think I have been very lucky. The clock said 10k on the clock but I thought too good to be true but you can’t argue about the originality of things. Engine does look longer in the tooth than that though so still not sure.
I gave the inner sill a good wire wheel going over and a kurust for the surface rust and it came up a treat. Looking inside the subframe mounts was a surprise, so different from the OS, perfect but the otherside needs a patch !!!
Carry on to next post, too many pics !!


4 user(s) are reading this topic
0 members, 2 guests, 0 anonymous users
-
Bing (2)


