Am reusing mine as in quite good nick, have read if you have a good 'pull / s;ide' on the spindle through the bushes all is ok, new spindels and seals on them for me. May regret it later down the line but costs are getting going and they will do fine !
Graham


Mini Virgin Rebuild Of 83 Mayfair.
Started by
grahama
, May 22 2010 05:09 PM
1006 replies to this topic
#166

grahama
-
- Members
-

- 2,442 posts
Up Into Fourth
- Location: Warrington
- Local Club: None in my area !!
Posted 19 May 2011 - 09:28 PM
#167
grahama
-
- Members
-
- 2,442 posts
Up Into Fourth
- Location: Warrington
- Local Club: None in my area !!
Posted 30 May 2011 - 07:15 PM
Hi all,
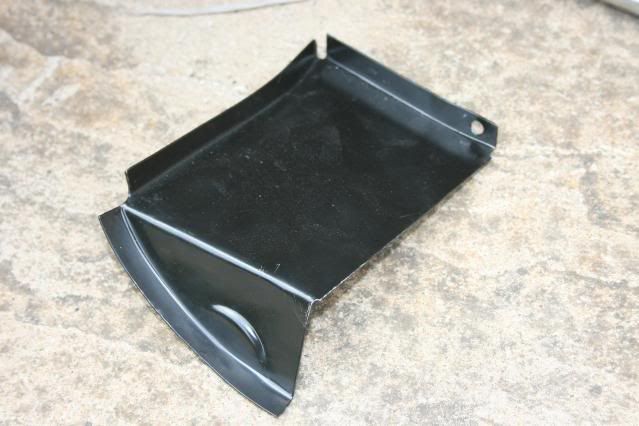
got two of these in my latest minispares delivery, (don't tell Jan), heritage for a change but still needs fettling.
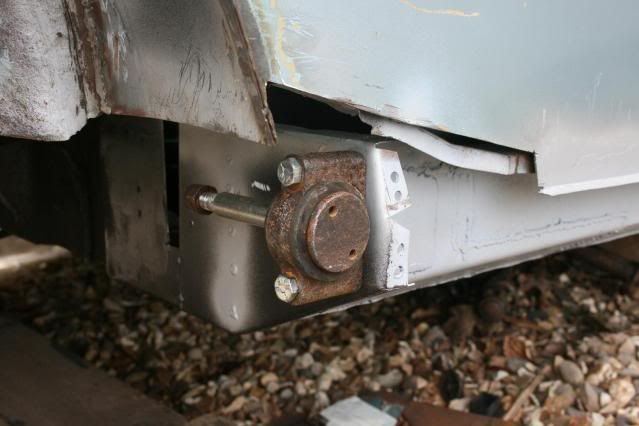
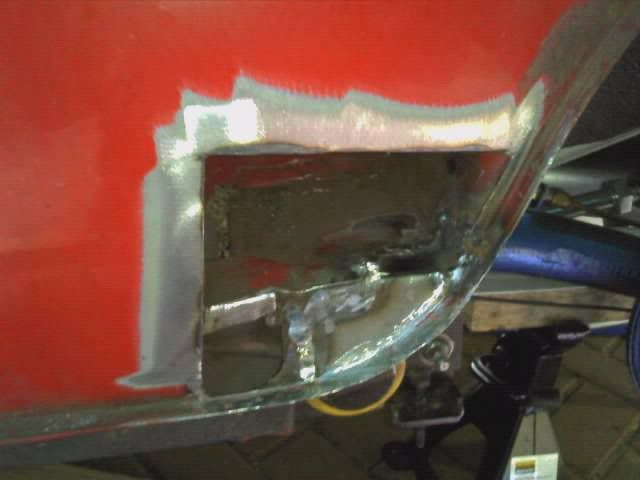
As you can see from the pics I fitted the trunnion to make sure it was in place and the subframe would fit later. The fit inside the space was less than perfect, probably due to my welding and fettling of pattern panels so I bashed and bent the closing pannel till it nearly fitted. I ended up with the gap to the inner sill which needed closing too so I used my large persuader again to fit it tight.
Tacked it inside and to the sill then banged it to close up the small gaps inside so it fitted flush to the inner bin and wheel arch. Quite pleased but then the upside down welding started again !

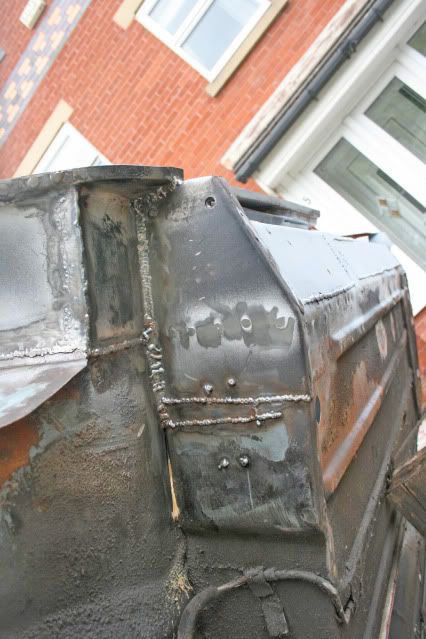
Welded the closing plate in and not too bad along the topside, but less perfect along the back side of the curved section. Still it's strong and no pin holes so will have to figure a way of cleaning up the weld in the corners. If I can't, then it's lots of seam sealer to hide it !!!
Gave it all a weld through prime to protect as I still have some dressing to do.

A little asside, my cylinders wers rusted closed, not too badly but took them apart to free up and clean, more bits in the conservatory but at least they are clean and painted now, mostly !
Not too much to report except the repainting of all my parts due to two gold colours not matching, doh !! Only had this afternoon due to rain and high winds, both of which don't lend themselves to outside welding !
Graham
got two of these in my latest minispares delivery, (don't tell Jan), heritage for a change but still needs fettling.
As you can see from the pics I fitted the trunnion to make sure it was in place and the subframe would fit later. The fit inside the space was less than perfect, probably due to my welding and fettling of pattern panels so I bashed and bent the closing pannel till it nearly fitted. I ended up with the gap to the inner sill which needed closing too so I used my large persuader again to fit it tight.
Tacked it inside and to the sill then banged it to close up the small gaps inside so it fitted flush to the inner bin and wheel arch. Quite pleased but then the upside down welding started again !
Welded the closing plate in and not too bad along the topside, but less perfect along the back side of the curved section. Still it's strong and no pin holes so will have to figure a way of cleaning up the weld in the corners. If I can't, then it's lots of seam sealer to hide it !!!
Gave it all a weld through prime to protect as I still have some dressing to do.
A little asside, my cylinders wers rusted closed, not too badly but took them apart to free up and clean, more bits in the conservatory but at least they are clean and painted now, mostly !
Not too much to report except the repainting of all my parts due to two gold colours not matching, doh !! Only had this afternoon due to rain and high winds, both of which don't lend themselves to outside welding !
Graham
#168
hughJ
-

- Members
-
- 727 posts
Soldiering Along
- Location: Highlands, Scotland
Posted 30 May 2011 - 08:40 PM
Hello Graham good to see you back at your Mini. Great work as I've come to expect. Great information too, as I am working round these areas. Well I say I'm working - I'm doing all I can to avoid the Mini. I changed a rear wheel bearing on my wife's Ford Fusion tonight. Great to be doing mechanics instead of bodywork. You seem able to work very cleanly. Impressed by the upsides down welding.
Hugh
Hugh
#169
sonikk4
-

- Admin
-
- 16,168 posts
Twisted Paint Polisher!!!
- Name: Neil
- Location: Cotwolds.
Posted 30 May 2011 - 08:46 PM
Those heritage close outs did not fit for us either so my calibrated impact device came to the party to deliver some rightful modifications. Its coming together though Graham.
#170
grahama
-
- Members
-
- 2,442 posts
Up Into Fourth
- Location: Warrington
- Local Club: None in my area !!
Posted 30 May 2011 - 09:04 PM
Thanks fellas,
just a little dissapointed with the neatness of the welds in the corners. Scrappy but strong is how I would describe them really and I am considdering some carbide burrs to grind them back a little.
One note Hugh, DO NOT put your quarter panel on before putting these closing plates in place. Welding inside the bins was nearly impossible and I am defo not showing those welds, lol. As I said before, untidy but do the job. I fully intend to line the bins so not too disasterous !
Thinking of doint this to do it properly.
Thanks to daveeeee for the pic !
Graham
Edited by grahama, 30 May 2011 - 09:22 PM.
#171
grahama
-
- Members
-
- 2,442 posts
Up Into Fourth
- Location: Warrington
- Local Club: None in my area !!
Posted 01 June 2011 - 05:55 PM
Hi all,
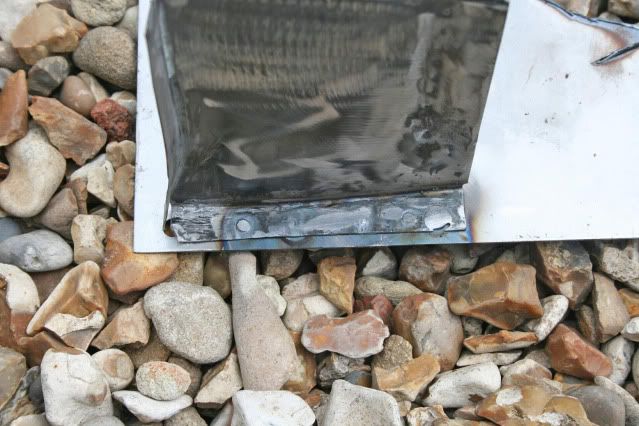
Update of the NS rear arch closing panel. Wasn’t going to post this but I had some problems that may help others and that I wasn’t expecting !
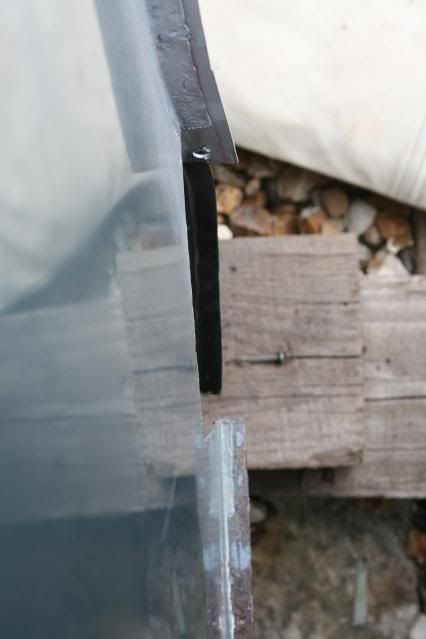
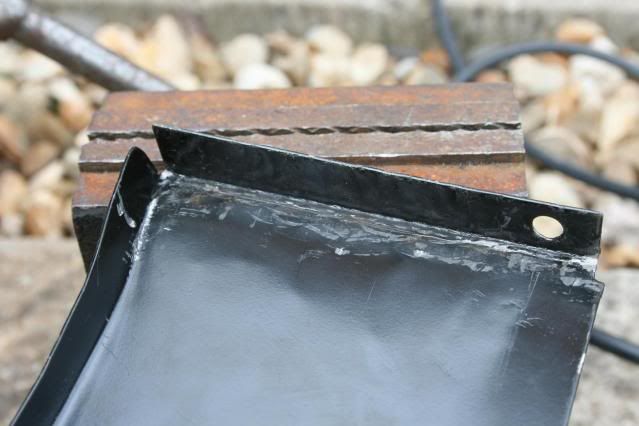
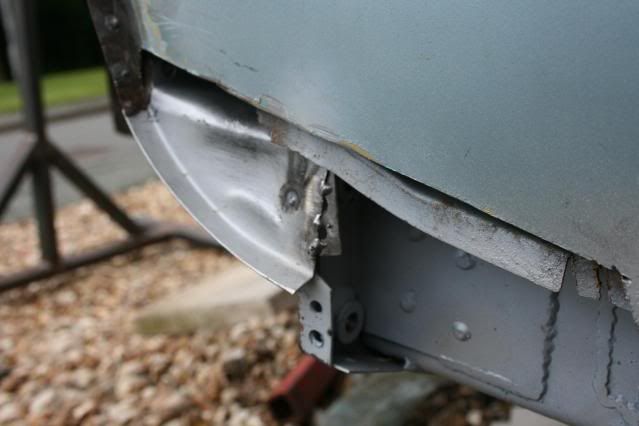
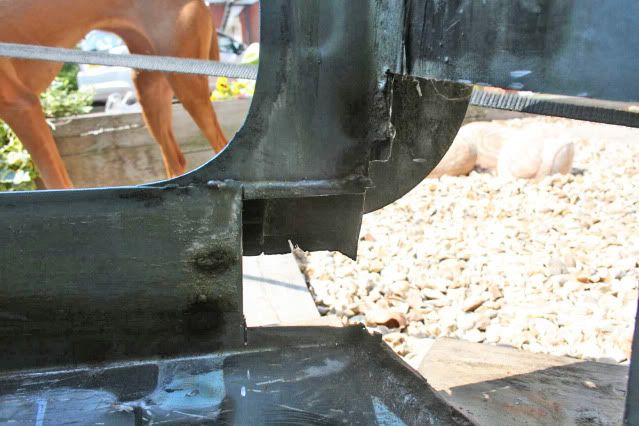
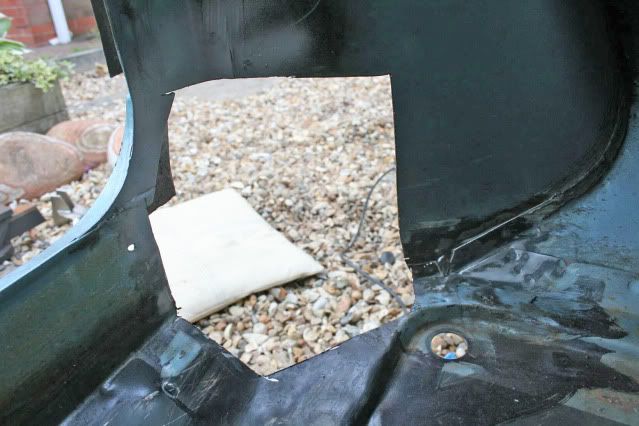
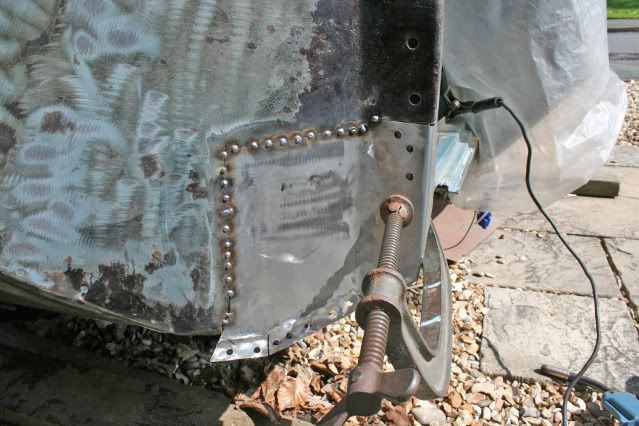
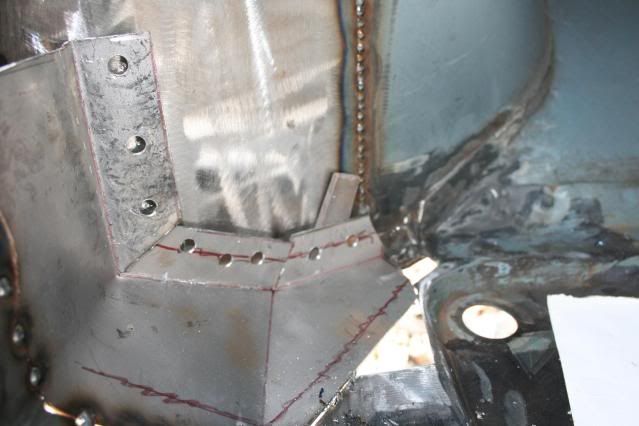
Fettled the pieces as with the OS panel, and not too bad a fit. However there was the usual gap alongside the edge of the heelboard as before. The only thing stopping me using the same solution was the position of the quarter panel as can be seen when the closing panel flange is looked at from above. It sits well inside the correct position even after fettling, and bending it in to meet the heelboard would make the problem worse.

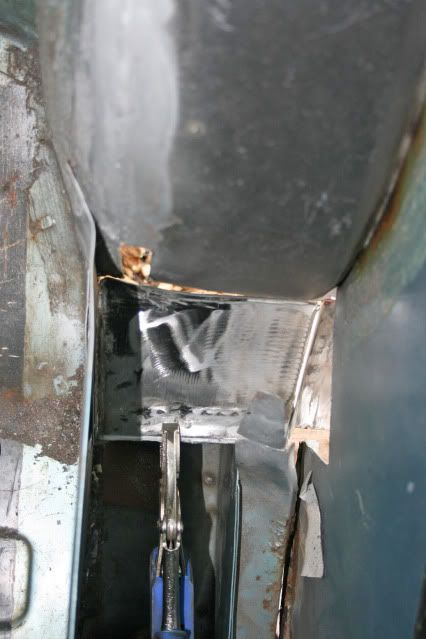
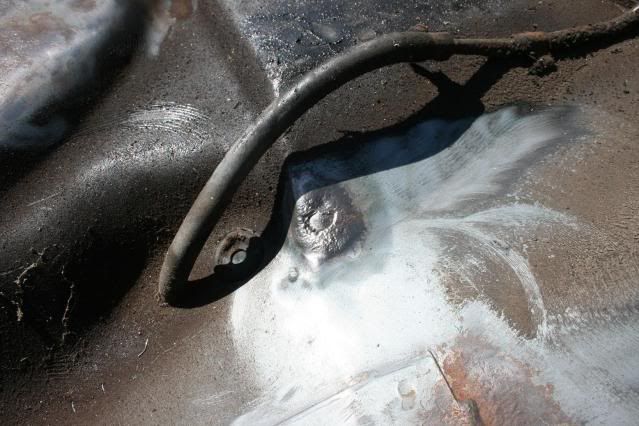
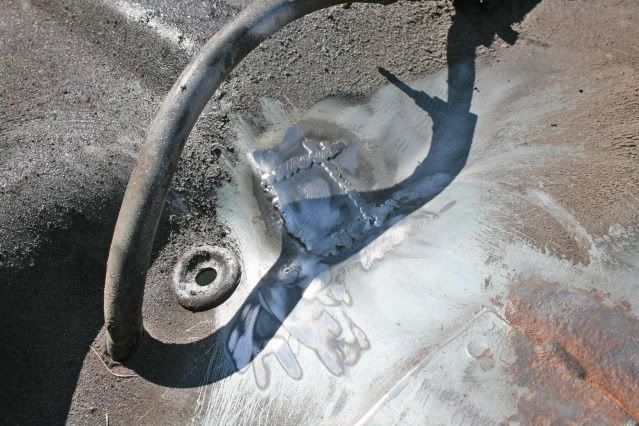
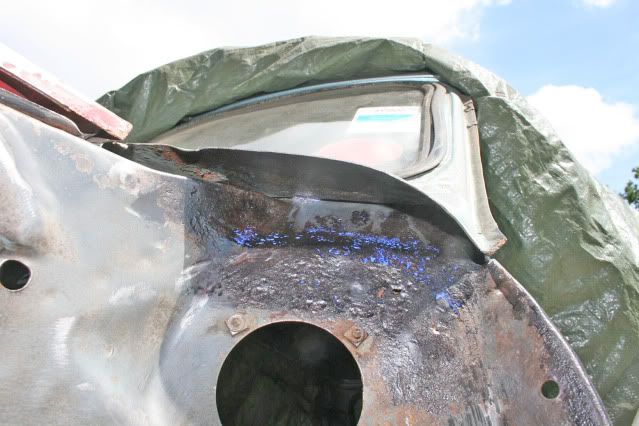
My solution this time was to weld in a strip of 3mm steel to help close the gap and bend the rest. This enabled me to keep the flange lines more or less inline along the car. Also inside the rear bin there was still a 2mm gap to the bin wall. Far too large a gap for my welding skills so I went on another solution hunt and came up with this.
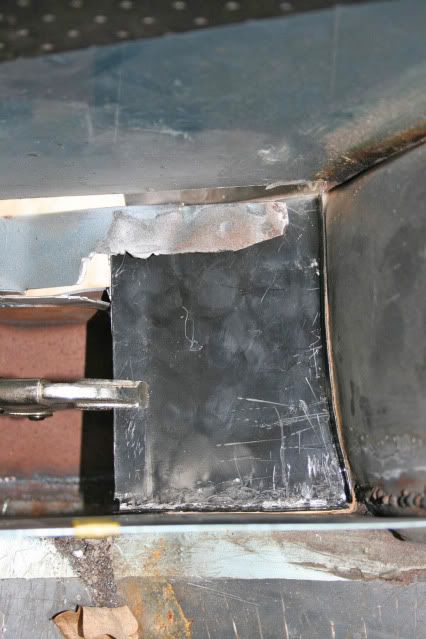
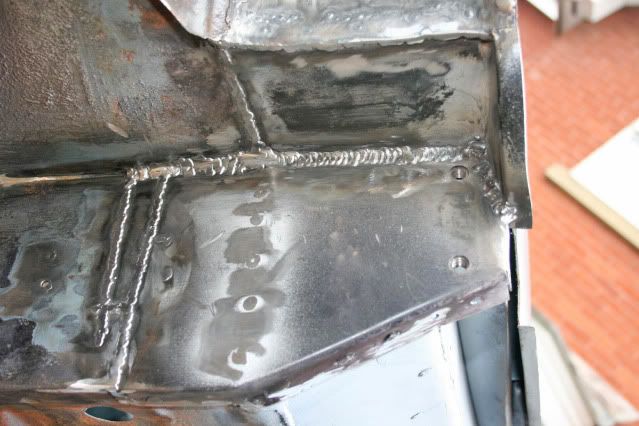
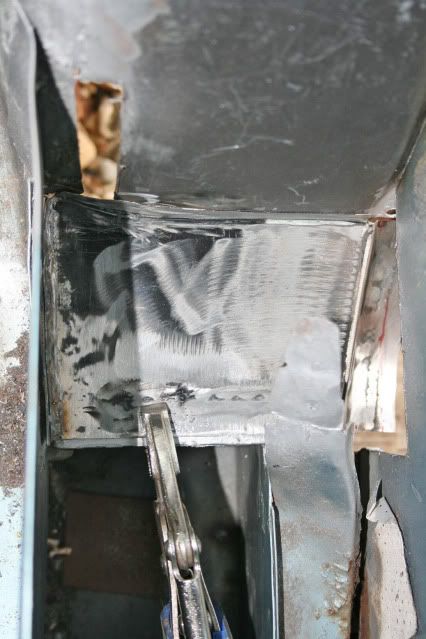
I used some 1.2mm sheet steel and plug welded in to the side of the existing fold. Ground down, the inside gap closed up nicely so I can weld it all shut. Also needed to increase the flange width so I don’t have to pull the quarter panel in to meet it and send that out of position. Not sure how it will all end up but learning as I go.

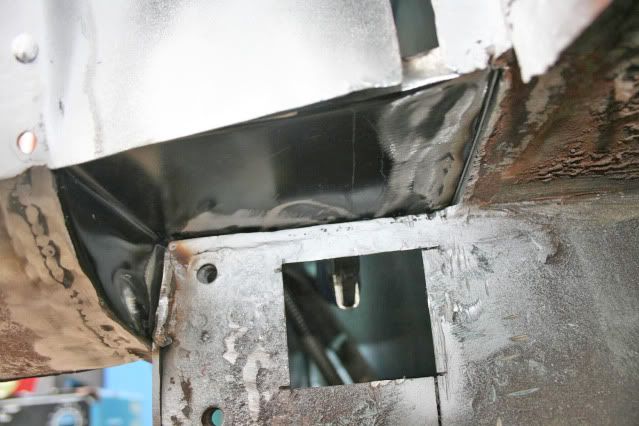
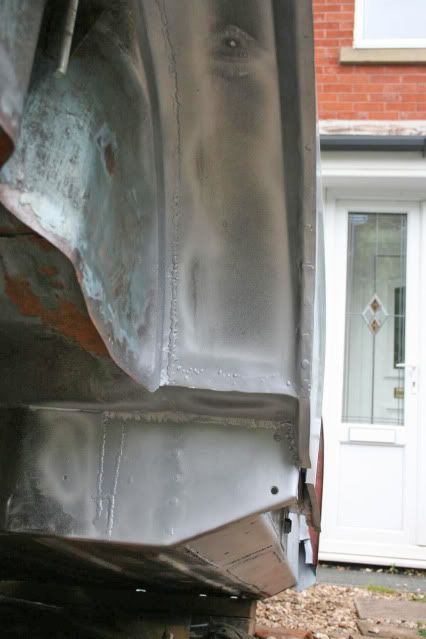
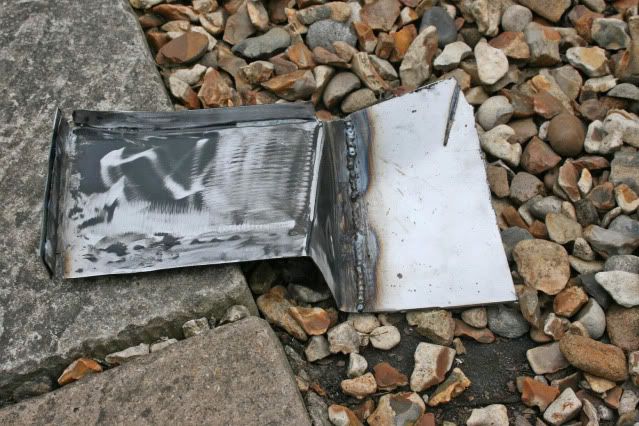
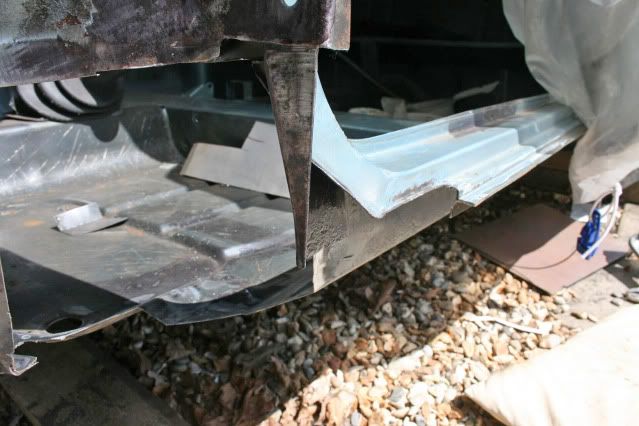
The flange needs trimming down but it will allow a non stressed fit of the quarter panel now. The final fit inside was as good as the OS but with more work required which I wasn’t expecting as the NS is in far better condition overall. A good tightish fit underneath too.

You can see the added material in the gap on the right here which will all be welded up to seal the gap properly.
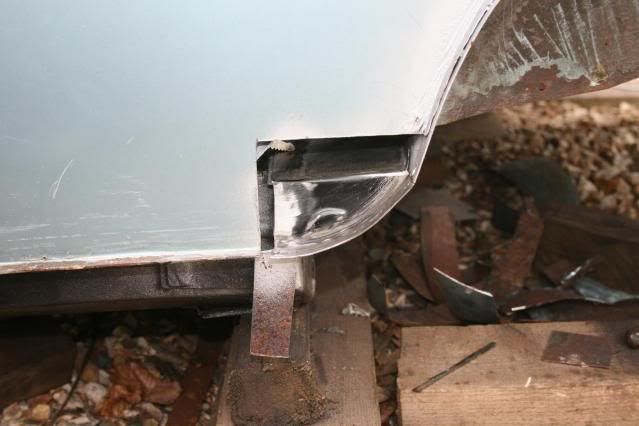
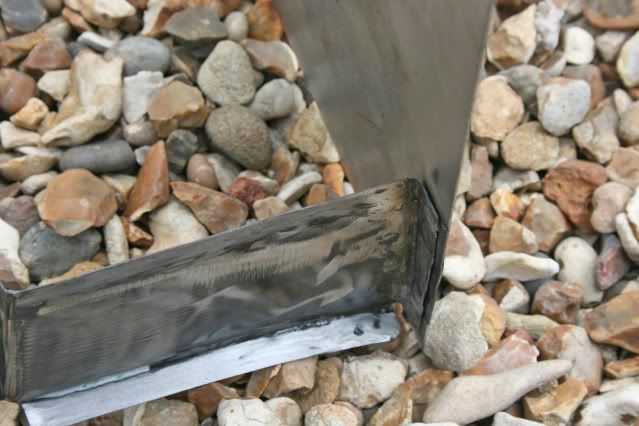
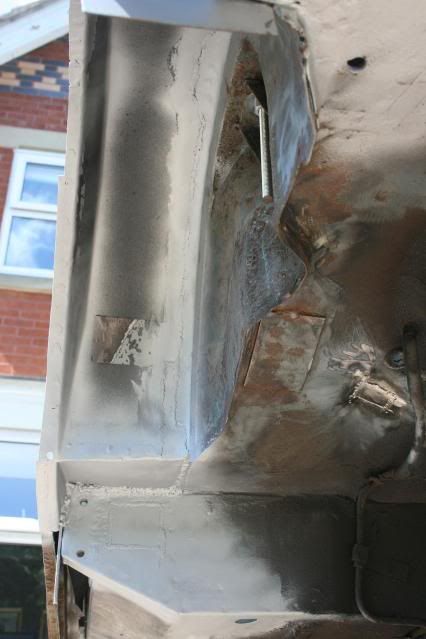
The panel in place from the side, quite pleased with it, but I am sure I will have some fettling to do later.
I would like to thank work for not calling me in today so I could swear at the mini !! Got some nice painting bits done too though and hopefully will weld it in soon !
Graham
Update of the NS rear arch closing panel. Wasn’t going to post this but I had some problems that may help others and that I wasn’t expecting !
Fettled the pieces as with the OS panel, and not too bad a fit. However there was the usual gap alongside the edge of the heelboard as before. The only thing stopping me using the same solution was the position of the quarter panel as can be seen when the closing panel flange is looked at from above. It sits well inside the correct position even after fettling, and bending it in to meet the heelboard would make the problem worse.
My solution this time was to weld in a strip of 3mm steel to help close the gap and bend the rest. This enabled me to keep the flange lines more or less inline along the car. Also inside the rear bin there was still a 2mm gap to the bin wall. Far too large a gap for my welding skills so I went on another solution hunt and came up with this.
I used some 1.2mm sheet steel and plug welded in to the side of the existing fold. Ground down, the inside gap closed up nicely so I can weld it all shut. Also needed to increase the flange width so I don’t have to pull the quarter panel in to meet it and send that out of position. Not sure how it will all end up but learning as I go.
The flange needs trimming down but it will allow a non stressed fit of the quarter panel now. The final fit inside was as good as the OS but with more work required which I wasn’t expecting as the NS is in far better condition overall. A good tightish fit underneath too.
You can see the added material in the gap on the right here which will all be welded up to seal the gap properly.
The panel in place from the side, quite pleased with it, but I am sure I will have some fettling to do later.
I would like to thank work for not calling me in today so I could swear at the mini !! Got some nice painting bits done too though and hopefully will weld it in soon !
Graham
Edited by grahama, 01 June 2011 - 05:58 PM.
#172
minimuk
-

- Members
-
- 1,947 posts
Camshaft & Stage Two Head
- Location: Midlands
Posted 01 June 2011 - 09:48 PM
Nice puzzling fettle action there Graham, glad you worked it out. looks good, plenty seamsealer and primer on it!! 
#173
grahama
-
- Members
-
- 2,442 posts
Up Into Fourth
- Location: Warrington
- Local Club: None in my area !!
Posted 03 June 2011 - 03:30 PM
Hi all,
suny day so a time to finish off a few bits before nights.


Found some rust on the old part of the arch so cut it out and welded a new, bigger patch in. Also first time flipping the shell over, thought the spit was too narrow to do it safely but no problems. Underside covered in underseal/waxoil and looks fine.
Re welded parts of the passenger arch that I was not happy with following my upside down welding disaster and put in the arch closing panel and a patch. As before I really struggled doing the corner welding, even right side up this time, but practice makes perfect so by the time I do one for myself I wil be bob on !!! Not the prettiest welding in the corners but I am going th get a carbide burr to finish them off neatly, ugly but strong !!
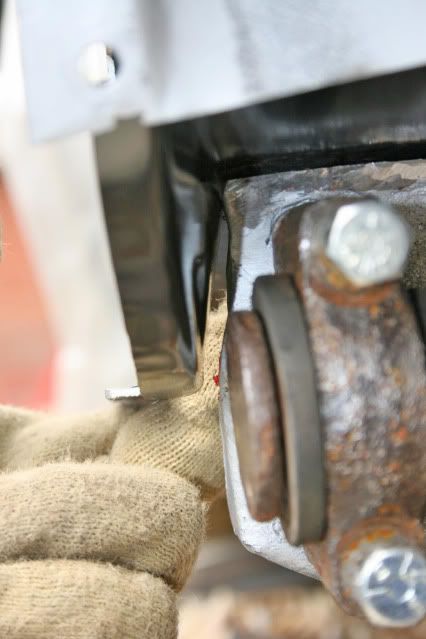
Took the factory bracket off as with the other side and found a right rust trap. Ground it off and cleaned it all up round about and no patch required for a change.
I did while I was digging around find a new hole, so cut out the crud and welded a small patch in. Nice and neat for a change, got the flat butt welds sussed !!
Gave it all a coating of weld through primer to protect it for now and tucked it up again before work.
Two very frustrating closing panels out of the way and arches done, boot floor to finish off over the next few days then Matthew can rub it down for priming. He was asking about lining the boot with carpet so his enthusiasm is picking up now the welding is moving along.
Hope you enjoyed,
Graham
suny day so a time to finish off a few bits before nights.
Found some rust on the old part of the arch so cut it out and welded a new, bigger patch in. Also first time flipping the shell over, thought the spit was too narrow to do it safely but no problems. Underside covered in underseal/waxoil and looks fine.
Re welded parts of the passenger arch that I was not happy with following my upside down welding disaster and put in the arch closing panel and a patch. As before I really struggled doing the corner welding, even right side up this time, but practice makes perfect so by the time I do one for myself I wil be bob on !!! Not the prettiest welding in the corners but I am going th get a carbide burr to finish them off neatly, ugly but strong !!
Took the factory bracket off as with the other side and found a right rust trap. Ground it off and cleaned it all up round about and no patch required for a change.
I did while I was digging around find a new hole, so cut out the crud and welded a small patch in. Nice and neat for a change, got the flat butt welds sussed !!
Gave it all a coating of weld through primer to protect it for now and tucked it up again before work.
Two very frustrating closing panels out of the way and arches done, boot floor to finish off over the next few days then Matthew can rub it down for priming. He was asking about lining the boot with carpet so his enthusiasm is picking up now the welding is moving along.
Hope you enjoyed,
Graham
Edited by grahama, 03 June 2011 - 03:33 PM.
#174
benjy_18
-

- TMF+ Member
-
- 1,038 posts
One Carb Or Two?
- Local Club: LSMOC
Posted 03 June 2011 - 03:38 PM
ive still got both those closing panels to do  but well done on all the repairs around the heelboard!
they look solid so i doubt they will cause a problem.
Ben
but well done on all the repairs around the heelboard!they look solid so i doubt they will cause a problem.
Ben
#175
grahama
-
- Members
-
- 2,442 posts
Up Into Fourth
- Location: Warrington
- Local Club: None in my area !!
Posted 03 June 2011 - 03:48 PM
Ta Ben,
just unhappy with the result, thought I was getting better with the welder, hey ho, suppose it's all a big learning curve seeing as though this car is my first try at it.
Graham
just unhappy with the result, thought I was getting better with the welder, hey ho, suppose it's all a big learning curve seeing as though this car is my first try at it.
Graham
#176
benjy_18
-
- TMF+ Member
-
- 1,038 posts
One Carb Or Two?
- Local Club: LSMOC
Posted 03 June 2011 - 03:53 PM
exactly the same with frumpy to be honest, surprised ive managed half the stuff ive done!
one tip on the welding front, try turning the power up slightly and just stitch welding things (tack after tack for about an inch) thats how ive been doing most things and its gone alright.
Ben
one tip on the welding front, try turning the power up slightly and just stitch welding things (tack after tack for about an inch) thats how ive been doing most things and its gone alright.
Ben
#177
hughJ
-
- Members
-
- 727 posts
Soldiering Along
- Location: Highlands, Scotland
Posted 03 June 2011 - 06:49 PM
Graham - you are getting a lot done. Great work. Wish I could muster your enthusiasm.
Hugh
Hugh
#178
grahama
-
- Members
-
- 2,442 posts
Up Into Fourth
- Location: Warrington
- Local Club: None in my area !!
Posted 03 June 2011 - 08:26 PM
Ben, I can only stitch weld anyway lol. In the corner the metal was thicker so that may be the problem. As I said I will grind it down and if required do again. The closing panels are bin and solid which is my main concern.
Hugh, have forced myself to do these last bits as I knew they were going to be a pain. Nicer fabrication work to do for a bit now. I find if I switch jobs, paint and clean instead of welding, I am more up for the next bit!!
Graham
Hugh, have forced myself to do these last bits as I knew they were going to be a pain. Nicer fabrication work to do for a bit now. I find if I switch jobs, paint and clean instead of welding, I am more up for the next bit!!
Graham
#179
grahama
-
- Members
-
- 2,442 posts
Up Into Fourth
- Location: Warrington
- Local Club: None in my area !!
Posted 06 June 2011 - 06:42 PM
Hi all,
Done some to the front end over the past couple of days, fabrication and welding fun !
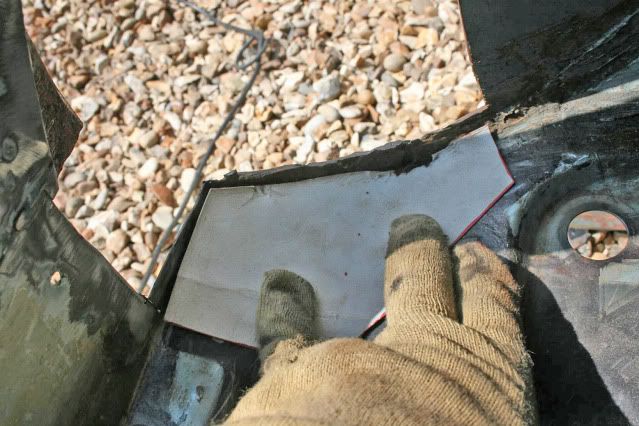
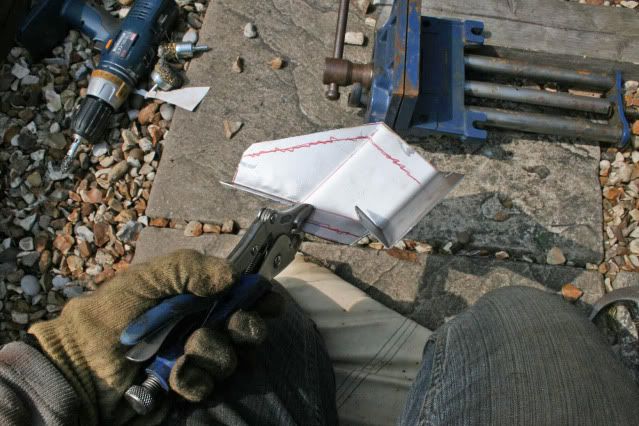
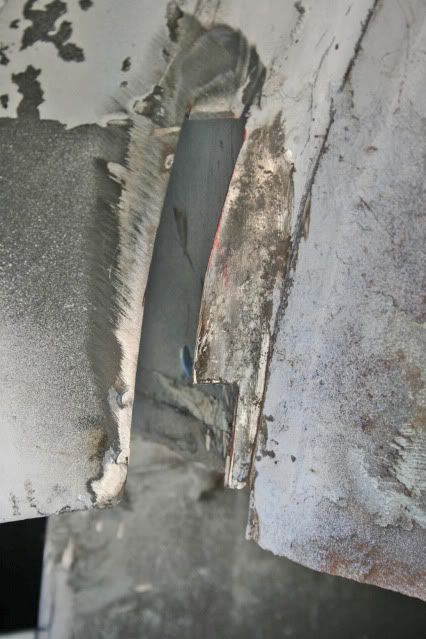
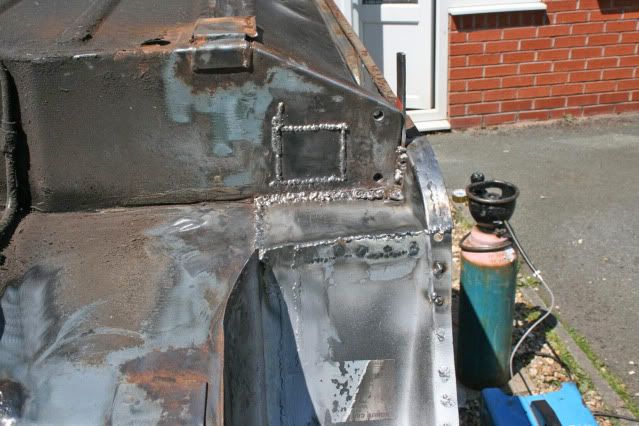
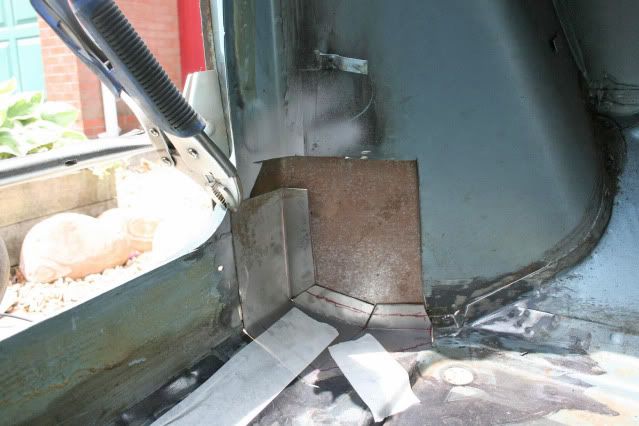
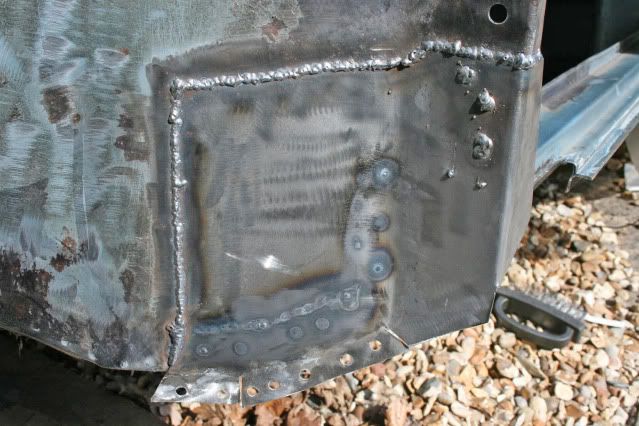
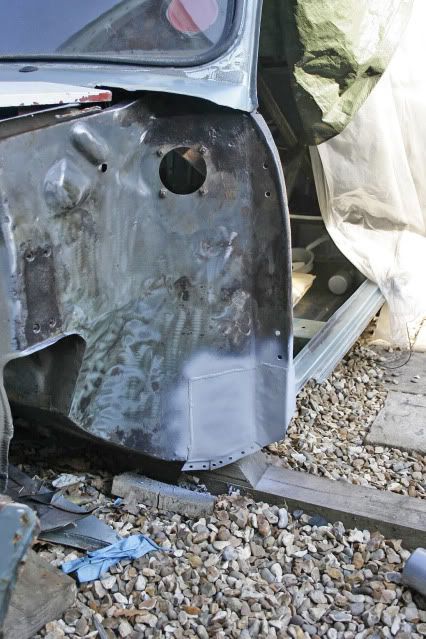
I left the NS flitch as above as it didn’t warrant a full replacement so decided to patch it. Template drawn and cut out, the flanges were cut and folded with a vice and mole grips for the middle flange as it wouldn’t fit in the vice.
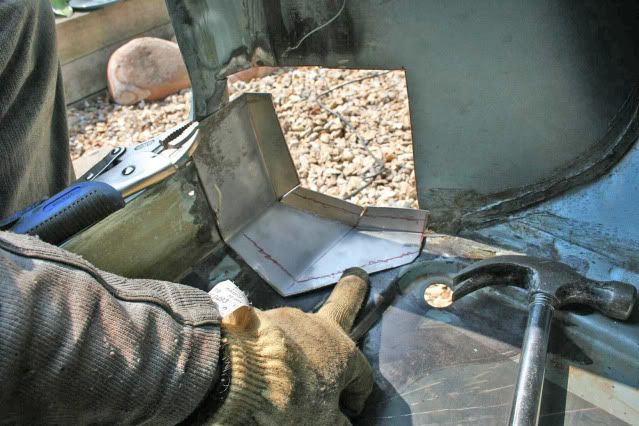
The trial fit of the floor patch looked ok, some fettling to do before the welding, and there is a patch required above it too as there was some rust on the welded joint.
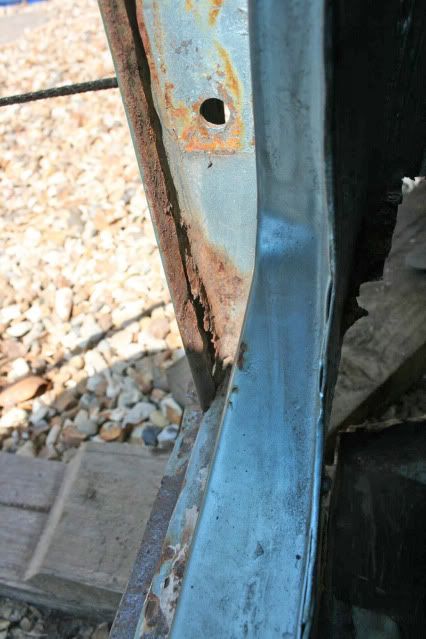

The lip the a panel was rusty so I wipped it off and found a previous repair, complete with welding wire sticking out, not how I do it !
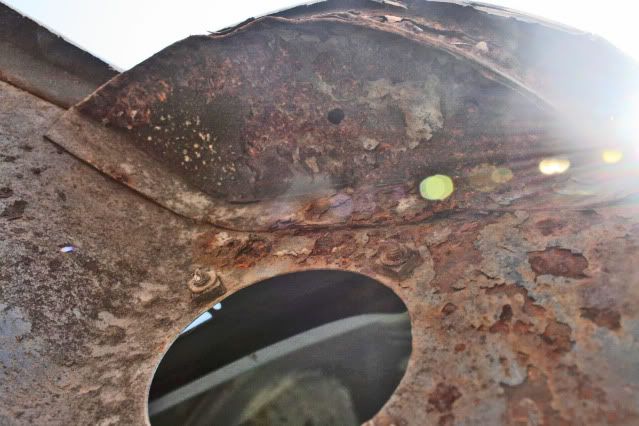
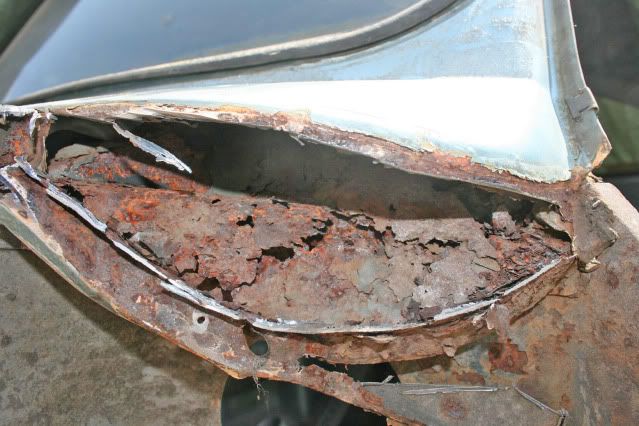
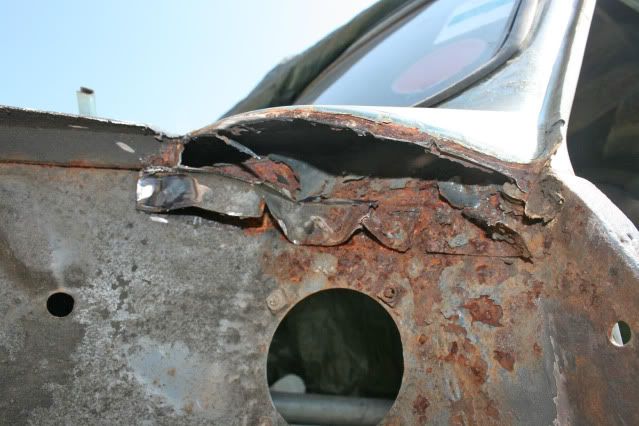
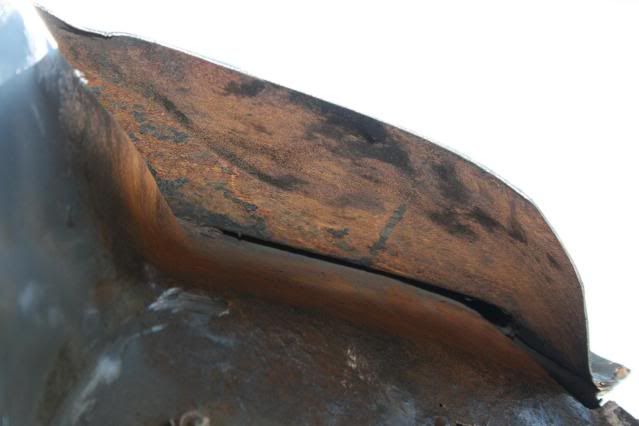
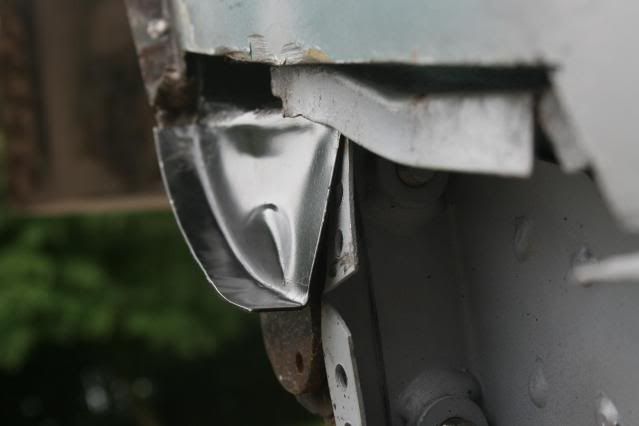
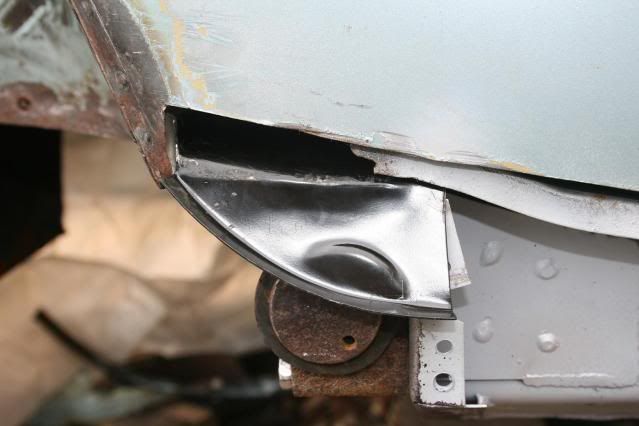
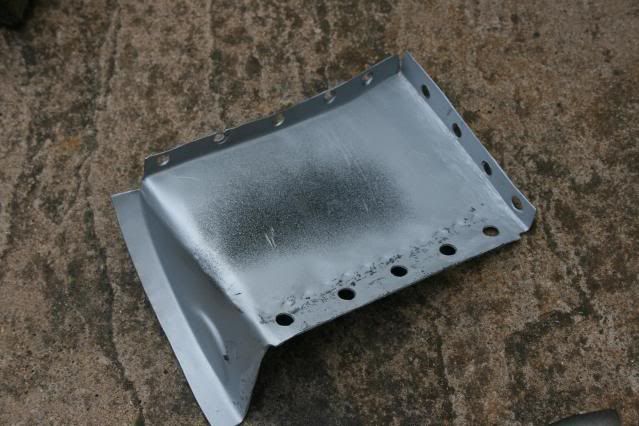
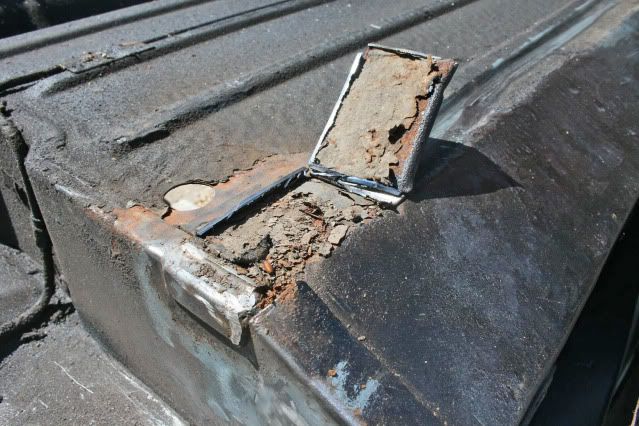
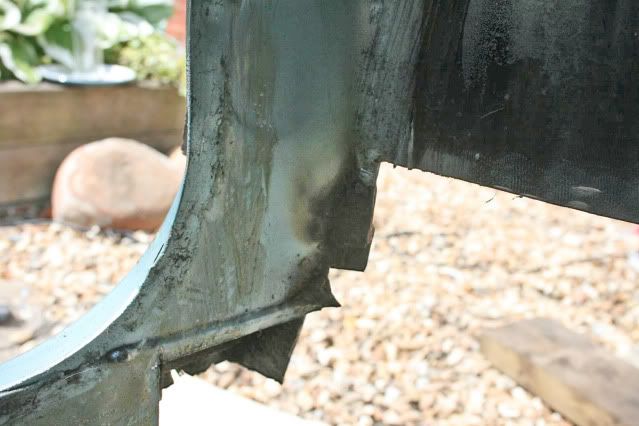
Under the scuttle the closing plate had a couple of small holes, not too bad I thought, as no rust inside either. However a prod later it disintegrated into the usual rusty mess, no wonder as it was held on by three spot welds in total, Once off the underside of the scuttle looked fine, just surface rust as with the OS.
Read on !
Done some to the front end over the past couple of days, fabrication and welding fun !
I left the NS flitch as above as it didn’t warrant a full replacement so decided to patch it. Template drawn and cut out, the flanges were cut and folded with a vice and mole grips for the middle flange as it wouldn’t fit in the vice.
The trial fit of the floor patch looked ok, some fettling to do before the welding, and there is a patch required above it too as there was some rust on the welded joint.
The lip the a panel was rusty so I wipped it off and found a previous repair, complete with welding wire sticking out, not how I do it !
Under the scuttle the closing plate had a couple of small holes, not too bad I thought, as no rust inside either. However a prod later it disintegrated into the usual rusty mess, no wonder as it was held on by three spot welds in total, Once off the underside of the scuttle looked fine, just surface rust as with the OS.
Read on !
#180
grahama
-
- Members
-
- 2,442 posts
Up Into Fourth
- Location: Warrington
- Local Club: None in my area !!
Posted 06 June 2011 - 06:42 PM
Part two,
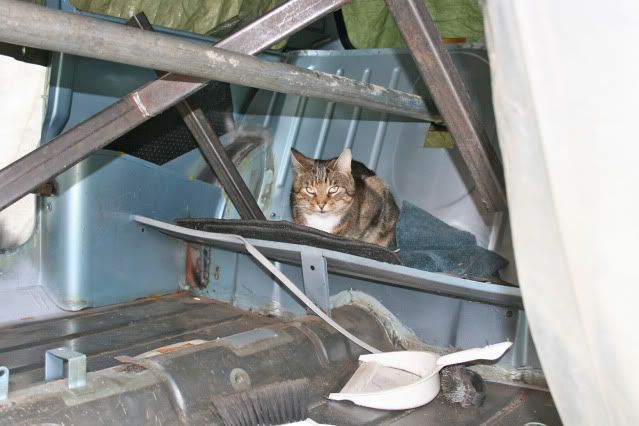
One of my cats sleeps in the shell when it rains and overnight so there he was waiting for me, but as soon as I start he legs it !
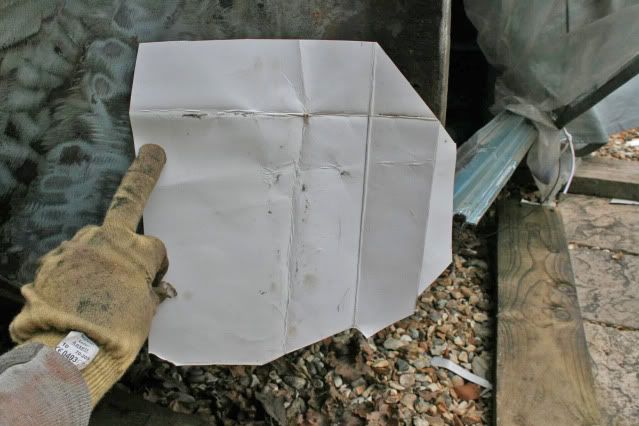
Cut the rotten floor join out and copied the OS flitch with a template and cut out to fit. Not too bad but the hard part of mating the two patches up was ahead.
Liberal application of Kurust under the end of the doorstep as surface rust was seen, followed by some black hammerite to seal it. Also did the bottom of the A post and under the scuttle.

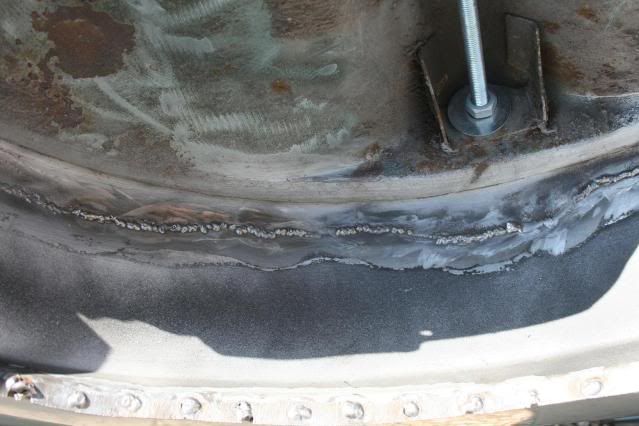
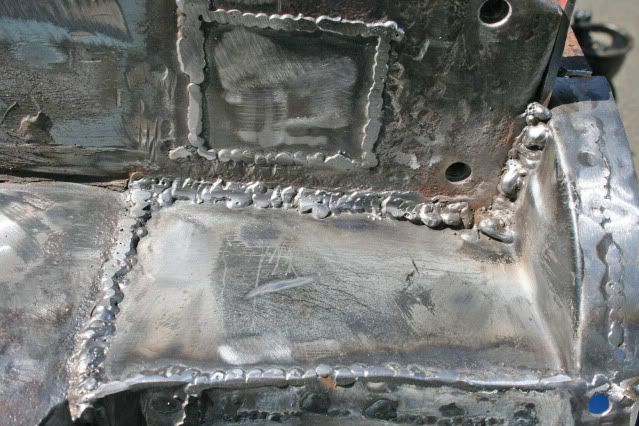
Welded the outside patch in place first, but needed a little help with the plug welding as it didn't quite touch the A post. As usual did a seam on the inside too for strength.
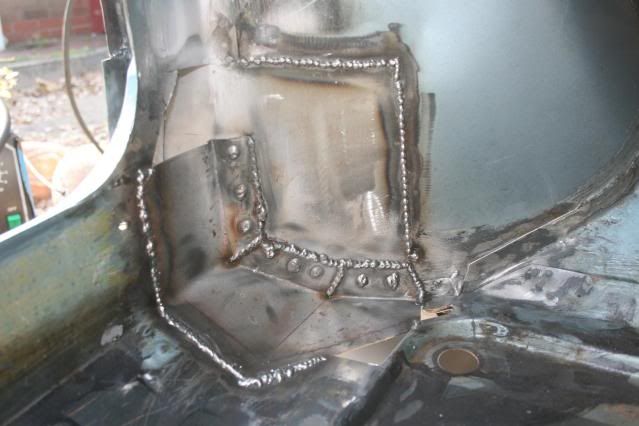
I tacked the inner floor patch in and then forgot that I hadn’t drilled the holes for the plug welding, so did them in situ and filed the insides as flush as I could. Also forgot the weld through primer so had to spray that as good as I could. All welded up, I felt a couple of places required a small patch, not holed yet but thin so patched it up too. Was getting good penetration through the two pannels, so should be strong enough. At this point I had an annoying neibour, who bought his two lads brand new corsas when they turned 17, come over to scoff that it wasn't done yet and he wouldn't trust it when done. Just what you need when wrestling with patches !!! Git !
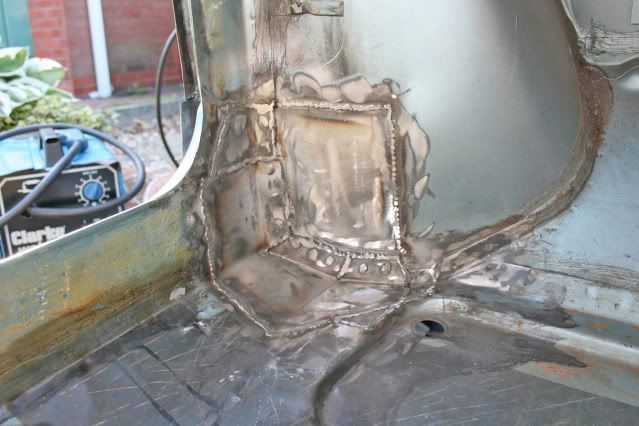
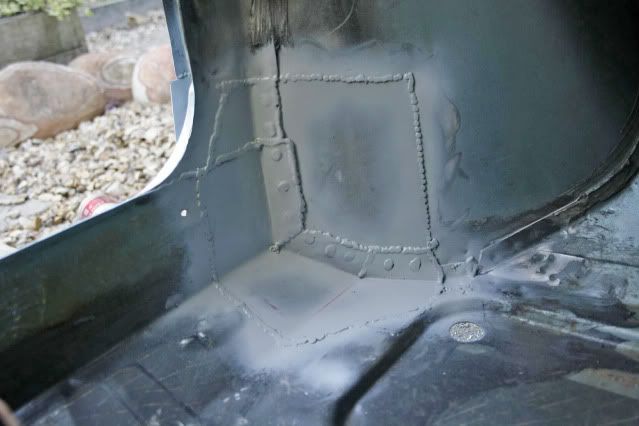
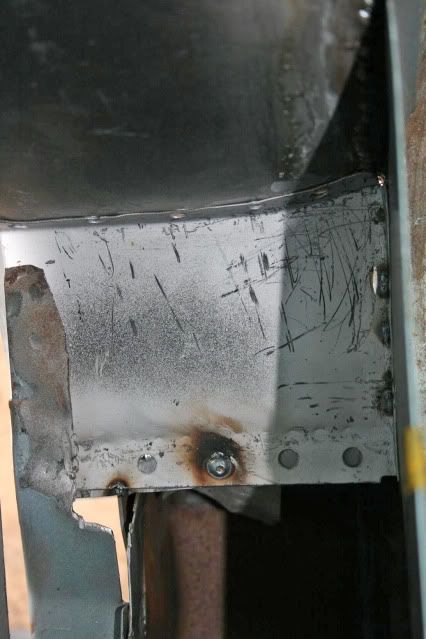
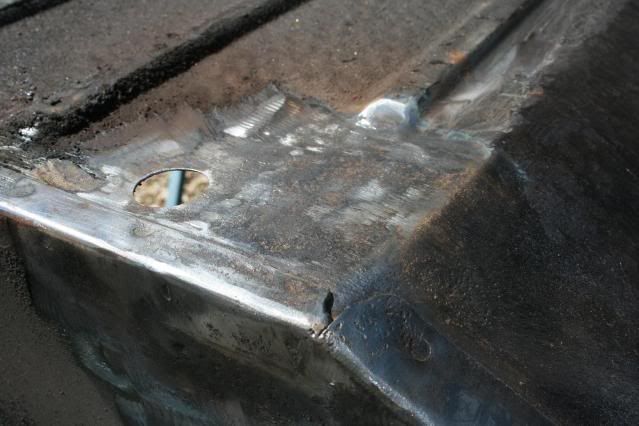
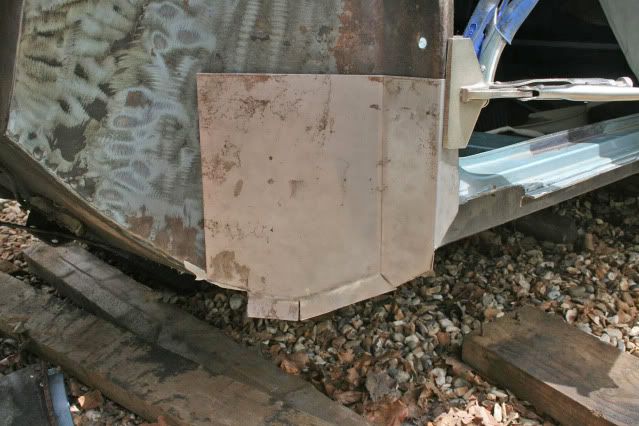
The whole area welded up and dressed down, I gave it a coat of etch primer to protect it. Will get onto the top of the flitch tomorrow if it stays dry and then that will all be done !!!
Graham
One of my cats sleeps in the shell when it rains and overnight so there he was waiting for me, but as soon as I start he legs it !
Cut the rotten floor join out and copied the OS flitch with a template and cut out to fit. Not too bad but the hard part of mating the two patches up was ahead.
Liberal application of Kurust under the end of the doorstep as surface rust was seen, followed by some black hammerite to seal it. Also did the bottom of the A post and under the scuttle.
Welded the outside patch in place first, but needed a little help with the plug welding as it didn't quite touch the A post. As usual did a seam on the inside too for strength.
I tacked the inner floor patch in and then forgot that I hadn’t drilled the holes for the plug welding, so did them in situ and filed the insides as flush as I could. Also forgot the weld through primer so had to spray that as good as I could. All welded up, I felt a couple of places required a small patch, not holed yet but thin so patched it up too. Was getting good penetration through the two pannels, so should be strong enough. At this point I had an annoying neibour, who bought his two lads brand new corsas when they turned 17, come over to scoff that it wasn't done yet and he wouldn't trust it when done. Just what you need when wrestling with patches !!! Git !
The whole area welded up and dressed down, I gave it a coat of etch primer to protect it. Will get onto the top of the flitch tomorrow if it stays dry and then that will all be done !!!
Graham
Edited by grahama, 06 June 2011 - 06:49 PM.


3 user(s) are reading this topic
0 members, 3 guests, 0 anonymous users


