What did you coat the arch in before you welded it Graham?? it could also be your earth point was not really clean as well.


Mini Virgin Rebuild Of 83 Mayfair.
Started by
grahama
, May 22 2010 05:09 PM
1006 replies to this topic
#151

sonikk4
-

- Admin
-

- 16,168 posts
Twisted Paint Polisher!!!
- Name: Neil
- Location: Cotwolds.
Posted 06 May 2011 - 06:36 PM
#152
grahama
-
- Members
-
- 2,442 posts
Up Into Fourth
- Location: Warrington
- Local Club: None in my area !!
Posted 06 May 2011 - 06:40 PM
Good point Neil,
I just put some weld through primer on it incase I got wey laid with something else. Actually I didn't clean up a section for the earth clamp, just put it straight onto the primer. Could account for the problem and resulting crappy welding !! Got it done in the end though but another lesson learned!
Graham
#153
minimuk
-

- Members
-
- 1,947 posts
Camshaft & Stage Two Head
- Location: Midlands
Posted 06 May 2011 - 09:26 PM
Graham, you might want to clean the welding nozzle too, especially if you weld up-side down, although you hear gas coming out the tip, you might have blocked the little holes on the nozzle point, if not it does not harm to give it a good clean.
Swan and Spain, all good I guess
Swan and Spain, all good I guess
#154
STREET TWEAKS
-

- Traders
-
- 662 posts
Super Mini Mad
Posted 06 May 2011 - 09:42 PM
I'm like a swan with this rebuild, calm on the surface but legs going like the clappers underneath !!!
Ha ha you and me both
love mate
#155
hughJ
-

- Members
-
- 727 posts
Soldiering Along
- Location: Highlands, Scotland
Posted 07 May 2011 - 06:09 PM
Hi Graham your fitting of parts and cleaning back to clean metal is the high standard I've come to expect from you. The welding looks fine - you should see some of the welding on other projects on this forum (mine sometimes!) and the people seem happy with it. It was done upsides down too. I do anything to avoid upsides down welding. I wish Graham I was a swan - with me its frenzy showing above the surface as well.
No work me on my Mini this week. Too many other jobs. I was going to tackle my rear quarter today but felling a tree and seeding grass took over.
Hugh
No work me on my Mini this week. Too many other jobs. I was going to tackle my rear quarter today but felling a tree and seeding grass took over.
Hugh
Edited by hughJ, 07 May 2011 - 06:09 PM.
#156
BusheyTrader
-

- TMF+ Member
-
- 484 posts
Speeding Along Now
- Location: Bushey
- Local Club: Nope
Posted 07 May 2011 - 06:37 PM
I finished off drilling the new flange section for plug welding and tacked it in, this went ok but my welder was throwing a wobbler today, producing loads of spatter, even though lots of gas comming out and an electric noise rather than a sizzling noise !!! Any ideas ??
I'm far from being a MIG expert, but I get the same problem as you if my MIG wire burns back to the disposable copper tip. Even though the wire feed appears OK, there must be some drag around the copper tip as everything goes pear shaped. After replacing the copper tip all is well again since it won't work properly again even if I try to clean it up.
Hope this helps,
Adam
Edited by BusheyTrader, 07 May 2011 - 06:38 PM.
#157
grahama
-
- Members
-
- 2,442 posts
Up Into Fourth
- Location: Warrington
- Local Club: None in my area !!
Posted 07 May 2011 - 07:01 PM
Hi Adam,
The wire was burning back as you say, and I changed the tip to as the wire fouled in the feed wheel part aswell. All cleaned up and new tip it went better, but I think the crappy earth I was using didn't help. When I was welding the inner seams for strength I had no problems really, think upside down combined with crap earth and sticky tip resulted in the less than perfect looking welds.
As I said earlier, the strength is there if a little untidy 6/10, must try harder !!!
Graham
#158
grahama
-
- Members
-
- 2,442 posts
Up Into Fourth
- Location: Warrington
- Local Club: None in my area !!
Posted 18 May 2011 - 08:05 PM
Hi all,
An update of sorts !! It’s been holiday’s time and raining but first holidays
Hic, hic, alot of that went on in sunny Spain for 5 days, nice.
Anyway the eagerly awaited return to blighty and the mini was interrupted with rain everyday till this afternoon, so I have been cleaning and painting.
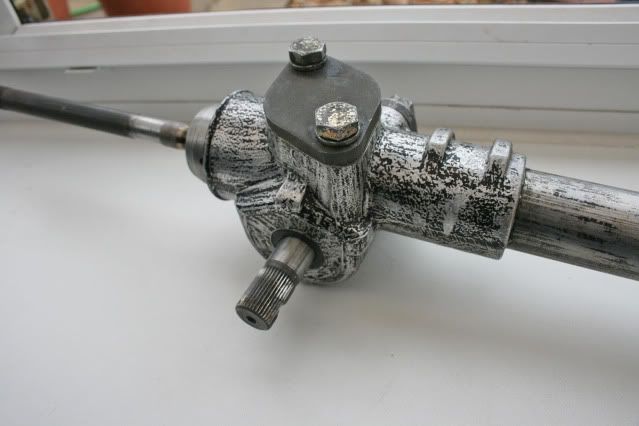
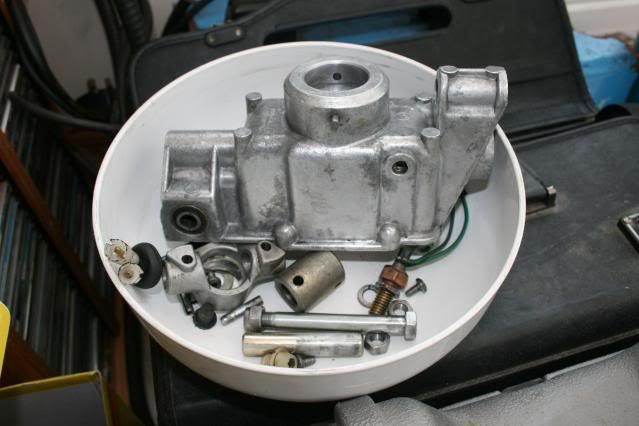
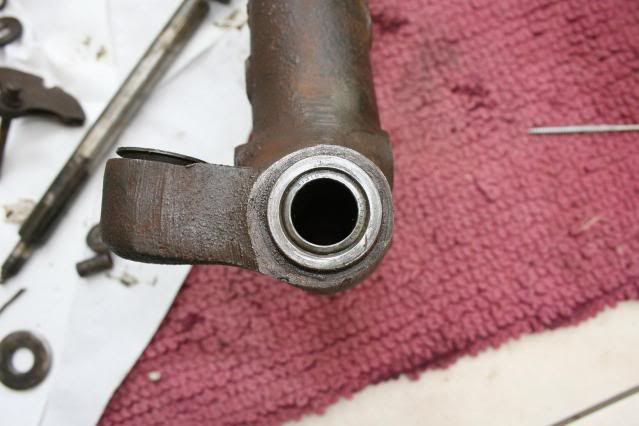
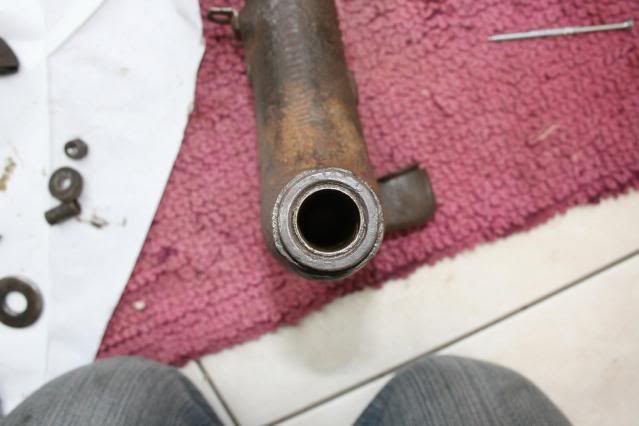
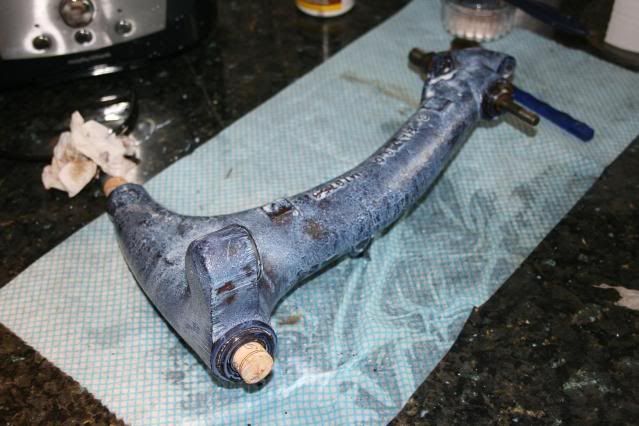
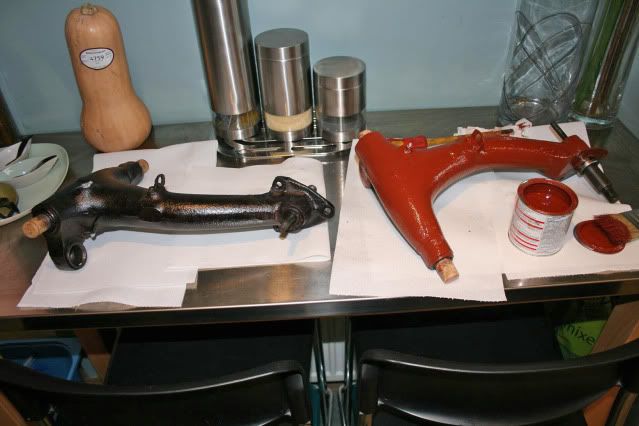
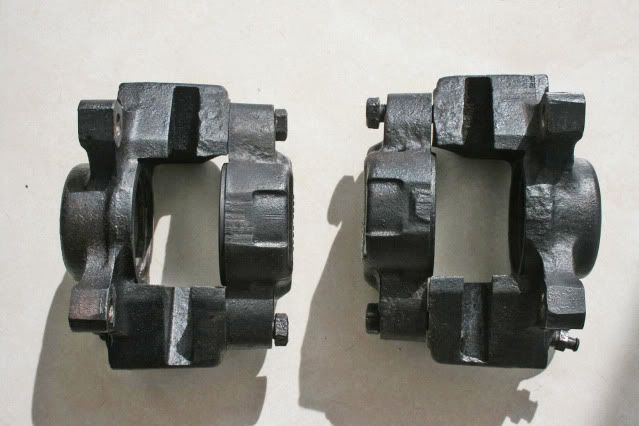
Also decided to strip and check out the radius and top arms and found that the bearings and bronze thingy looked fine and although the spindle had had it there was a nice pull on the spindle through the bearings.
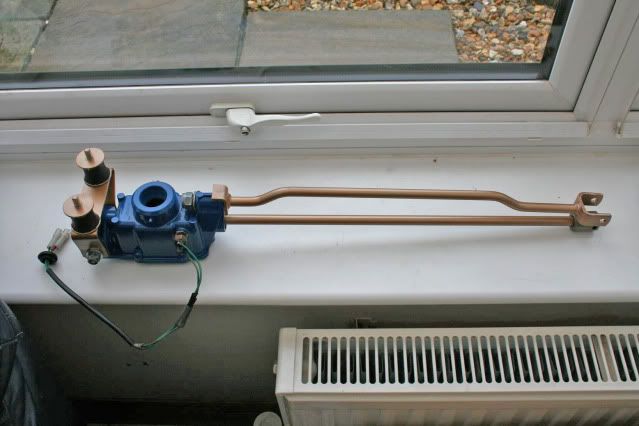
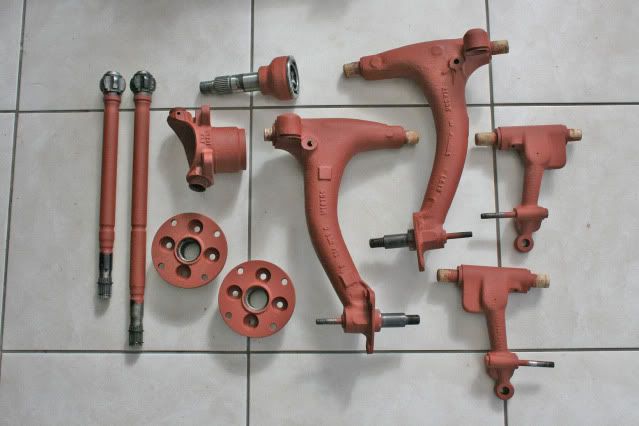
Kurusted most things in sight to be honest and then gave them some red oxide primer like this...
I have to say the good lady wife is not best pleased at the mo as the kitchen is a parts washing room by day and fooderie by night and then there are the parts drying in the conservatory and oil sometimes on the worktops !! Divorce coming up !!
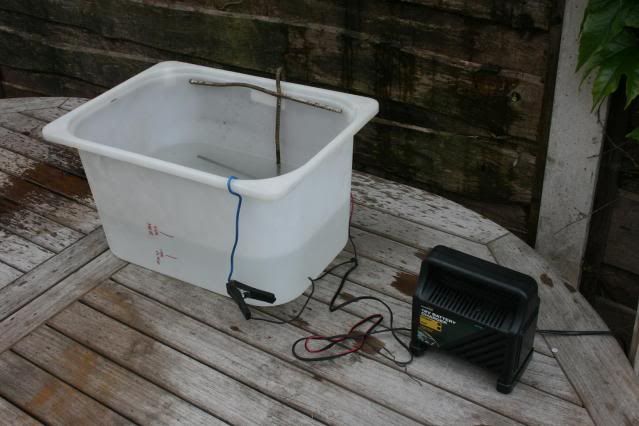
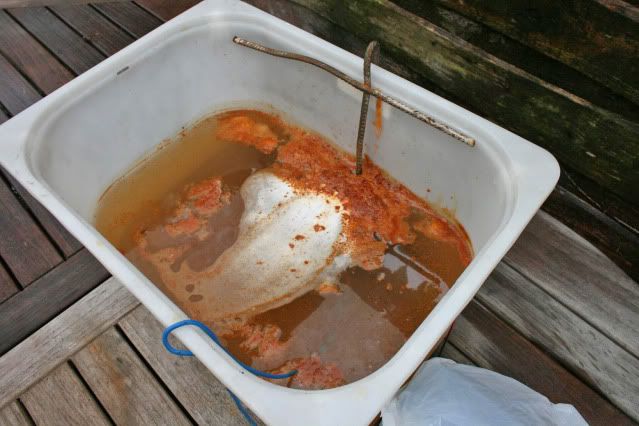
Then the weeks highlight came, home science involving car battery charger, water and soda crystals, electrolytic rust removal. Set it up on the nice new decking, another frown from her indoors, and lobbed some parts in.
Before
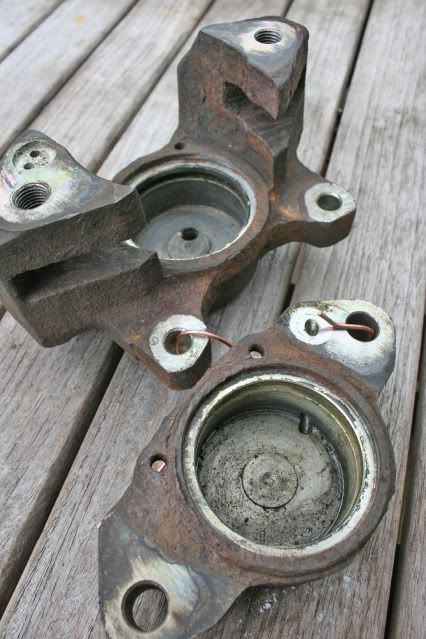
After
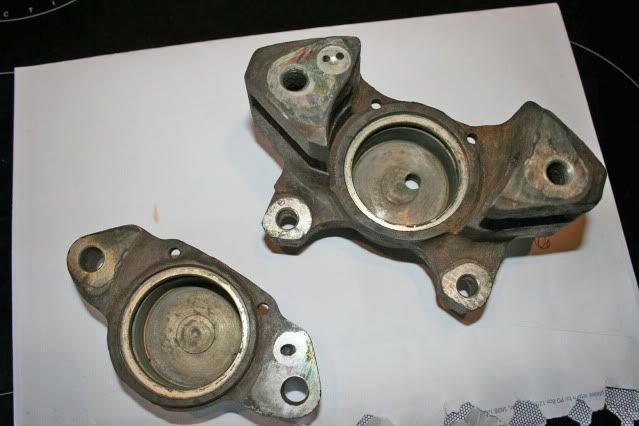

And again kurusted
Came out pretty well with no drill brushing required, just a light scrub with a stiff brush ! Quite impressed with the process, certainly makes things easier on the old drill grinder, very gentle too on the good metal as only the rust and crud removed.
Read on !!
An update of sorts !! It’s been holiday’s time and raining but first holidays
Hic, hic, alot of that went on in sunny Spain for 5 days, nice.
Anyway the eagerly awaited return to blighty and the mini was interrupted with rain everyday till this afternoon, so I have been cleaning and painting.
Also decided to strip and check out the radius and top arms and found that the bearings and bronze thingy looked fine and although the spindle had had it there was a nice pull on the spindle through the bearings.
Kurusted most things in sight to be honest and then gave them some red oxide primer like this...
I have to say the good lady wife is not best pleased at the mo as the kitchen is a parts washing room by day and fooderie by night and then there are the parts drying in the conservatory and oil sometimes on the worktops !! Divorce coming up !!
Then the weeks highlight came, home science involving car battery charger, water and soda crystals, electrolytic rust removal. Set it up on the nice new decking, another frown from her indoors, and lobbed some parts in.
Before
After
And again kurusted
Came out pretty well with no drill brushing required, just a light scrub with a stiff brush ! Quite impressed with the process, certainly makes things easier on the old drill grinder, very gentle too on the good metal as only the rust and crud removed.
Read on !!
Edited by grahama, 18 May 2011 - 08:07 PM.
#159
grahama
-
- Members
-
- 2,442 posts
Up Into Fourth
- Location: Warrington
- Local Club: None in my area !!
Posted 18 May 2011 - 08:06 PM
next bit...
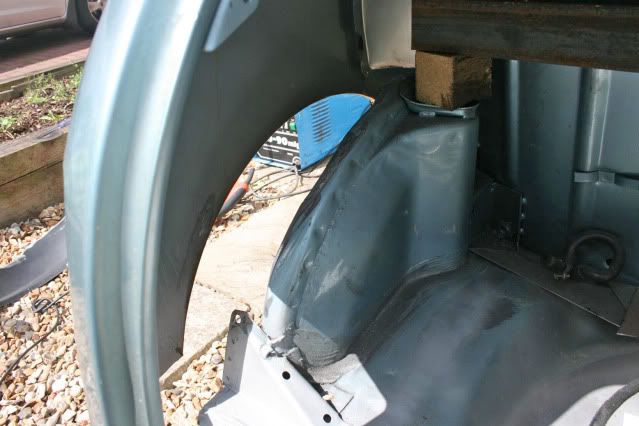
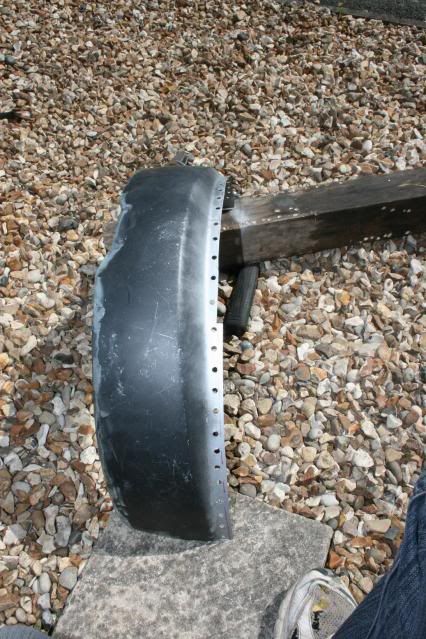
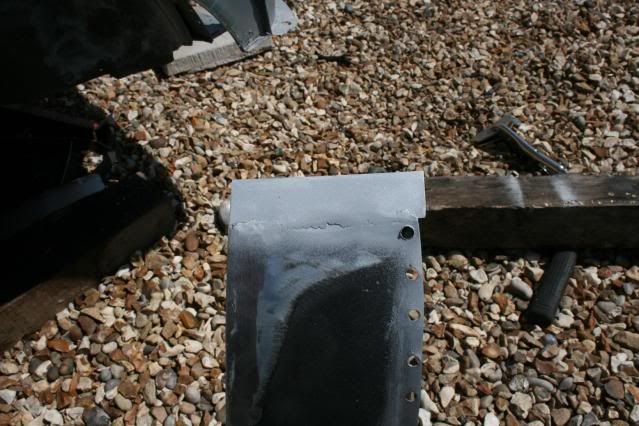
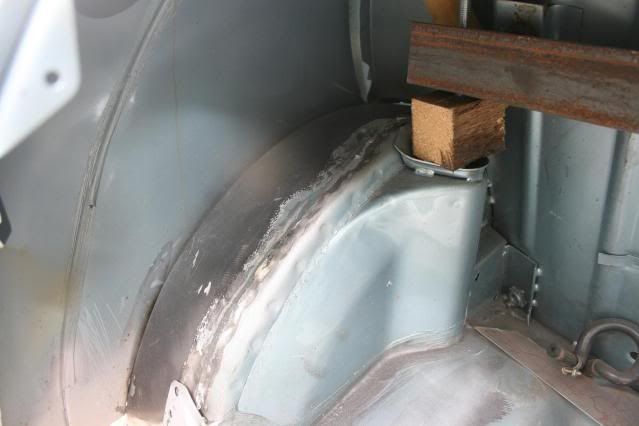
Anyway enough of cleaning and painting stuff, the sun came out so did a little before going to collect my free exhaust, courtesy of James, aka jame753, ta pal !! Attacked the NS wheel arch bl*^dy roller weld first to get it free for replacement.
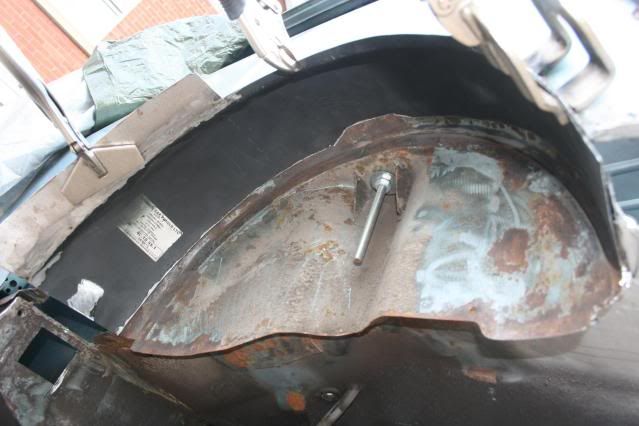
There was also a hole in the NS heelboard so a good deal of banging with a screwdriver confirmed only a patch was required.
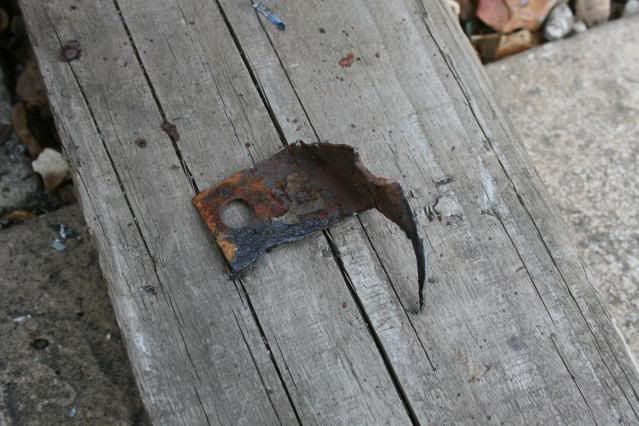
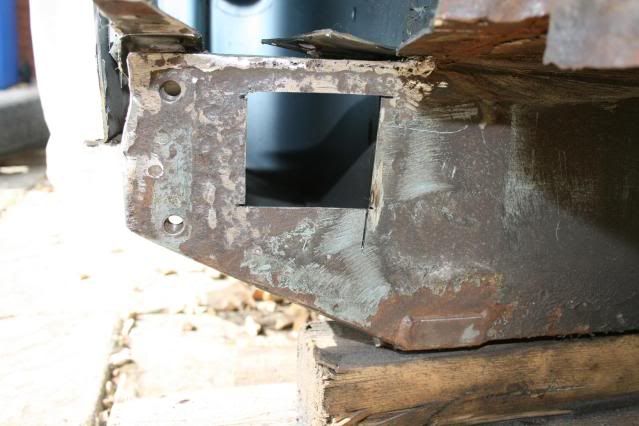
The closing paned seemed to be bodged in with weld, and although solid it looked a bit rough, and as I explored found rust behind so cut it all out.
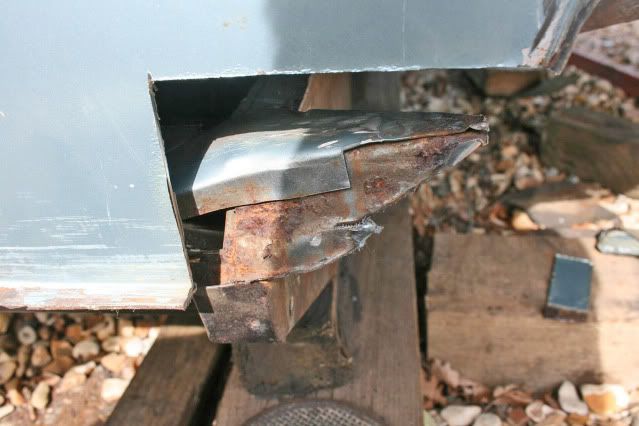
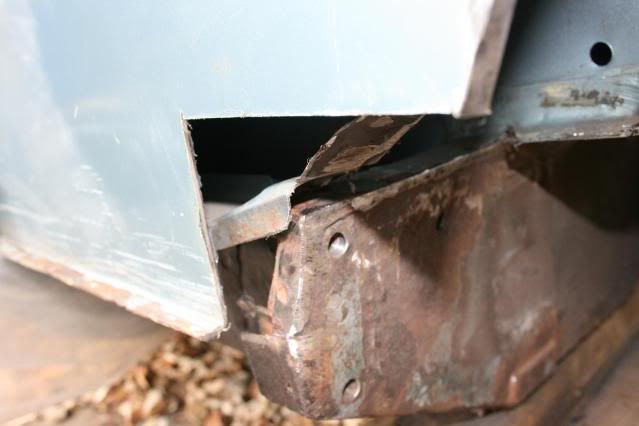
When this was all back to good metal I pulled at the old outer sill end and out it popped, not held in with much and rusty aswell so a good decision to attack the bodged weld area. More work to put it all back in but it will at least be rust free and should last longer.
Patch hole cut and as I said the surrounding area although a bit pitted was solid so am leaving alone.
Rain not a total loss maker so onward tomorrow if the gas lasts !!
Graham
Anyway enough of cleaning and painting stuff, the sun came out so did a little before going to collect my free exhaust, courtesy of James, aka jame753, ta pal !! Attacked the NS wheel arch bl*^dy roller weld first to get it free for replacement.
There was also a hole in the NS heelboard so a good deal of banging with a screwdriver confirmed only a patch was required.
The closing paned seemed to be bodged in with weld, and although solid it looked a bit rough, and as I explored found rust behind so cut it all out.
When this was all back to good metal I pulled at the old outer sill end and out it popped, not held in with much and rusty aswell so a good decision to attack the bodged weld area. More work to put it all back in but it will at least be rust free and should last longer.
Patch hole cut and as I said the surrounding area although a bit pitted was solid so am leaving alone.
Rain not a total loss maker so onward tomorrow if the gas lasts !!
Graham
Edited by grahama, 18 May 2011 - 08:13 PM.
#160
grahama
-
- Members
-
- 2,442 posts
Up Into Fourth
- Location: Warrington
- Local Club: None in my area !!
Posted 19 May 2011 - 06:49 PM
Hi all,
still sunny and boy does the back of my neck feel tender !! An update of the rear NS arch replacement with problems both panel and welding !!
Wont post too many pics as a repeat of the OS but with a couple of differences that might help others.
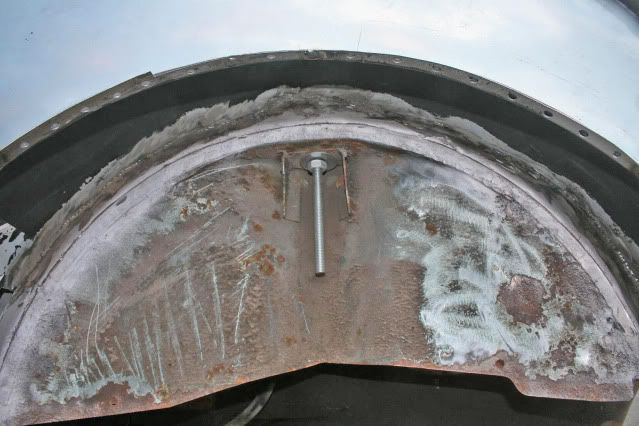
Cut out the arch after offering up and yet again the Magnum panel was short on the flange front !! Very frustrating when an arch panel cost £30 ish quid each !! Anyway made some adjustments as with the OS repair.
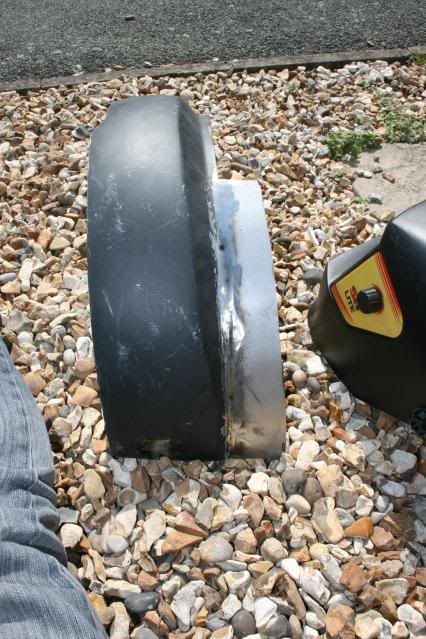
This time the flange was short on the front of the arch not the rear, thought crap part making would at least be consistently crap, but hey ho, mod done and drilled out for plug welding.
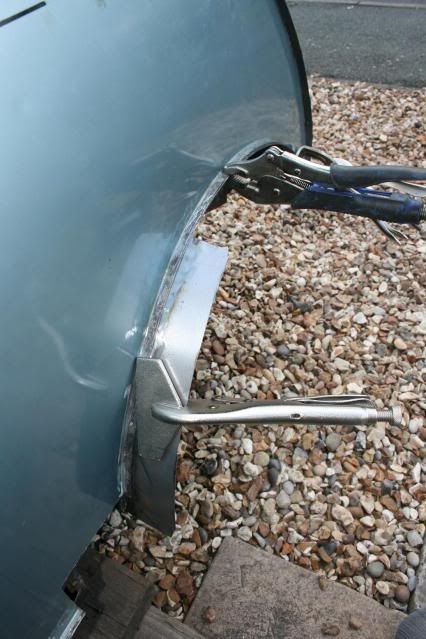
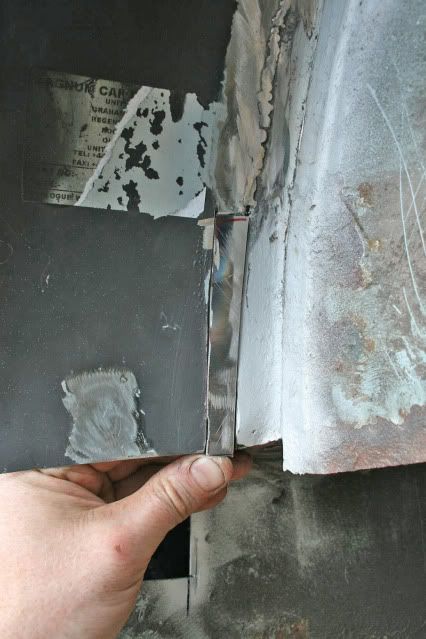
A difference to the OS arch is the extenstion piece I welded onto the end of the panel so it goes past the boot floor and will hopefully make finishing in that area easier than the OS boot to arch welding will be, but we'll see !!
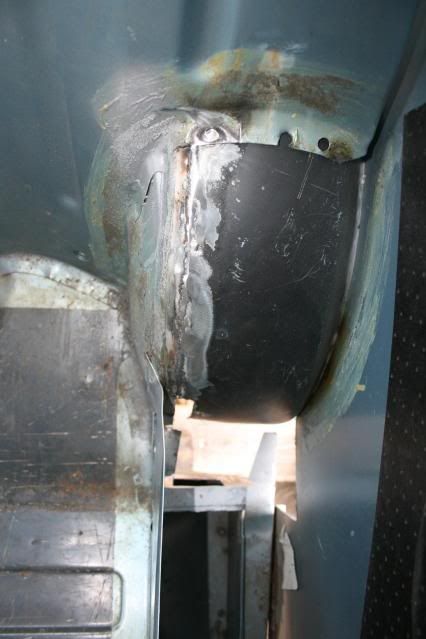
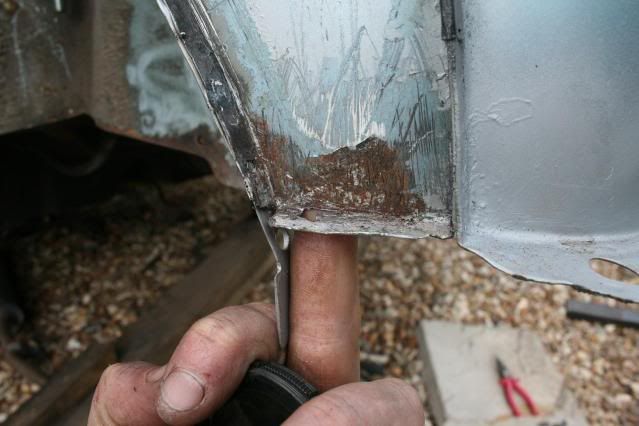
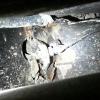
All welded in ane dressed down, but that doesn't tell the whole story. I had to beat the arch with a large persuader to get them to meet around the cut edges and by eck, welding upside down, how does that work ??? Still can't do it, burn through, blobbing and wire burning back to the tip, none of this happens when doing it looking down. Maybe it's me, maybe the welder, but upside down and me and welding are not good bedfellows. I even made a good earth to ensure all was well and still no good. Then I ran out of gas ahhhhhhhhhhhhhhhhhhhhhhhhhhhhhhhhhhhhhhhhhhhhh !!!
Although the welds look ok on photo, there are some pinholes and just not really happy with it so I will get some more gas and go over it all to make sure all is sealed and strong.

As the fit was so crap, probably my cutting to blame, I had a 2mm gap at the heelboard end, far too big for me to weld so cut a hole in the new panel and made a patch, also made one for the heelboard area from yesterday, just need some gas now.
I aslo found some more rot in a place I suspected it but didn't explore.
Another lesson learned, explore rot before welding in new metal right next to the rot, ahhhhhhhhhhhhhhhhhhhhhhhhhhh, much harder to sort now but I'll get to it tomorrow if I can get some gas!!
Little but rewarding update, if not complete.
Graham
ps ok I lied about the pics sorry !!!
still sunny and boy does the back of my neck feel tender !! An update of the rear NS arch replacement with problems both panel and welding !!
Wont post too many pics as a repeat of the OS but with a couple of differences that might help others.
Cut out the arch after offering up and yet again the Magnum panel was short on the flange front !! Very frustrating when an arch panel cost £30 ish quid each !! Anyway made some adjustments as with the OS repair.
This time the flange was short on the front of the arch not the rear, thought crap part making would at least be consistently crap, but hey ho, mod done and drilled out for plug welding.
A difference to the OS arch is the extenstion piece I welded onto the end of the panel so it goes past the boot floor and will hopefully make finishing in that area easier than the OS boot to arch welding will be, but we'll see !!
All welded in ane dressed down, but that doesn't tell the whole story. I had to beat the arch with a large persuader to get them to meet around the cut edges and by eck, welding upside down, how does that work ??? Still can't do it, burn through, blobbing and wire burning back to the tip, none of this happens when doing it looking down. Maybe it's me, maybe the welder, but upside down and me and welding are not good bedfellows. I even made a good earth to ensure all was well and still no good. Then I ran out of gas ahhhhhhhhhhhhhhhhhhhhhhhhhhhhhhhhhhhhhhhhhhhhh !!!
Although the welds look ok on photo, there are some pinholes and just not really happy with it so I will get some more gas and go over it all to make sure all is sealed and strong.
As the fit was so crap, probably my cutting to blame, I had a 2mm gap at the heelboard end, far too big for me to weld so cut a hole in the new panel and made a patch, also made one for the heelboard area from yesterday, just need some gas now.
I aslo found some more rot in a place I suspected it but didn't explore.
Another lesson learned, explore rot before welding in new metal right next to the rot, ahhhhhhhhhhhhhhhhhhhhhhhhhhh, much harder to sort now but I'll get to it tomorrow if I can get some gas!!
Little but rewarding update, if not complete.
Graham
ps ok I lied about the pics sorry !!!
Edited by grahama, 19 May 2011 - 06:50 PM.
#161
benjy_18
-

- TMF+ Member
-
- 1,038 posts
One Carb Or Two?
- Local Club: LSMOC
Posted 19 May 2011 - 07:44 PM
hey graham,
i had the same problem with the rot on the back of the arch, still isnt sorted so i will wait and see how you tackle it (Y) shame about those arches youve had, i used a heritage one when i did mine and it fit pretty much perfect
really good work going on here well done
Ben
i had the same problem with the rot on the back of the arch, still isnt sorted so i will wait and see how you tackle it (Y) shame about those arches youve had, i used a heritage one when i did mine and it fit pretty much perfect
really good work going on here well done
Ben
#162
grahama
-
- Members
-
- 2,442 posts
Up Into Fourth
- Location: Warrington
- Local Club: None in my area !!
Posted 19 May 2011 - 07:52 PM
Damn you and your heritage panels, lol.
My thoughts were the arch panels are not too critical and shouldn't bee too far out, mmmmmmmmmmmm however, just a little fettling which I am finding out is standard mini really !!!
Will work out fine when I get some gas, just takes longer to sort, like 4 hours again start to finish !
Was thinking of getting one of these if I can't make one, no. 10 ...
http://www.somerford...-Cabriolet,.pdf
Graham
Edited by grahama, 19 May 2011 - 07:56 PM.
#163
hughJ
-
- Members
-
- 727 posts
Soldiering Along
- Location: Highlands, Scotland
Posted 19 May 2011 - 08:20 PM
Graham, great to have you back and glad you had a good holiday. As usual your work is very clean. Thanks for all the info - I am on the same area as you. I thought your upside down welding most impressive - it is incredibly difficult - even Pete on SWRNC (South West Rod 'n' Custom) (found on rich2's posts) says upside down welding is difficult. Look forward to seeing how you get on. You have more guts than me.
Hugh
Hugh
#164
grahama
-
- Members
-
- 2,442 posts
Up Into Fourth
- Location: Warrington
- Local Club: None in my area !!
Posted 19 May 2011 - 08:51 PM
Hugh,
welding upside down was only needed due to taking out the arch and, I thought, wekening the back of the car. So I welded it in on the ground to avoid ant twisting as with the OS arch. Very hard and when I have some more gas I will put it on the spit to do it less upside down.
I thought, given my inexperience, that welding was welding no matter how it was done, but I suppose gravity takes it's toll !! As my post says I will re go over the area to make sure.
As for guts, not sure on that one, just stupid and go for it , lol, think I am an expert now I have done a bit !!! Reality is showing me different though !!
Graham
Edited by grahama, 19 May 2011 - 08:51 PM.
#165
JustSteve
-
- Members
-
- 1,883 posts
Puke-Boy!!
- Location: Long Eaton, Nottingham
Posted 19 May 2011 - 09:20 PM
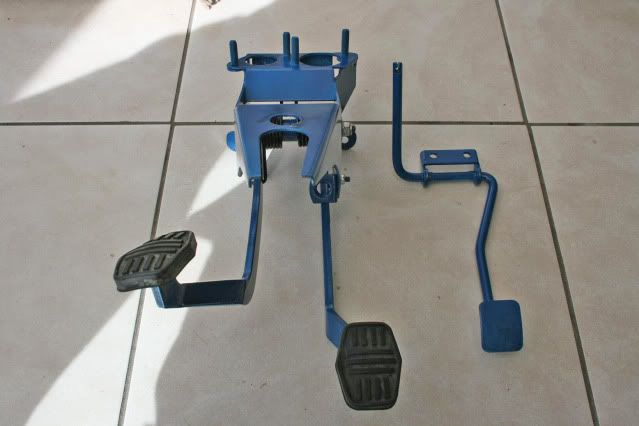
Hey Graham, your progress is looking good and I am liking the blue and gold combo!
regarding your radius arms, are you re-using your existing bushes or replacing them? I'm currently onto my radius arms and they need new bushes, but I'm being told I should just get complete radius arms.
Keep up the good work mate, Steve.
regarding your radius arms, are you re-using your existing bushes or replacing them? I'm currently onto my radius arms and they need new bushes, but I'm being told I should just get complete radius arms.
Keep up the good work mate, Steve.


1 user(s) are reading this topic
0 members, 1 guests, 0 anonymous users


