that looks really tidy graham!
I think im going to redo that bit on wednesday as mines a bit ugly and you make it look simple enough.
keep it up
Ben


Mini Virgin Rebuild Of 83 Mayfair.
Started by
grahama
, May 22 2010 05:09 PM
1006 replies to this topic
#181

benjy_18
-

- TMF+ Member
-

- 1,038 posts
One Carb Or Two?
- Local Club: LSMOC
Posted 06 June 2011 - 06:58 PM
#182
grahama
-
- Members
-
- 2,442 posts
Up Into Fourth
- Location: Warrington
- Local Club: None in my area !!
Posted 06 June 2011 - 07:11 PM
Ben,
took me about 12 hours of swearing and cut fingers, so I wouldn't use 'you make it look simple' lol. Very rewarding though when done. Can you not dress your welds to make them look better rather than redoing them, this is what I am going to do on the rear closing plates. Will look through your thread again.
Graham
#183
benjy_18
-
- TMF+ Member
-
- 1,038 posts
One Carb Or Two?
- Local Club: LSMOC
Posted 06 June 2011 - 07:16 PM
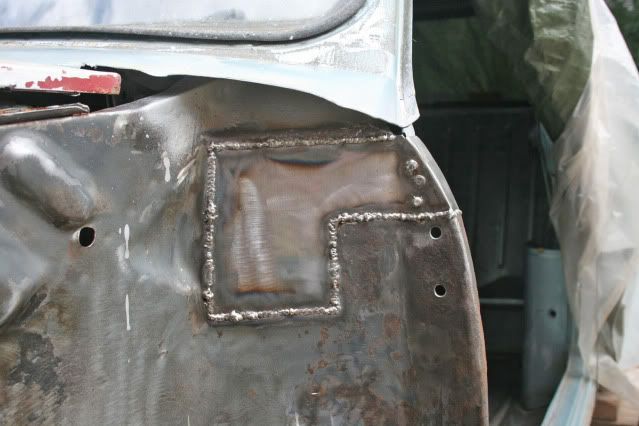
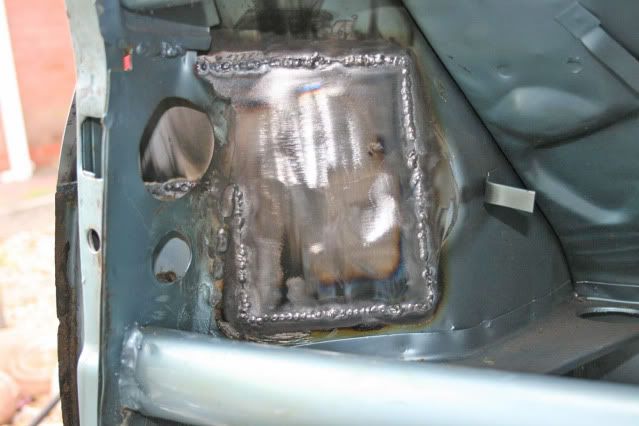
the welds themselves are fine, but im not amazingly happy with the way the panel has gone in. but as its not actually finished yet i may aswell restart it and do it properly
#184
minimuk
-

- Members
-
- 1,947 posts
Camshaft & Stage Two Head
- Location: Midlands
Posted 06 June 2011 - 07:40 PM
famous flitch repair,...increadable precision job you did there, bet yr proud you did that looking back at it now.
Keep it going!!!
Keep it going!!!
#185
grahama
-
- Members
-
- 2,442 posts
Up Into Fourth
- Location: Warrington
- Local Club: None in my area !!
Posted 06 June 2011 - 07:53 PM
Yea, quite chuffed with it. It does look a little untidy as I don't grind my welds down fully so as not to weaken the welds themselves, therefore thay always show. There will be carpet over so not visible and plenty of underseal on the outside ones too. Was a puzzle but enjoyable
Graham
Graham
#186
MINI-TURBO
-
- Members
-
- 230 posts
Mini Mad
- Location: newmarket
Posted 06 June 2011 - 08:06 PM
it looks good mate, keep up the good work. 
#187
MINI-TURBO
-
- Members
-
- 230 posts
Mini Mad
- Location: newmarket
Posted 06 June 2011 - 08:09 PM
it looks good mate, keep up the good work.
#188
nrwilliams
-

- Noobies
-
- 133 posts
Mini Mad
- Location: Uckfield, East Sussex
Posted 07 June 2011 - 01:48 PM
Fantastic! Very nice work!  )
)
)
#189
grahama
-
- Members
-
- 2,442 posts
Up Into Fourth
- Location: Warrington
- Local Club: None in my area !!
Posted 07 June 2011 - 04:44 PM
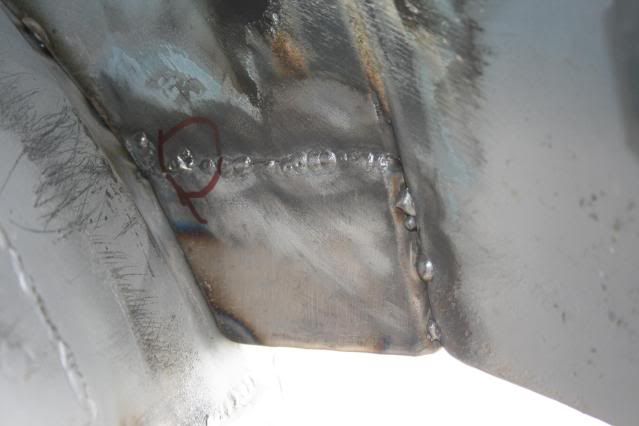
Hi all,
last update for the week as work calls, b ut not had a bad run at it this few days off. Only a few bits done but here they are...
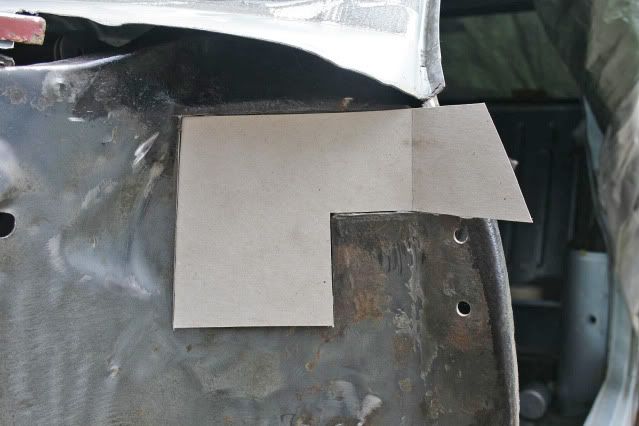
The top of the NS flitch was next on the adgenda. Some crappy metal above the air vent which is going and at the top of the A panel lip. Cut out as neat as I could and Blue Peter skills came out again in the form of another template.
The patch cut out, I had to make the lip for the A panel as the top of the lip is curved and couldn't bend it with my toolset. So made one and welded it on. Once fitted the radius worked out fine.
All welded up and some on the inside too as is the way I like to do it, right or wrong, sometimes there are poor penetration patches so I go over them, can't hurt !!
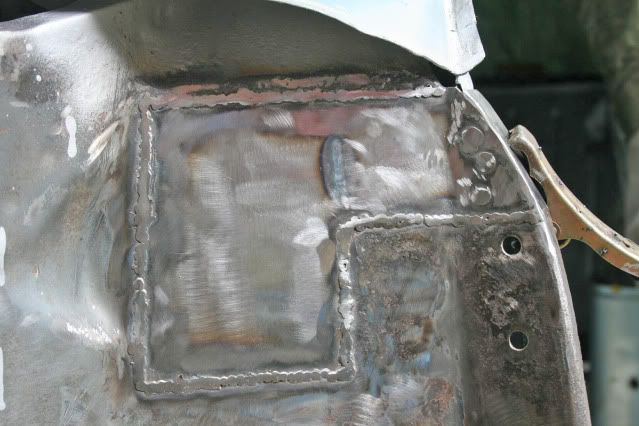
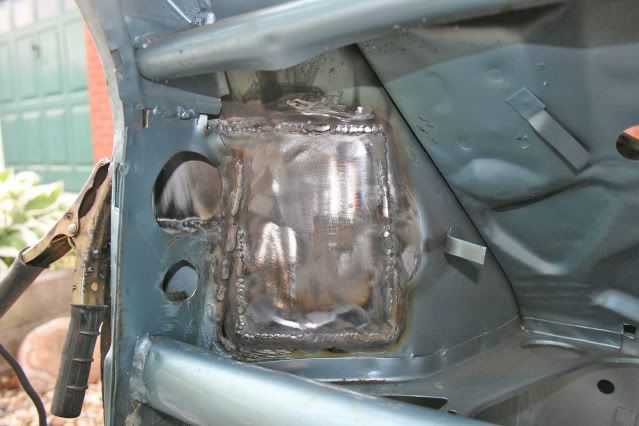
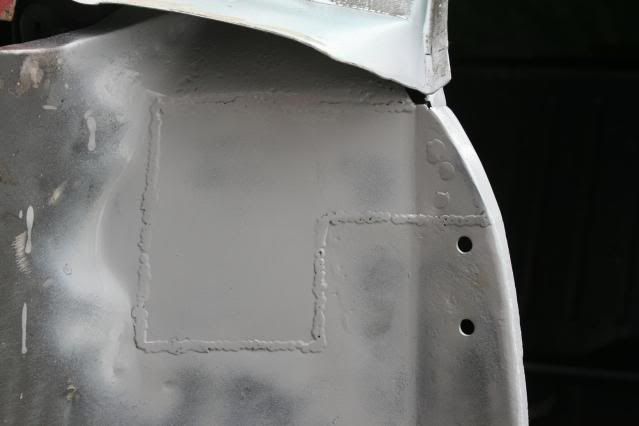
All dressed up and etched primed as usual. There was one bit from yesterday I didn't get round to and that was folding the flange over on the lower flitch patch.
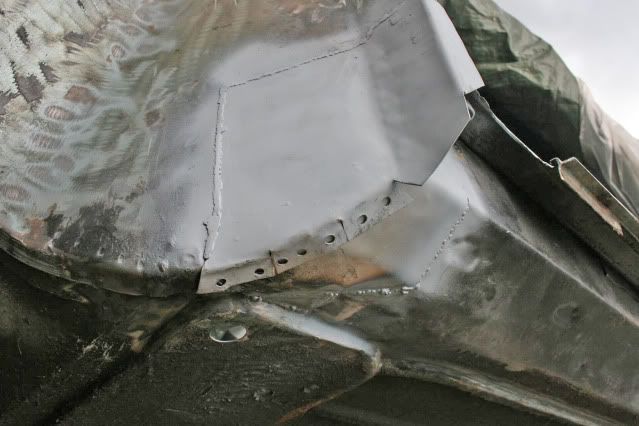
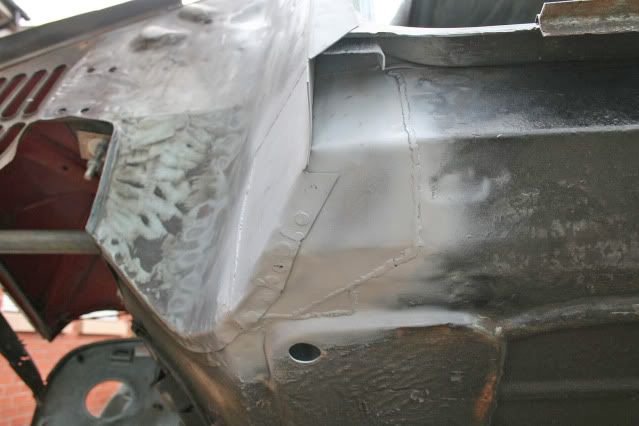
A few belts with the persuader and it submitted and was plug welded to the inner patch. Also did a seam on the floor patch so done both sides too, dressed it all and beat the rain by 16 seconds !!!
All tucked up for a few days now, but seem to be on a bit of a roll now the complicated bits are done, feeling quite upbeat about it all at the moment.
Regards,
Graham
last update for the week as work calls, b ut not had a bad run at it this few days off. Only a few bits done but here they are...
The top of the NS flitch was next on the adgenda. Some crappy metal above the air vent which is going and at the top of the A panel lip. Cut out as neat as I could and Blue Peter skills came out again in the form of another template.
The patch cut out, I had to make the lip for the A panel as the top of the lip is curved and couldn't bend it with my toolset. So made one and welded it on. Once fitted the radius worked out fine.
All welded up and some on the inside too as is the way I like to do it, right or wrong, sometimes there are poor penetration patches so I go over them, can't hurt !!
All dressed up and etched primed as usual. There was one bit from yesterday I didn't get round to and that was folding the flange over on the lower flitch patch.
A few belts with the persuader and it submitted and was plug welded to the inner patch. Also did a seam on the floor patch so done both sides too, dressed it all and beat the rain by 16 seconds !!!
All tucked up for a few days now, but seem to be on a bit of a roll now the complicated bits are done, feeling quite upbeat about it all at the moment.
Regards,
Graham
#190
minimuk
-
- Members
-
- 1,947 posts
Camshaft & Stage Two Head
- Location: Midlands
Posted 07 June 2011 - 06:29 PM
nice finishing up there Graham, bet yr thinking on a next project by now, great work keep it going, don't forget to measure now and then 
Edited by minimuk, 07 June 2011 - 06:29 PM.
#191
hughJ
-

- Members
-
- 727 posts
Soldiering Along
- Location: Highlands, Scotland
Posted 07 June 2011 - 08:37 PM
Graham that is fantastic fabrication and repairs to the flitch and floor. You are leaving me way behind. You seem to have natural skilled hands. I went for bought panels there! Oh the shame!!
Looking forward to the next instalment
Hugh
Looking forward to the next instalment
Hugh
#192
grahama
-
- Members
-
- 2,442 posts
Up Into Fourth
- Location: Warrington
- Local Club: None in my area !!
Posted 07 June 2011 - 09:40 PM
Hi,
next project will probably be another mini or maybe a bug if cheap enough, same for minis at the moment tho !! Can't stop looking all misty eyed at campervans though !
Hugh,
you have already done these bits, very well by the way, about even at the moment, back to the rear next to finish it off !! More fettling comming up.
Graham
#193
benjy_18
-
- TMF+ Member
-
- 1,038 posts
One Carb Or Two?
- Local Club: LSMOC
Posted 08 June 2011 - 09:42 AM
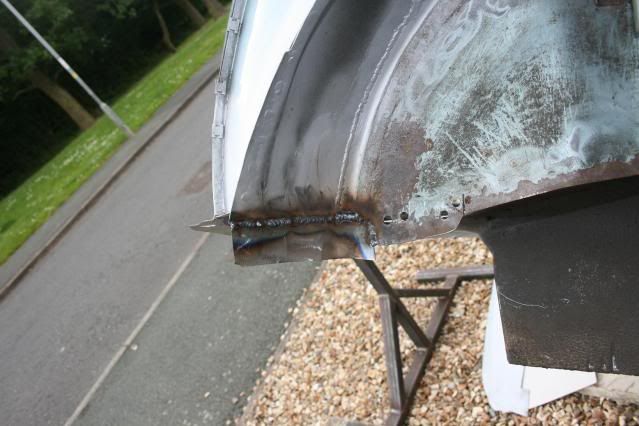
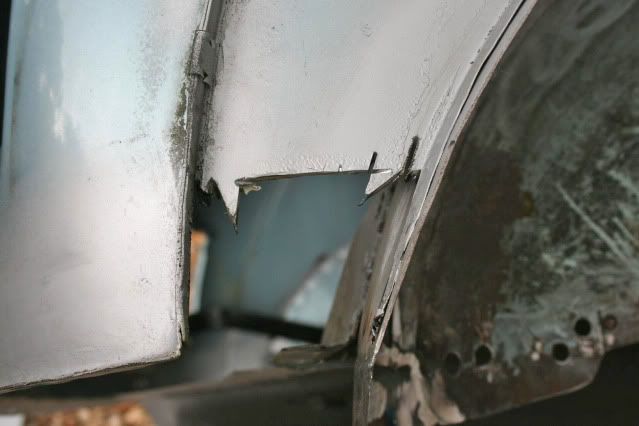
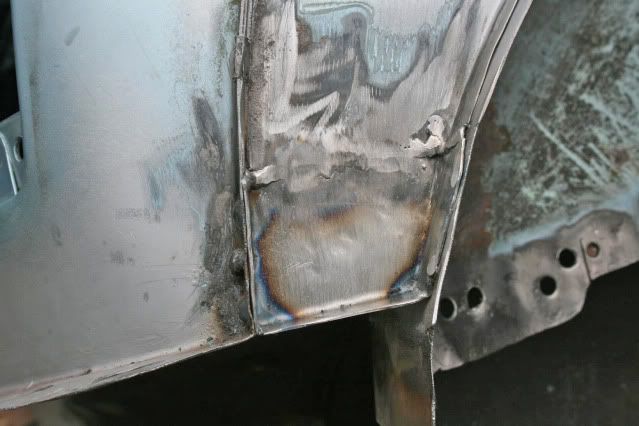
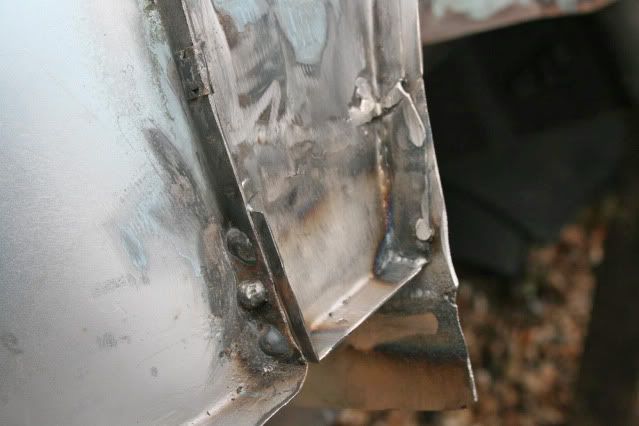
hey graham,
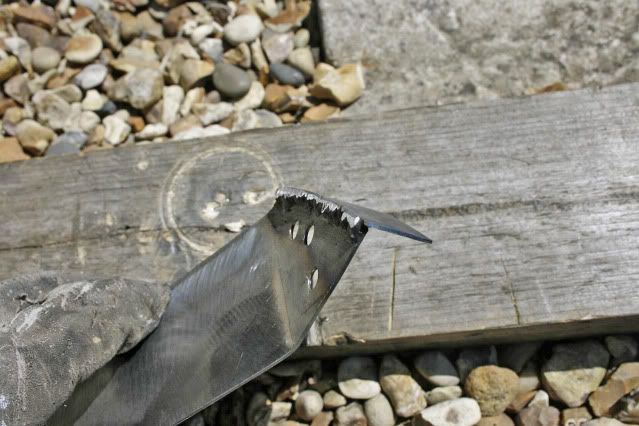
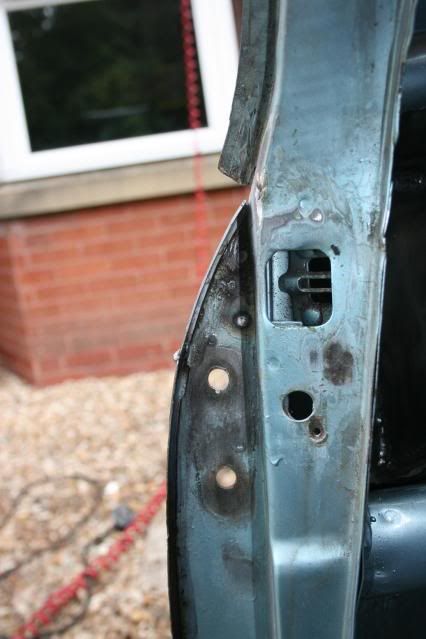
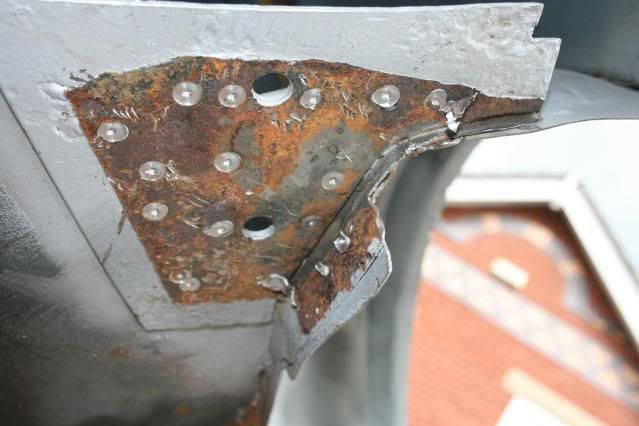
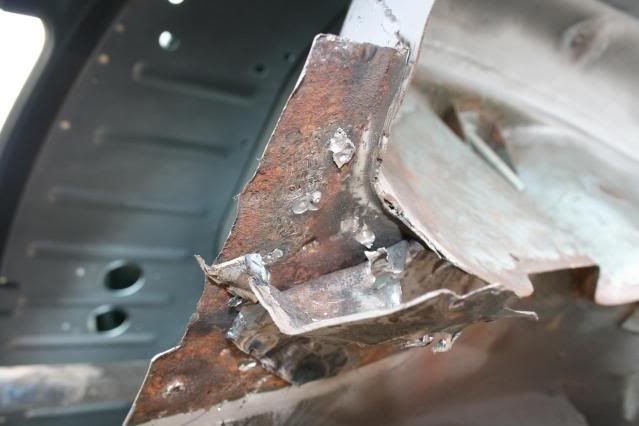
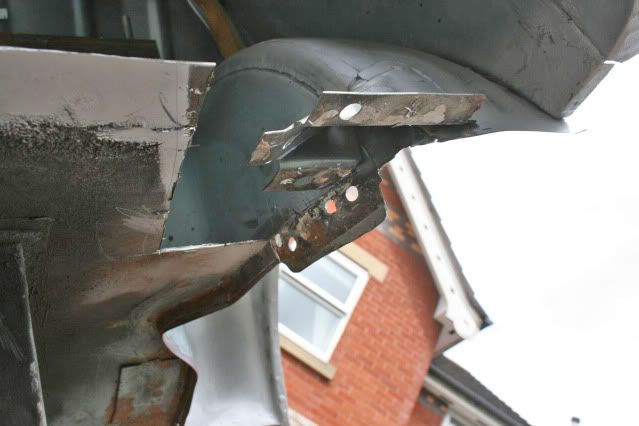
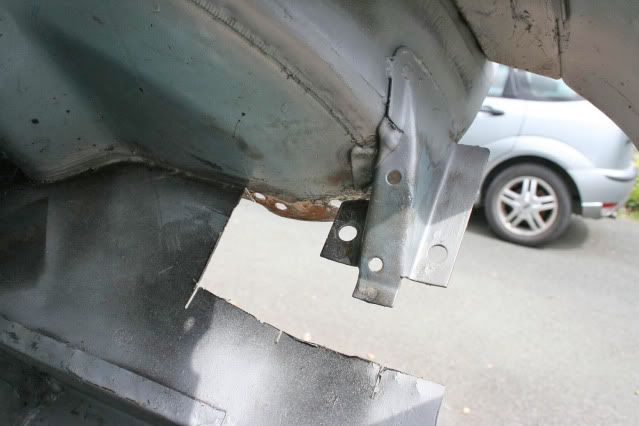
managed to find some photos from when i started to rebuild the corner of the doorstep, its just missing the actual corner now which i shouldget today.
hope they help

this shows the bottom of the hinge panel
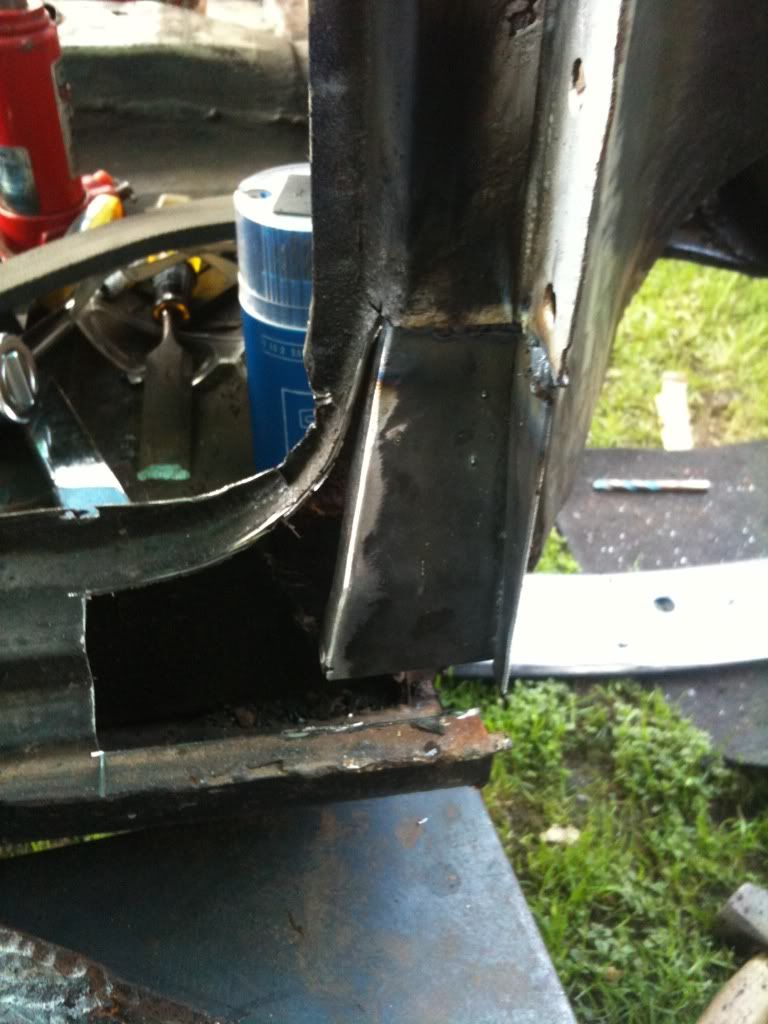
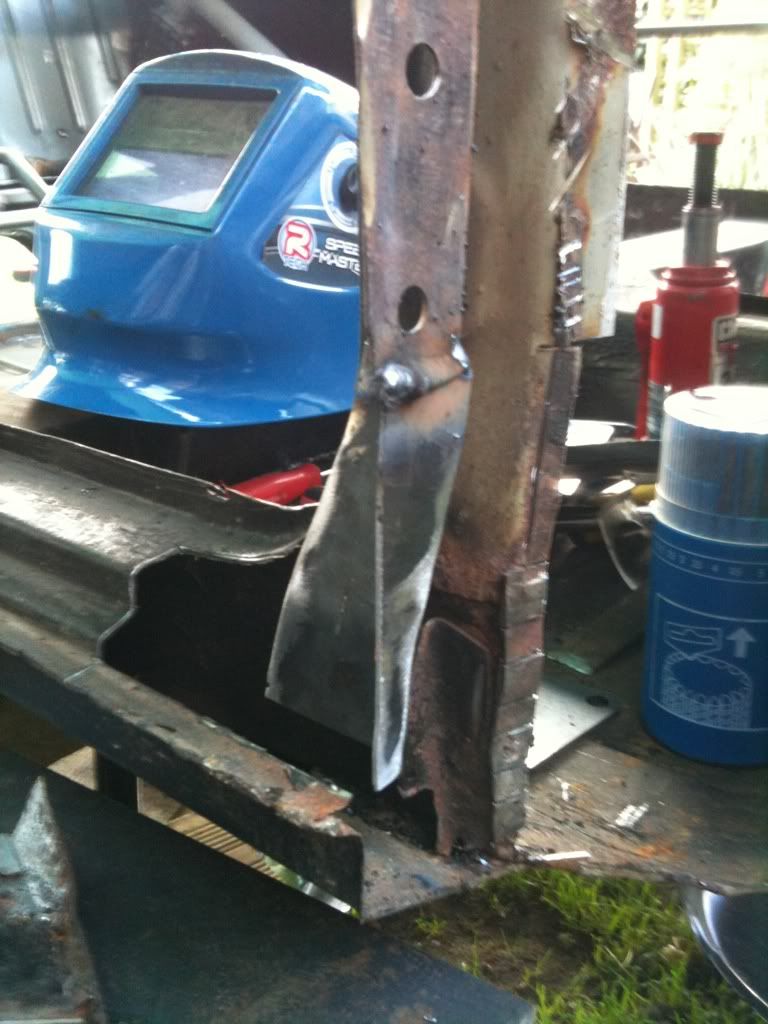
obviously all this was done before i put the flitch on.
good luck
Ben
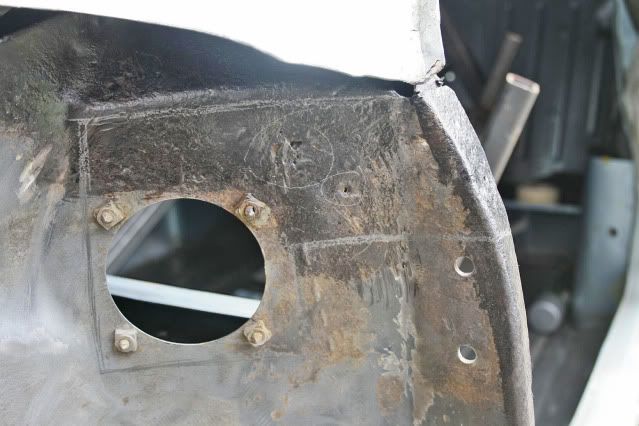
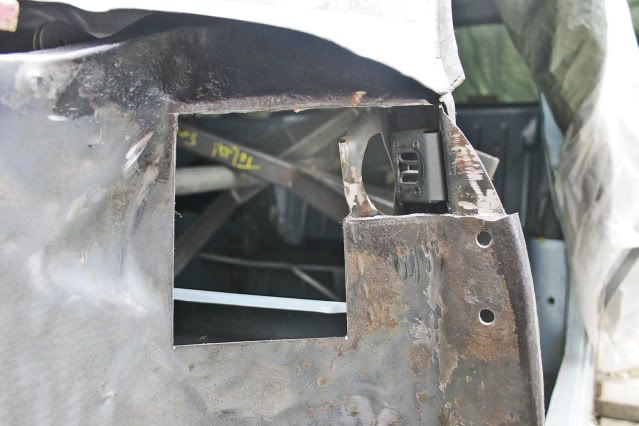
managed to find some photos from when i started to rebuild the corner of the doorstep, its just missing the actual corner now which i shouldget today.
hope they help
this shows the bottom of the hinge panel
obviously all this was done before i put the flitch on.
good luck
Ben
#194
grahama
-
- Members
-
- 2,442 posts
Up Into Fourth
- Location: Warrington
- Local Club: None in my area !!
Posted 10 June 2011 - 03:30 PM
Hi all,
Cheers Ben for the pics, got sorted in the end with various pics and info.
Anyhow, must be mad doing some work before nights, am knackered now, what with running inside every 1/2 hour with the flippin rain showers. Did a couple of important jobs though.
Decided to take the subframe strengthening plates off as not complete and I could see some rust around the edges. Looked at Hugh's work in this area and thought mine looked much better, not !!! Slight rust under the first plate but major rot on the underneath of the boot floor under the second.
Took a largish piece out to cut back to good metak but left the subframe mount in place as it was in excellent condition and didn't want to disturb positioning. Also took out down the side of the arch to be throurough and only a smidge of surface rust so will treat the rest of the seam along the arch bottom and make a boot floor patch. Thinking I may well go to the dark side and but a boot panel !!!
Something I have been advised to do is to extend my arches as I would not have anything to weld the boot floor panel to otherwise so here it is !!

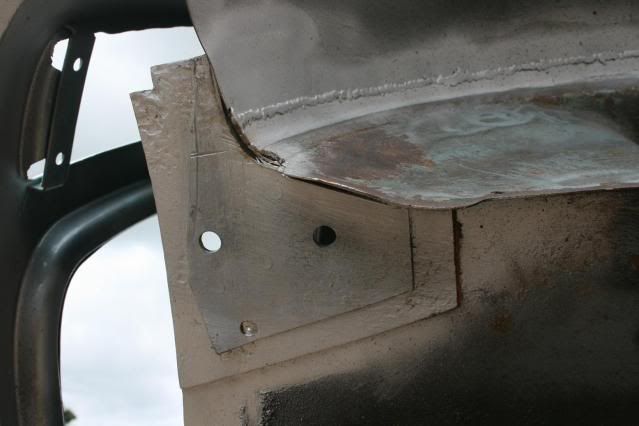
The bottom of the quarter panel was a little thin, and holey on the NS so while I had access I cut back to good metal again and made a patch, trimmed, welded the corners up and fitted, not too bad.
Welded it in place with a seam at top and plugs front and rear. Will need to wait till my carbide burs arrive to finish these of properly, but ground down where I could. Inside revealed a pinhole, but the welder was already away and will do it next time if I remember !!
Not too much today,
Graham
Cheers Ben for the pics, got sorted in the end with various pics and info.
Anyhow, must be mad doing some work before nights, am knackered now, what with running inside every 1/2 hour with the flippin rain showers. Did a couple of important jobs though.
Decided to take the subframe strengthening plates off as not complete and I could see some rust around the edges. Looked at Hugh's work in this area and thought mine looked much better, not !!! Slight rust under the first plate but major rot on the underneath of the boot floor under the second.
Took a largish piece out to cut back to good metak but left the subframe mount in place as it was in excellent condition and didn't want to disturb positioning. Also took out down the side of the arch to be throurough and only a smidge of surface rust so will treat the rest of the seam along the arch bottom and make a boot floor patch. Thinking I may well go to the dark side and but a boot panel !!!
Something I have been advised to do is to extend my arches as I would not have anything to weld the boot floor panel to otherwise so here it is !!
The bottom of the quarter panel was a little thin, and holey on the NS so while I had access I cut back to good metal again and made a patch, trimmed, welded the corners up and fitted, not too bad.
Welded it in place with a seam at top and plugs front and rear. Will need to wait till my carbide burs arrive to finish these of properly, but ground down where I could. Inside revealed a pinhole, but the welder was already away and will do it next time if I remember !!
Not too much today,
Graham
#195
hughJ
-
- Members
-
- 727 posts
Soldiering Along
- Location: Highlands, Scotland
Posted 10 June 2011 - 07:55 PM
Not too much today!!! If I could get through what you do Graham I'd be delighted. Fantastic work. Leapfrogging me. I like the repair to the bottom rear quarter - I have to do a similar one.
Hugh
Hugh


2 user(s) are reading this topic
0 members, 2 guests, 0 anonymous users


