Nice one Graham, glad you get ready before cold spel, excellent priming on the go there, bet yr proud yrselves. how are your doors?
keep at it, engine looks like and indoor winter job.


Mini Virgin Rebuild Of 83 Mayfair.
Started by
grahama
, May 22 2010 05:09 PM
1006 replies to this topic
#256

minimuk
-

- Members
-

- 1,947 posts
Camshaft & Stage Two Head
- Location: Midlands
Posted 14 October 2011 - 09:40 PM
#257
grahama
-
- Members
-
- 2,442 posts
Up Into Fourth
- Location: Warrington
- Local Club: None in my area !!
Posted 14 October 2011 - 10:04 PM
Thanks all,
plan is to at very least get the rear all sealed and primed with at least two coats and get the front started. I say front, if I can get the front panel in place correctly then I may well get some more done, wings and a panels maybe, we'll see. Doors are pretty good, new 'old' passenger door from fleabay looked mint but has a couple of bits to do. Tried a quick fit with the doors and car, seemed ok, but hinges are being refurbished as the screws to the flitch have gone and they are being drilled out and replaced. Door apeture may well need a welding rod or two but that's not my main thing before Winter.
The engine is indeed my Winter project, started now as I haven't got a clue about engines and may well be asking loads of questions. Came apart easily enough so how hard can it be, lol !!! Thinking of having a minimal bore/hone, (due to lad's insureance), and a skim of the head and block as two 'different' engine parts, just to make sure.
As long as all protected while outside for the cold weather then I can get cracking early on next year. A wiring loom to plan over Winter too as mine was broken in many many places.
Phew, sweating just thinking about trying to convince Jan that 'a mini is for life, especially Christmas time when the engine is in bits' lol !!! !!
Graham
#258
Carlos W
-

- TMF+ Member
-
- 10,115 posts
Mine is purple, but I have been told that's normal
- Location: Sittingbourne, Kent
Posted 14 October 2011 - 10:09 PM
But primer is semi porous isn't it?
#259
mini-luke
-

- Traders
-
- 2,362 posts
Postman Pat
- Location: Hereford
Posted 14 October 2011 - 10:13 PM
Yes, it does absorb moisture  Not as bad a filler mind
Not as bad a filler mind
#260
grahama
-
- Members
-
- 2,442 posts
Up Into Fourth
- Location: Warrington
- Local Club: None in my area !!
Posted 14 October 2011 - 10:14 PM
This stuff is used to paint bridges and other metal things, however the tin says slightly porus but with rust inhibiting properties !! I don't know, but it's outside and rust is already showing through red oxide so thought I'd try something else, no time for top coat before the big chill.
Graham
Graham
Edited by grahama, 14 October 2011 - 10:20 PM.
#261
grahama
-
- Members
-
- 2,442 posts
Up Into Fourth
- Location: Warrington
- Local Club: None in my area !!
Posted 17 October 2011 - 07:00 PM
Hi all,
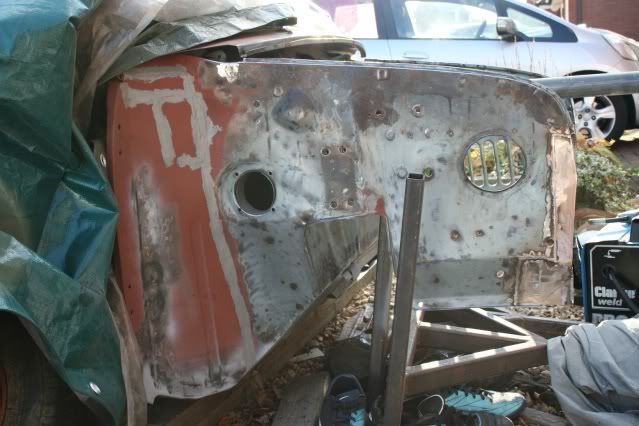
well the updates seem to be getting shorter as the days are but that's also due to me having several cups of coffee before venturing outside!! However I must push on while I can still feel my fingers when working so a small update ..
Carrying on from last time I have scraped the old sound felt off the roof as it was annoying me sat there so that just needs primer rollering on.
Started to clean up the bulkhead so I could get this primed. The old seam sealer was about at the end of it's days and rust had formed underneath despite being fairly stuck down. The rest of it was in pretty good nick so a good wire brushing will sort it out.
Still don't know what bolts to the bar thing next to where the accelerator cable goes through??
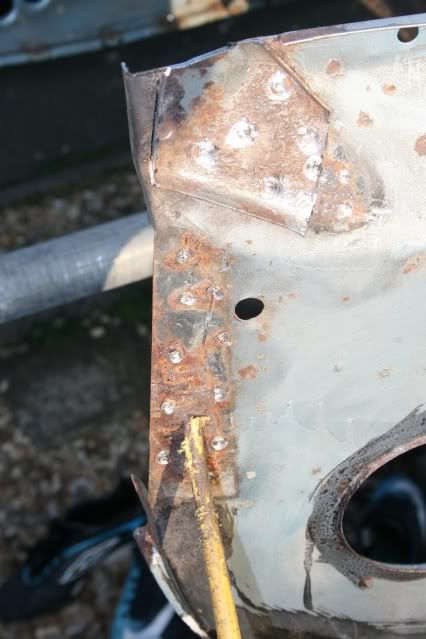
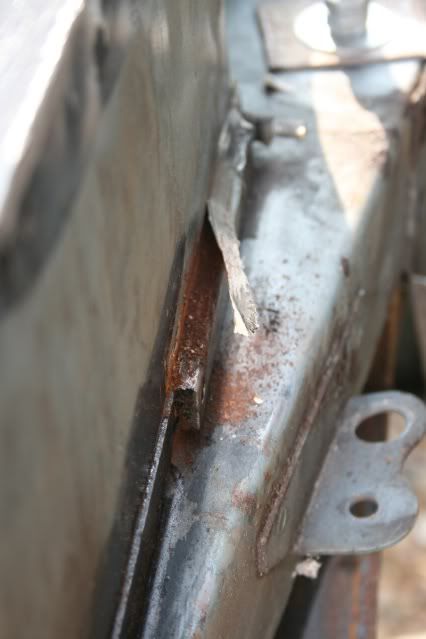
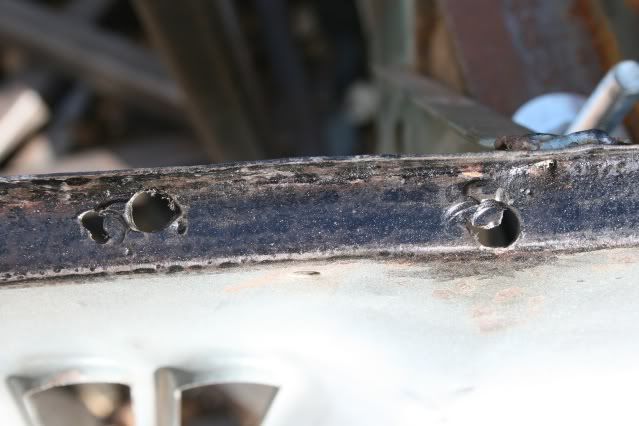
On to the front end and under the front panel mounts was a heap of thin inner wing. Wasn't expecting this to be honest as it looked really good there. So once again the templates came out.
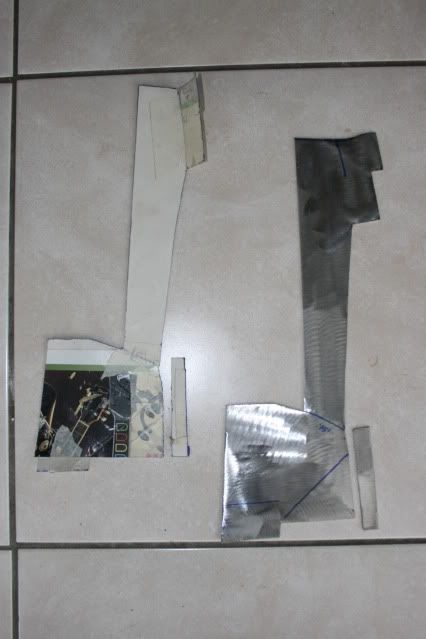
The inner wing is quite 'shaped' where it meets the front panel and it took some time to cut, bend and tease into the right shape.
Thats the OS done will get the other side done later in the week if the snow stops sooner that they expect. A litttle lip work and then I can put the front end on.
Keeping going !!
Graham
well the updates seem to be getting shorter as the days are but that's also due to me having several cups of coffee before venturing outside!! However I must push on while I can still feel my fingers when working so a small update ..
Carrying on from last time I have scraped the old sound felt off the roof as it was annoying me sat there so that just needs primer rollering on.
Started to clean up the bulkhead so I could get this primed. The old seam sealer was about at the end of it's days and rust had formed underneath despite being fairly stuck down. The rest of it was in pretty good nick so a good wire brushing will sort it out.
Still don't know what bolts to the bar thing next to where the accelerator cable goes through??
On to the front end and under the front panel mounts was a heap of thin inner wing. Wasn't expecting this to be honest as it looked really good there. So once again the templates came out.
The inner wing is quite 'shaped' where it meets the front panel and it took some time to cut, bend and tease into the right shape.
Thats the OS done will get the other side done later in the week if the snow stops sooner that they expect. A litttle lip work and then I can put the front end on.
Keeping going !!
Graham
#262
hughJ
-

- Members
-
- 727 posts
Soldiering Along
- Location: Highlands, Scotland
Posted 18 October 2011 - 11:04 AM
Good one Graham - that's a fantastic bit of fabrication!! The thought of winter is a bit of a nightmare!
Keep up the good work - you will anyway.
Hugh
Keep up the good work - you will anyway.
Hugh
#263
grahama
-
- Members
-
- 2,442 posts
Up Into Fourth
- Location: Warrington
- Local Club: None in my area !!
Posted 22 October 2011 - 05:41 PM
Hi all,
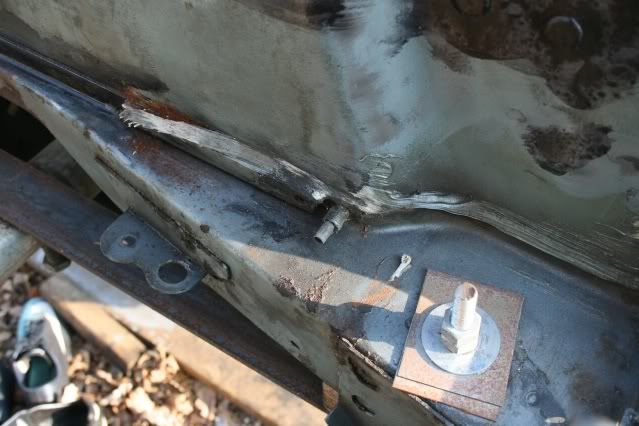
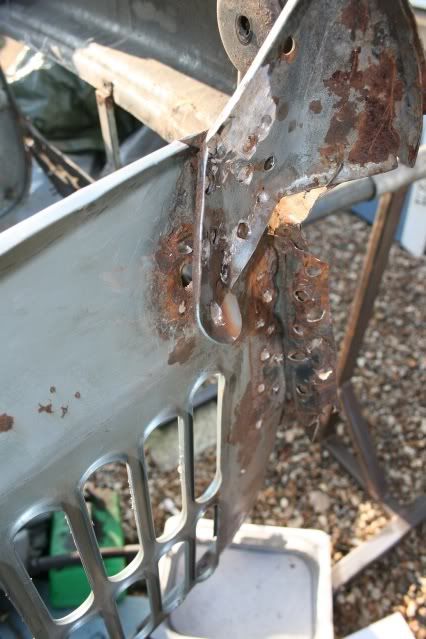
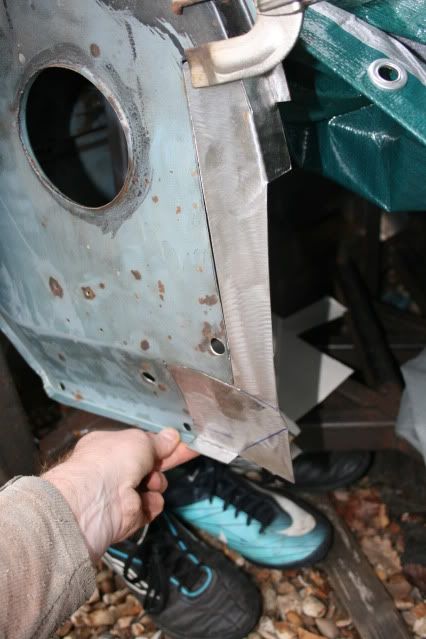
sunny again so making the most of it . Carried on with the inner arch repairs and lip that the bonnet and wings sit on / near.

Got the pieces all welded in and ground down, but not after grinding through my VIN plate. Hope this is all ok for the MOT or do I need a new VIN plate now ??

Not sure what this lip return was for as on the original it wasn't connected to anything but put it back just in case.
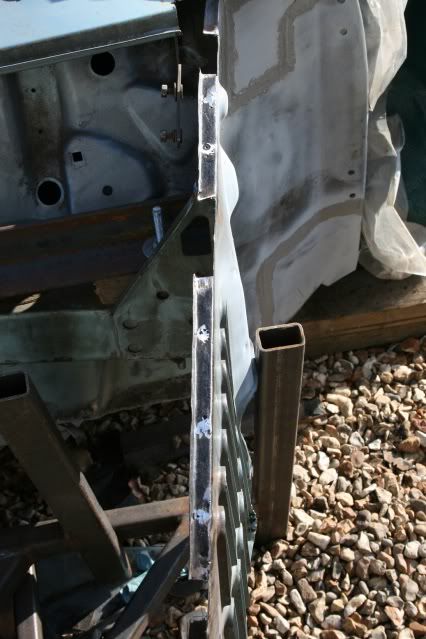
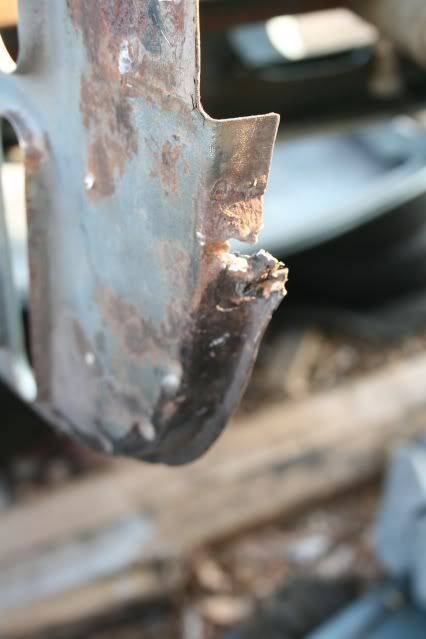
Had a nightmare getting the NS wing off and drilled holes through the top of the inner wing. So I cut out the crappy metal and welded new in, ground down and cleaned up.
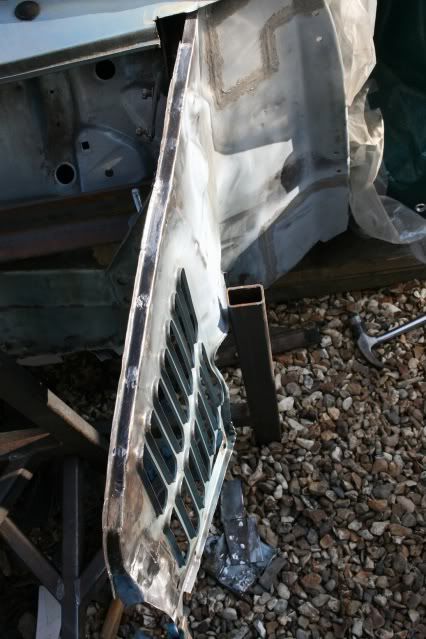
Voila !!
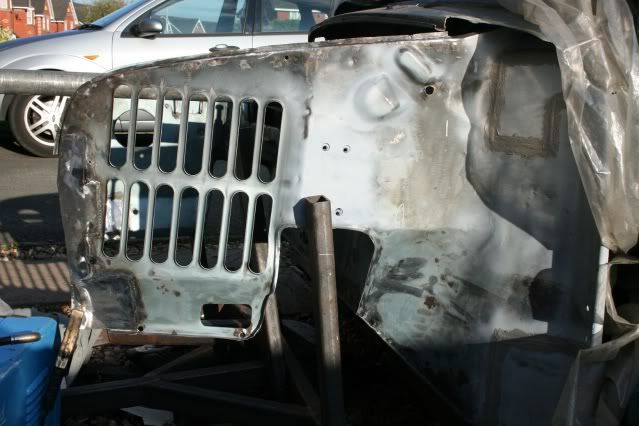
So inner wings done and ready for a little kurust for a bit of surface stuff and a prime. I am going to do the pin method of attaching the bonnet so I cut out the bonet hinges, right or not I don't know, but I had a little surface rust under the scuttle to get to and this made it easier to do, so off they came!!
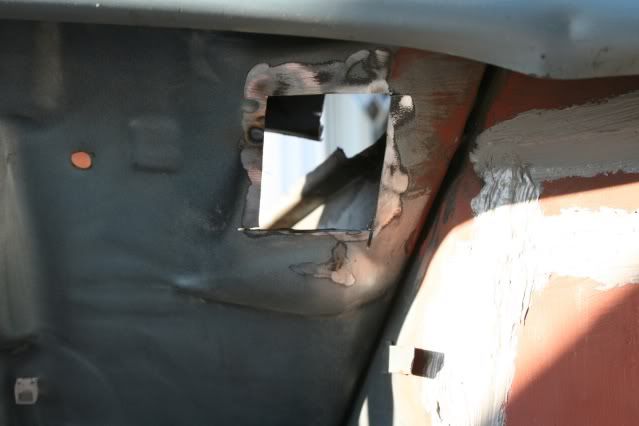
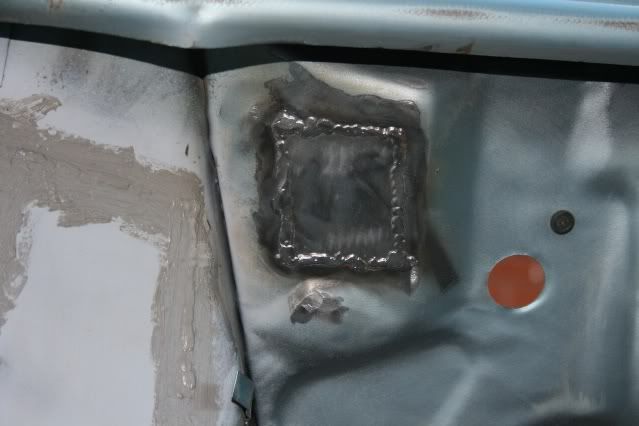
Ground down as far as I wanted to so a seam seal and prime to go this weekend hopefully but Man City are thrashing Man Utd on Sunday so may well just have a few beers instead !! COME ON CITY !!
Sooooooooo then, apart from a little bit on the rear side window lips, I am rust free on the shell, so I can fit the front end on. That's not including the doors though lol !!
Long live the fresh metal !!
Graham
sunny again so making the most of it . Carried on with the inner arch repairs and lip that the bonnet and wings sit on / near.
Got the pieces all welded in and ground down, but not after grinding through my VIN plate. Hope this is all ok for the MOT or do I need a new VIN plate now ??
Not sure what this lip return was for as on the original it wasn't connected to anything but put it back just in case.
Had a nightmare getting the NS wing off and drilled holes through the top of the inner wing. So I cut out the crappy metal and welded new in, ground down and cleaned up.
Voila !!
So inner wings done and ready for a little kurust for a bit of surface stuff and a prime. I am going to do the pin method of attaching the bonnet so I cut out the bonet hinges, right or not I don't know, but I had a little surface rust under the scuttle to get to and this made it easier to do, so off they came!!
Ground down as far as I wanted to so a seam seal and prime to go this weekend hopefully but Man City are thrashing Man Utd on Sunday so may well just have a few beers instead !! COME ON CITY !!
Sooooooooo then, apart from a little bit on the rear side window lips, I am rust free on the shell, so I can fit the front end on. That's not including the doors though lol !!
Long live the fresh metal !!
Graham
Edited by grahama, 22 October 2011 - 05:46 PM.
#264
hughJ
-
- Members
-
- 727 posts
Soldiering Along
- Location: Highlands, Scotland
Posted 22 October 2011 - 06:04 PM
As usual top quality Graham work. Don't know why you complain about your welding, that is superb. You can see that the weld has had a good heat and melted into the metal. You do see welds on the forum that just seem to sit on the surface.
Do you really think a Mini is ever rust free??
Hugh
Do you really think a Mini is ever rust free??
Hugh
#265
grahama
-
- Members
-
- 2,442 posts
Up Into Fourth
- Location: Warrington
- Local Club: None in my area !!
Posted 22 October 2011 - 06:52 PM
Hugh,
I am still getting blow through and have to fill them up, so the ground down welds do not sometimes reflect the 'before' picture. I do as you say seem to get good penetration and the grinder is the mini restorer's best friend so all good !! It is so frustrating sometimes because I can have a mint run down one side of a patch and the doing nothing different it all goes to pot, but hey ho, getting to the end of it now.
Never rust free I think too, but lots of gloup on the underside should help, lol.
Graham
#266
Andrew O
-

- Members
-
- 1,425 posts
Previously known as Andrewo330.
Posted 22 October 2011 - 06:54 PM
Coming along nicely ( I'm reading all your updates )
#267
hughJ
-
- Members
-
- 727 posts
Soldiering Along
- Location: Highlands, Scotland
Posted 22 October 2011 - 06:59 PM
Hey Graham your doing yourself down. I do admire your welding. I am starting to believe that blow through and catching it is not bad. It means the metals is melting which is what we want to do. I've noticed some of the best penetrating welds is the days you hold the heat and it blows through a lot but you keep catching it. The worst days are when you rush along trying to avoid blow through at all costs. Well that's my two pennies worth from my great experience!!! It does have a right look about it.
Hugh
Hugh
#268
grahama
-
- Members
-
- 2,442 posts
Up Into Fourth
- Location: Warrington
- Local Club: None in my area !!
Posted 29 October 2011 - 02:46 PM
Hi all,
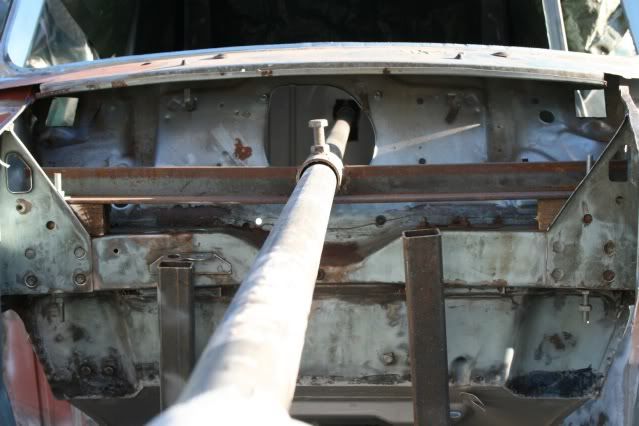
plodding on this week with the front end mostly, priming and sealing so it's protected and ready for front.
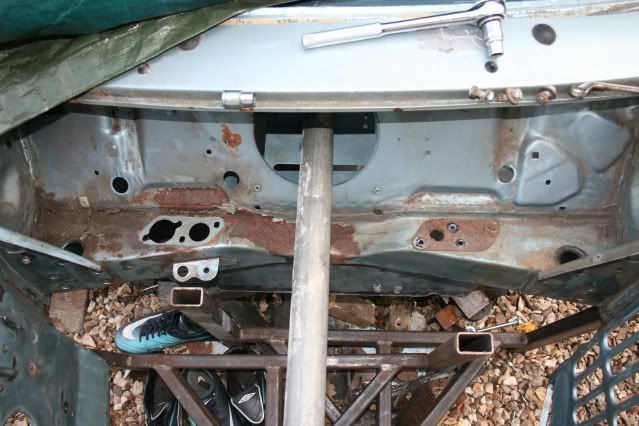
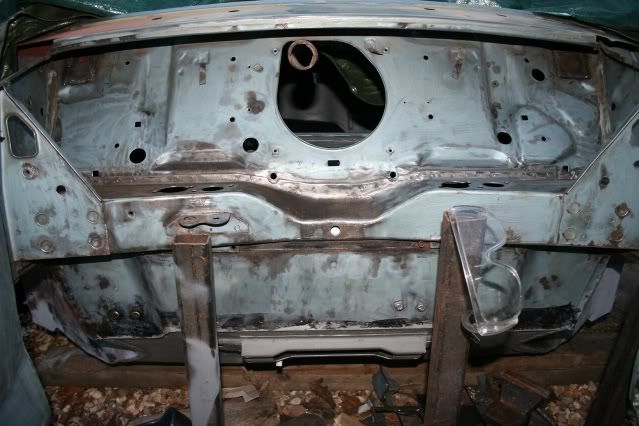
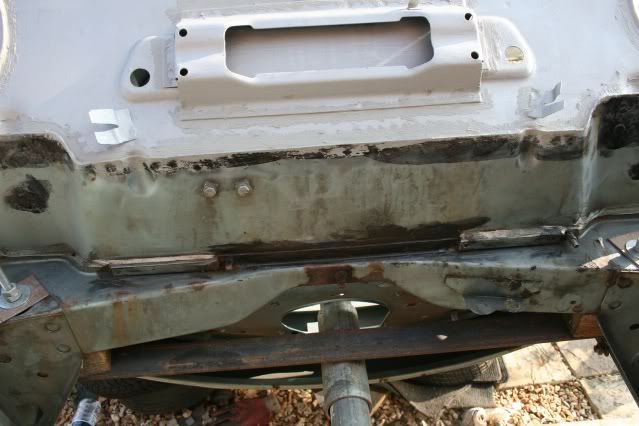
Started with de rusting the bulkhead which was fine really, surface rust and a little light pitting on the thick cross member, but no way it was being replaced as I couldn't dent it with a screwdriver so happy with it. The scuttle had the ID stamped into it so I guess that's original too, a nice surprise again.

Put some weld through primer where the wing is going on and the front panel joining bit and primed the rest with my usual stuff. Seam sesaled as it was from factory, lots, and everywhere, lol, and left to dry. Will recoat the primer after it's all dry as all needs a 2nd coat now.
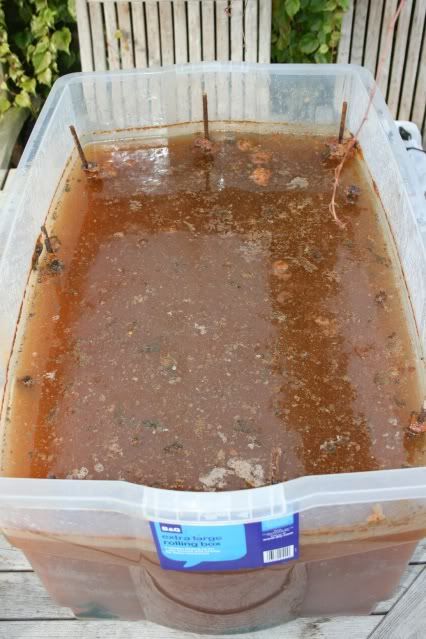

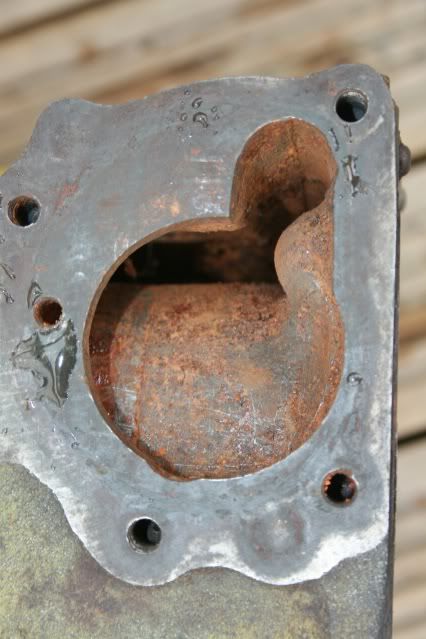
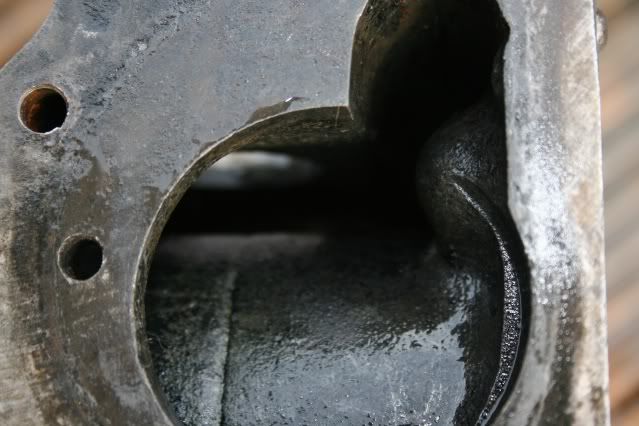
As you can see from the home science project box it was time to look at the engine block. Took it out and jet washed it and got the jet right inside the water channels to flush all the crap out. As you can see from the before and after pics not too shabby result.
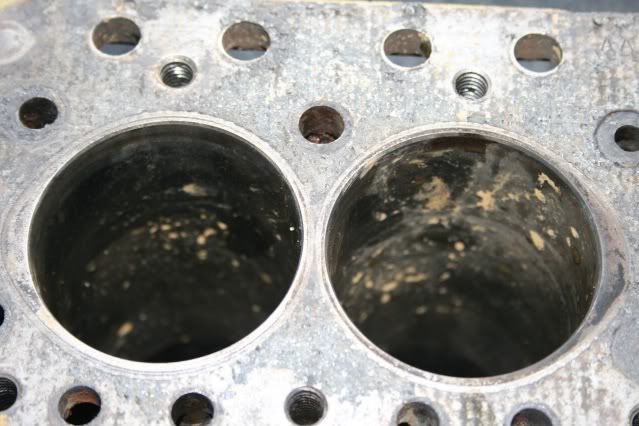
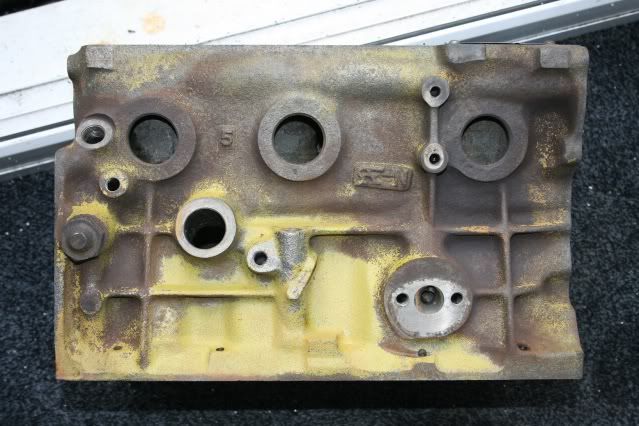

Literally 2 minutes after the jet washing, the bores started to rust up so I quickly turned the oven on low to dry it all out. Yes you guessed it, Jan came in and gave me yet another boll^*£ing for inappropriate use of household amenities, but got it all dried out and smeared the bores and cam follower bores with oil to stop any rusting. The block needs a quick rub down, kurust and then a paint. After that it's over to the machine shop for a skim. Head is in the science project box now for a while.
Then these turned up....
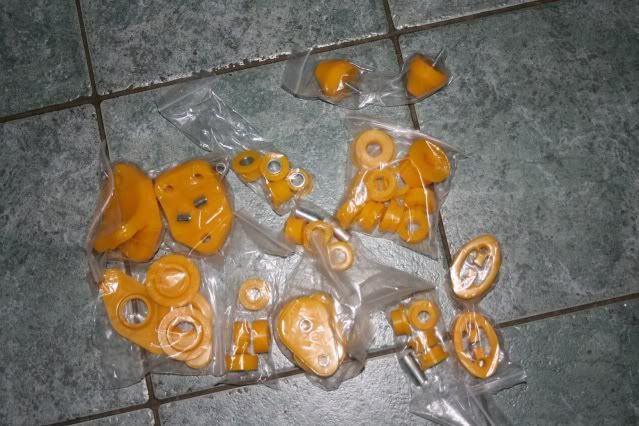

Couldn't resist trying them out, but for the life of me I can't find where they all go, lol. Think that delivery will be like the rest of the build, bits left over !!!
Regards,
Graham
plodding on this week with the front end mostly, priming and sealing so it's protected and ready for front.
Started with de rusting the bulkhead which was fine really, surface rust and a little light pitting on the thick cross member, but no way it was being replaced as I couldn't dent it with a screwdriver so happy with it. The scuttle had the ID stamped into it so I guess that's original too, a nice surprise again.
Put some weld through primer where the wing is going on and the front panel joining bit and primed the rest with my usual stuff. Seam sesaled as it was from factory, lots, and everywhere, lol, and left to dry. Will recoat the primer after it's all dry as all needs a 2nd coat now.
As you can see from the home science project box it was time to look at the engine block. Took it out and jet washed it and got the jet right inside the water channels to flush all the crap out. As you can see from the before and after pics not too shabby result.
Literally 2 minutes after the jet washing, the bores started to rust up so I quickly turned the oven on low to dry it all out. Yes you guessed it, Jan came in and gave me yet another boll^*£ing for inappropriate use of household amenities, but got it all dried out and smeared the bores and cam follower bores with oil to stop any rusting. The block needs a quick rub down, kurust and then a paint. After that it's over to the machine shop for a skim. Head is in the science project box now for a while.
Then these turned up....
Couldn't resist trying them out, but for the life of me I can't find where they all go, lol. Think that delivery will be like the rest of the build, bits left over !!!
Regards,
Graham
#269
hughJ
-
- Members
-
- 727 posts
Soldiering Along
- Location: Highlands, Scotland
Posted 29 October 2011 - 08:34 PM
Hello Graham - you are moving onto other things! Most interesting cleaning of your engine. I'm not stripping mine - it runs fine. I like the poly-bushes. Must be good to be doing something other than bodywork.
I put my XS650 engine in the oven at maximum heat, following the 'advice' of a local engineer. He said it would be the quickest way to clean it. The oil would burn off and it could be wire brushed. Yes he was right the oil did burn off and it stunk the house out. My Anne was as loving and caring as your Jan in her reaction, of course my daughter had to back her right up. When I opened the oven the cylinder liners had fallen out!! What a bad day. But we learn from mistakes!
All the best
Hugh
#270
grahama
-
- Members
-
- 2,442 posts
Up Into Fourth
- Location: Warrington
- Local Club: None in my area !!
Posted 29 October 2011 - 09:06 PM
Mine was running ok, bit of blue smoke but nothing bad. Thought that as the gearbox was a bit iffy in 2nd and will need a looking at, I may adwell do the lot!! Never done it before and hope I can get it going again.
Yea, its nice putting things back together again tho, looking forward to stripping the crap off the sub frames and putting them back on.
Yea, its nice putting things back together again tho, looking forward to stripping the crap off the sub frames and putting them back on.


0 user(s) are reading this topic
0 members, 0 guests, 0 anonymous users


