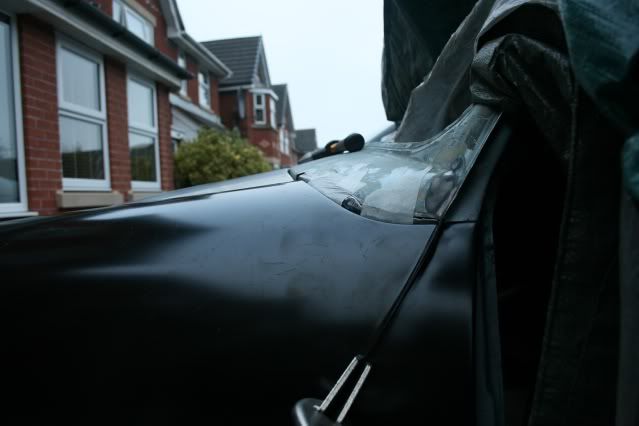
Looking good . Take your time fitting the front end ,fitted mine with self tappers to start with so i could adjust if neccessary . nice to someone else working under a tarp,watch the condesation doesn't bugger the roof up put waxoyl on the inside of mine as it is always wet


Mini Virgin Rebuild Of 83 Mayfair.
Started by
grahama
, May 22 2010 05:09 PM
1006 replies to this topic
#286

Badchilli
-

- Noobies
-

- 99 posts
Stage One Kit Fitted
- Location: Derby
Posted 09 November 2011 - 08:00 PM
#287
minimuk
-

- Members
-
- 1,947 posts
Camshaft & Stage Two Head
- Location: Midlands
Posted 09 November 2011 - 08:02 PM
so food for thought..... line door up and tighten so the door is sitting perfect,both sides mind,........finish the scuttle panel with the lower bracket, line up your a-panels, then offer wings and front panel with the bonnet on it to have the correct gap,....yes both sides of the bonnet........ you need to use all the clamps you have and maybe selftappers to tighten wings on innerwings, just drill a few 2 mm holes through the wing-lip and innerwing lip, you can always spotweld them after.
don't worry there is LIGHT!!!!!!
before I forget, wing-lip to scuttle needs bending inwards to fit correctly, take your time doing that, claps, clamps and more clamps
don't worry there is LIGHT!!!!!!
before I forget, wing-lip to scuttle needs bending inwards to fit correctly, take your time doing that, claps, clamps and more clamps
Edited by minimuk, 09 November 2011 - 08:06 PM.
#288
grahama
-
- Members
-
- 2,442 posts
Up Into Fourth
- Location: Warrington
- Local Club: None in my area !!
Posted 09 November 2011 - 09:06 PM
Thanks for the advice, not a quick job then lol. Order in tomorrow for new bits !
Edited by grahama, 09 November 2011 - 09:06 PM.
#289
LouisT
-

- Members
-
- 197 posts
Mini Mad
- Location: Manchester
Posted 09 November 2011 - 09:11 PM
Looking good graham!!!
Just need them bumpers and grill now to finish it off
Keep going bud, soon be being painted.
Louis
Just need them bumpers and grill now to finish it off
Keep going bud, soon be being painted.
Louis
#290
minifcd
-

- Members
-
- 246 posts
Mini Mad
- Location: Stamford
Posted 12 November 2011 - 08:51 PM
Coming along nicely Graham. Finally read to the current page! When you fit the front end panels, clamp every thing in place and make sure your happy with it. I tend to spend two days aligning and tweeking to get them right and then I remove all the clamps, leaving only the clamps between the outer wings and front panel seams, so the whole front can be removed in one and weld the wings to the front panel on the floor. Makes it so much easier!
#291
grahama
-
- Members
-
- 2,442 posts
Up Into Fourth
- Location: Warrington
- Local Club: None in my area !!
Posted 16 November 2011 - 06:28 PM
Hi all,
little ' lining up ' update. Mmmmmm, am I glad I went for a heritage front end, the only dodgy bits are the non heritage scuttle repair panels, a lesson for next time.
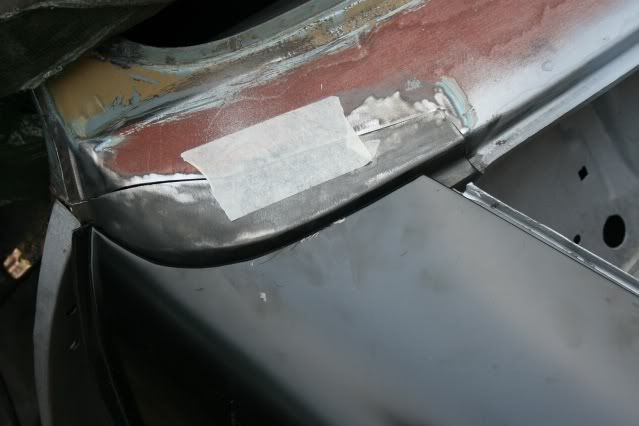

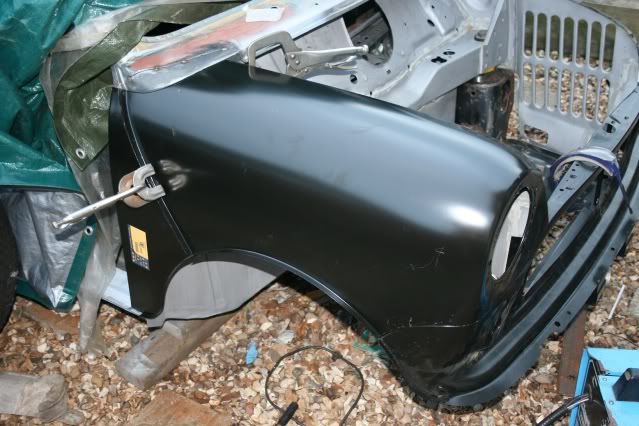
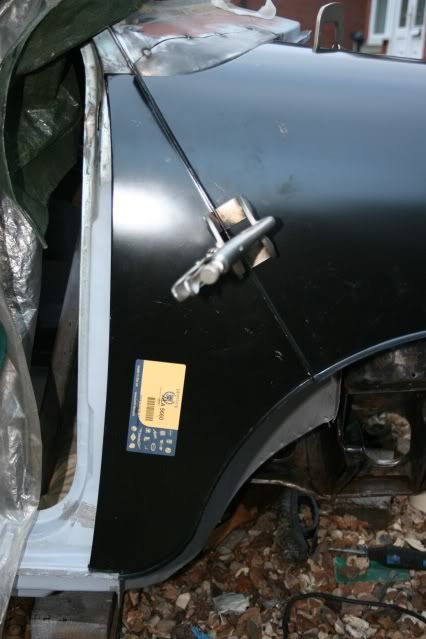
Slotted in the scuttle repair patch after putting the front panel and wing back on, (got the correct wing this time !!). All lined up I tacked it into place and put trimmed the A panel into my dodgy doorstep repair so it fitted nicely.
Won't final fit everything till I have the doors ready to fit, hinges being refurbished at the moment., then I ran out of wire so no more welding.
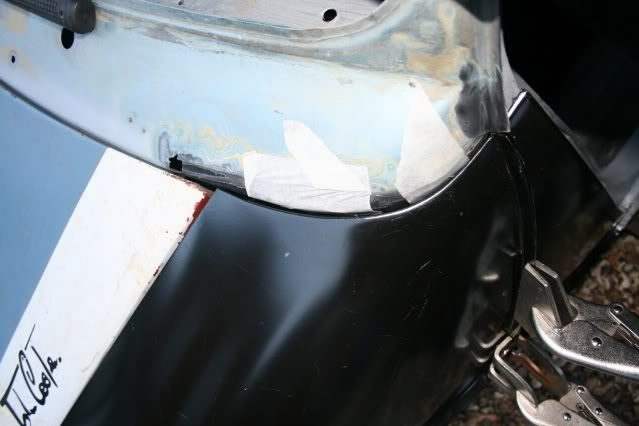
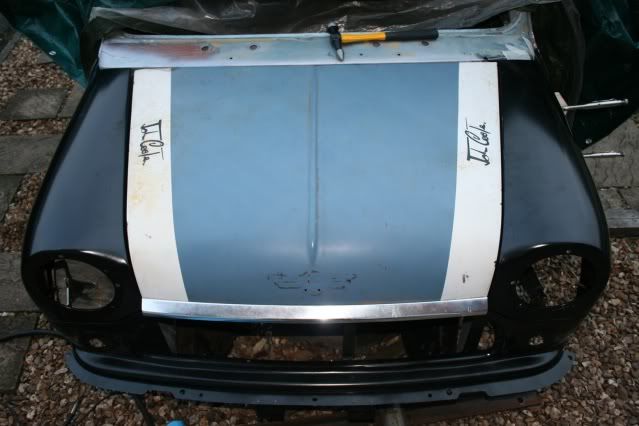
Cut down a scuttle end piece to fit on the NS and did the same as OS to get the fit right before any welding. The wing does seem a little tight at the top so mat trim it so I have a nice join at the scuttle, what are your thoughts on this??
The bonnet gape seem to have opened up a little at the front so looking better overall there. Hopefully get some wire tomorrow so I can carry on.
Then onto science project again...the subframe chapter !
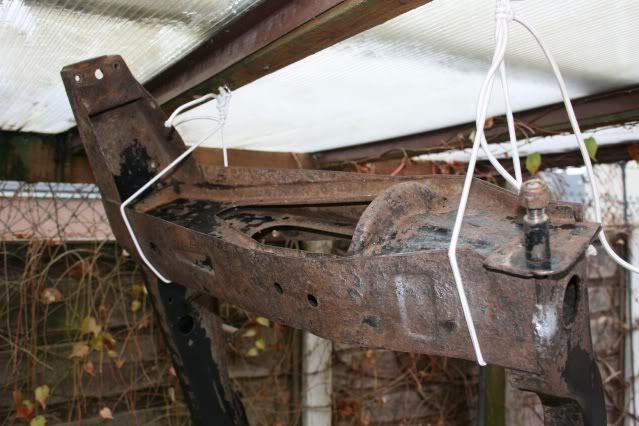
On the whole the subframe is fine, but plenty of surface rust as this end shows. May put on a repair section, depands how it turns out, but too good to scrap.. I take it it is an original as has MOWOG stamped on it. So in it went with some jiggery pokery due to size...
Will leave for a week and then turn round to do the other end. The middle section that wont go in is fine.
Well thats all till tomorrow or Friday, enjoy.
Graham
little ' lining up ' update. Mmmmmm, am I glad I went for a heritage front end, the only dodgy bits are the non heritage scuttle repair panels, a lesson for next time.
Slotted in the scuttle repair patch after putting the front panel and wing back on, (got the correct wing this time !!). All lined up I tacked it into place and put trimmed the A panel into my dodgy doorstep repair so it fitted nicely.
Won't final fit everything till I have the doors ready to fit, hinges being refurbished at the moment., then I ran out of wire so no more welding.
Cut down a scuttle end piece to fit on the NS and did the same as OS to get the fit right before any welding. The wing does seem a little tight at the top so mat trim it so I have a nice join at the scuttle, what are your thoughts on this??
The bonnet gape seem to have opened up a little at the front so looking better overall there. Hopefully get some wire tomorrow so I can carry on.
Then onto science project again...the subframe chapter !
On the whole the subframe is fine, but plenty of surface rust as this end shows. May put on a repair section, depands how it turns out, but too good to scrap.. I take it it is an original as has MOWOG stamped on it. So in it went with some jiggery pokery due to size...
Will leave for a week and then turn round to do the other end. The middle section that wont go in is fine.
Well thats all till tomorrow or Friday, enjoy.
Graham
#292
LouisT
-
- Members
-
- 197 posts
Mini Mad
- Location: Manchester
Posted 16 November 2011 - 06:41 PM
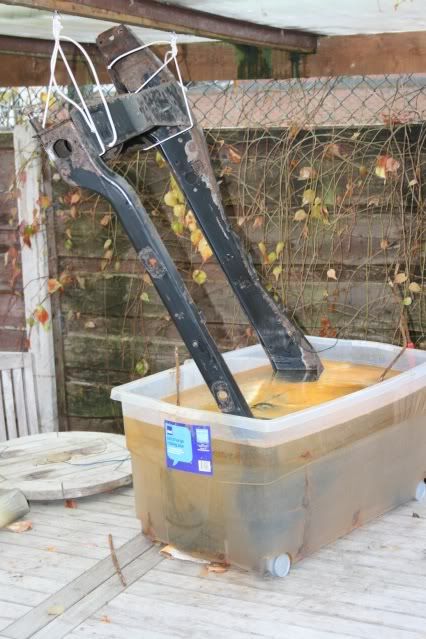
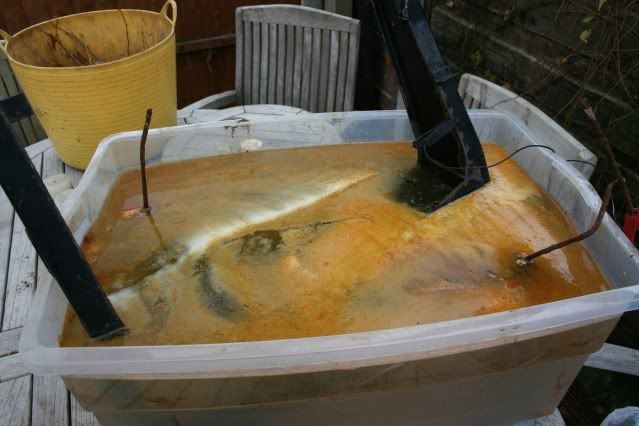
What have you used in the tub Graham?
Need to do this with mine,
Cheers
Louis
Need to do this with mine,
Cheers
Louis
#293
grahama
-
- Members
-
- 2,442 posts
Up Into Fourth
- Location: Warrington
- Local Club: None in my area !!
Posted 16 November 2011 - 07:41 PM
Hi Louis,
For every 1 gal water mix 1 tbl sp washing soda (tesco laundry section). You put the negative terminal from a battery charger to the object and the positive terminal to a sacrificial steel strip and turn on, but dont let them touch or let the positive terminal go in the water or it will rot away like the sacrificial strip !! Takes a while for larger items but takes the rust off and not the good steel. Works for me and there are loads of videos on utube, search for electolytic rust removal.
Graham
#294
hughJ
-

- Members
-
- 727 posts
Soldiering Along
- Location: Highlands, Scotland
Posted 17 November 2011 - 08:44 AM
Graham, old man, steady!!! Your going off way too fast for me. Tremendous work. You are at the part I'm dreading - lining up the front.
I thought I could get ahead of you but am falling way behind.
All the best
Hugh
I thought I could get ahead of you but am falling way behind.
All the best
Hugh
#295
Carlos W
-

- TMF+ Member
-
- 10,115 posts
Mine is purple, but I have been told that's normal
- Location: Sittingbourne, Kent
Posted 17 November 2011 - 08:53 AM
Don't worry Hugh, i'm doing rear subframe mounts today
#296
grahama
-
- Members
-
- 2,442 posts
Up Into Fourth
- Location: Warrington
- Local Club: None in my area !!
Posted 17 November 2011 - 04:09 PM
Old man, lol, feel like it at the moment, very nervous affair lining up the front end. Running out of wire made me stop !! Looks far ahead but nothing can be put on properly without the doors, so a while yet.
Carlos, good luck, measure, measure and then line up ane measure again !!
Graham
Carlos, good luck, measure, measure and then line up ane measure again !!
Graham
#297
minimuk
-
- Members
-
- 1,947 posts
Camshaft & Stage Two Head
- Location: Midlands
Posted 17 November 2011 - 06:32 PM
Nice going there Graham like your new front, a bit more tweekig there and spot on. Re Subby,.. have you tried Molasses and water 2??
#298
Carlos W
-
- TMF+ Member
-
- 10,115 posts
Mine is purple, but I have been told that's normal
- Location: Sittingbourne, Kent
Posted 17 November 2011 - 06:53 PM
Carlos, good luck, measure, measure and then line up ane measure again !!
Graham
Graham,
The procedure I used for the first side was cut out, bolt the new panel to the subframe, then put the subframe in place and bolt it to its other 3 mounting points, tack it in place, remove the subframe then seam weld it in!
That's the plan for the next one but I found a horrible repair on the floor which has been cut out today so I need to make a new bit up before I can get the mounting point in!
Also, I knocked the halogen light over when it was hot and smashed the bulb so bad light stopped play!
#299
minimuk
-
- Members
-
- 1,947 posts
Camshaft & Stage Two Head
- Location: Midlands
Posted 17 November 2011 - 07:08 PM
Carlos, good luck, measure, measure and then line up ane measure again !!
I know that line from somewhere,........
I know that line from somewhere,........
Edited by minimuk, 17 November 2011 - 07:08 PM.
#300
grahama
-
- Members
-
- 2,442 posts
Up Into Fourth
- Location: Warrington
- Local Club: None in my area !!
Posted 17 November 2011 - 07:27 PM
Carlos, a better plan than I used, mine is out by a bit so will Shim it up, or completely redo, but that would really hurt!!
Minimum indeed ur advice which I follow now, but too late for my sub mount repair.
Minimum indeed ur advice which I follow now, but too late for my sub mount repair.


0 user(s) are reading this topic
0 members, 0 guests, 0 anonymous users


